List of items
Rotary Attachment | Connection cable | Hex key | User guide card |
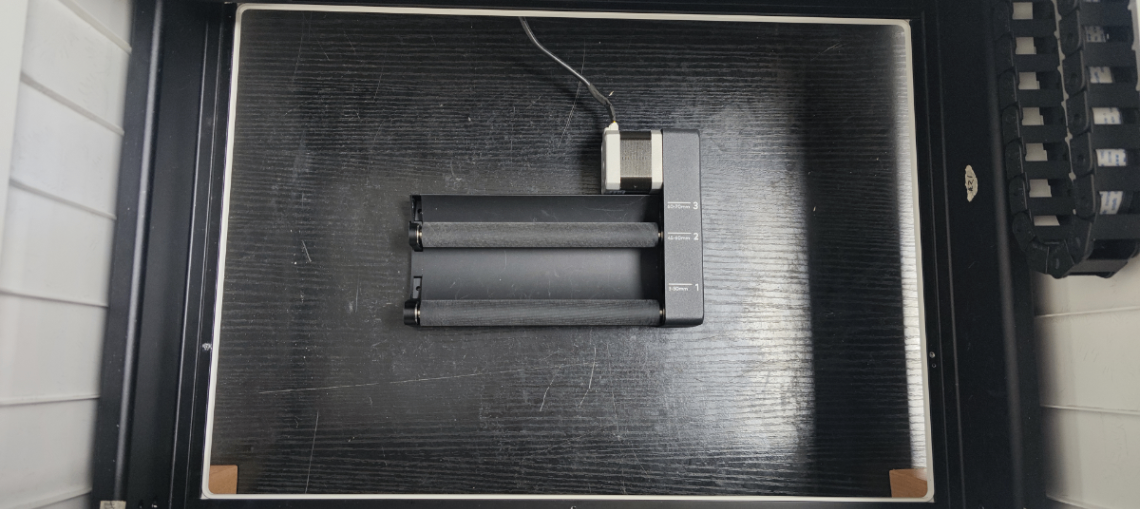
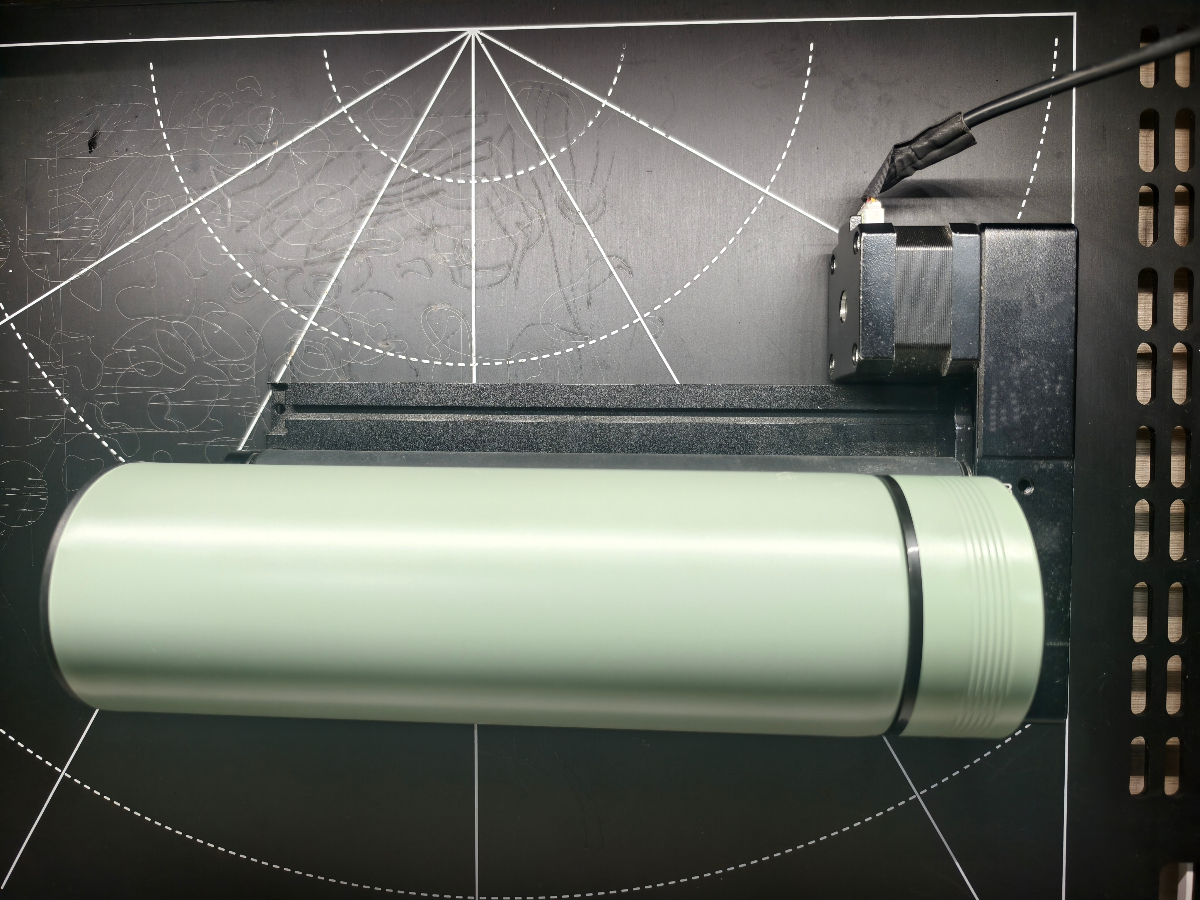
Meet your Rotary Attachment
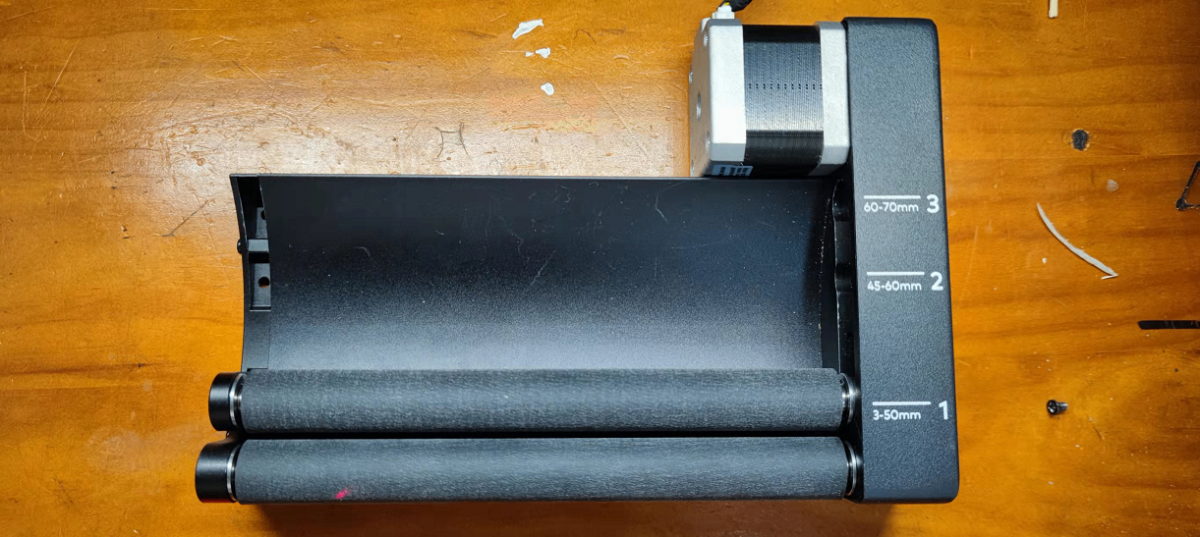
1: Motor 2: Device connection port 3: Adjustable roller 4: Roller stand 5: Slot × 3 6: Fixed roller |
1. Connect Rotary Attachment to xTool M1
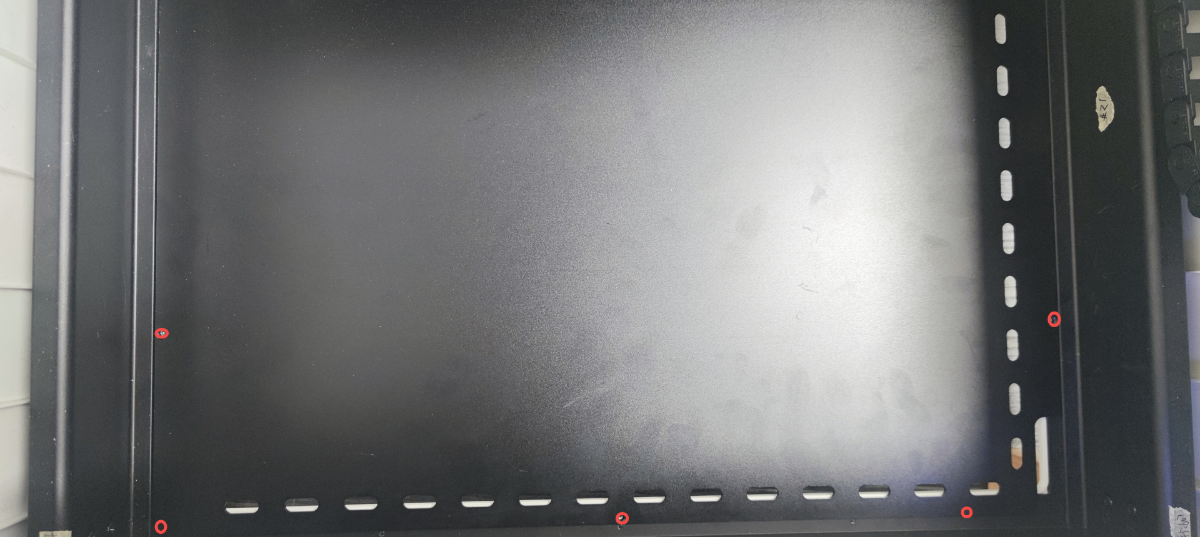
(1) Before operation, ensure that xTool M1 is powered off. Open the lid, remove screws that fix the baseplate and detach the baseplate from the device.
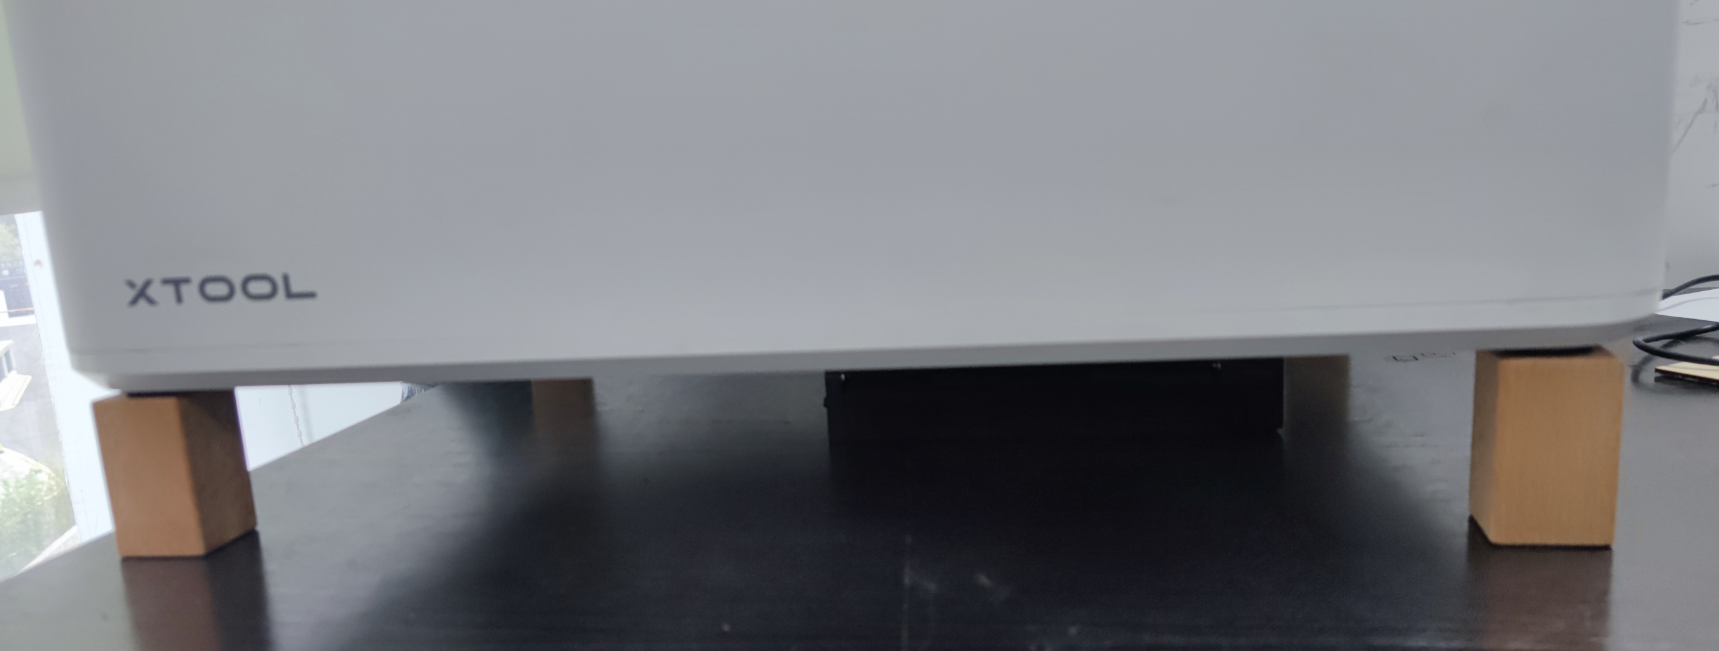
(2) Use risers to elevate xTool M1. Ensure that the risers are placed on a flat surface to keep the device steady during operation.
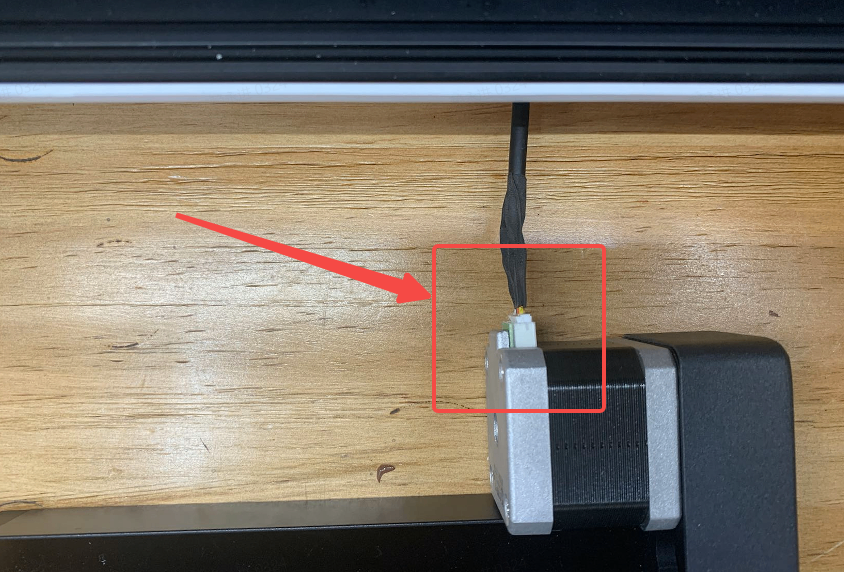
(3) Insert the white connector of the connection cable into the connection port of Rotary Attachment.
(4) Place Rotary Attachment in the center of the working area with its motor facing the rear plate of xTool M1.
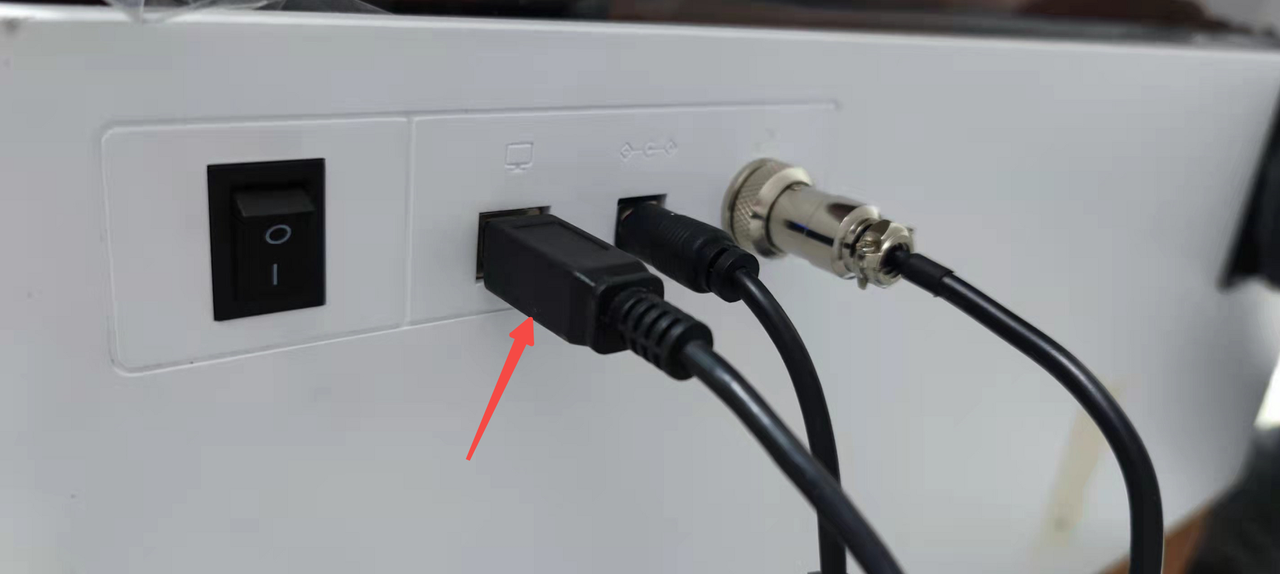
(5) Insert the aviation connector into the connection port of xTool M1.
2. Select processing mode and measure the diameter
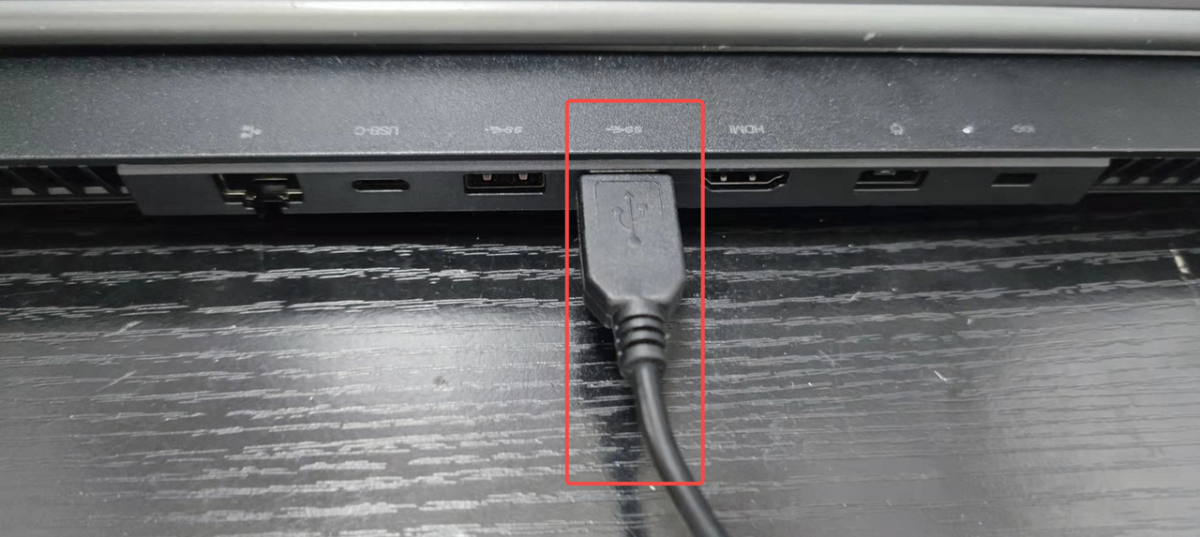
(1) Use the USB cable to connect xTool M1 to your PC.
(2) Power on xTool M1 and connect it to xTool Studio.
Refer to Connect and Set Up xTool M1 with xTool Studio for instructions on connecting xTool M1 to xTool Studio.
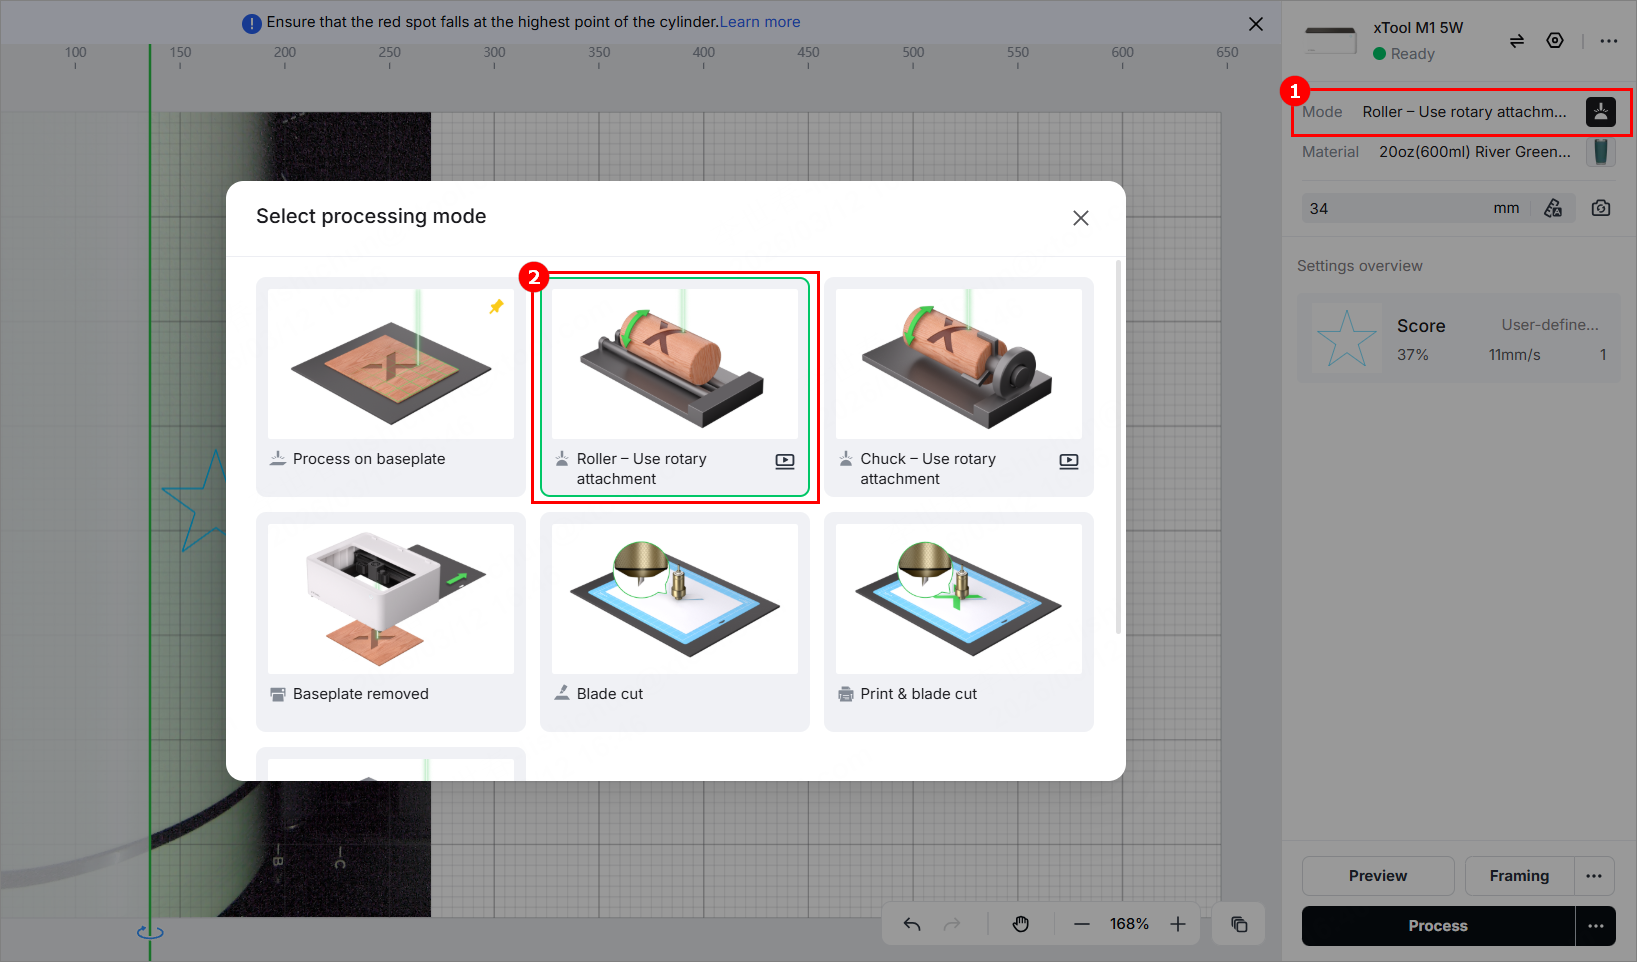
(3) Choose Roller - Use rotary attachment mode.
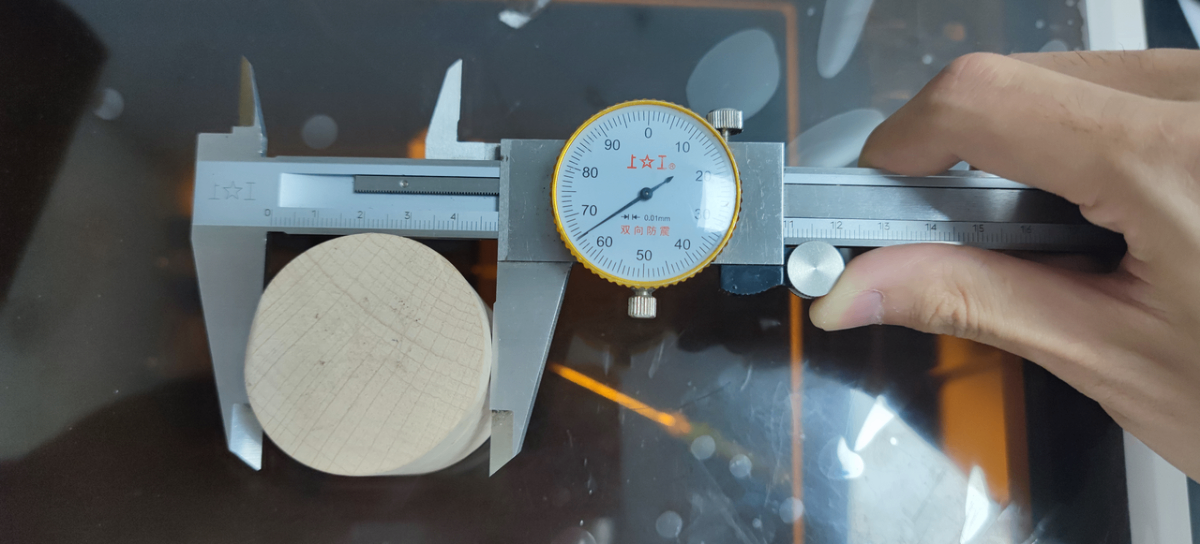
(4) Measure the diameter of the cylindrical material to be engraved and determine the gear as follows.
Gear | Diameter (unit: mm) |
1 | 3-50 |
2 | 45-60 |
3 | 60-70 |
3. Set the engraving gear
(1) Remove the screw of the adjustable roller.
(2) Pull up the stand of the adjustable roller.
(3) Rotate the adjustable roller to the target gear.
(4) Put the stand of the adjustable roller into the target slot and press it into place.
Note: The side with a concave part faces away from the movable roller.
(5) Tighten the removed screw to the target screw hole.
4. Place four risers
Place four risers horizontally or vertically according to the diameter of the cylindrical material.
Diameter (unit: mm) | The way risers should be placed | |
3-20 | Horizontally |
|
20-70 | Vertically |
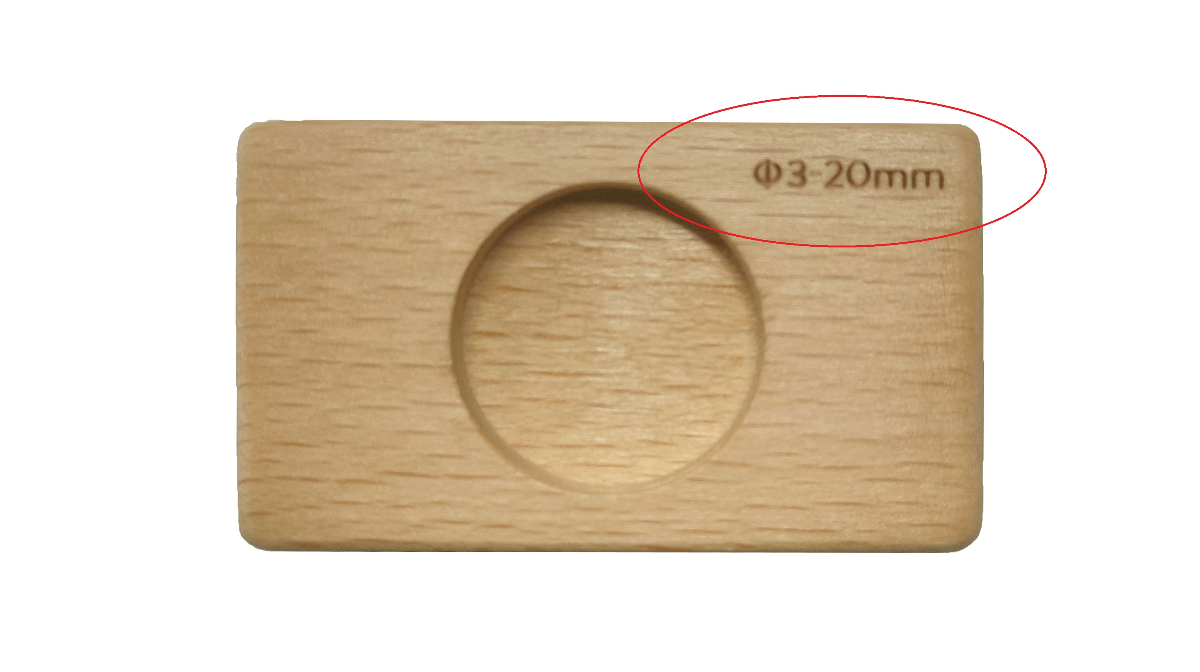
Note: The way the riser is placed determines how high xTool M1 can be elevated. To keep the device steady, ensure that all risers are placed in the same way and all device feet are well put in the circular depressions of the risers.
5. Design the processing object and set parameters
(1) Place the cylindrical material on Rotary Attachment.
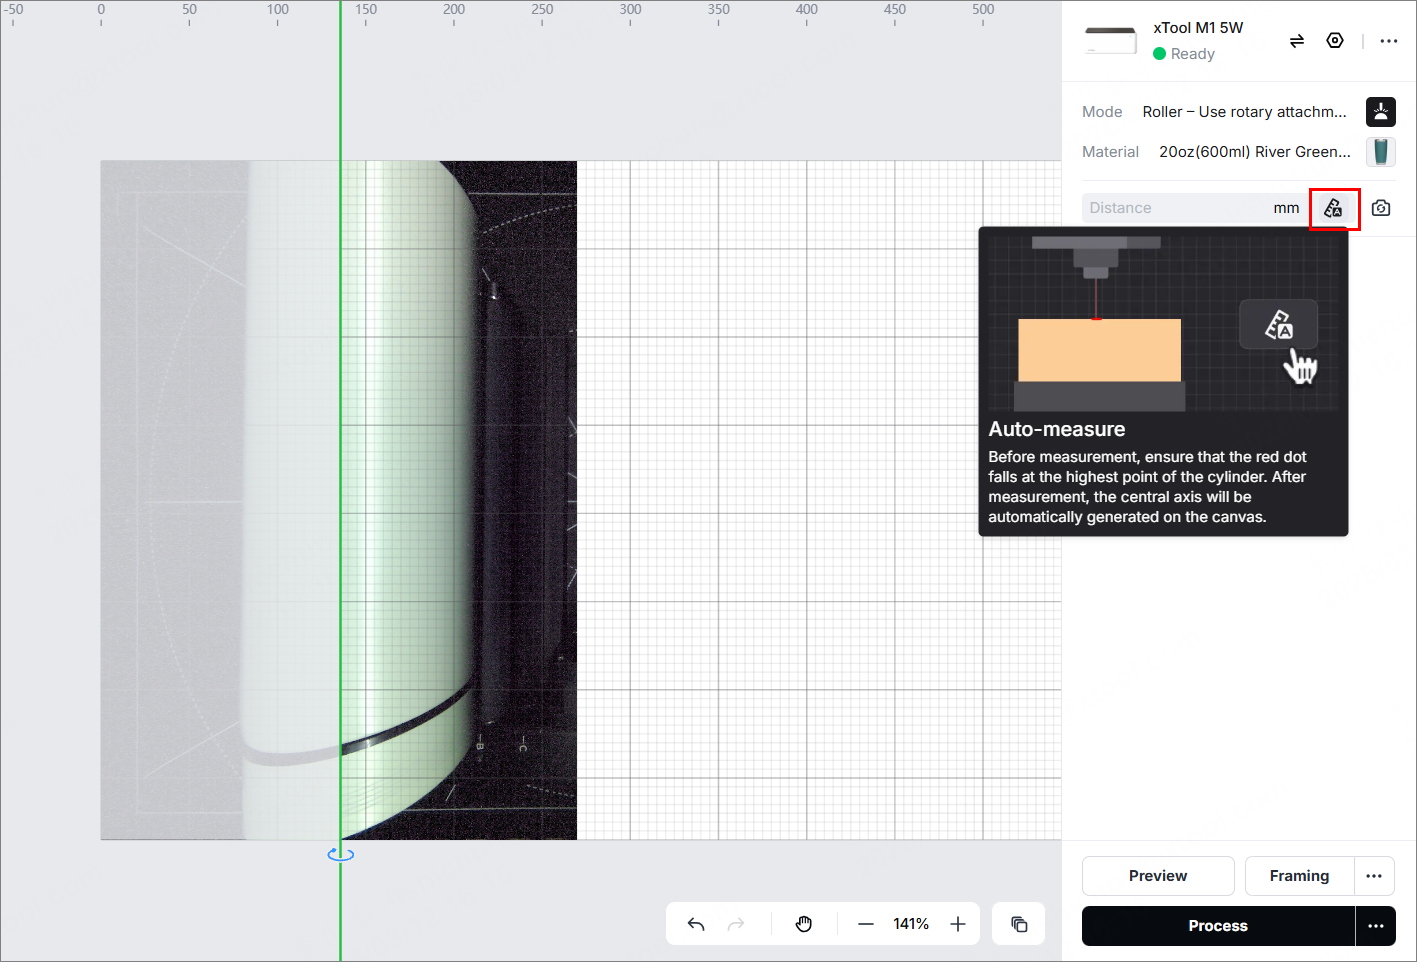
(2) Click  icon, drag the green line to the highest point of the material and then click
 icon.
icon.
(3) Import a project file or insert an element.
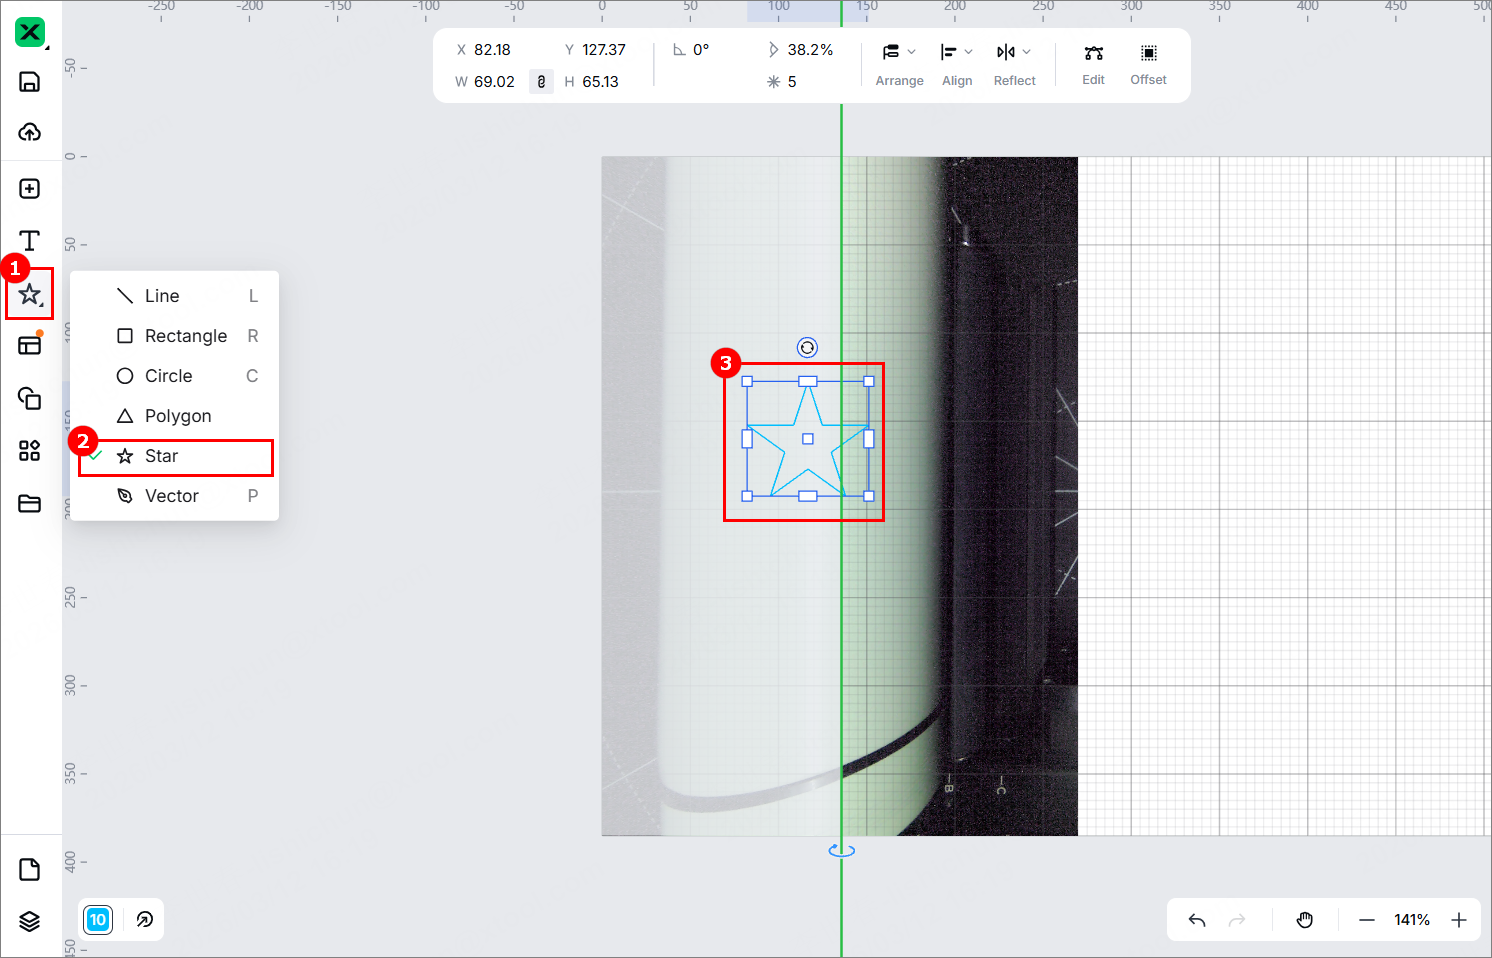
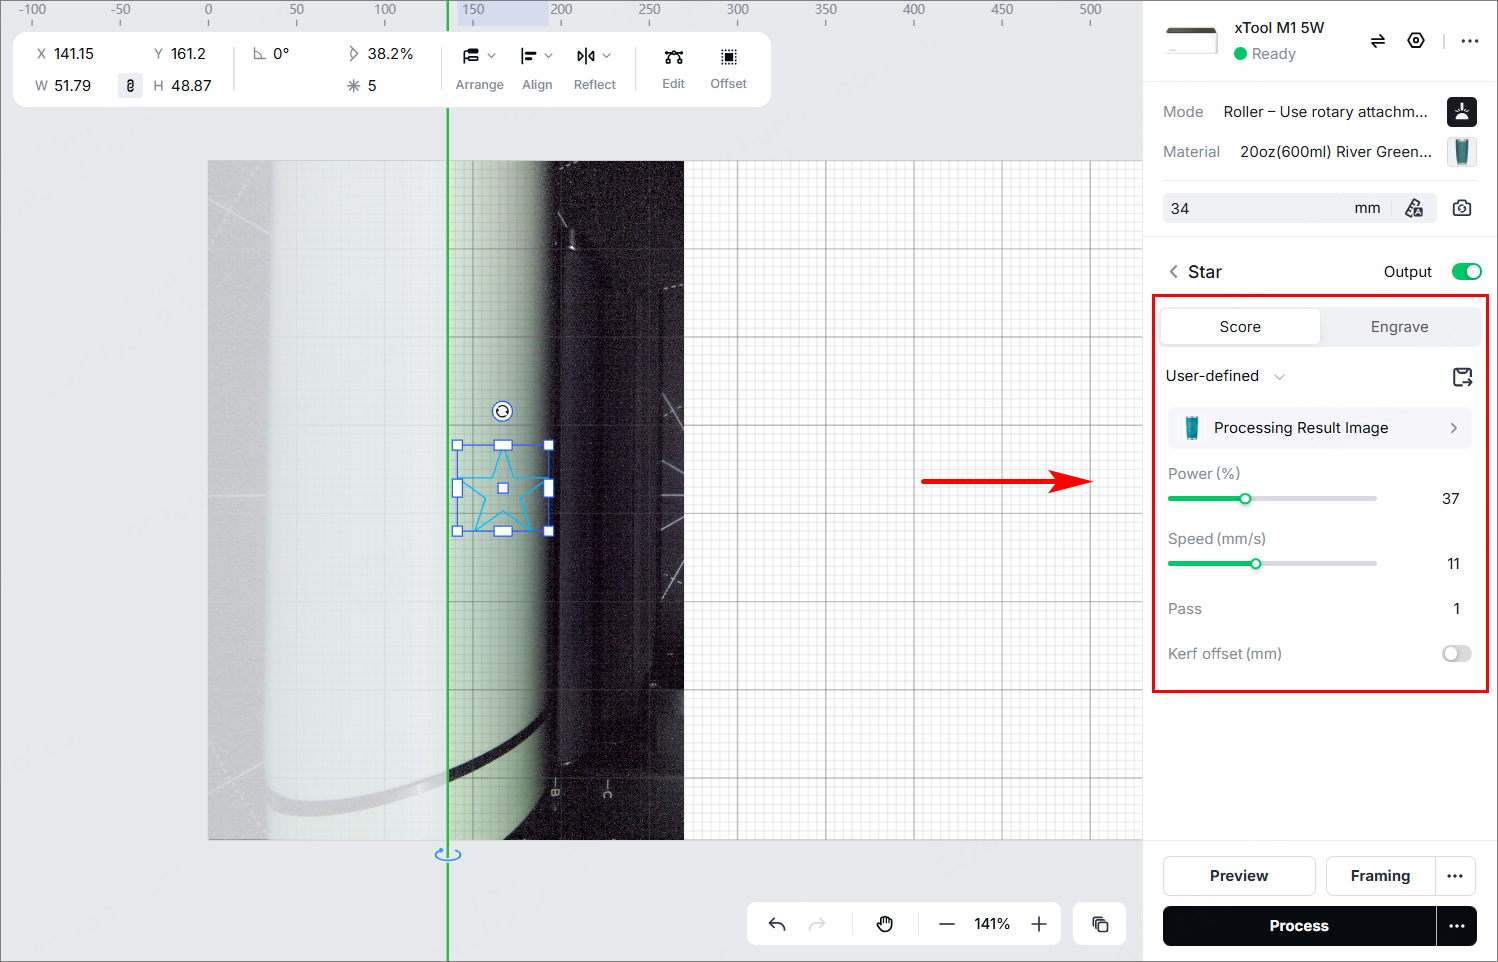
(4) Adjust the image size, place the image closely on the right of the green line, and then set the parameters: material, speed, power, and pass.
(5) Click Process.

(6) Click Preview Processing Path.
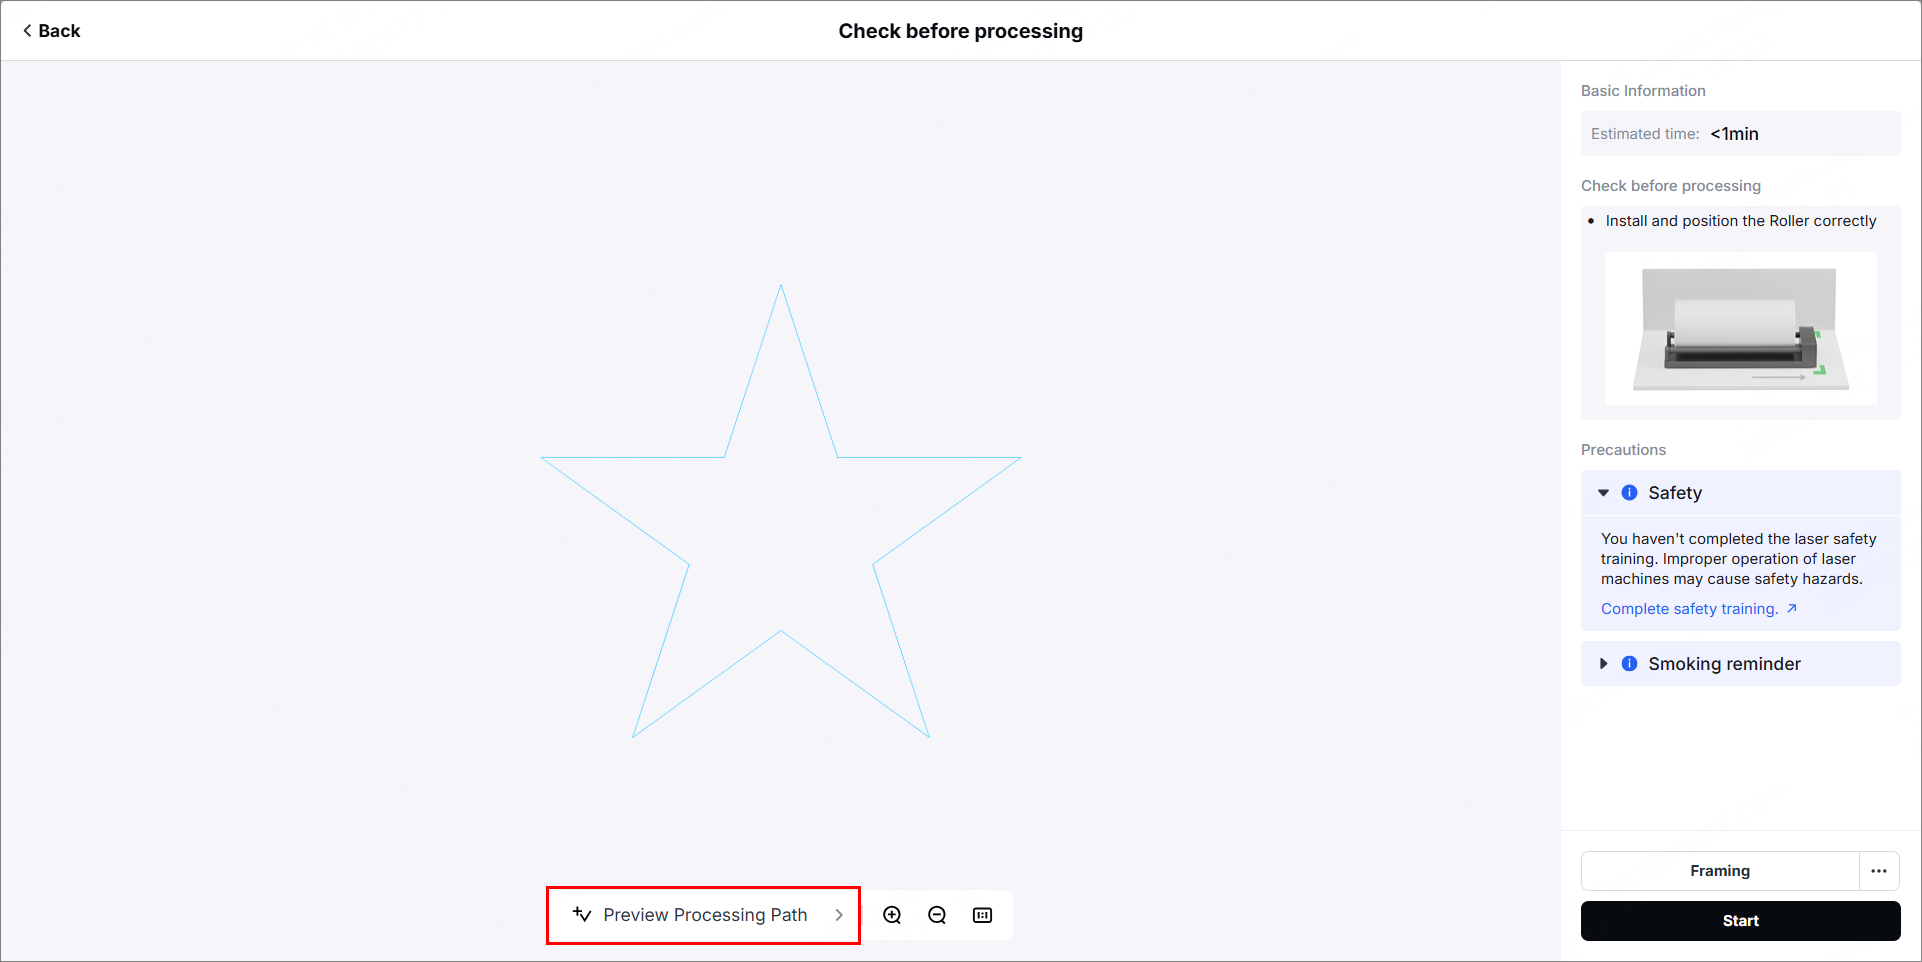
(7) In the bottom-right corner, click Start.

6. Start processing
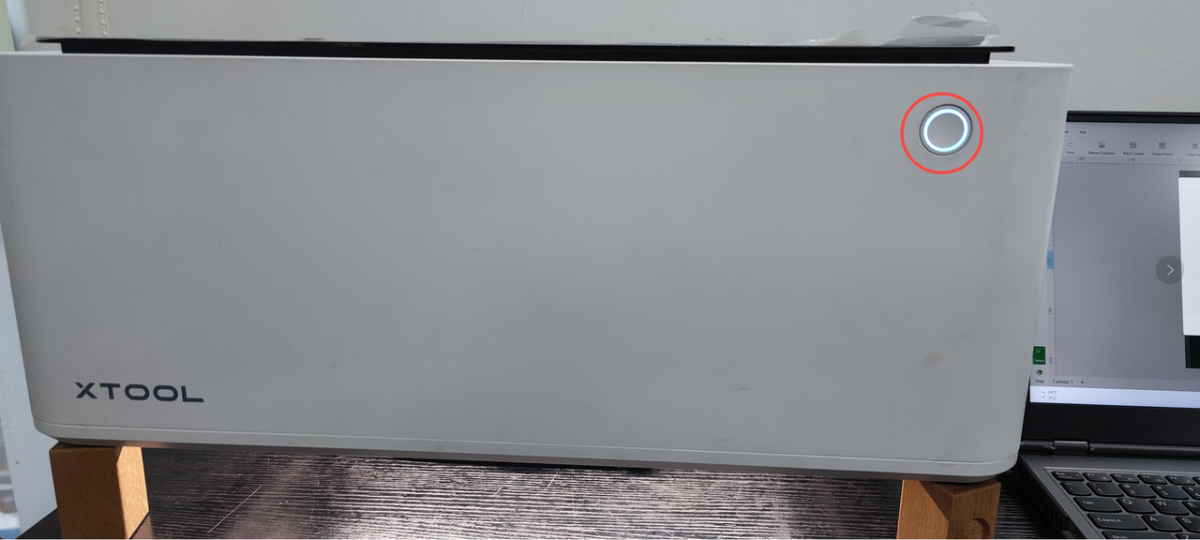
(1) Press the button to start processing.
(2) Take out the material after the operation is complete and the ventilator stops working.
Switch to Flat Surface Mode or Blade Cutting Mode
(1) Turn off xTool M1. Disconnect it from the power supply before you remove the connection cables.
(2) Remove the connection cable of RA1, detach it from xTool M1 and then install the baseplate.
(3) Close xTool Studio and open it again. Then its processing mode changes automatically. Or click Switch to set the processing mode.
Appendix
Annular Indicator Description
| State | Description |
Before operation | Normally on in white | Not connected |
Blinking in green | Network setting | |
Normally on in blue | Connected | |
In operation | Blinking in blue | Performing a task |
Breathing in green | Task completed | |
Breathing in white | Entering the sleep state | |
Other | Blinking in purple | Firmware updating |
Normally on in red | Exceptions occur |
Services & Help
Learn & Education

Copyright © 2025 xTool All Rights Reserved.