xTool Store
Start Metal Cleaning with xTool MetalFab CNC Cutter in xTool Studio
Updated Mar 5,2026
Updated Mar 5,2026
Brief introduction
With the cleaning nozzle installed, xTool MetalFab CNC Cutter supports automatic rust and paint removal for multiple metals, including steel plates and molds. The smart function helps to avoid uneven cleaning caused by manual operation.
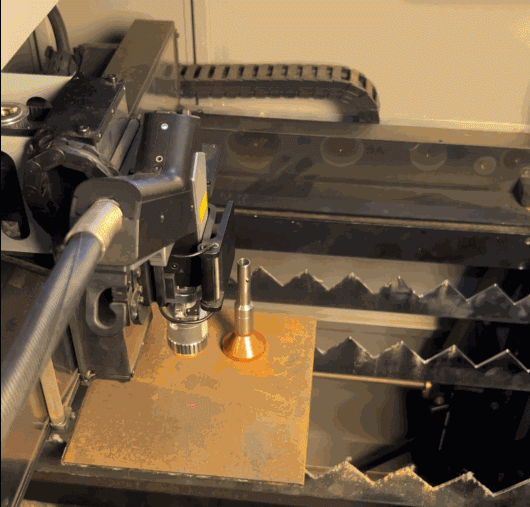
Cleaning nozzle for CNC use
Procedures
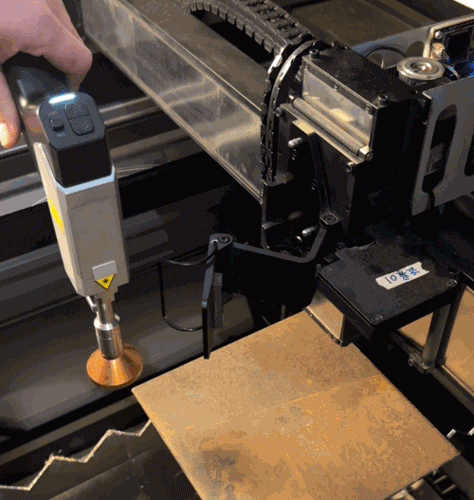
Step 1: Install the cleaning nozzle
- Turn off the two devices.
- Open the protective lid of xTool MetalFab CNC Cutter and take out the welding head from the carriage.
- Take off the cutting tip.
- Install the cleaning nozzle.
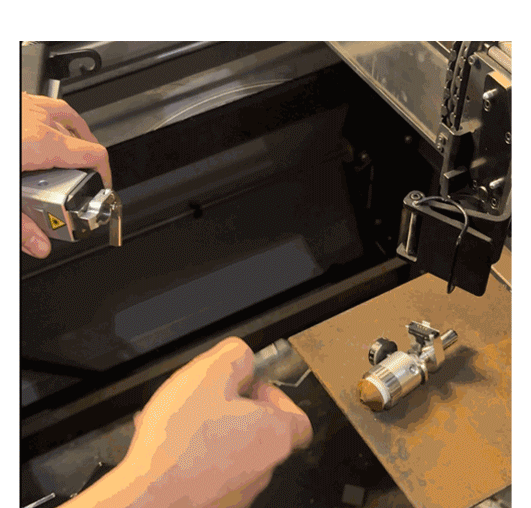
- Reinstall the welding head.
Step 2: Place the material
- Place the material on the slats.
Note: Thin material needs to use the fixtures. - Close the protective lid.
- Turn on the two devices.
Step 3: Configure settings in xTool Studio
- Connect your xTool MetalFab CNC Cutter in xTool Studio and recalibrate the device.
For more details about the calibration process, watch the corresponding part in the unboxing video tutorial. - In the right panel, click the current processing mode, and then select Rust removal.
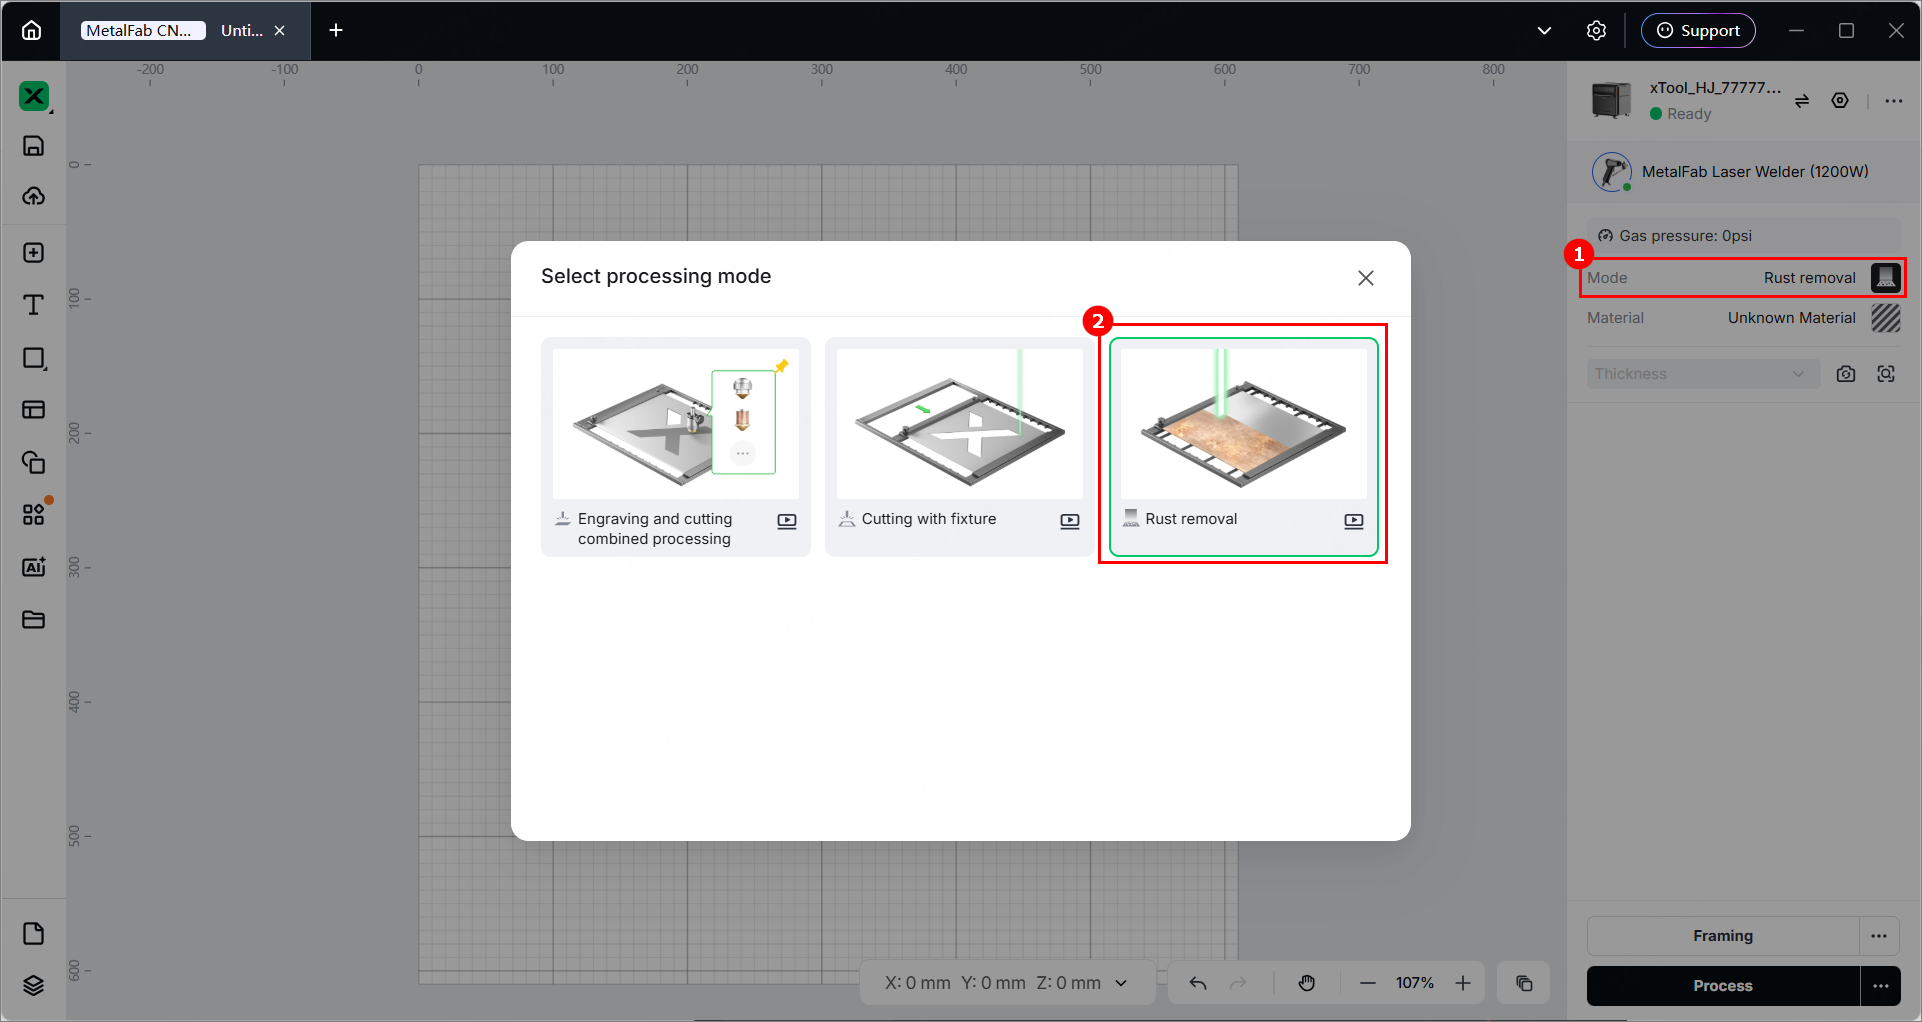
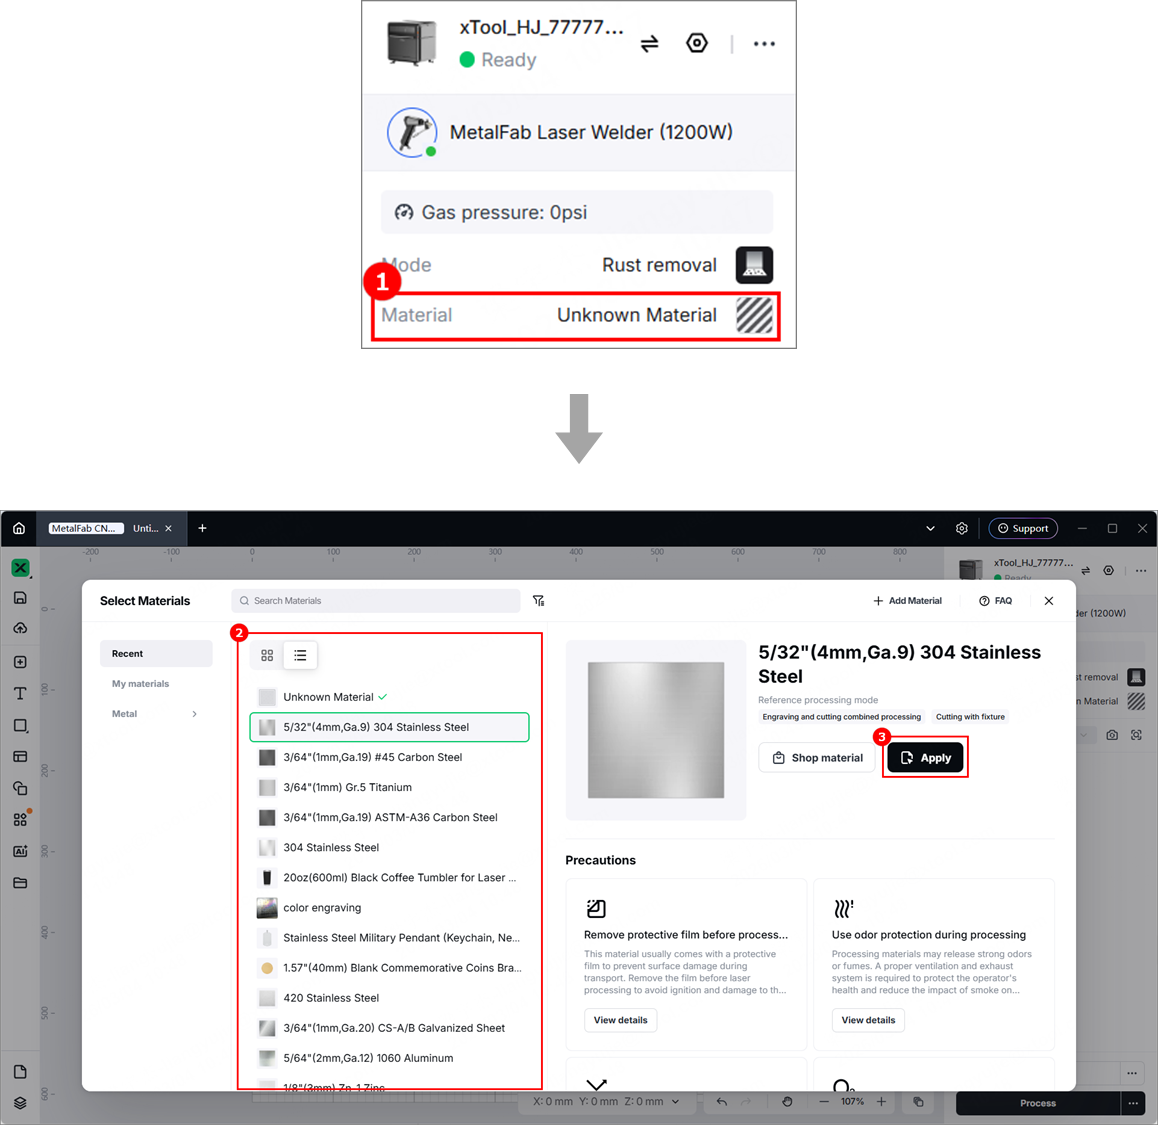
- Click Unknown material, select a desired material, and click Apply.
- Click
 or
or  to obtain the background image.
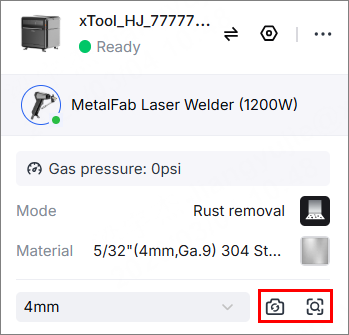
- Import a cleaning path file or create an object covering the area to be cleaned.
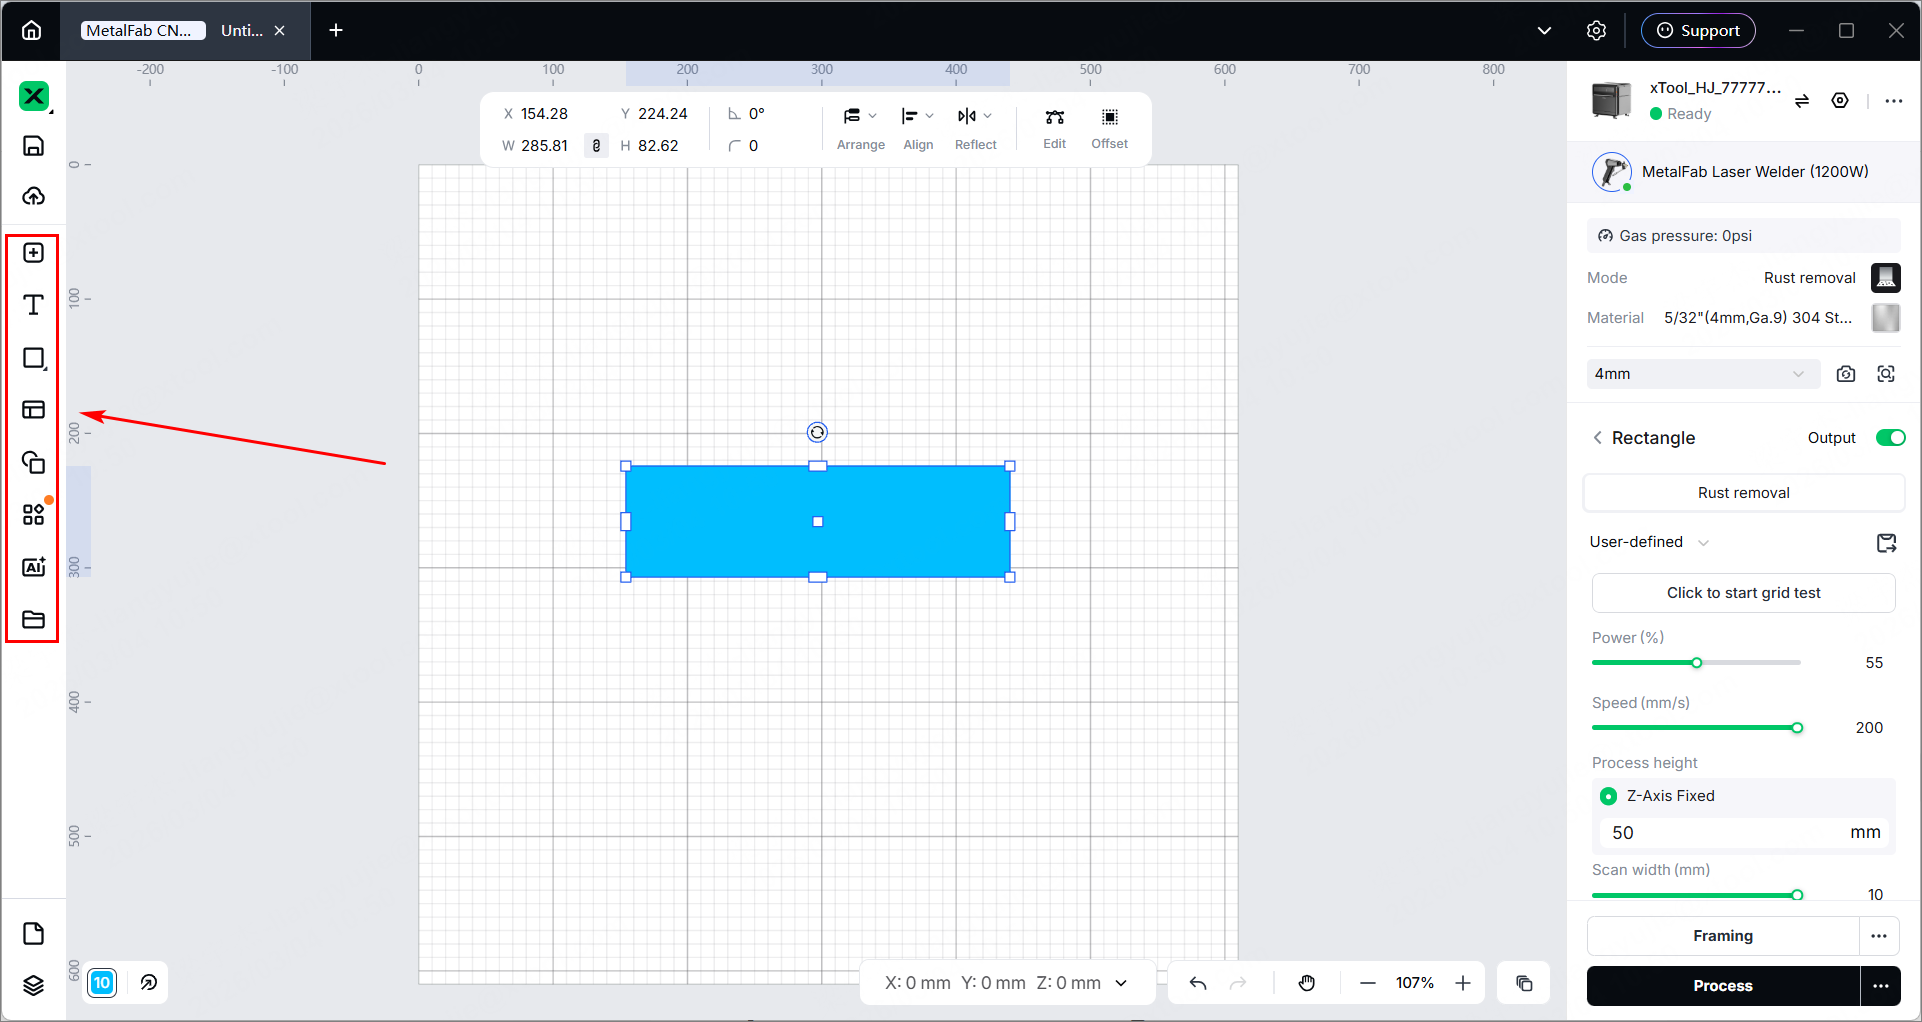
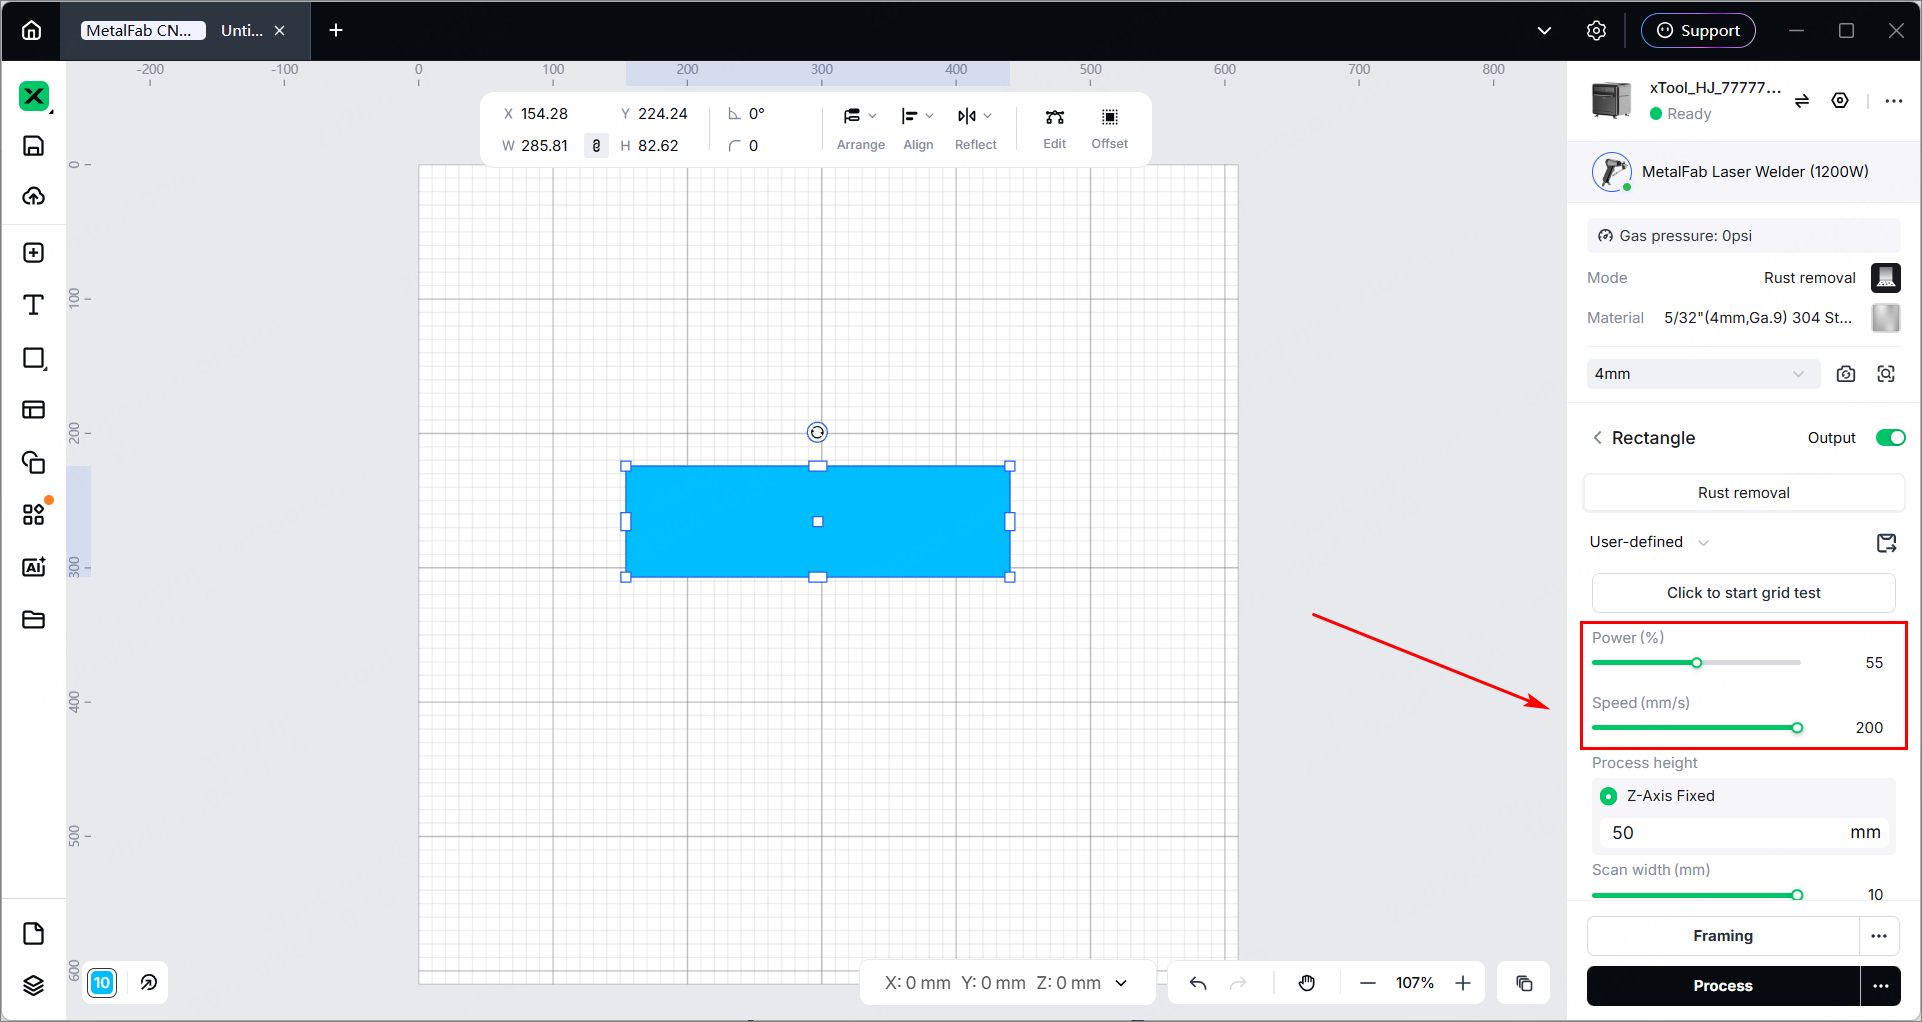
- Click the object and configure settings by adhering to the range mentioned below:
- Power: 50% – 70%
- Speed: 200 mm/s – 300 mm/s
Step 4: Prepare the shielding gas
- Prepare nitrogen, argon (recommended), or compressed air as the shielding gas.
- Set the air pressure of the shielding gas within 0.5 MPa to 0.6 MPa.
Step 5: Start laser cleaning
- In the bottom-right of the page, click Process.

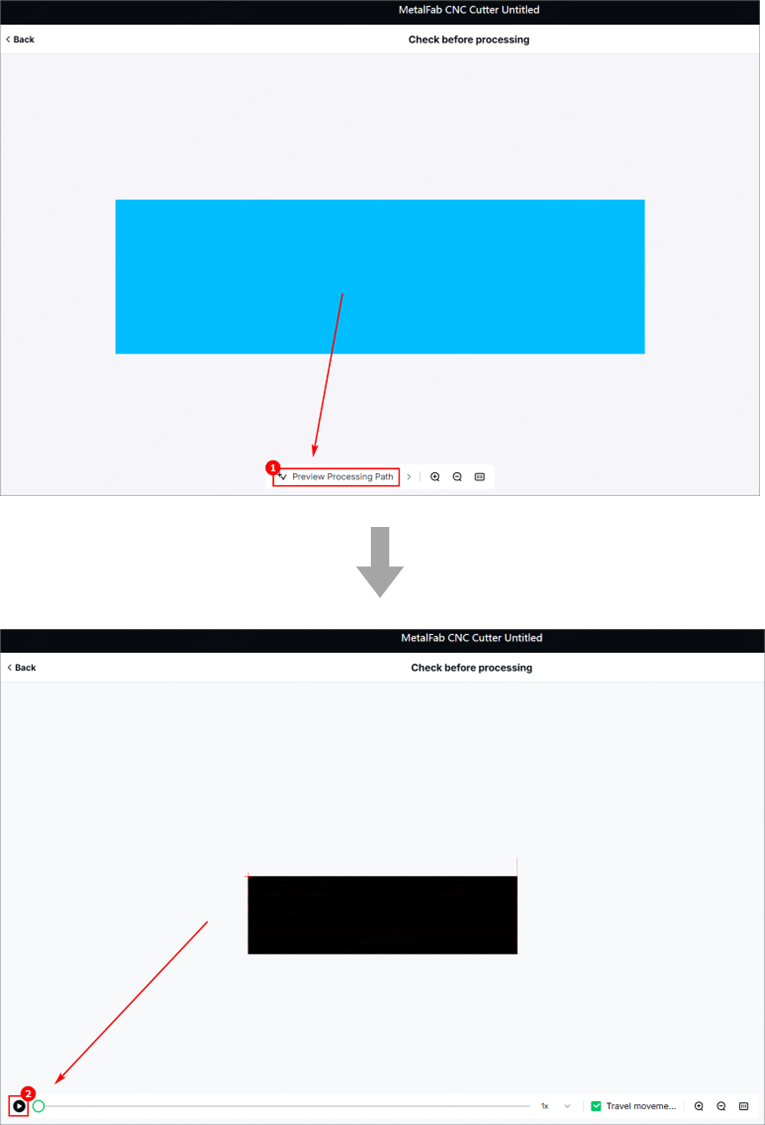
- Click Preview Processing Path and
.
- In the bottom-right corner of the page, click Start.

- Press the start/stop button to start the processing.
Preview
Was this page helpful?
0 out of 0 found this helpful
Help Ticket
Use this help ticket to submit your issue. We will respond within 1 business day
Submit a Ticket Tags
Help Ticket
Use this help ticket to submit your issue. We will respond within 1 business day
Submit a Ticket Services & Help
Learn & Education

Copyright © 2025 xTool All Rights Reserved.