Issue description
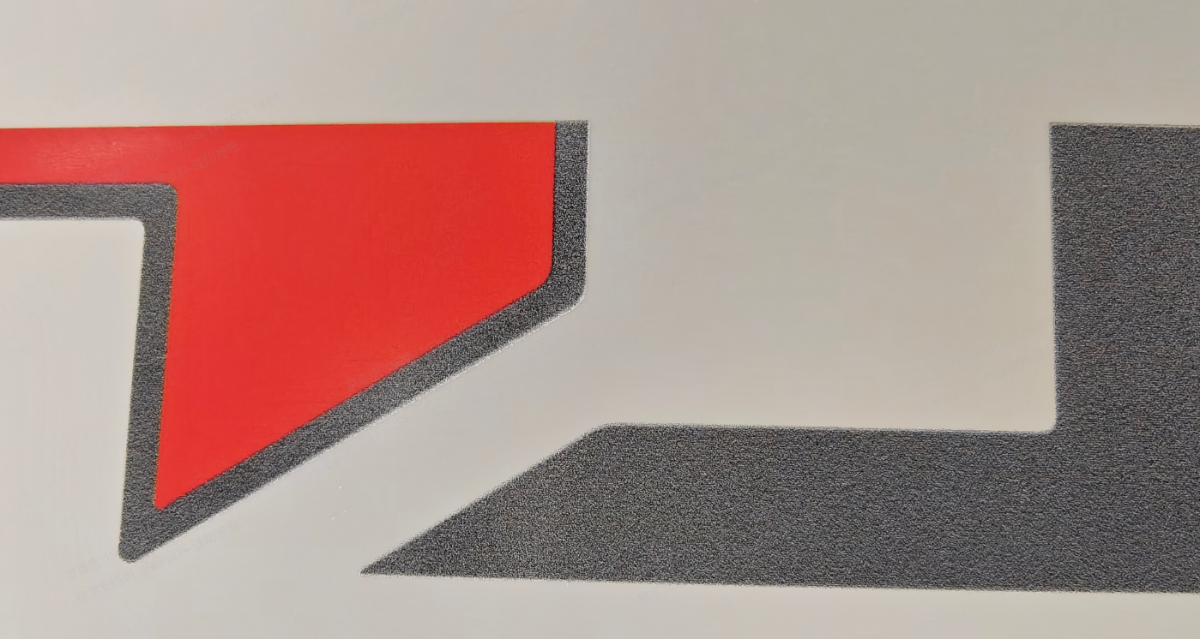
The printed design appears noticeably grainy, pixelated, or blurry, lacking sharpness and definition, as shown in the example image below.
Possible causes
- Calibration Issues: The device has not been calibrated, or there is a significant deviation in the calibration data.
- Low Source Resolution: The resolution of the original image file is too low.
- Low Print Settings: The resolution setting within the print parameters is set too low.
- Visual Effect of Film Coating: The matte coating on the DTF film can create a visual effect that looks like graininess before the design is heat-pressed.
Troubleshooting
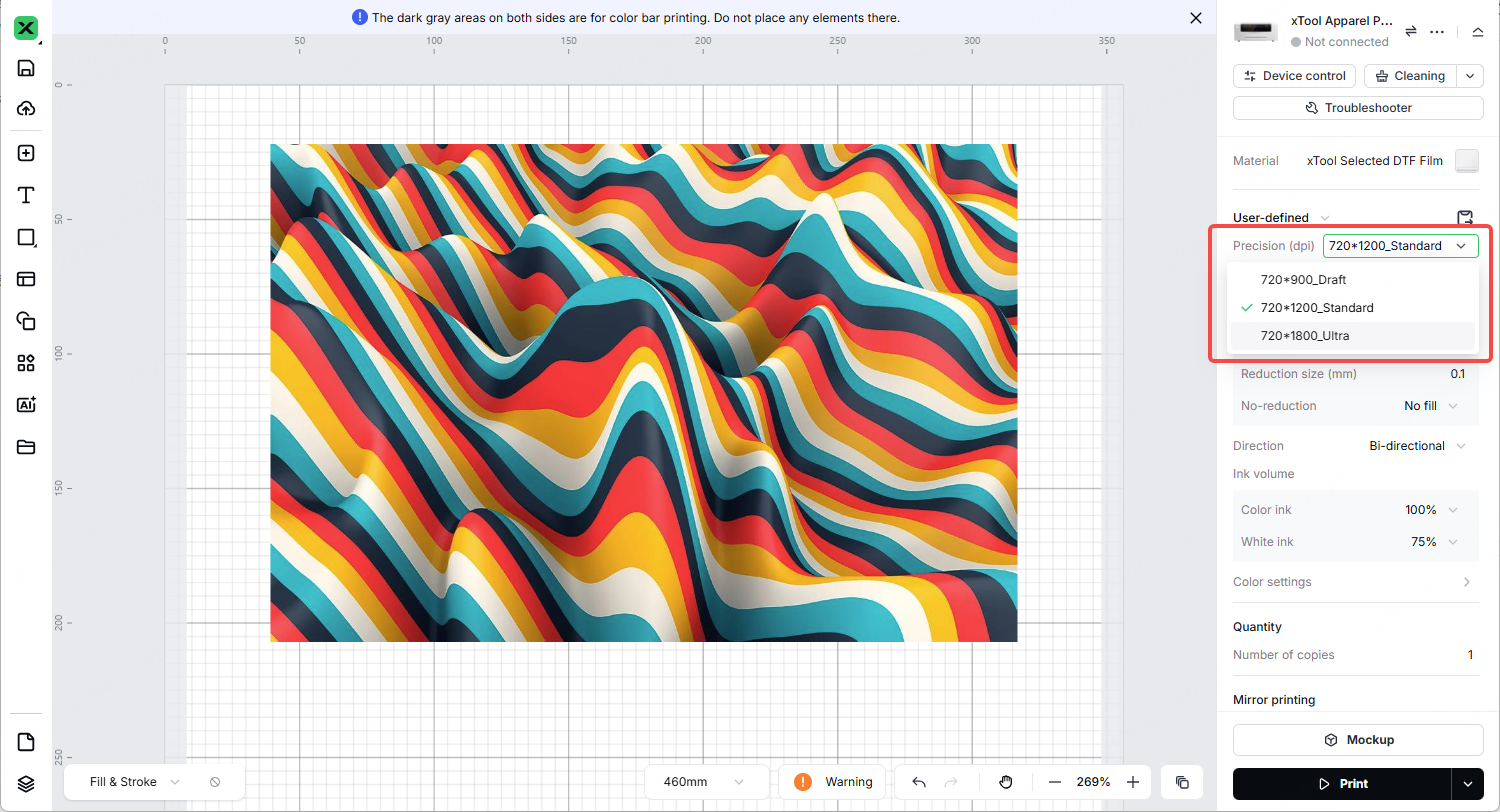
Step 1: Adjust print resolution
Lower resolution settings will naturally result in blurrier images.
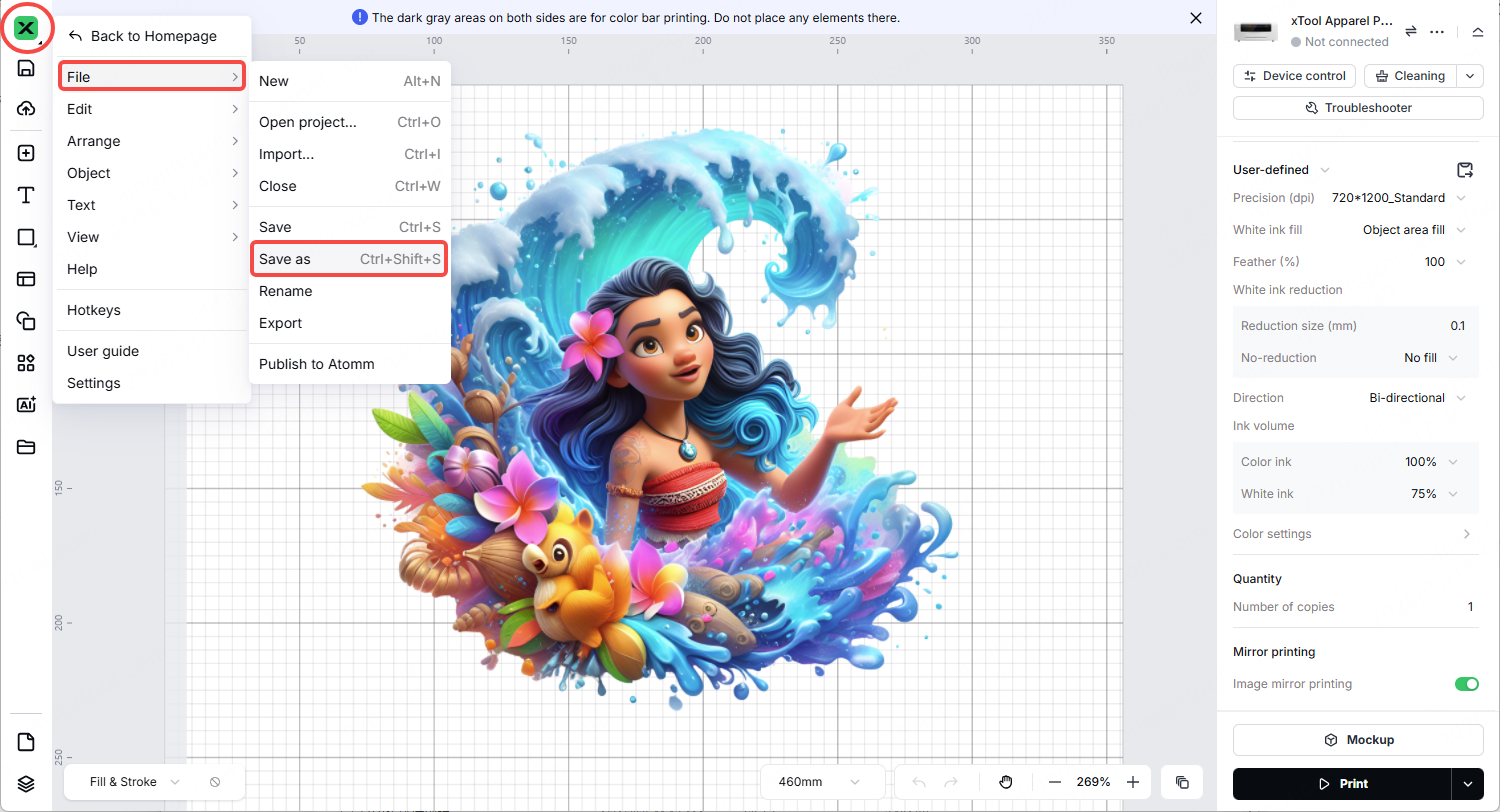
- Open your project in the software (xTool Studio or XCS).
- Adjust the Print Resolution setting to the Highest available option.
- Print the design again to check for improvement.
Diagnosis:
- If improved but still grainy: The issue may be the source image itself (see Step 2).
Step 2: Check source image quality
If the original image is low quality, increasing the print settings will not fix the issue.
- Replace the Image: Import a different, high-definition (HD) image into the software.
- Compare: Print this new image using the same parameters (Resolution, Ink Volume, Feathering, Print Direction).
- Diagnosis:
- If the new image prints clearly: The original image resolution was too low.
- If the new image is still blurry: The issue is not the file. Proceed to Step 3.
Step 3: Recalibrate the printer
Mechanical movement variations can cause ink droplets to land incorrectly, resulting in a fuzzy or grainy look.
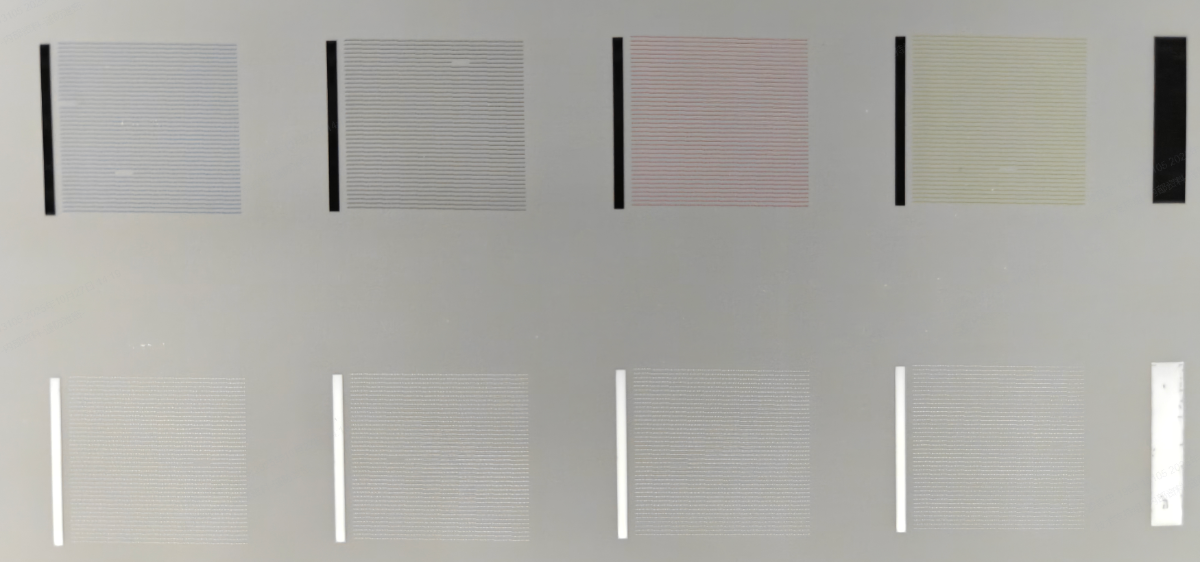
- Prerequisite Check: Ensure the print nozzles are healthy.
- Tap Maintenance > Print Test Image on the control panel.
- Ensure each color block has fewer than 5 missing lines.
- Perform Calibration:
- Attempt Automatic Calibration first.
- If the result is unsatisfactory, perform Manual Calibration.
- Path in xTool Studio:
Device Settings > Calibration.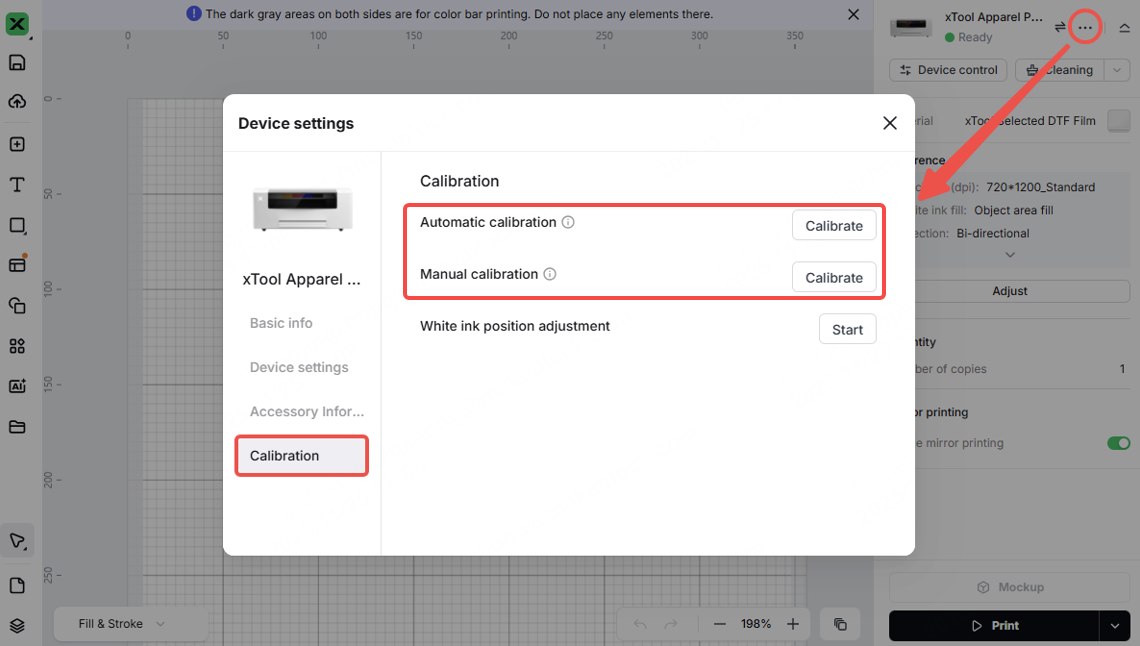
Step 4: Verify post-heat press results
This is a critical check. DTF film has a special ink-absorbing coating. When you look at the printed design on the film (before transferring), you are looking through this textured coating, which often creates a grainy or "soft" visual effect.
- Transfer the Design: Proceed with the full process—powdering, curing, and heat pressing the design onto a garment.
- Inspect the Final Result: Peel the film and check the design on the fabric.
- Since the ink melts and bonds to the fabric, the "graininess" caused by the film texture usually disappears.
Diagnosis:
- If the transfer on the garment is clear: The printer is working normally.
- If the transfer on the garment is still grainy: Proceed to the data collection section below.
If the problem persists
Should the issue persist after completing the preceding steps, please submit a ticket via the "Submit a Ticket" button. The standard response time is one business day.
Please include the following details to facilitate a quick diagnosis:
Work log files & project files
To analyze the rendering process, we need your logs and the specific project file.
- Project File: Please attach the
.xcsor.xtfile you are trying to print.
- Work Logs:
- Via xTool Studio:
Three dots icon > Device Settings > Basic info > Export log.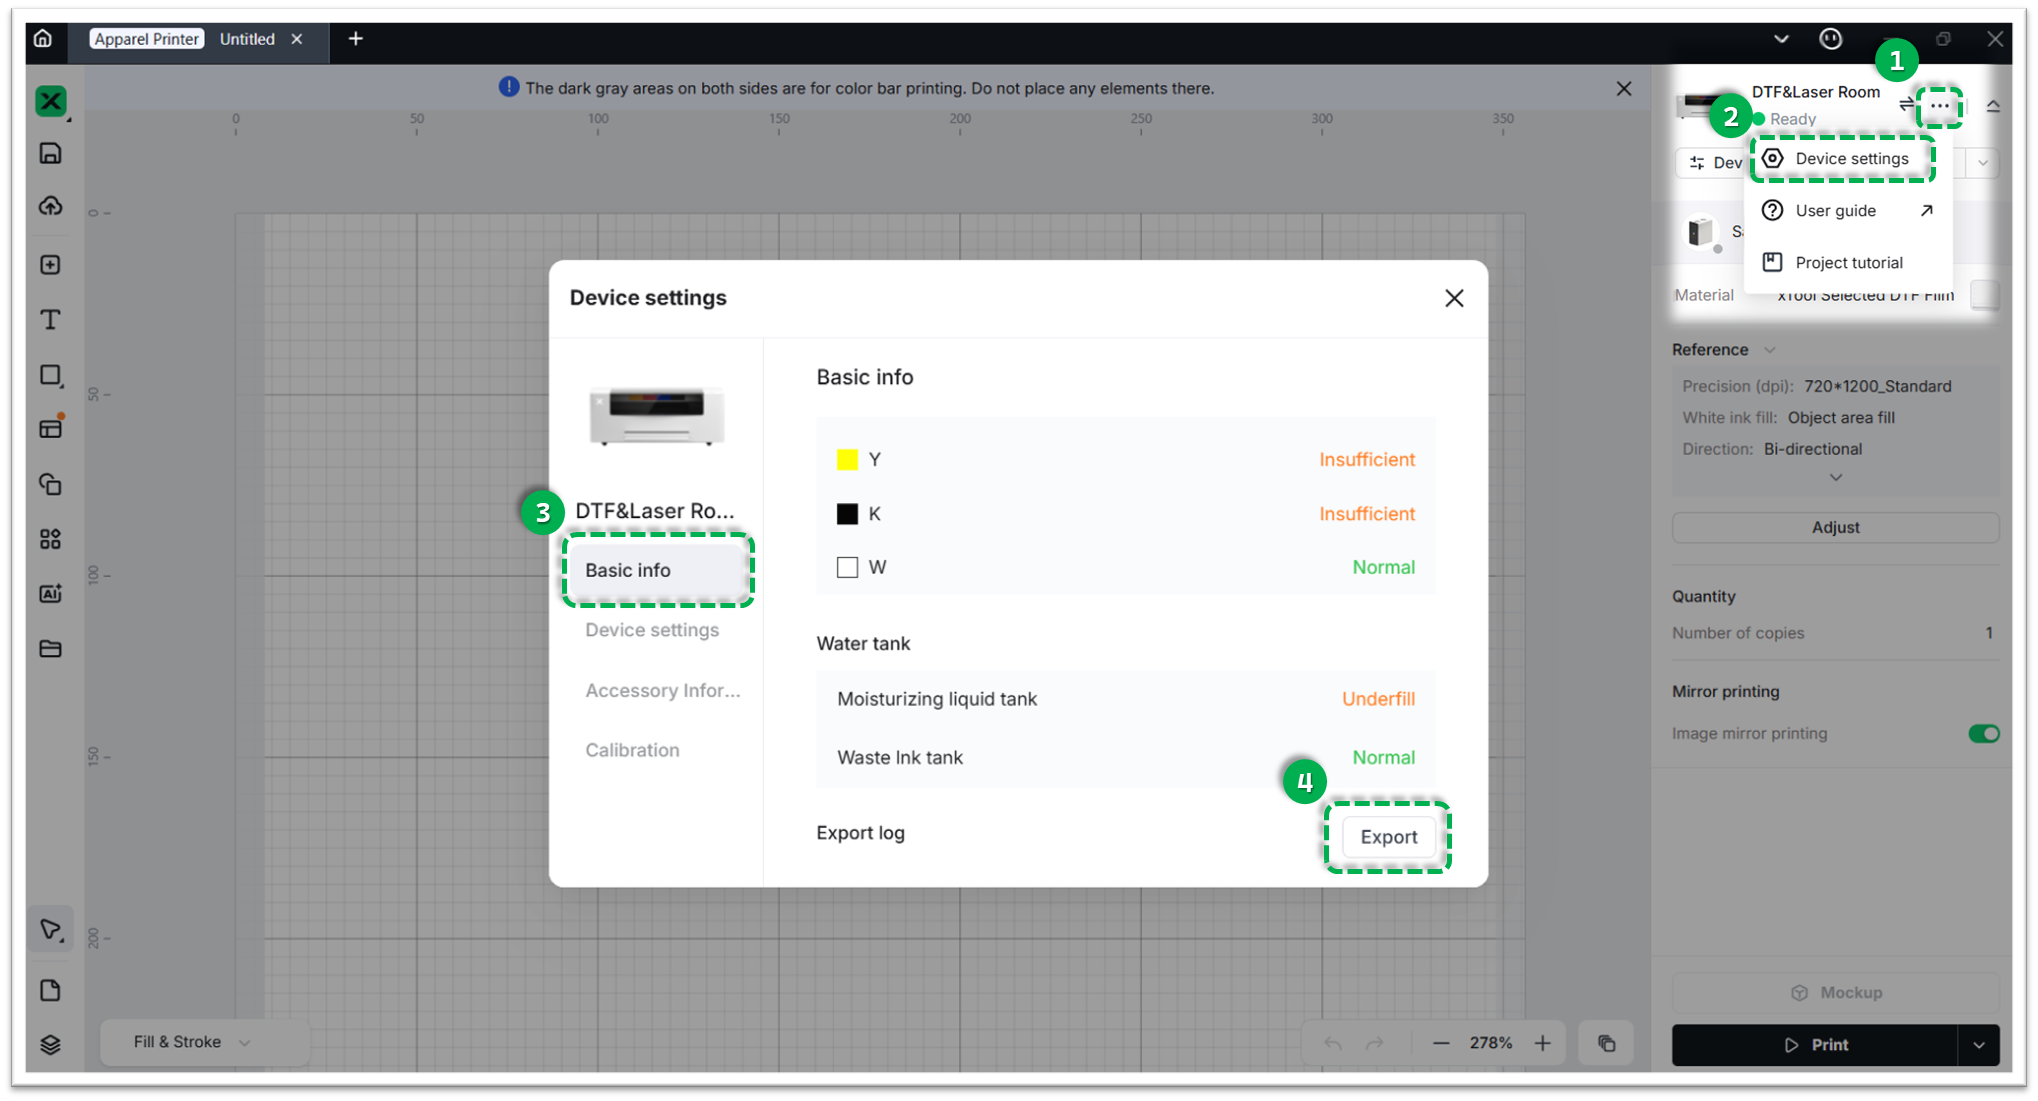
- Via XCS:
Settings > Basic info > Export log.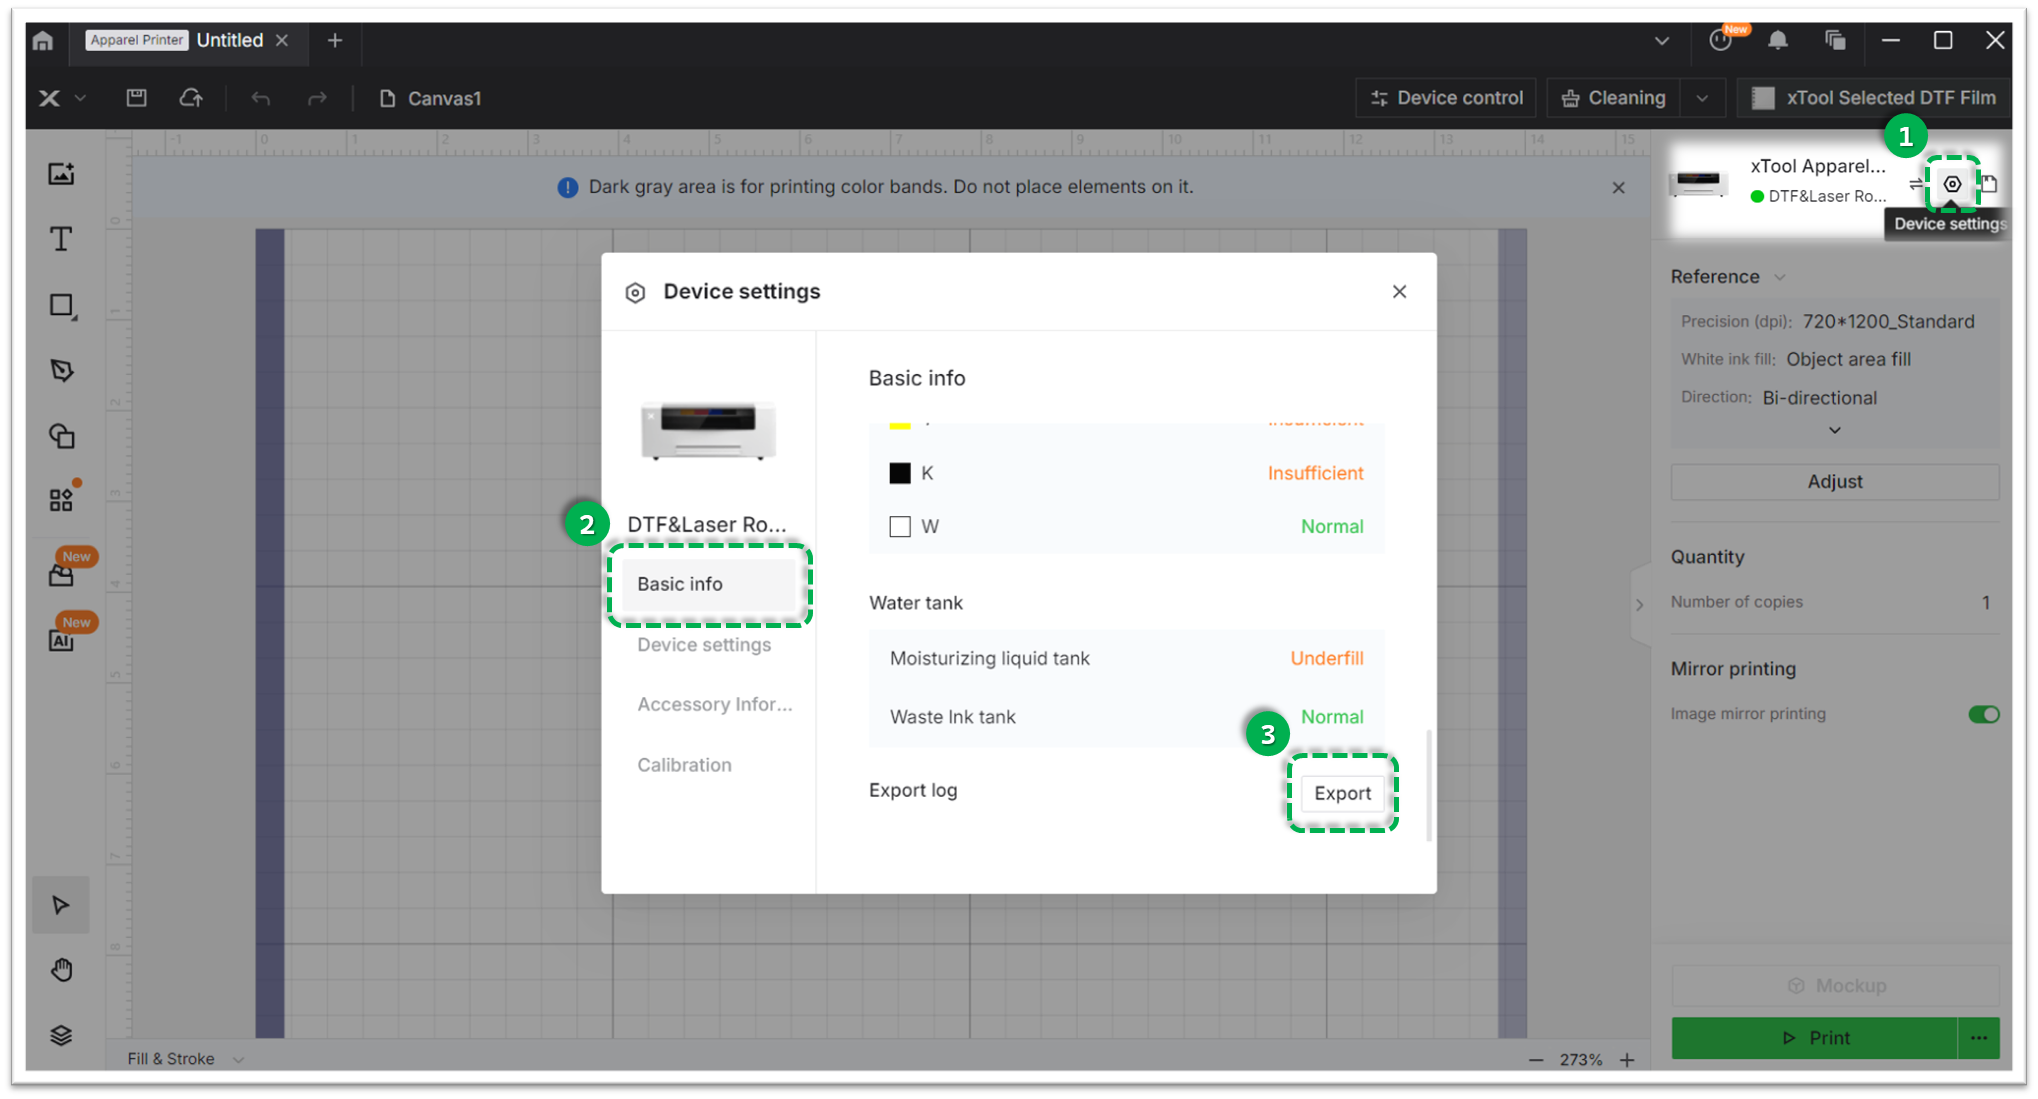
- Via xTool Studio:
"Temp" folder
This folder contains intermediate data generated during the print process.
- How to export: Please refer to this video tutorial: How to export the Temp folder
Visual Evidence
- Photos: Please provide clear comparison photos (e.g., the print on the film vs. the result after heat pressing).
- Video: A short video showing the issue is also helpful.
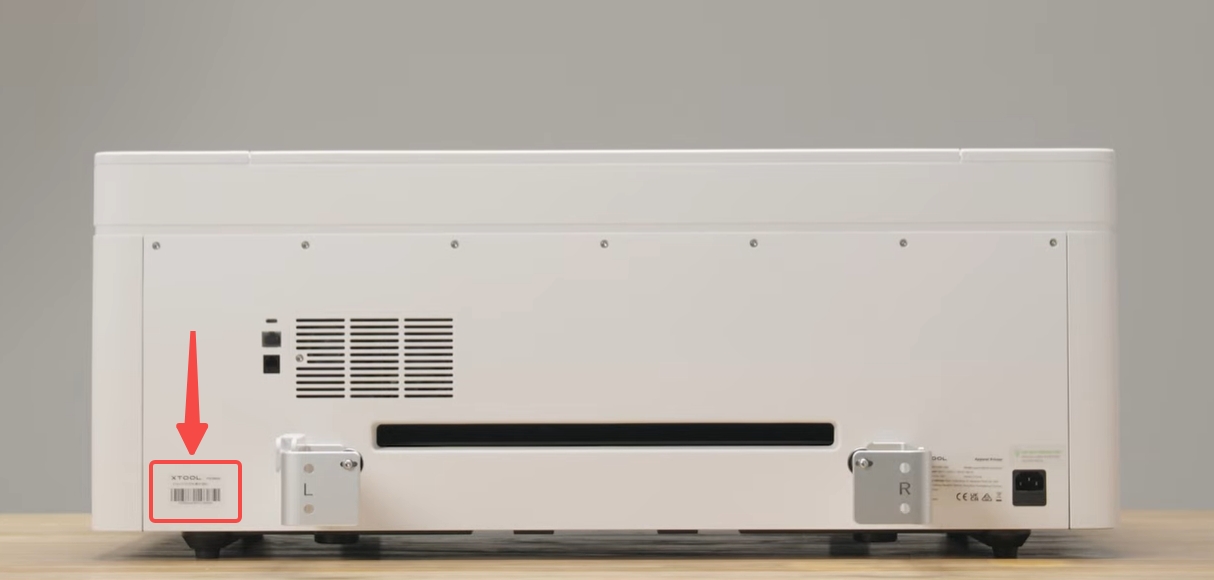
Device Information
- Serial Number (SN): Located on the rear panel label.
Documentation feedback
Help improve this content by providing feedback. If this content did not meet your requirements, select "No" in the "Was this page helpful?" section below. Include specific details about what was unclear or missing in the pop-up suggestion box. Feedback submissions are reviewed by xTool technical writers to enhance future documentation.
Services & Help
Learn & Education

Copyright © 2025 xTool All Rights Reserved.