Issue description
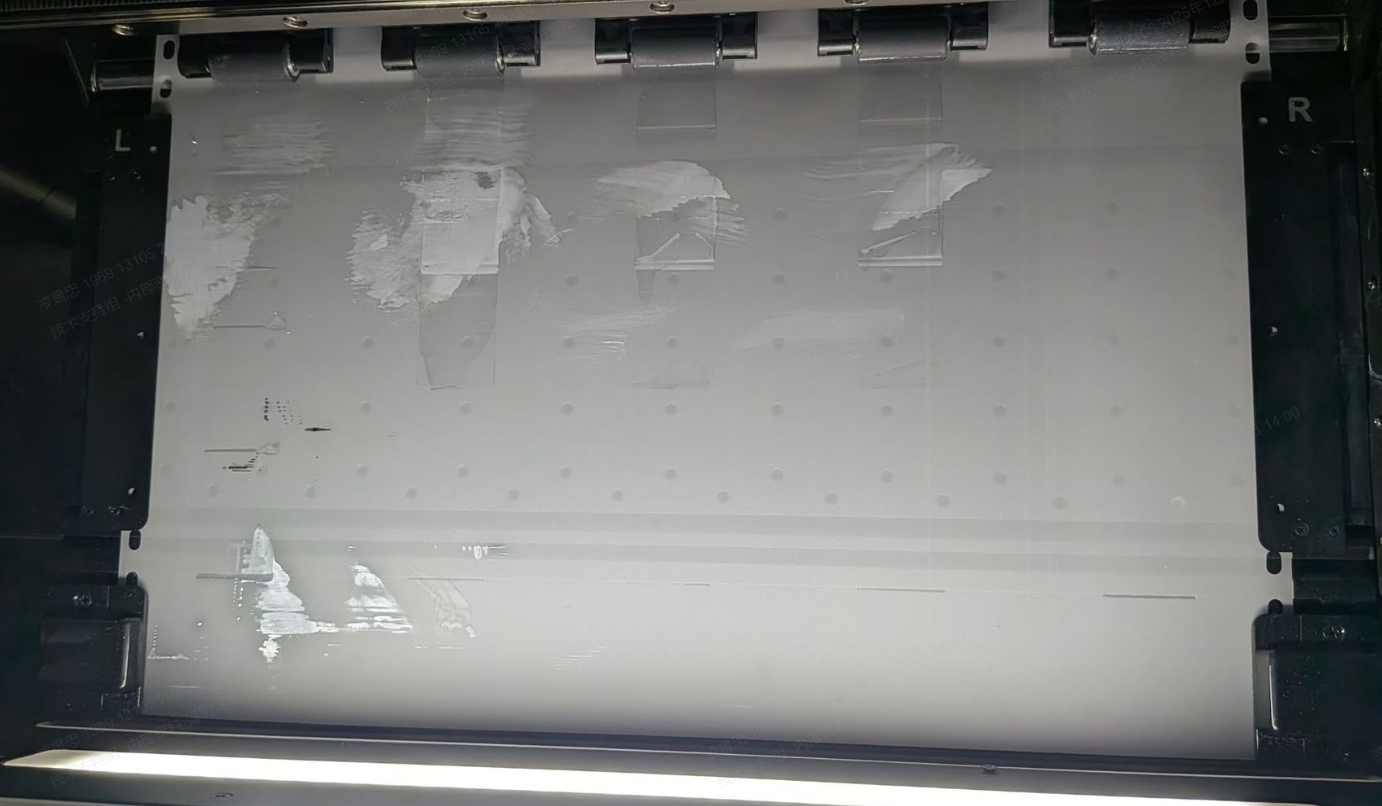
After feeding unprinted film into the printer, you observe pools or patches of ink stains on the film surface.
Mechanism of the Issue: This issue typically occurs during the cutting process as delineated in the following sequence:
- During cutting, the film "buckles" or bulges upwards.
- The buckled film touches the wet print head, causing ink to transfer onto the film.
- When the film rolls back, the wet ink on the film transfers onto the pinch rollers.
- Consequently, any new film fed into the machine gets stained by the dirty rollers.
Important Note: The film bulging during cutting may not be visible to the naked eye, but even slight contact with the print head can cause ink contamination.
Potential causes
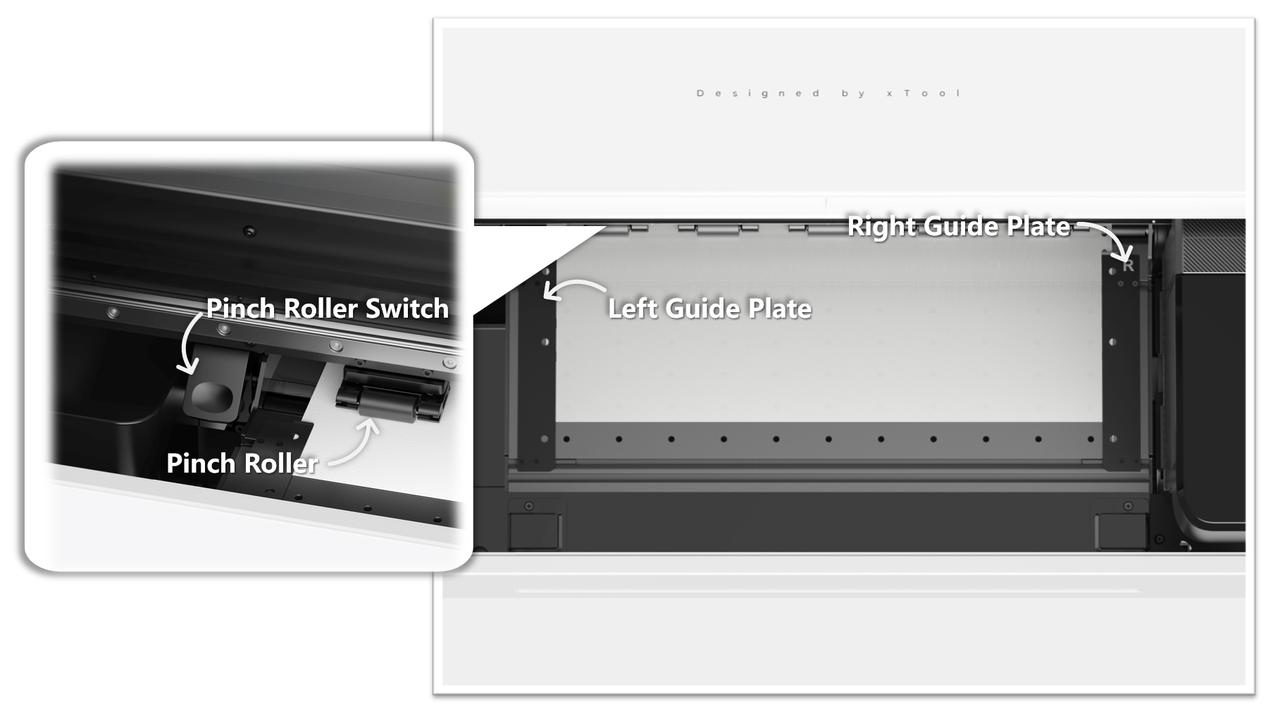
- Film Alignment: The film is not properly secured by the guide plates.
- Hardware Damage: The Blade Module is broken.
- Mechanical Failure: The roller on the bladed module is broken.
Clean up & recovery
Before troubleshooting the root cause, clean contaminated components to prevent further issues.
Step 1: Remove the contaminated film
Use scissors or a cutting tool to remove the stained section of the film.
- If the film is short: You can remove it directly from the printer.
- If the film is long (fed into the oven):
- Detach the magnetic cover of your xTool OS1 Oven.
- Cut the film inside the oven and remove it from there.
- 💡 Cause: Pulling film backwards from the oven into the printer can drag curing powder into the printer's sensitive mechanics.
Step 2: Clean the pinch rollers
Since ink has likely been transferred to the rollers, they must be cleaned to stop the cycle of staining.
- Toggle the pinch roller switch outward to raise the pinch rollers.
- Inspect each roller for ink residue.
- Clean them thoroughly using a lint-free cloth.
- Reference: See the guide Pinch Rollers Cleaning for details.
Step 3: Clean the print head
The special coating on DTF film can clog the print head nozzles upon contact.
- Perform Standard Automatic Cleaning:
- On the printer's control panel, tap Maintenance > Cleaning > Standard.
- Execute Standard Automatic Cleaning cycle
- This removes foreign matter and ink residue from print head
- Verify:
- Print a test pattern. On the printer's control panel, tap Maintenance > Print Test Image.
- Result:
- If the test pattern is good, proceed to the Troubleshooting section below.
- If the test pattern shows clogged nozzles (missing lines) after multiple cleanings, the coating may have dried on the head. You must Deep Soak the print head (Moisturizing Liquid + Cleaning Liquid in a 1:1 ratio for 6–12 hours).
- Reference: See Step 3: Deep soak the print head in the maintenance guide.
Troubleshooting
Step 1: Check for proper film alignment
Improper loading is a common cause of buckling.
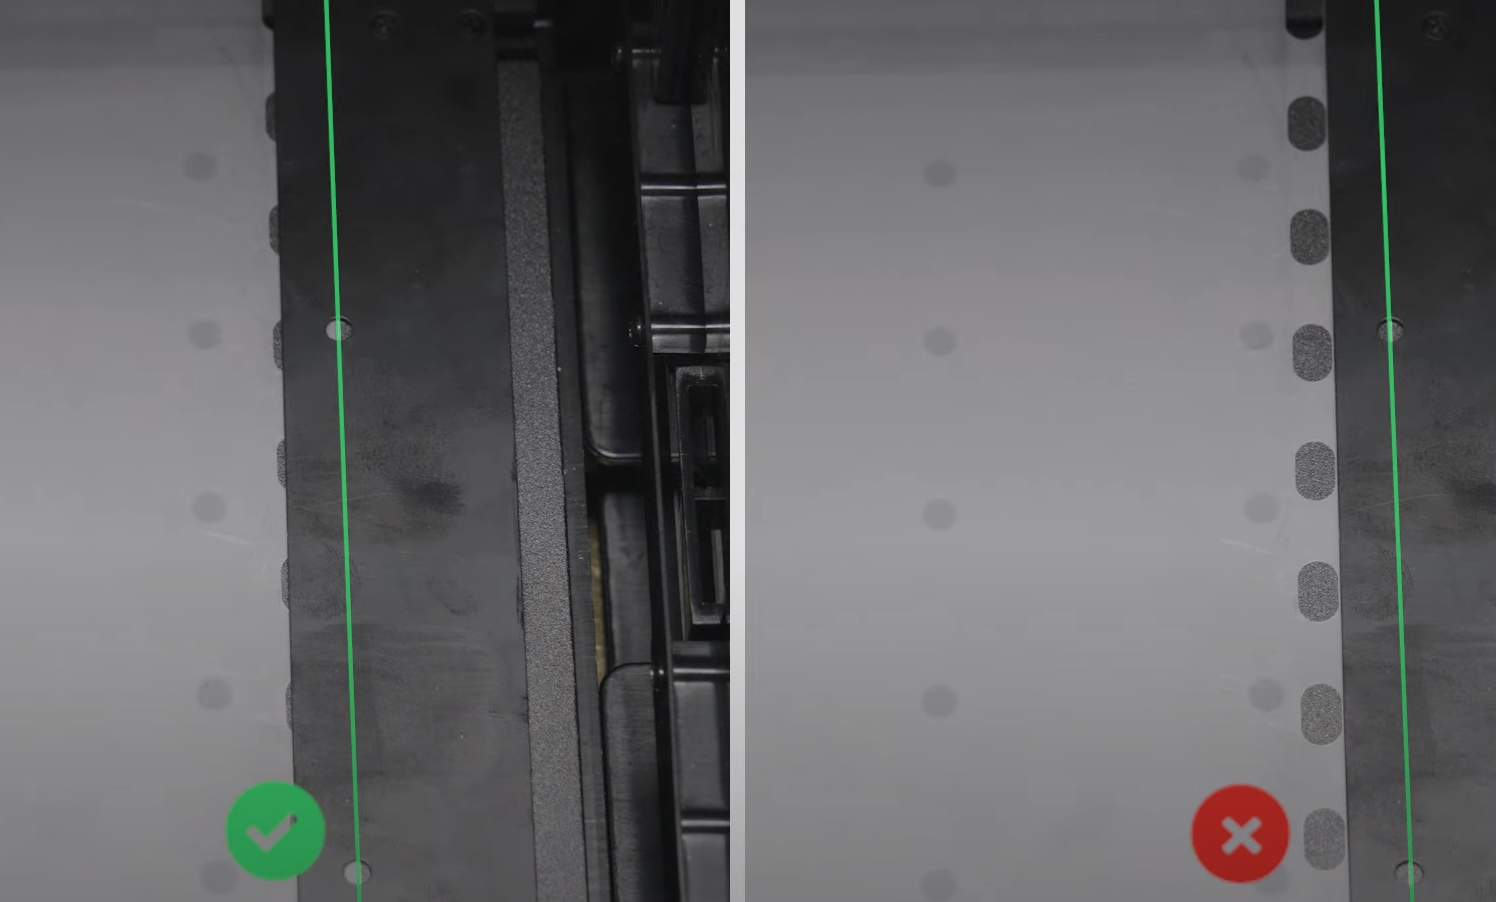
- The film edge must align precisely with the white marking line.
- The film must not overlap the white line.
- The gap/deviation must be ≤ 1 mm.
- Action:
- If aligned incorrectly, reload the film.
- If aligned correctly, proceed to Step 2.
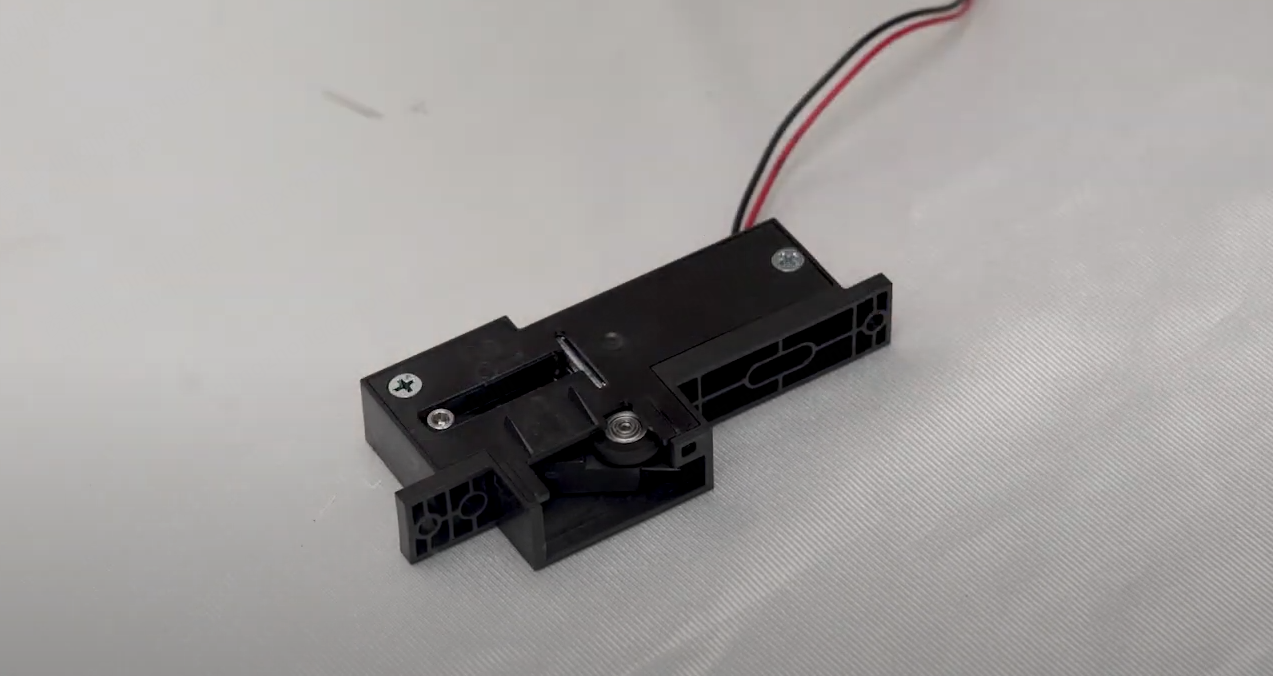
Step 2: Inspect the blade module
- Remove the cutting blade module.
- Video Guide: Replace the Cutting Blade for xTool Apparel Printer
- Inspect: Check the plastic housing of the module for cracks, particularly near the screw holes (see reference image below).
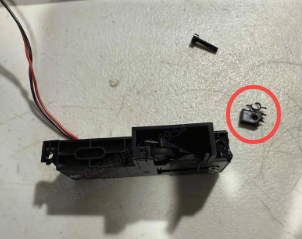
- Action:
- If cracked/broken: Contact xTool Customer Service for a replacement.
- If intact: Reinstall and proceed to Step 3.
Step 3: Check feeding process
If the printer mechanics are fine, the issue might be relevant to the film feeding process into the oven.
Film feeding issues between printer and oven can cause tension and bulging.
- Action: Refer to the video guide: xTool Apparel Printer & OS1 Troubleshooting: PET Film Not Feeding into Oven
Step 4: Record the cutting process
Since the printer cannot cut while the lid or side panels are open (due to safety interlocks), follow this specific procedure to capture the issue:
⚠️ SAFETY WARNING: Exercise extreme caution. Keep hands away from moving parts.
- On the control panel, tap Maintenance > Control > Cutting.
- Immediately after the cut command is sent/executed, open the Left-side panel.
- Record: Take a video from the side angle showing the film's behavior (specifically looking for the "buckle" or "wave" motion).
- Send this video to the support team if the issue persists.

If the problem persists
Should the issue persist after completing the preceding steps, please submit a ticket via the "Submit a Ticket" button in the "Help Ticket" section below. The standard response time is one business day.
Please include the following details to facilitate a quick diagnosis:
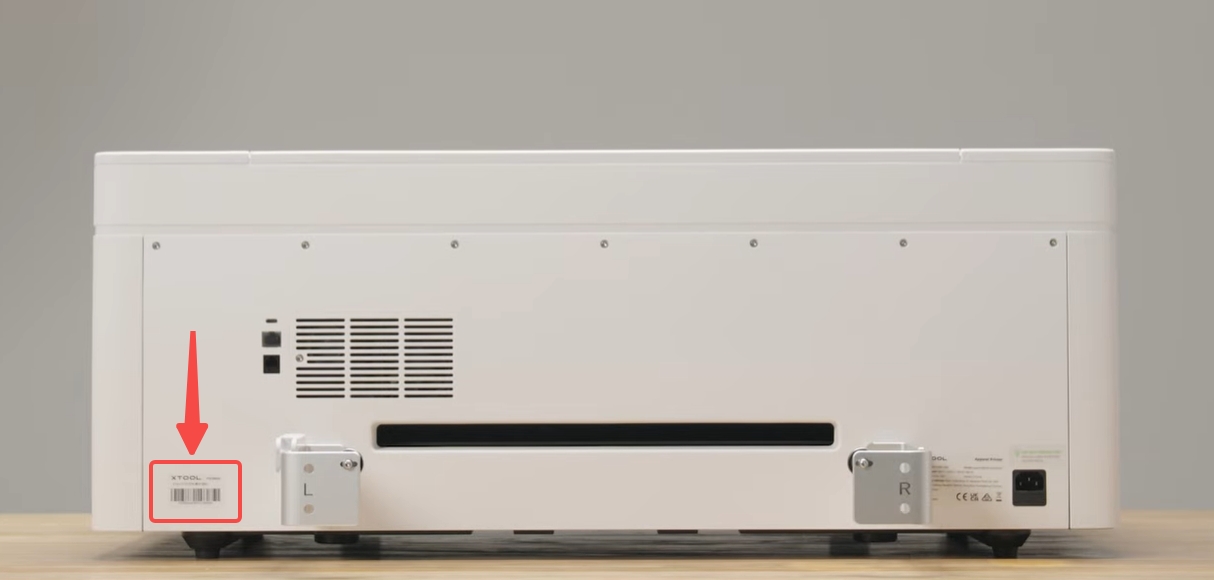
1 Device Information
- Serial Number (SN): Located on the rear panel label.
2 Photos & Video
- Photo: Clear photos of how the film is aligned with the white marking line between the left and right guide plates.

- Photo: Close-up photos of the Blade Module (removed).
- Video: The side-view video of the cutting process recorded in Step 4.
Services & Help
Learn & Education

Copyright © 2025 xTool All Rights Reserved.