Issue description
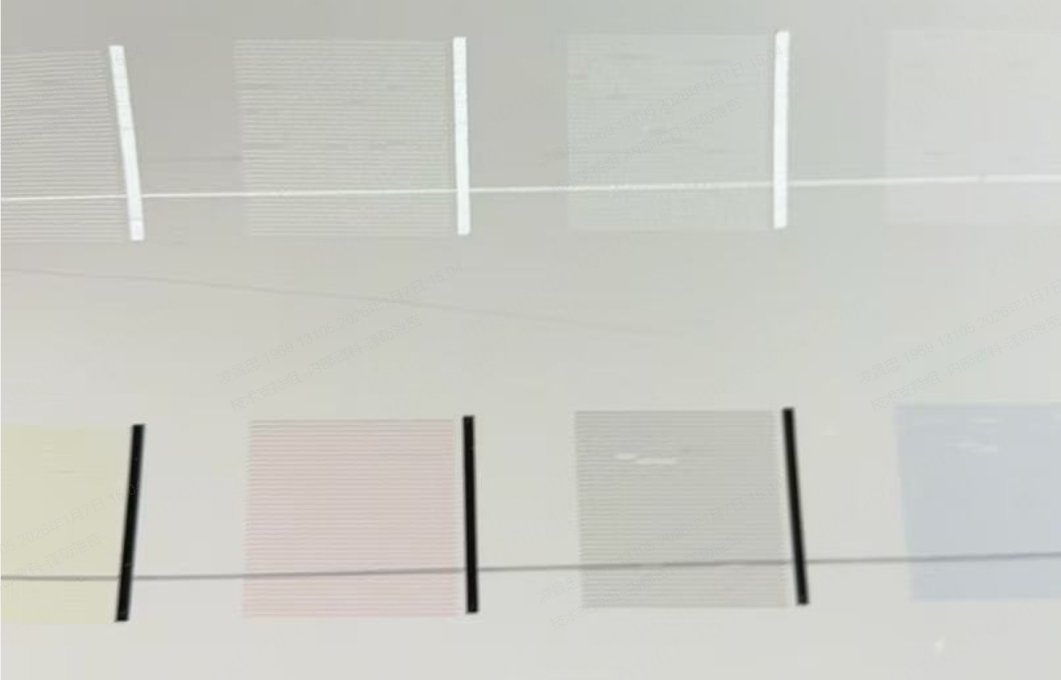
When printing a test pattern or design, the output shows long horizontal white or black stripes across the print. In actual designs, this may appear as large rectangular blocks of solid black or white. See the images below for reference.
- Consult this content for troubleshooting.
Potential causes
- Print head failure: Hardware malfunction in one or both print heads
- Carriage controller board failure: Electronic control board malfunction (higher probability)
Diagnostic logic
This troubleshooting guide uses a cable swap diagnostic method to determine whether the issue stems from the print head or the carriage controller board.
Diagnostic Principle: By swapping the print head connection cables, you can isolate whether:
- The problem follows the physical print head (print head failure)
- The problem follows the cable connection position (carriage controller board failure)
⚠️ CRITICAL SAFETY REQUIREMENT
- Before swapping print head cables, you MUST disconnect the printer power cord from the wall outlet.
- Failure to do so may cause electrical damage.
Troubleshooting
Step 1: Print a test image
First, generate a standard test pattern to analyze the defect.
- On the control panel, tap: Maintenance > Print Test Image.
- Analyze the result:
- Scenario A: If BOTH print head areas (White and CMYK) show abnormal horizontal lines or bars across the entire width.
- Diagnosis: This is likely a Carriage Controller Board failure. Please contact xTool Customer Service immediately.
- Diagnosis: This is likely a Carriage Controller Board failure. Please contact xTool Customer Service immediately.
- Scenario B: If the abnormality appears in ONLY ONE print head area.
- Action: Proceed to Step 2 to perform the cable swap test.
Step 2: Swap print head cables
This step swaps the connection between the two print heads to see how the error behaves.
💡 Purpose: By swapping cable connections, you force the system to route signals differently.
- If the problem moves to the opposite print head area, the carriage controller board is likely glithing.
- If the problem stays with the same physical print head, that print head is likely malfunctioning.
- Center the Carriage:
- On the LCD control panel, go to Maintenance > Control.
- Tap the Left arrow button under "Move print head" repeatedly until the carriage is in the middle of the printer.
- Power Off:
- Turn off the printer.
- UNPLUG the power cord from the wall outlet. (Do not skip this!)
- Swap Connections:
- Detach the Print Carriage Top Cover.
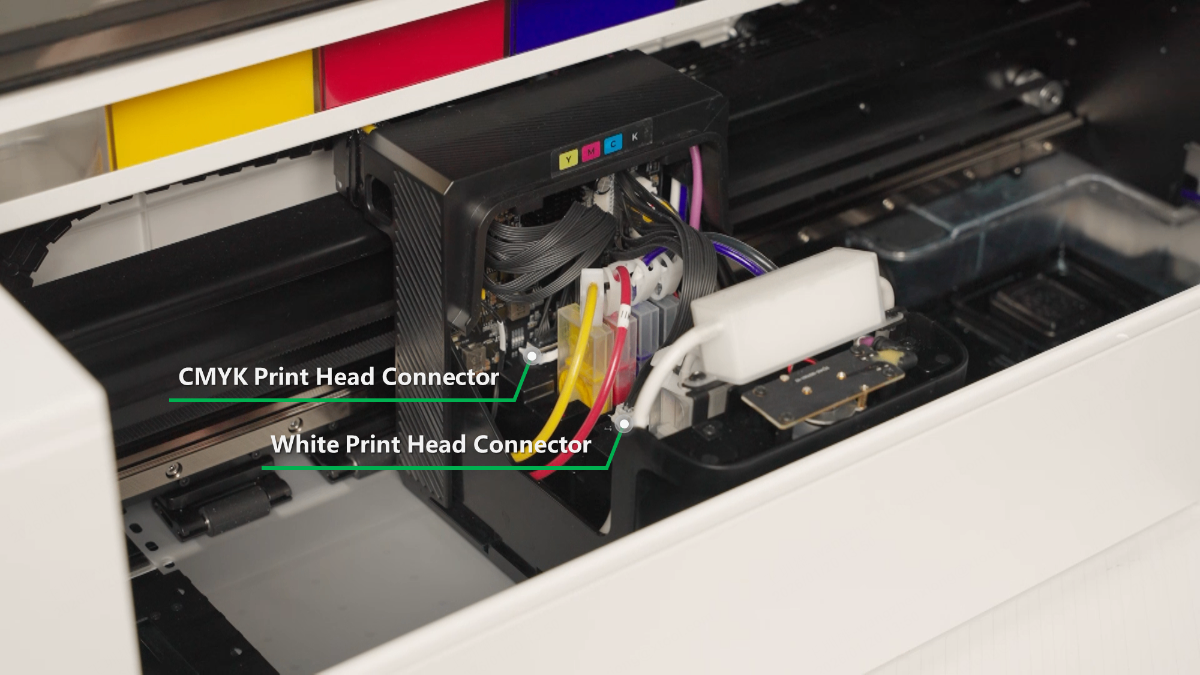
- Locate the flat cables connected to the two print heads.
- Swap their positions: Unplug the cable from the left head and plug it into the right head, and plug the cable from the right head into the left head. Ensure the latches are locked securely.
- Retest:
- Reconnect the power cord and turn on the printer.
- Print another Test Image.
- On the control panel, tap: Maintenance > Print Test Image.
Step 3: Analyze the results
Compare the "Before Swap" test print with the "After Swap" test print.
Result A: Problem moved to opposite print
- Example: A White bar becomes a Black bar (or, vice verse, a Black bar becomes a White bar).
- Diagnosis: This indicates a Carriage Controller Board issue. The board is sending erratic signals.
- Action: Contact xTool Customer Service.
Result B: Problem stayed with same print
- Example: The print result looks exactly the same as before the swap (e.g., the same type and location of color bock).
- Diagnosis: This indicates the issue is likely NOT the board, but potentially the Print Head itself.
- Action: Please export the device logs and contact xTool Customer Service for further analysis.
If the problem persists
Should the issue persist after completing the preceding steps, please submit a ticket via the "Submit a Ticket" button in the "Help Ticket" section below. The standard response time is one business day.
Please include the following details to facilitate a quick diagnosis:
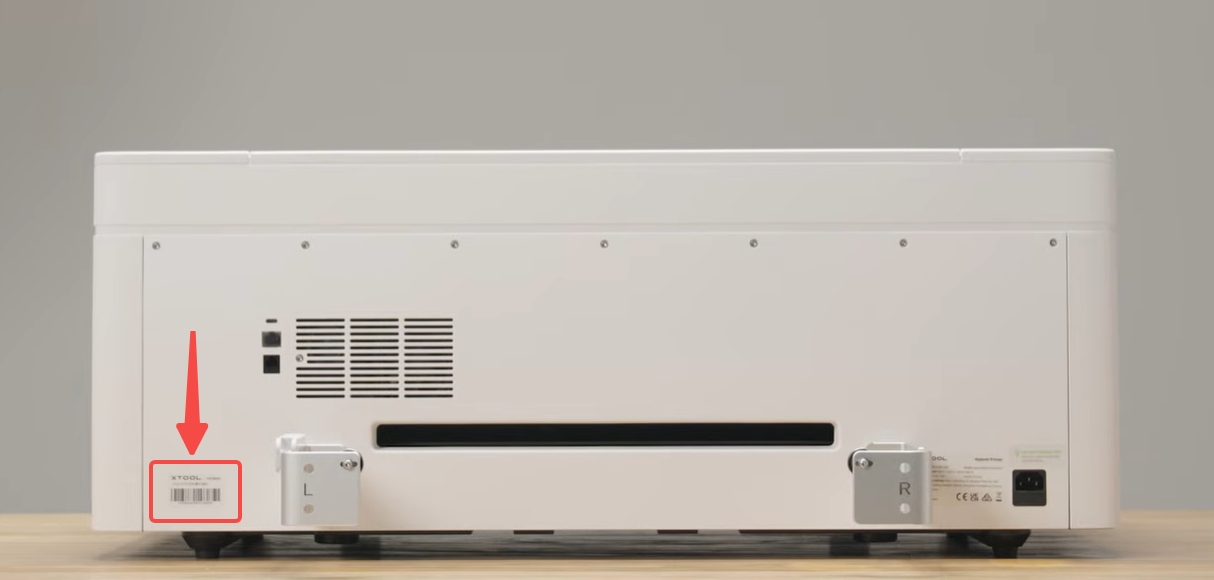
1 Device information
- Serial Number (SN): Located on the rear panel label.
2 Work log files
Please export the logs twice (Before and After the cable swap in Step 3).
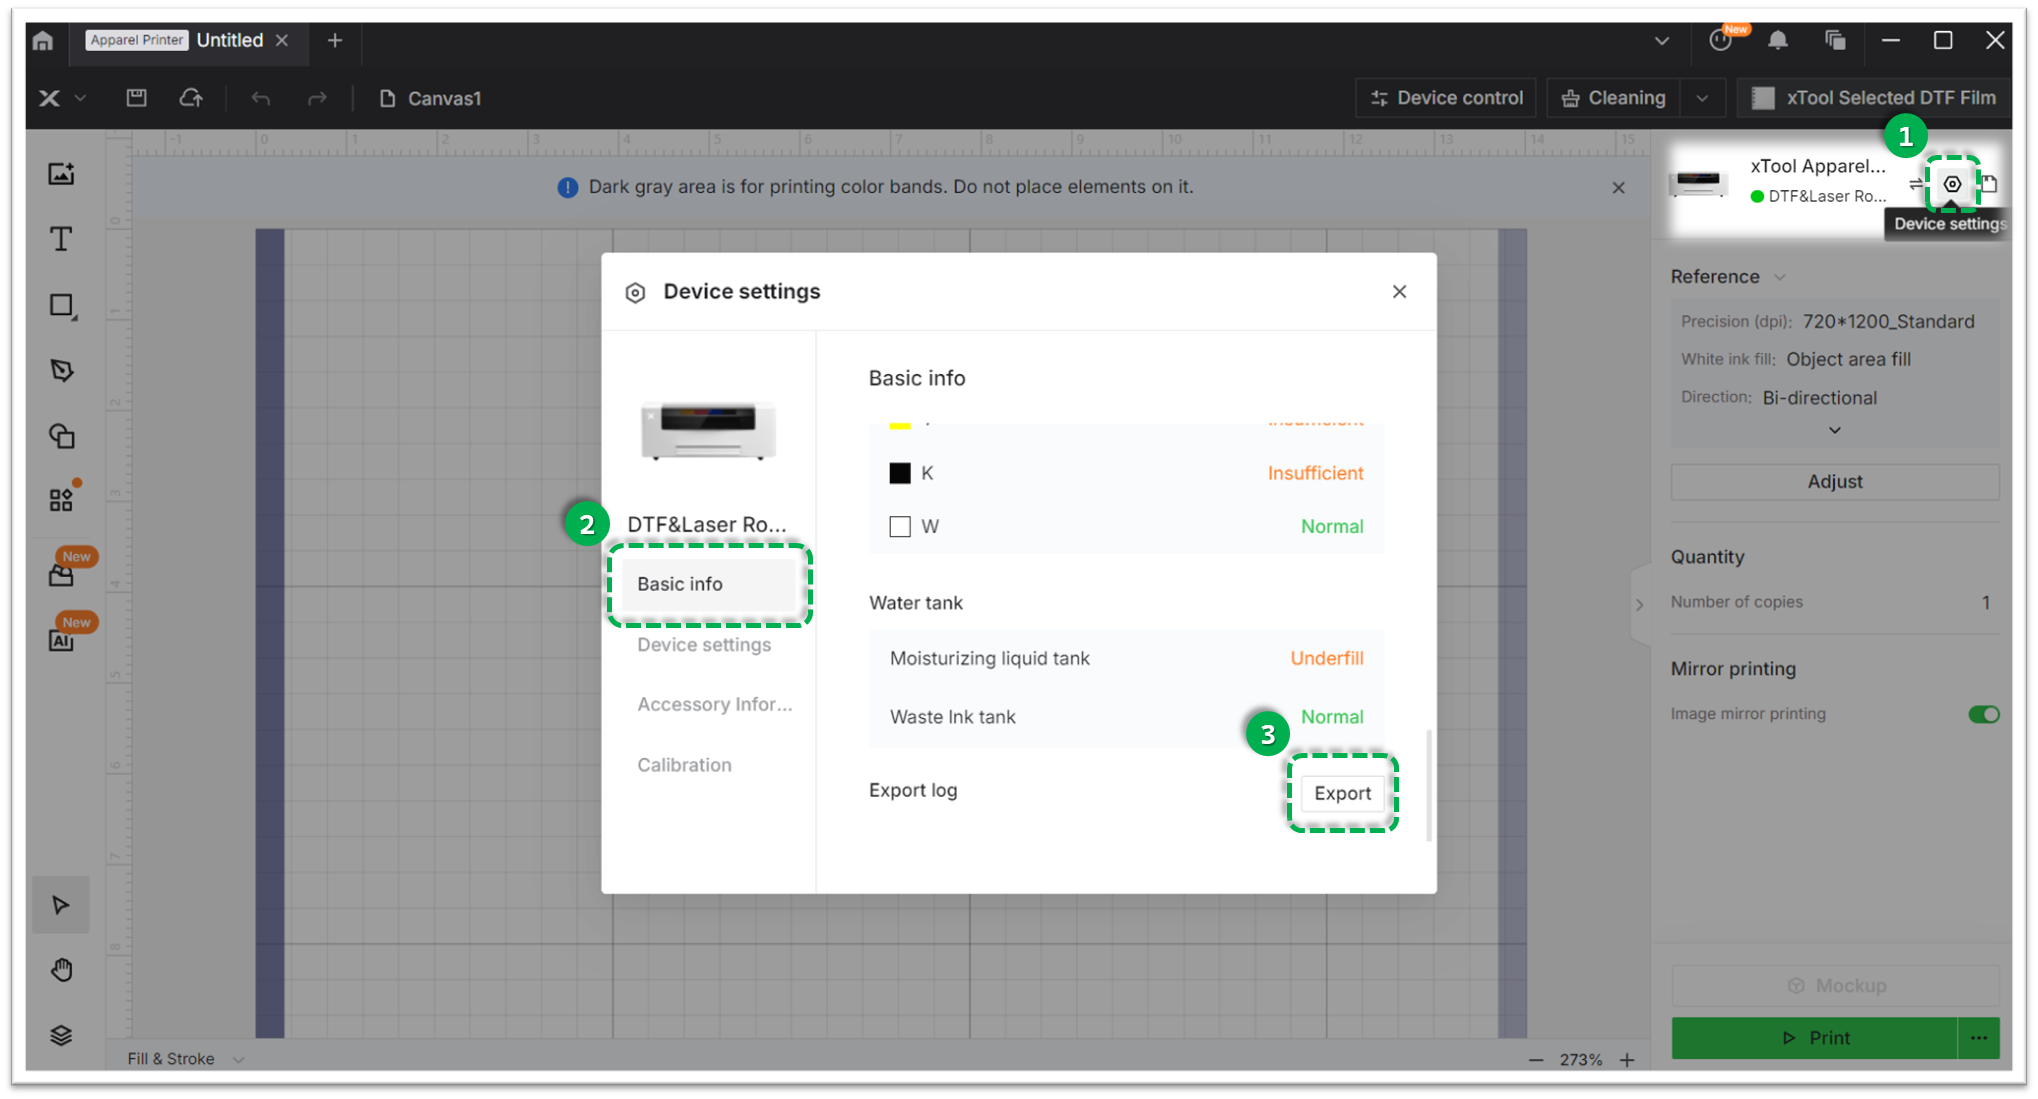
- Method A: Via xTool Creative Space (XCS)
Settings (gear icon) > Basic info > Export log.- Compress the folder into a .zip file.
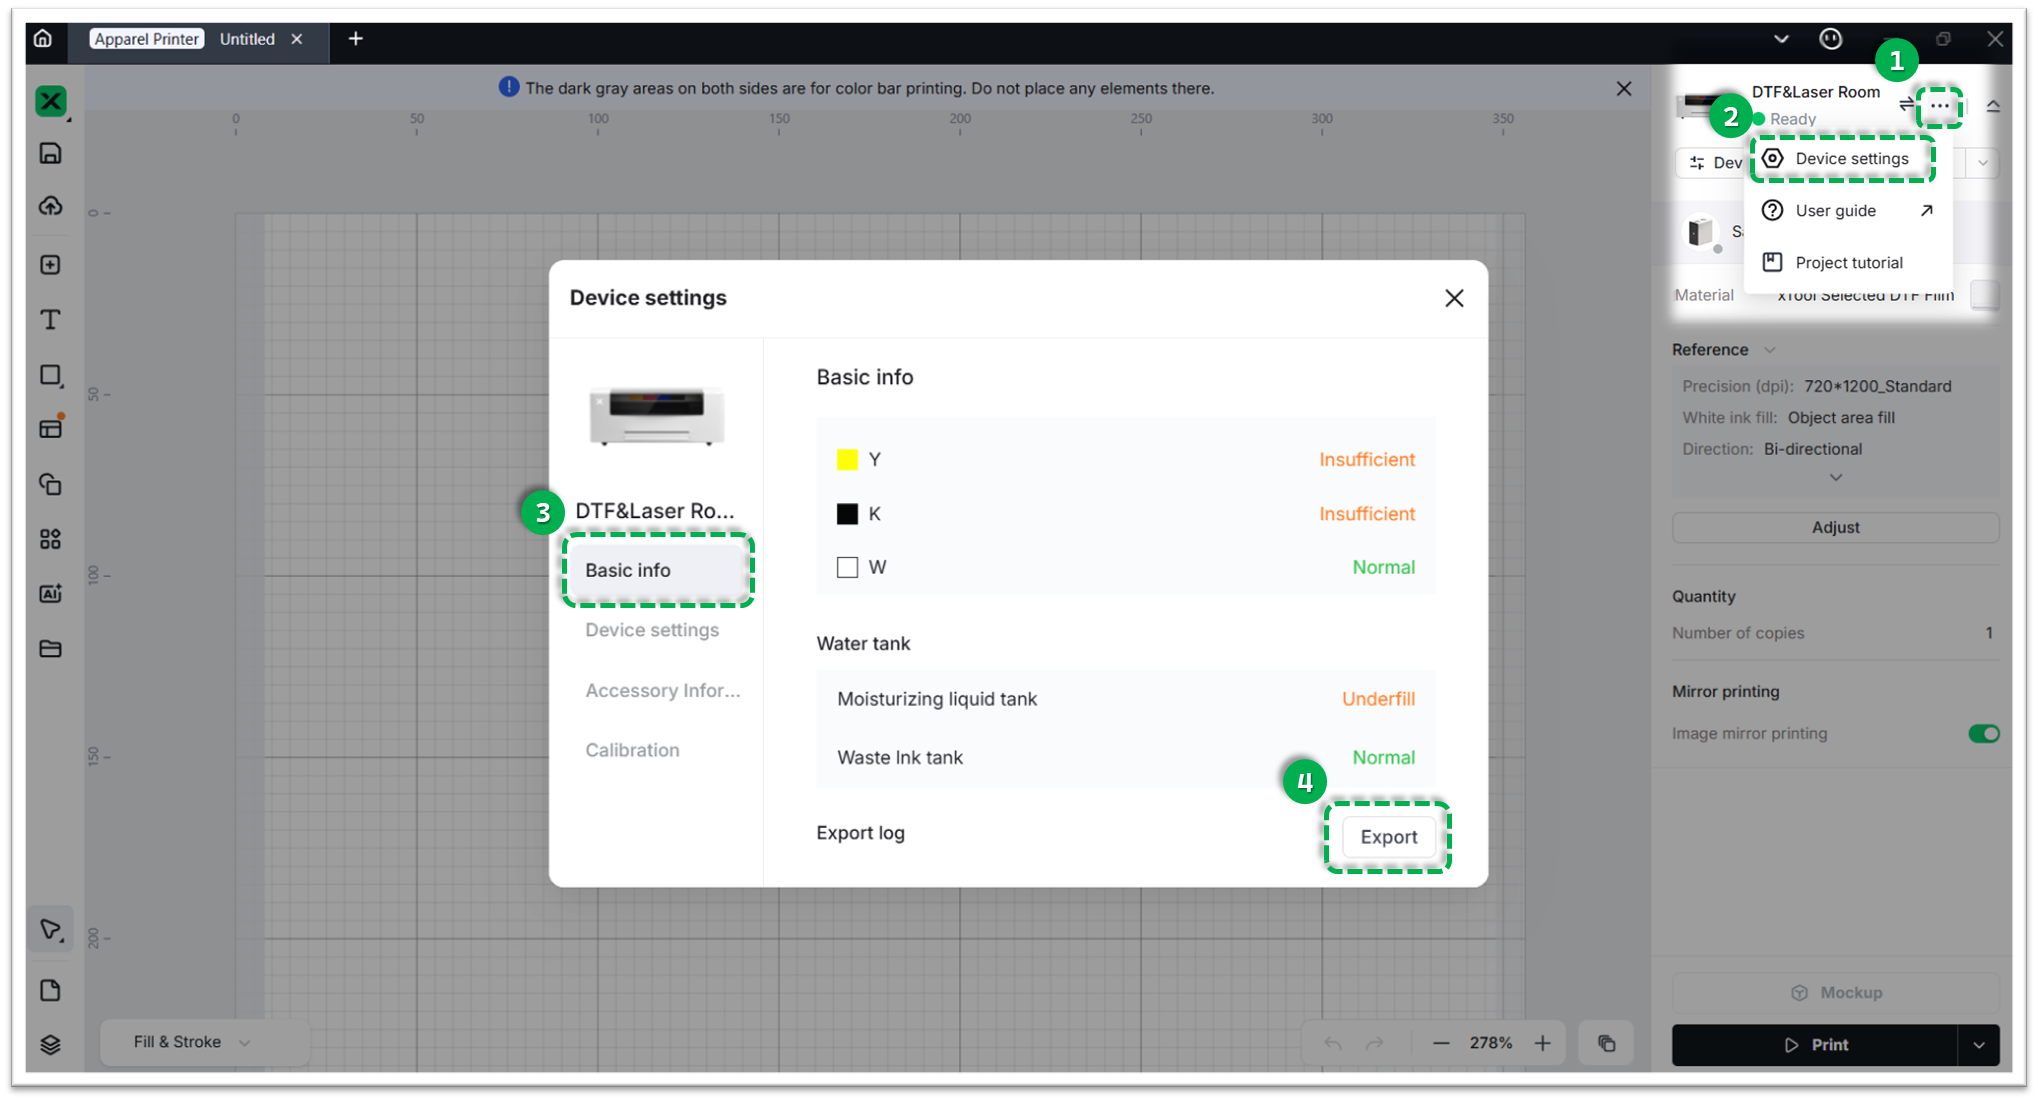
- Method B: Via xTool Studio
Three dots icon > Device Settings > Basic info > Export log.- Compress the folder into a .zip file.
3 Test print photos (Crucial)
Please provide clear photos of:
- The "Before Swap" test print.
- The "After Swap" test print.
Services & Help
Learn & Education

Copyright © 2025 xTool All Rights Reserved.