Issue description
After you connect the power cord, xTool Apparel Printer fails to boot up. The issue typically presents in one of two ways:
- No Power: No blue indicator lights are flashing inside the machine.
- Black Screen: Blue indicator lights are flashing inside the machine, but the LCD control panel remains black and unresponsive.
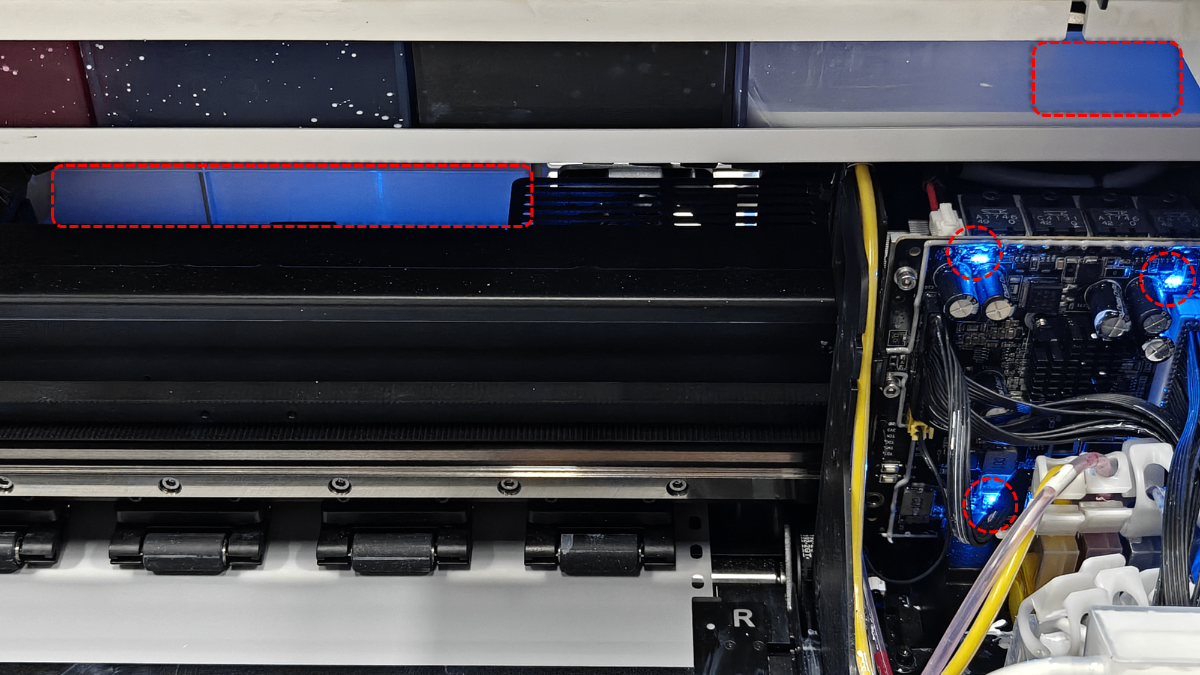
Under normal operation, blue indicator lights should be visible inside the printer. See the image below.
- This guide provides comprehensive troubleshooting steps to diagnose and resolve power-related issues.
Potential causes
- Power Supply Failure: The Switched-Mode Power Supply unit has failed or the voltage setting is incorrect.
- Cable Connection: The Control Panel Cable (integrated beneath the right cover) is loose or disconnected.
- Hardware Malfunction: The LCD screen or the High-speed PCB has failed.
Troubleshooting
Step 1: Check internal power indicators
Connect the power cord and switch on the printer. Look through the transparent cover or gaps to see if any blue indicator lights are illuminated inside.

Scenario A: No lights are visible inside (Total power loss)
This indicates an issue with the power source or the power supply unit.
⚠️ DANGER: Electrical Safety Warning
AC Voltage Risk: DO NOT touch exposed internal wiring or electrical circuits with your hands while the machine is plugged in. Follow all safety precautions.
- Test the Power Cord:
- Swap the printer's power cord with another known working cord (e.g., the power cord from your xTool OS1 Oven).
- Test if the printer turns on.
- Note: Remember to return the cords to their original devices after testing.
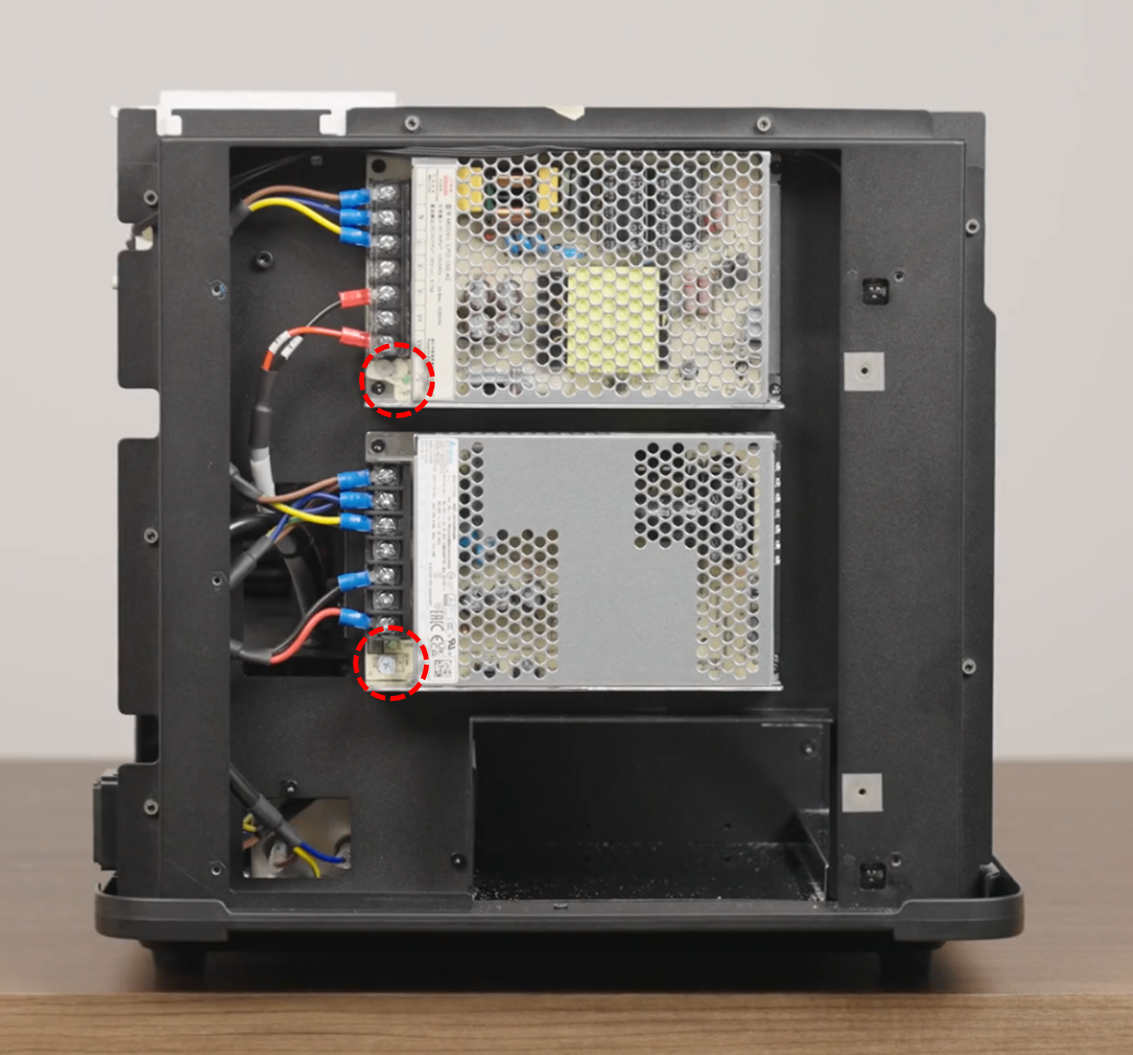
- Check the Power Supply Unit:
- If the cord is fine, refer to the guide: Replace the Switched-Mode Power Supply for xTool Apparel Printer to access the power supply.
- Check if the LED indicators on the power supply unit itself are lit.
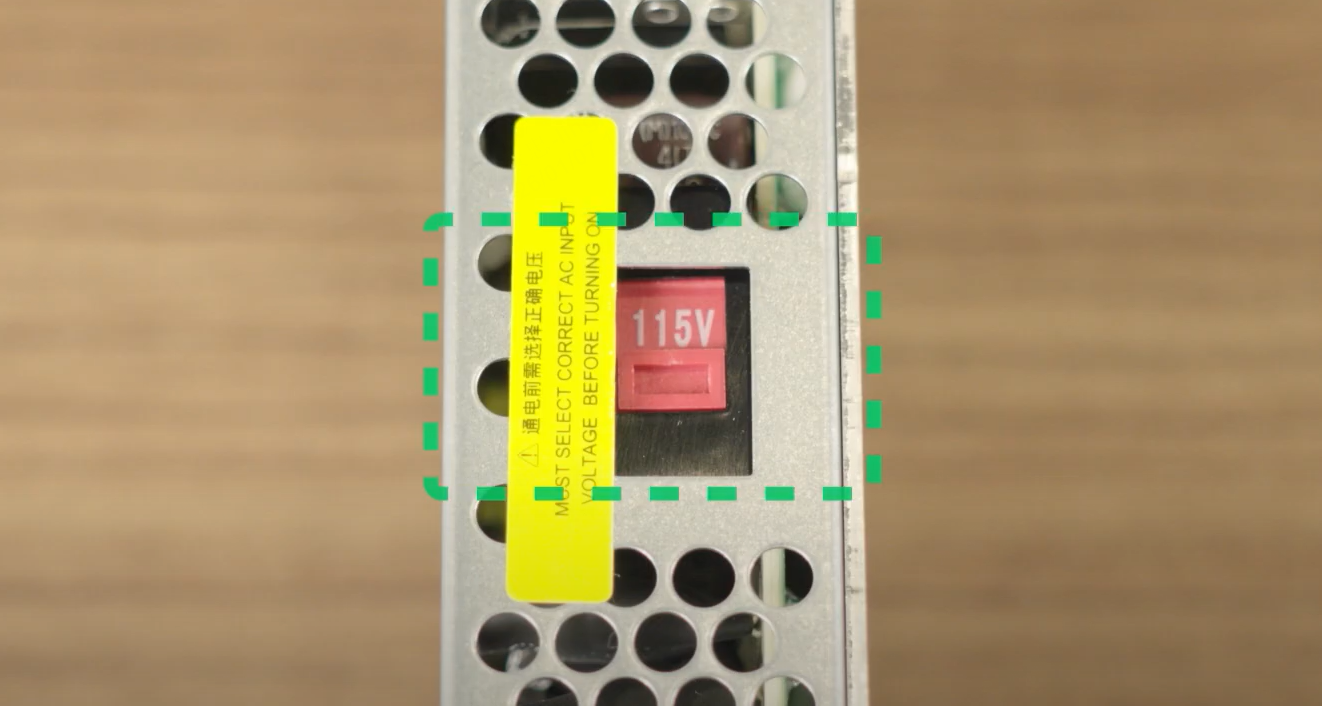
- Check Voltage Setting: Ensure the voltage switch on the power supply matches your local voltage (110V or 220V).
- Action: If the power supply LED is off or the voltage setting is wrong, take a photo and contact xTool Customer Service.
Scenario B: Blue lights are visible inside
This indicates the machine is receiving power. The issue lies with the control system or display. Proceed to Step 2.
Step 2: Check print carriage movement
This step helps determine if the system is booting up (screen issue) or frozen (board issue).
- Prepare the Carriage (Unlock & Center): If the printer is off, the carriage is likely locked.
- Open the right-side panel.
- Rotate the ink stack knob DOWN until you feel resistance.
- Rotate it back UP for 1–2 turns.
- Gently push the print carriage by hand to the center of the working area.
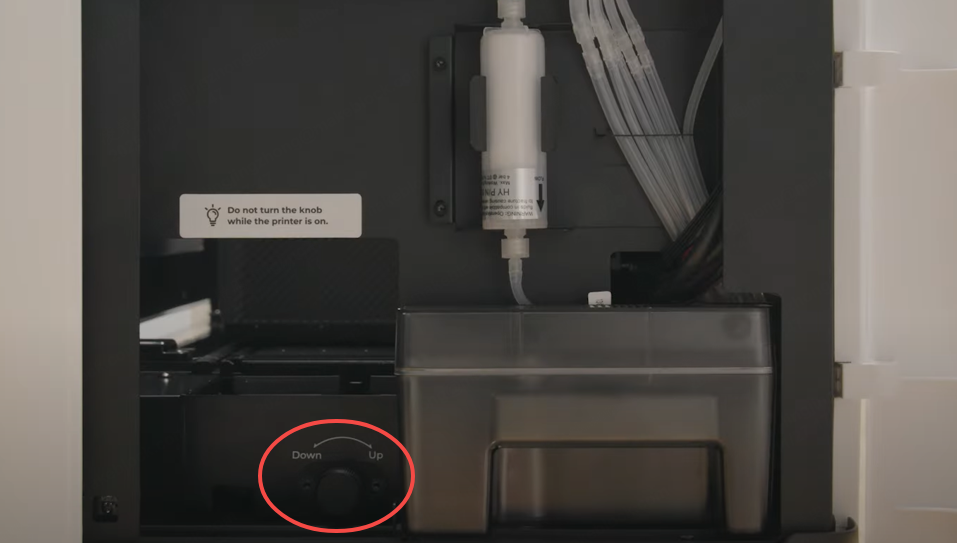
- Power On and Observe Plug in the power cord. Observe carriage movement.
Situation A: Carriage moves back to home position (Right), but the screen is black
The system is running, but the screen is not receiving a signal.
- Cause: Loose Control Panel Cable.
- Action:
- Refer to the video: Replace the Right Cover on xTool Apparel Printer
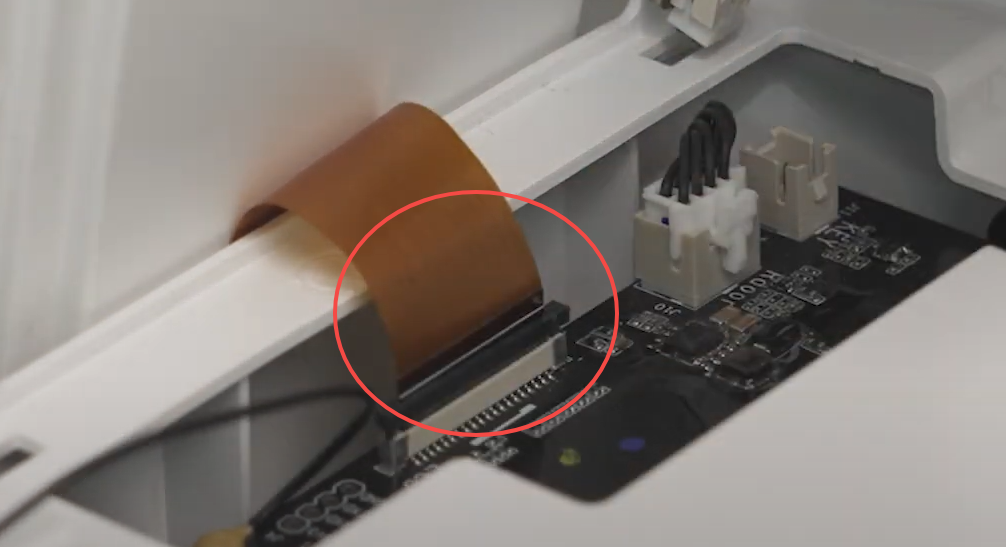
- Locate the Control Panel Cable connecting the LCD to the high-speed PCB.
- Disconnect and firmly reconnect the cable.
- Critical Check: Ensure the connector is fully inserted until the white marking line is parallel to the socket.
- Retest. If the screen remains black, contact xTool Customer Service.
Situation B: Carriage does not move at all, and the screen is black
The system has failed to initialize.
- Cause: High-speed PCB failure or Control Panel failure.
- Action:
- Refer to the video: Replace the Right Cover on xTool Apparel Printer to remove the right cover.
- Locate the High-speed PCB (right beneath the control panel assembly).
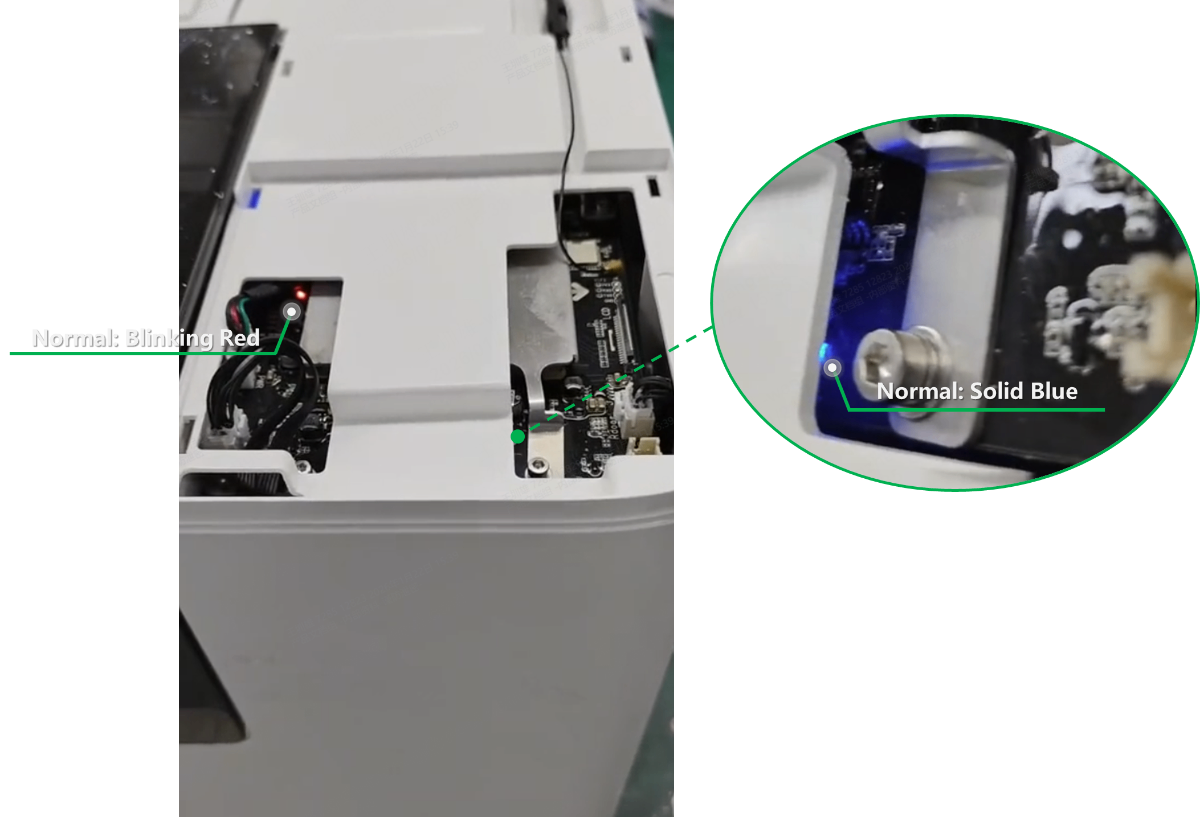
- Power on the machine and observe the two small indicator lights on the board. Refer to the image below.
- Normal Status:
- Left LED: Flashing Red.
- Right LED: Solid Blue.
- Record: Take a video of these lights and proceed to the "If the Problem Persists" section.
If the problem persists
Should the issue persist after completing the preceding steps, please submit a ticket via the "Submit a Ticket" button in the "Help Ticket" section below. The standard response time is one business day.
Please include the following details to facilitate a quick diagnosis:
1 Video evidence (Required)
Based on your findings in Step 2, please provide:
- If Carriage DOES NOT move: A video showing the stationary carriage and the status of the LEDs on the High-speed PCB (inside the right cover).
- If Carriage MOVES: A video showing the carriage moving to the home position while the LCD screen remains black.
- If NO Internal Lights: A video showing the power supply unit LED and a photo of the voltage selector switch position.
2 Device information
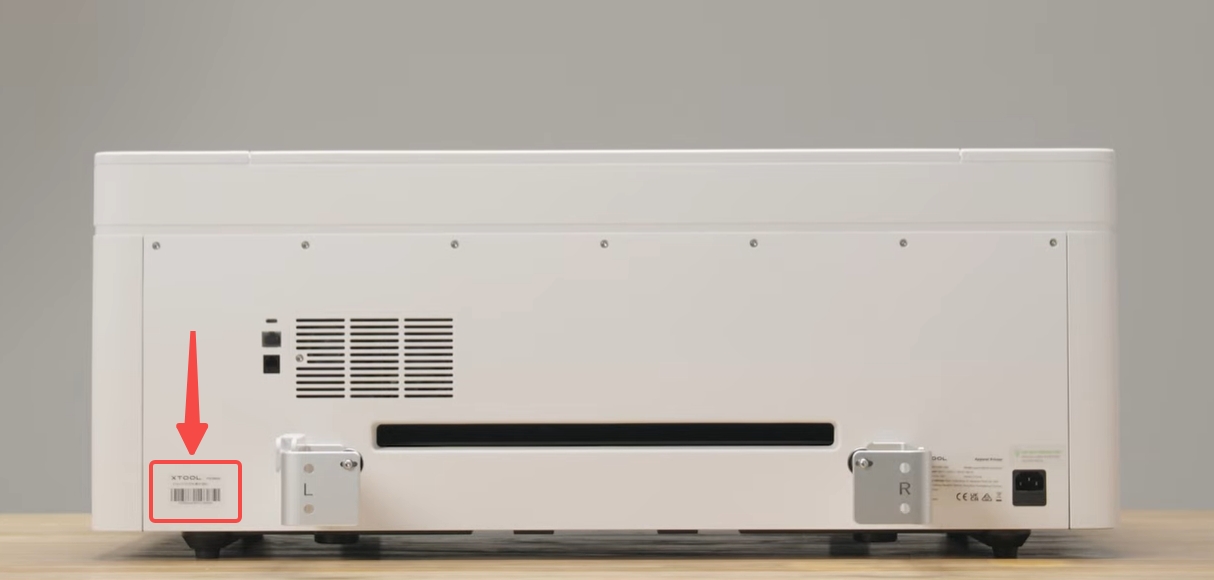
- Serial Number (SN): Located on the rear panel label.
Services & Help
Learn & Education

Copyright © 2025 xTool All Rights Reserved.