Issue description
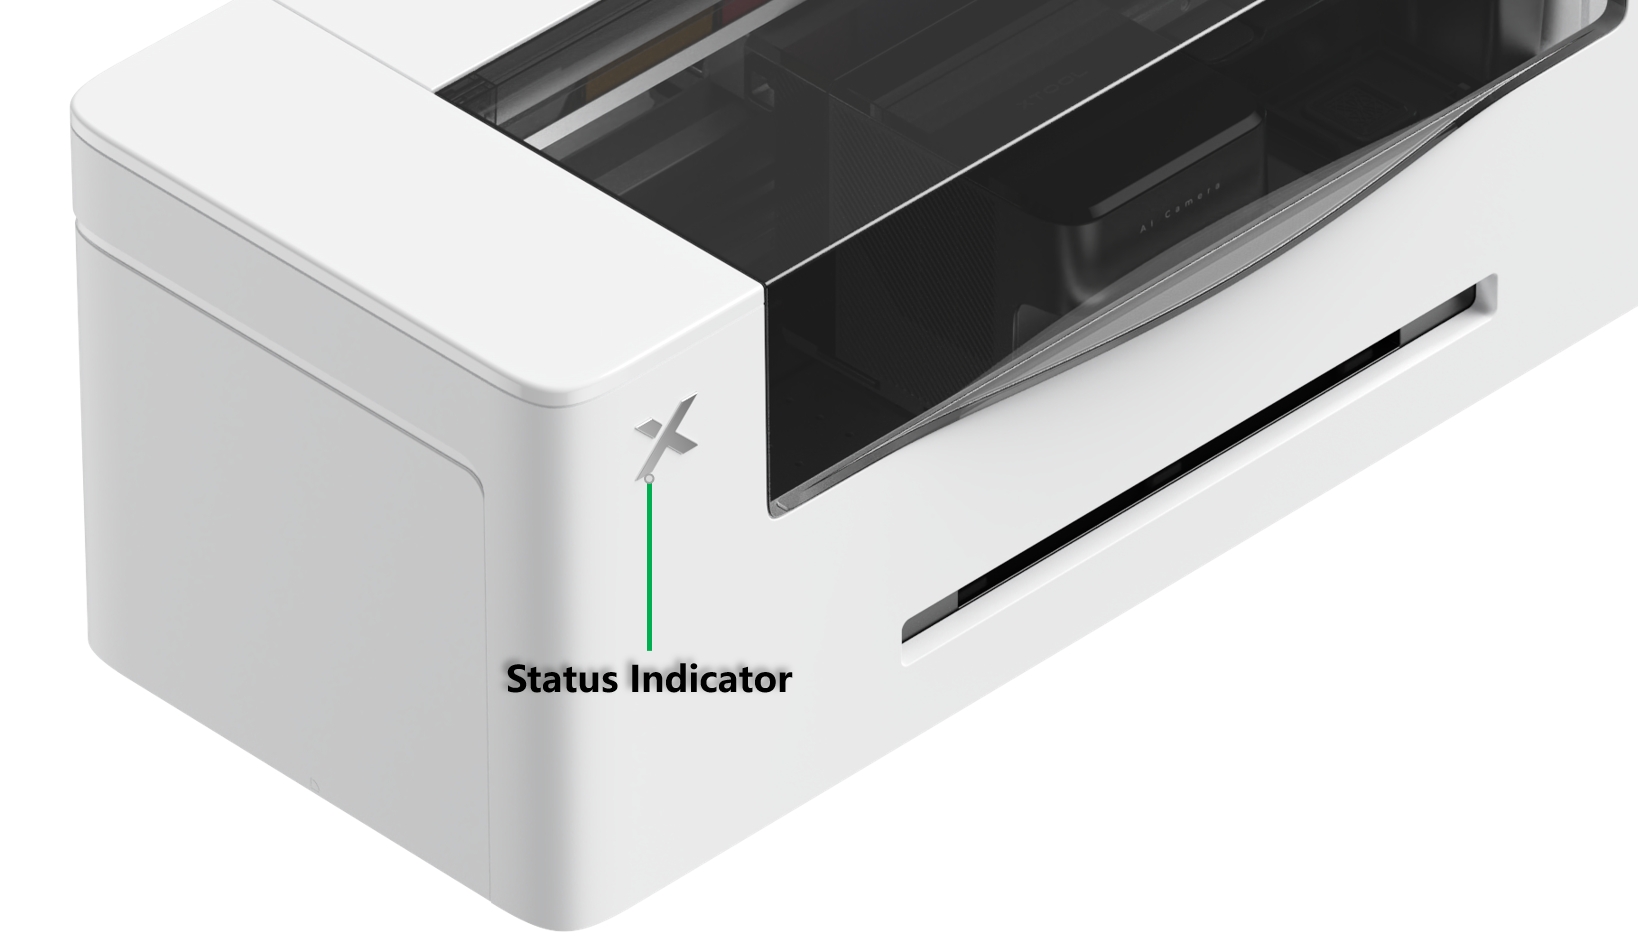
While operating your xTool Apparel Printer with xTool Creative Space, xTool Studio, or via the control panel, you receive an error message stating: "Ink stack failed to engage with print head". Simultaneously, the X status indicator on the printer body flashes red.
- This guide provides step-by-step troubleshooting to resolve the issue.
Possible causes
This error may occur due to one or more of the following issues, listed in order of likelihood:
- Foreign object obstructing the ink stack (most common)
- Ink stack motor cable disconnected (highly probable)
- Ink stack engagement malfunction (less probable)
- Ink stack structural damage (rare)
- Ink stack motor malfunction (rare)
Diagnostic logic
Understand the ink stack sensor system
The ink stack employs two sensors to detect its position:
- Origin sensor - Detects the lowest point (home position)
- Engagement sensor - Detects the highest point (closed/sealed position)
Error message correlation:
- If the origin sensor fails to detect the ink stack position: "Print head failed to return to origin (Z axis time out)."
- If the origin sensor detects position but the engagement sensor fails: "Ink stack failed to engage with print head."
Troubleshooting approach
Based on probability and ease of diagnosis, follow this order:
- Check for foreign objects obstructing the ink stack.
- Verify motor cable connections.
- Inspect sensors and structural components.
Troubleshooting
Step 1: Check for obstructions
First, verify that the ink stack is not physically stuck.
- Power Off: Turn off the printer and disconnect the power cable.
- Access the Area: Open the right-side panel and remove the waste ink tank.
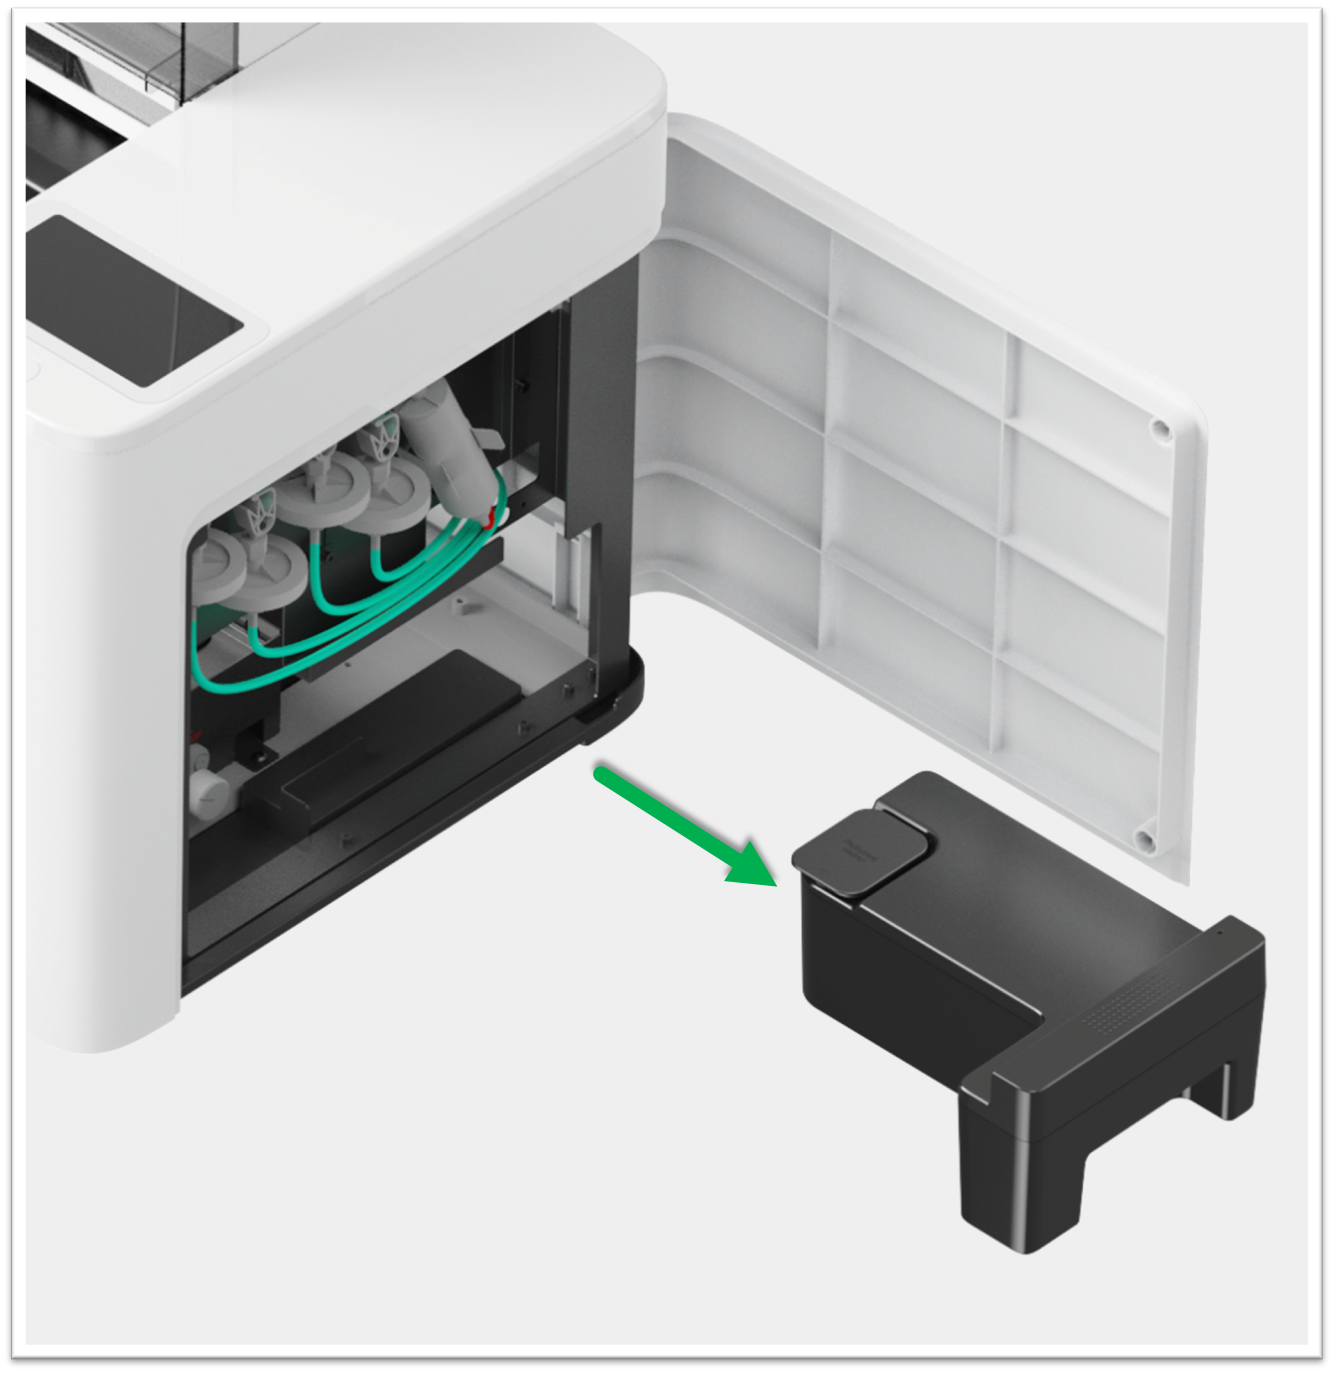
- Visual Inspection: Look inside the compartment for any debris or foreign objects that might be blocking the ink stack from moving up or down.
- Manual Movement Test:
⚠️ Safety Warning: Ensure the printer is disconnected from the power source before proceeding.
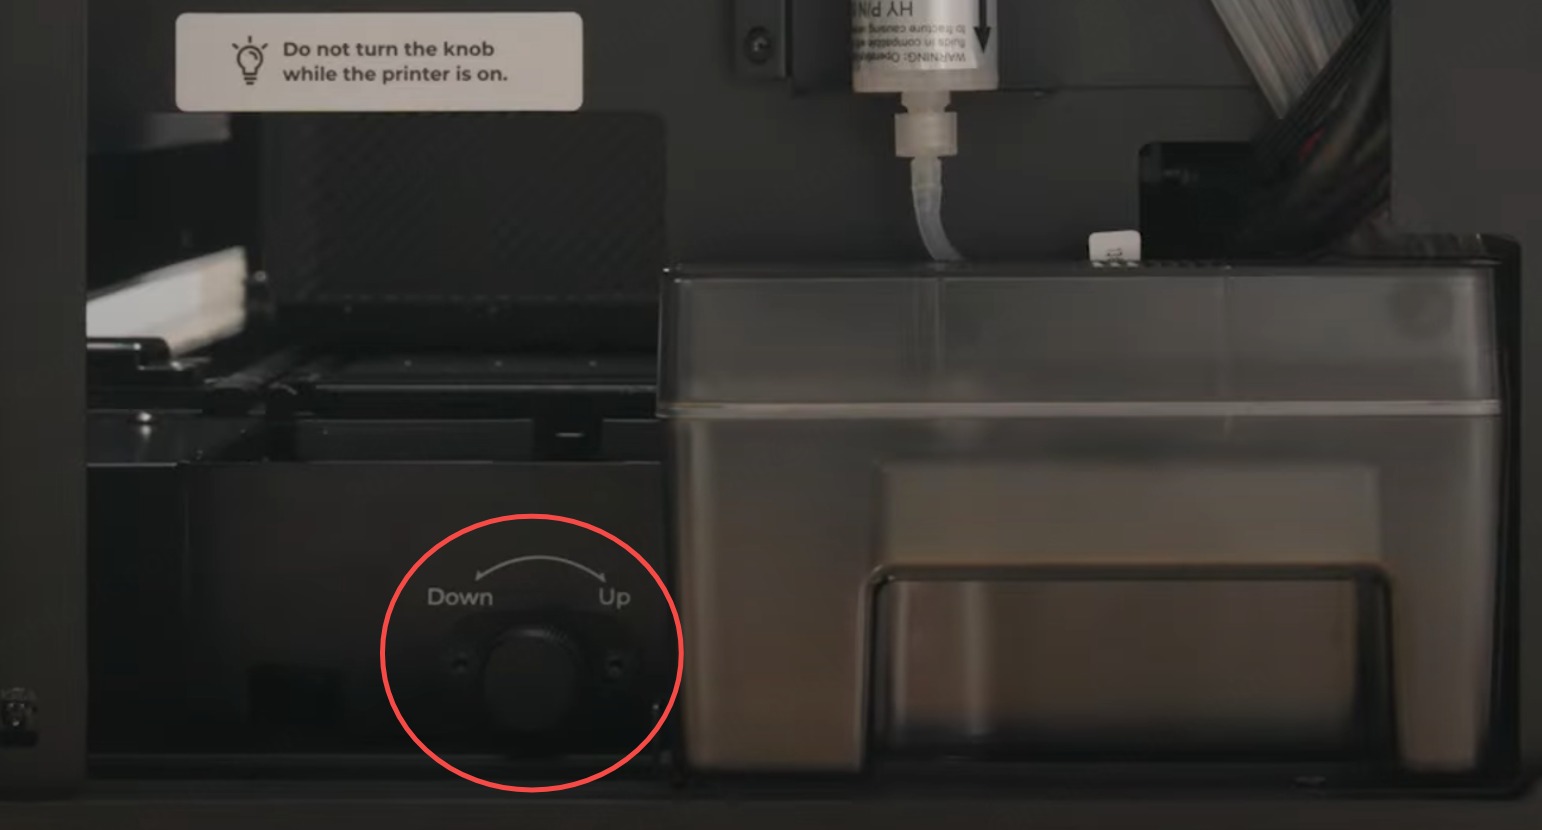
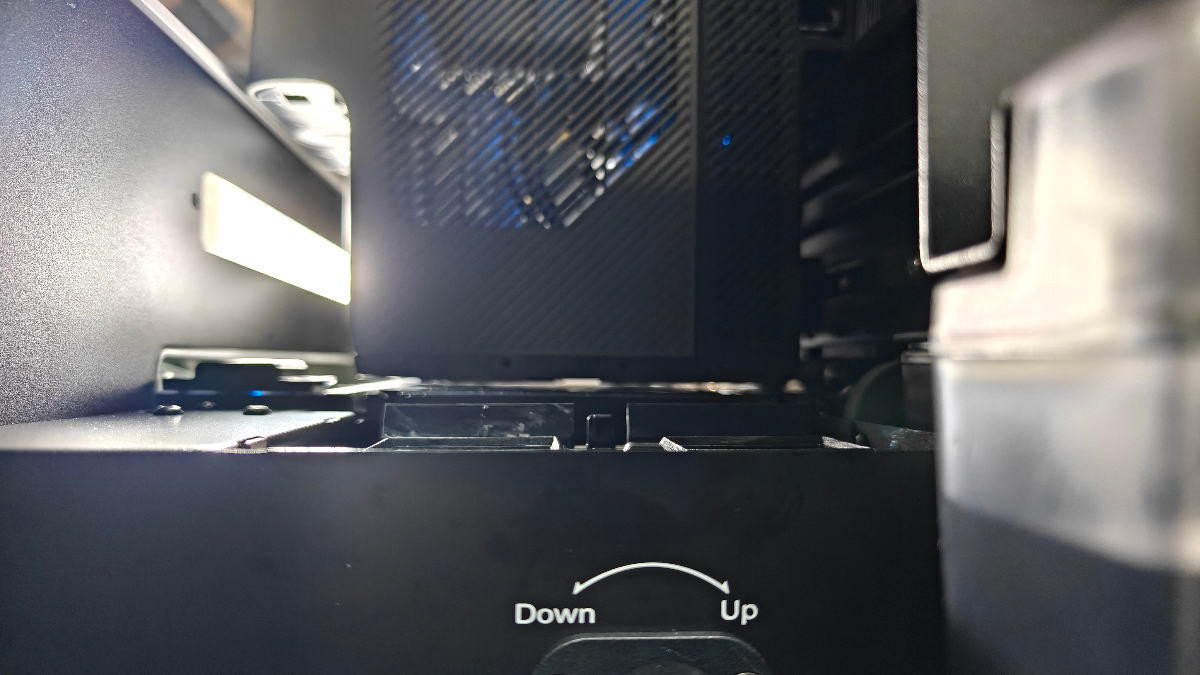
- Locate the manual rotation knob (positioned to the left of the waste ink tank slot).
- Manually turn the knob to raise and lower the ink stack.
- Normal operation: You should feel resistance only at the very highest and lowest points.
- Abnormal operation: If you feel significant resistance in the middle of the movement, an obstruction is likely present.
- Clear Obstruction: Attempt to remove any visible debris. If you cannot remove it, or if the mechanism feels broken, please contact xTool Customer Service.
- Test: If no obstruction is found and the stack moves manually, proceed to Step 2.
Step 2: Check the ink stack motor connection
If the mechanism moves freely, the issue may be an electrical connection.
⚠️ Safety Warning: Ensure the printer is disconnected from the power source before proceeding.
- Prepare the Printer:
- Remove the two installation screws that secure the printer to your xTool OS1 oven.
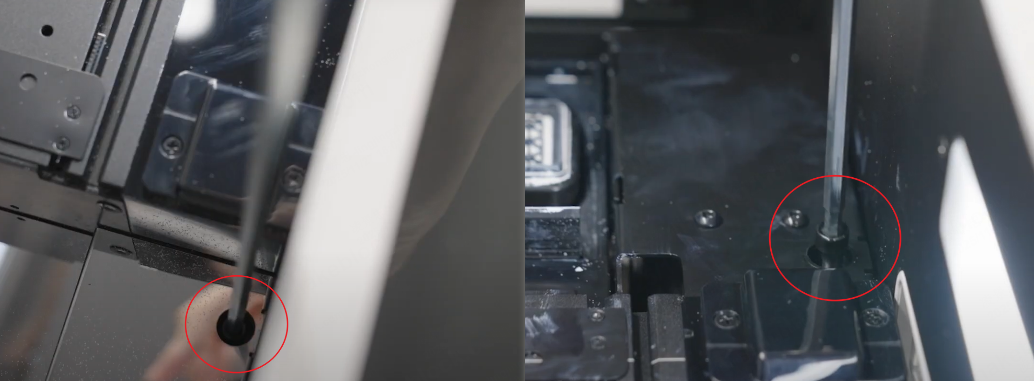
- Carefully place the printer across two stable tables of equal height for safe access to the bottom panel.
- Remove the two installation screws that secure the printer to your xTool OS1 oven.

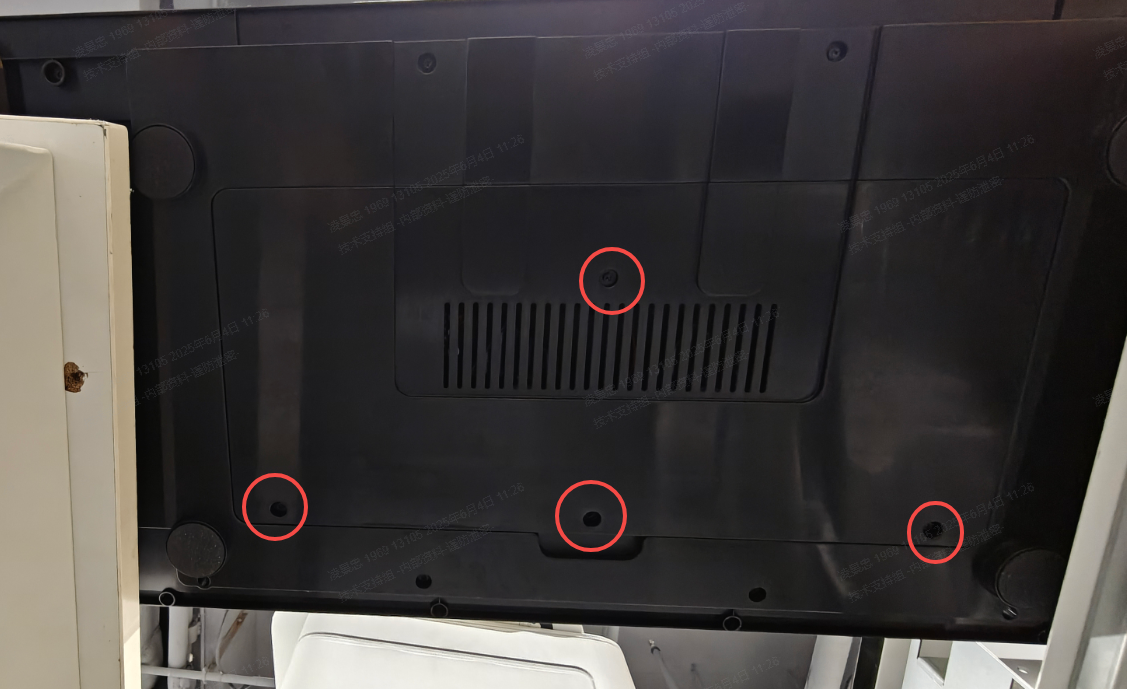
- Remove Bottom Panel:
- Use the included M2.5mm Hex screwdriver.
- Remove the 4 hex screws securing the bottom protective panel.
- Check Motor Cable:
- Locate the ink stack motor cable.
- Check if it is securely connected. Even if it looks connected, disconnect and reconnect to ensure a secure connection.
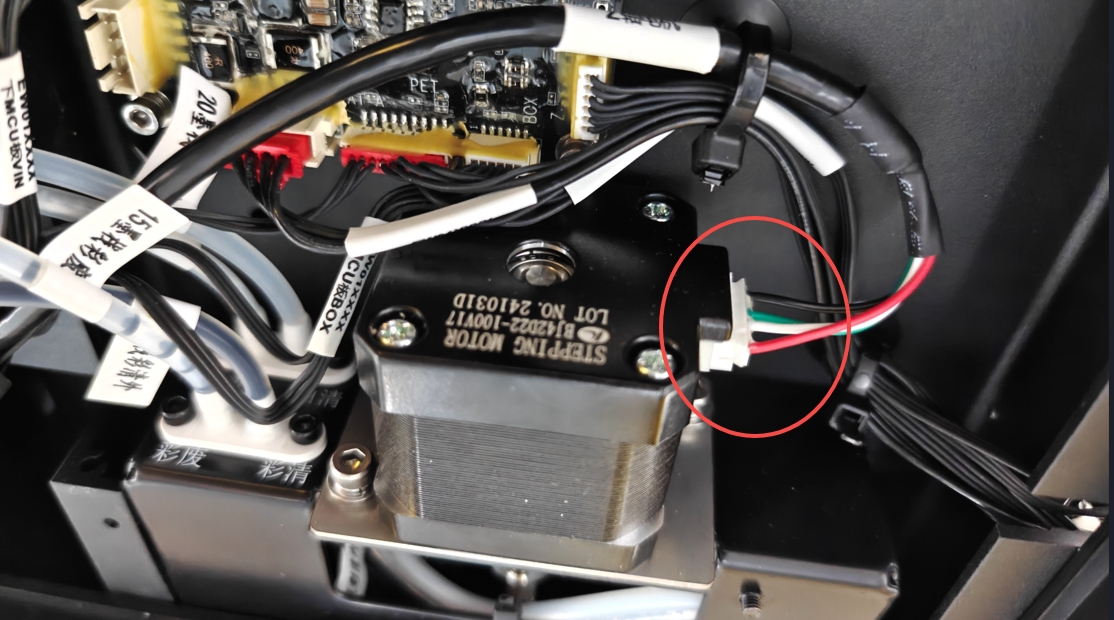
- Power On & Test: Reconnect the power and turn on the printer to test if the error persists.
Advanced Check (If the error continues): If reseating the cable at the motor end does not work, you must check the other end of the cable on the motherboard.
- Refer to the guide: Replace the Motion Controller Board for xTool Apparel Printer to remove the printer's rear casing.
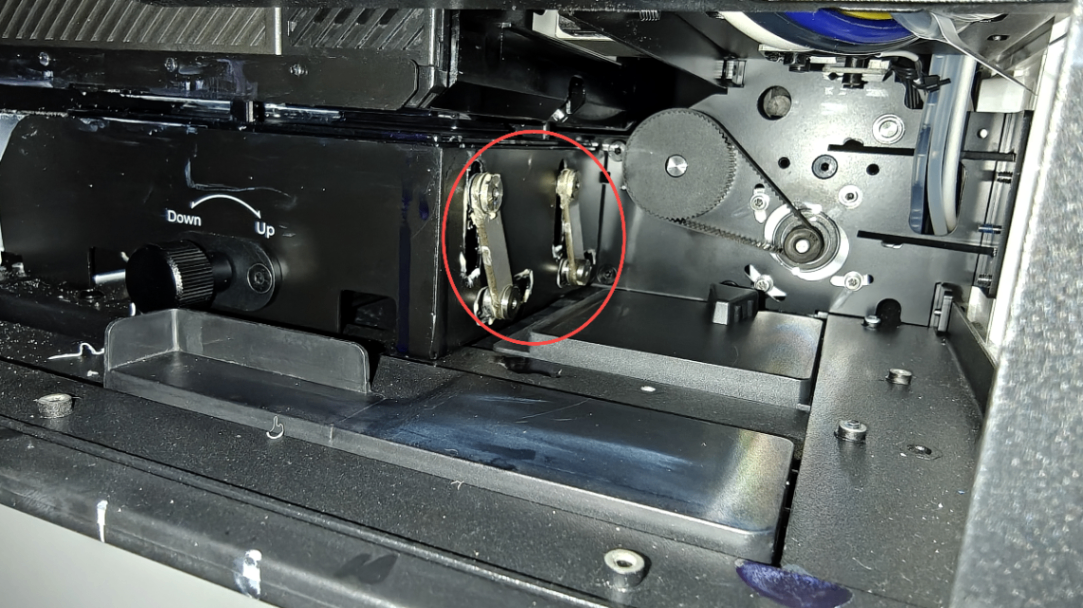
- Locate the ink stack motor connection on the board (circled in the image below).
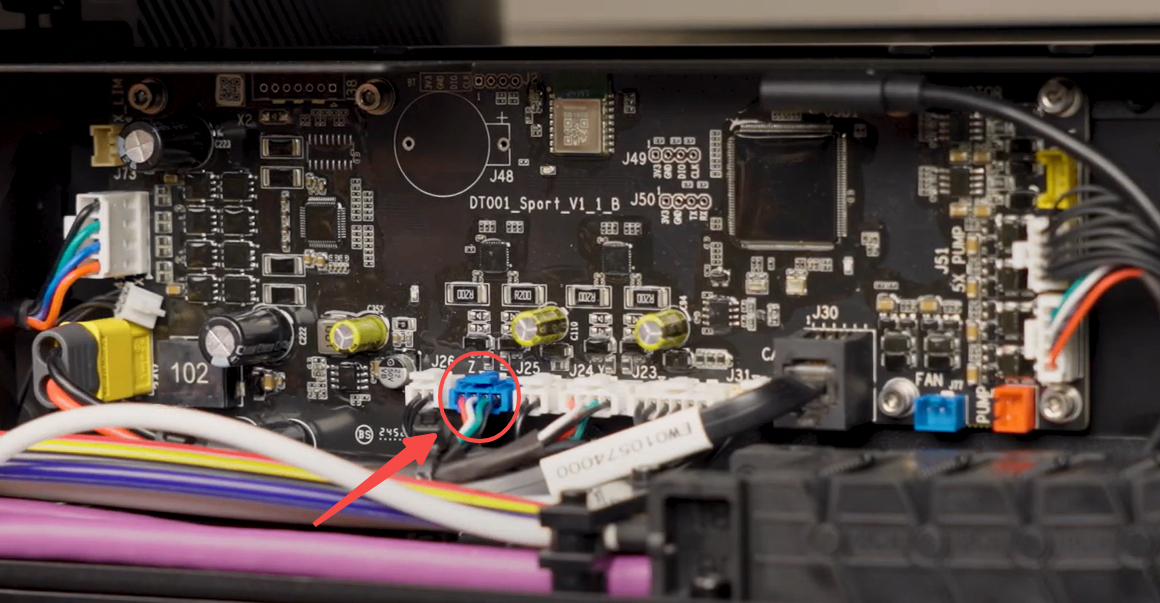
- Verify the connection is secure:
- If disconnected, reconnect it firmly.
- If connected, disconnect and reconnect to ensure proper seating.
- Reassemble the printer and test the operation again.
If the problem persists
Should the issue persist after completing the preceding steps, submit a ticket via the "Submit a Ticket" button in the "Help Ticket" section below. The standard response time for xTool Customer Service is one business day.
Include the following details to help better diagnose the problem:
1 Work log files
Please export the logs based on the software you are using.
Method A: Via xTool Creative Space (XCS)
- Click the Device Settings icon (gear symbol) in the top-right corner.
- Select the Basic info tab.
- Scroll down to Export log and click Export.
- A folder will be generated. Compress (Zip) this entire folder into a single file and attach it to your ticket.

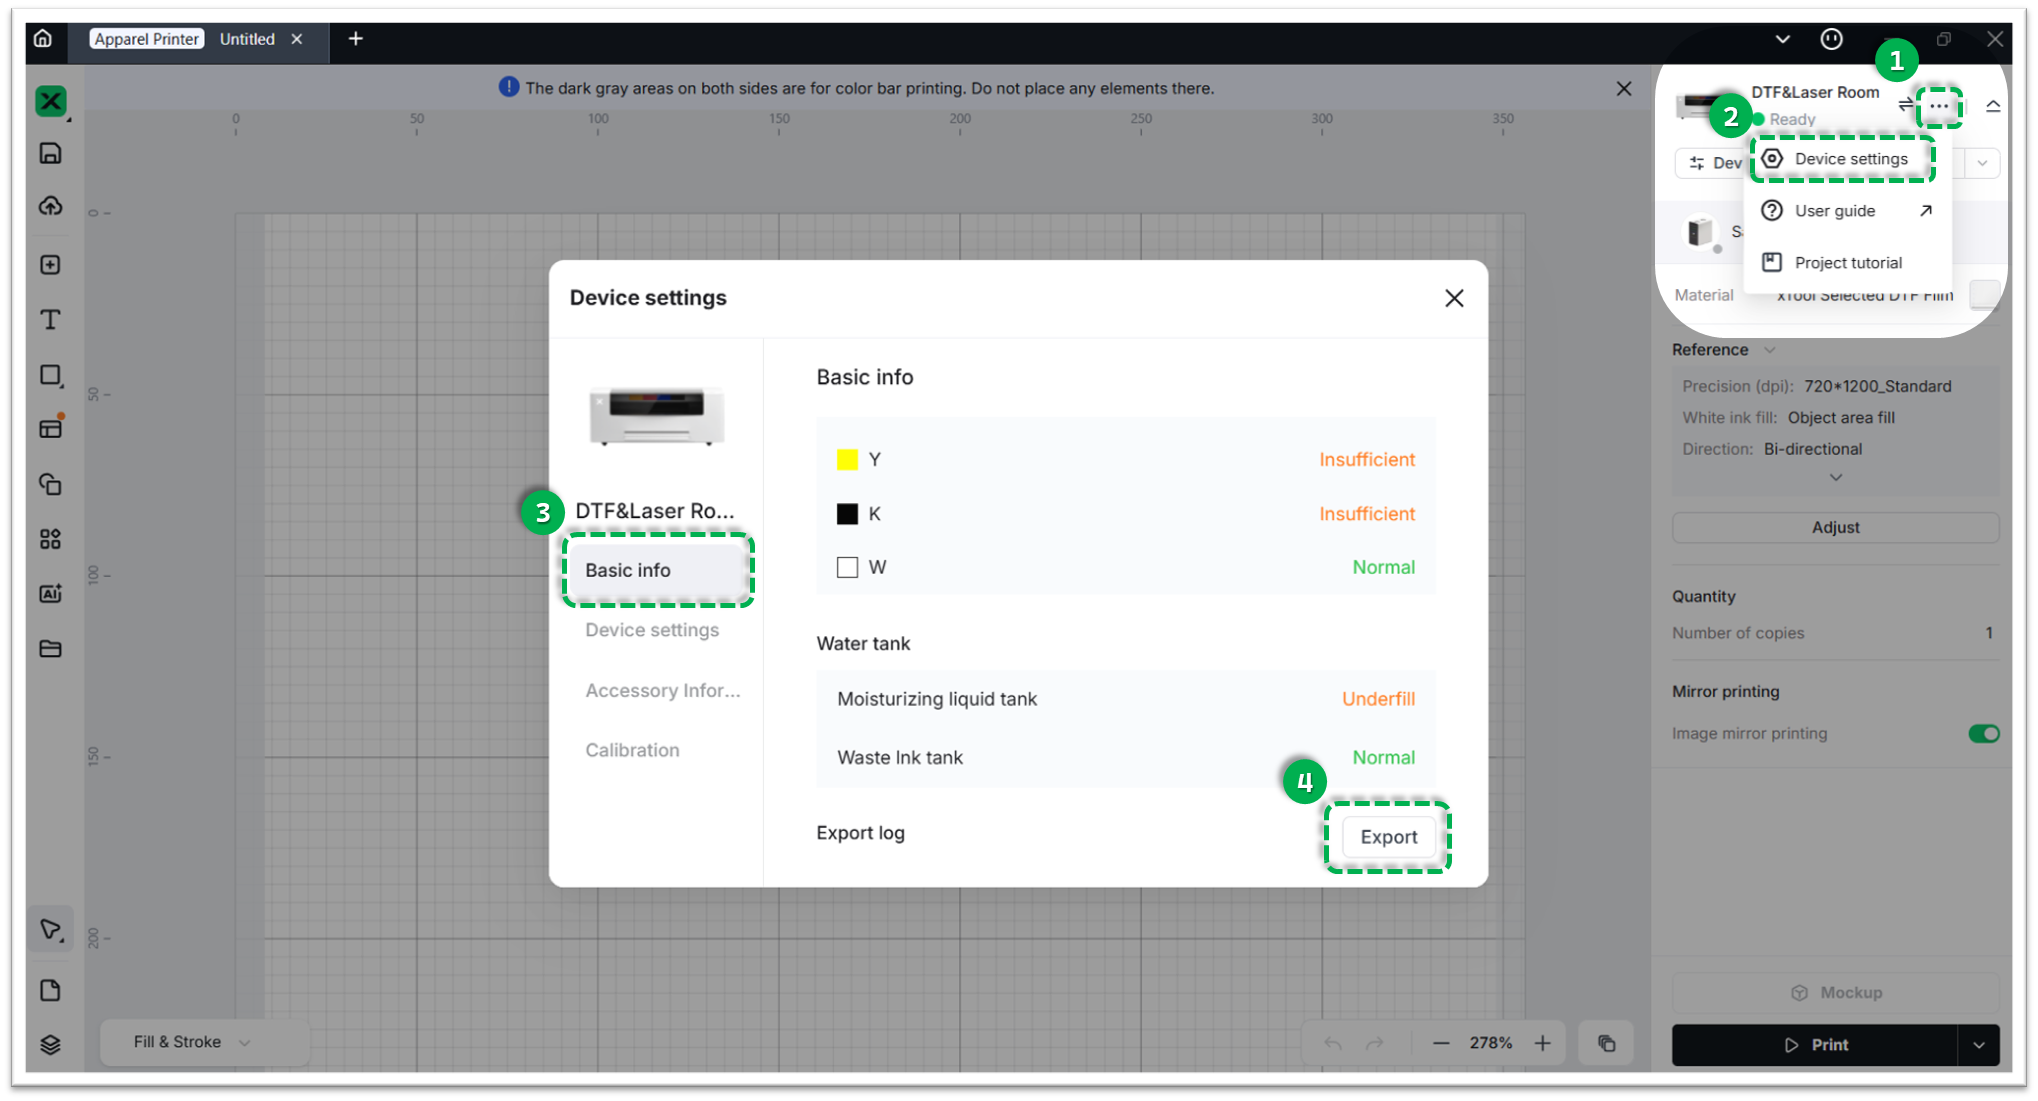
Method B: Via xTool Studio
- Click the three dots icon next to the device image.
- Select Device Settings (gear icon).
- Select the Basic info tab on the left.
- Scroll down to Export log and click Export.
- A folder will be generated. Compress (Zip) this entire folder into a single file and attach it to your ticket.
2 Video of ink stack movement
- Power off your printer and open the right-side panel.
- Wait 15 seconds.
- Power the printer back on.
- Record a video showing the movement of the ink stack during the startup process.
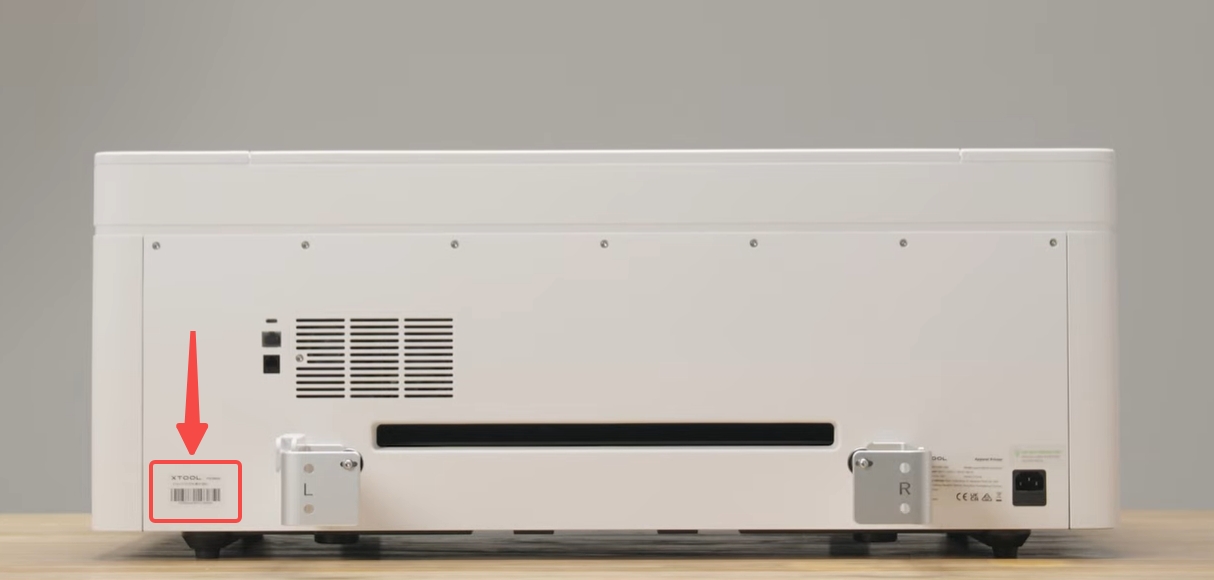
3 Serial number (SN)
The product serial number (SN) is typically located on a label in the lower left corner of the rear panel, as shown in the reference image below.
4 View firmware version
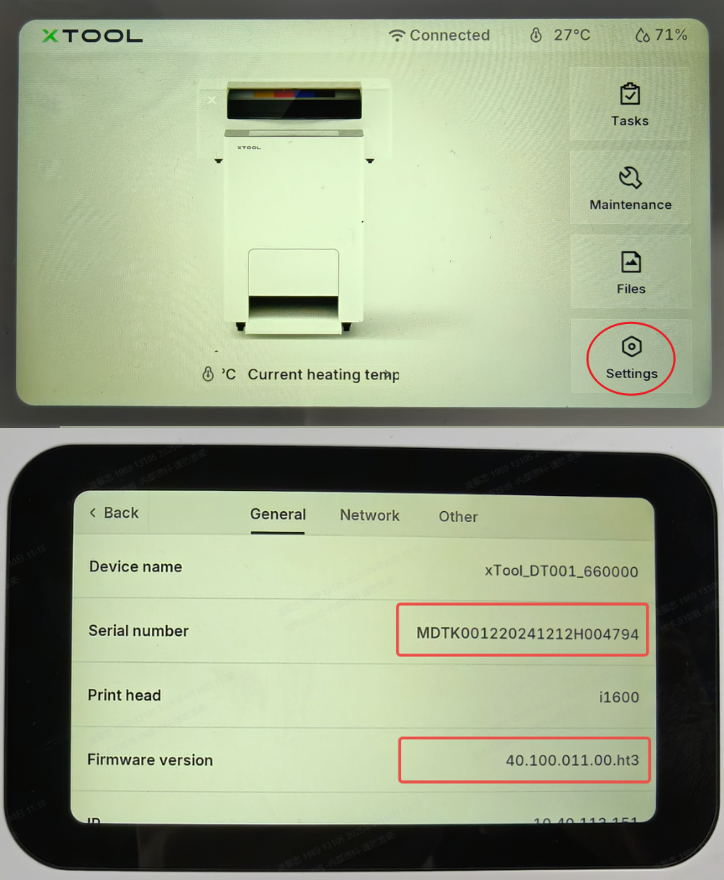
On the Printer’s LCD Screen
- From the Home screen, tap Settings.
- In the General menu, scroll down to locate Firmware Version.
Services & Help
Learn & Education

Copyright © 2025 xTool All Rights Reserved.