xTool Studio is an all-in-one software for graphic designing and editing, laser process setting, and device controlling.
Minimum and recommended PC requirements
Item | Minimum configuration | Recommended configuration |
|---|---|---|
Processor | Intel Core i5-6200U | Intel Core i5-11600 |
Operating system | Win 10 (64 bit) macOS 11 or later | |
RAM | 8 GB | 16 GB or more |
Display resolution | 1280 × 720 (pixels) | 1920 × 1080 (pixels) or higher |
Hard drive | 8 GB | 12 GB or more |
- With the minimum configurations, all the functions of xTool Studio can be used properly. When you import a complex image, such as an image larger than 50,000,000 pixels or an SVG image larger than 1 MB, however, xTool Studio may fail to run smoothly.
- With the recommended configurations, xTool Studio can run more smoothly when you import and edit a complex image; the software delay may be shorter, and the performance is better.
Download and install xTool Studio
(1) Download xTool Studio from xtool.com/pages/software.
(2) Double-click the software you've downloaded to install it.
(3) Open xTool Studio. In the top-right corner, click the icon > Settings, and set the language on the General tab page.
Connect xTool F2 Ultra to xTool Studio
USB connection
(1) Use the USB cable to connect xTool F2 Ultra to your computer.
Note: If the provided USB cable is incompatible with your computer, you need to use an adapter, which is not included in the pack.
(2) Open xTool Studio on your computer. In the top-right corner of the software, click + New Project.
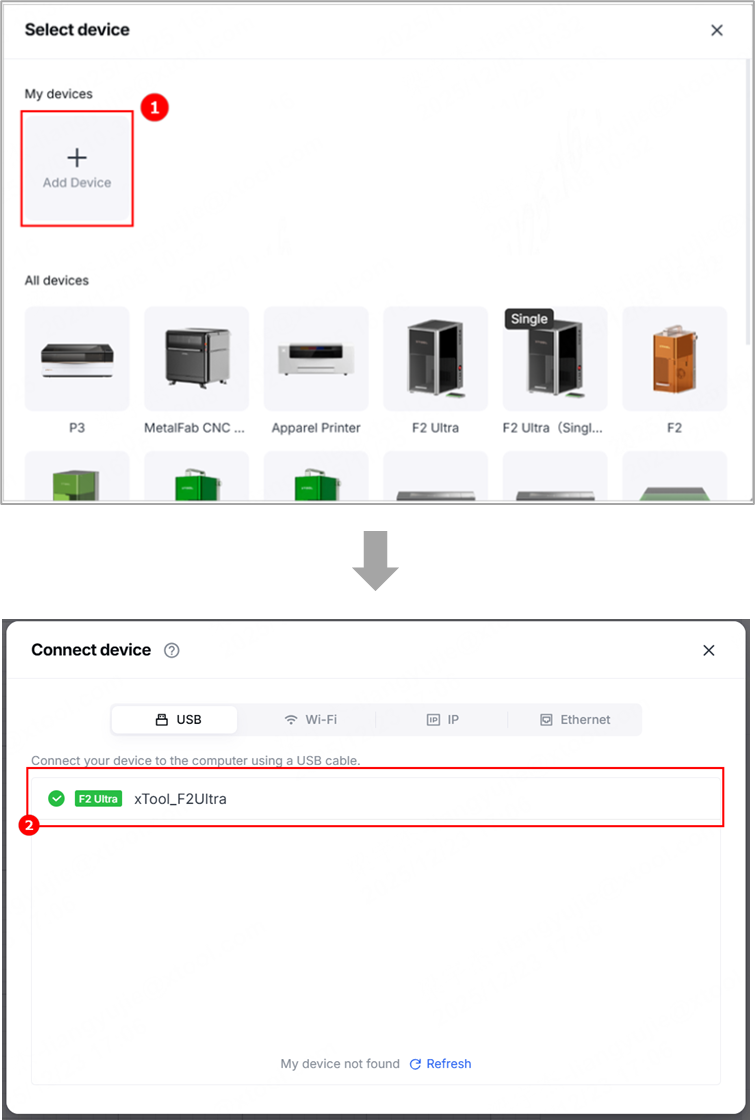
(3) On the right side of the page, click Select device.
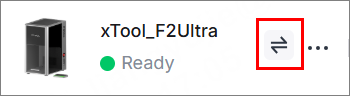
Note: If you have connected an xTool device in xTool Studio before, click the icon next to the device.
(4) On the pop-up window, click Add Device. Then, click the name of your device to connect to it.
Note: After the device is connected, you can configure Wi-Fi for it so that you can connect it to xTool Studio through Wi-Fi next time.
Wi-Fi connection
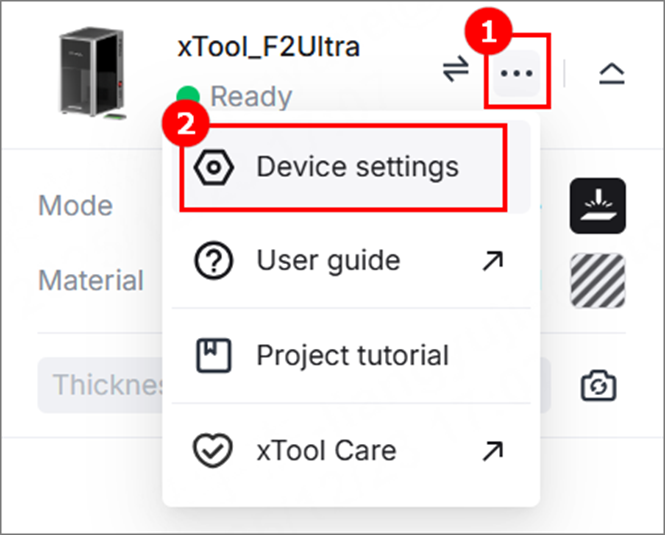
(1) In the top-right corner of the software, click > Device settings to enter the device settings page.
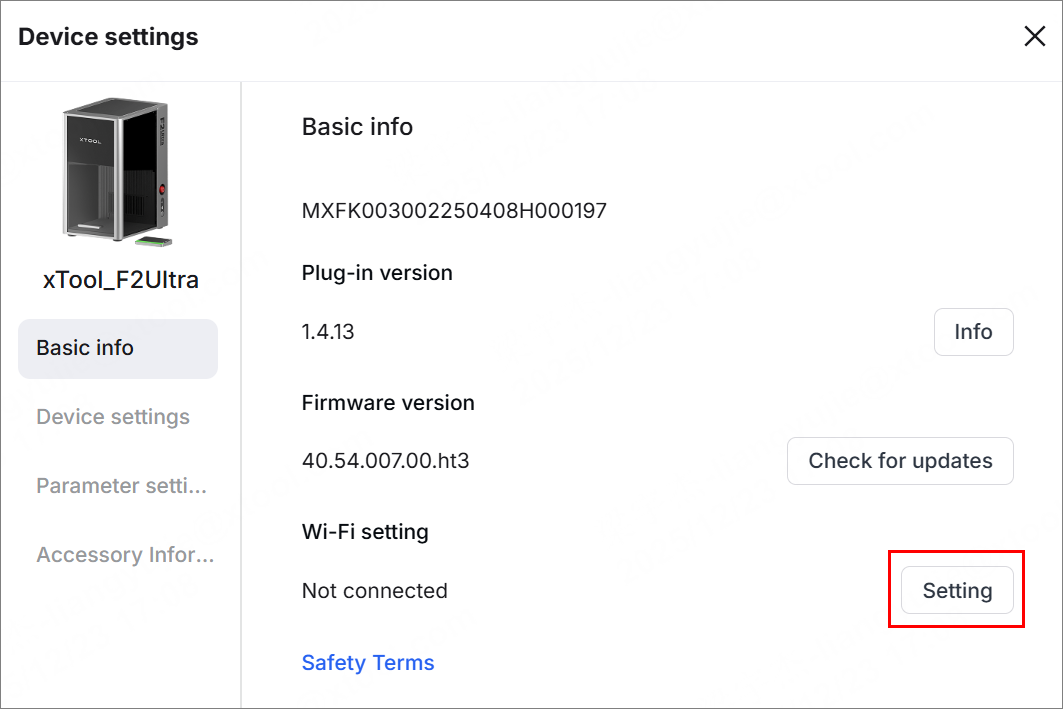
(2) On the Basic info tab page, click Setting for Wi-Fi setting.
(3) In the Wi-Fi setting dialog box, select a Wi-Fi, enter the password, and click Next.
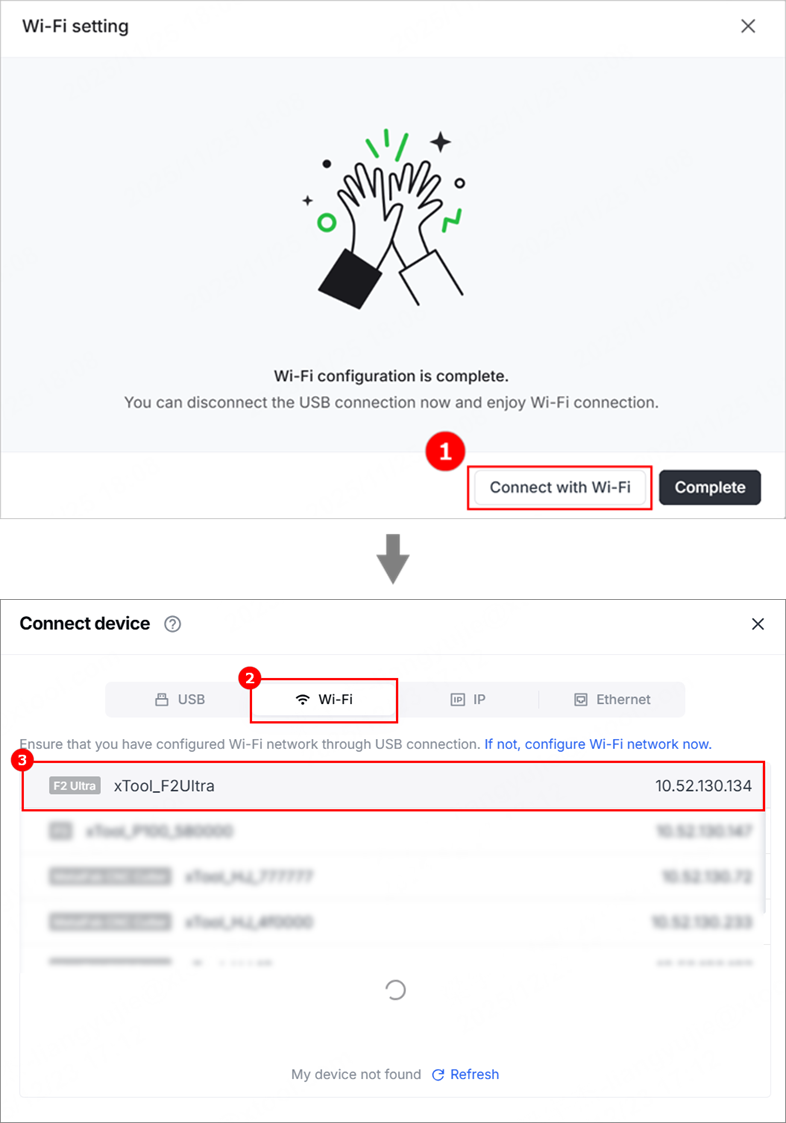
(4) Click Connect with Wi-Fi. In the Connect device dialog box, click Wi-Fi and select the device name to connect to it. If you do not want to connect your device and the computer through Wi-Fi now, click Complete to close the dialog box.
Note: Ensure that your computer and xTool F2 Ultra are connected to the same network.
IP address connection
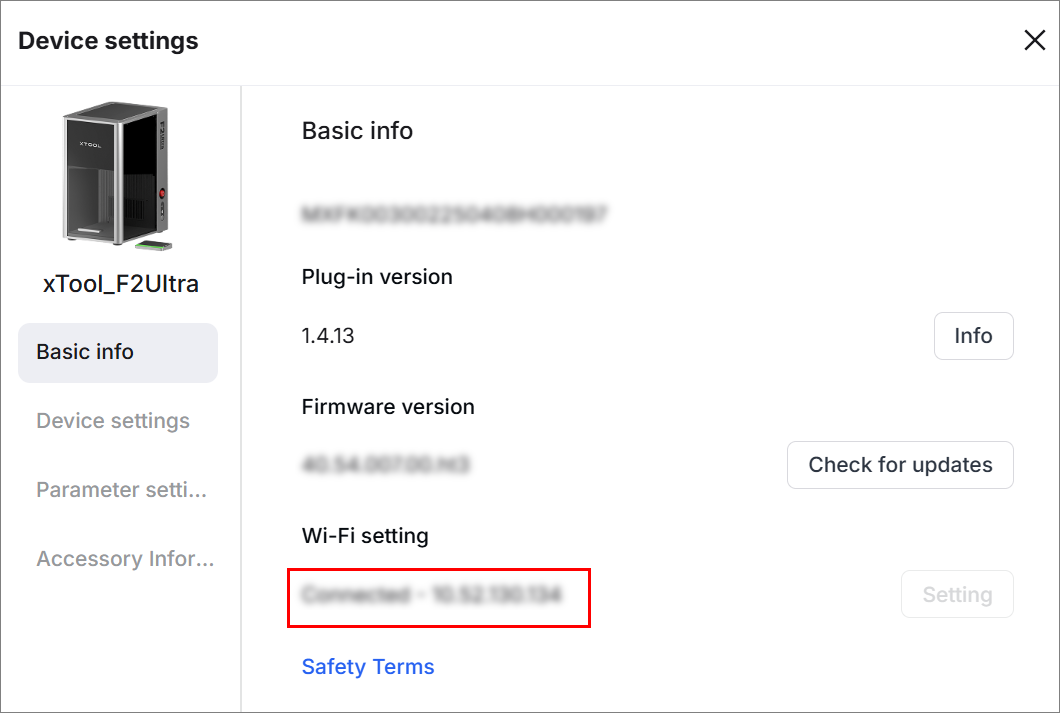
After you complete the Wi-Fi settings for xTool F2 Ultra, an IP address is displayed under Wi-Fi setting on the device settings page. You can use the IP address to connect xTool F2 Ultra to the computer.
(1) In the top-right corner of the software, click > Device settings to enter the device settings page.
(2) Note down the IP address and return to the canvas page.
(3) On the canvas page, click > Connect Device.
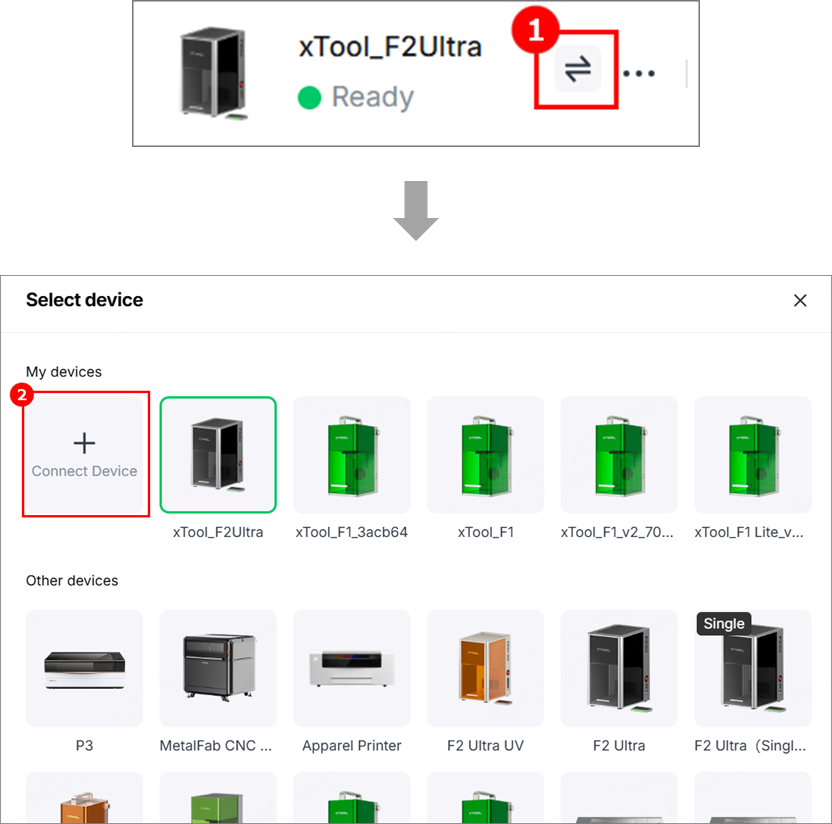
(4) In the Connect device dialog box, click IP, enter the IP address noted down in step (2), and click Connect.
Set up xTool F2 Ultra in xTool Studio
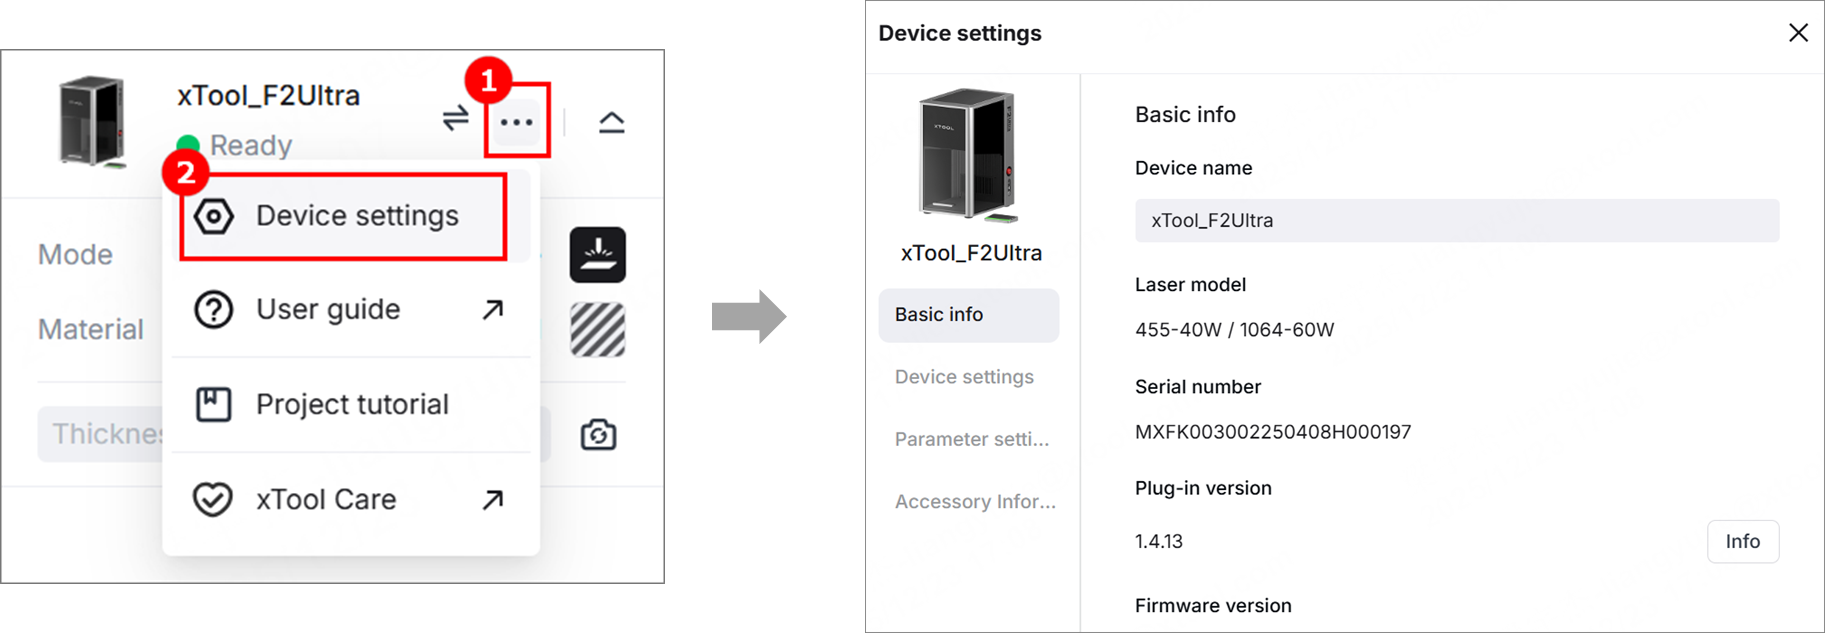
(1) In the top-right corner of the software, click the icon > Device settings to enter the device settings page.
(2) In the Basic info tab page, you can view the basic information of xTool F2 Ultra and modify the following information.
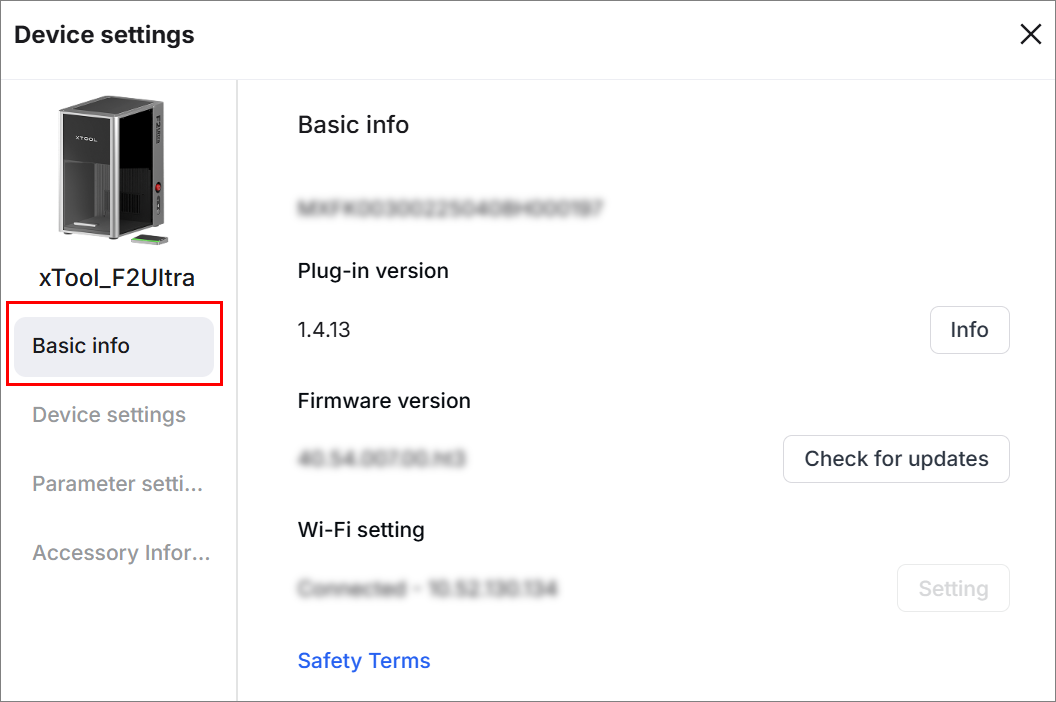
- Device name: Displays the name of the device. You can set a new name for it.
- Laser model: Displays the laser model of the device.
- Serial number: Displays the serial number of the device.
- Plug-in version: Displays the plug-in version of the device. You can click Info to view detailed information.
- Firmware version: Displays the firmware version of the device. You can click Check for updates and update the firmware if a new version is available.
- Wi-Fi setting: Connect the device to a Wi-Fi network.
(3) In the Device settings tab page, you can set up the device and export files as needed.
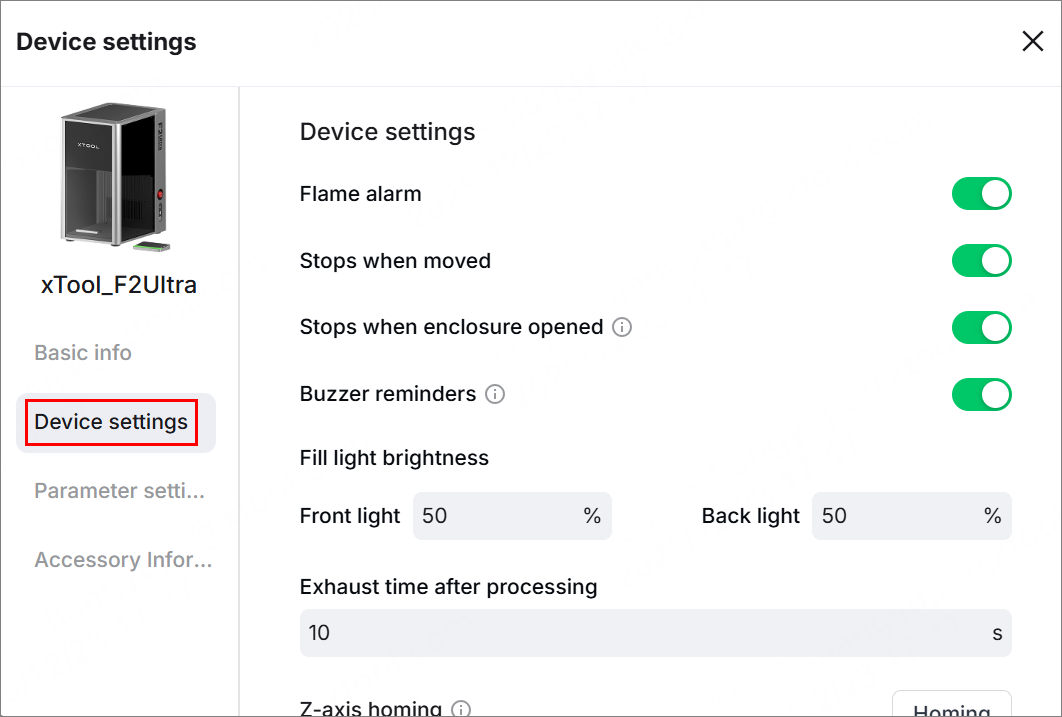
- Flame alarm: If enabled, the device will pause processing and raise the alarm when flame is detected.
- Stops when moved: If enabled, the device will pause processing when it is moved or tilted during processing. If you plan to perform laser processing on sloped surfaces while hand‑holding the device, disable this feature to ensure normal operation.
- Stops when enclosure opened: If enabled, processing will be automatically paused when you open the enclosure during processing. To use xTool F2 Ultra with its protective enclosure opened, you need to disable this function.
- Buzzer reminders: If enabled, the buzzer sounds when the device is ready for processing, and the processing is complete.
- Fill light brightness: You can set the brightness of the front light and back light in the working area.
- Exhaust time after processing: You can set the time duration the exhaust fan continues to work after a processing task ends. By working for a longer time, the fan can exhaust the remaining smoke after processing.
- Z-axis homing: When the red and blue light spots overlap, but the measured thickness is inaccurate, you can click Homing to return the laser module to its original position.
- Export elements on the canvas as GCode: You can click Export to export the elements as a GCode file.
- Export .xf file: You can click Export to export .xf file for offline processing.
- Device sleep: If enabled, the device automatically enters sleep if no operation is performed for 10 minutes.
- Work log: You can click Export to export the work log.
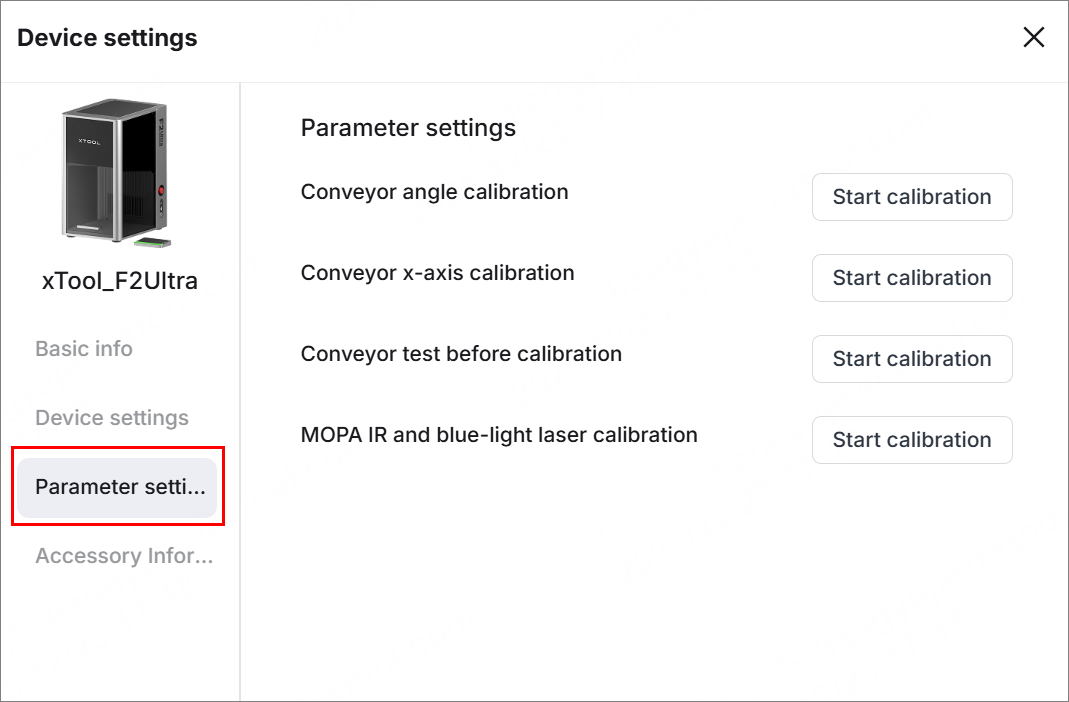
(4) In the Parameter settings tab page, you can click Start calibration to compensate for some mechanical errors due to long-distance transportation or other reasons.
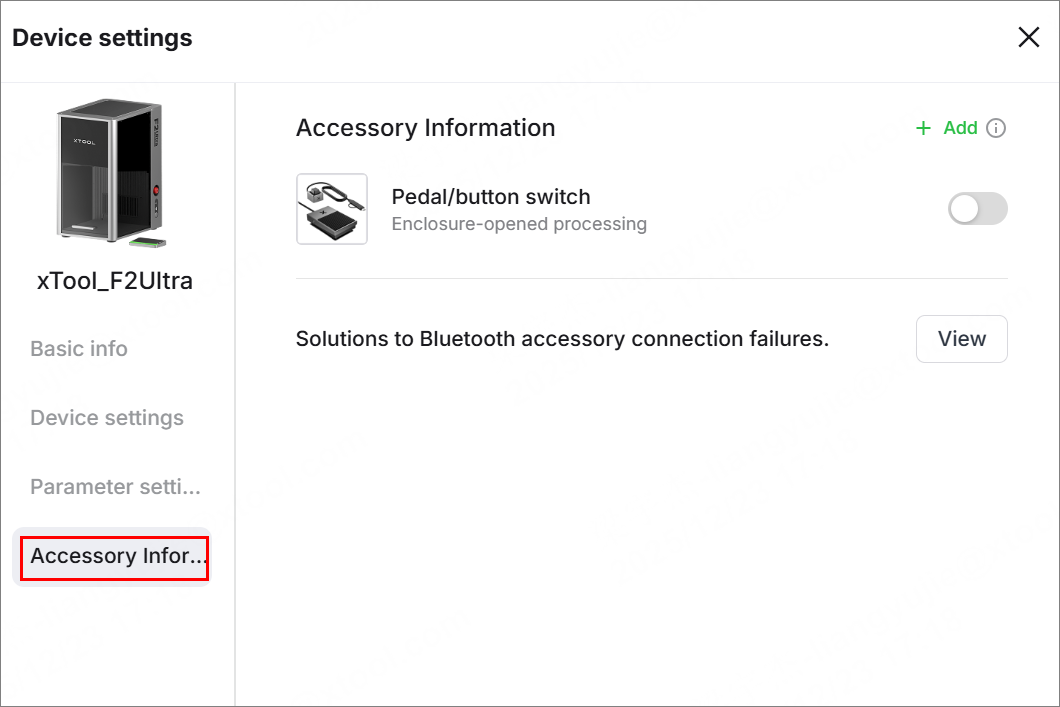
(5) In the Accessory Information tab page, you can see the information about accessories connected to xTool F2 Ultra.
Processing modes of xTool F2 Ultra
xTool Studio supports multiple processing modes for xTool F2 Ultra.
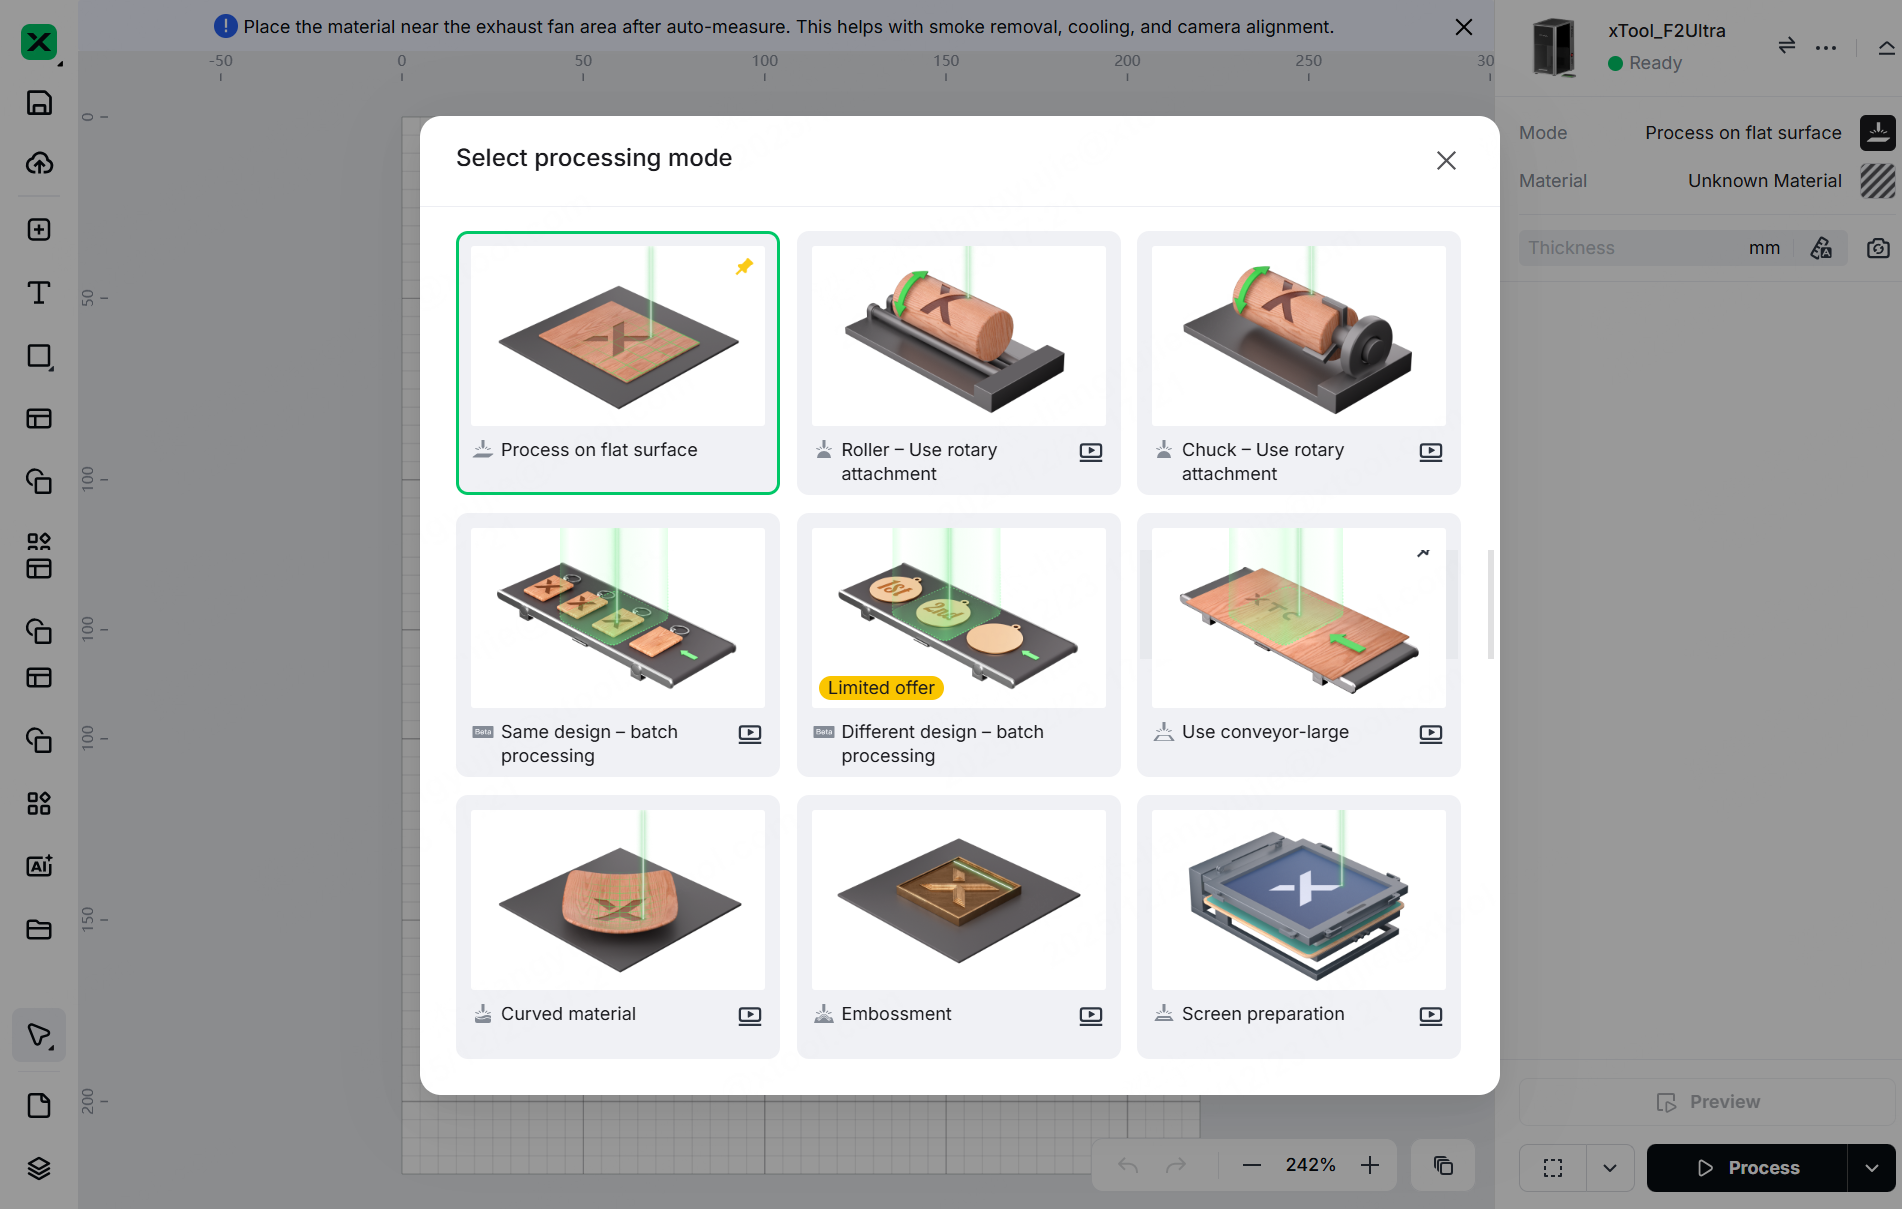
- Process on flat surface: to process small and flat materials
In this mode, you need to place the material on the baseplate of xTool F2 Ultra. - Roller – Use rotary attachment: to process irregular cylindrical and extra-long materials
In this mode, you need to use xTool F2 Ultra with xTool Rotary Attachment in Roller mode. - Chuck – Use rotary attachment: to process cylindrical materials with rounded or non-rounded bases
In this mode, you need to use xTool F2 Ultra with xTool Rotary Attachment in Chuck mode. - Same design – batch processing: to process multiple materials using the same design
In this mode, the same design is applied repeatedly to multiple materials for batch processing. - Different design – batch processing: to process multiple materials using different designs
In this mode, different designs are assigned to multiple materials for batch processing. - Use conveyor-large: to process extra-long materials continuously
In this mode, you need to use xTool F2 Ultra with the conveyor to enable continuous processing of large or long materials. - Curved material: to process materials with curved surfaces
In this mode, the processing path is adjusted to match the curvature of the material surface. - Embossment: to create raised or embossed effects on the material surface
In this mode, multiple processing passes are applied to achieve an embossing effect. - Screen preparation: to prepare designs for screen printing
In this mode, the design is processed and prepared for use in screen printing workflows.
