This guide primarily uses xTool F1 as the operational example, but the workflow is consistent across xTool F1, xTool F1 Lite, and xTool F2.
Introduction
Screen printing involves three main steps: mounting the screen, engraving the screen (making the stencil), and printing the design. You can seamlessly use your xTool F1 / xTool F1 Lite / xTool F2 to engrave the screen mesh.
Note:
- xTool F1 / xTool F1 Lite / xTool F2 only supports xTool Polyester Fast-Engrave Screen available for purchase at xtool.com.
- You may also visit the product page—Polyester Fast-Engrave Screen (4pcs)—and switch to your corresponding country or region before placing an order.
💡 For a comprehensive overview of the screen printing process, please refer to: Reading Guide for xTool Screen Printer.
Part 1: Mount the screen & set up laser device
The following steps demonstrate the process using xTool F1.
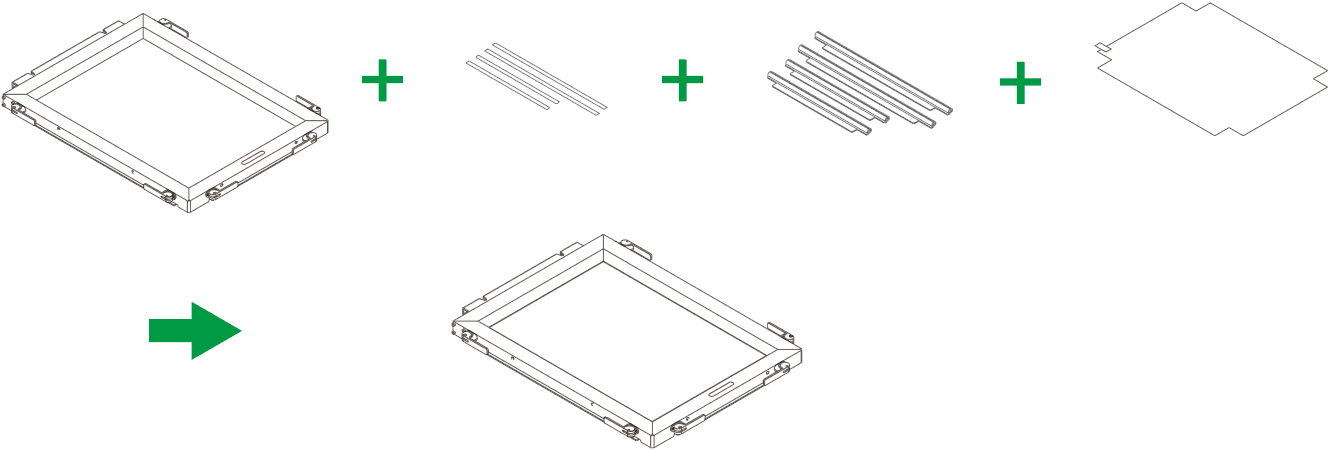
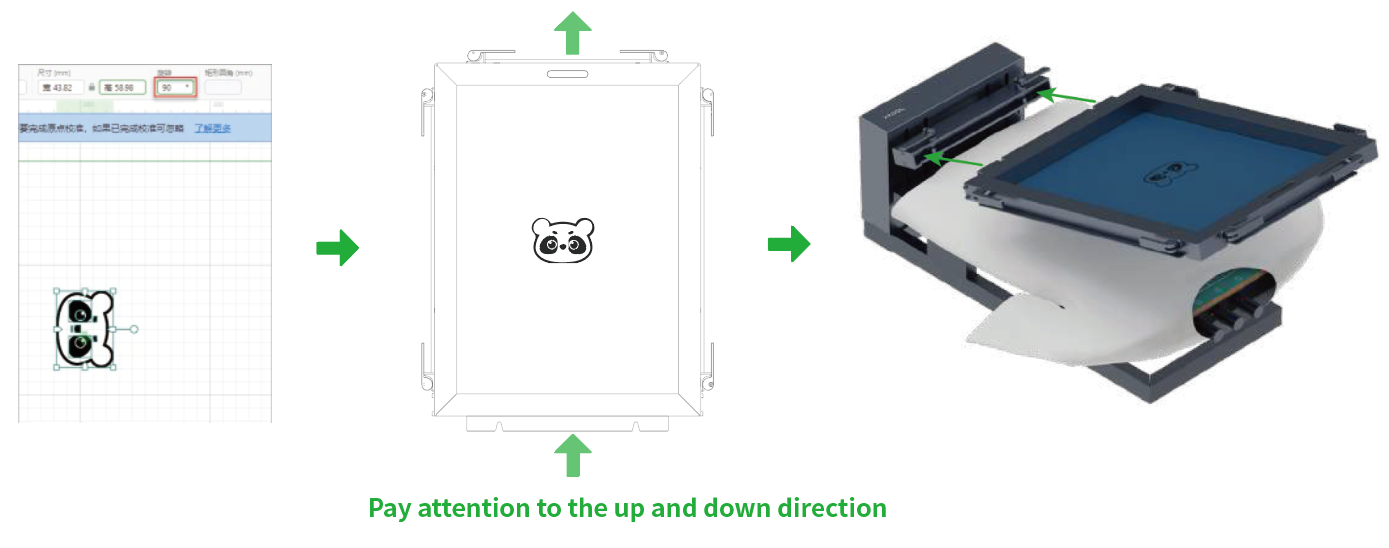
- Mount the Screen: Mount the Fast-Engrave Screen onto the frame. Refer to xTool Screen Printer User Guide (Fast-Engrave Screen) for detailed mounting instructions
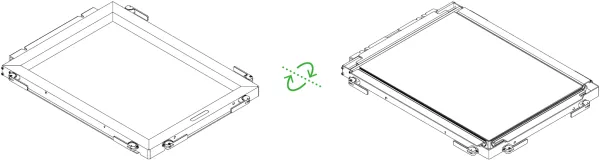
- Flip the Assembly: Turn the screen assembly over to allow the back of the screen (the flat mesh side) to face up.
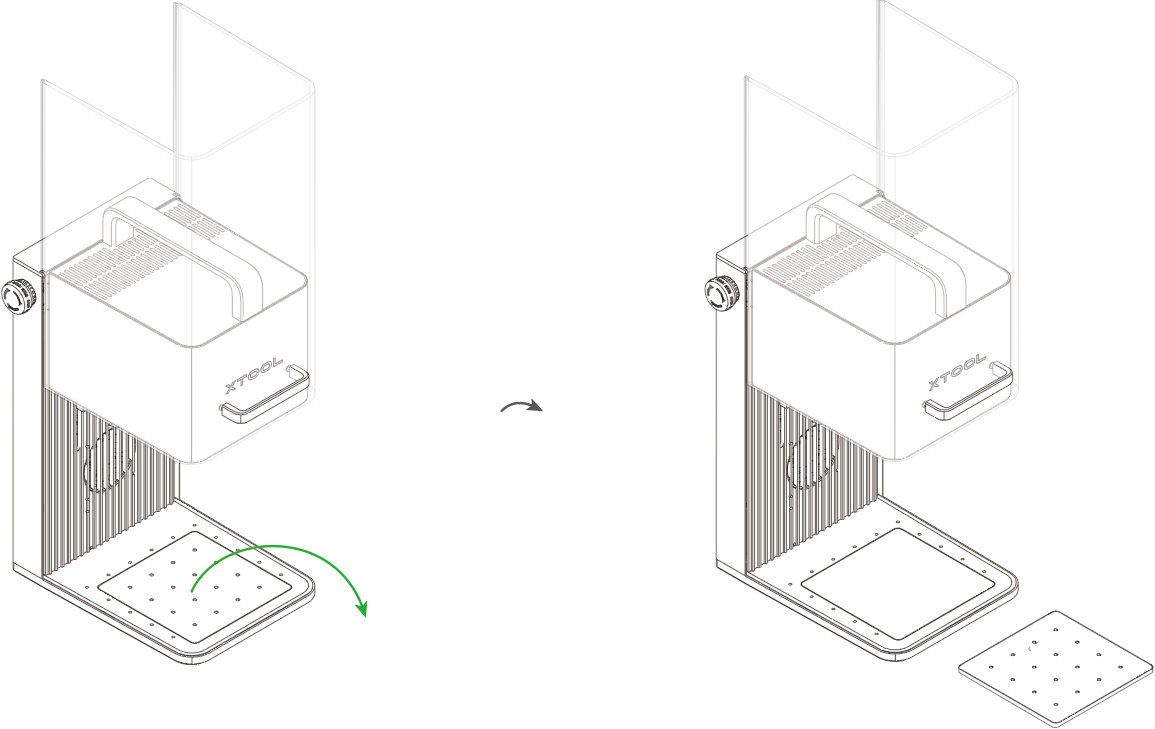
- Prepare the Laser: Lift the protective enclosure of your laser device and remove its baseplate.
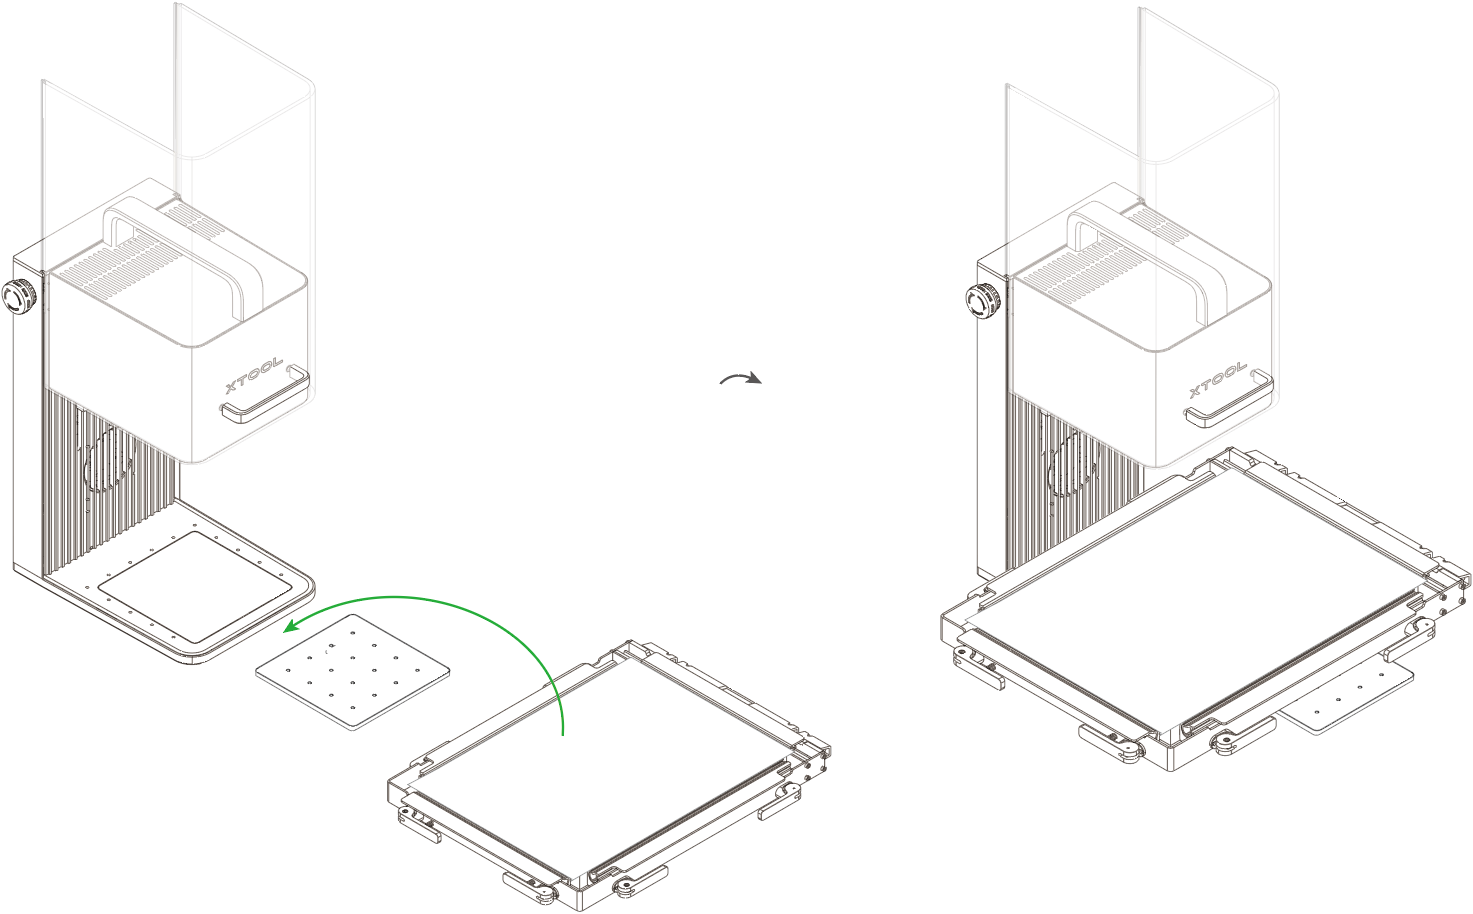
- Place the Frame: Position the flipped screen frame directly onto the working area of the laser device.
Part 2: Software setup in xTool Studio
(1) Open or create a project
- Open an existing file: Click Open on the home screen and select your
.xt file. - Note: Always verify the machine model and material thickness settings when opening an existing file.
- Note: Always verify the machine model and material thickness settings when opening an existing file.
- Create new: Click + New project.
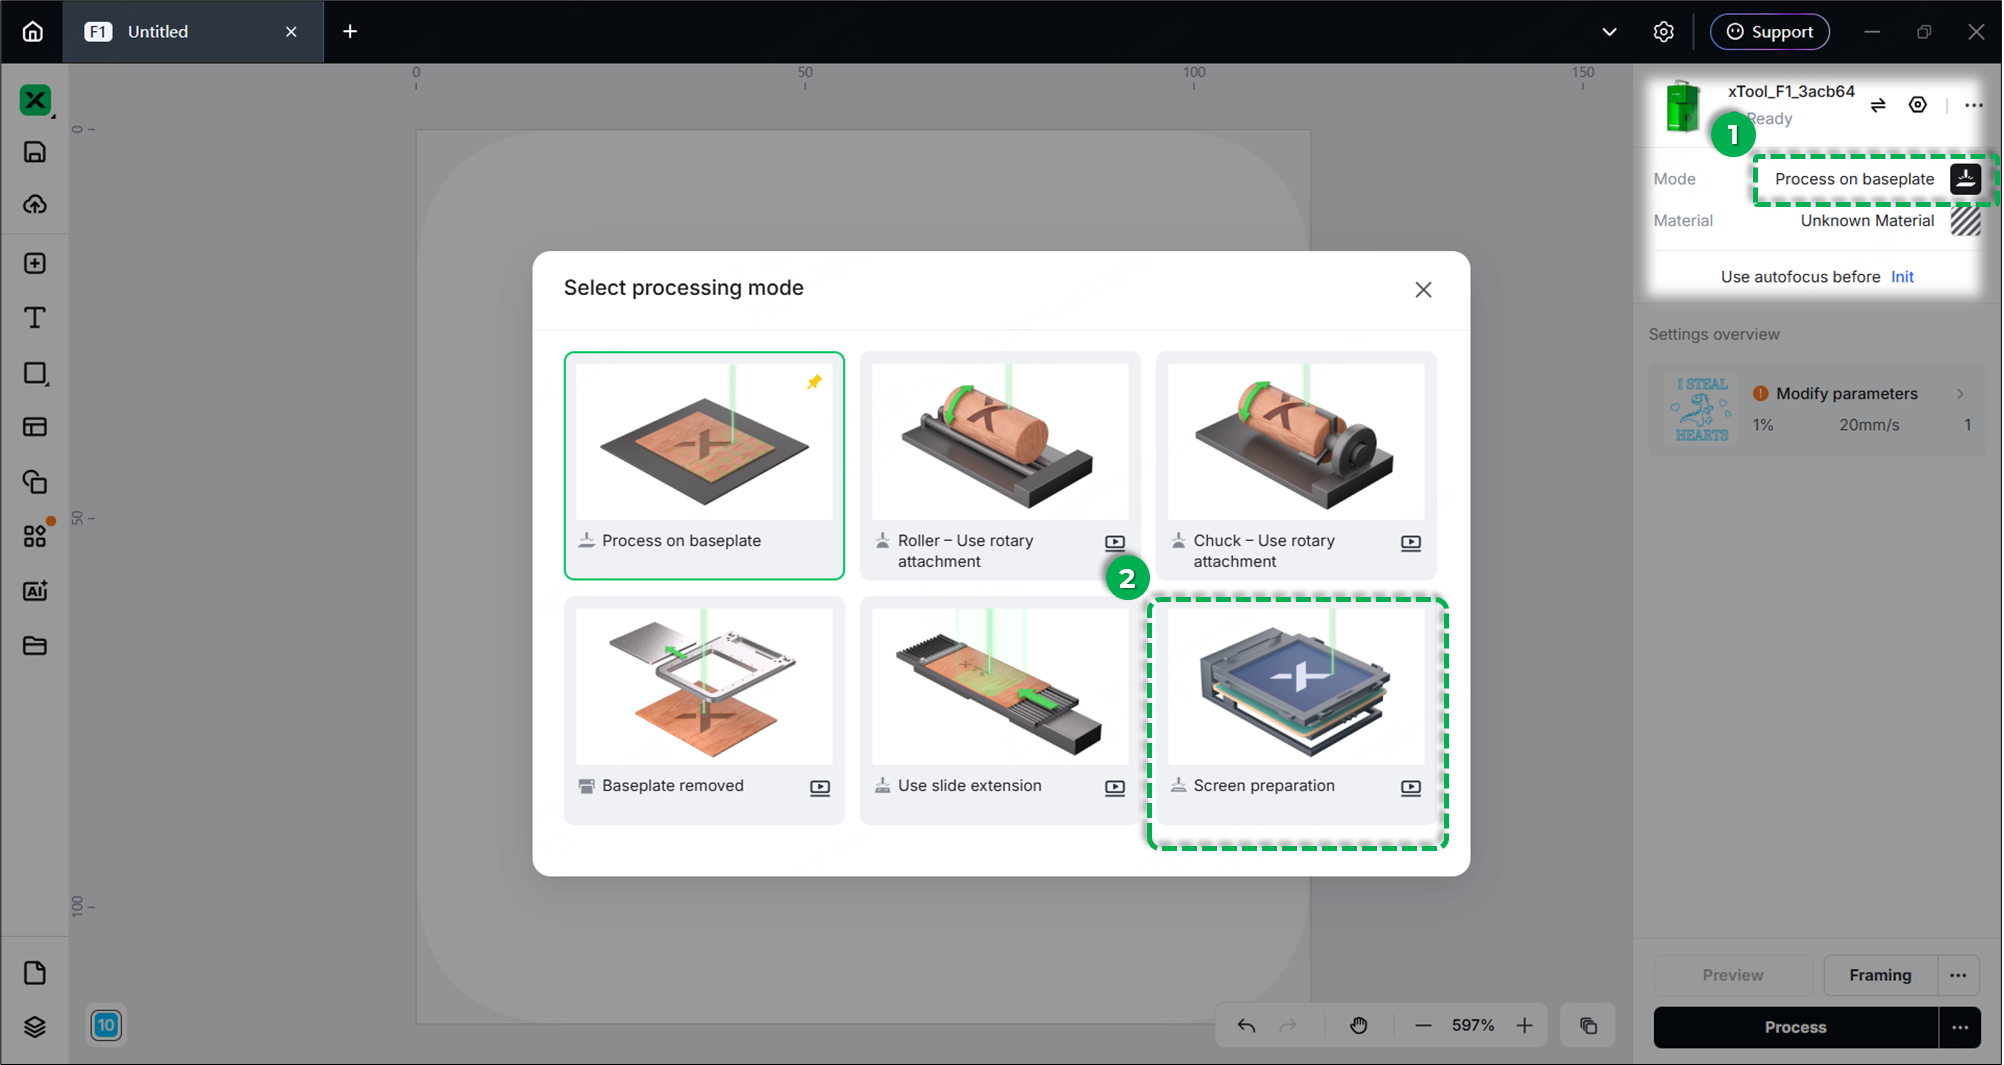
(2) Select mode and material
- At the top of the software, click the processing mode and select Screen preparation.
- Click User-defined material in the top-right corner.
- In the Select Materials window, click Screen printing > Polyester Fast-Engrave Screen, then click Apply.

Note: xTool strongly recommends using official xTool coated screens. The software includes preset parameters optimized for these screens to guarantee the best engraving results.
(3) Set laser focus
xTool F1 / xTool F1 Lite / xTool F2 supports both manual focus and auto focuse. Choose the focus method based on your preference.
Option A: Manual focus (Knob adjustment)
- Turn the physical knob on the right side of your laser device to move the laser module up or down.
- Clockwise: Moves the module UP (the red dot moves left).
- Counterclockwise: Moves the module DOWN (the red dot moves right).
- Focus is correctly set when the red dot overlaps the blue dot, forming a purple dot.

Note: Do not force the knob if the laser module reaches its highest physical point.
Option B: Auto focus (by material thickness measure)
- Click the Auto-measure icon (ruler symbol) in the right corner.
- The machine will automatically measure the distance.
- Verify the focus: The red dot and blue dot on the material surface should overlap to form a single purple dot
Note: If this is your first time using Auto Focus after each power cycle of your laser device, initialization is required:
- Click Init in the top-right corner to return the laser module to its original position.
(4) Design and layout
- Import/Create design:
- Use the left toolbar to import images, add text, or create vector shapes.
- Ensure all design elements are placed within the printable area of the mesh.
- Supported formats include: SVG, DXF, JPG, JPEG, PNG, BMP, and more.
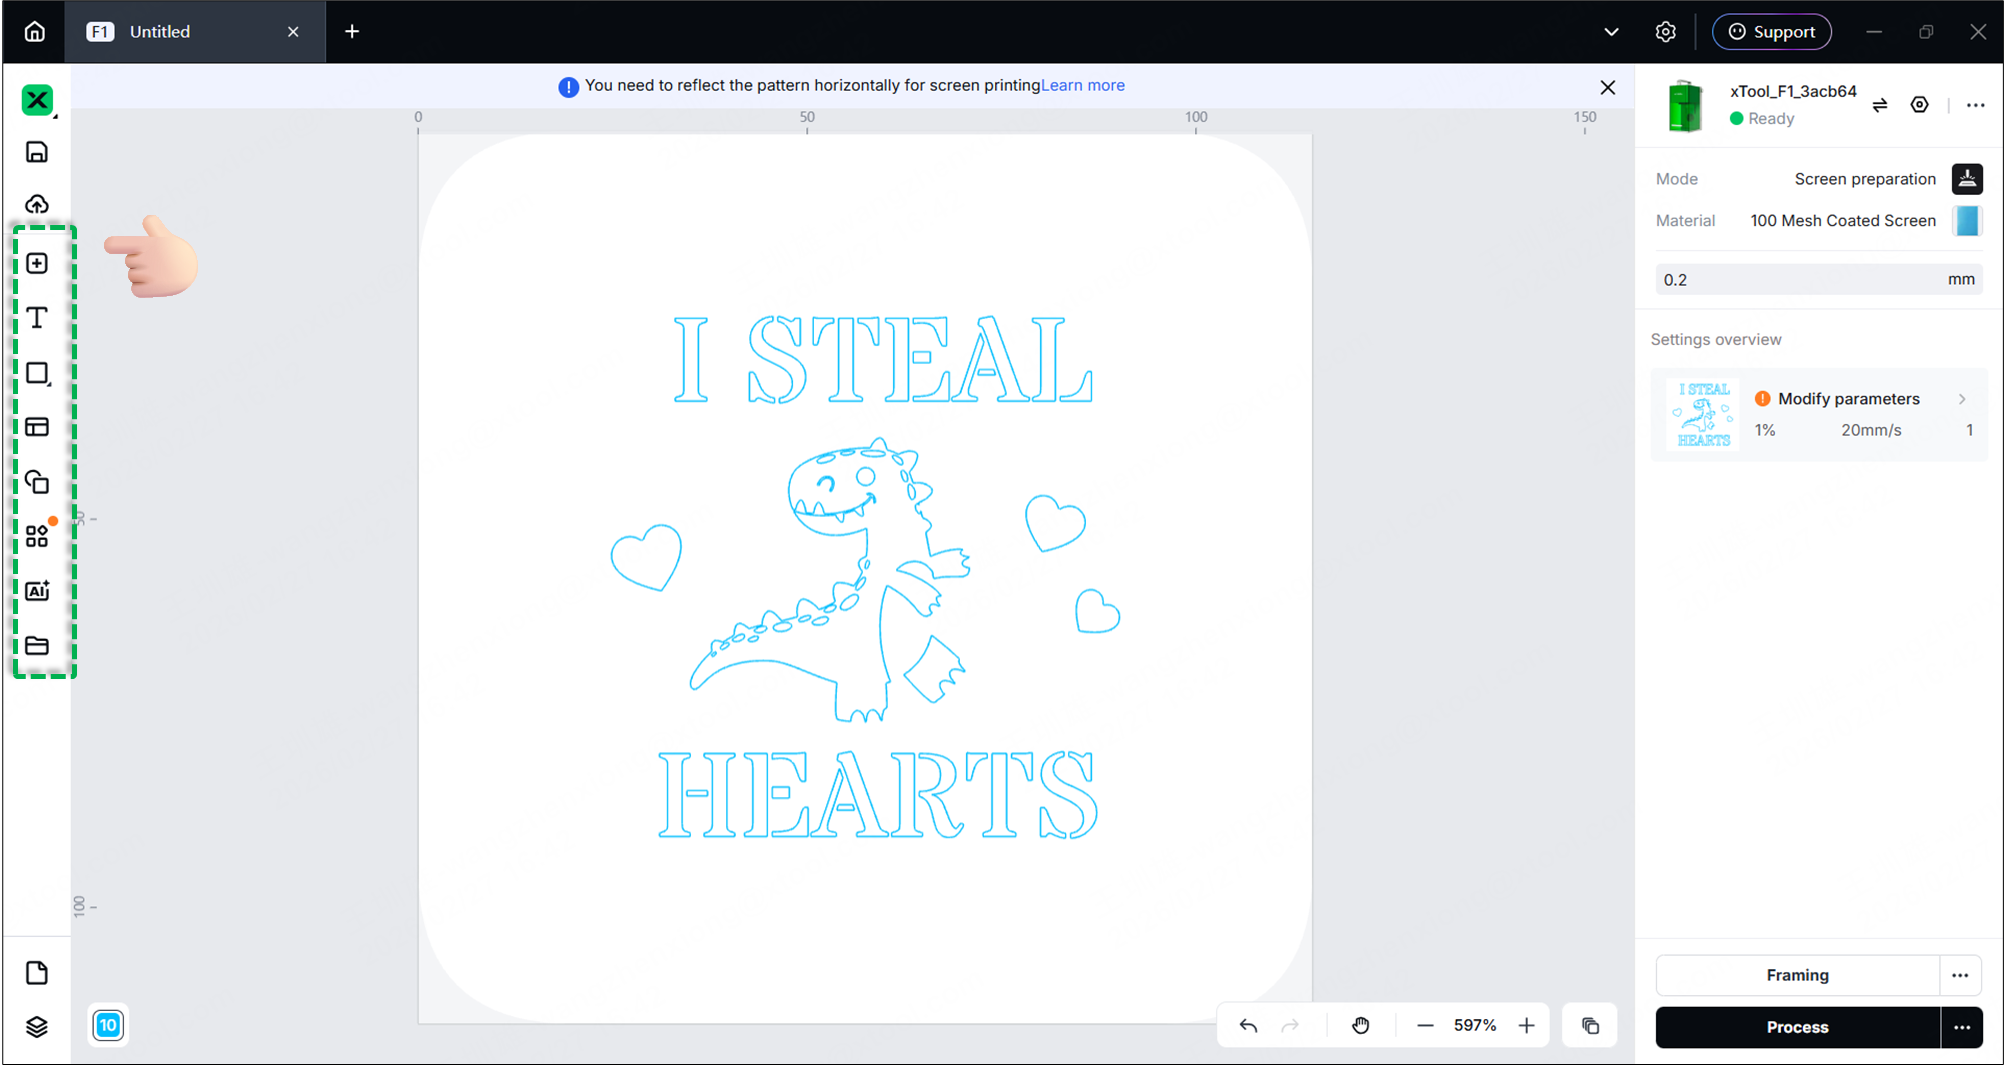
- Reflect (Mirror) the design:
- Crucial Step: Since you are engraving on the back of the screen, you must flip the design.
- Select your design and use the Reflect Horizontally tool in the top toolbar.
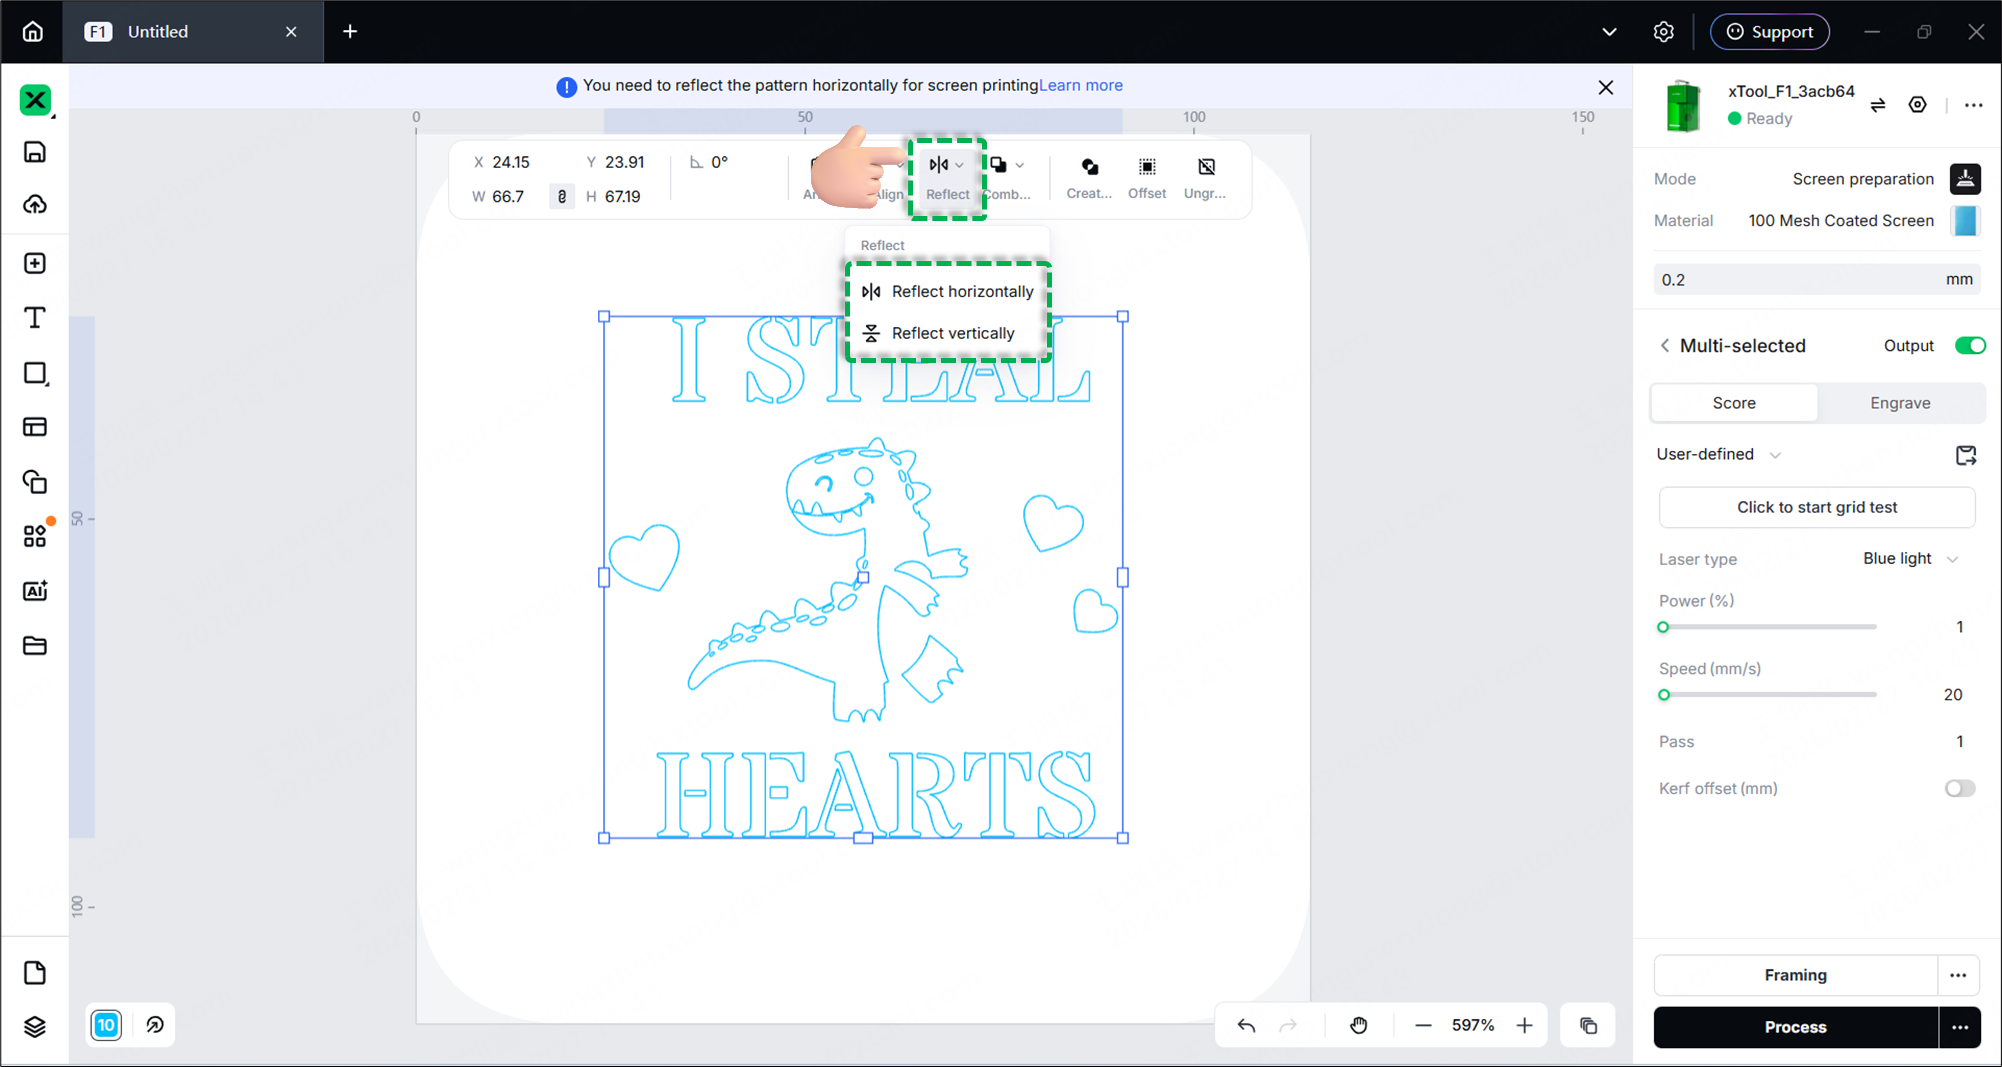
- Rotate (If necessary):
- Adjust the orientation of your design based on how you will print on the final object (e.g., a T-shirt).
- Example: If sliding a T-shirt onto the platen requires a specific orientation, rotate your design 90° accordingly.
Note: xTool Studio provides recommended processing parameters for coated screens. You only need to select the fast-engrave screen as the material, and the software will automatically set processing parameters for the screen.
Part 3: Framing & processing
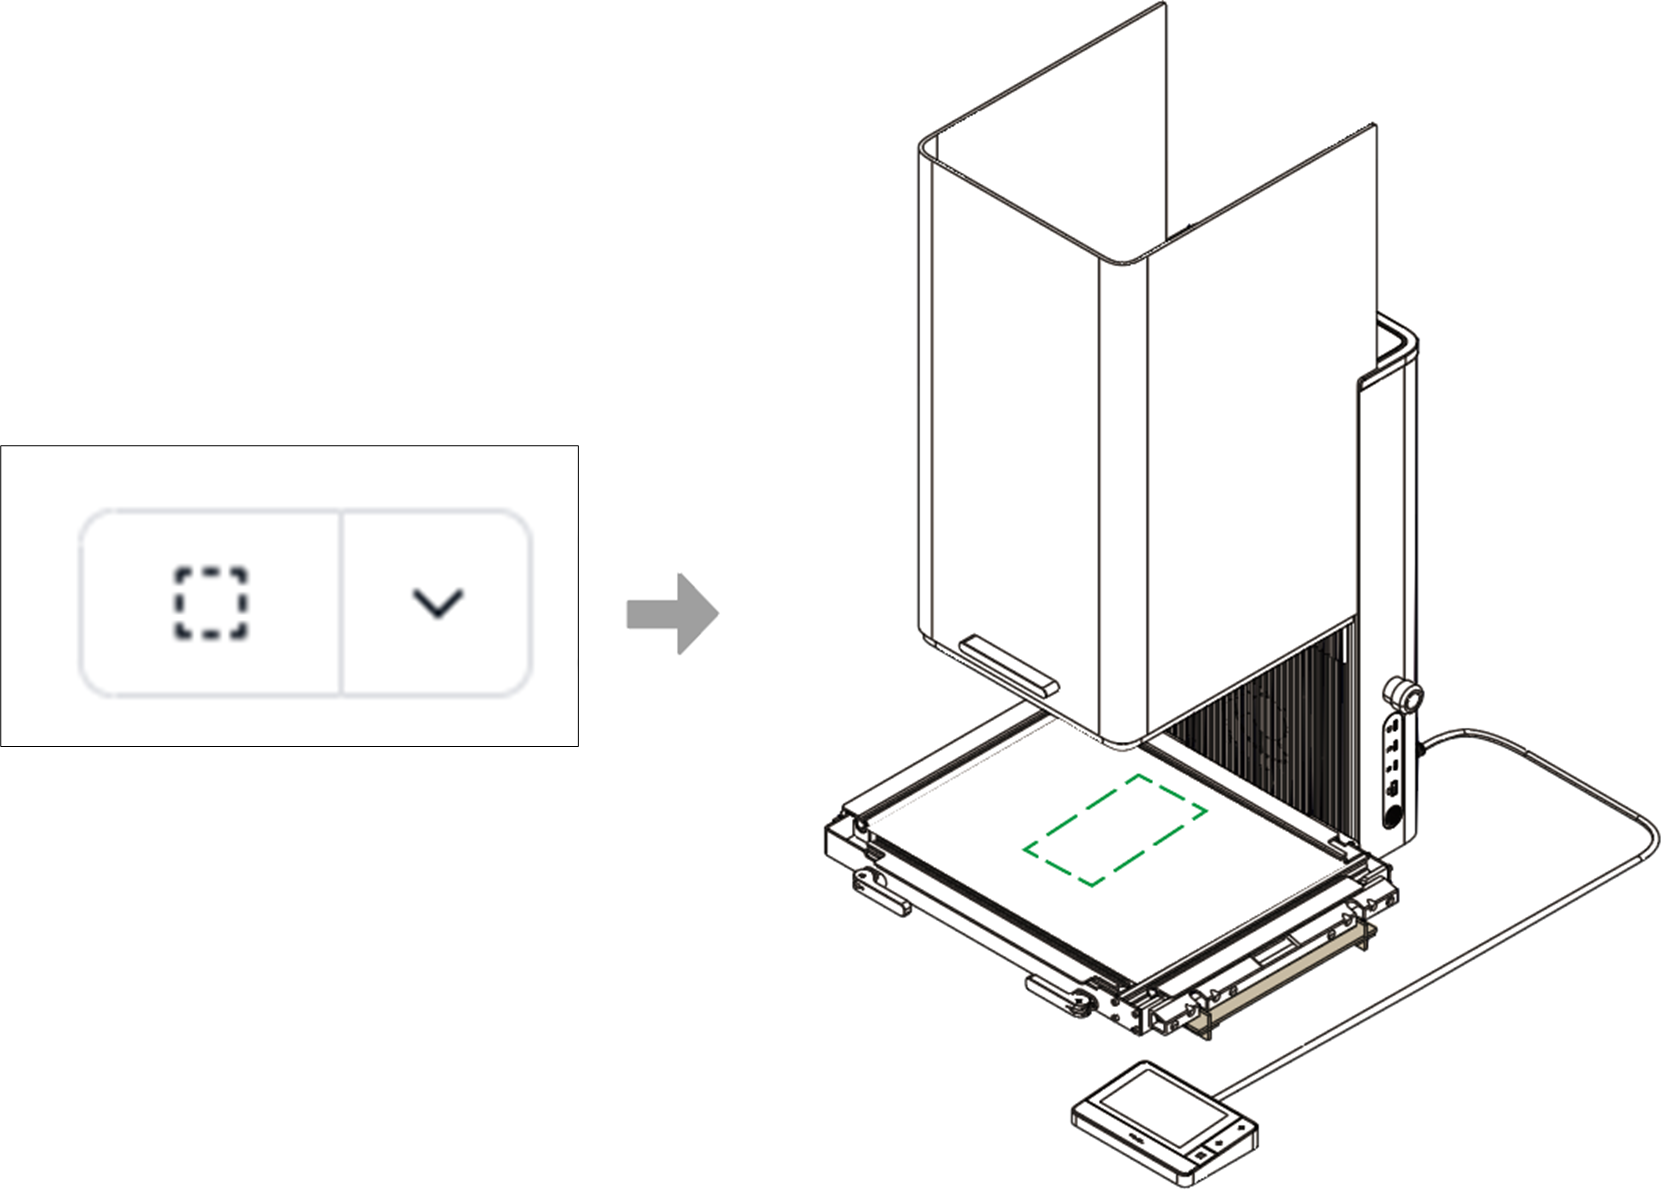
(1) Framing (Preview area)
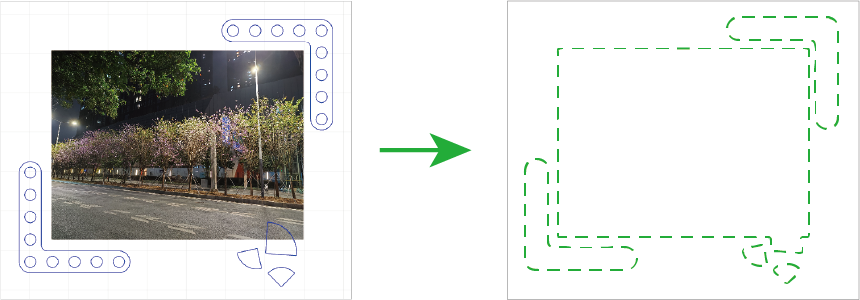
Framing projects a low-power laser light onto the material to show exactly where the design will be engraved.
- Click the three‑dots icon next to the Framing button to adjust framing settings.
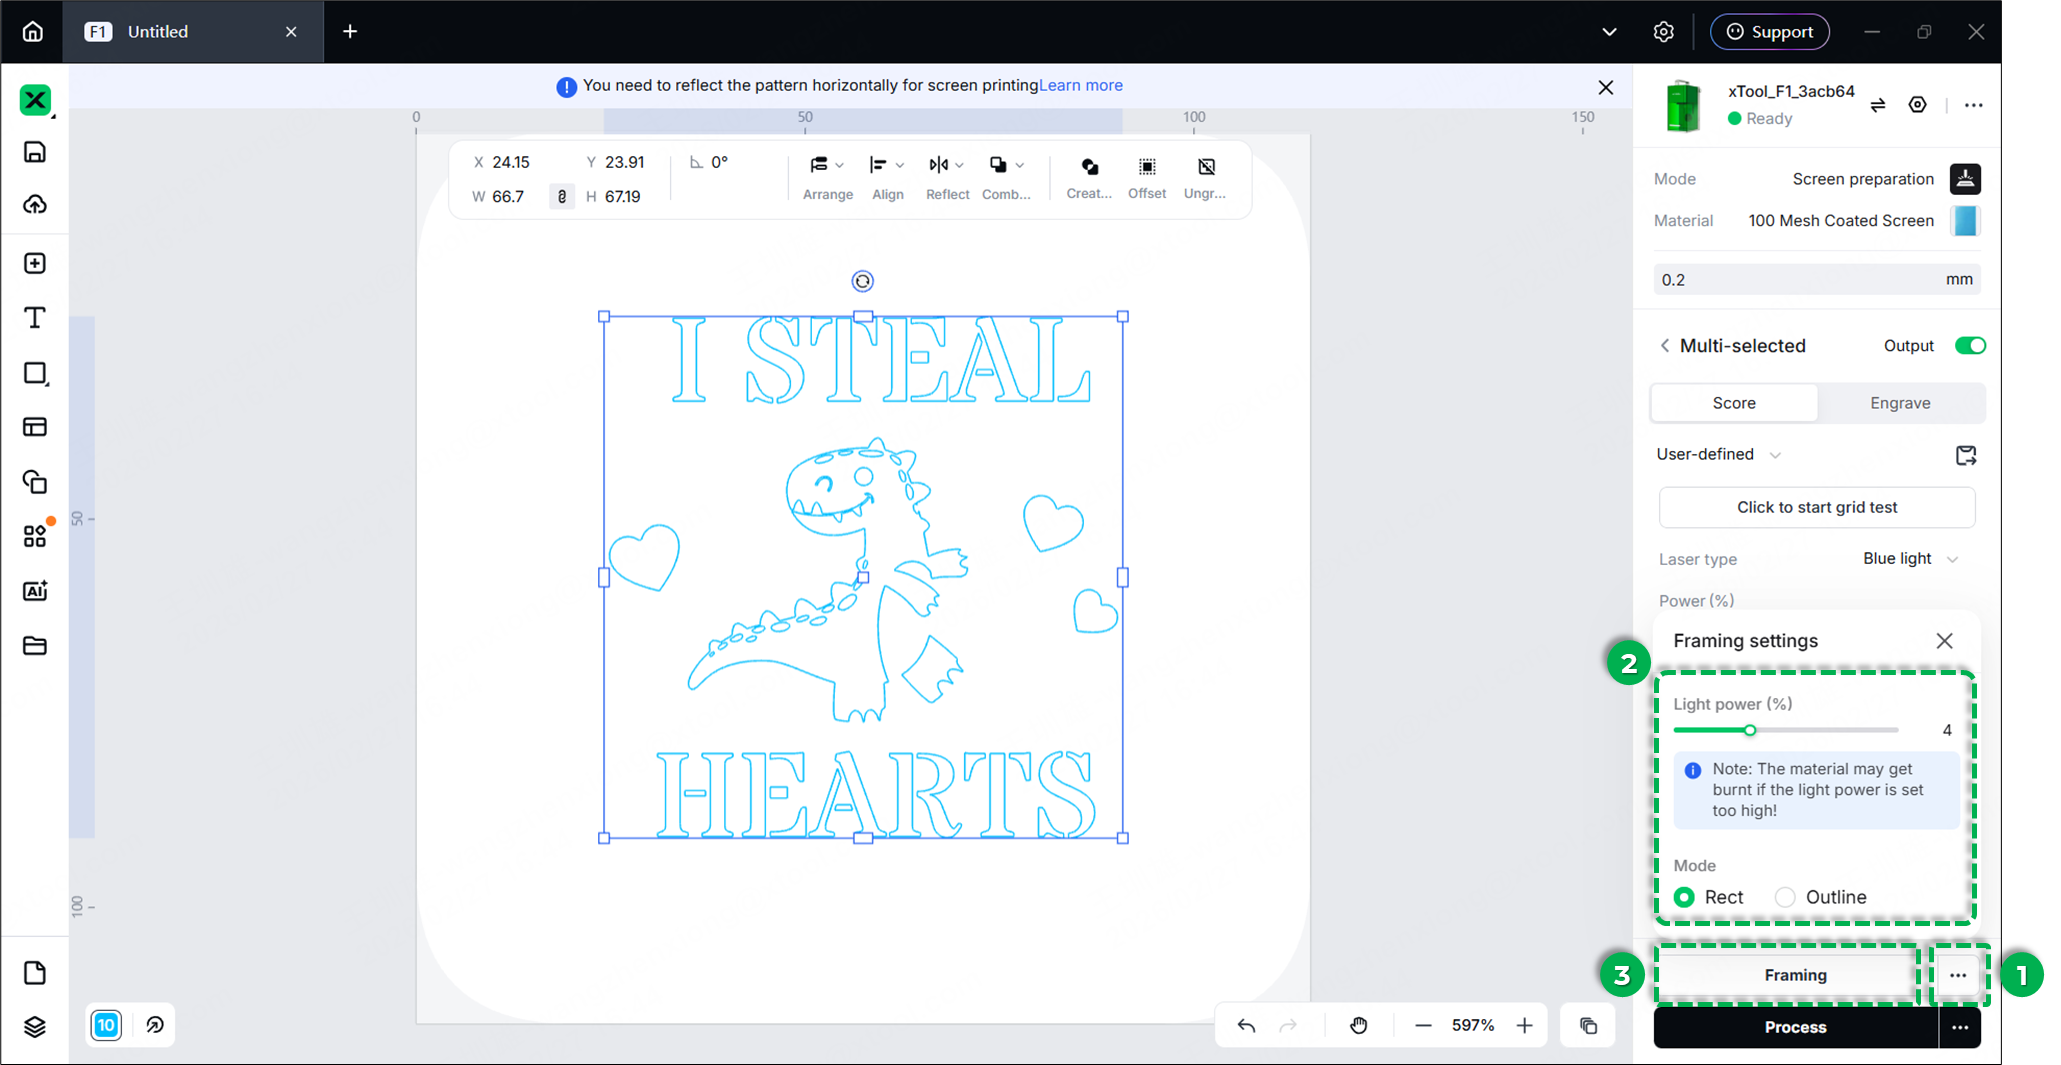
- Adjust Settings:
- Light Power: Increasing the power makes the framing light more visible.
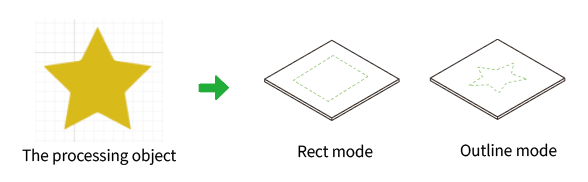
Warning: Do not set the power too high or leave it framing for too long, as it may scorch the screen coating. - Mode: Choose Rect (rectangular border) or Outline (actual shape contour).
- Light Power: Increasing the power makes the framing light more visible.
- Preview Specific Elements (Optional):
- Default Framing: Previews the boundary of all elements on the canvas.
- Selected Elements Framing: Click on specific elements on your canvas during the framing process. The laser will instantly adjust to trace only the boundary of the selected items.
- Default Framing: Previews the boundary of all elements on the canvas.

- Check Position:
- Click the Framing button to begin processing area preview.
- The protective enclosure filters laser light, making the framing dot appear dim.
- Tip: You may slightly lift the enclosure to see the framing more clearly, but close it immediately to ensure safety.
⚠️ Safety Reminder
Keep the enclosure closed during framing, or wear laser safety goggles rated for 455 nm and 1064 nm wavelengths.
- Adjust & Stop: If the position is incorrect, move the design in the software. Once satisfied, click Stop framing in the software or press the physical framing button on the laser device.
(2) Start processing
⚠️ SAFETY WARNING: During laser processing, always keep the protective enclosure closed. If you must operate with the enclosure open (Class 4 mode), you must wear laser safety goggles certified to shield against 455 nm and 1064 nm wavelengths.
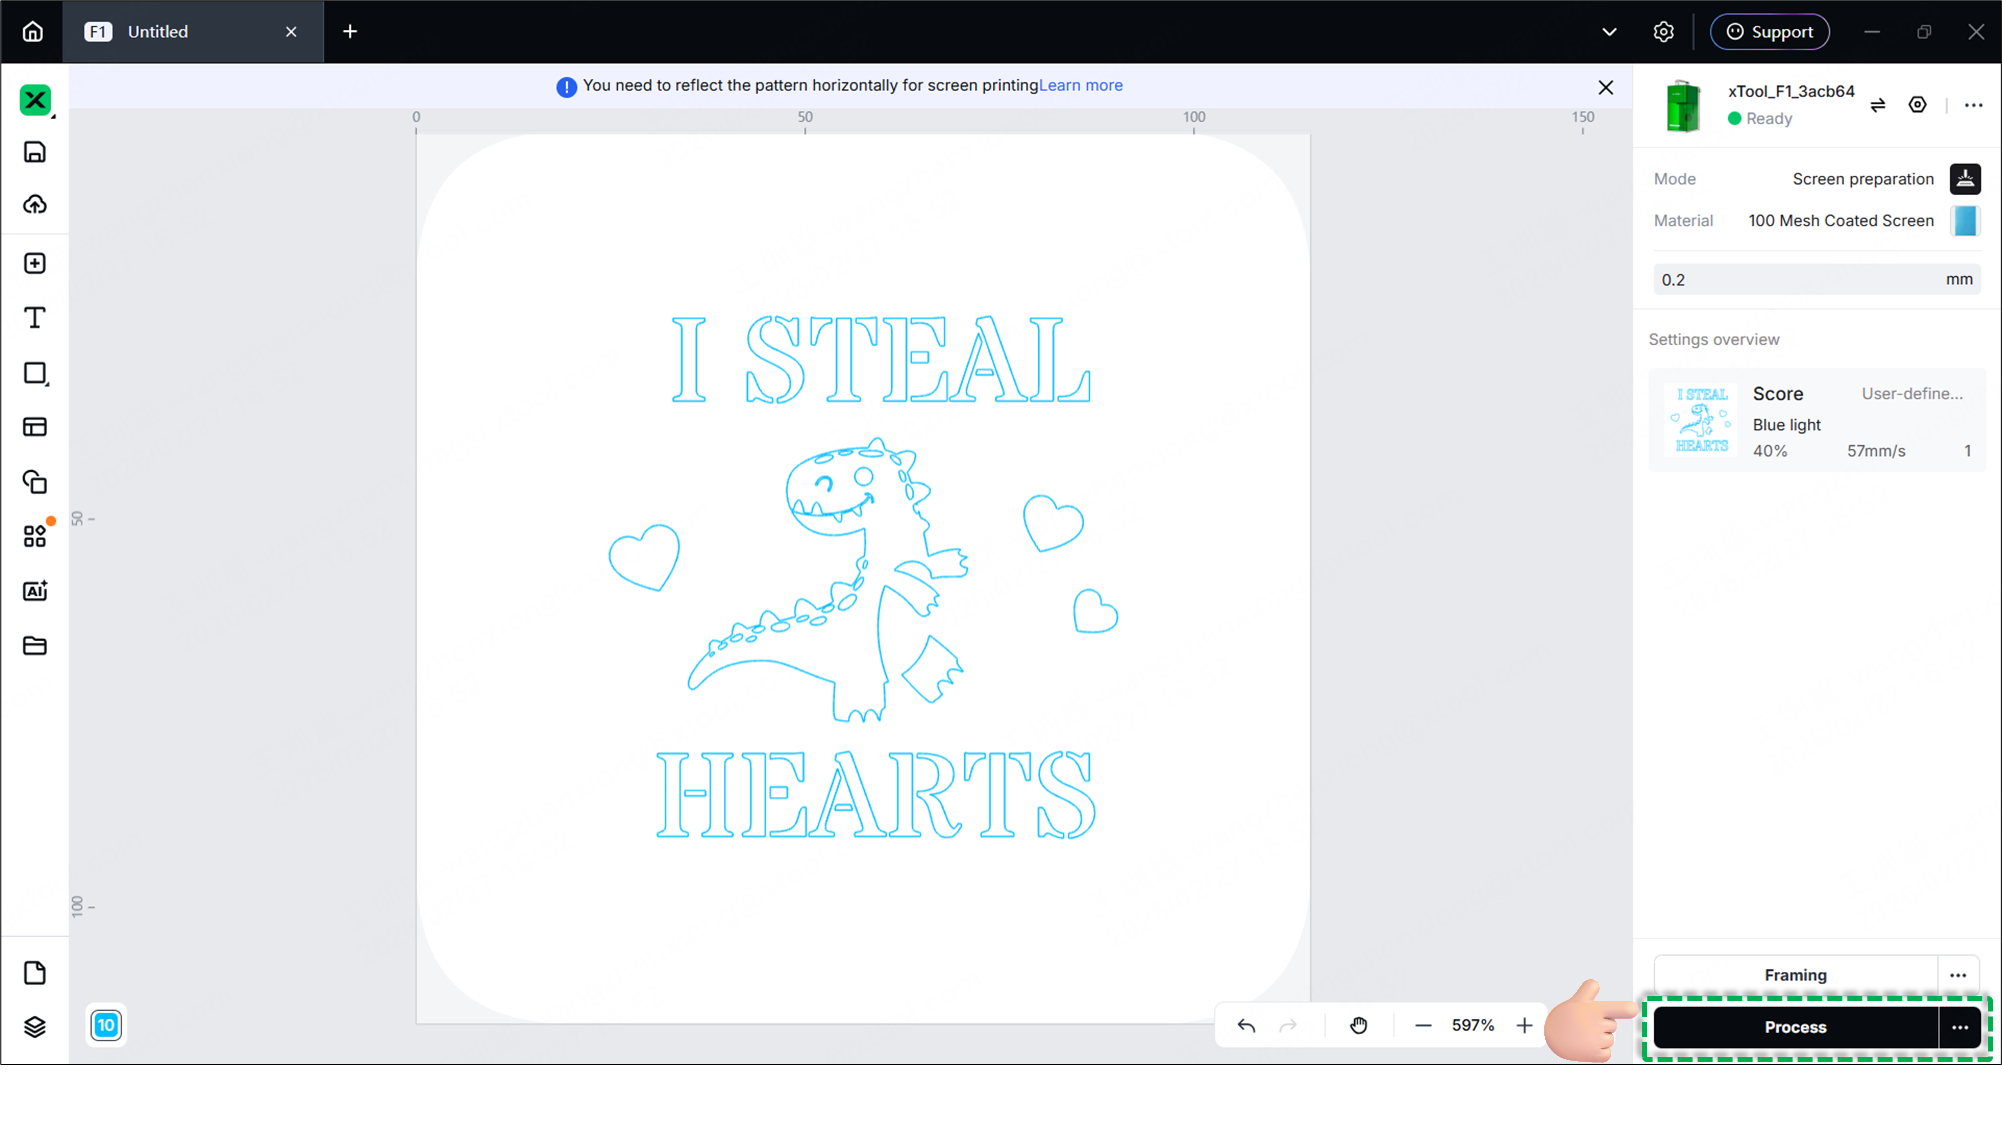
- Click Process in the bottom-right corner.
- Close the protective enclosure.
- Click Start in the bottom-right corner.
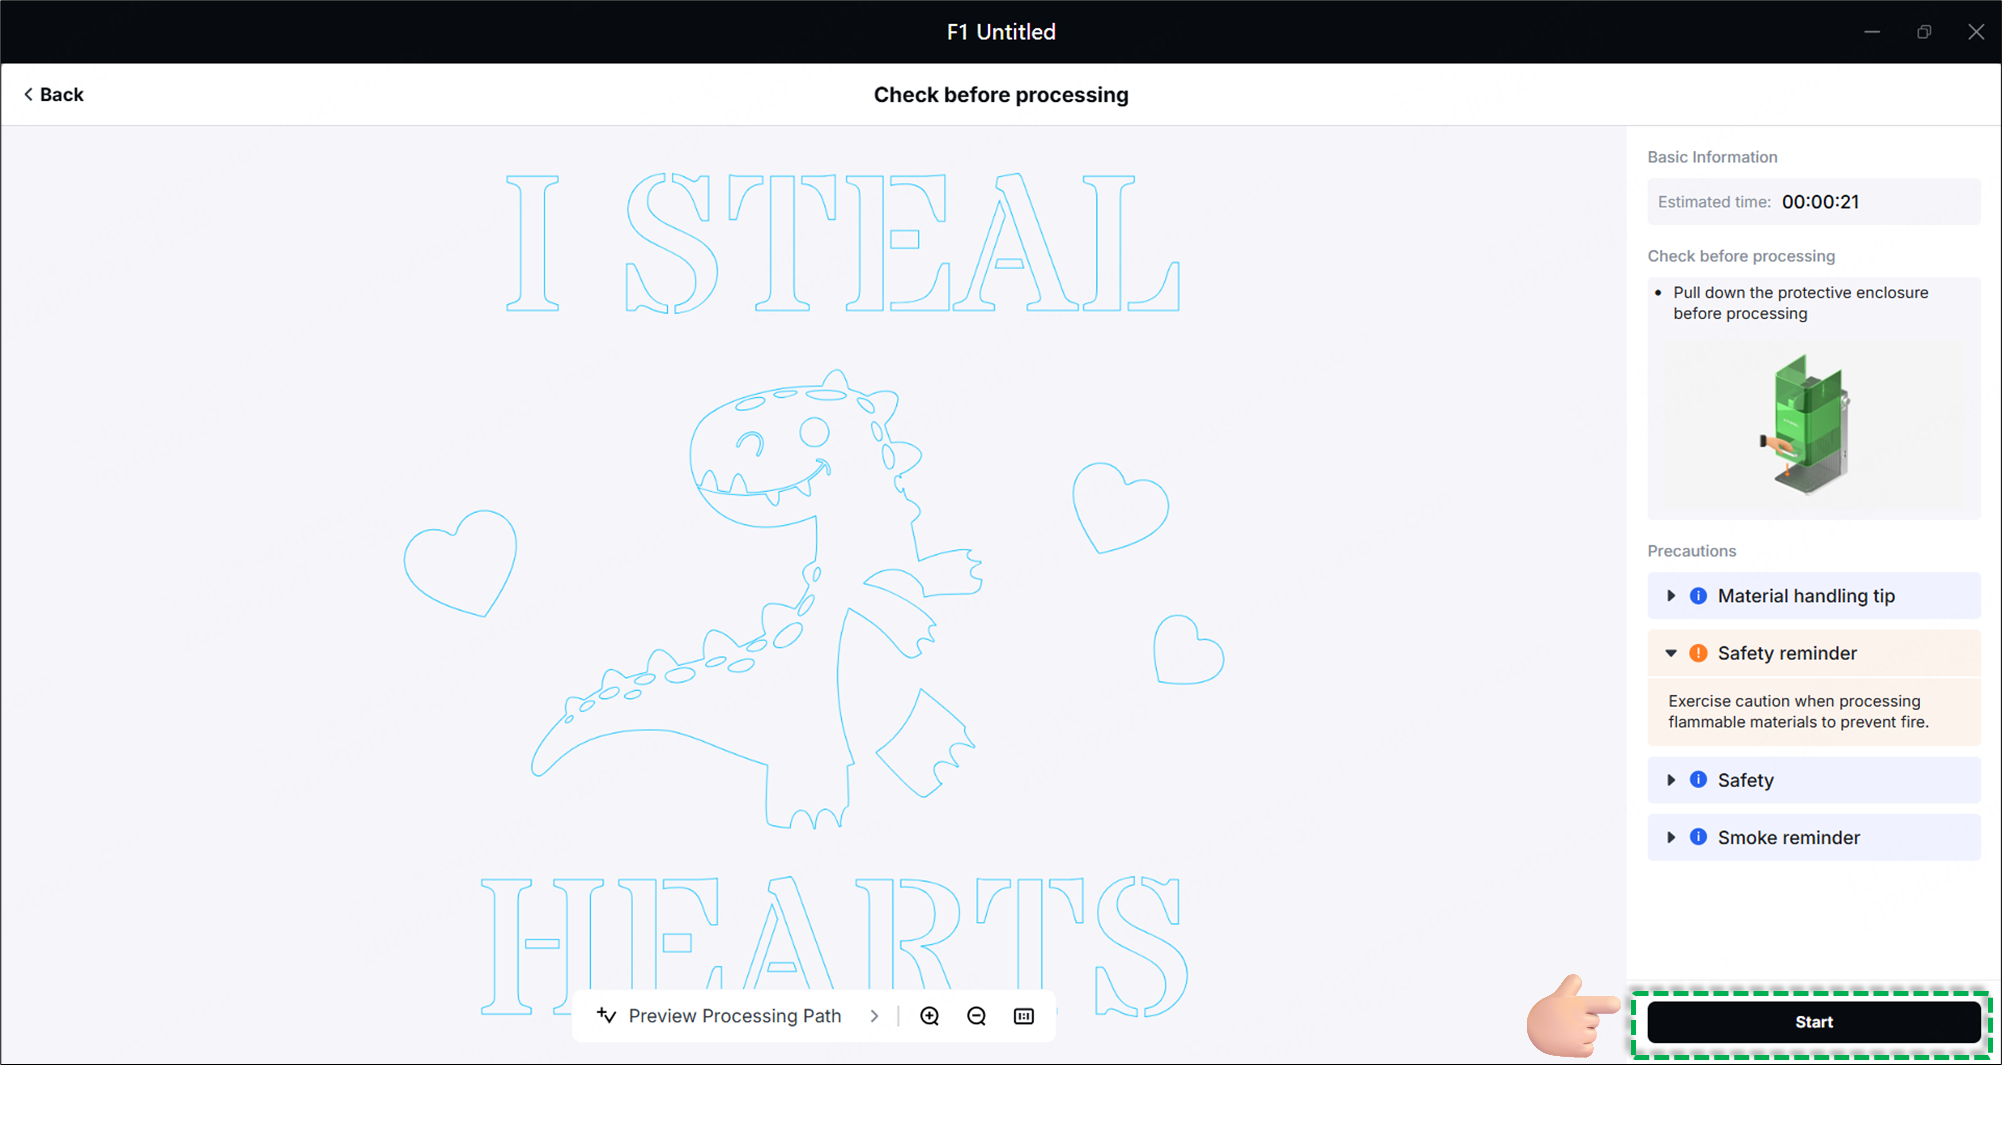
- When the software displays "Ready," press the physical Knob on your laser device to begin engraving.
- Wait for the processing to finish, then click Finish to complete the operation. 🎉
