This guide primarily uses xTool F1 Ultra as the operational example. The workflow is consistent across F2 Ultra (dual‑laser version), F2 Ultra (single‑laser version), and F2 Ultra UV.
Introduction
Screen printing involves three main steps: mounting the screen, engraving the screen (making the stencil), and printing the design. You can use your xTool F1 Ultra to engrave the screen mesh.
Note: xTool F1 Ultra only supports Fast-Engrave Screens and Small Frames. These materials are available for purchase at xtool.com.
💡 For more information on how to start screen printing, refer to xTool Screen Printer User Guide (Fast-Engrave Screen).
Part 1: DIY frame fixing pieces
To ensure precision, the screen frame must be secured firmly on the baseplate with a mounting fixture. This section guides you through creating such a wooden fixture with your xTool F1 Ultra, F2 Ultra (dual laser version), F2 Ultra (single-laser version), or F2 Ultra UV.
Tools required
- xTool F1 Ultra / F2 Ultra (dual laser version) / F2 Ultra (single-laser version) / F2 Ultra UV
- 3mm Basswood Plywood sheets (×2)
Step 1: Process the fixture parts
(1) Download the Project File: Frame Fixing Pieces for xTool F1 Ultra
(2) Open in xTool Studio: Import the project file. Keep the default processing parameters.
(3) Configure Output Settings:
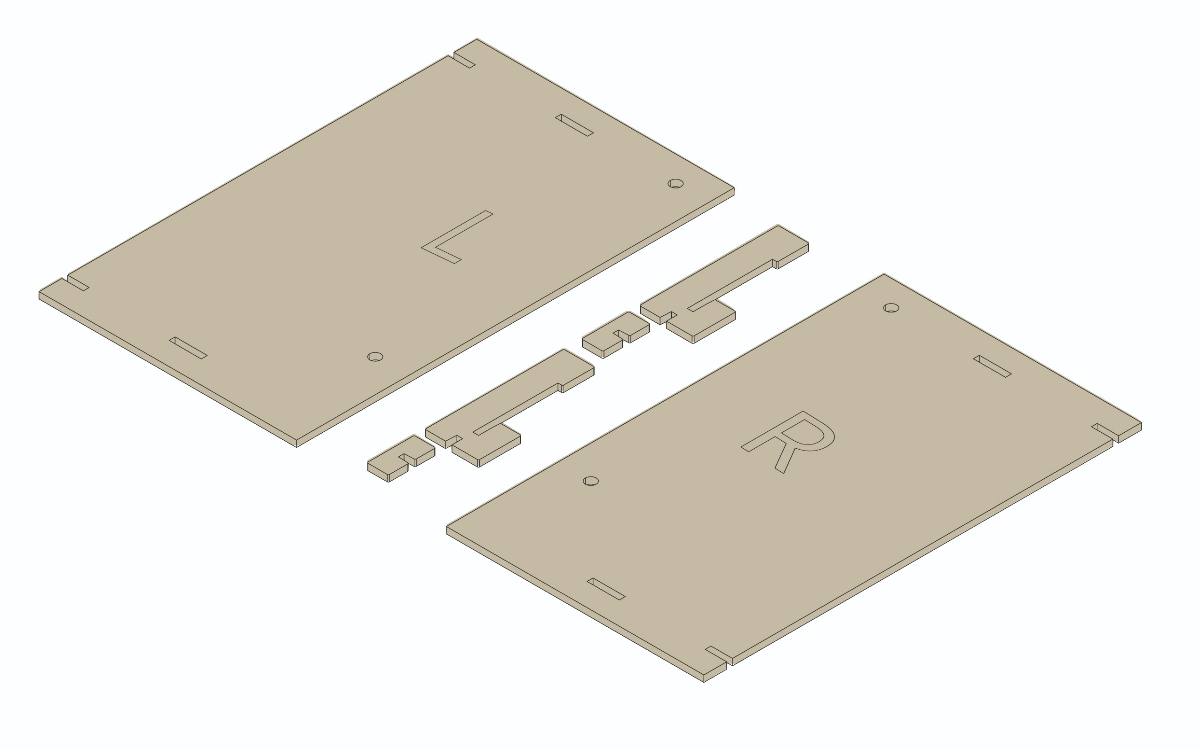
- The file contains designs for the Left (L) and Right (R) fixture pieces.
- By default, the "Cut" and "Score" parameters for the Left (L) design may have the Output toggled OFF (indicated by an "Ignored" watermark).
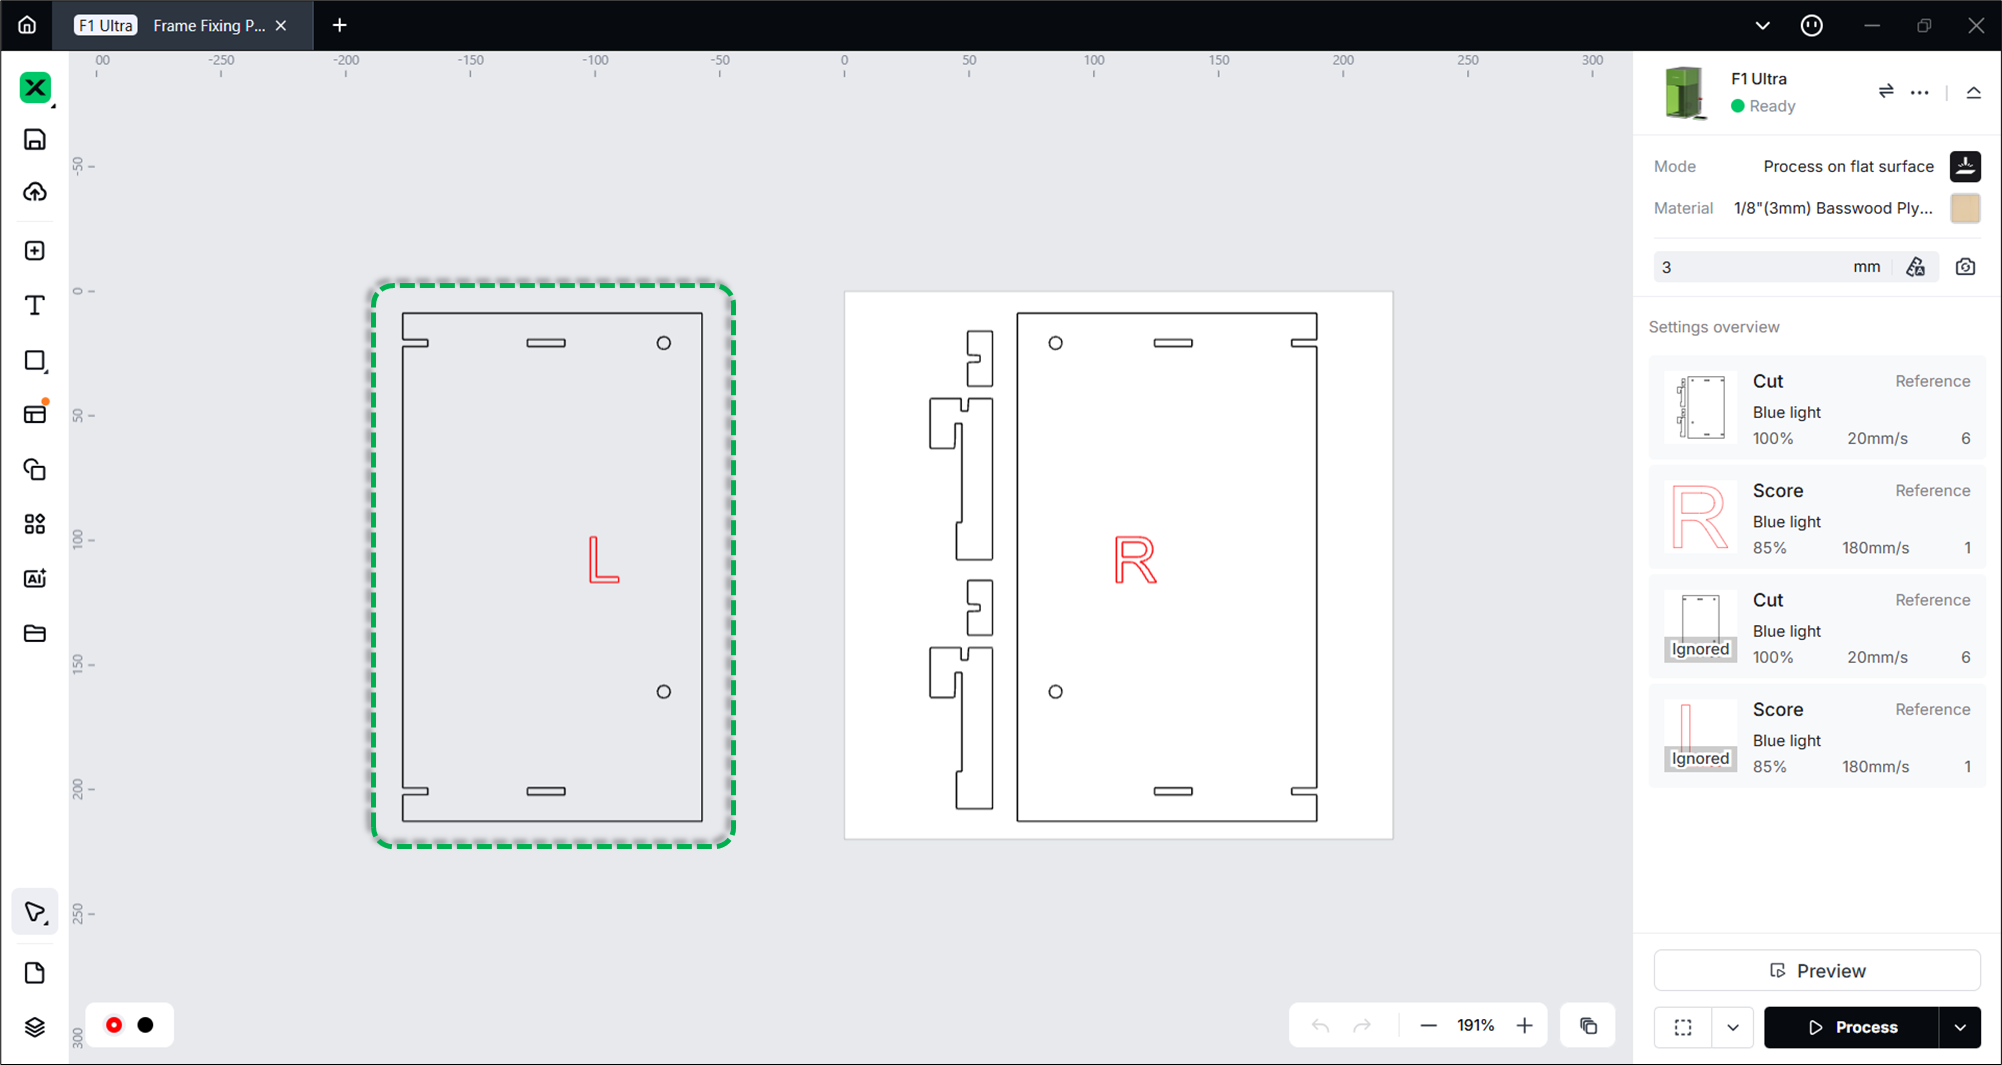
- Select the "Cut" and "Score" layers for the design you wish to process. In the settings panel, toggle the Output switch to ON to unlock processing.
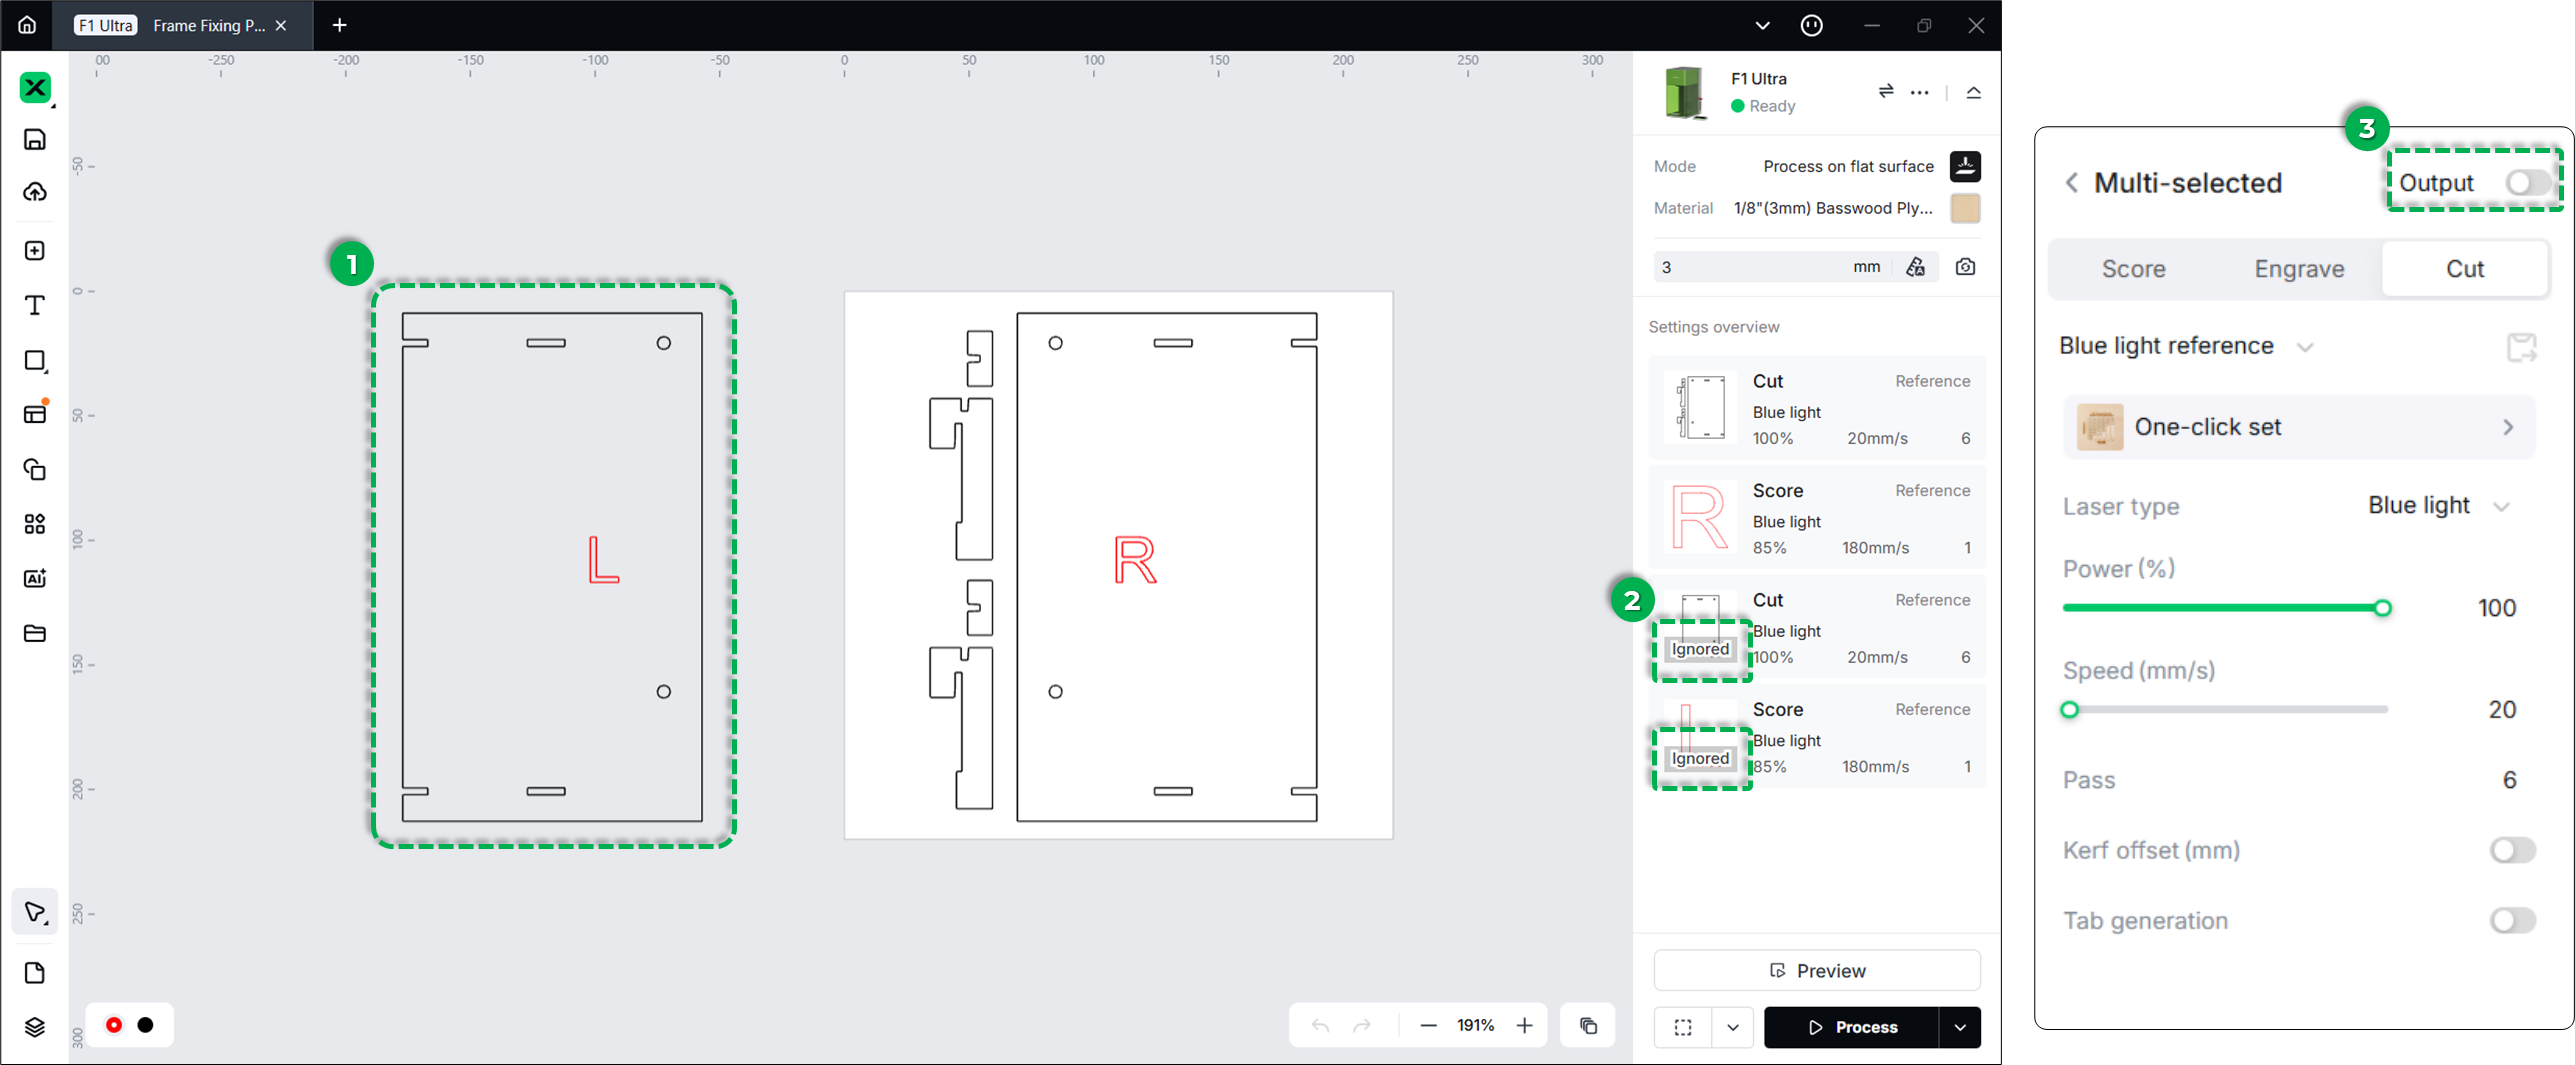
- 💡 Tip: If you are processing one side at a time, ensure the other side's Output is turned OFF.
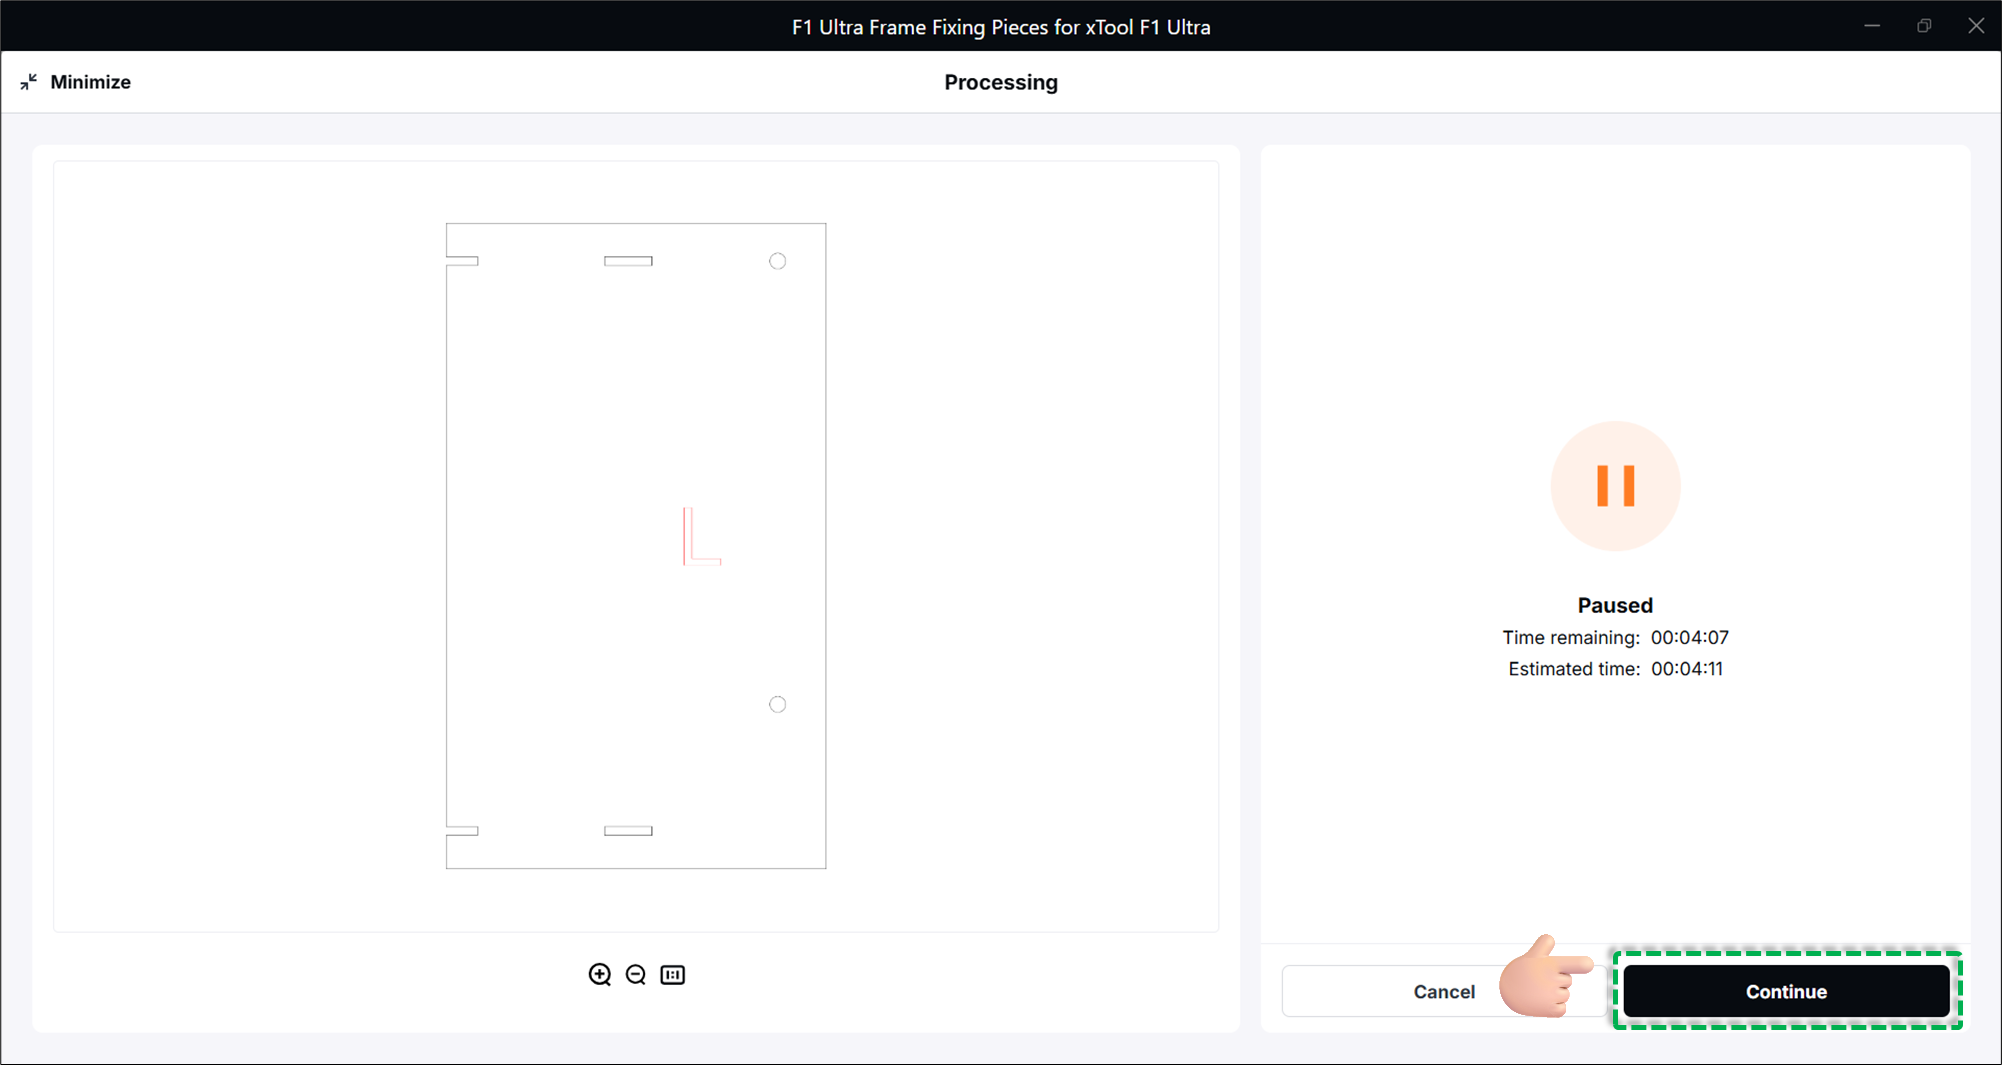
(4) Handle Flame Alarms:
- Important: Minor flames may occur when cutting wood. If the machine pauses and triggers a flame alarm, verify it is safe, then click False alarm > Got it in xTool Studio.

- Tap Confirm on the touchscreen controller screen and press the Start/Stop button to resume.

- In xTool Studio, click Continue to resume the software process.
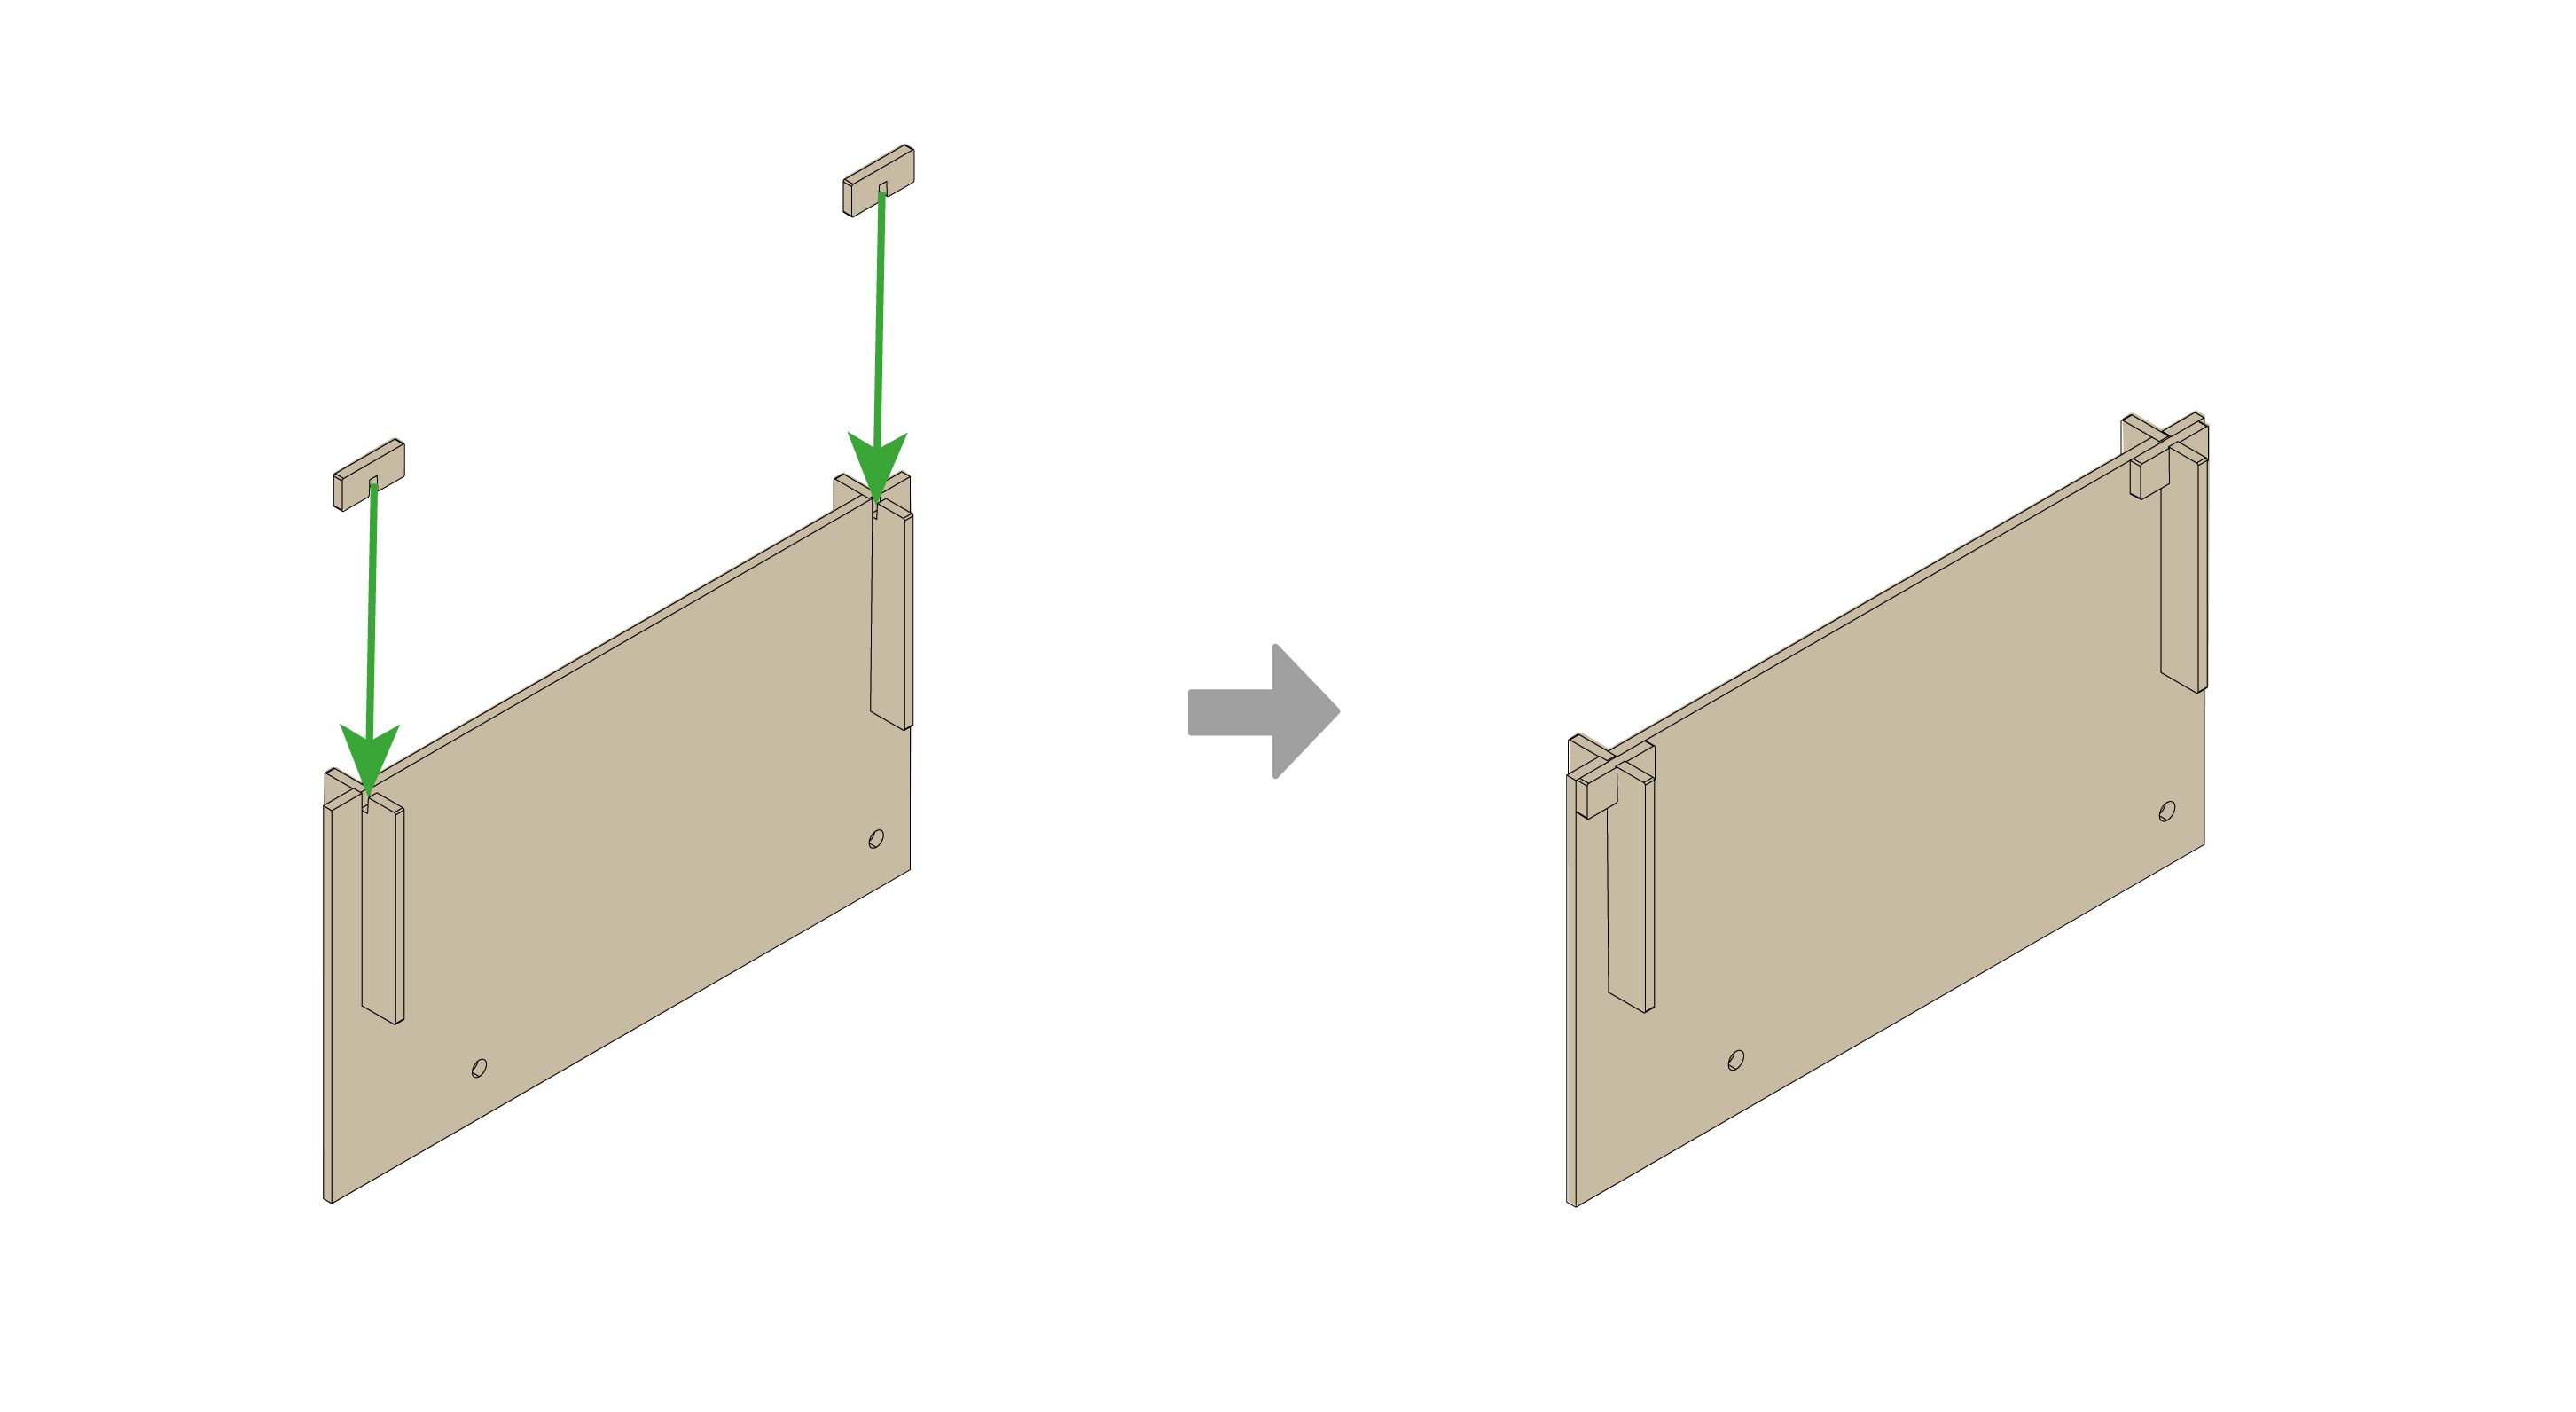
Step 2: Assemble the fixture
- Remove the cut pieces from the wood sheet.
- Stack and assemble the pieces to form the fixture marked "R" (Right) and "L" (Left).

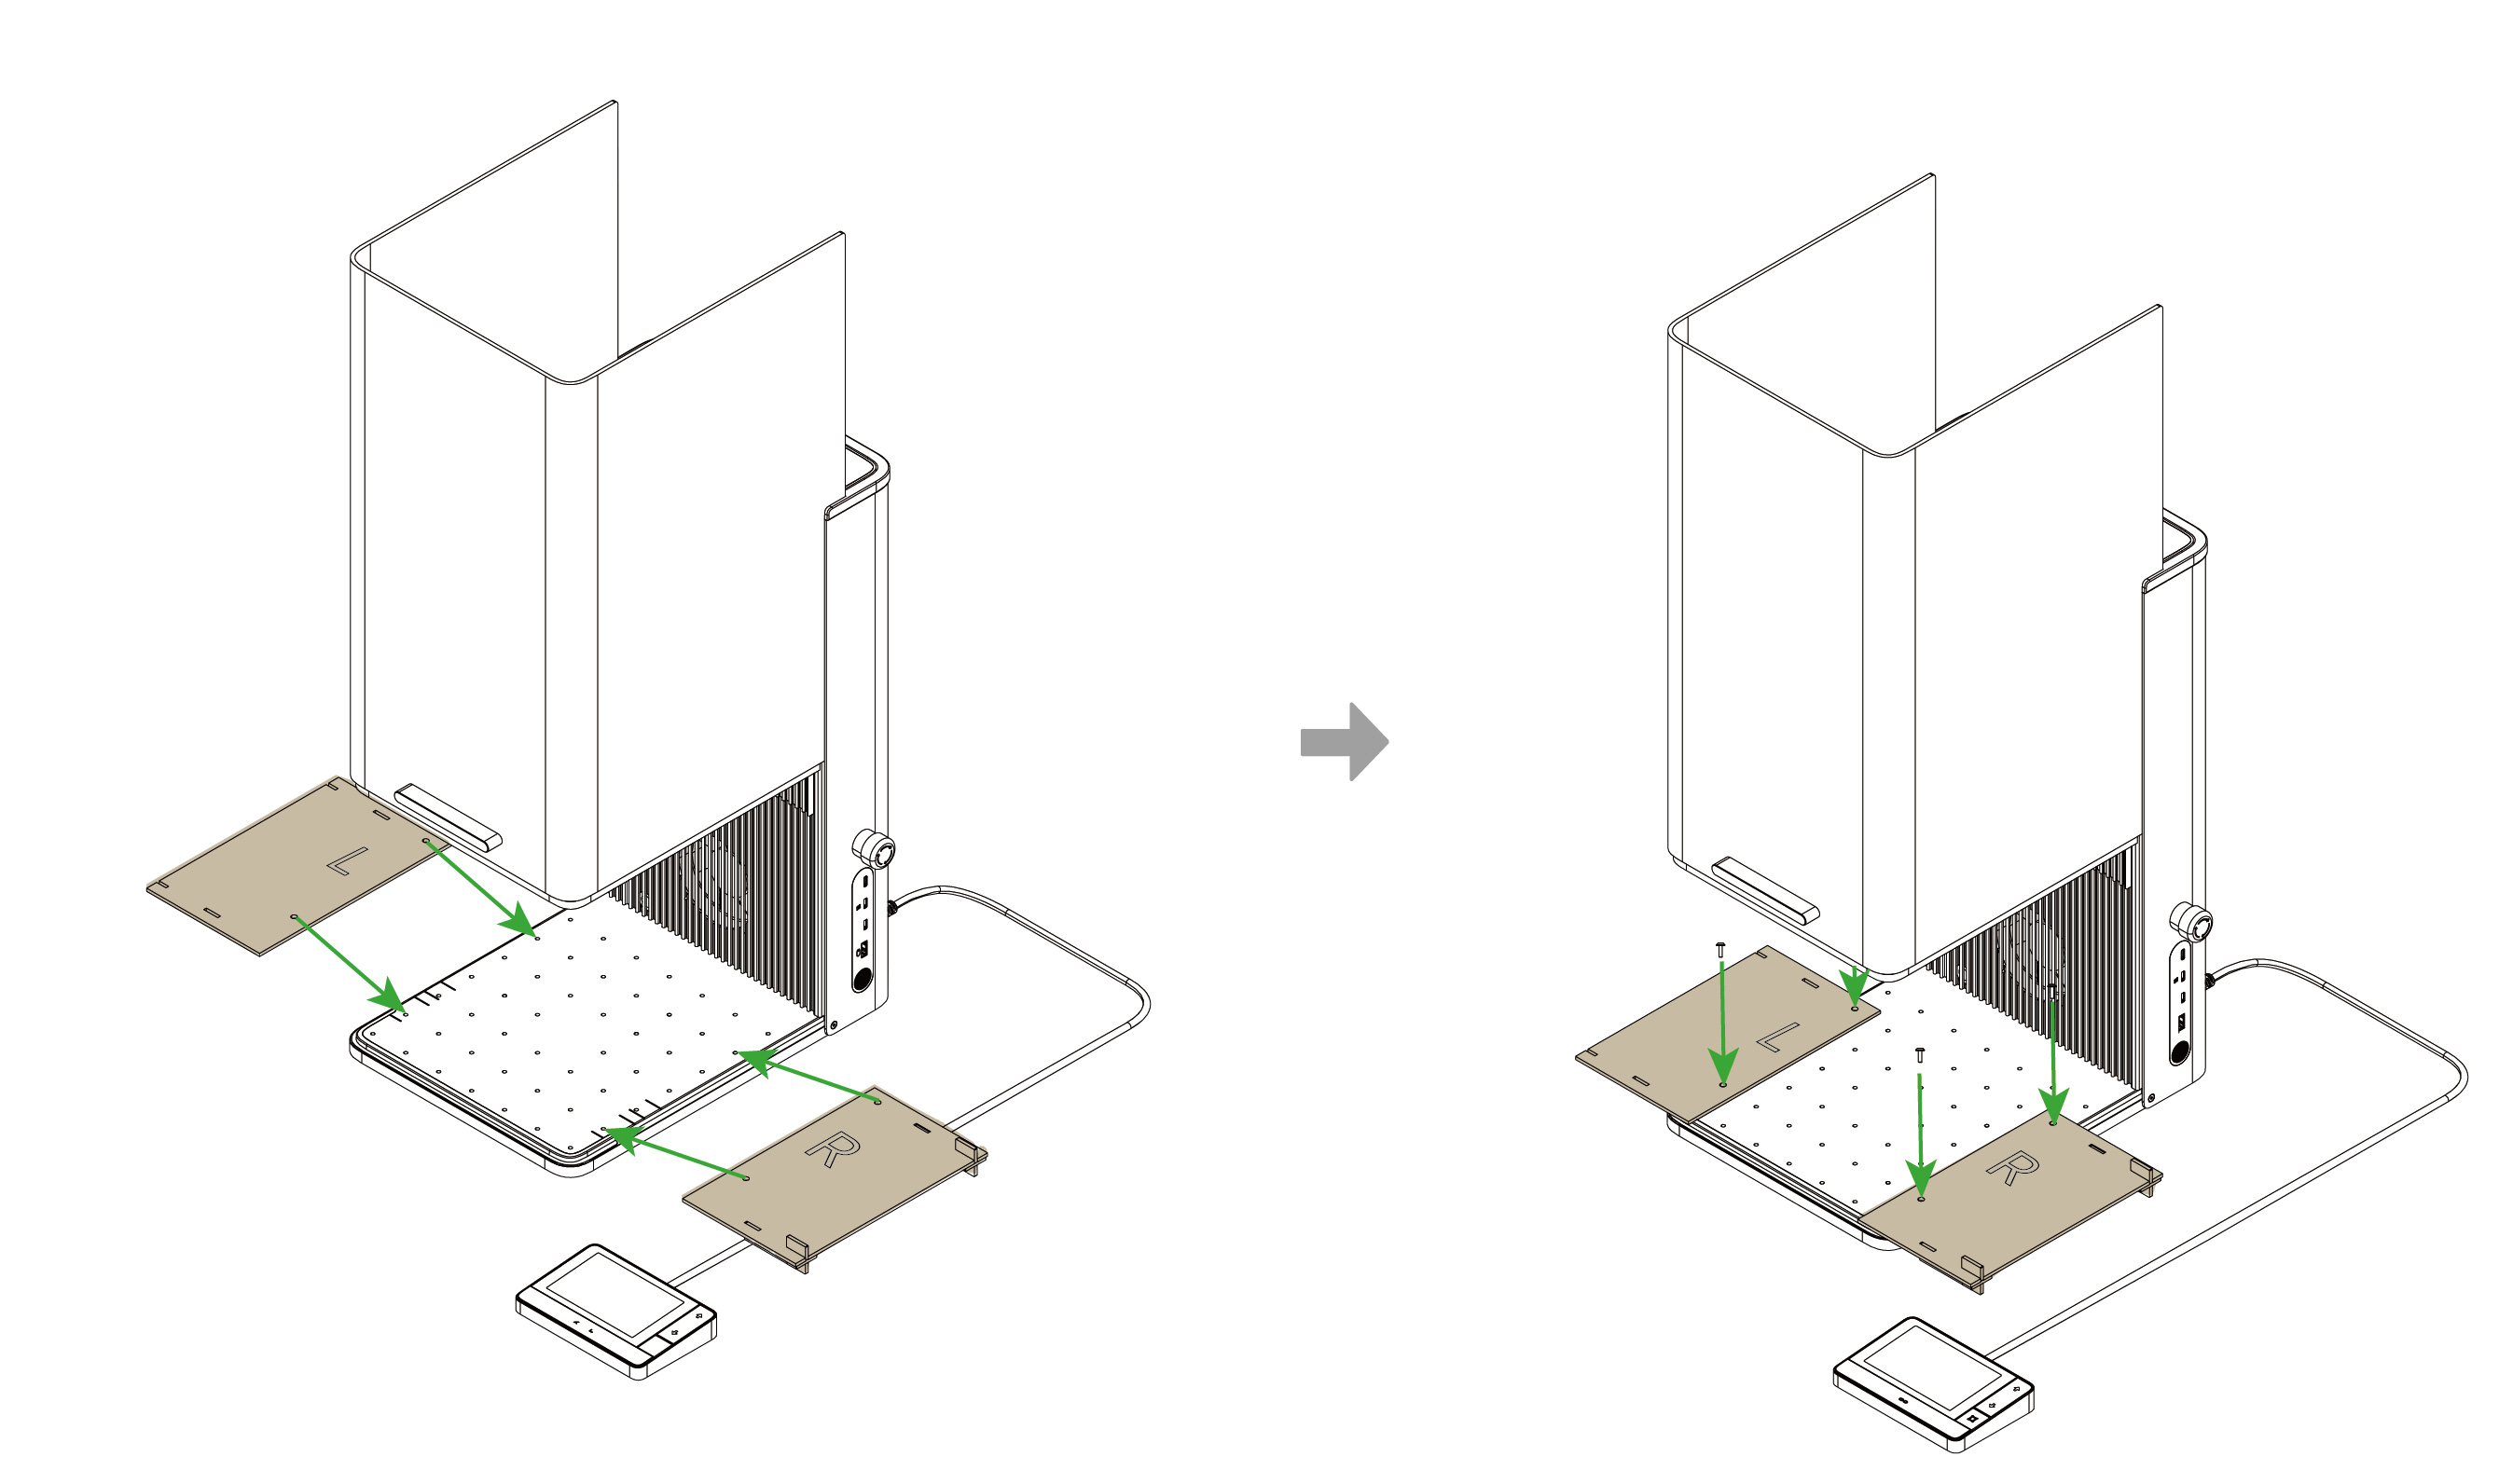
Step 3: Install the fixture
Install the DIY fixture based on your specific laser device. This section demonstrates with xTool F1 Ultra.
- Place the assembled fixtures onto the metal baseplate of your xTool F1 Ultra.
- Align the four holes of the fixtures with the corresponding holes on the baseplate.
- Secure the fixtures tightly using four M4 screws.
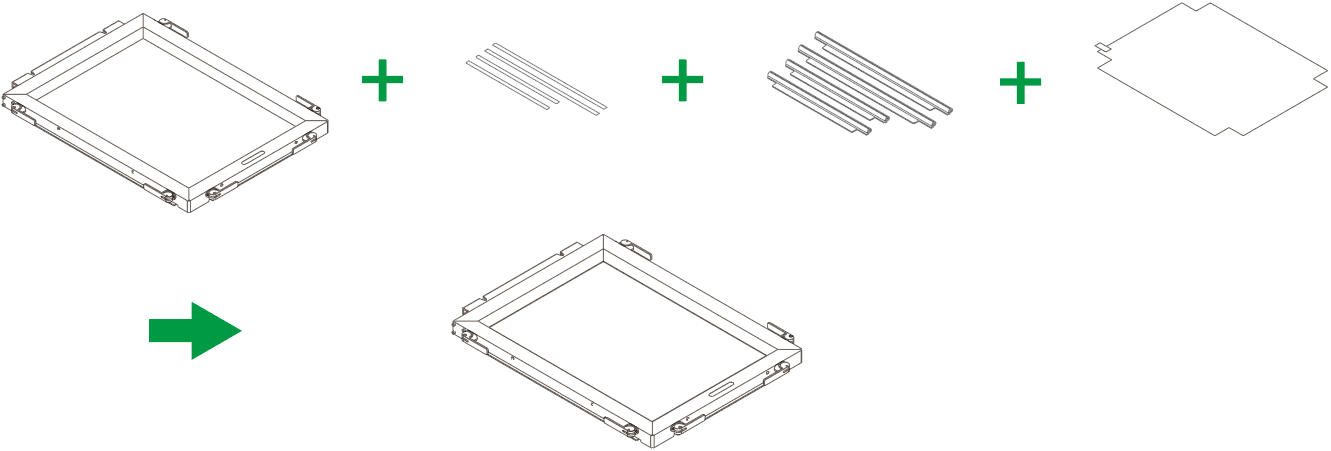
Part 2: Mount the screen
Install the screen onto the DIY fixture. The following steps demonstrate the process using xTool F1 Ultra.
- Mount the Fast-Engrave Screen onto the frame. Refer to xTool Screen Printer User Guide (Fast-Engrave Screen) for mounting details.
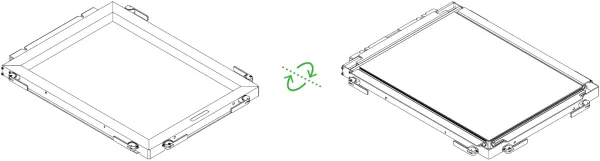
- Flip the screen assembly over to allow the back of the screen (the flat mesh side) to face up.
- Lift the protective enclosure of the xTool F1 Ultra.
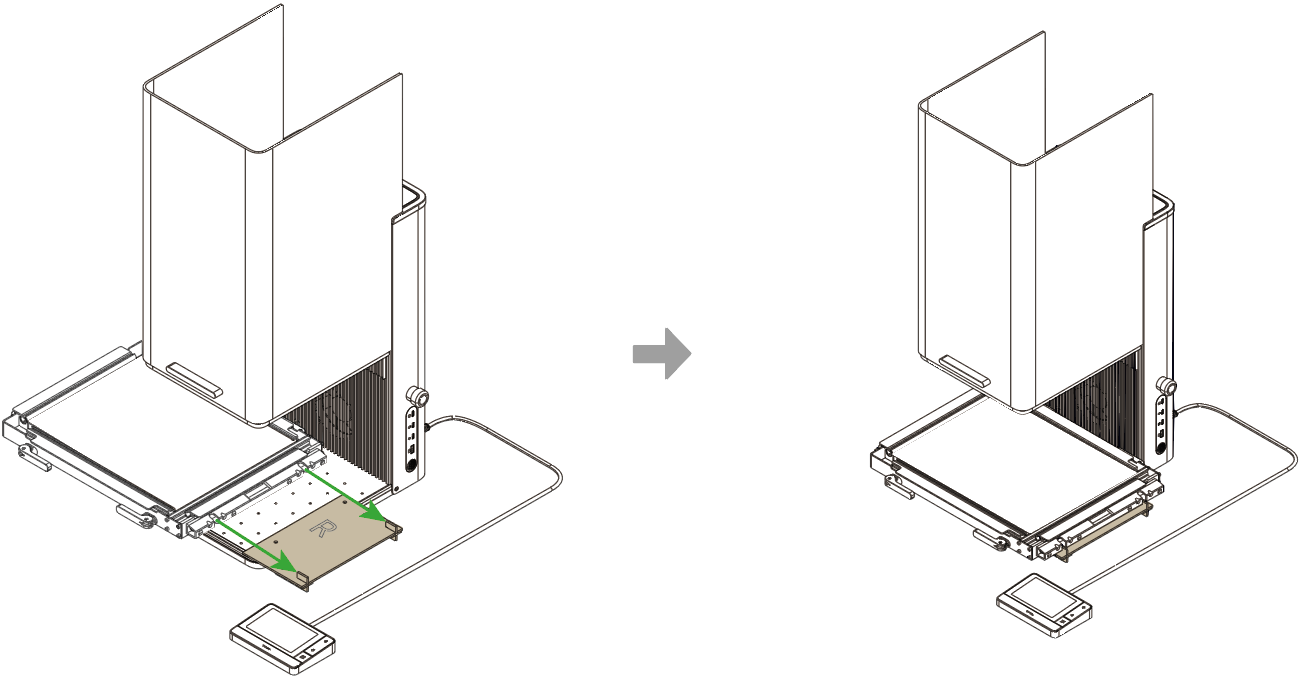
- Place the screen frame onto the baseplate, sliding it snugly into the wooden fixtures you installed.
Note: Ensure the fixing pieces are screwed down tightly before inserting the frame to prevent movement during engraving.
Part 3: Software setup in xTool Studio
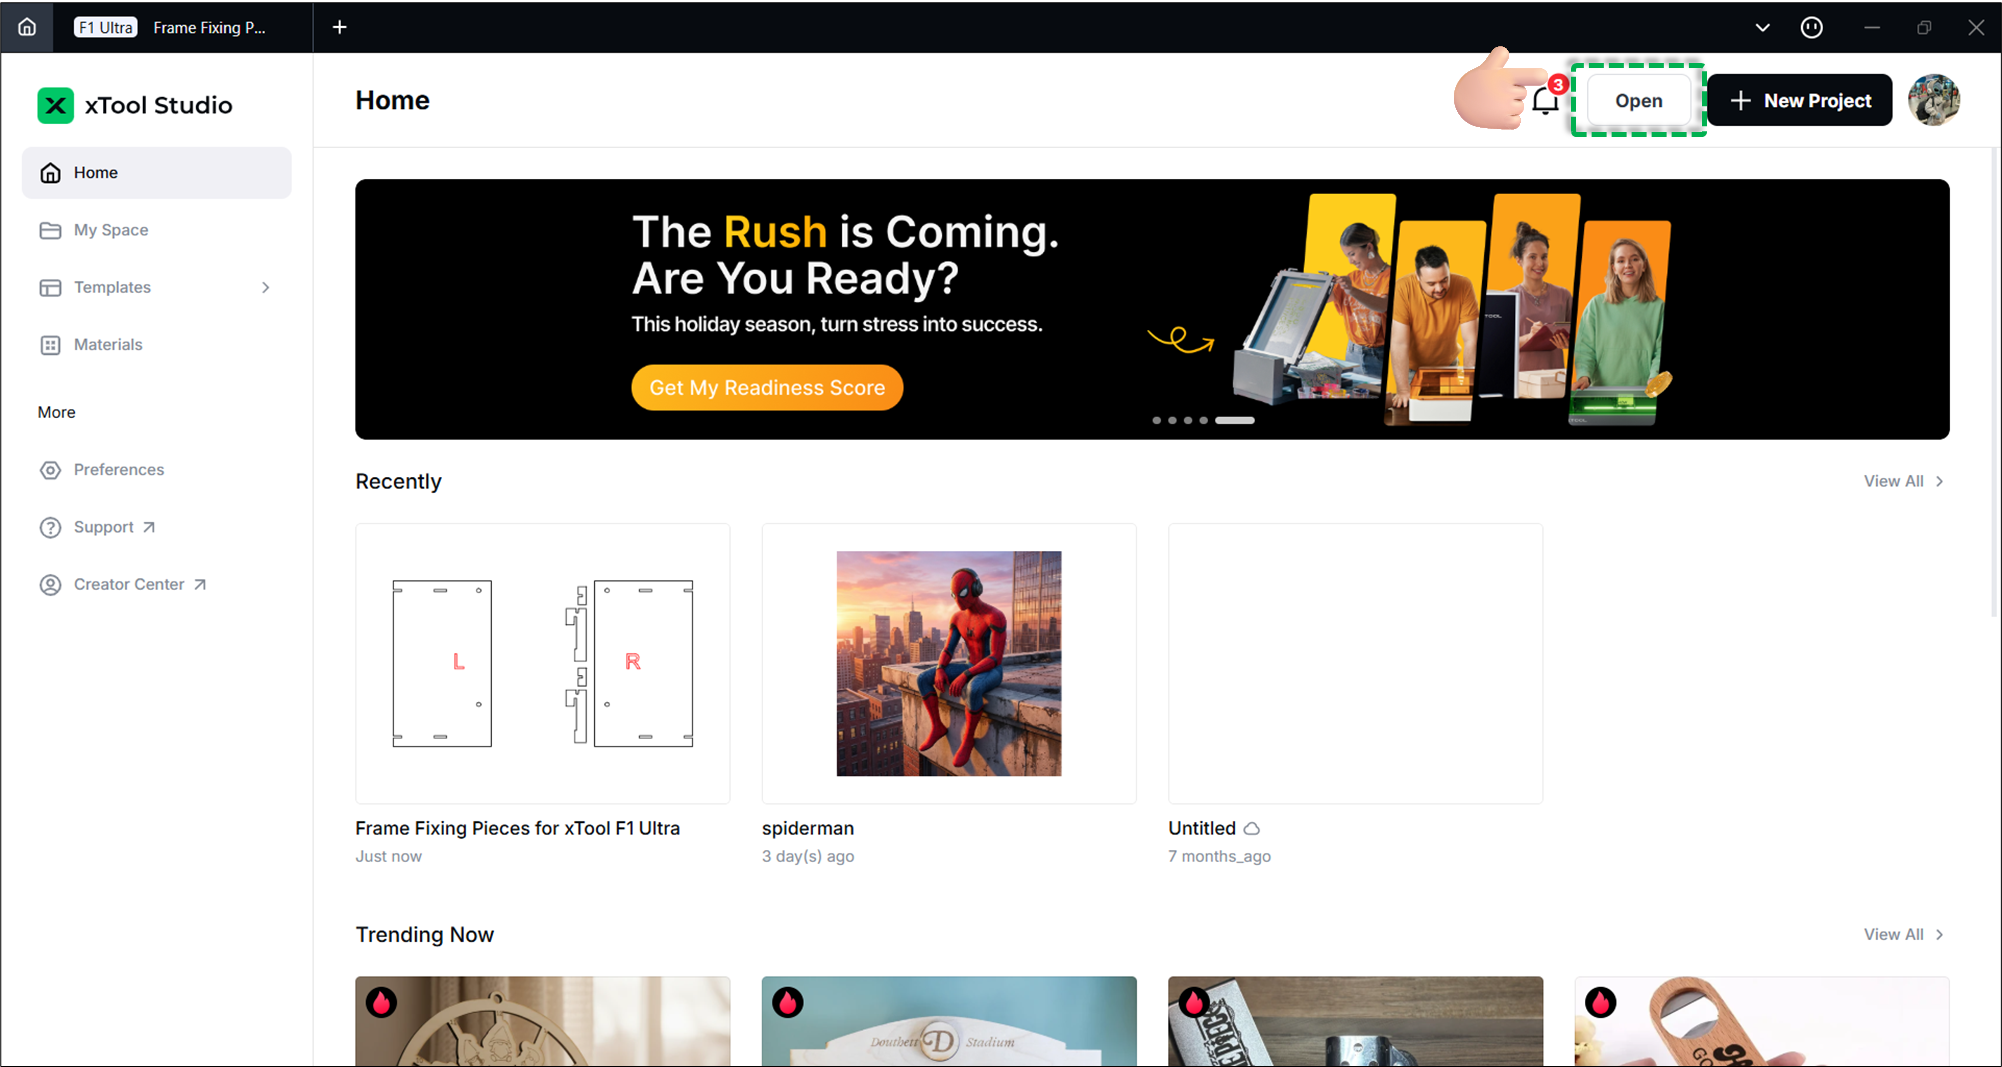
(1) Open or create a project
- Open an existing file: Click Open on the home screen and select your
.xt file. - Note: Always verify the machine model and material thickness settings when opening an existing file.
- Note: Always verify the machine model and material thickness settings when opening an existing file.
- Create new: Click + New project.

(2) Select mode and material
- At the top of the software, click the processing mode and select Screen preparation.

- Click User-defined material in the top-right corner.
- In the Select Materials window, click Screen printing and select your material before clicking Apply.
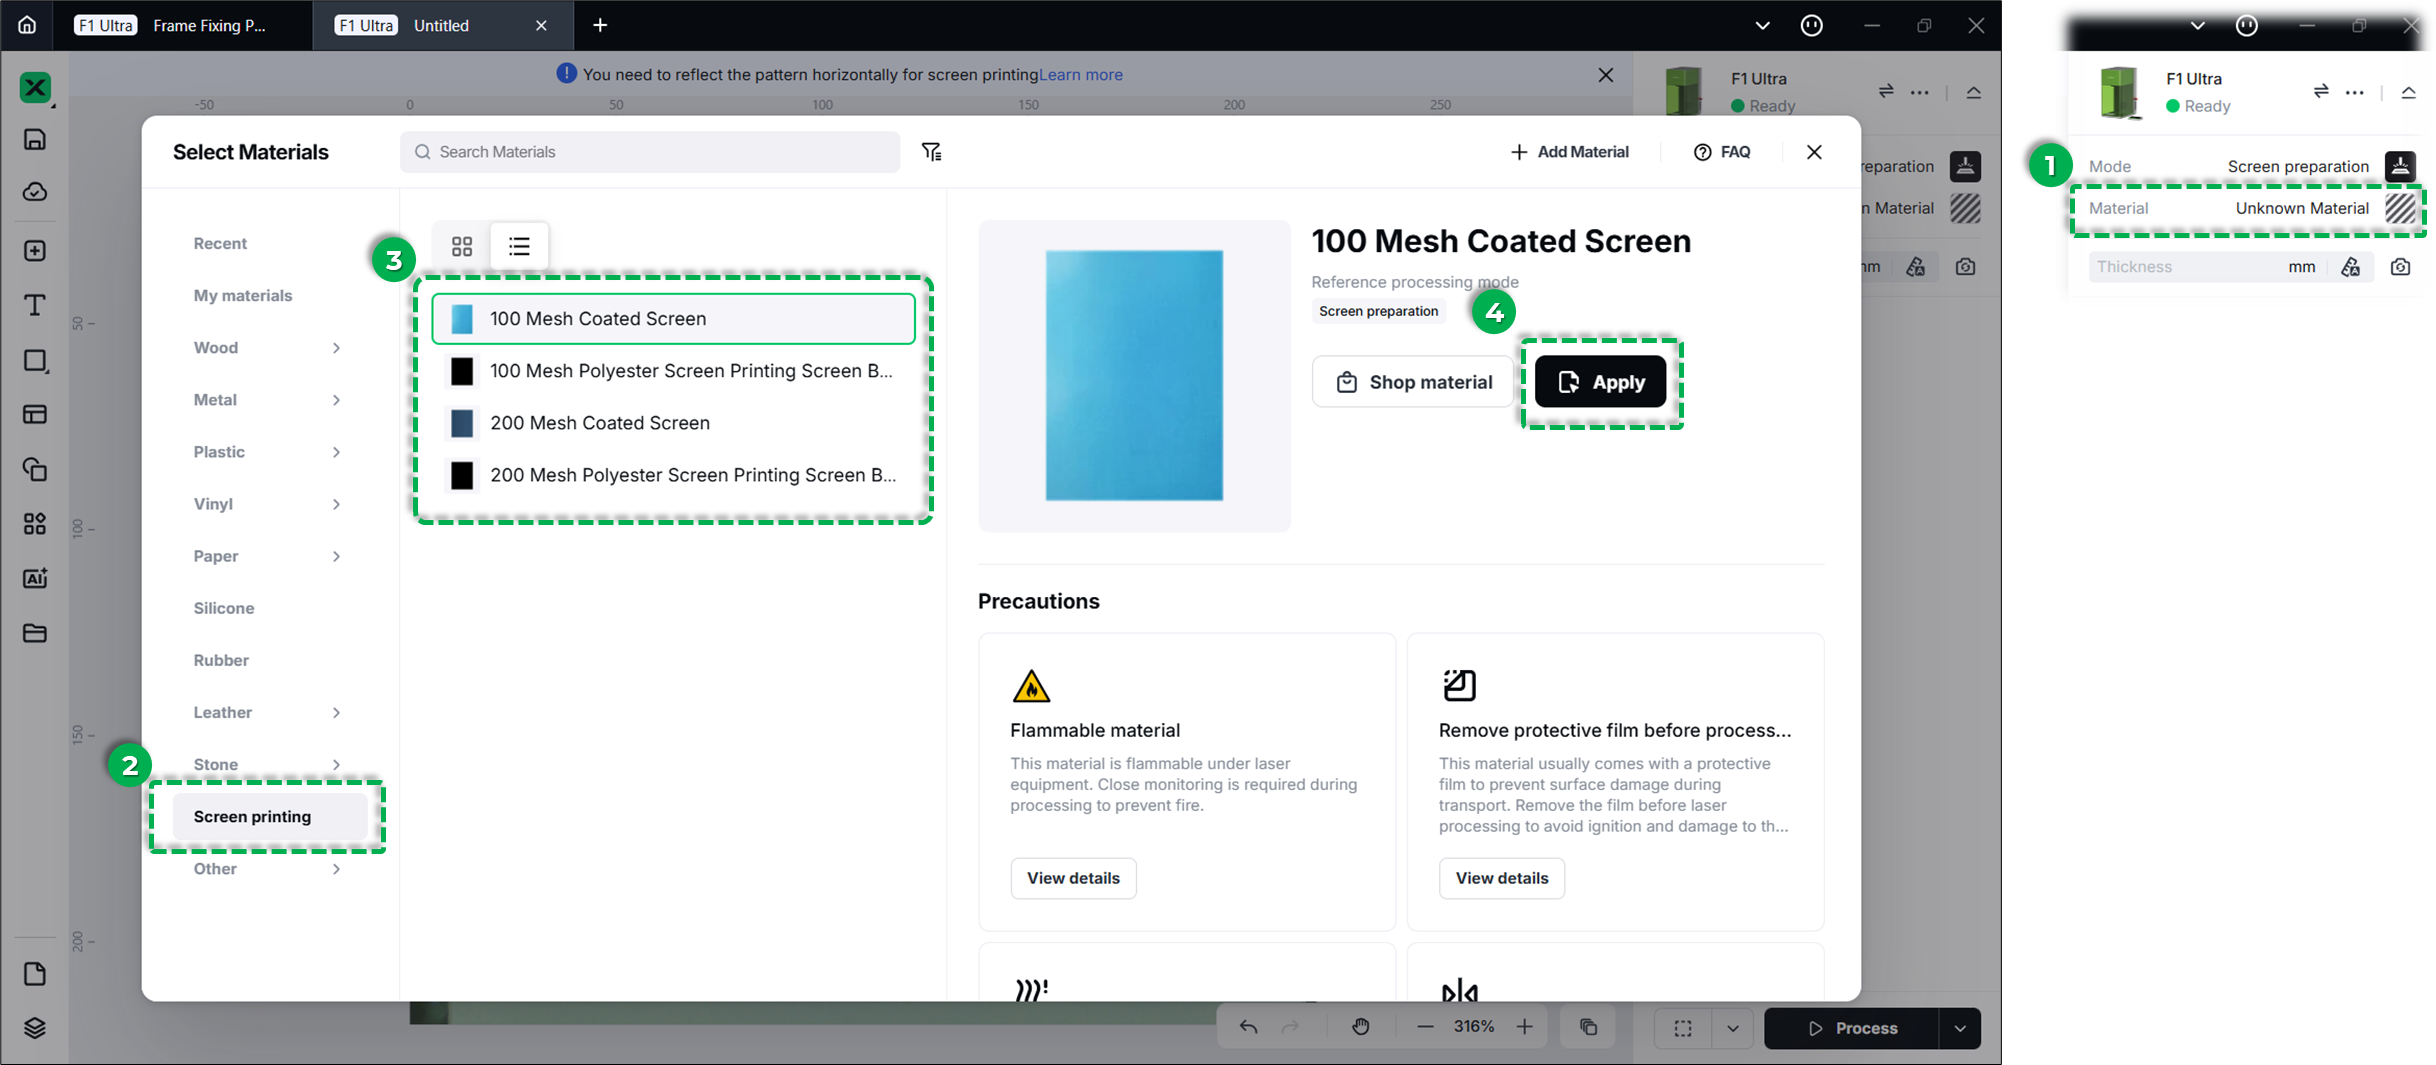
Note: xTool strongly recommends using official xTool coated screens. The software includes preset parameters optimized for these screens to guarantee the best engraving results.
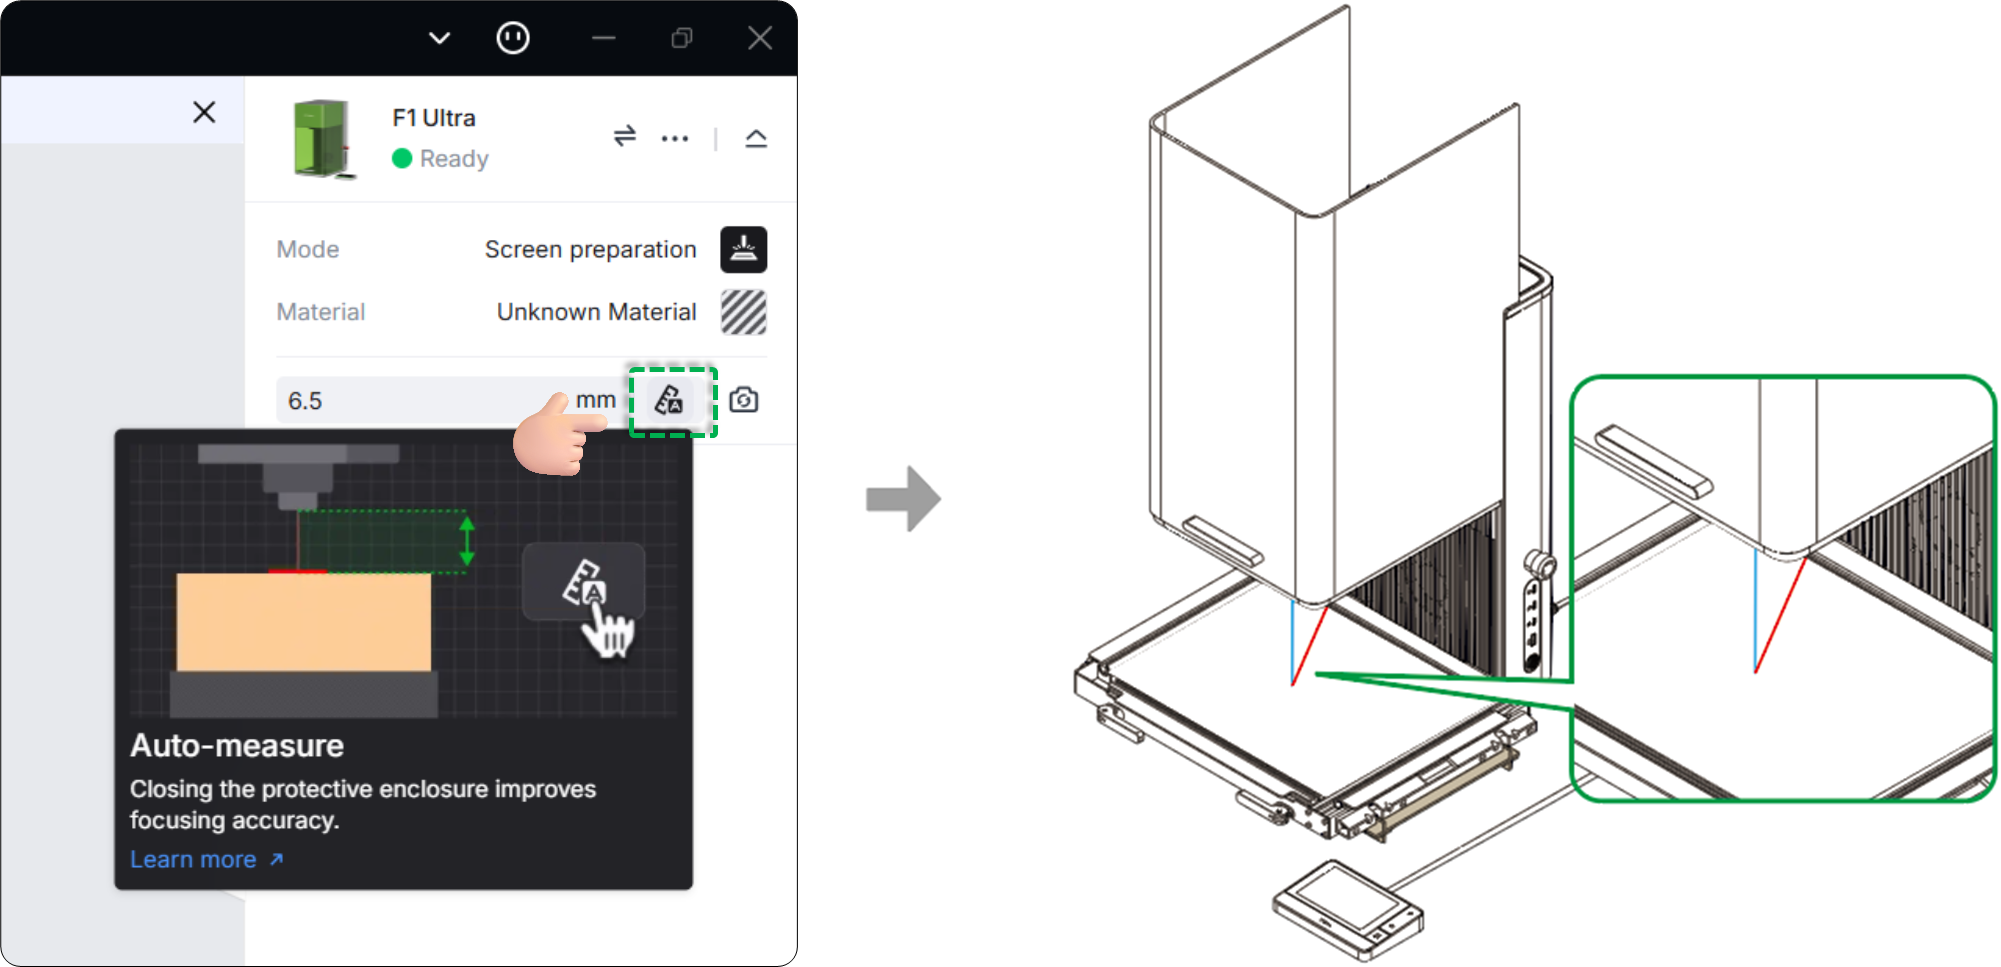
(3) Set laser focus
- Click the Auto-measure icon (ruler symbol) in the right corner.
- The machine will automatically measure the distance.
- Verify the focus: The red dot and blue dot on the material surface should overlap to form a single purple dot.
Note: If the dots overlap but the measured thickness seems incorrect, perform Z-axis homing (Calibration) and try again. For details about Z-axis homing and manual-focus, refer to Focus the Laser
(4) Design and layout
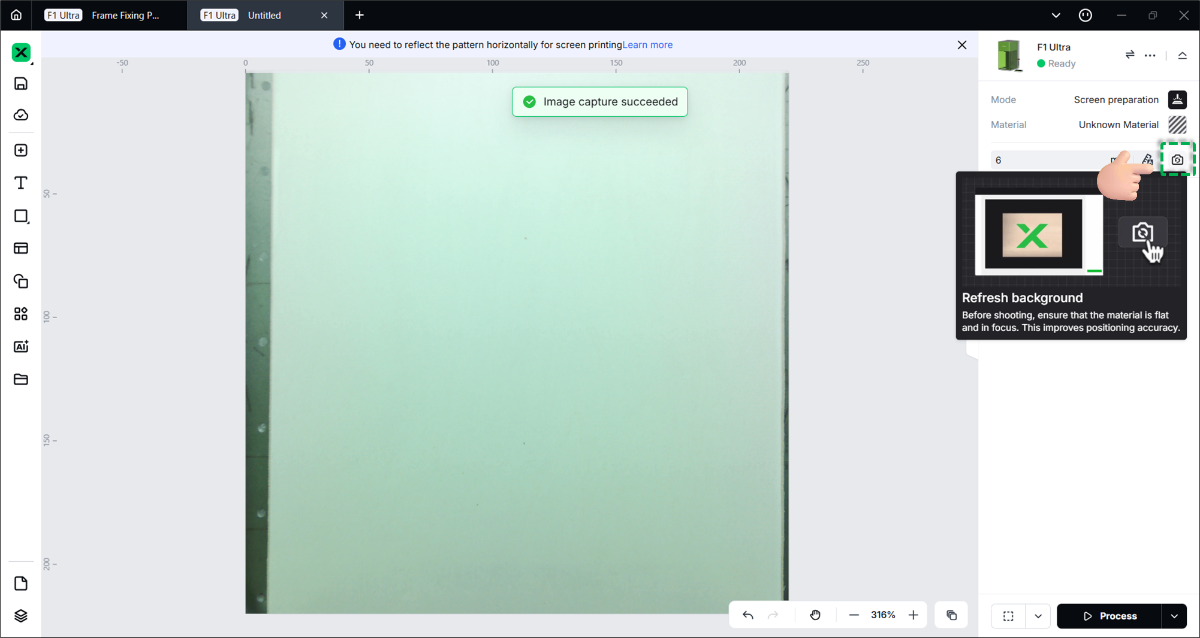
- Refresh background:
- Click the Refresh background (camera icon) on the right panel.
- The software will capture an image of the screen frame on the baseplate. Use this as a canvas to position your design accurately.
💡 Note: xTool Studio captures an image of the xTool F1 Ultra's processing area and uses it as the preview canvas background. You can position your processing objects directly on this background for accurate alignment.
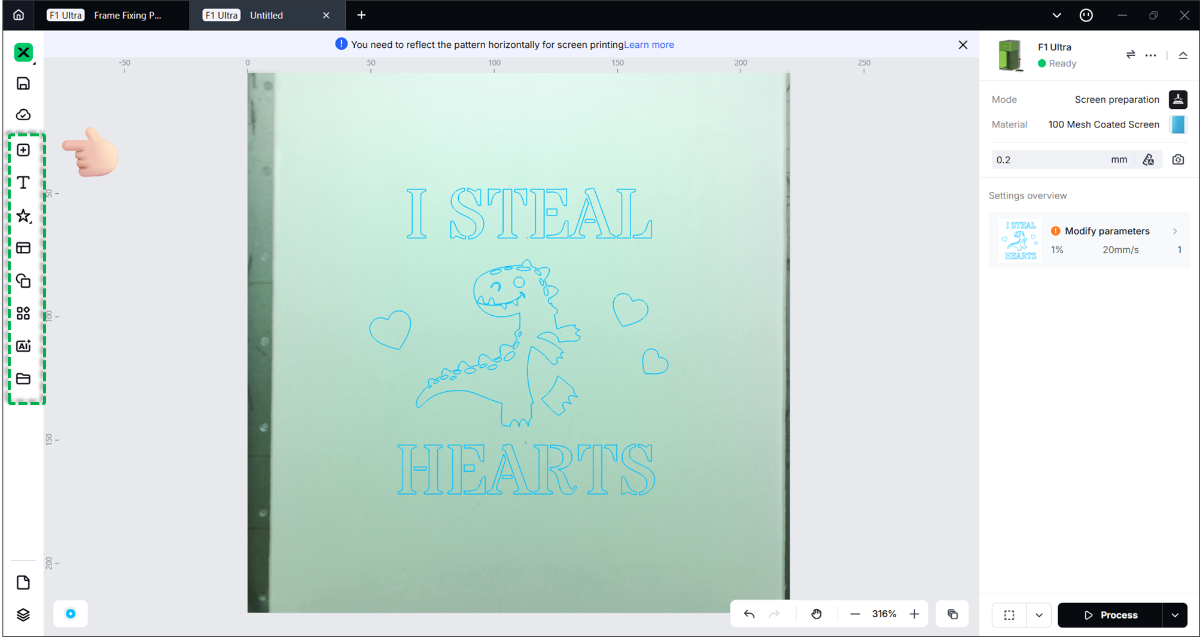
- Import/Create design:
- Use the left toolbar to import images, add text, or create vector shapes.
- Ensure all design elements are placed within the printable area of the mesh.
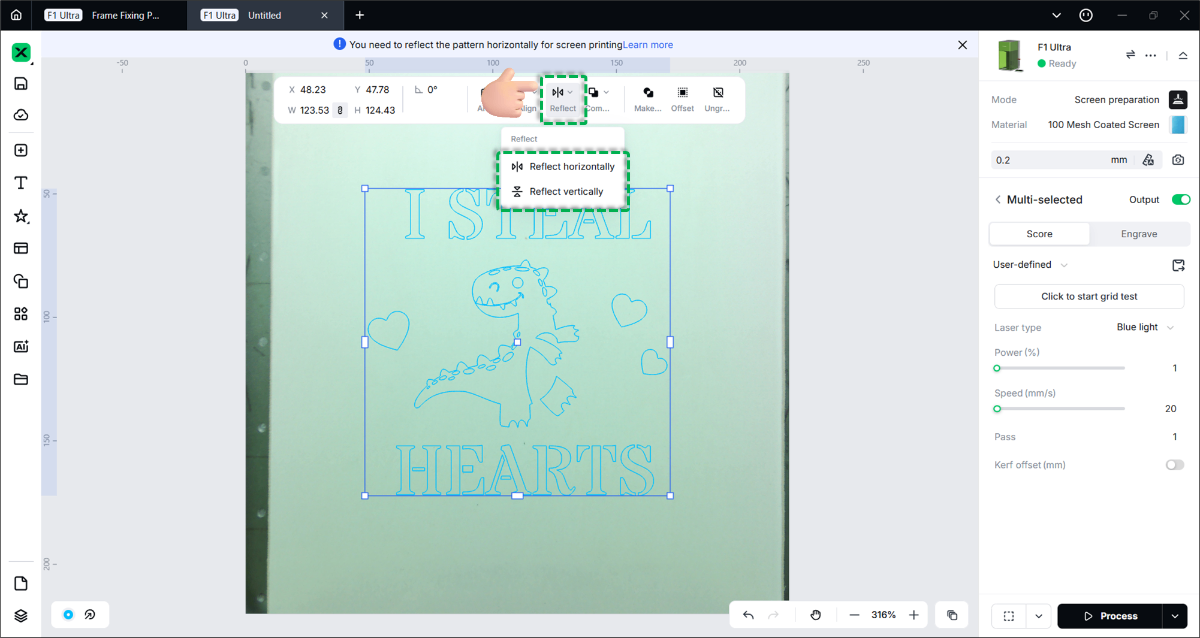
- Reflect (Mirror) the design:
- Crucial Step: Since you are engraving on the back of the screen, you must flip the design.
- Select your design and use the Reflect Horizontally tool in the top toolbar.
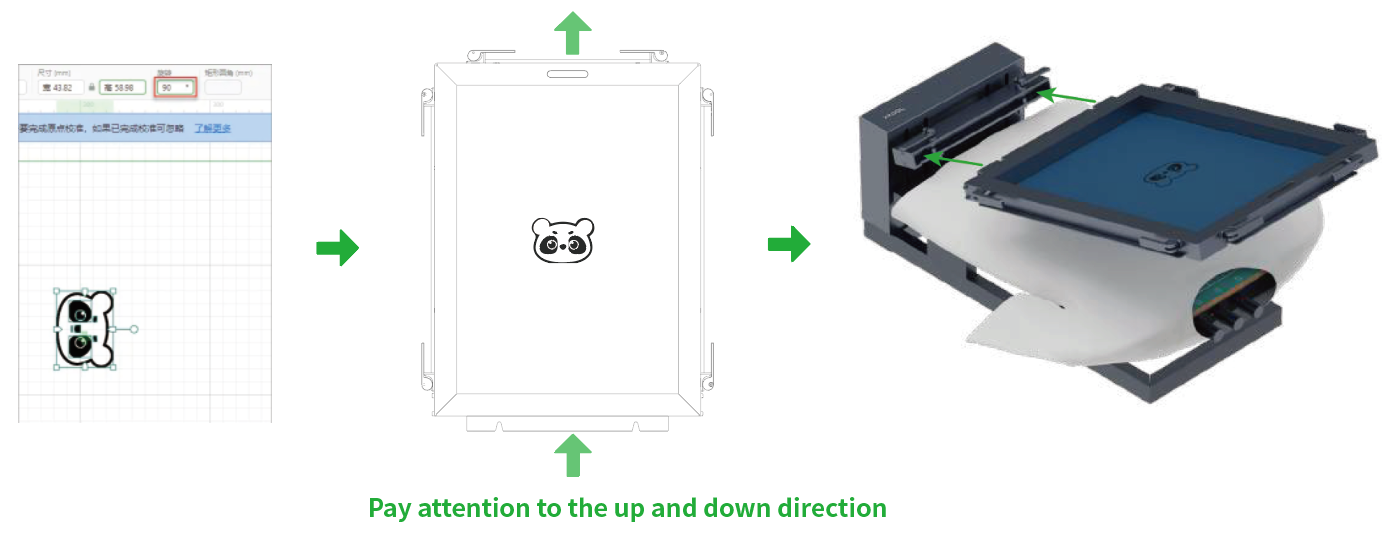
- Rotate (If necessary):
- Adjust the orientation of your design based on how you will print on the final object (e.g., a T-shirt).
- Example: If sliding a T-shirt onto the platen requires a specific orientation, rotate your design 90° accordingly.
Part 4: Framing & processing
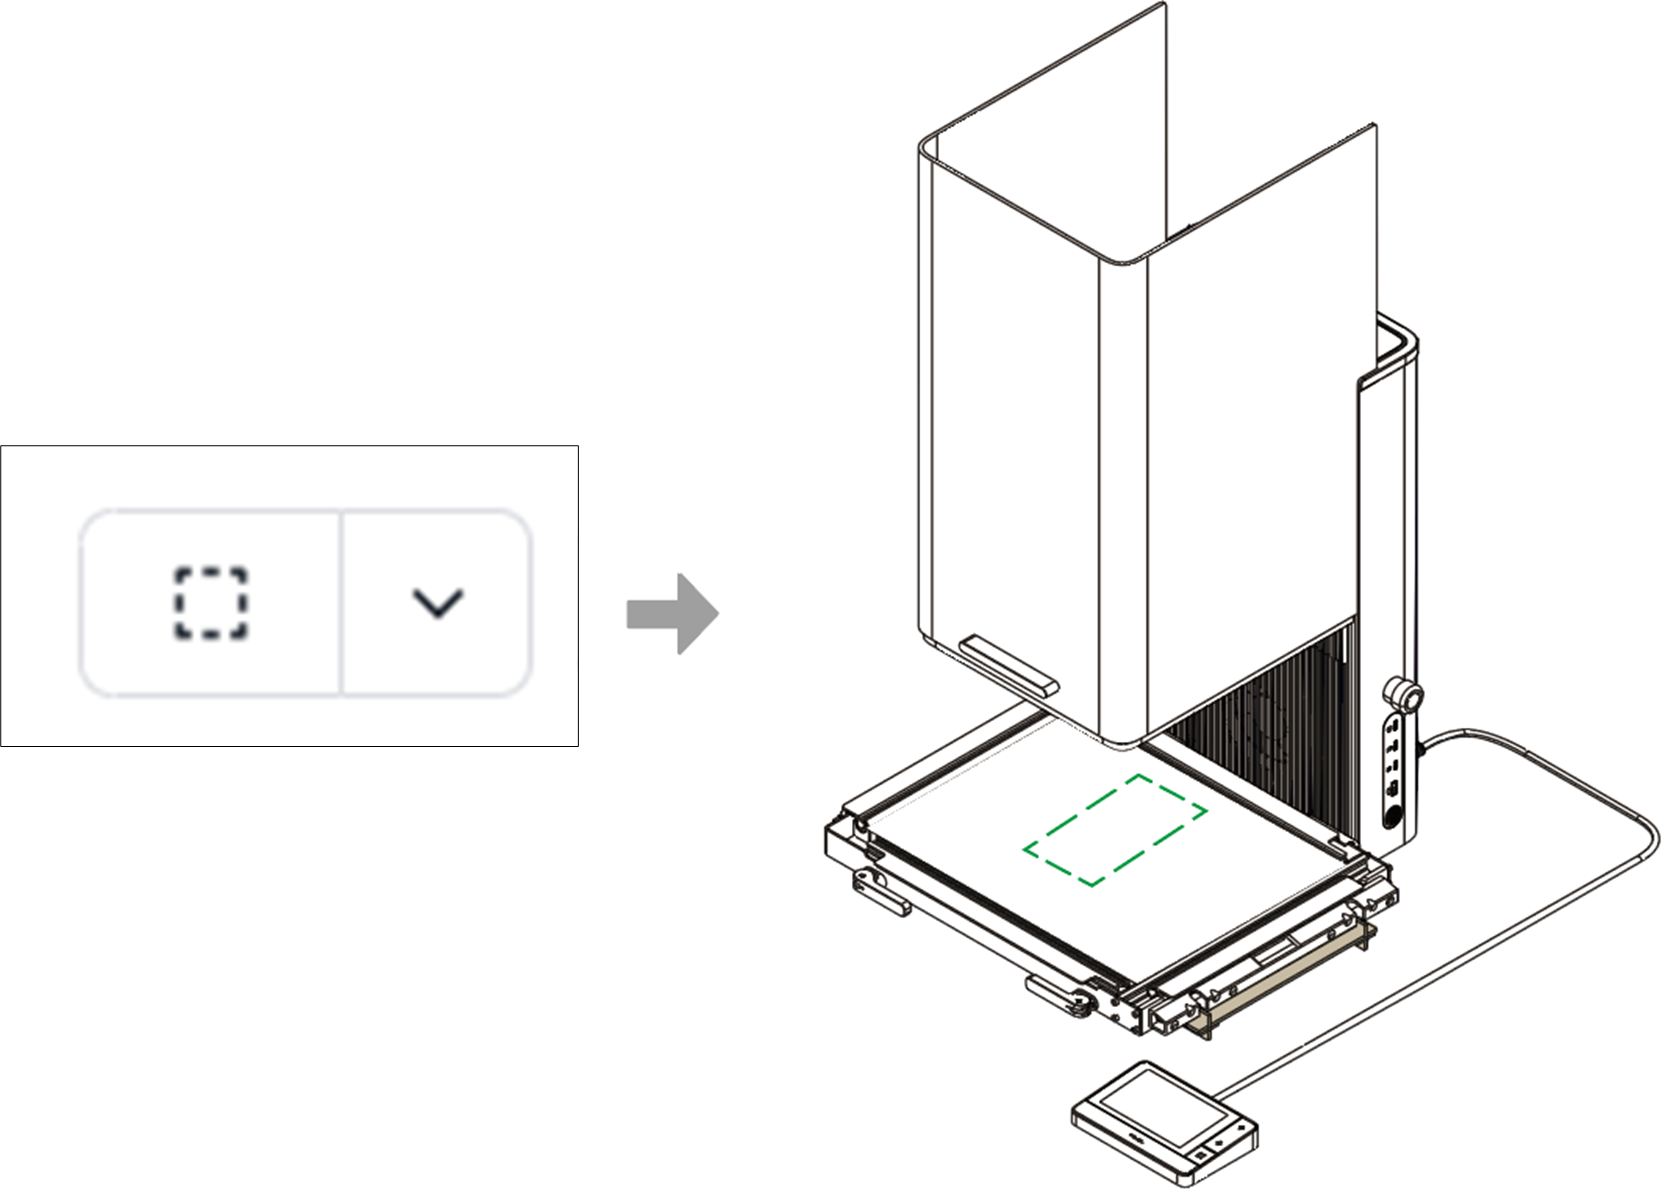
(1) Framing (Preview area)
Framing projects a low-power light to show where the design will be engraved.
- Click Framing in the software.
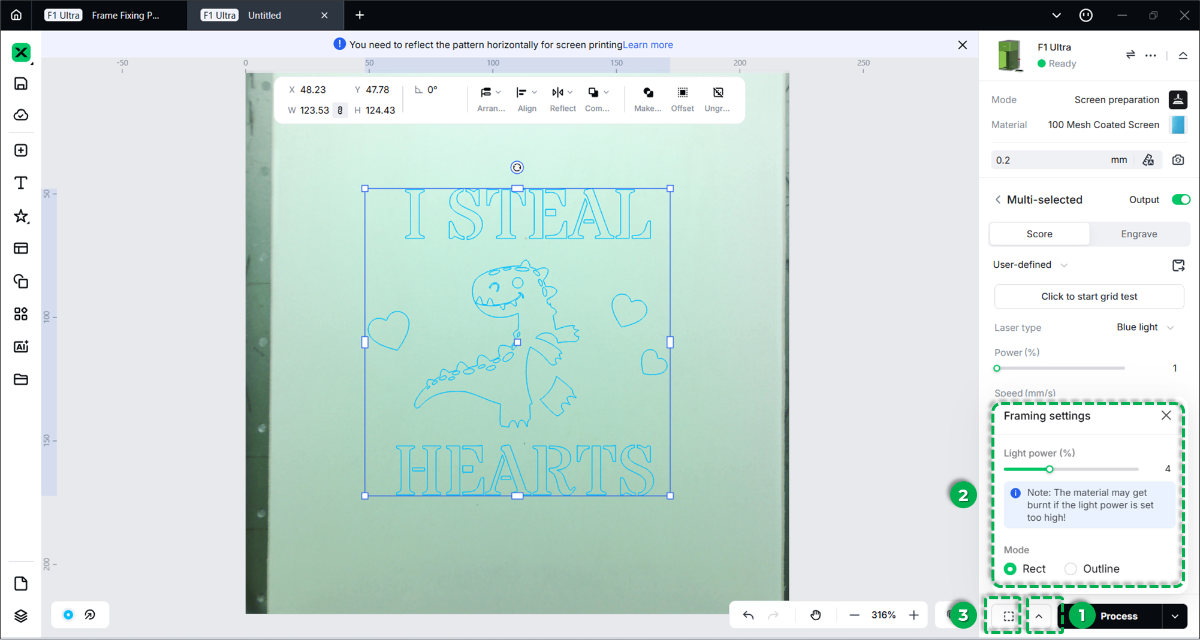
- Adjust Settings:
- Light Power: Increasing power makes the frame more visible, but excessive power or prolonged framing may scorch the screen coating.
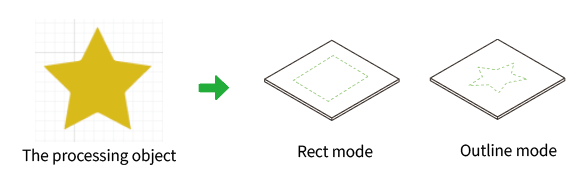
- Mode: Choose Rect (rectangular border) or Outline (actual shape contour).
- Check Position:
- The protective enclosure filters laser light, which may make the framing light appear dim.
- Tip: You may slightly lift the enclosure to see the framing more clearly, but close it immediately to ensure safety.
- Click Stop Framing when satisfied. If the position is incorrect, adjust the design in the software or the material on the baseplate.
(2) Start processing
- Click Process in the bottom-right corner.
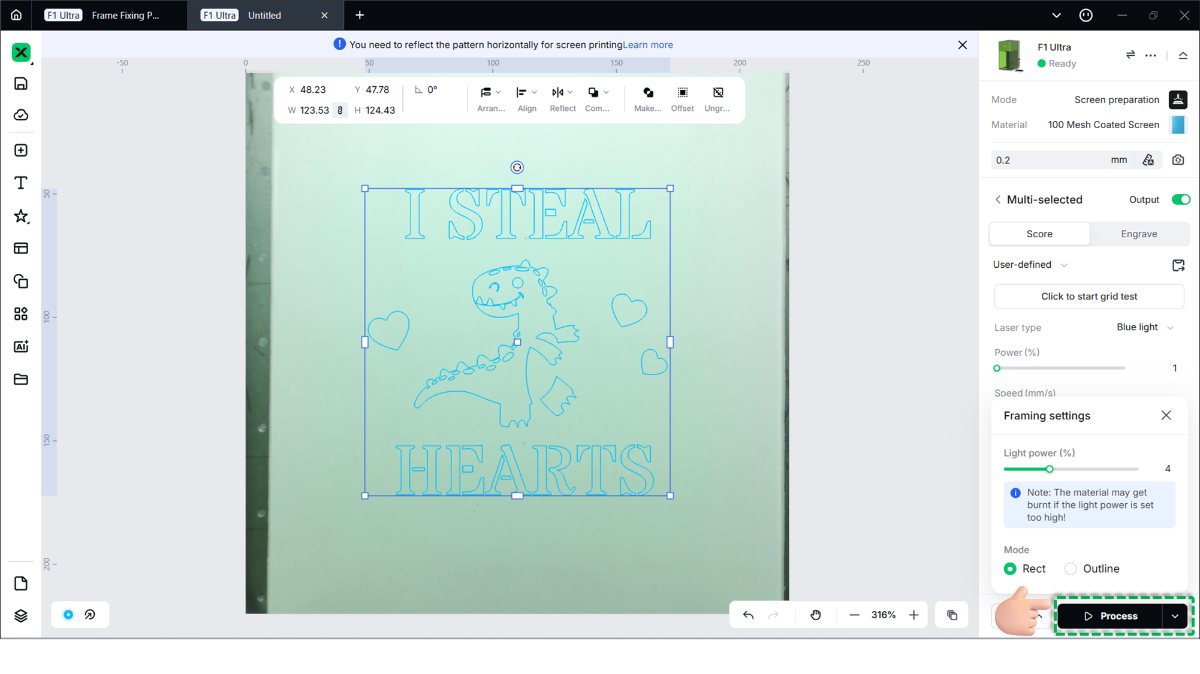
- Close the protective enclosure.
- Click Start in the bottom-right corner.
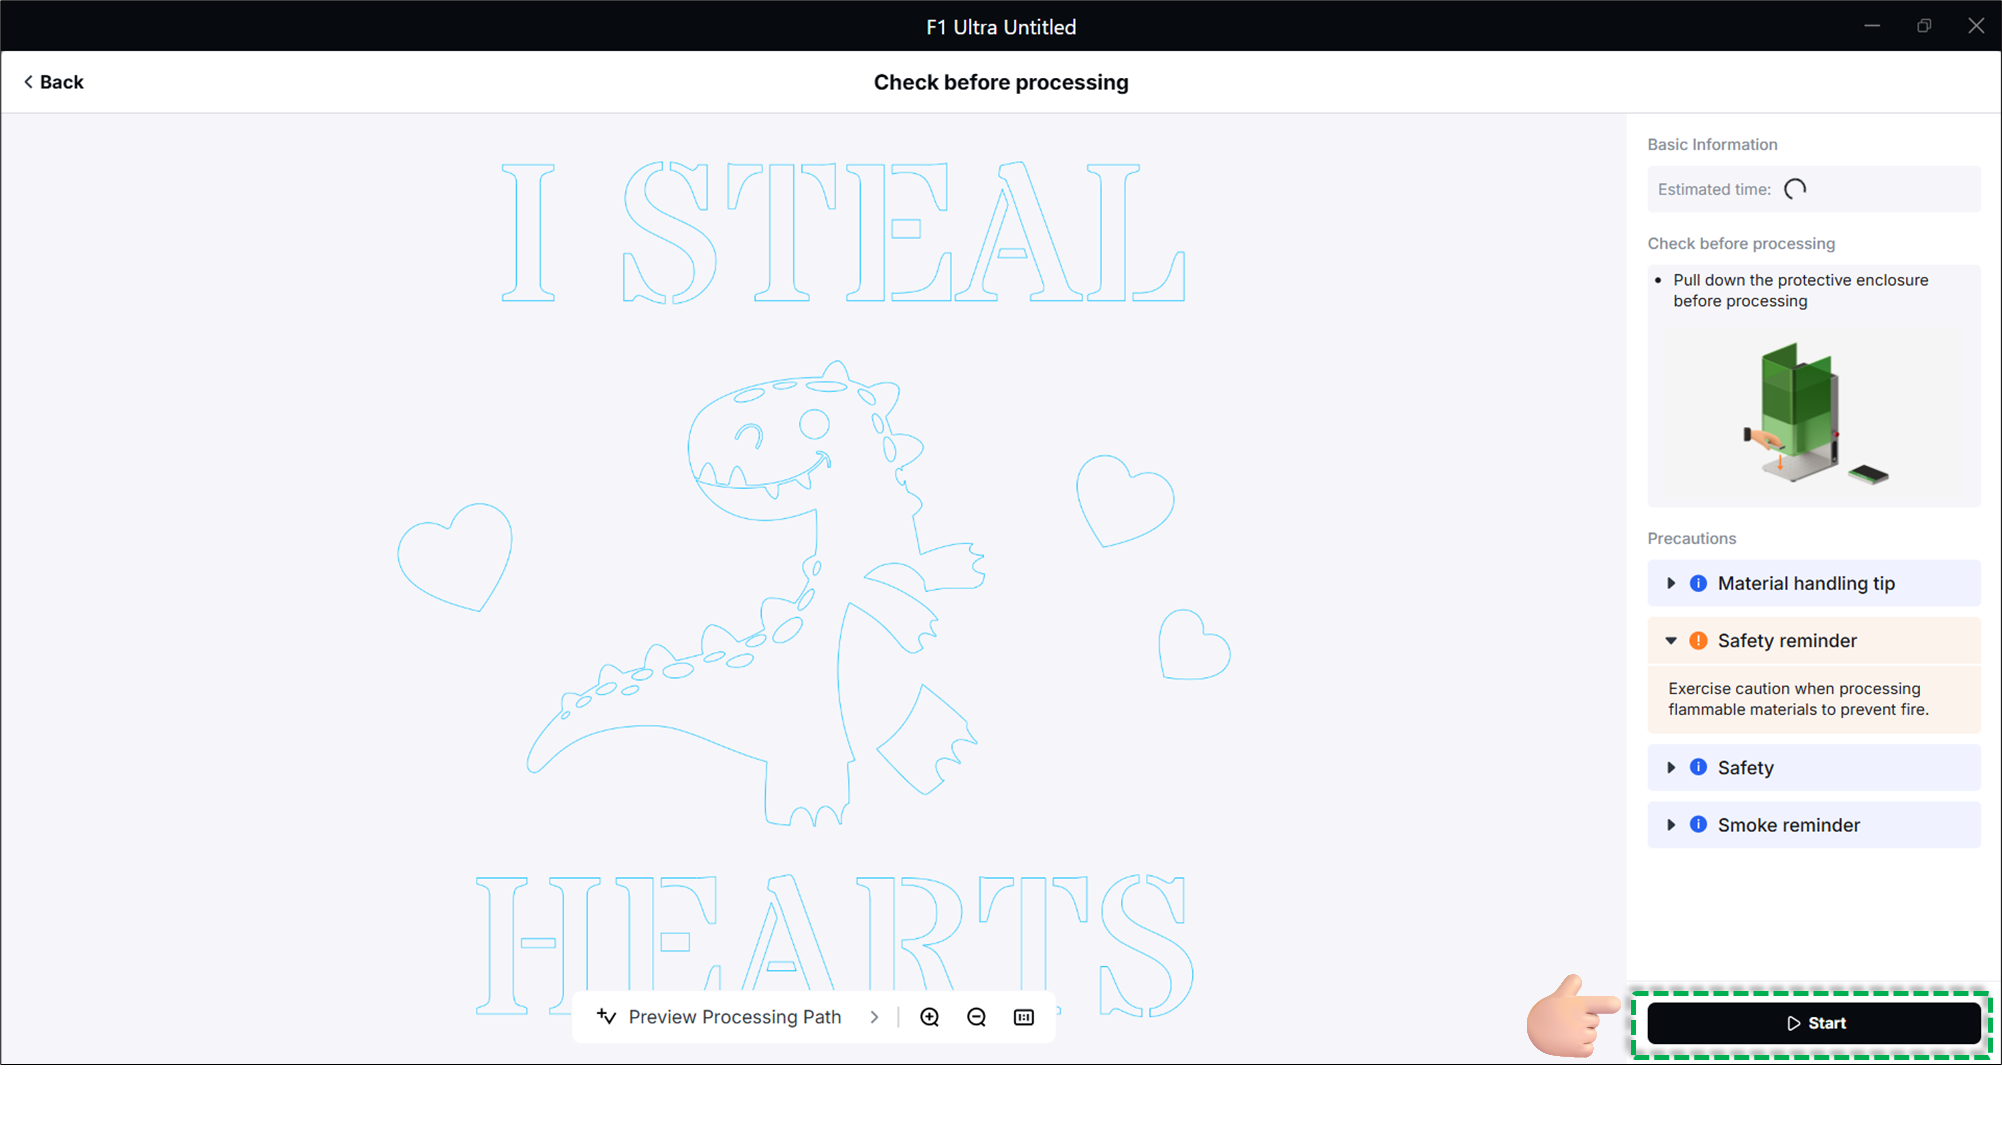
- When the software displays "Ready," press the Start/Stop button on the touchscreen controller to begin engraving.
Safety Warning: During laser processing, always keep the protective enclosure closed. If operating with the enclosure open (Class 4 mode), you must wear safety goggles that shield against 455 nm and 1064 nm wavelengths.
- Wait for the processing to finish, then click Finish to complete the operation. 🎉
