This passage provides step-by-step instructions for upgrading the firmware for xTool S1. If you want to uprade the firmware for xTool S1 or have trouble during the upgrade, please refer to this guide for advice.
Important things to know
- For xTool S1, the firmwares of the main control board, the laser module, and the Wi-Fi module are upgradable.
- It is recommmended to connect your device and xTool Studio using the original USB cable that comes with xTool S1 for the upgrade. During the upgrade, ensure that the power supply, the Internet, and the USB connection are secured.
- You can upgrade the firmware through the device setting or developer mode. If you use the developer mode, you can download the firmware files to your local disk, and then upgrade offline.
- Make sure your xTool Studio is up-to-date before the firmware upgrade. Restart the device and try again if there is an exception during the upgrade.
Note: The device doesn't need to be recognized in the software for the upgrade, as long as the USB remains connected.
Upgrade through the device settings
Upgrade the firmware
(1) Make sure the computer is connected to the Internet.
(2) Open xTool Studio and connect it to xTool S1. For more information about how to connect xTool S1 and xTool Studio, see Connect and Set Up xTool S1 with xTool Studio.
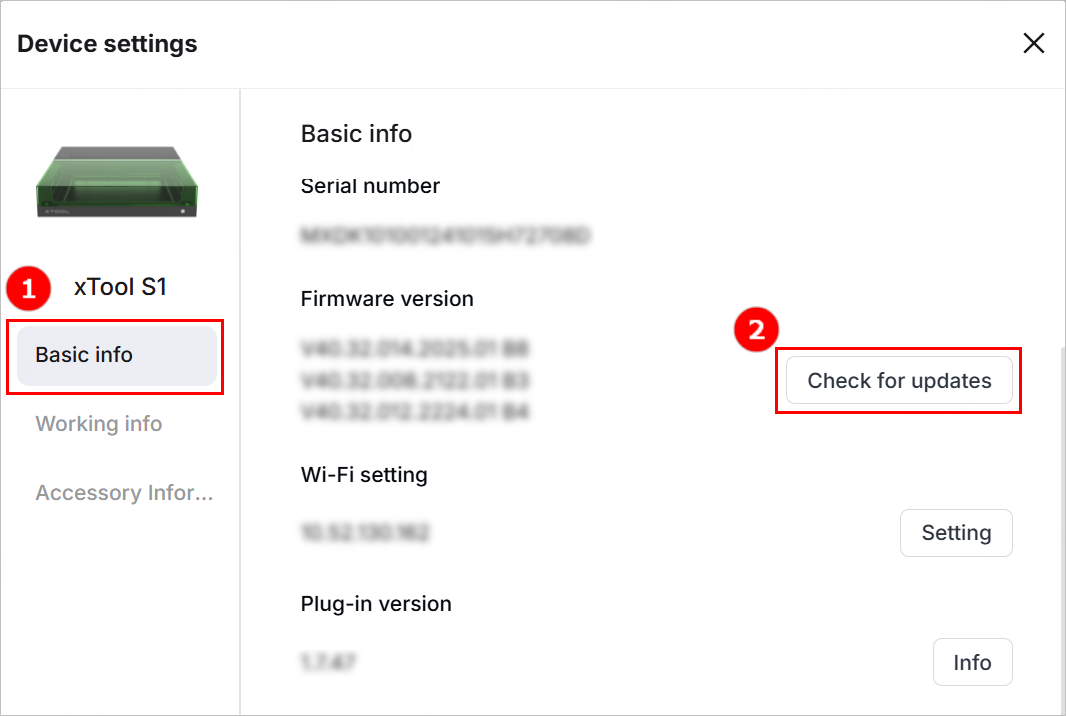
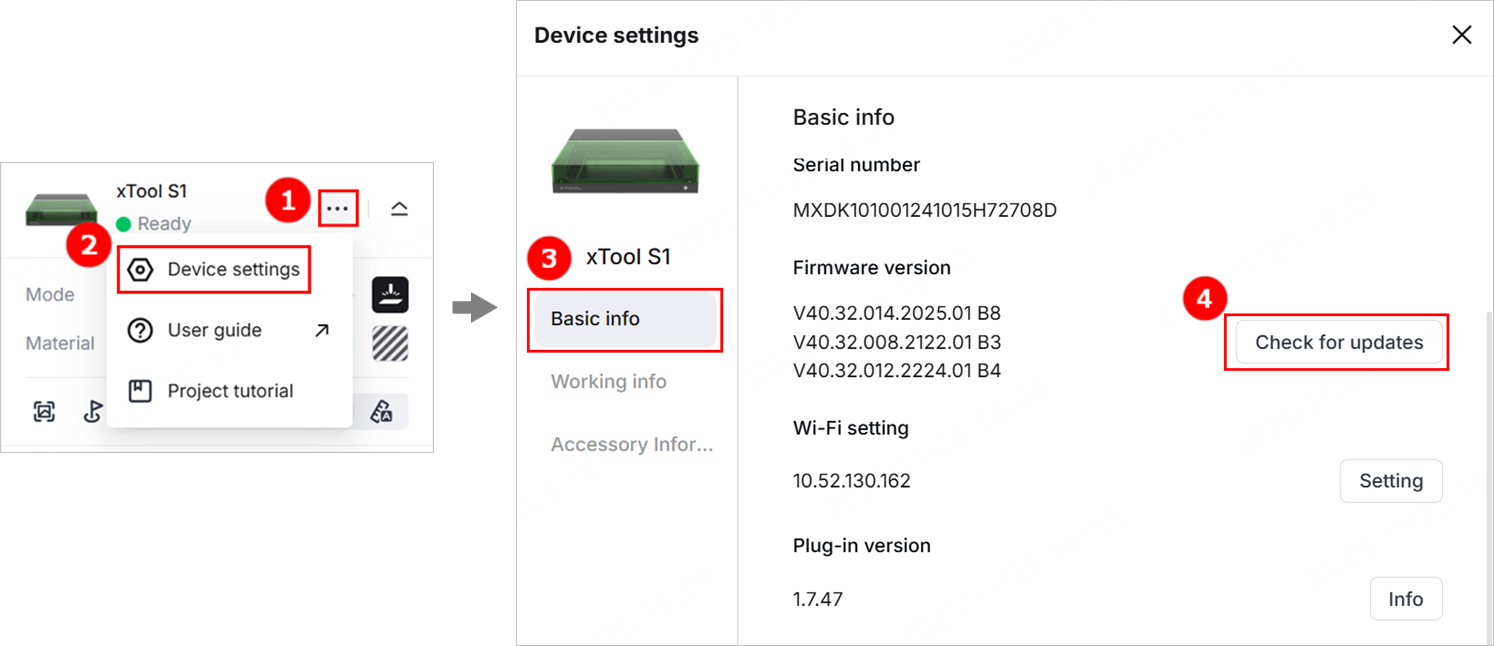
(3) In the top-right corner of the software, click the icon > Device settings to enter the device settings page.
(4) In the Basic info tab, click Check for updates for Firmware version. If your firmware is not up-to-date, an upgrade prompt will show.
(5) Click Update and wait until the firmware is downloaded and upgraded.
Note: During the firmware upgrade of the main control board, a "Device disconnected" message pops up in the software, and the light inside the device is off. For the Wi-Fi module and the laser module, the light stays on. During the firmware upgrade, the start button indicator blinks purple, and then stays solid white.
(6) When the upgrade is complete, the message Firmware update succeeded pops up and the laser module moves to the upper left home position.
How to deal with firmware upgrade failure
During the upgrade, if the message Firmware update failed pops up, follow the steps in this part for troubleshooting.
1. Check the firmware version
The software may prompt you that the firmware update fails, even though the update actually succeeds. Therefore, check whether the current firmware version is the latest before trobleshooting. If the firmware version is the latest, ignore the failure prompt.
To view the firmware version, go to Device settings > Basic info > Check for updates.
2. Check the device status
(1) Make sure you don't disconnect the USB connection or power off the machine during the upgrade.
(2) Restart the device and try again.
Upgrade through the developer mode
For this method, the software doesn't have to recognize the device for the firmware upgrade. Simply connect the device to the computer using the original USB cable that comes with xTool S1.
Video guide
Upgrade the firmware
(1) Click the link below to download the desired firmware file.
- Firmware for the main control board: xtool_d2_gd470_V40.32.014.2025.01.V01 B8.bin
- Firmware for the Wi-Fi module: xtool_d2_esp32_s3_app_V40.32.012.2224.01.V01_B4.bin
- Firmware for the laser module: V40.32.009.2122.01.V01 B1.bin
(2) Open xTool Studio and click  > Settings to enter the xTool Studio settings page.
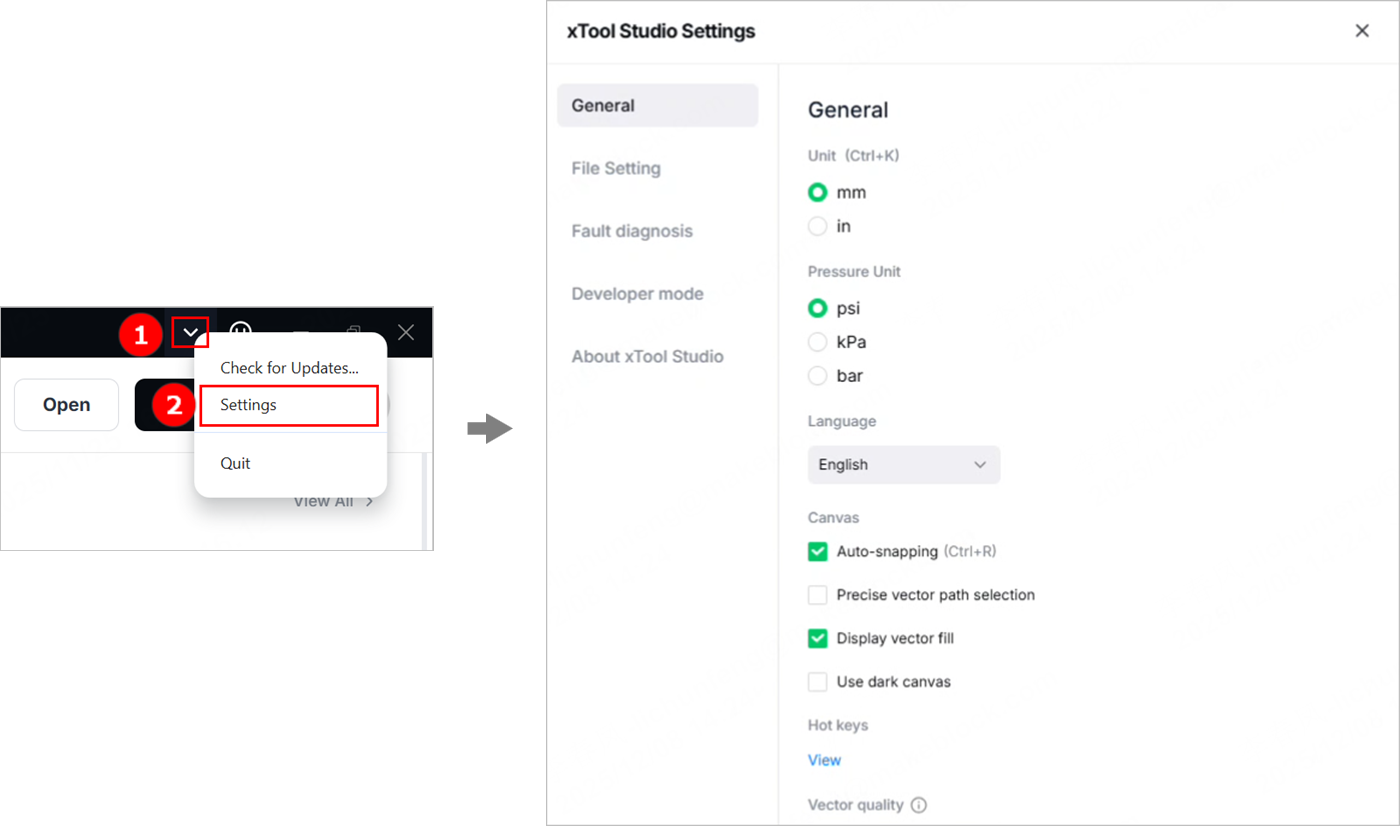
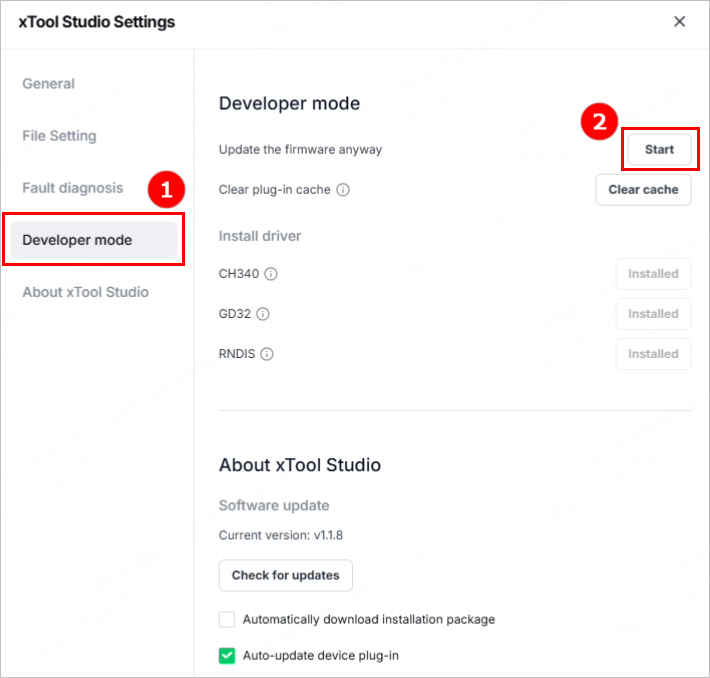
(3) Click Developer mode > Start.
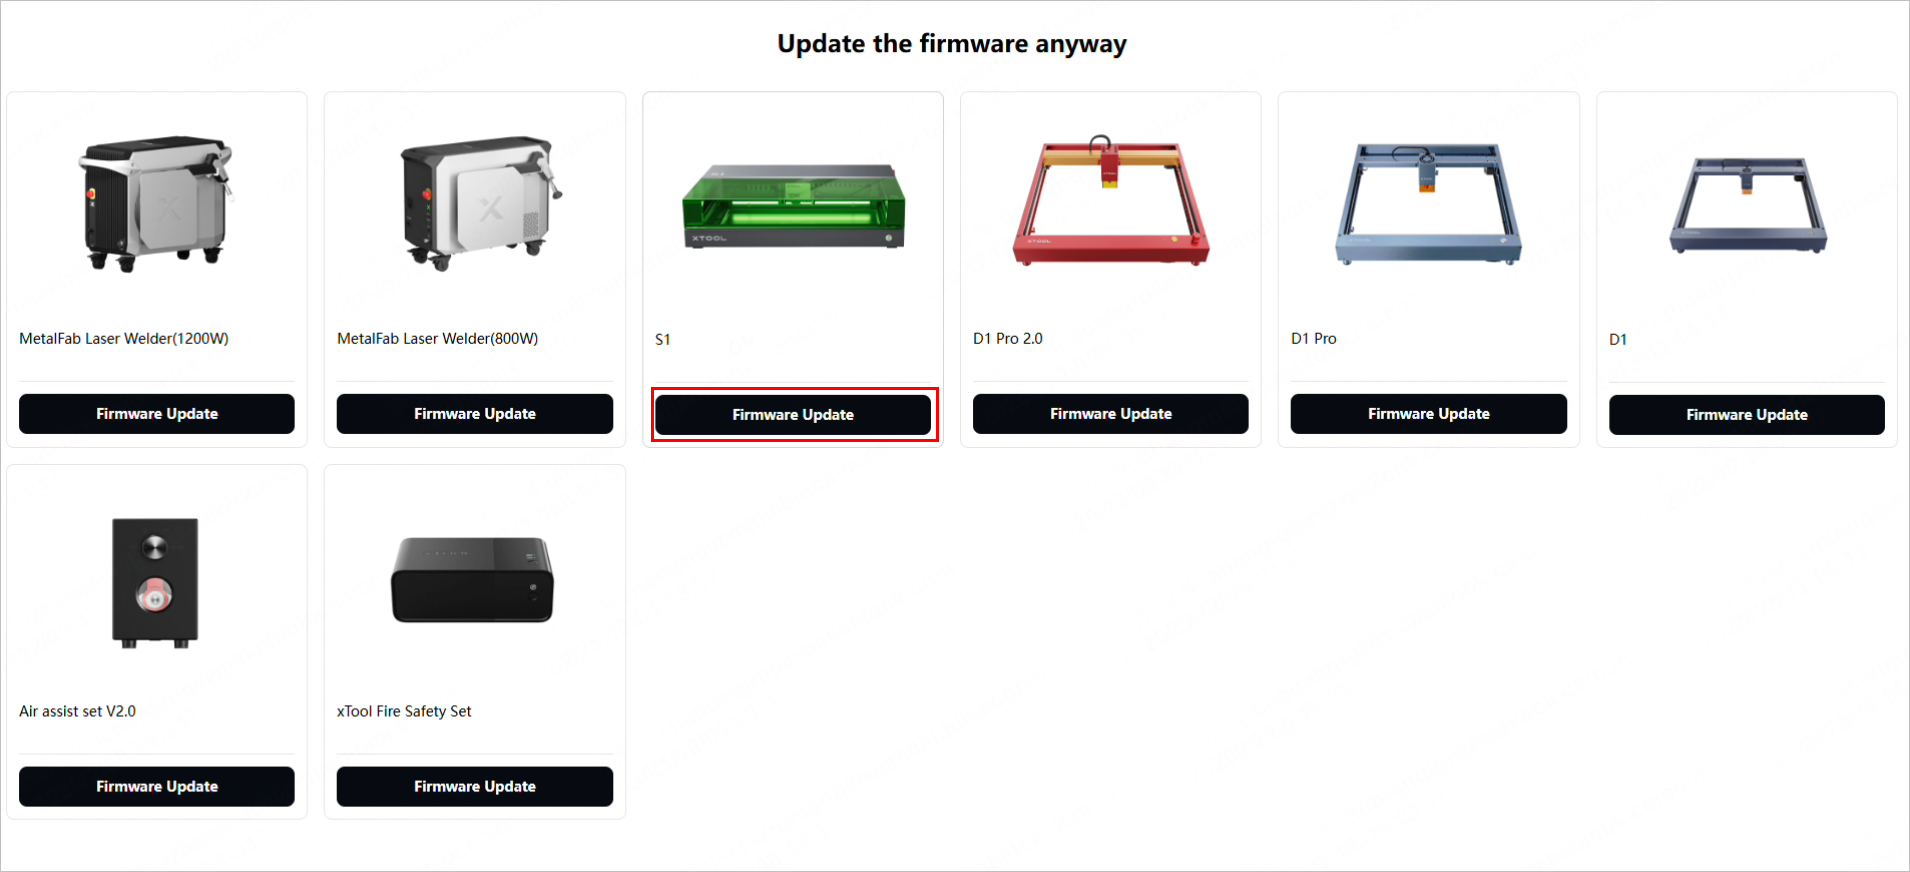
(4) In the dialog box that is displayed, click Firmware Update for S1.
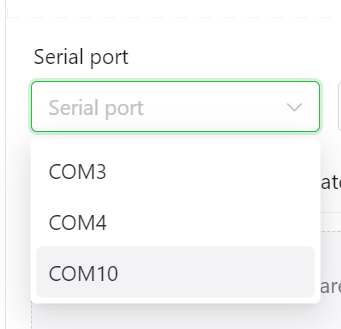
(5) Select the serial port based on the USB driver information.

- For Windows.
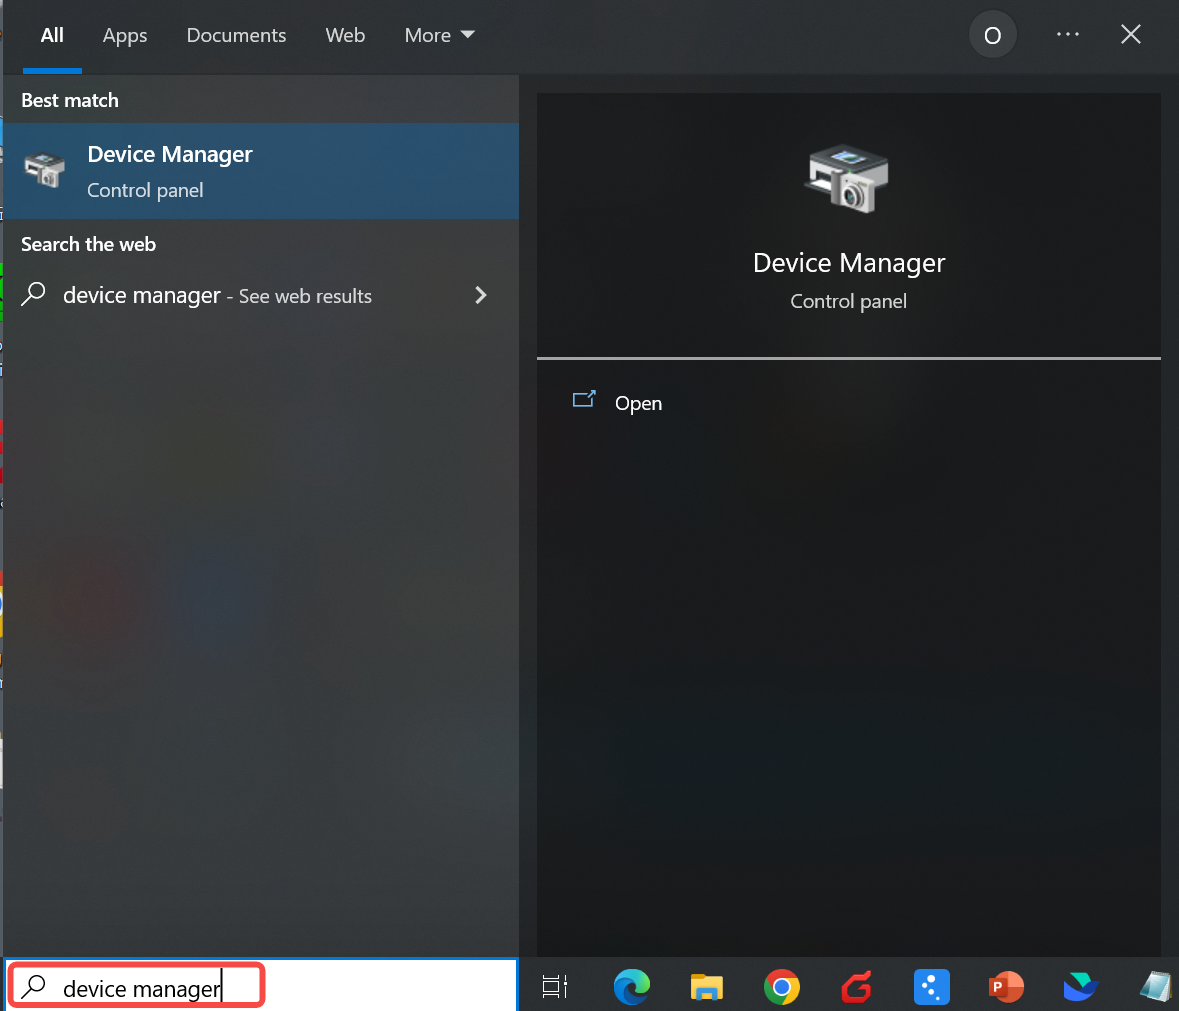
- In the search box on the taskbar, type device manager, then select from the menu.
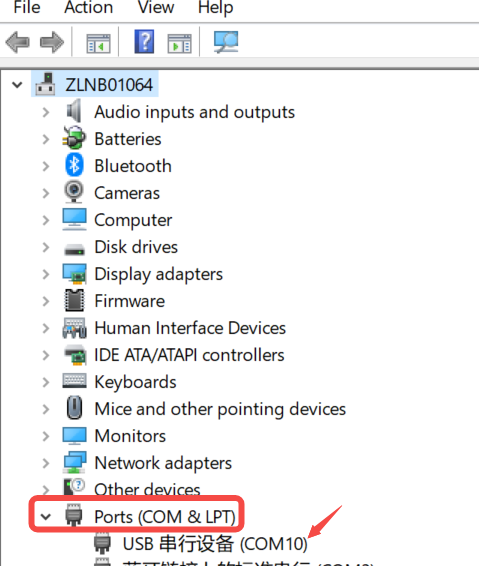
- In the device manager window, find the COM port number under Ports (COM & LPT).
- Here we can see COM 10. Then you can select COM 10 as your serial port.
|
|
|
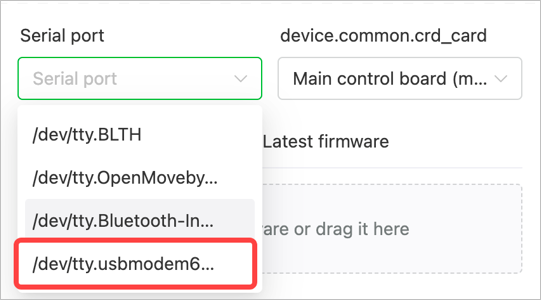
- For macOS:
Select from the Serial port drop-down menu: /dev/tty.usbmodem6D69CAF714351
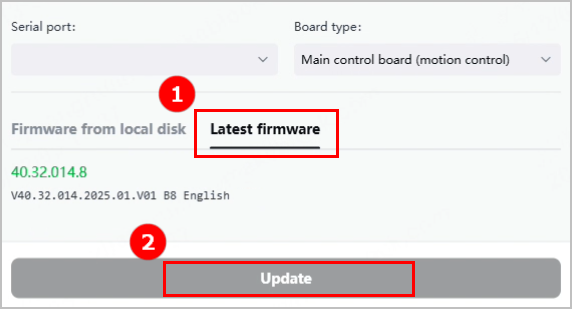
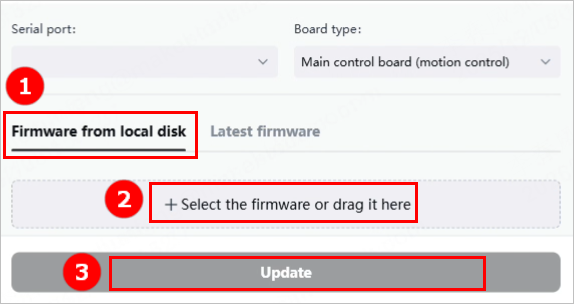
(6) Select the board type you need to upgrade the firmware for.

(7) Update the firmware using one of the following methods.
- Click Latest firmware > Update. The software will download the firmware from the server and complete the upgrade automatically.
- In the Firmware from local disk tab, upload the firmware file downloaded in step (1) and click Update.
Note: If you need to roll back to a previous firmware or try a beta version, update the firmware in this way.
Note: Make sure the firmware file uploaded is the same as the component you choose for the upgrade. For example, if you choose the main control board as the board type but upload the laser module firmware file, it will cause trouble.
(8) After the upgrade is complete, the message Firmware update succeeded pops up in the software.
How to deal with firmware upgrade failure
If the software prompts the error message Firmware update failed, the communication between the laser module and the main control board may be interrupted. Please check if the connection cable is inserted properly at both ends.
Services & Help
Learn & Education

Copyright © 2025 xTool All Rights Reserved.