Issue description
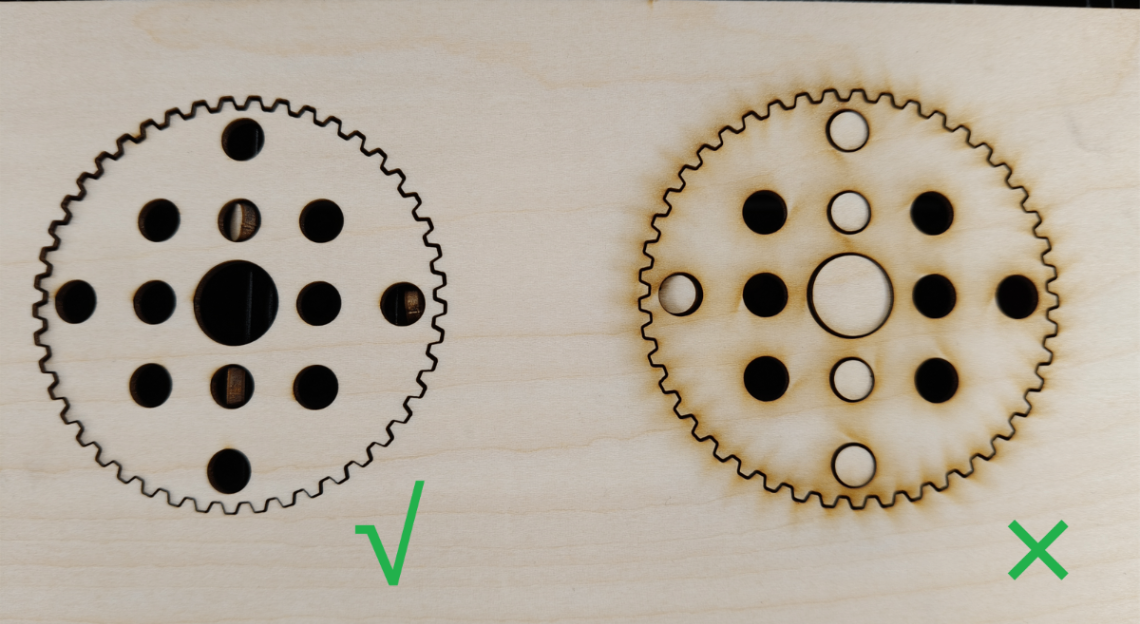
When you process laser cutting, the airflow of the air nozzle decreases, leading to poor cutting results, such as light-colored boards blackening severely.
This troubleshooting article is only suitable for solving the problem of poor cutting or engraving effect caused by the reduction of air pump airflow. If the processing result is not good due to other problems, such as out-of-focus, parameters, etc., please refer to the corresponding article:
- For laser cutting result issue: Troubleshooting Material Yellowing or Blackening During Laser Cutting
- For laser engraving result issue: Troubleshooting Poor Engraving Results for xTool P3
Possible causes
- Incorrect processing mode
- Improper air pump processing power
- Air inlet of the air pump clogs
- Air circuit clogs
- Air circuit leaks
- Faulty air pump
Important notes
- The air pump operates only during laser processing.
- The air pump’s airflow can significantly reduce yellowing during cutting only when it fully cuts through the material. If it fails to cut through the material, the airflow actually exacerbates the yellowing.
Troubleshooting procedures
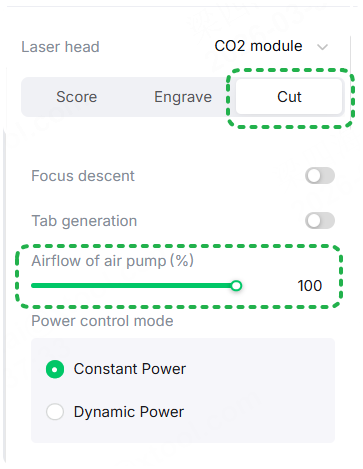
1. Check the processing settings
Check whether you select Cut mode to process, and whether the airflow of the air pump is 100%.
2. Test the airflow of the air tube
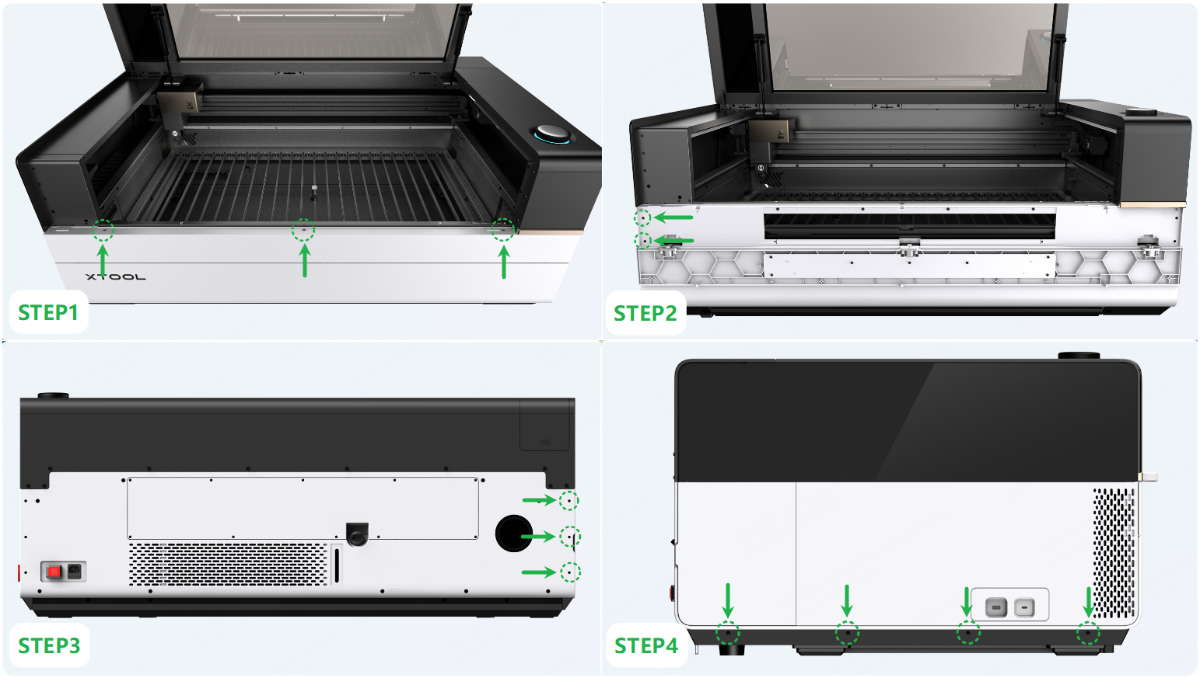
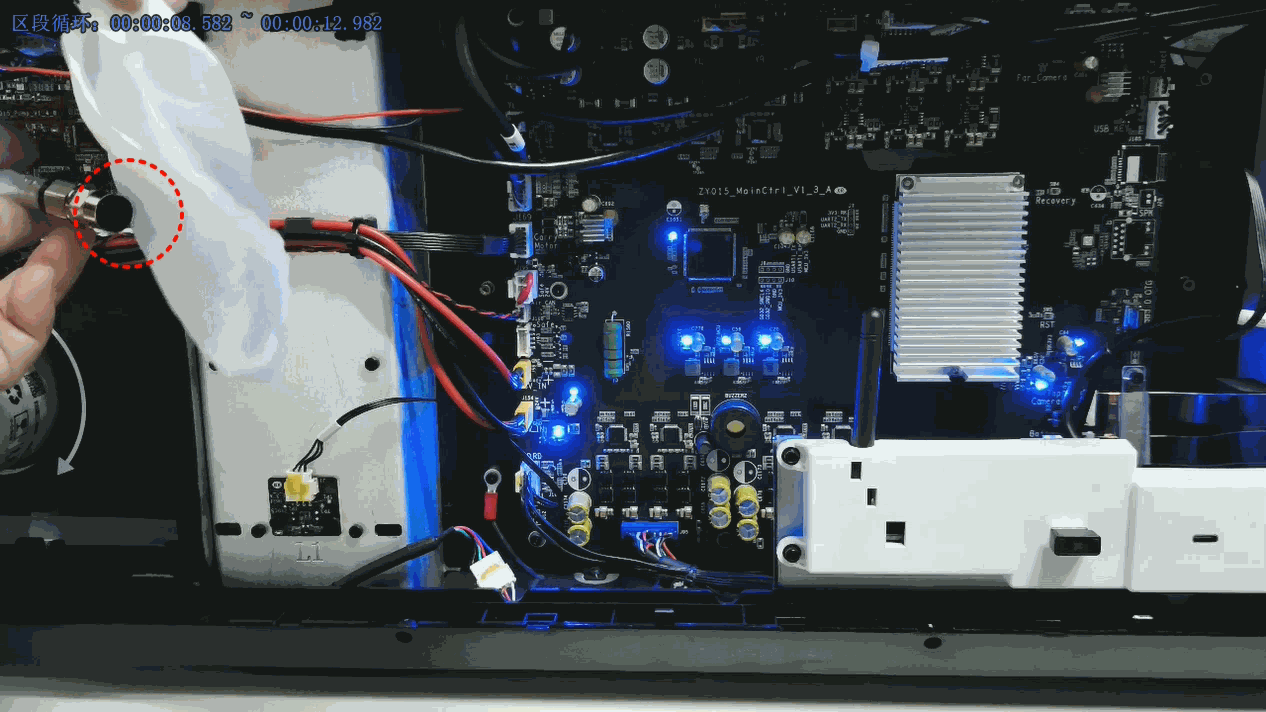
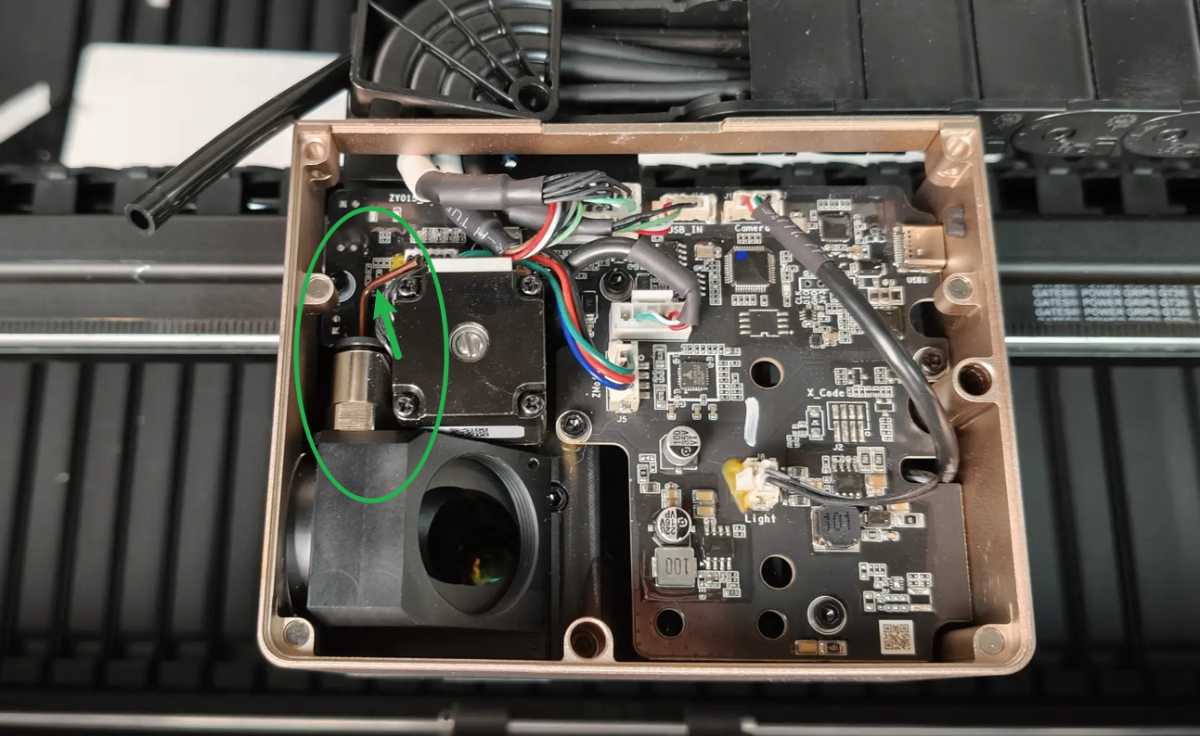
(1) Power off the device. Follow the illustrations below or the video tutorial to remove the left panel.
(2) Cut off the cable ties (as shown). Press the black connector and unplug the air tube.

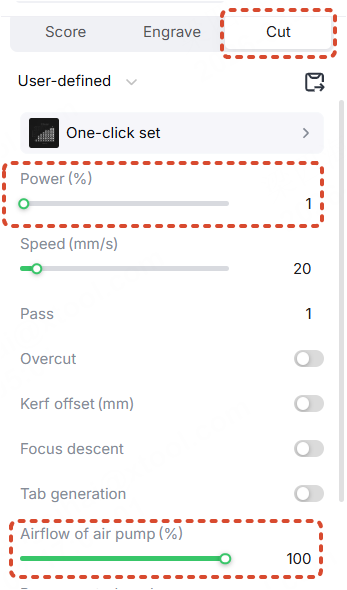
(3) Power on xTool P3. Adjust the power to 1% in Cut mode, and perform the processing. (Ensure the airflow of the air pump is 100%.)
(4) Hold a small piece of tissue near the air tube and observe the airflow at the side air tube connector.
- Normal operation: The air pump operates with a steady, rhythmic sound; when you cup your hand over the outlet, you can feel a noticeable, strong airflow (typically around 39 SLPM), and a tissue can be easily blown away.
- Abnormal conditions: The airflow is weak or unstable, preventing the tissue from being blown effectively.
- If your air pump blows air normally, please follow step 4 below to check the air circuit.
- If your air pump does not blow air properly, please follow step 3 below to check the air inlet end of the air pump.
3. Check the air inlet end of the air pump
3.1 Check the air pump silencers
xTool P3 comes with two types of silencers, so the positions of the silencer and the air pump intake may vary.
(1) Follow the video tutorial to remove two air pump silencers.
(2) Set the air pump to 100% power for processing, and observe the airflow from the left air tube connector and the intake.

- If there is still no suction at a particular intake port, the air pump piston is damaged. Please replace the air pump.
- If airflow through the air nozzle returns to normal after removing the silencer, and there is a noticeable suction at both air inlets, it means the silencer is dirty or clogged. Please follow the guide to clean the silencer.
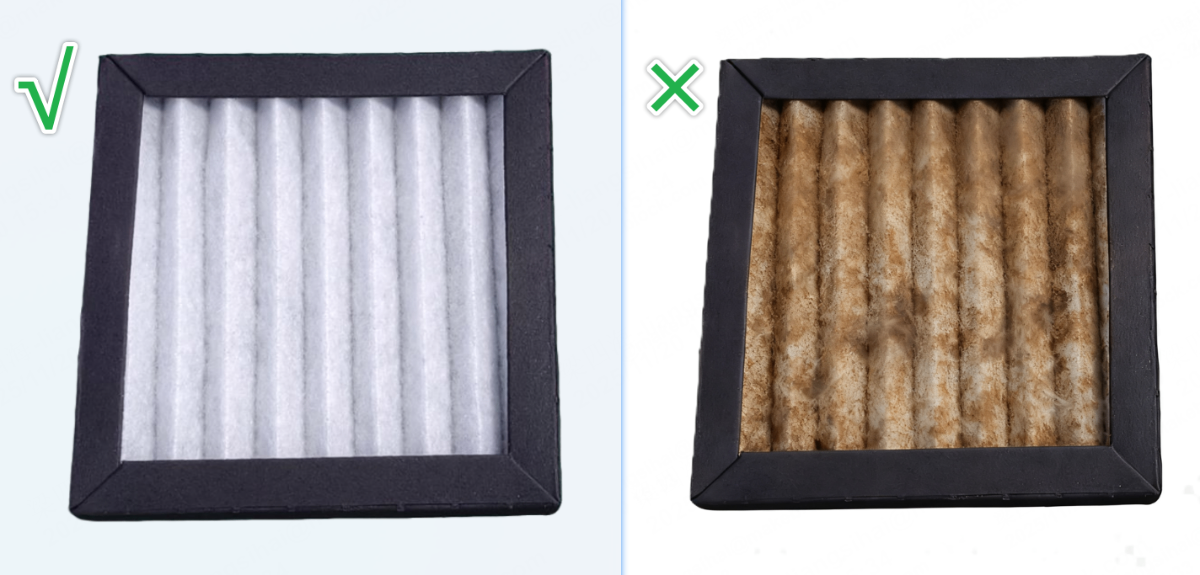
3.2 Check the filter screen of the air pump
If the filter screen of the air pump is dirty, the silencer will be clogged.
Please check the filter screen regularly. If the filter screen is dirty, clean it or replace it with a new one to extend the lifespan of the silencer. Follow the video tutorial to maintain the filter screen.
3.3 Check the smoke exhaust condition of the device
If excessive processing fumes cannot be discharged in time, some fumes may be drawn into the air pump, accelerating the clogging of its silencer.
You can improve smoke exhaust by:
- Increase the airflow of the SafetyPro™ IF2 2.0 and extend its working time.
- Regularly clean the SafetyPro™ IF2 2.0 fan blades to ensure optimal smoke extraction performance.
- Shorten the exhaust pipe and keep it as straight as possible to improve exhaust efficiency.
- Connect SafetyPro™ AP2 Max to enhance smoke discharge performance (The SafetyPro™ AP2 Max cannot be used simultaneously with SafetyPro™ IF2 2.0).
4. Check the air circuit of the air pump
4.1 Check whether the air tube is broken
Check the air tube for any tears or leaks. If any are found, replace it with a new one.
4.2 Check the air tube condition
Check the tube for any obvious kinks or severe bends. If you find any, straighten the tube before trying again.
4.3 Check the air tube adapter of the Z-axis
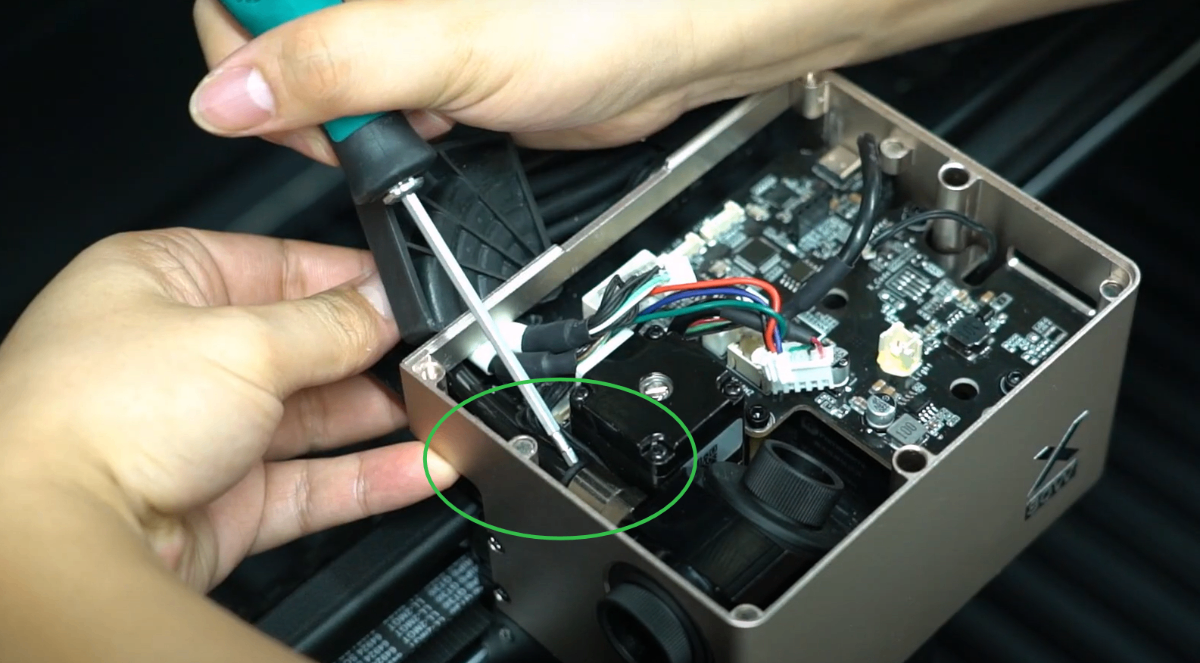
(1) Power off the device. Use a 2mm hex key to remove the cable fixing block, and pull out the air tube (no need to unplug the cable connector). Follow the video to operate.
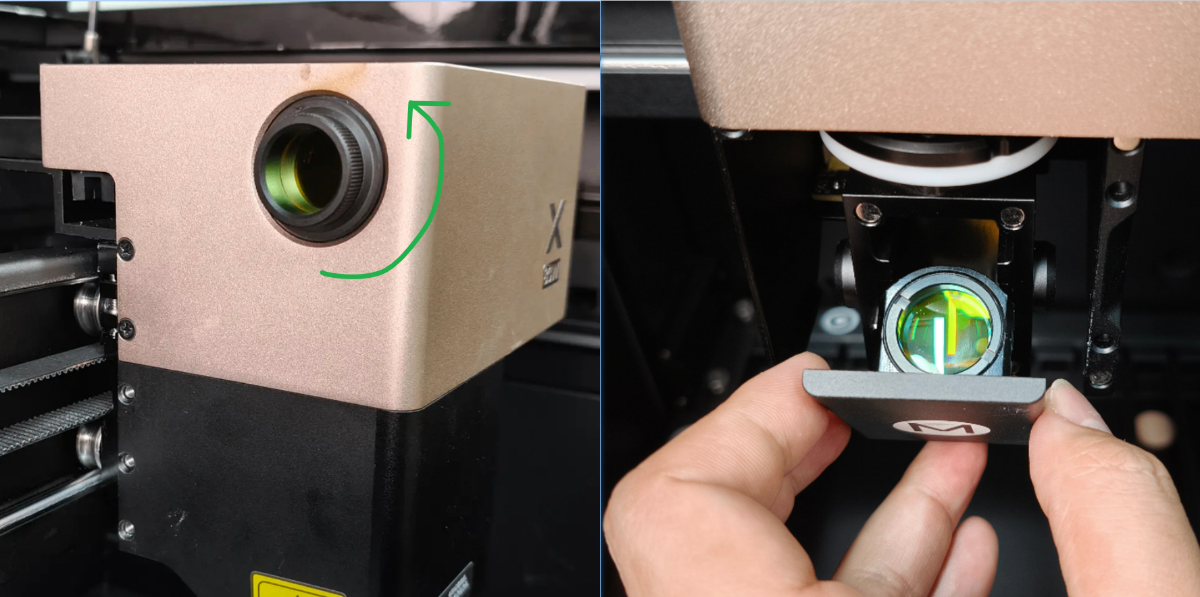
(2) Remove the window lens and focus lens.
(3) Use tools such as toothpicks or small screwdrivers to insert into the connector and check for any residues or foreign objects, then clean them up.
Still experiencing issues?
Should the issue persist after completing the preceding steps, submit a ticket via the "Submit a Ticket" button in the "Help Ticket" section below. The standard response time for xTool Customer Service is one business day.
For a prompt resolution, please include the following details:
- Issue description: A detailed explanation of the observed problem.
- Video evidence: Attach a video demonstrating the issue, where applicable.
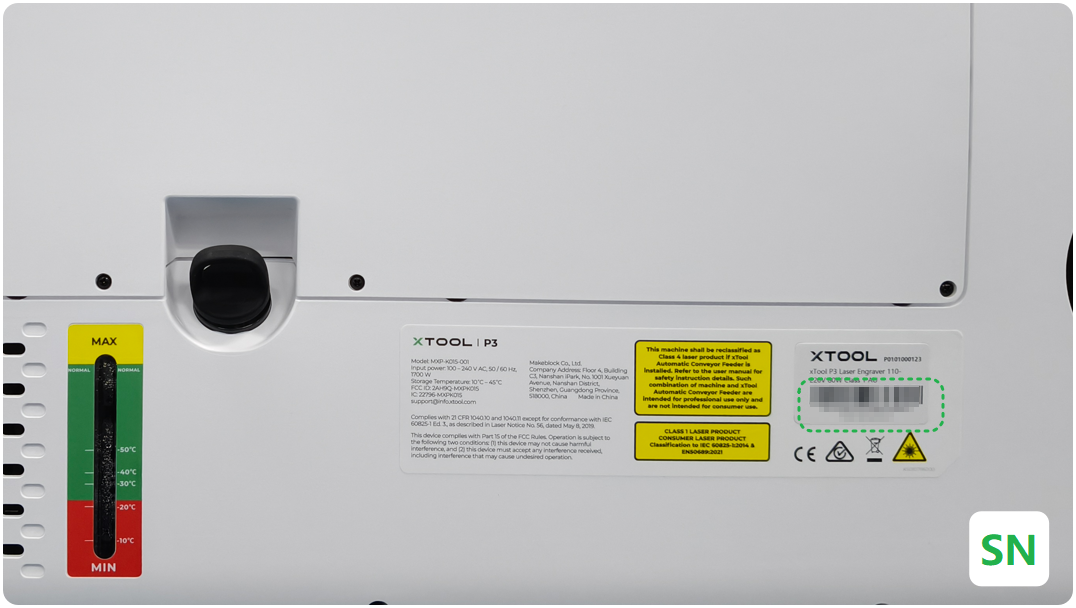
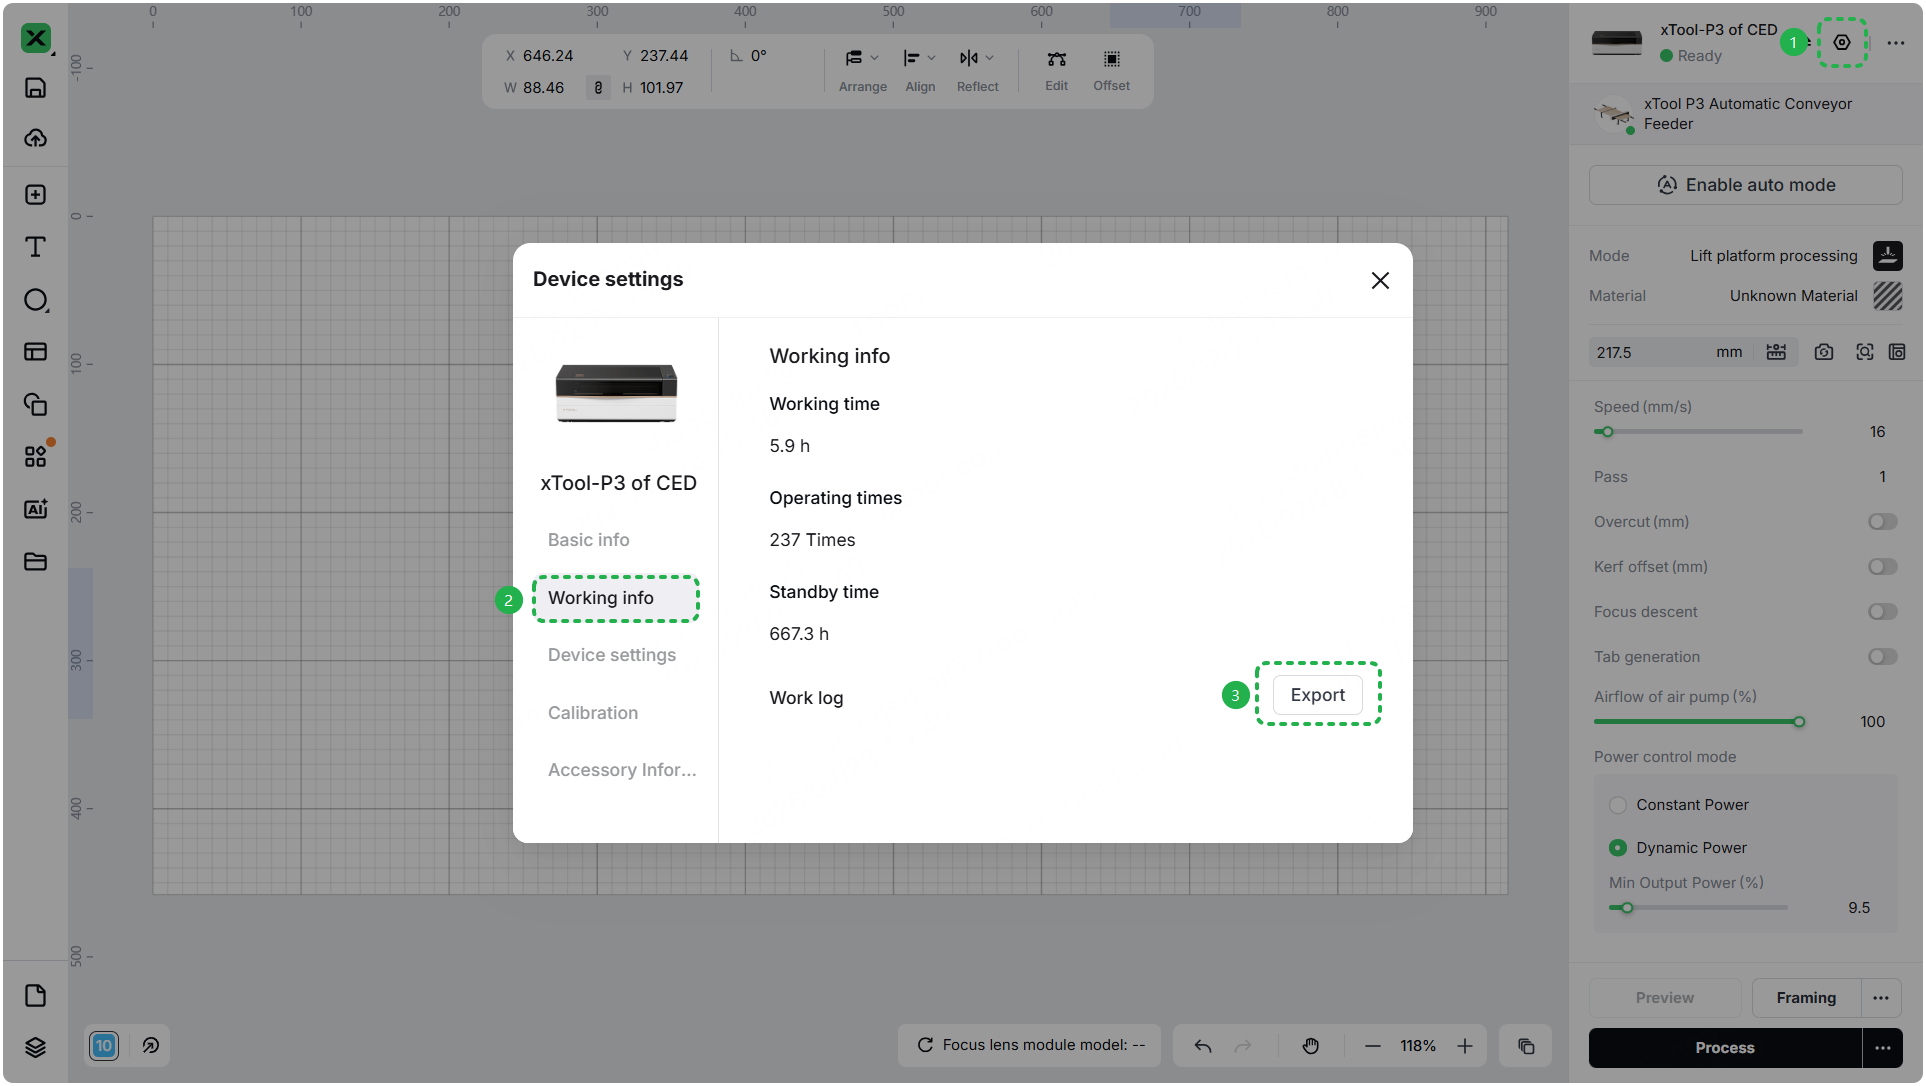
- Device information: Follow the steps to find the SN and export the work log.
- Troubleshooting performed: Any troubleshooting steps you have already attempted, along with their results.
This information is crucial for xTool technical support engineers to provide timely assistance.
Documentation feedback
Help improve this content by providing feedback. If this content did not meet your requirements, select "No" in the "Was this page helpful?" section below. Include specific details about what was unclear or missing in the pop-up suggestion box. Feedback submissions are reviewed by xTool technical writers to enhance future documentation.
