Introduction
This guide explains how to obtain information for ink stack calibration on the xTool Apparel Printer and how to perform the calibration manually.
Issue description
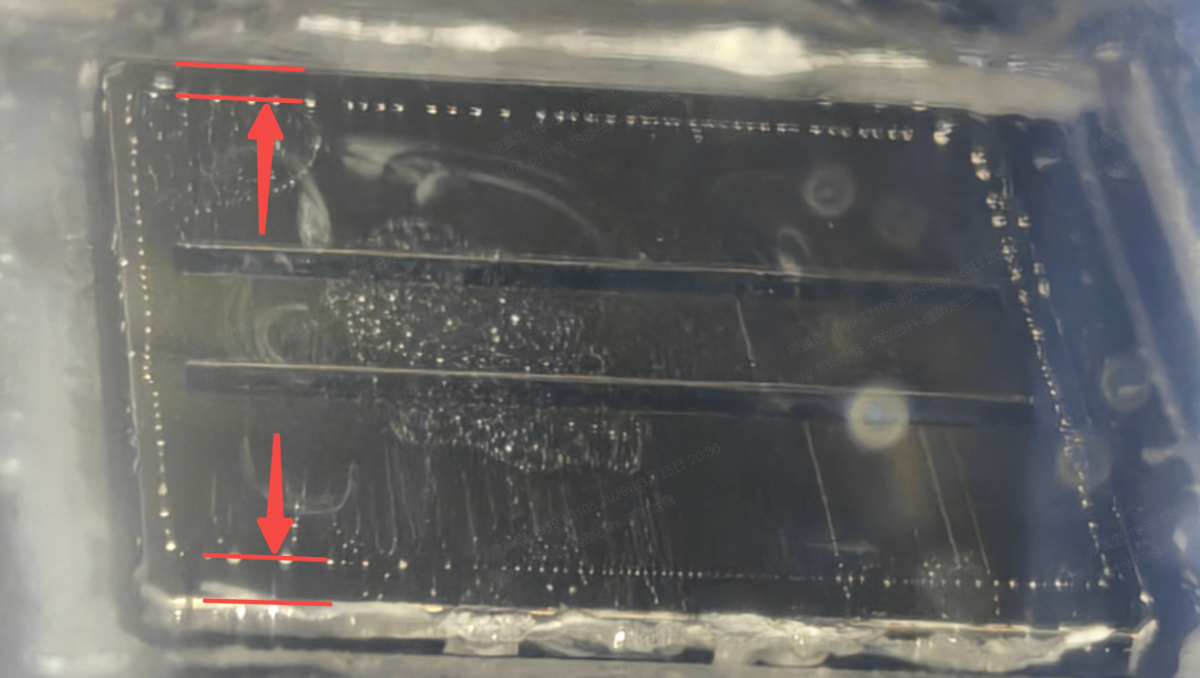
If the ink stack calibration fails due to a printhead offset, you need to calibrate the printhead manually.
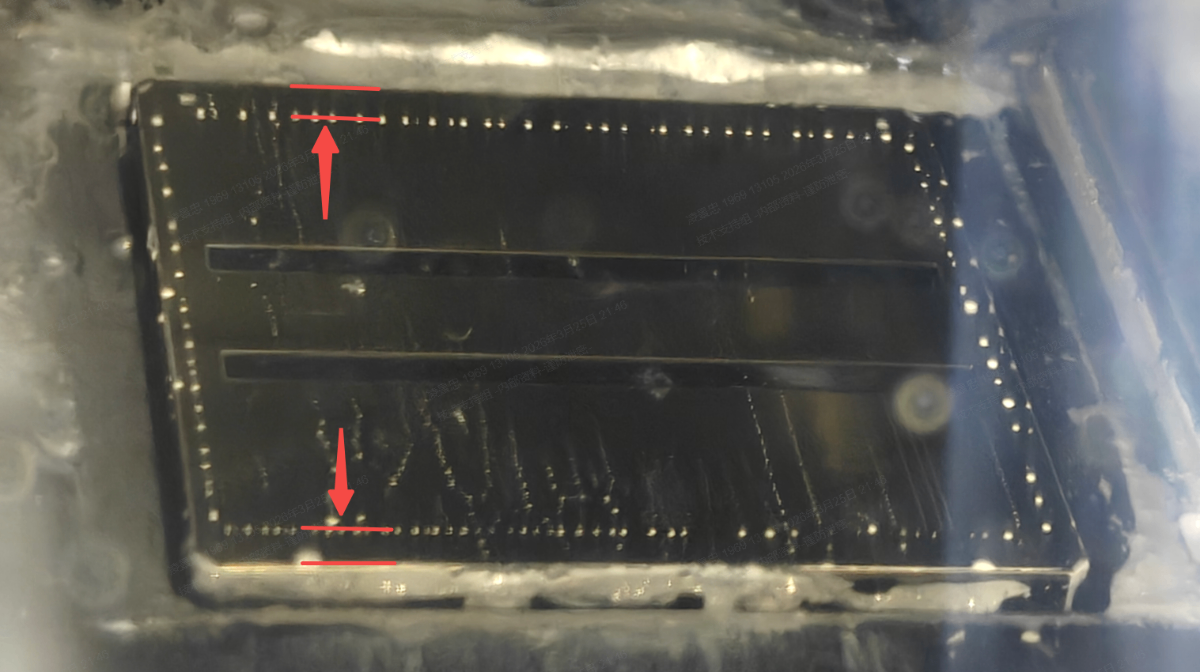
The printhead is centered ✅️
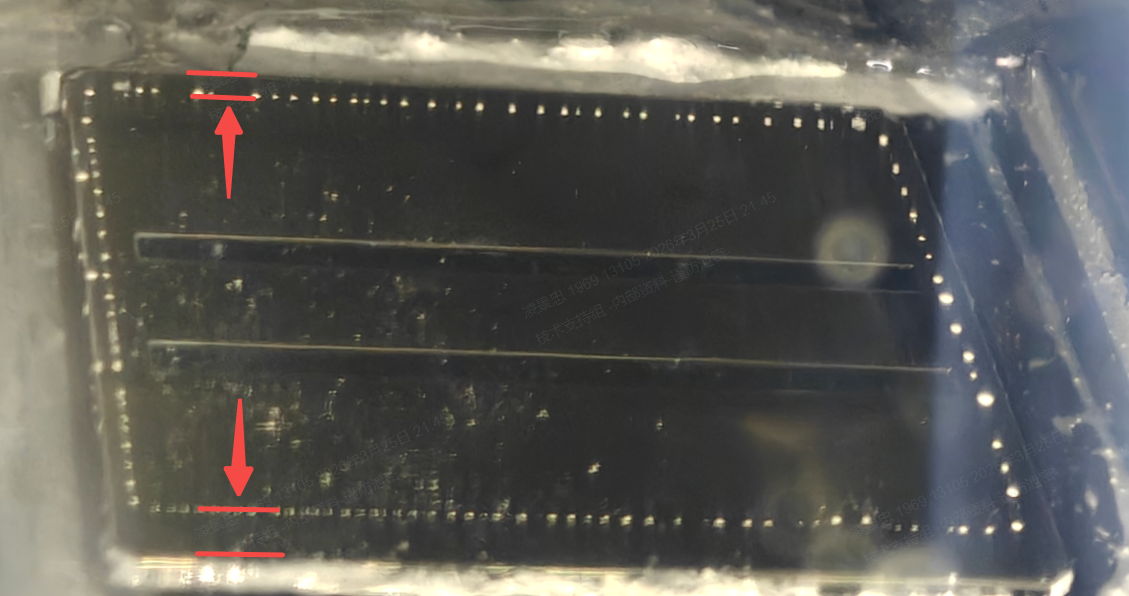
The printhead offsets ❌️
Required data
Refer to the following video tutorial to get the data.
(1) Note: A common issue is inaccurate shooting, so please keep the following points in mind:
- Apply the ink evenly to both ink pads to prevent white lines or unclear markings in the photo of the bottom of the printhead. Then press the reset button to reset the printer.
- Shooting area: There is a mirror on the left side of the printer. Take a photo of this mirror with your phone; there is no need to photograph the print head. Clean the mirror before taking the photo.
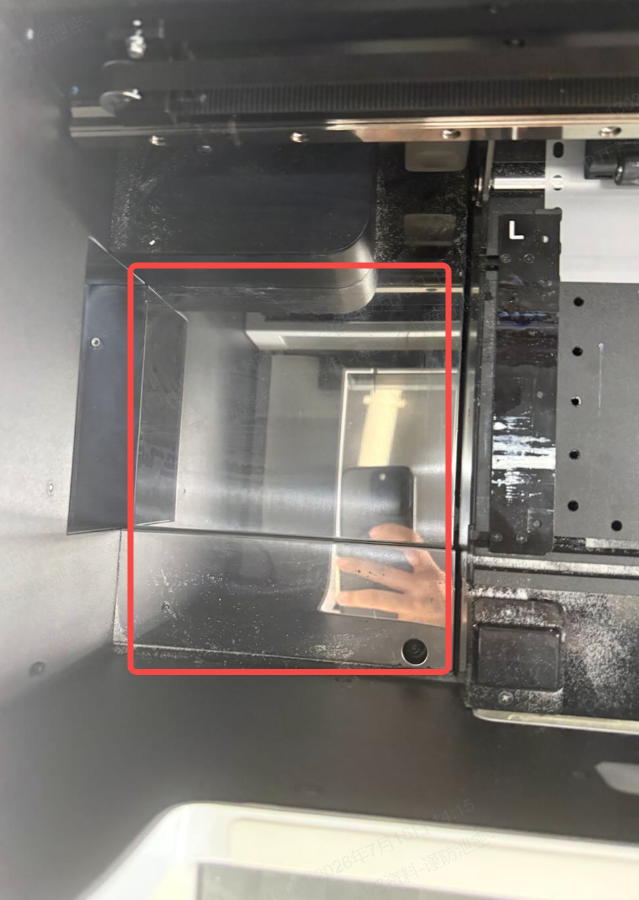
- Shooting angle: Open the left panel of the printer, turn on the phone’s flashlight, and photograph the mirror. There is no need to put the phone inside the left panel to shoot.
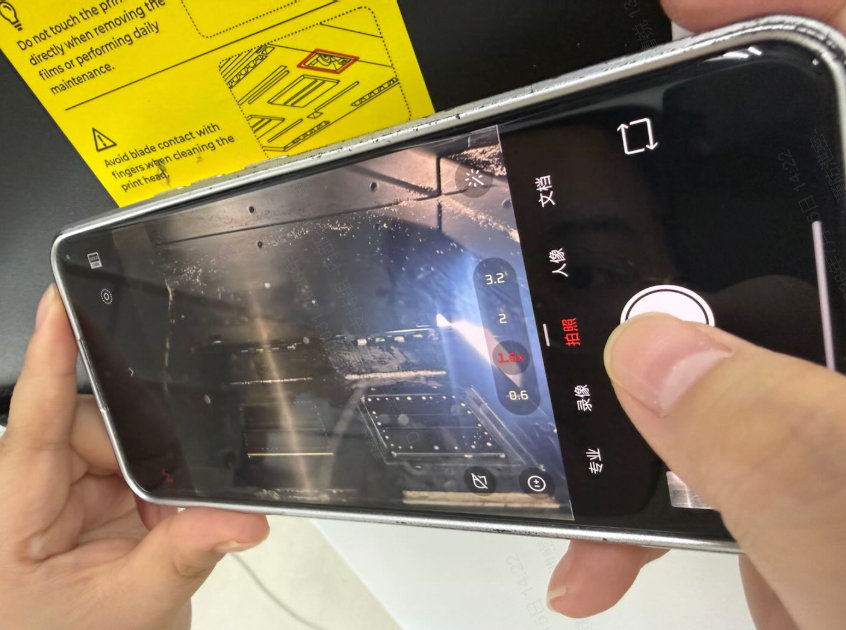
(2) Adjust the print head.
Follow the on-screen prompts to operate:
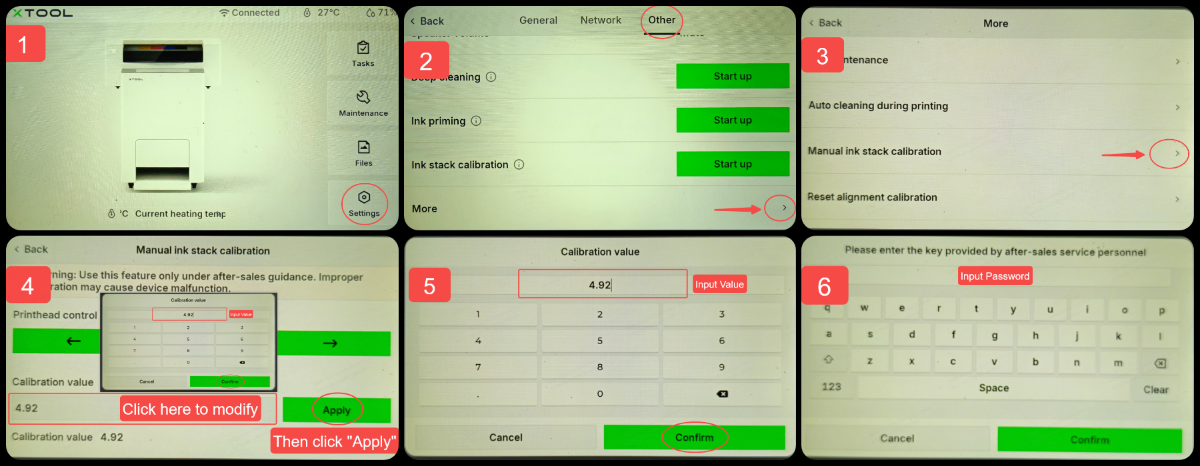
The password is the last six digits of the device's serial number in uppercase.
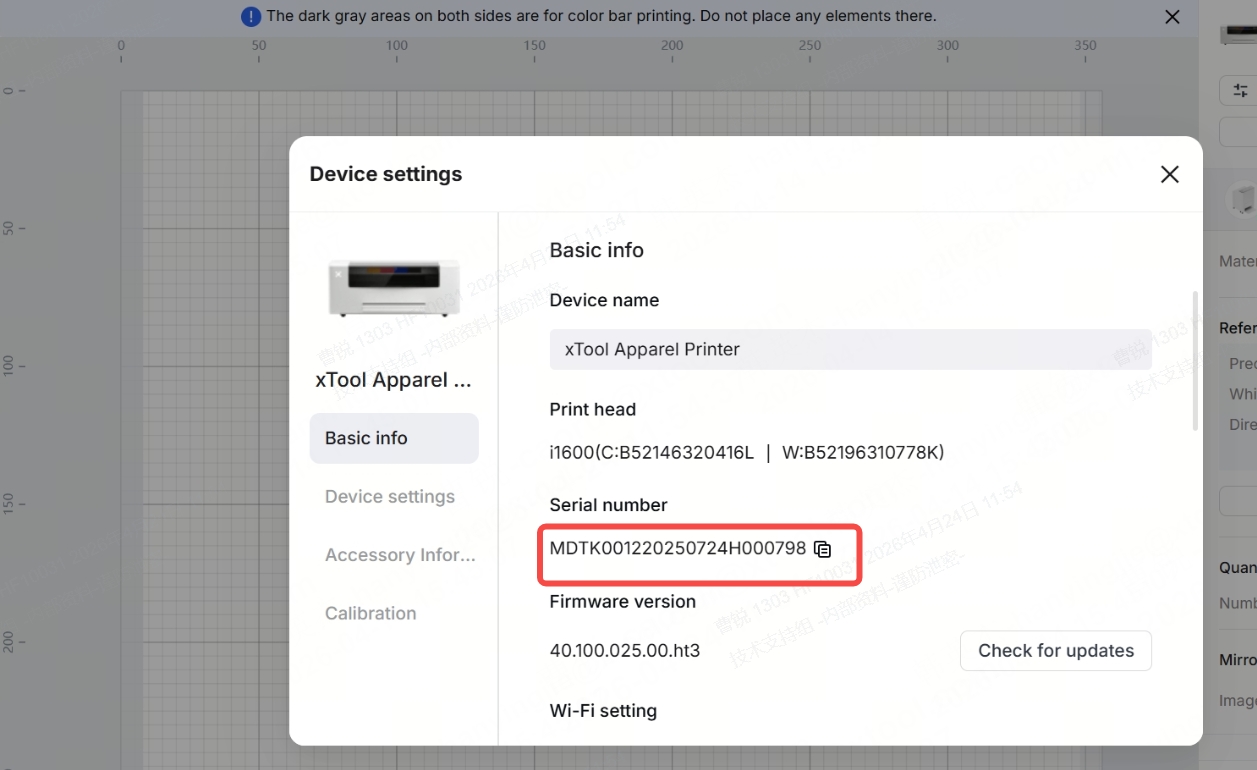
(3) Confirm whether to increase or decrease the value.
- If the inner dimension is narrower than the outer dimension, the value needs to be reduced.
- If the inner width is greater than the outer width, the value needs to be increased.
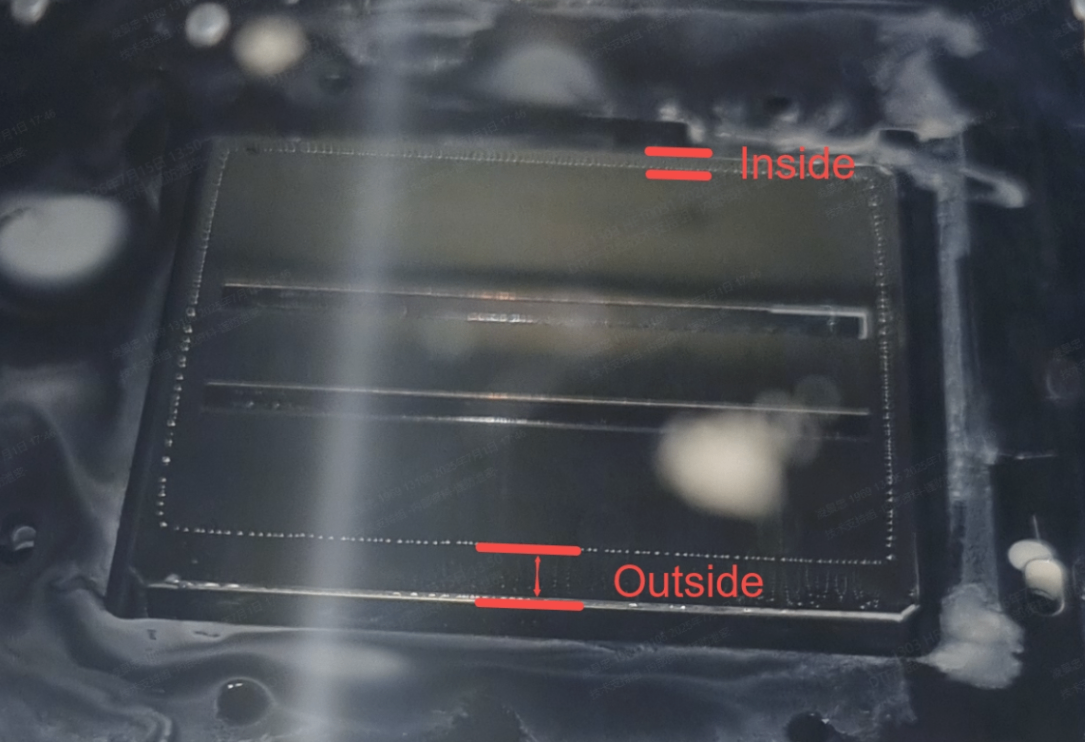
(4) Confirm the adjusted value (using "print head is too far inward" as an example; if it is too far outward, increase the value).
The adjustment values vary by device and must be set based on each device's specific conditions.
- Severe offset: Reduce the read offset value by 1.5 to 1.8.
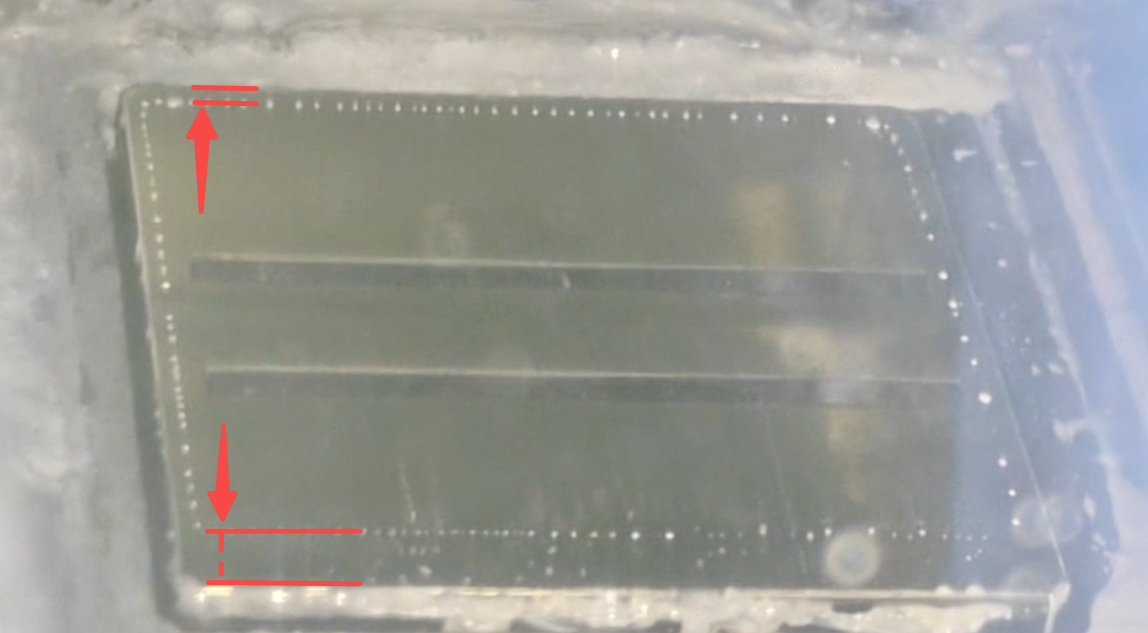
- Medium offset: Reduce the read offset value by 0.8 to 1.
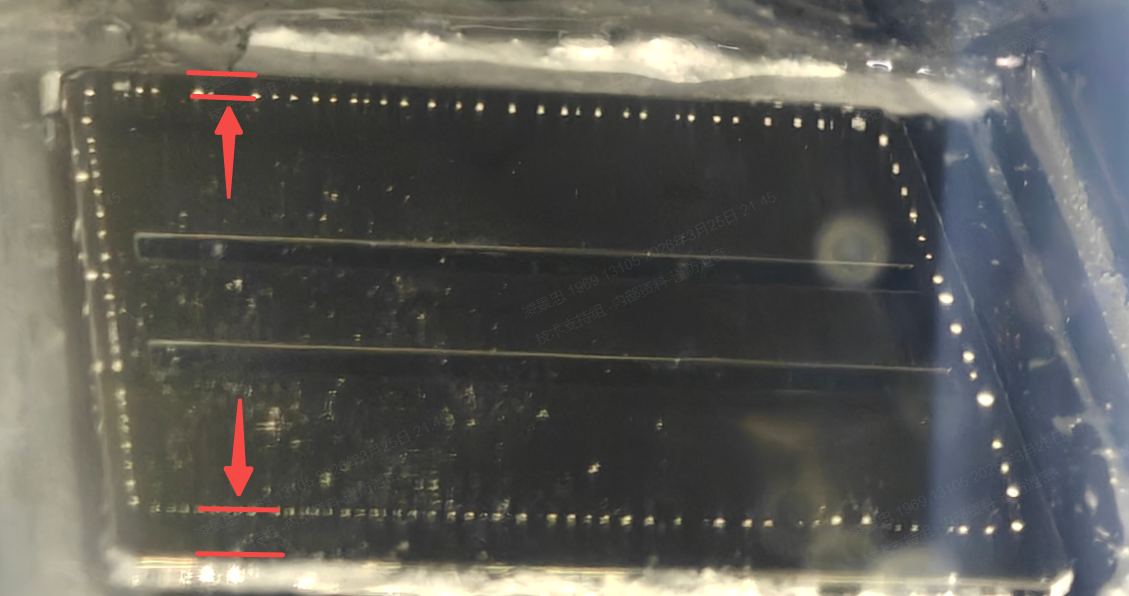
- Slight offset: There is no need to adjust the offset value (if adjustment is needed, reduce the read value by about 0.2 and then write it again).