Overview
After curing a printed film in your xTool OS1 Automatic Shaker Oven, you may notice hot melt adhesive powder has adhered and melted onto blank areas of the film that were not part of your original design. Under normal conditions, powder should only adhere to inked areas of your design.
- This guide helps you identify and resolve this issue based on its appearance. Please find the scenarios below that match your film to begin troubleshooting.
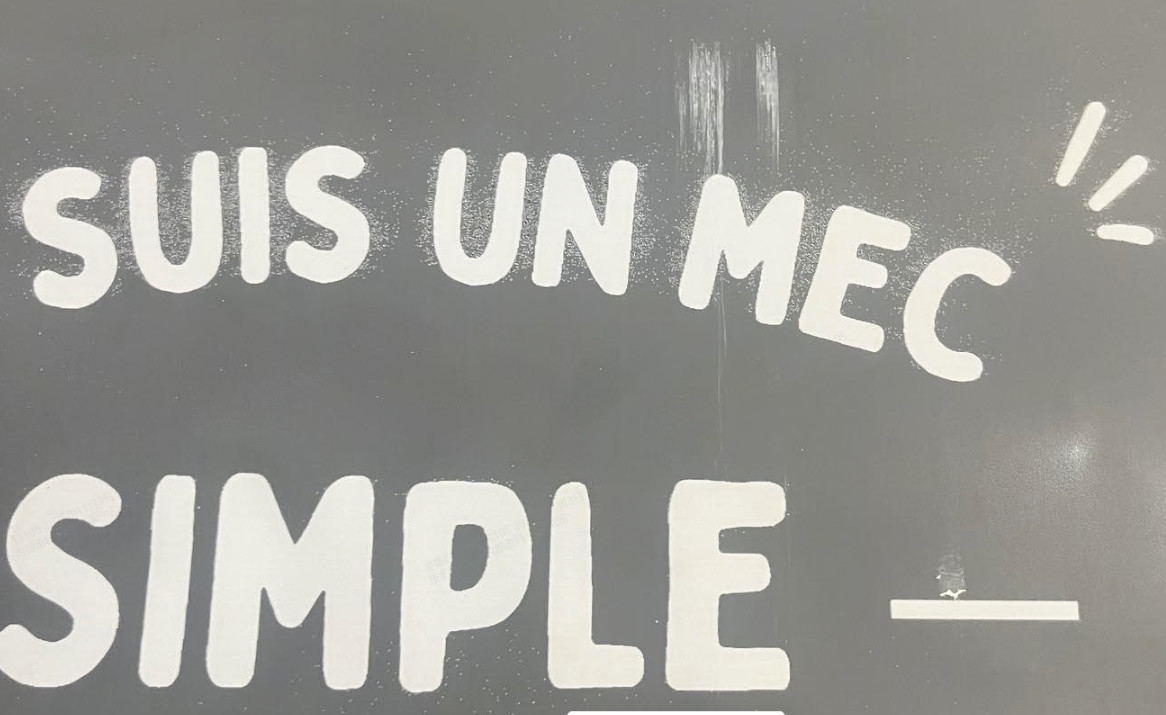
Large Border or "Frame" of Powder in Blank Areas
Issue description
After curing, a large, continuous area of melted powder appears around the edges of the design, often creating an unwanted frame-like outline around the edges. See the image below.

Large Blank Areas Covered in Adhesive Powder
Cause
This is typically caused by an incomplete background removal or stray, semi-transparent pixels in the original design file. The printer deposits a small amount of ink in these areas, which is enough for the powder to stick.
Solution: Inspect & clean your design file
Step 1: Check the design file in xTool Studio or XCS
This issue is often caused by the design file itself, not the printer hardware. You can use the "Stroke" function in xTool Creative Space (XCS) or xTool Studio to check your image.
- Add Stroke to Design:
- In the XCS or xTool Studio canvas, click to select your design.
- From the top menu, select "Stroke".
- Choose a bright, obvious color (like red) and set the Width (pt) to a small value, such as 0.5.
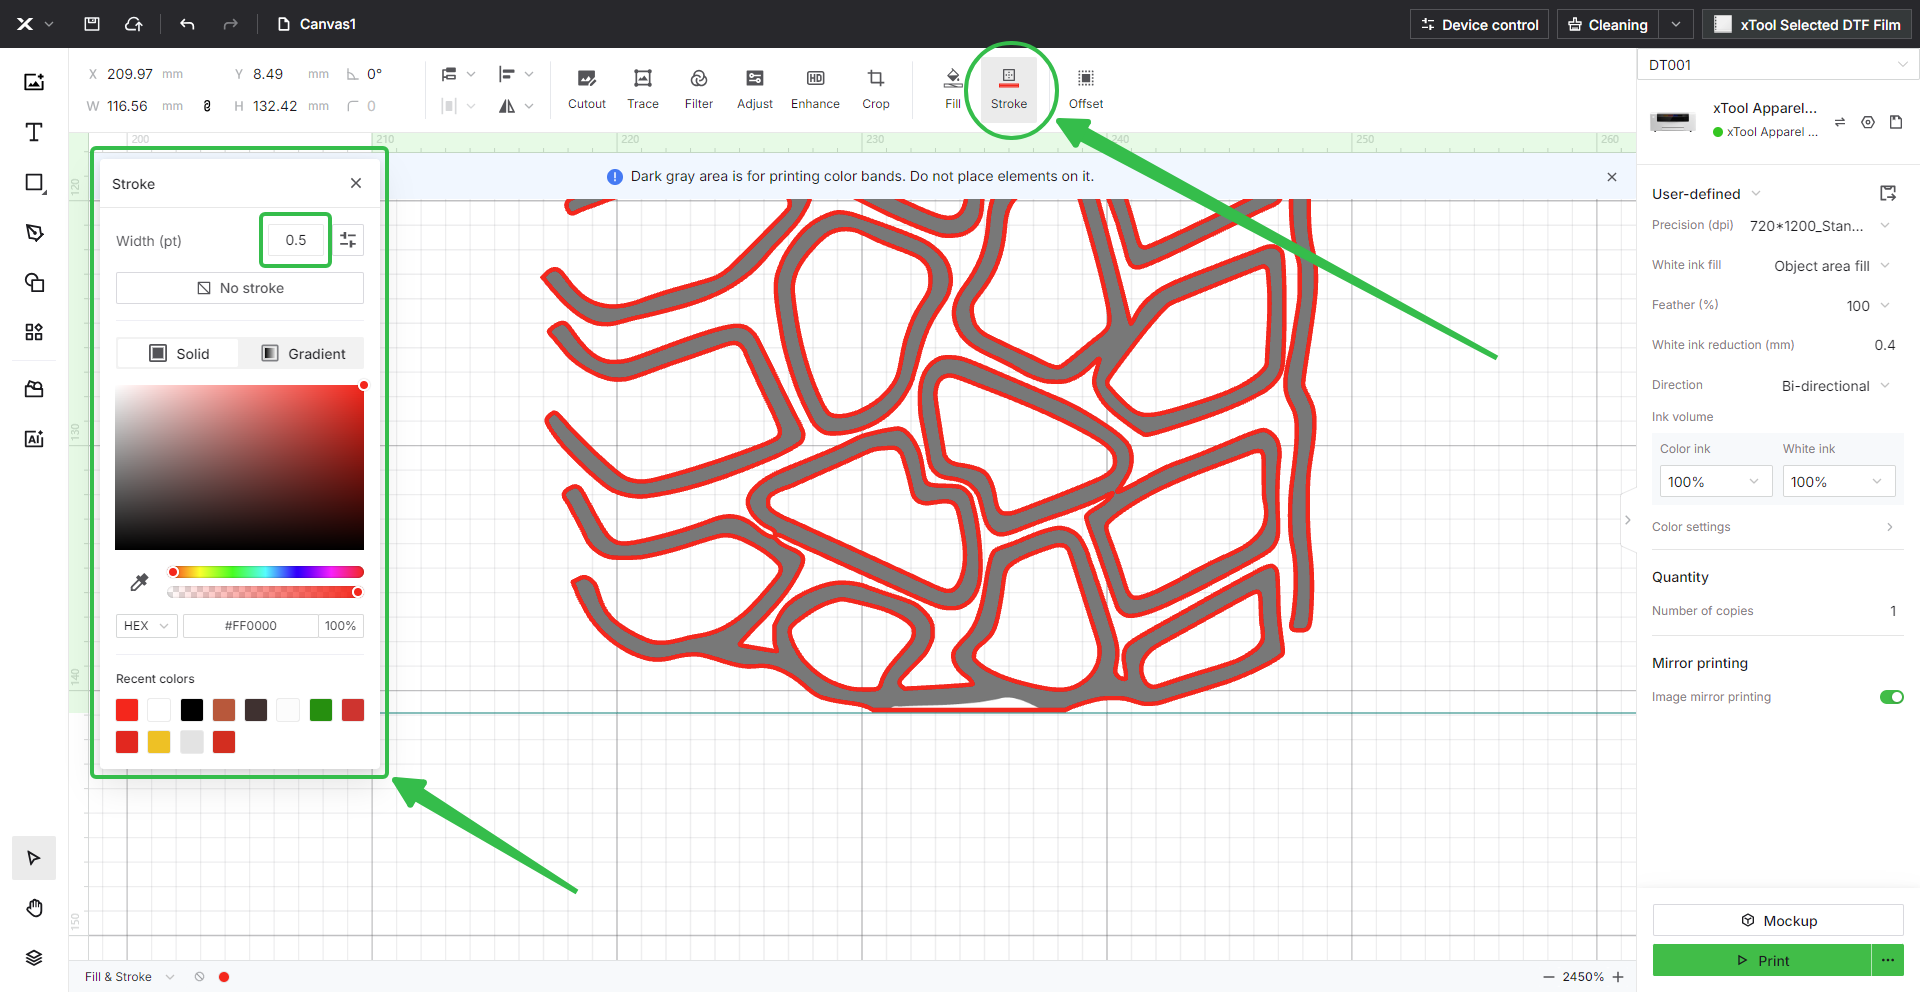
- Analyze the Results:
- This will create a thin, colored outline around your entire design. Zoom in and carefully inspect the edges.
- If you see a thin white line or unexpected artifacts between your design and the new colored stroke, it means your original image file contains unwanted stray pixels or a hidden border. See the demonstration image below for a visual reference.
- These white edges indicate image editing artifacts that cause spillover.
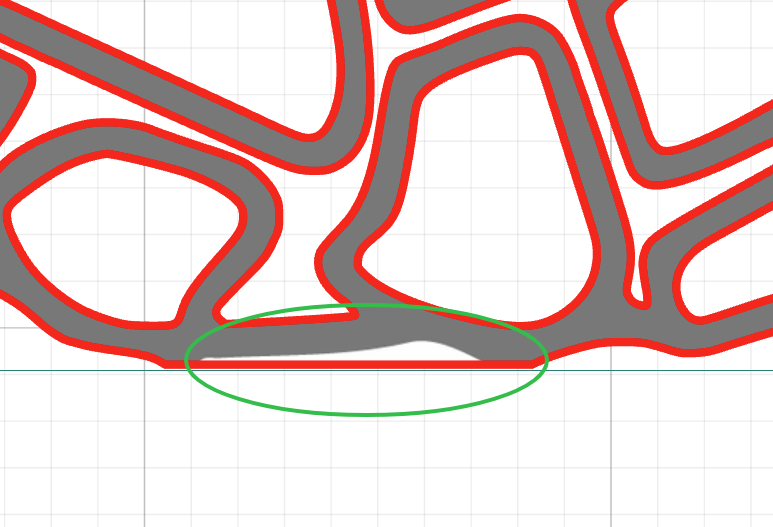
- Identify the Problem:
- White edges visible between the stroke and design indicate file issues.
- These artifacts are typically caused by improper image editing or background removal.
- Proceed to the next step for the corresponding solution.
Step 2: Edit out unexpected artifacts
The issue must be fixed in the source file.
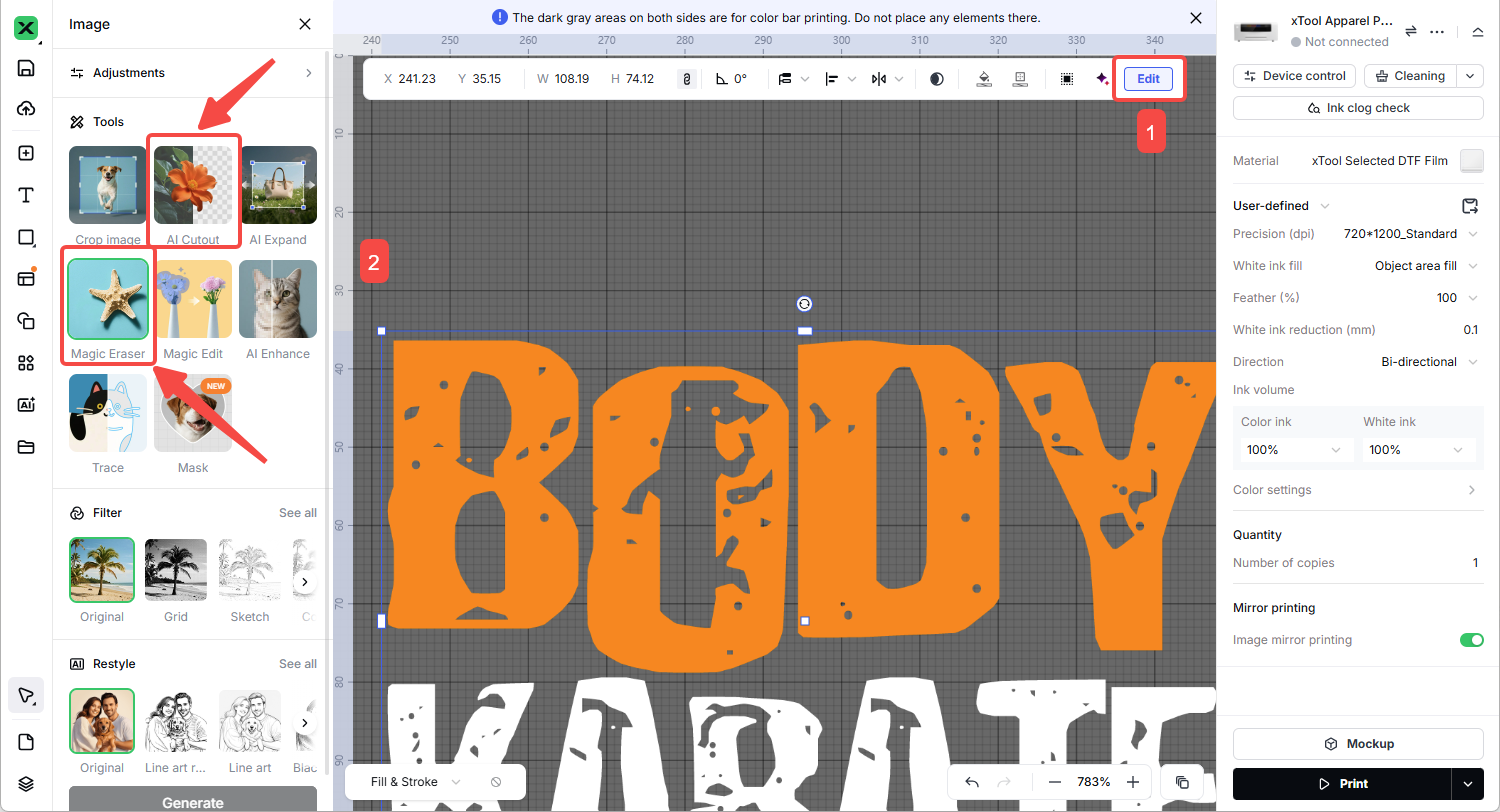
Option 1: Use xTool Studio's built-in editing tools
- Select your design in xTool Studio;
- Click the "Edit" button;
- Use the "AI Cutout" or "Magic Eraser" feature to remove unwanted edges.
Option 2: Use external image editing software
- Open your design in software such as Adobe Photoshop;
- Carefully erase any stray pixels or borders around your design;
- Ensure clean, crisp edges without transparent or semi-transparent pixels.
After editing, save your file and test print to verify the issue is resolved.
Streak or drag-pattern powder contamination
Issue description
After curing, you notice streak-like or drag-pattern contamination of melted adhesive powder along the edges of your design, similar to ink splatter patterns.
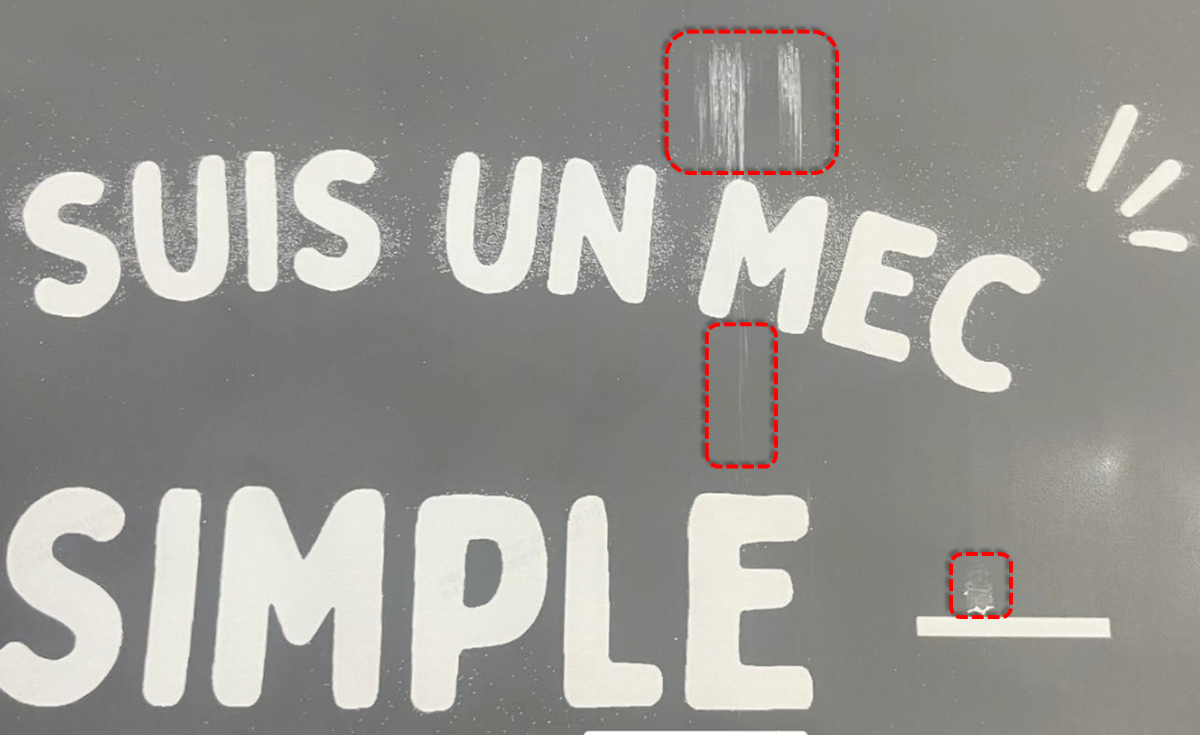
Drag‑Like Adhesive Residue
Cause
This is caused by printhead clogging, which leads to ink misting or splattering during printing.
Solution: Check & clean the print head
- Check Environment: Ensure your working environment temperature is stable, around 25°C (77°F). High temperatures can cause ink to atomize ("ink misting") during printing.
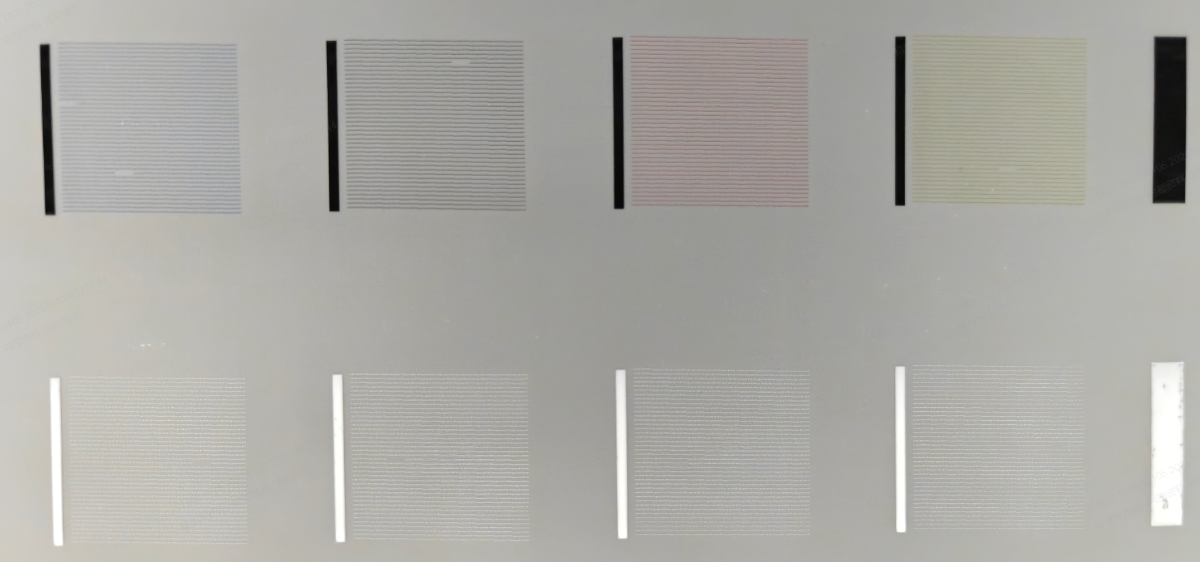
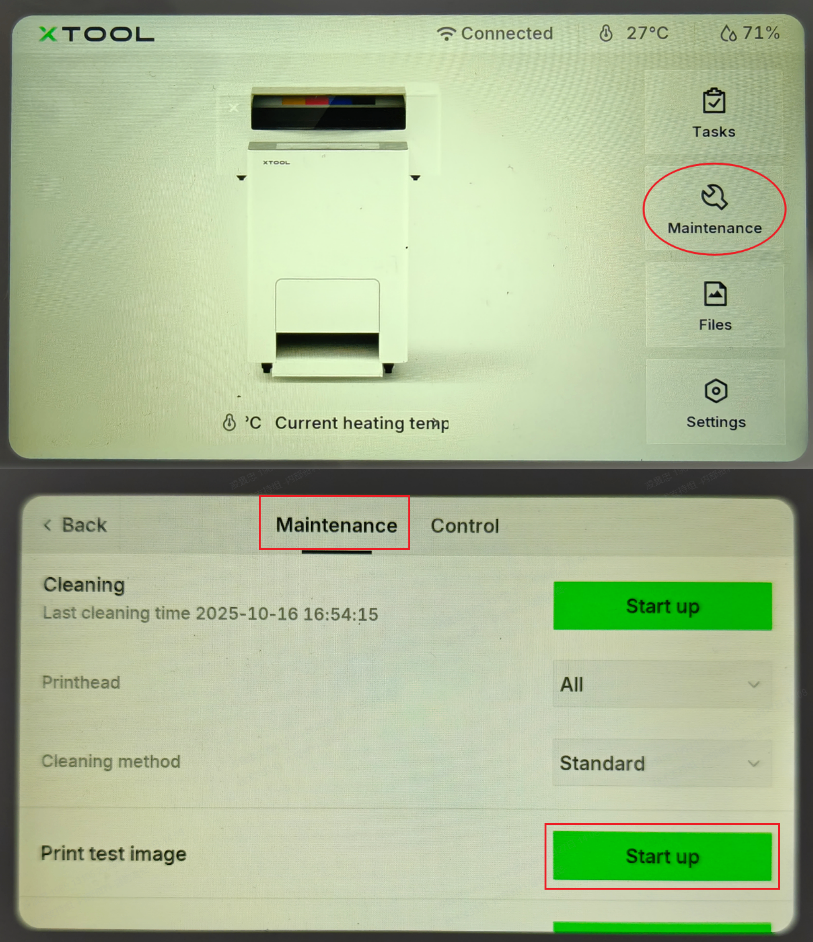
- Print Test Image: On the control panel, tap: Maintenance > Print Test Image. This will check if all printhead nozzles are ejecting normally.
- A normal test print should look like the reference image below with minimal or no missing lines (≤5).
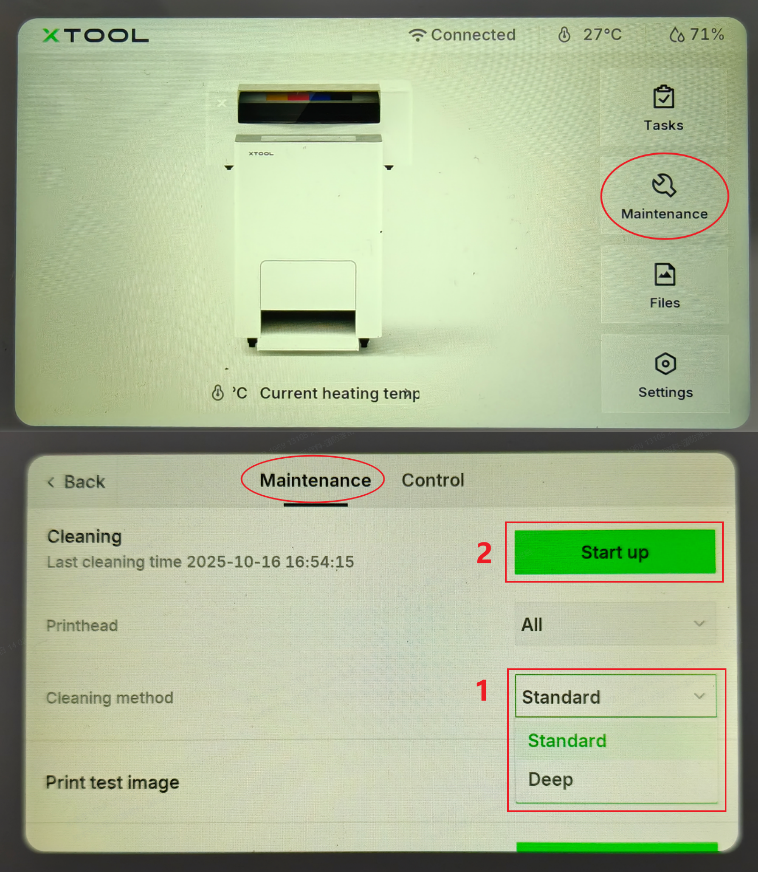
- Perform Cleaning: If the test image is abnormal (e.g., missing lines), perform a "Standard" or "Deep" cleaning.
- On the control panel, tap Maintenance.
- Select "Standard" or "Deep".
- Tap the "Start up" button.
- Deep Soak (If Necessary): If the problem persists even after multiple cleaning cycles, or if it occurs when the test print looks normal, you may need to deep soak the print head.
- Soak the print head for 4-6 hours in a 1:1 mixture of moisturizing liquid and cleaning liquid.
- For detailed instructions, refer to the guide: Troubleshoot Missing Strip Lines / Failed Printing Sample Test for xTool Apparel Printer
- Post-Soak: After soaking, perform 2-3 "Deep" cleaning cycles. Print another test image and then print your design again to verify if the issue is resolved.
- Contact Support: If the issue is still not resolved, please proceed to the "If the problem persists" section.
Minor, sporadic "dot-shaped" powder
Issue description
After curing, small, scattered spots of adhesive powder appear on the film.
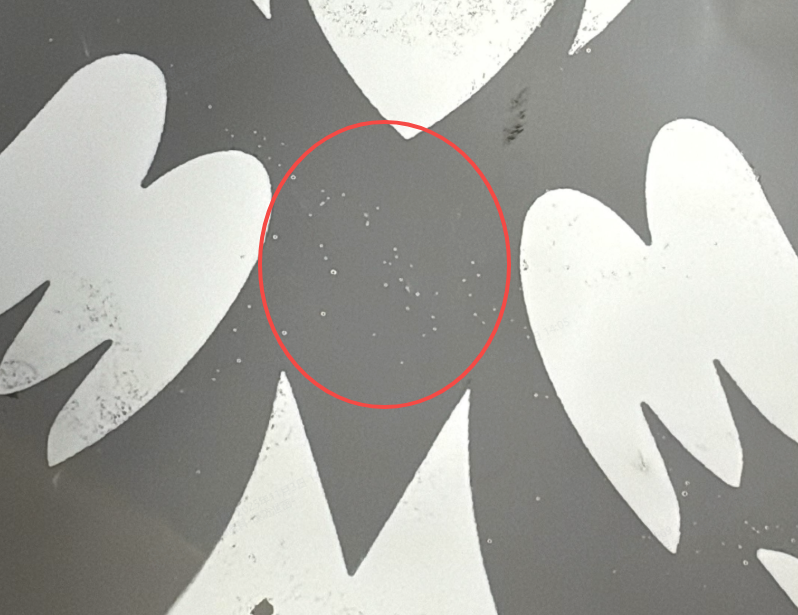
Spot‑Like Adhesive Residue
Cause
This may be caused by various factors, including static electricity on the film, environmental conditions, or minor contamination during the printing process.
Solution: Manual cleaning after curing
- If you only find sporadic, dot-shaped powder, wait for the film to cool completely to room temperature after curing.
- Use a soft-bristle brush to gently sweep the surface of the film.
- The sporadic powder dots should brush off easily without affecting the cured design.
- If this does not resolve the issue, proceed to the next section.
If the problem persists
Should the issue persist after completing the preceding steps, submit a ticket via the "Submit a Ticket" button in the "Help Ticket" section below. The standard response time for xTool Customer Service is one business day.
Include the following details to help better diagnose the problem:
Your project file
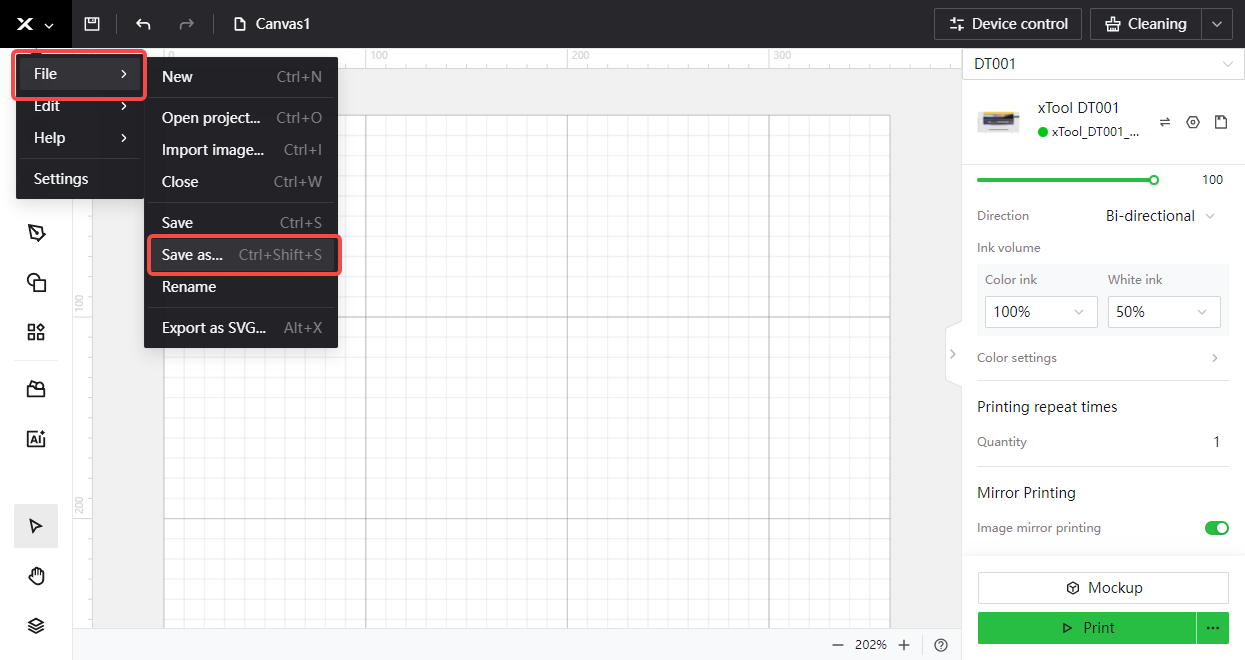
- In xTool Creative Space (XCS) or xTool Studio, click the X icon in the top-left corner.
- Select File → Save As…
- In the save dialog, choose your destination folder, enter a file name, and click Save.
Test print photo
- A clear photo of your test print.
- On the control panel, tap: Maintenance > Print Test Image
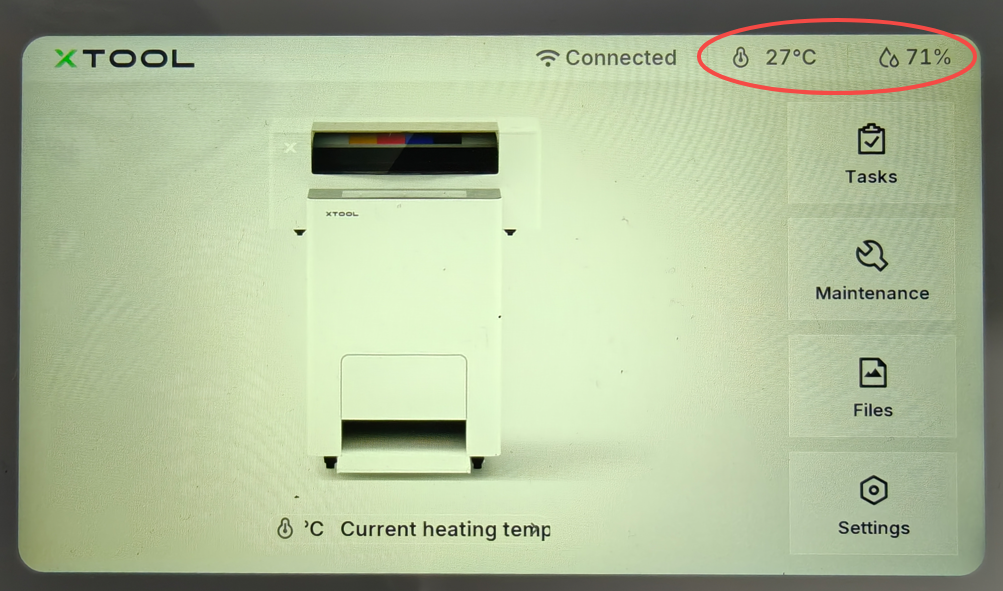
Home screen screenshot
- A photo of the control panel's "Home" screen, showing the current temperature and humidity information.
Services & Help
Learn & Education

Copyright © 2025 xTool All Rights Reserved.