Issue description
When you start processing, the nozzle hits the material.
Possible causes
- The focusing is not determined.
- Incorrect material colors or height
- The distance measurement module is faulty.
Troubleshooting procedures
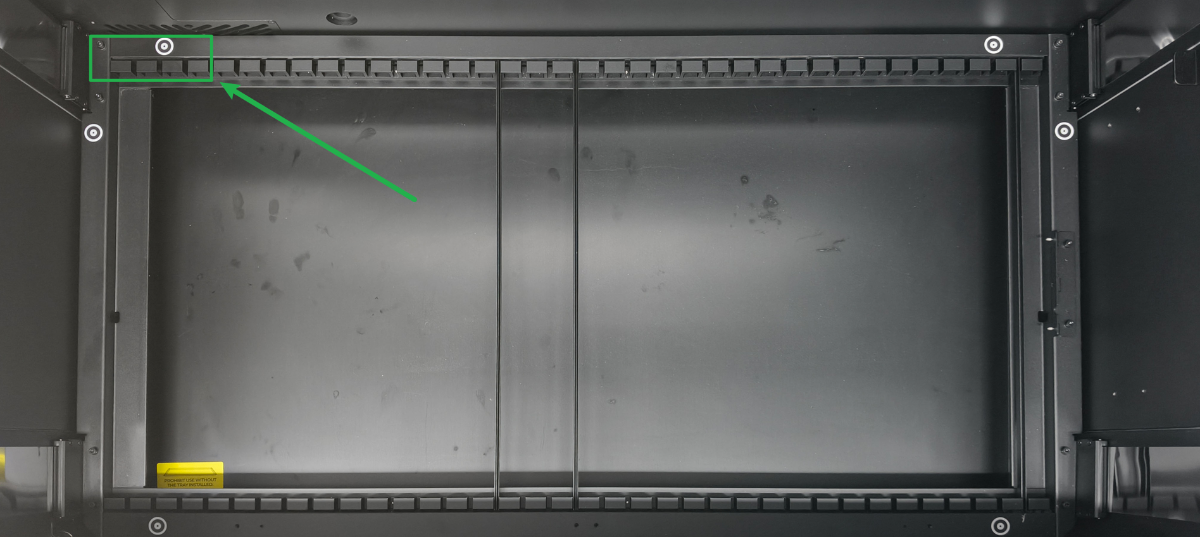
1. Check the origin of measurement
Check for any foreign objects or material on the slat slots in the origin area (original distance calibration point). If present, remove them.
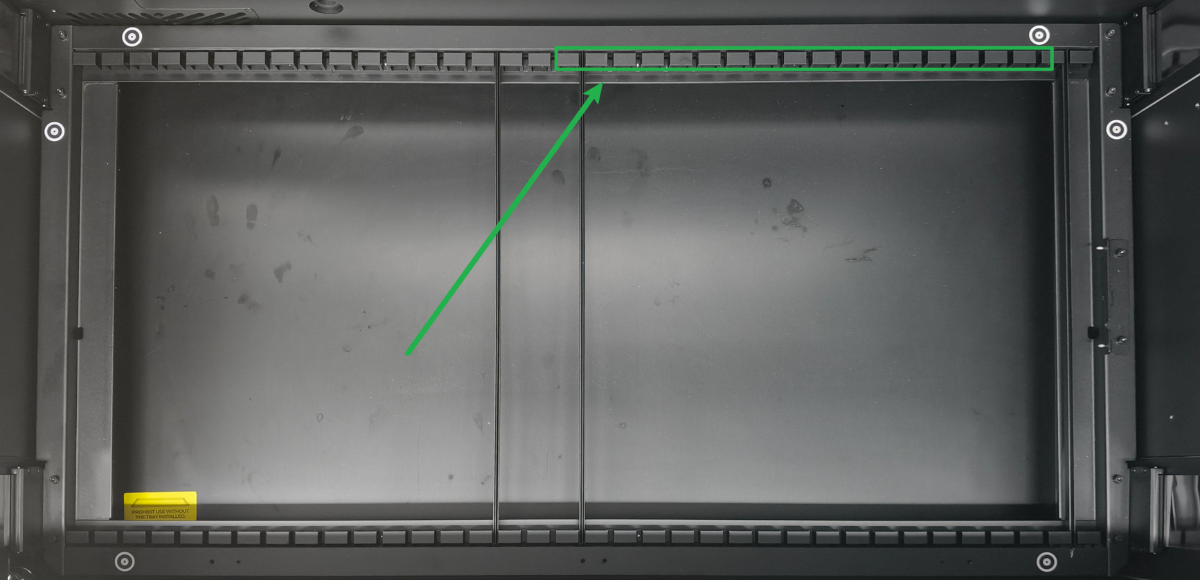
2. Check the slat slots
When you use distance measurement, the shown position of the slat slots is the calibration reference point, and the material cannot be placed here. Otherwise, inaccurate distance measurement may occur, leading to:
- Out of measurement range indicates distance measurement failure.
- The significant deviation between the measured distance and the actual value may cause the laser module to collide with the material during processing.
If the material is too wide and requires covering the slat slots for processing, please use manual mode.
3. Check the material's color
xTool P3 does not support measuring transparent materials. Suppose the material is laminated with a transparent top layer and an opaque bottom layer. In that case, the device will measure the distance to the opaque bottom layer, causing the measurement failure or significant deviation.
You can apply the masking tape to the transparent materials before distance measurement.
4. Check the material's height
The lift platform mode only supports processing materials of the same height.
When you process stepped materials or materials of different heights, if one processing surface is slightly lower (with a height difference exceeding 3mm between the two materials), it may cause the laser module to collide with the material. Please adjust both materials to the same height before processing.
If you process the curved materials, select Curved materials to process.
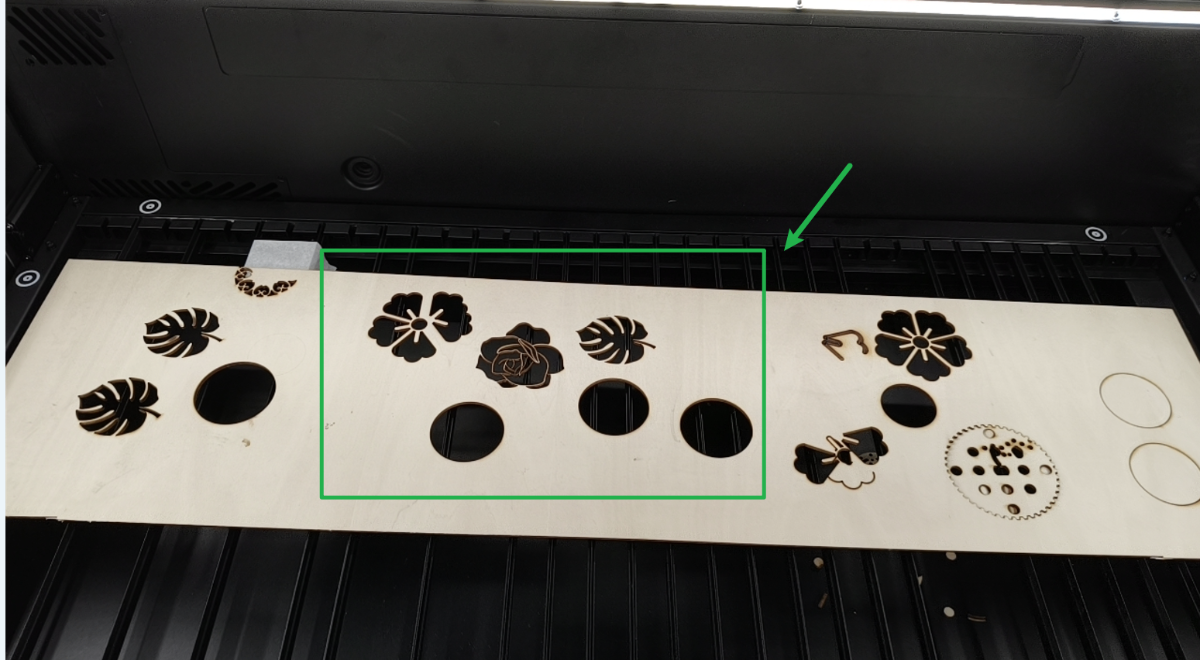
5. Check the measuring point on the material
If the measurement location is in a hollowed-out area, distance measurement may fail or leads to significant deviation.
For manual mode, you can measure other non-cutout areas, or apply masking tape to the hollowed-out area and then measure the position of the masking tape.
For auto mode, if the automatic measurement position coincides with a hollowed-out area, you can apply masking tape to the pattern before using auto mode.
6. Check whether the cutting material drops and flips up
When you perform laser cutting, materials may drop and flip up after being cut through. Follow the steps below to prevent material flipping.
- Add slats under the laser cutting area.
- Use the honeycomb panel to process.
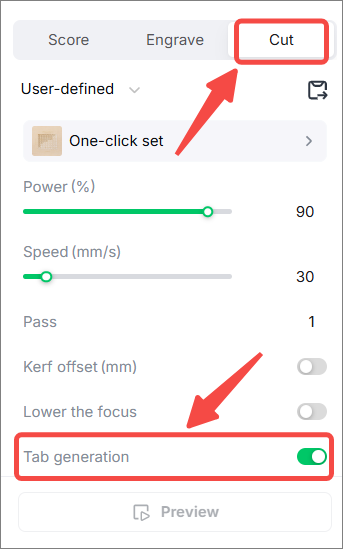
- Set the tab to prevent material dropping. Go to How to Set Tab Generation to learn how to set the tabs.
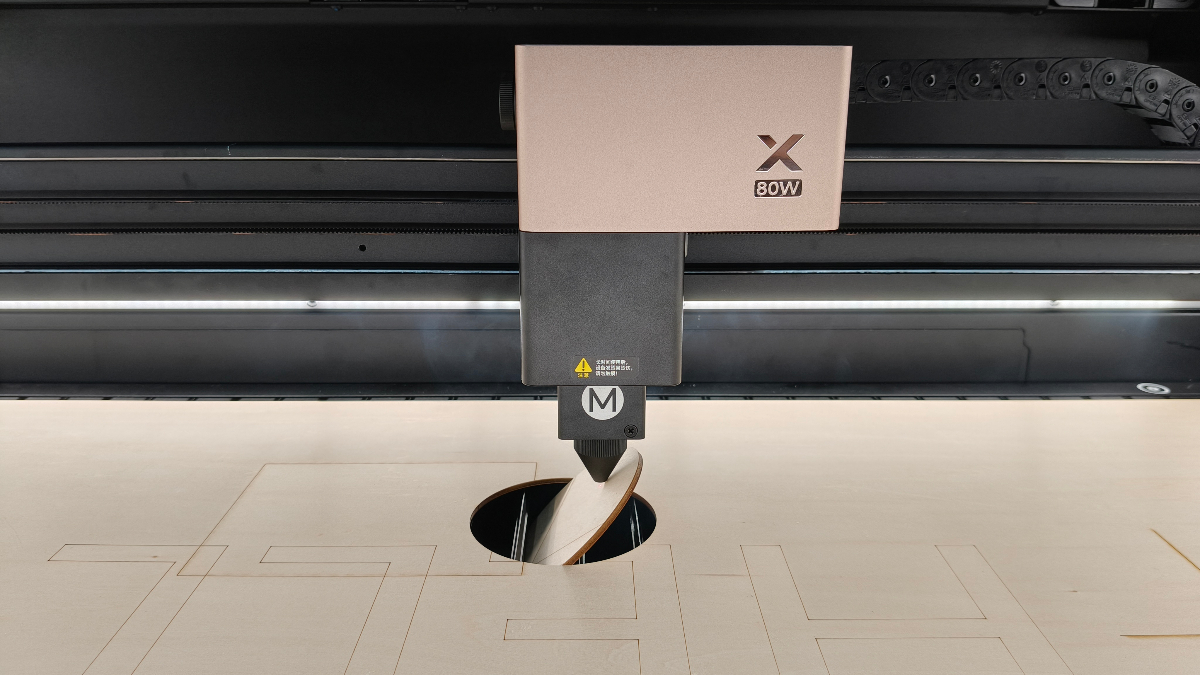
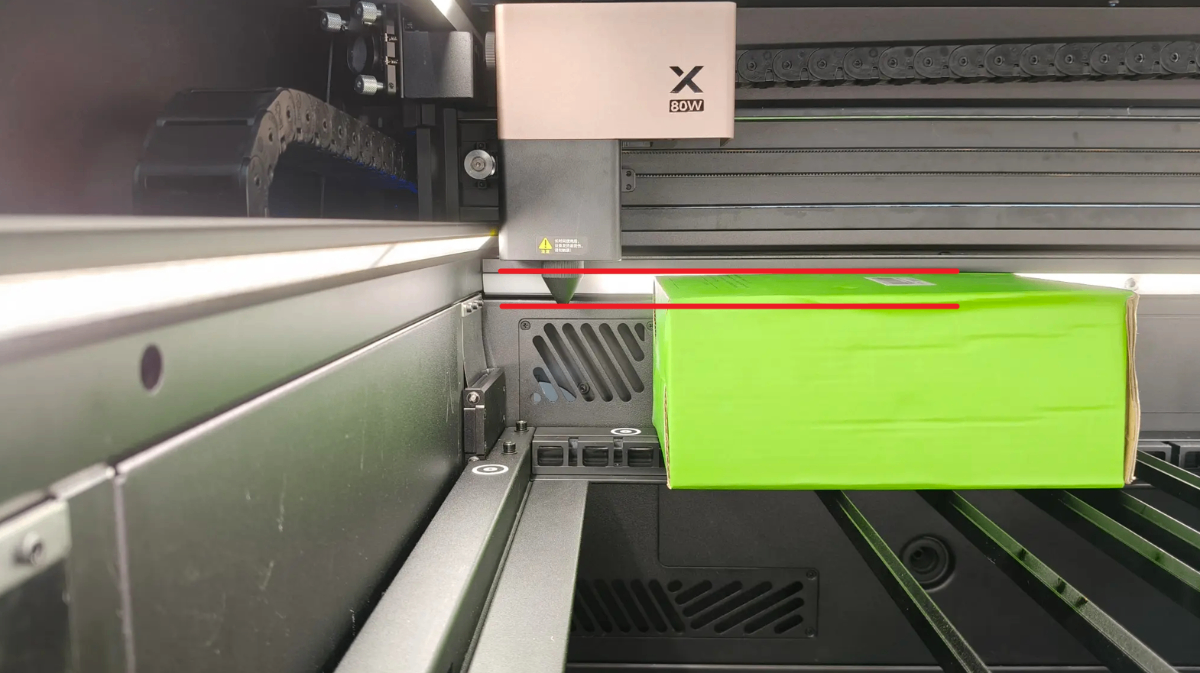
7. Check the material's height (during distance measurement)
Check whether the surface of the material is higher than the air nozzle (as shown).
If the surface is higher than the air nozzle, turn the knob to lower the lifting platform. And ensure the distance between material surface and the air nozzle is at least 4 mm.
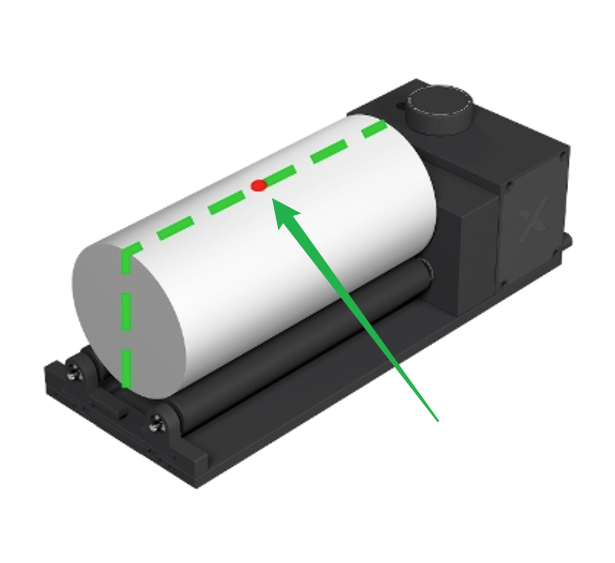
8. The highest point on the material surface is not measured (in Rotary attachment mode)
When you process with the rotary attachment mode, the device should measure the highest point on the material surface.
9. Remove the air nozzle (in Laser Engraving mode)
When you process only in laser engraving for all patterns in one project, you can remove the air nozzle to reduce the possibility of air nozzle hitting the material.
10. Check the precision of the distance measurement
(1) Select Lifting platform processing and click to measure the distance between the flat material and the laser module.
(2) Observe whether the measurement result meets the formula below or not (Deviation range: ±1.5mm).
Distance input value (mm) = Distance from laser module bottom to material surface (as shown) - 30 mm
- If the result meets the formula, check for other issues.
- If the result does not meet the formula, contact xTool after-sales service and send them an operating video.
Still experiencing issues?
Should the issue persist after completing the preceding steps, submit a ticket via the "Submit a Ticket" button in the "Help Ticket" section below. The standard response time for xTool Customer Service is one business day.
For a prompt resolution, please include the following details:
- Issue description: A detailed explanation of the observed problem.
- Video evidence: Attach a video demonstrating the issue, where applicable.
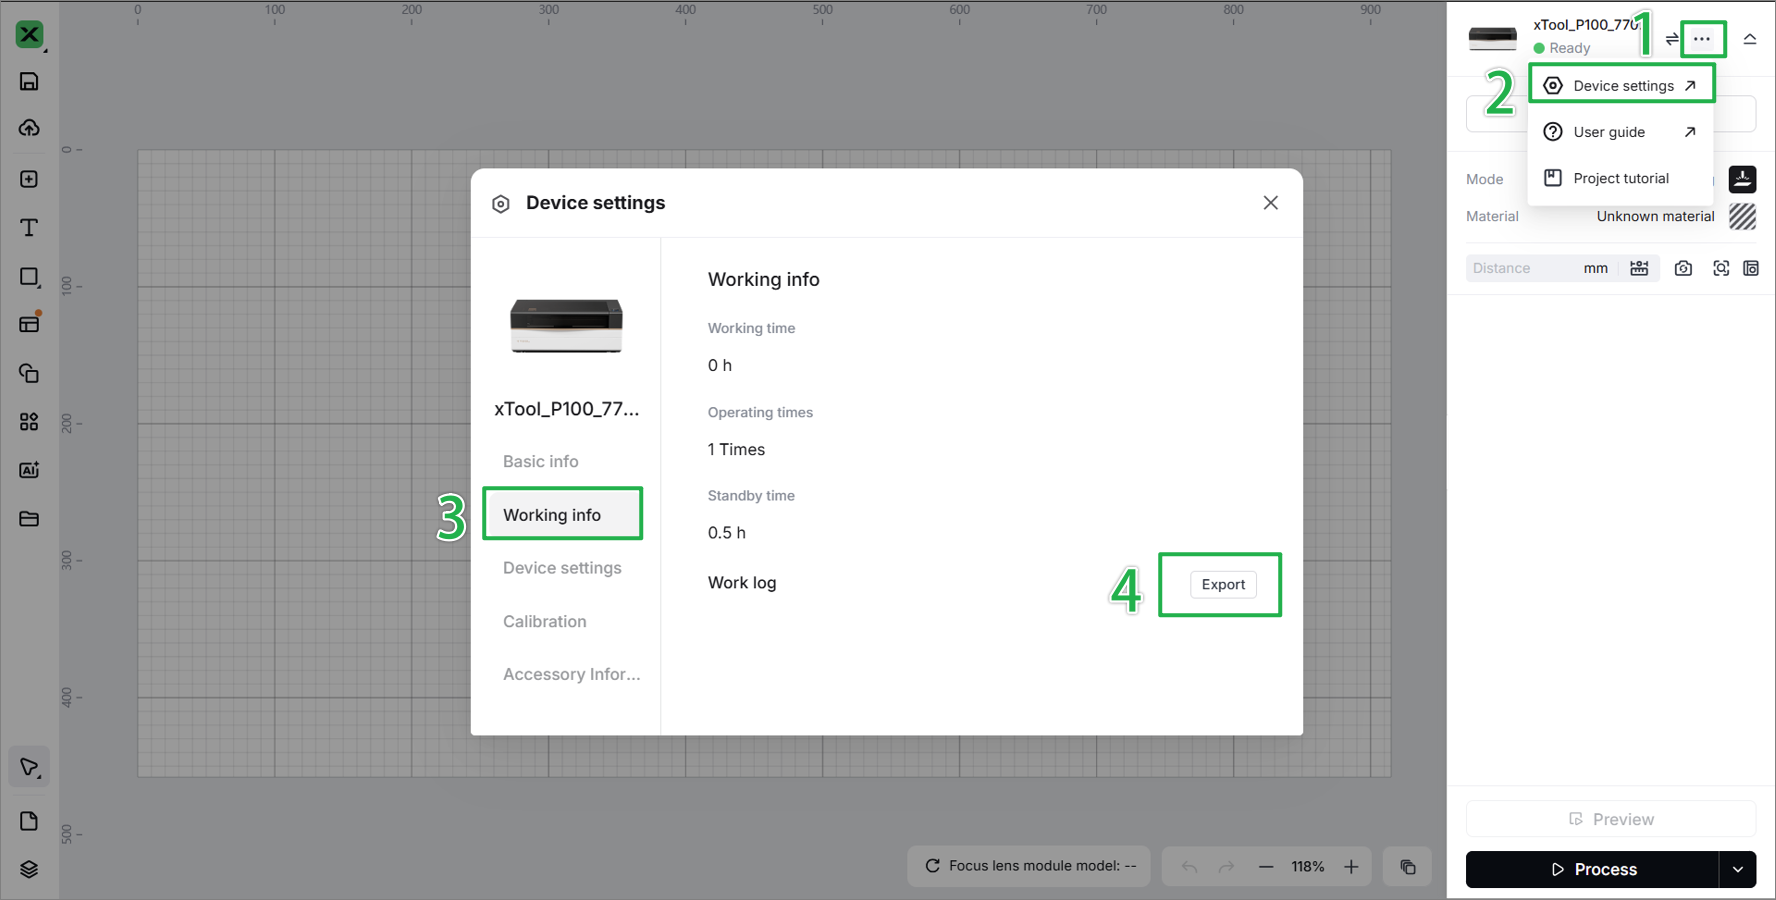
- Device information: Follow the steps to find the SN and export the work log.
- Troubleshooting performed: Any troubleshooting steps you have already attempted, along with their results.
This information is crucial for xTool technical support engineers to provide timely assistance.
Documentation feedback
Help improve this content by providing feedback. If this content did not meet your requirements, select "No" in the "Was this page helpful?" section below. Include specific details about what was unclear or missing in the pop-up suggestion box. Feedback submissions are reviewed by xTool technical writers to enhance future documentation.
Services & Help
Learn & Education

Copyright © 2025 xTool All Rights Reserved.