Important Tips
- The maximum processing area (XYZ) for F2 Ultra UV internal engraving is: 70 mm × 70 mm × 150 mm.
- Material height (Z) must not exceed 160 mm.
- The material's XY external dimensions can exceed 70 × 70 mm. However, the processing is limited to the central 70 × 70 mm area. This means that even if the material is wider, engraving can proceed normally as long as the content is located within the central area.
Types and Descriptions of Inner Engraving Processing
Inner Engraving Processing Types
Scanning Engraving | Dotting Engraving | Textured Engraving | Solid Engraving | Point Cloud Engraving | 3D Photo | 2D Image | |
STL | √ | √ | √ | ||||
GLB | √ | √ | √ | ||||
OBJ/3MF | √ | √ | √ | ||||
PLY | √ | √ | |||||
SVG, DXF, JPG, JPEG, GIF, PNG, BMP, and WEBP | √ |
Outline Engraving
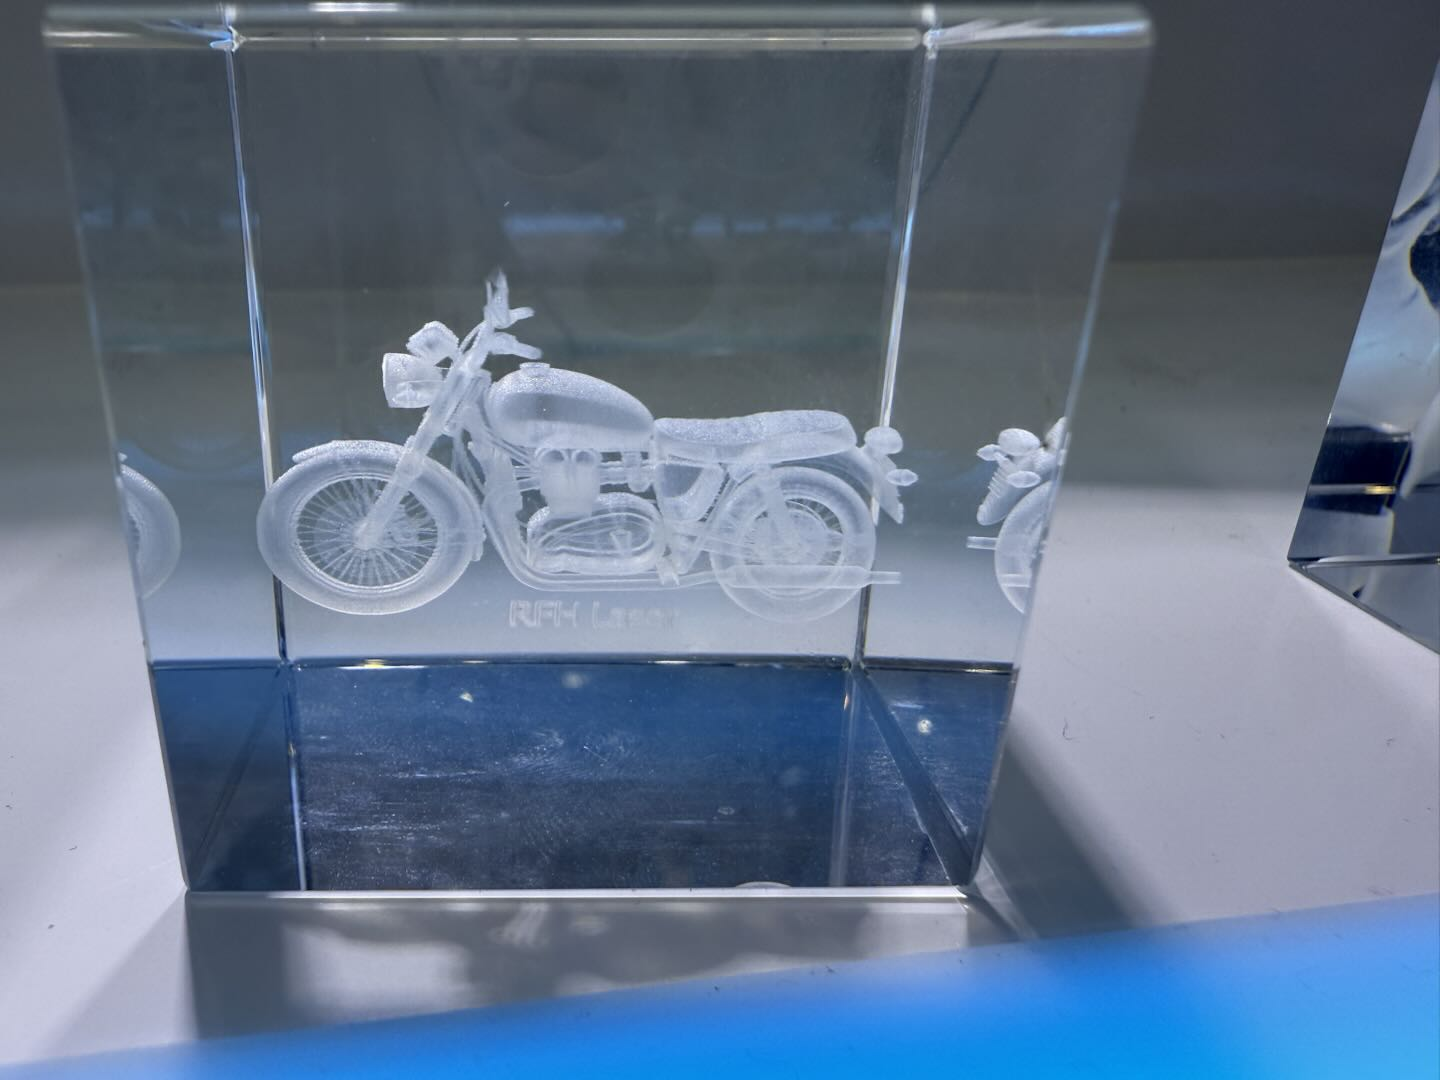
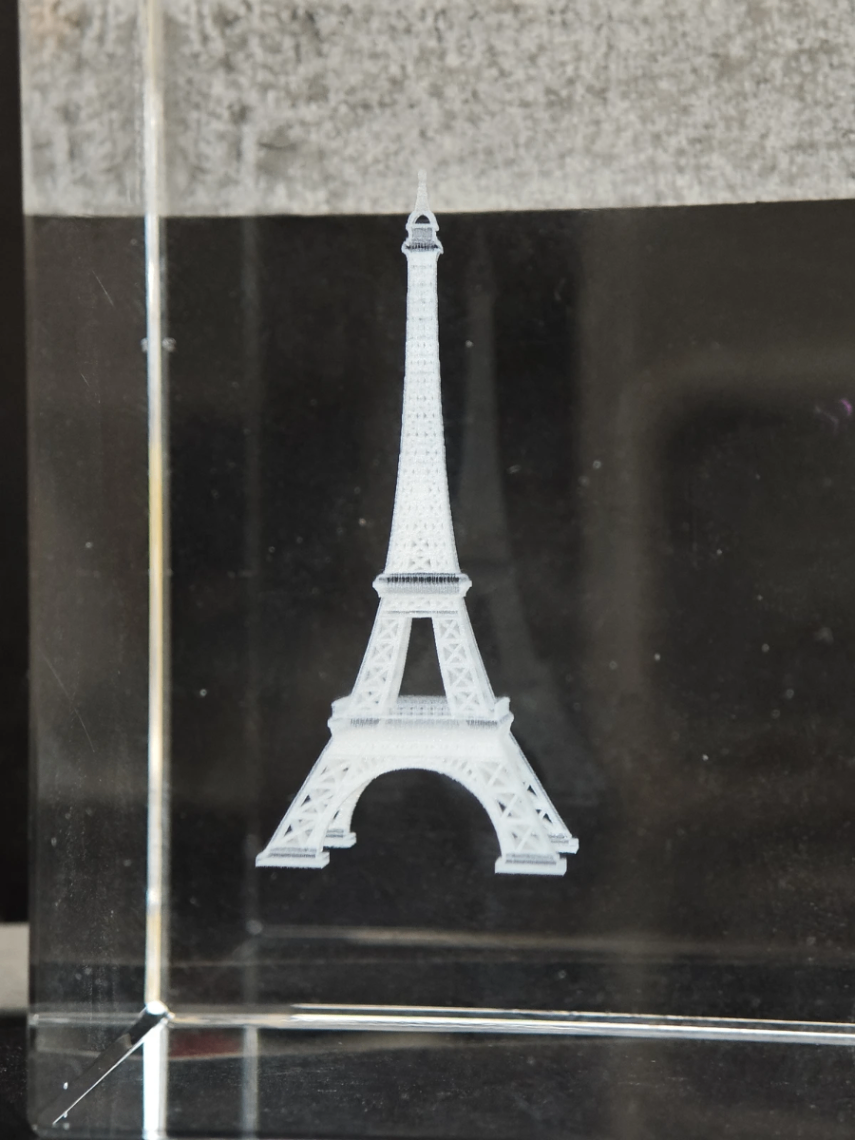
1.1 Scanning Engraving
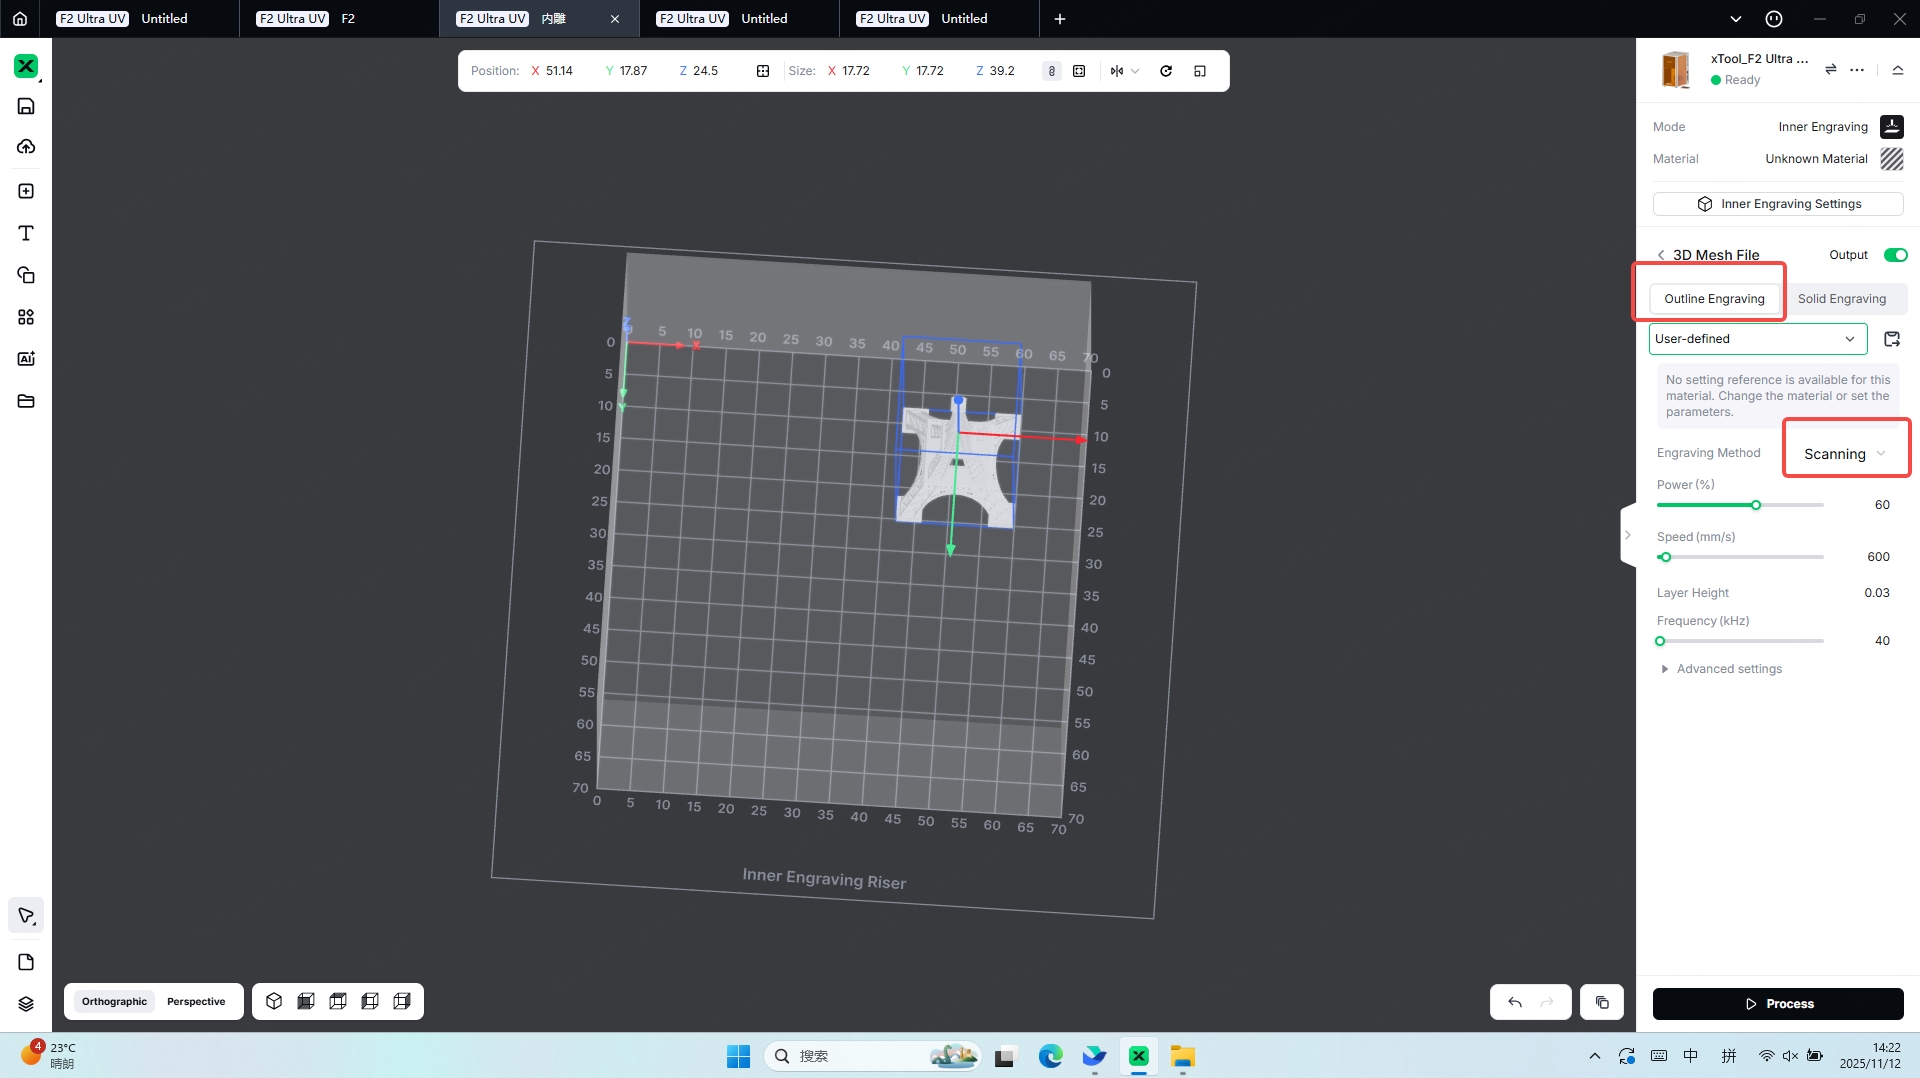
Characteristics: The advantage of scanning is its ability to deliver energy continuously along the engraving path. Compared with Dotting and other modes, this continuous scanning allows the laser to generate a more uniform internal stress distribution and smoother micro-fractures within the glass.
Suitable 3D Model: 3D Mesh Model
Processing Showcase:
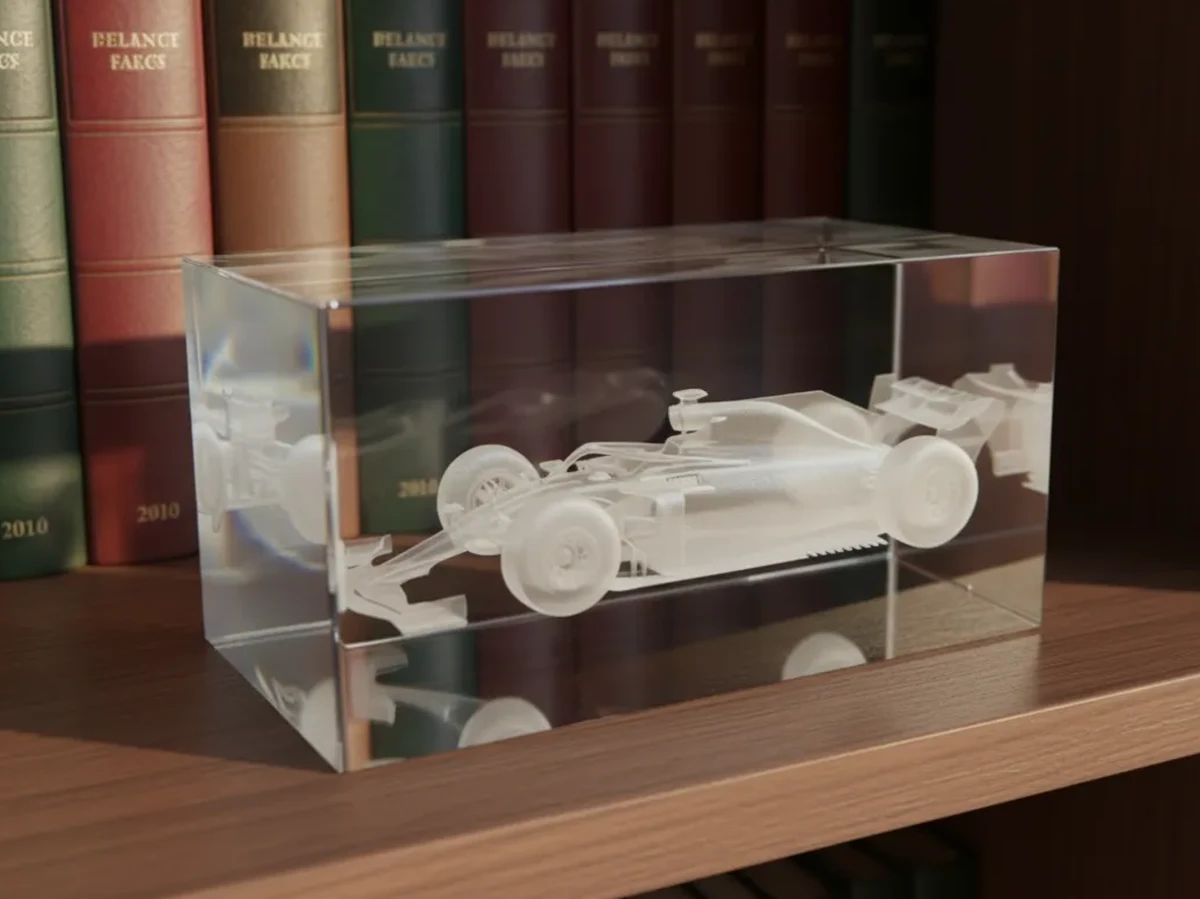
1.2 Dotting Engraving
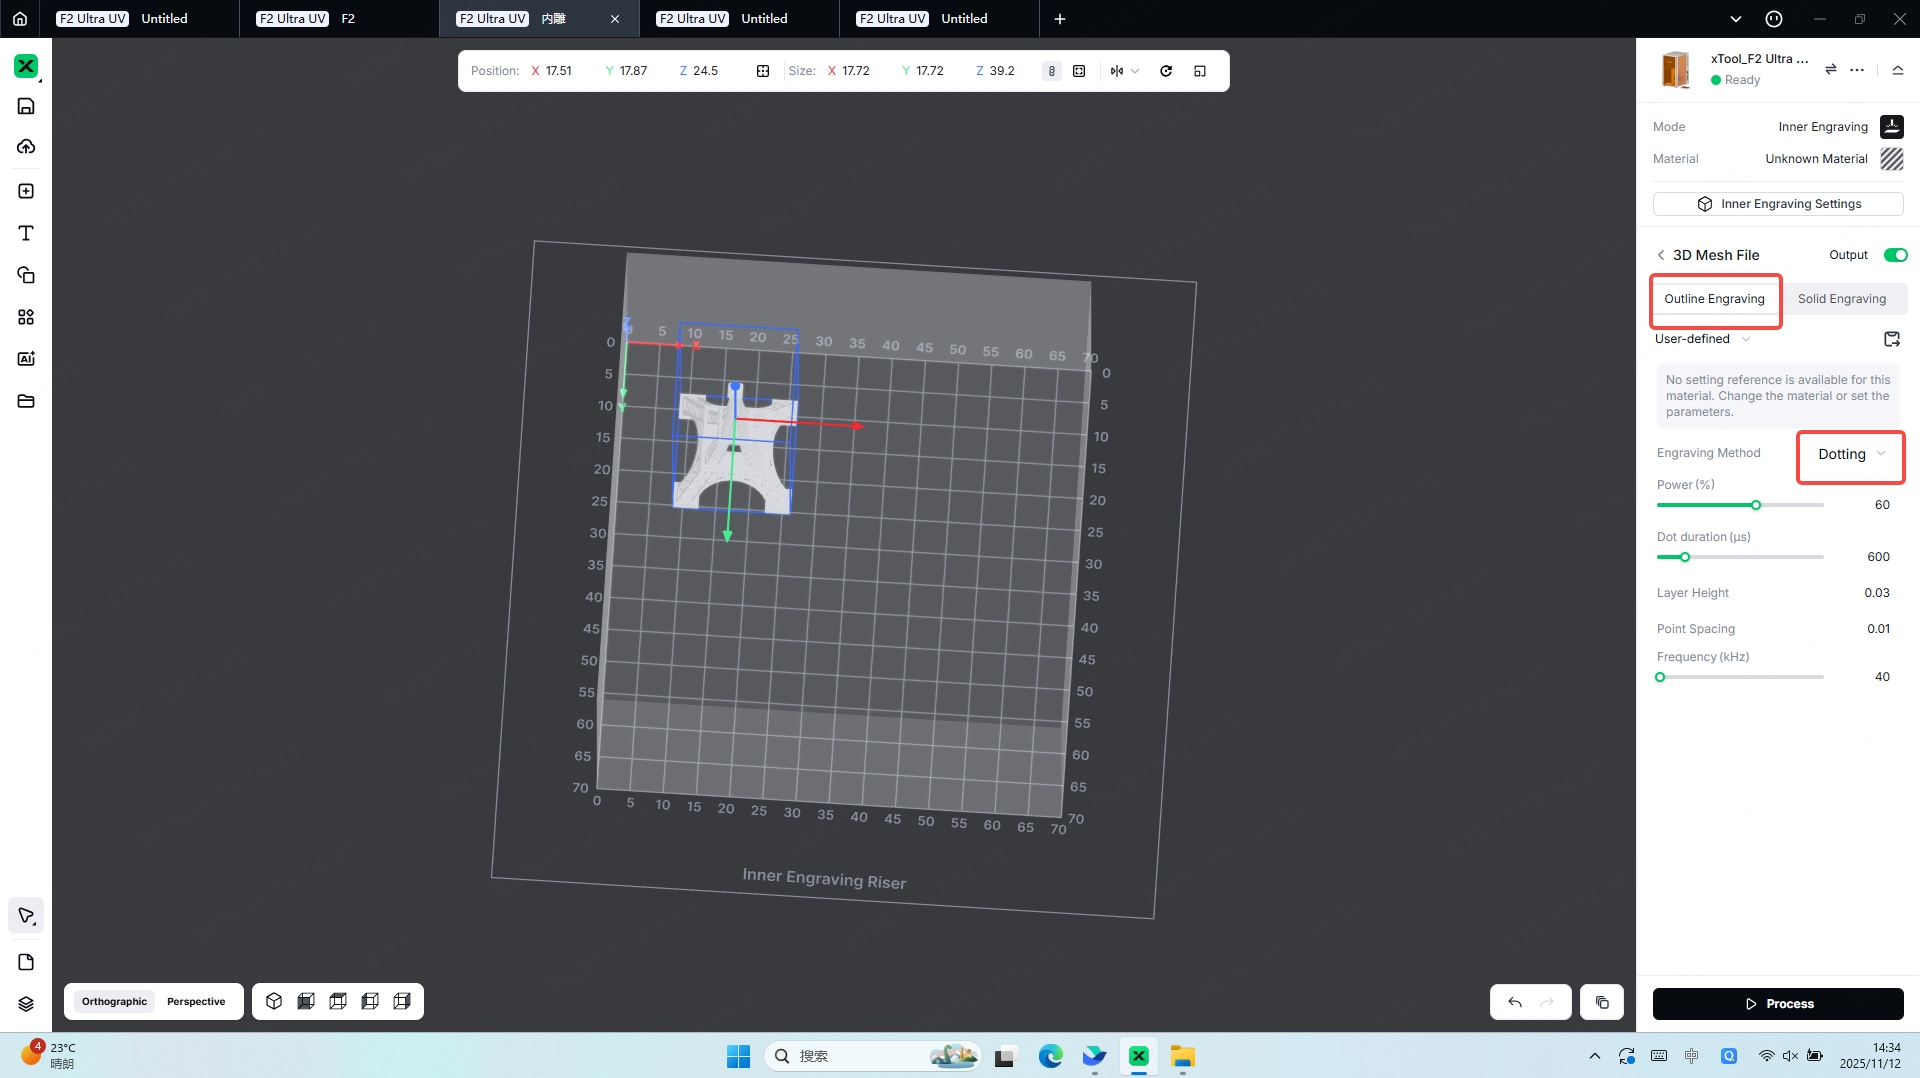
Characteristics:
In the glass inner-engraving laser mode, the core characteristic of Dotting is its use of densely distributed, discrete laser pulses to create individual micro-explosion points inside the glass, which then combine to form the final pattern.
Suitable 3D Model: 3D Mesh Model
Processing Showcase:
1.3 Textured Engraving
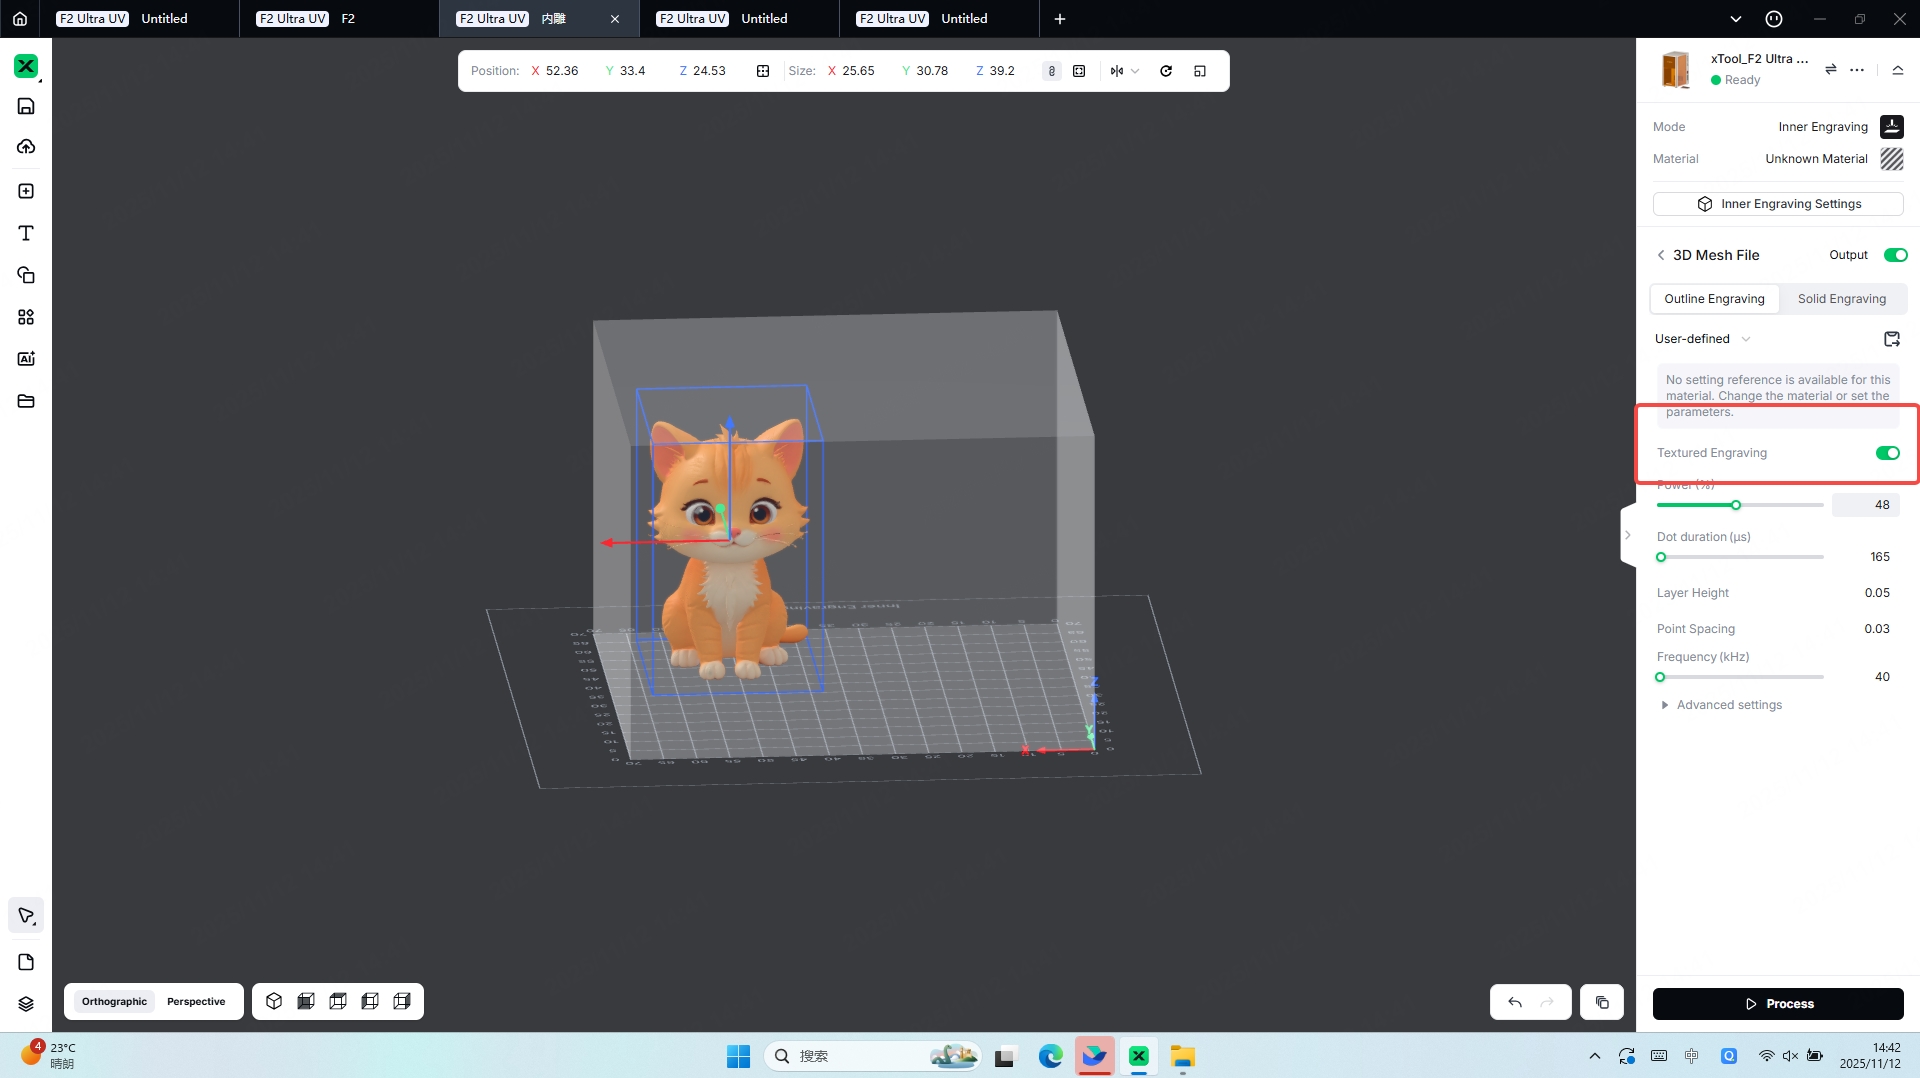
Characteristics:
Textured engraving refers to the process of engraving the surface textures of a model inside the glass, making the model more realistic and vivid. When engraving a 3D model with textures, it is not recommended to disable the Textured Engraving option. Processing with Textured Engraving enabled helps make the model more realistic and vivid.
Suitable 3D Model: 3D Mesh Model with texture
Processing Showcase:
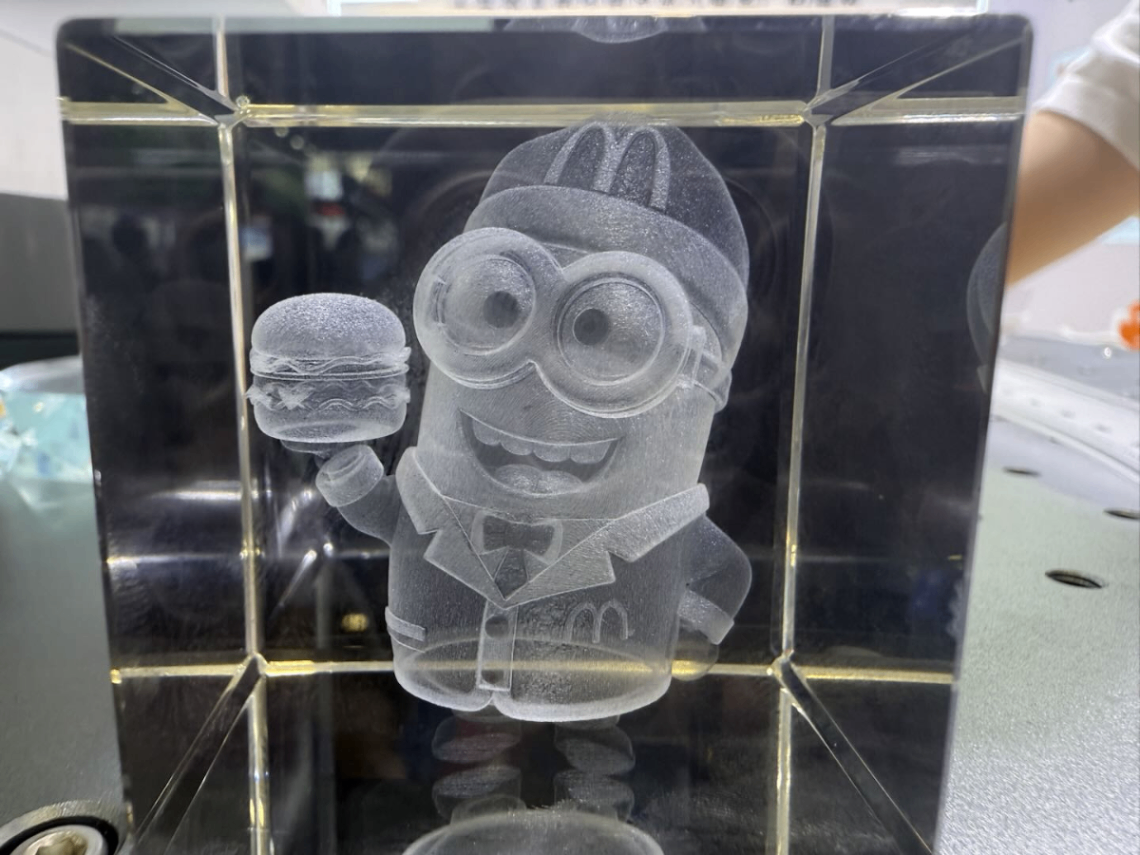
Solid Engraving
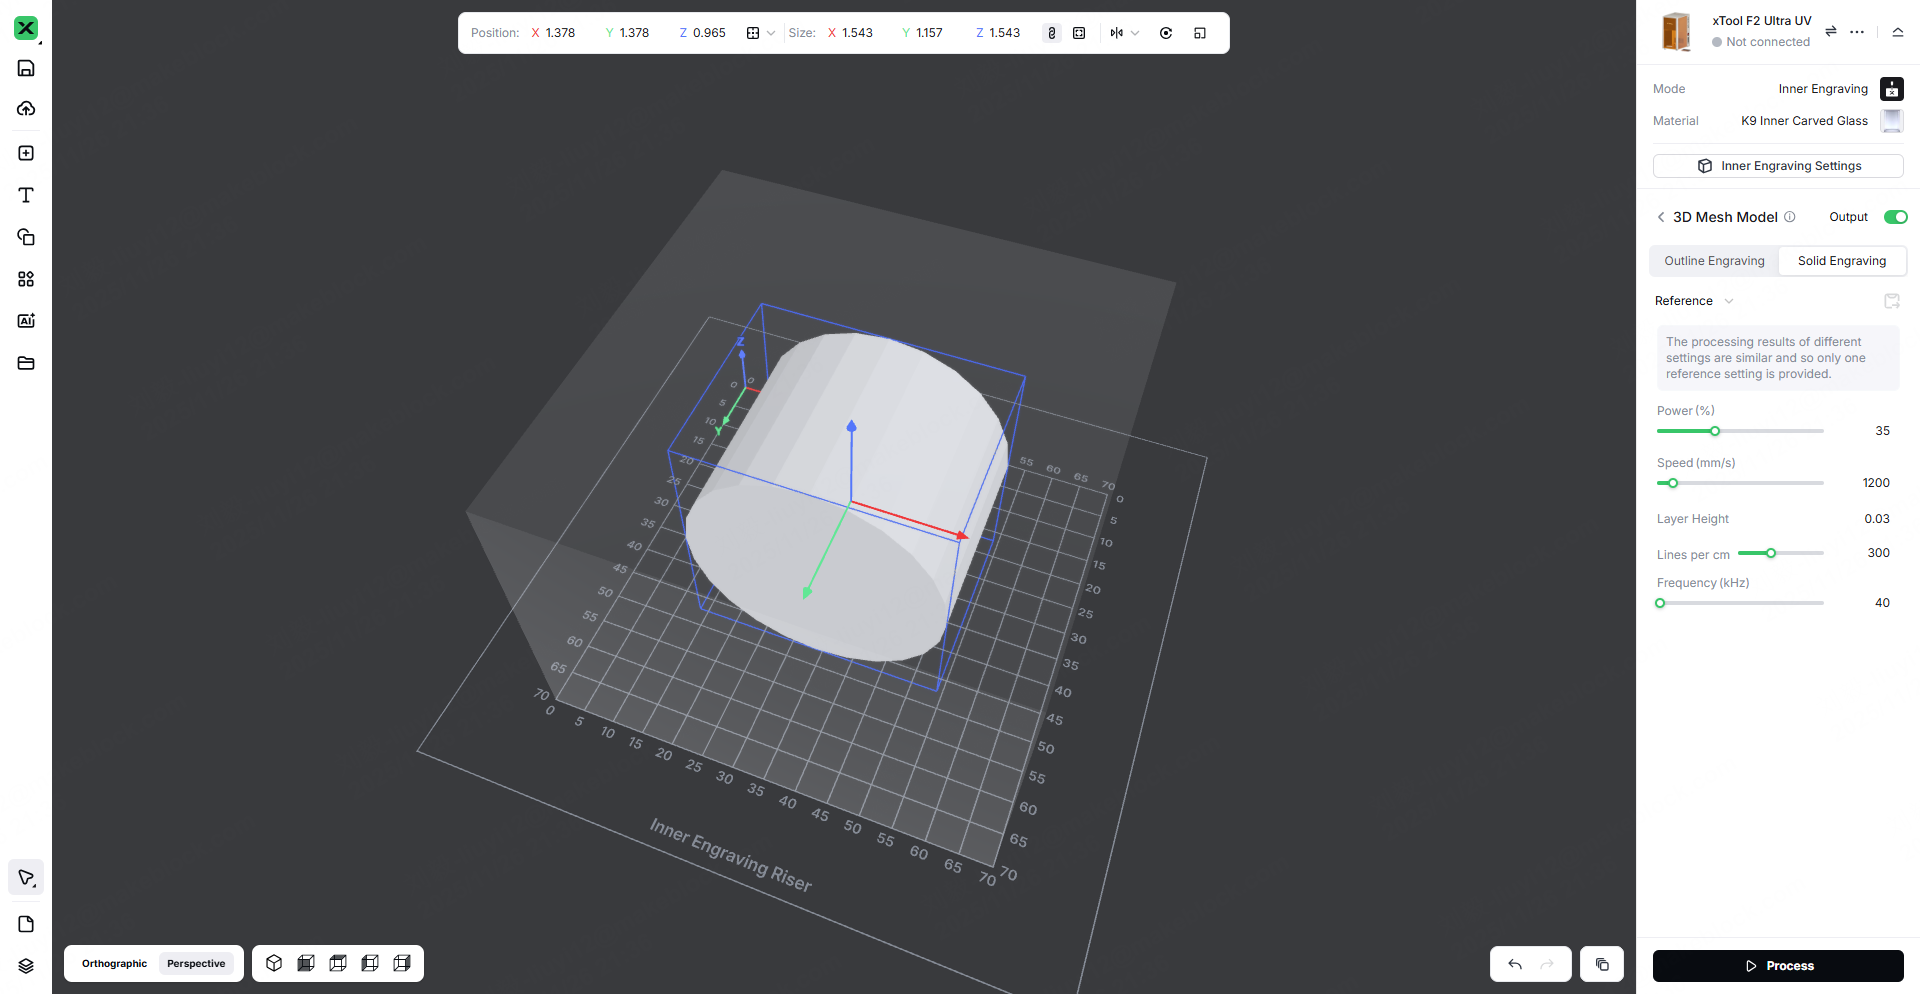
Characteristics:
In the glass inner-engraving laser mode, the fill engraving method allows the designated area to be fully filled along a complete path, achieving a solid fill effect that accurately reproduces the graphic contours and delivers a uniform texture. This makes it suitable for large-area designs and high-precision engraving applications requiring consistent and detailed filling.
Suitable 3D Model: 3D Mesh Model
Processing Showcase:
Inner Engraving
3.1 Point Cloud Engraving
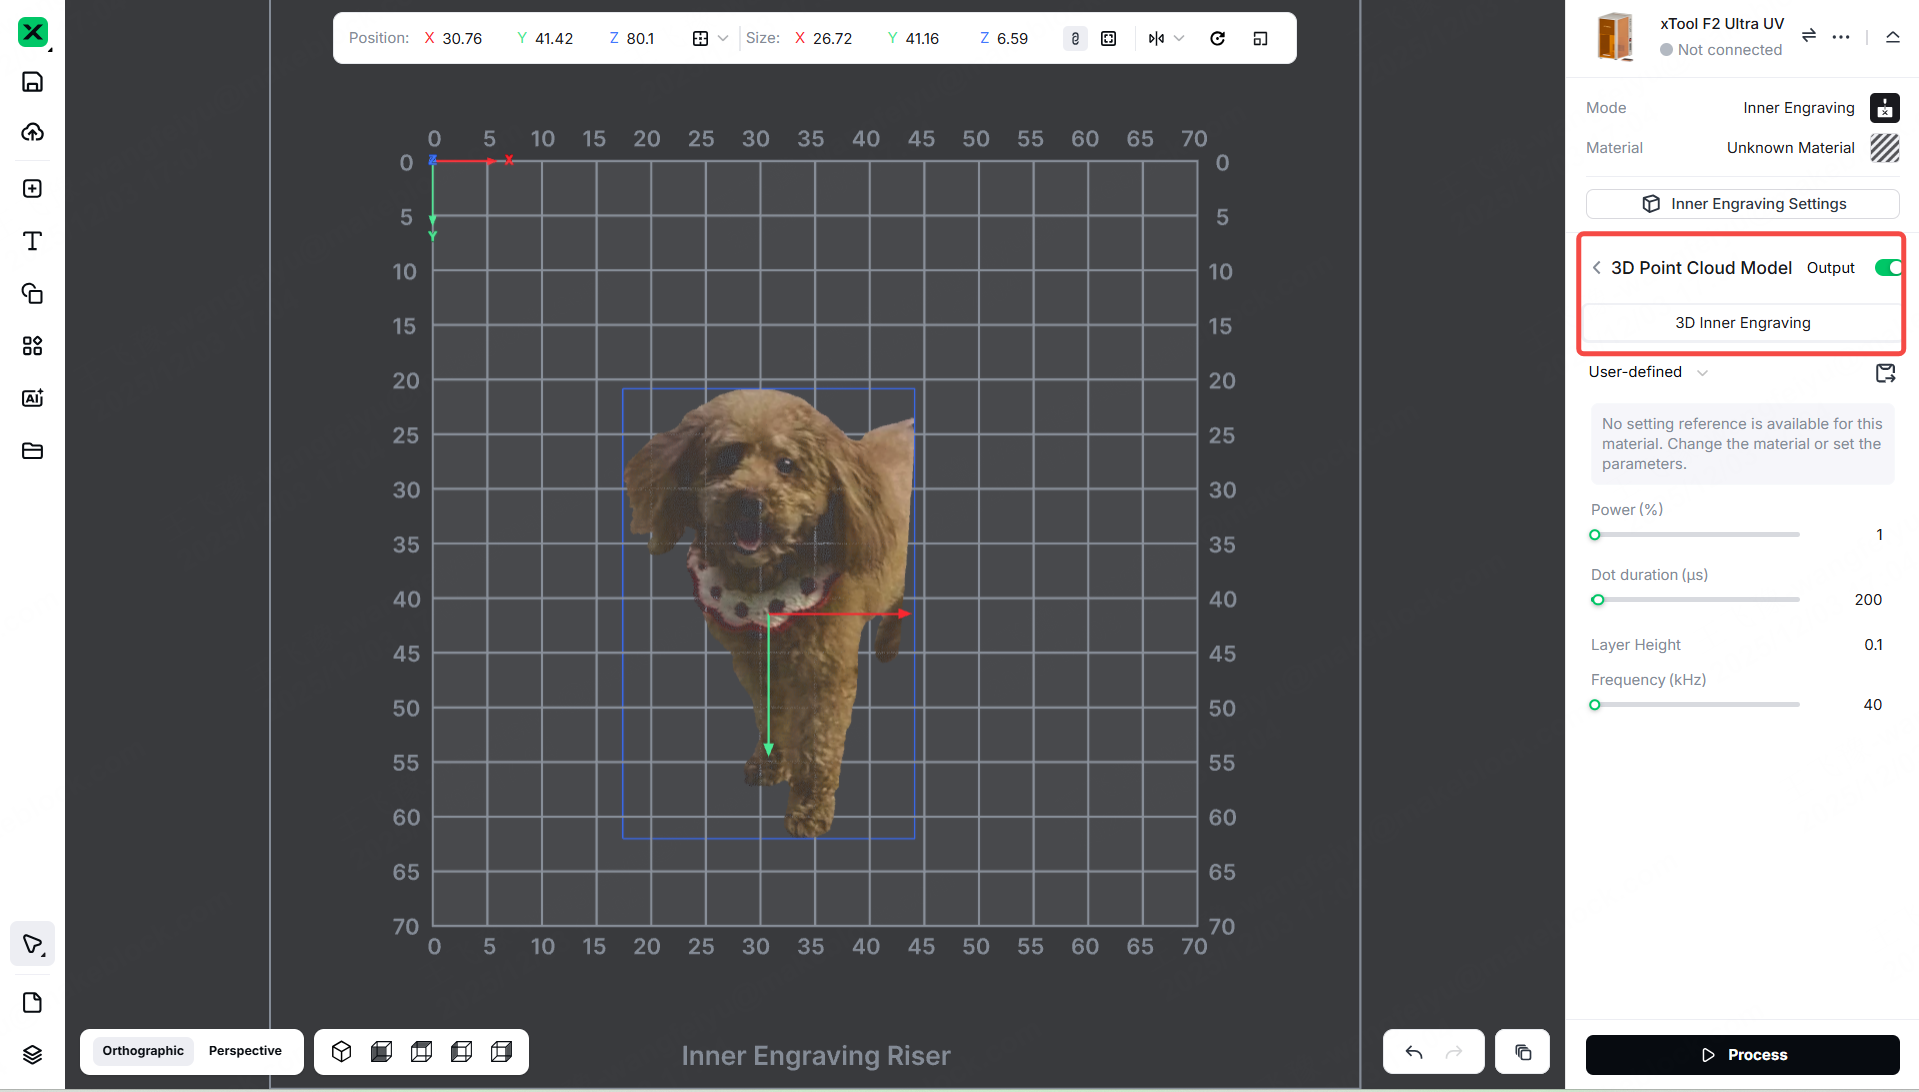
Characteristics:
This process directly imports your point cloud, faithfully preserving all details while intelligently optimizing data. It prioritizes precision, delivering high-quality engraved results.
Suitable 3D Model: 3D Point Cloud Model
Processing Showcase:
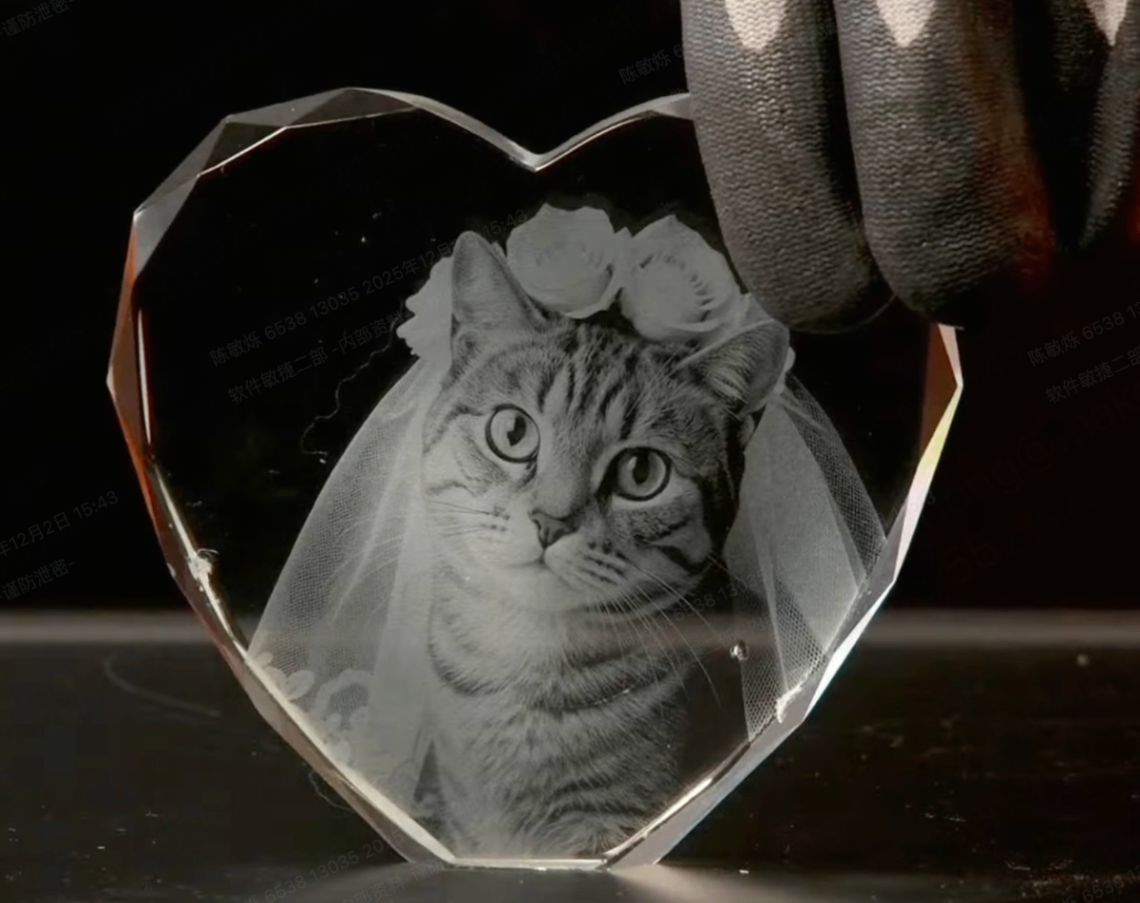
3.2 2D Image
After importing a flat photo into the software, you can click Center on Material to place the photo at the center of the material model. When performing Inner Engraving with a flat image, positioning the image on the horizontal plane provides the best engraving results.
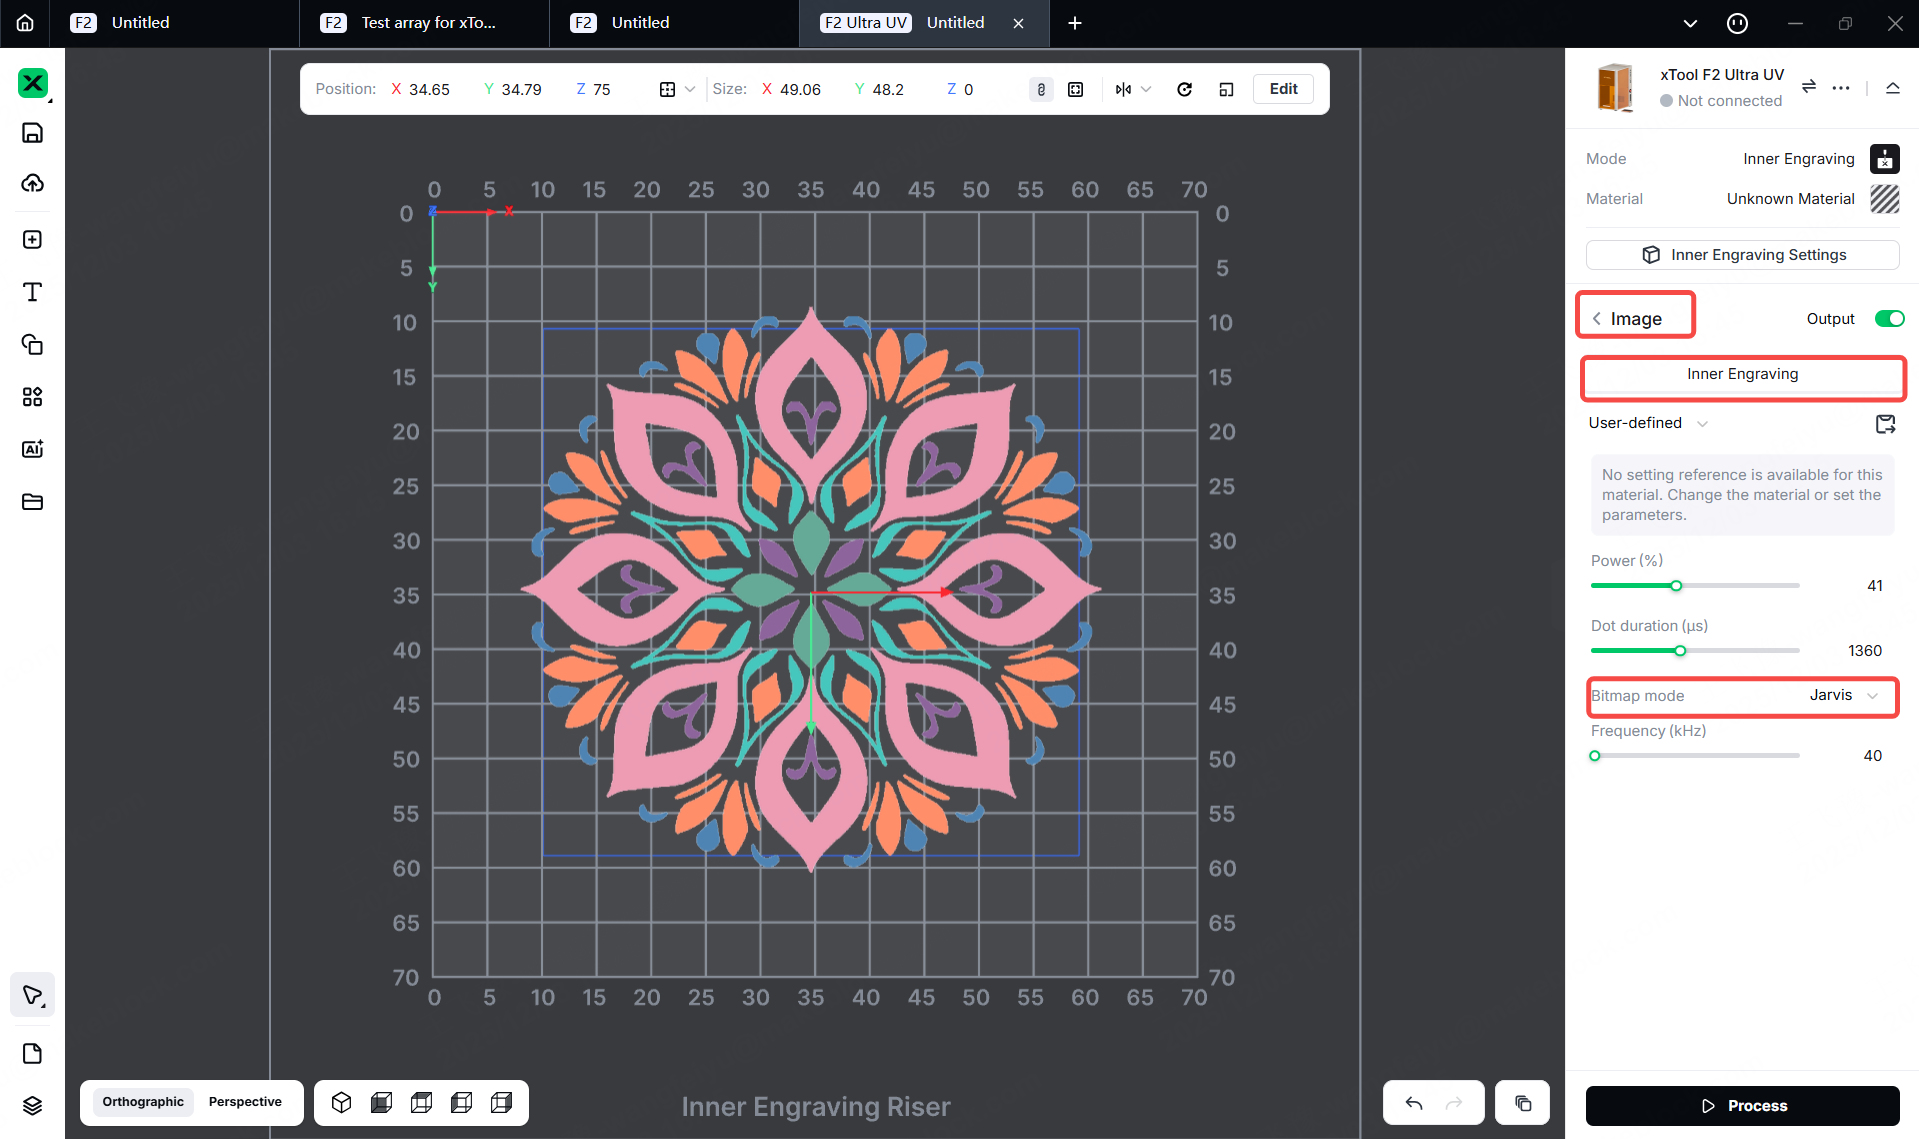
Click the "Edit" button in the editing bar at the top of the canvas.Then click 'Adjustments',the image imported into the software can be processed with Auto Adjust, and the auto-adjustment feature combines device and material parameters to achieve better engraving results.
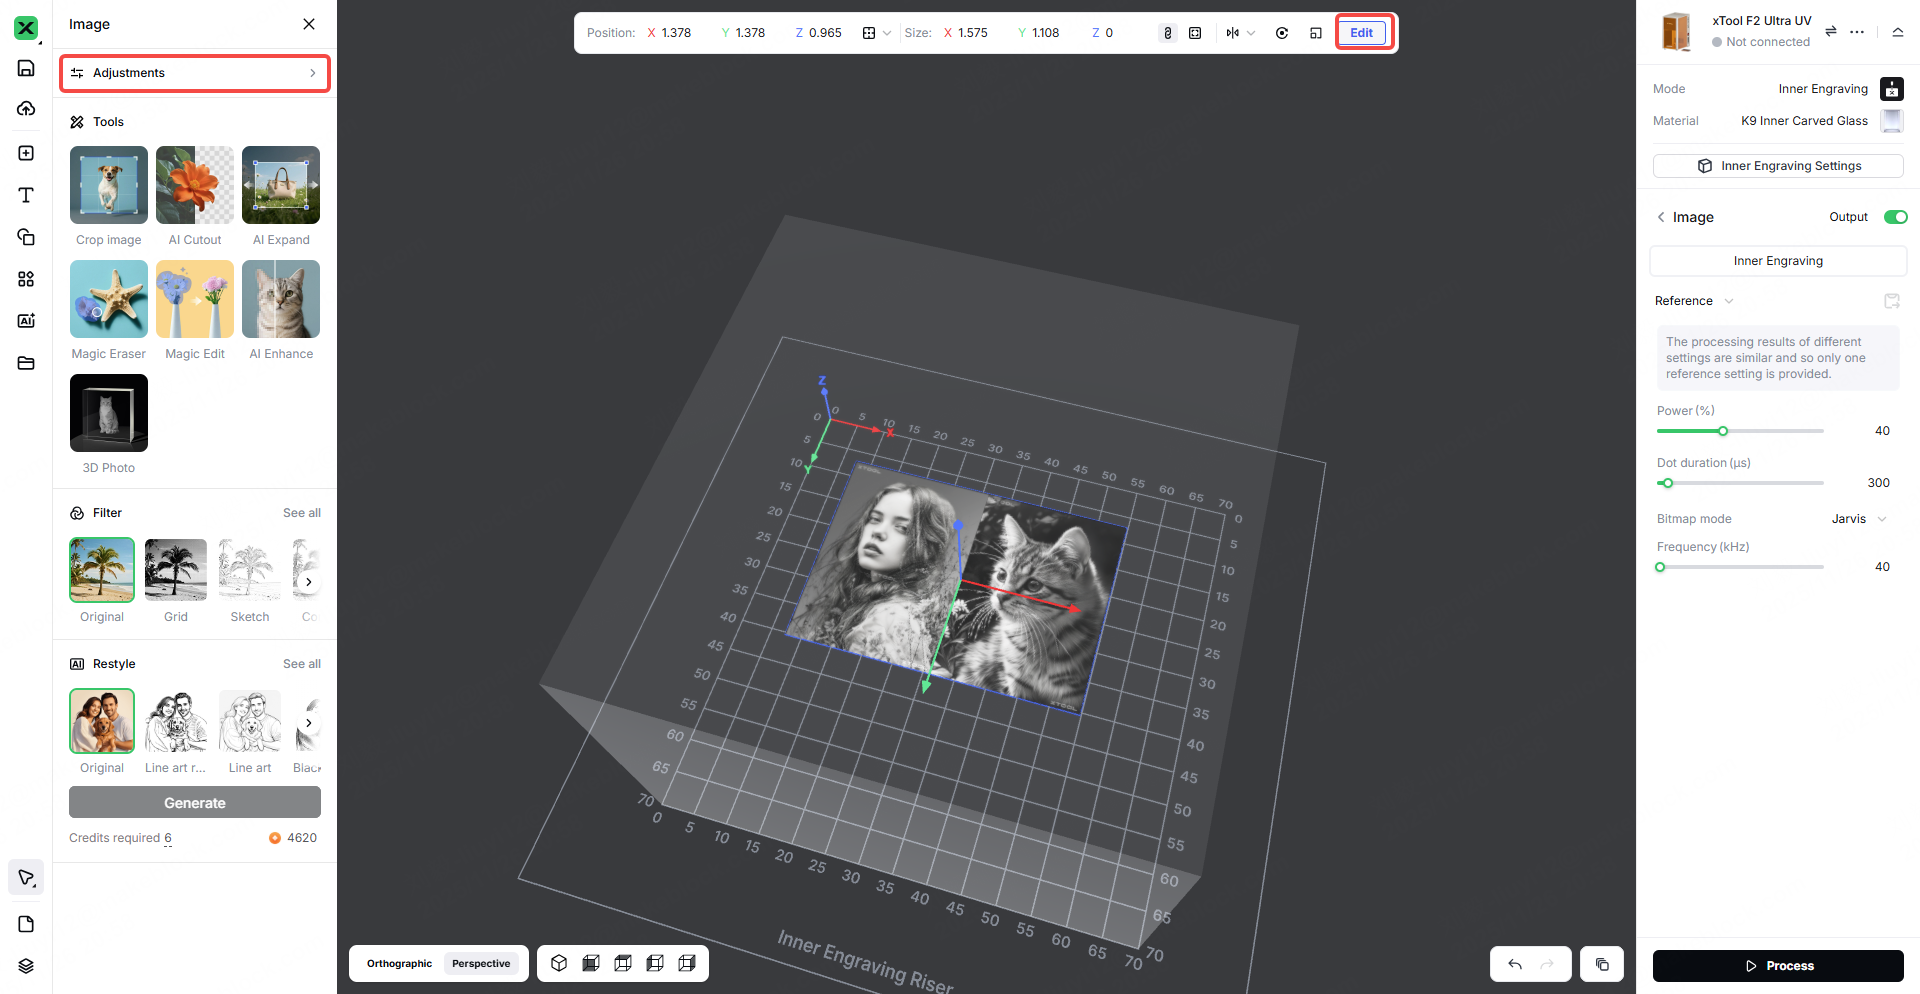
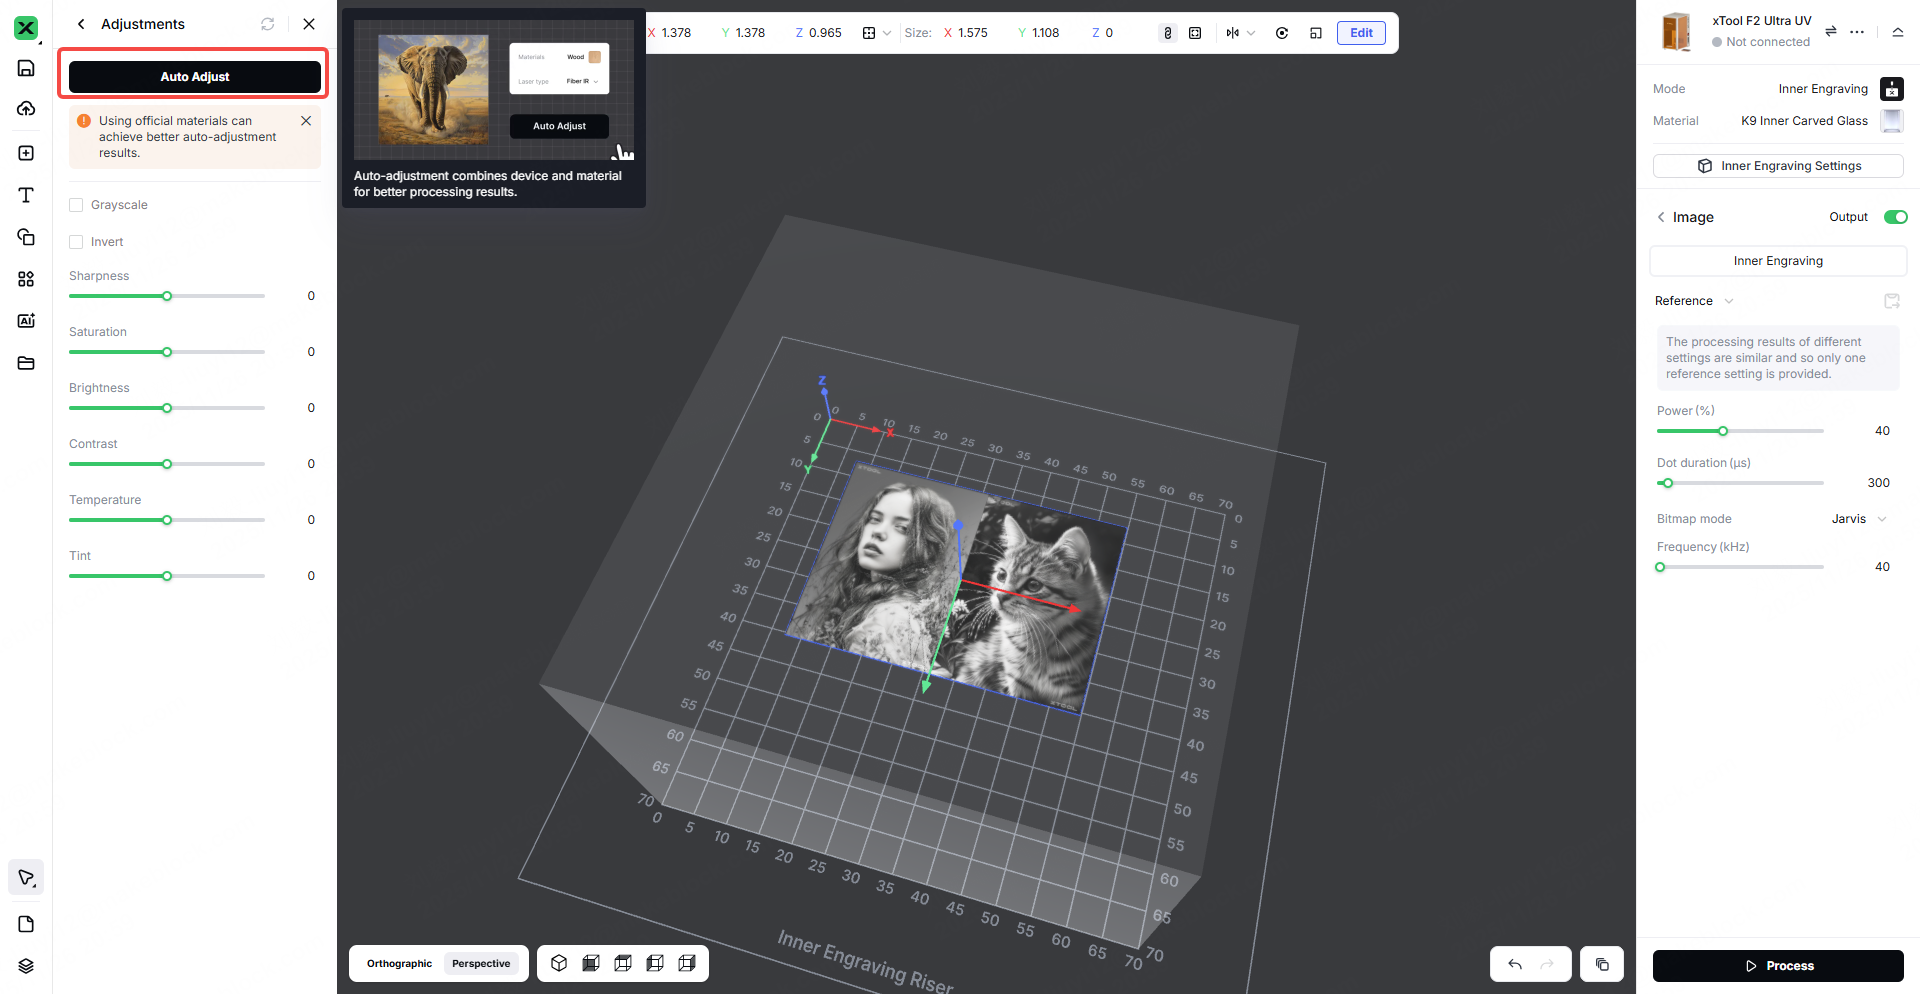
Suitable Model : 2D Image
Processing Showcase:
Processing Phenomena Explanation and Optimization Suggestions
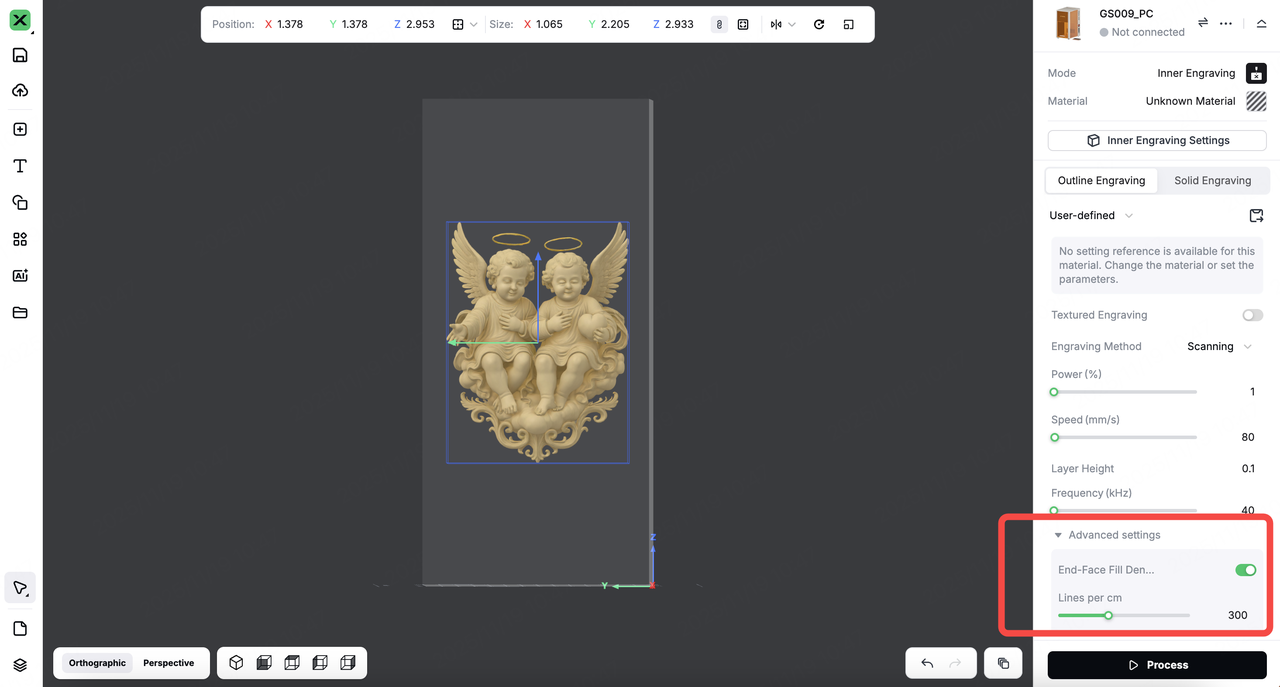
2.1 Why is the point density sparse on the top/bottom but denser on the sides in 3D outline Engraving ?
In 3D Outline Engraving, the sparser point density on the top and bottom surfaces compared to the denser distribution on the sides is a normal phenomenon related to the processing characteristics.
When using the "Scanning" method, the angle between the scanning lines and the model surface varies: this angle is larger on the top and bottom surfaces, resulting in relatively sparse points, while it is smaller on the side surfaces, leading to a denser point distribution.
Optimization Method:
You can adjust the engraving density in Advanced Settings > End Face Fill Density to balance the appearance on the model's top and bottom surfaces.
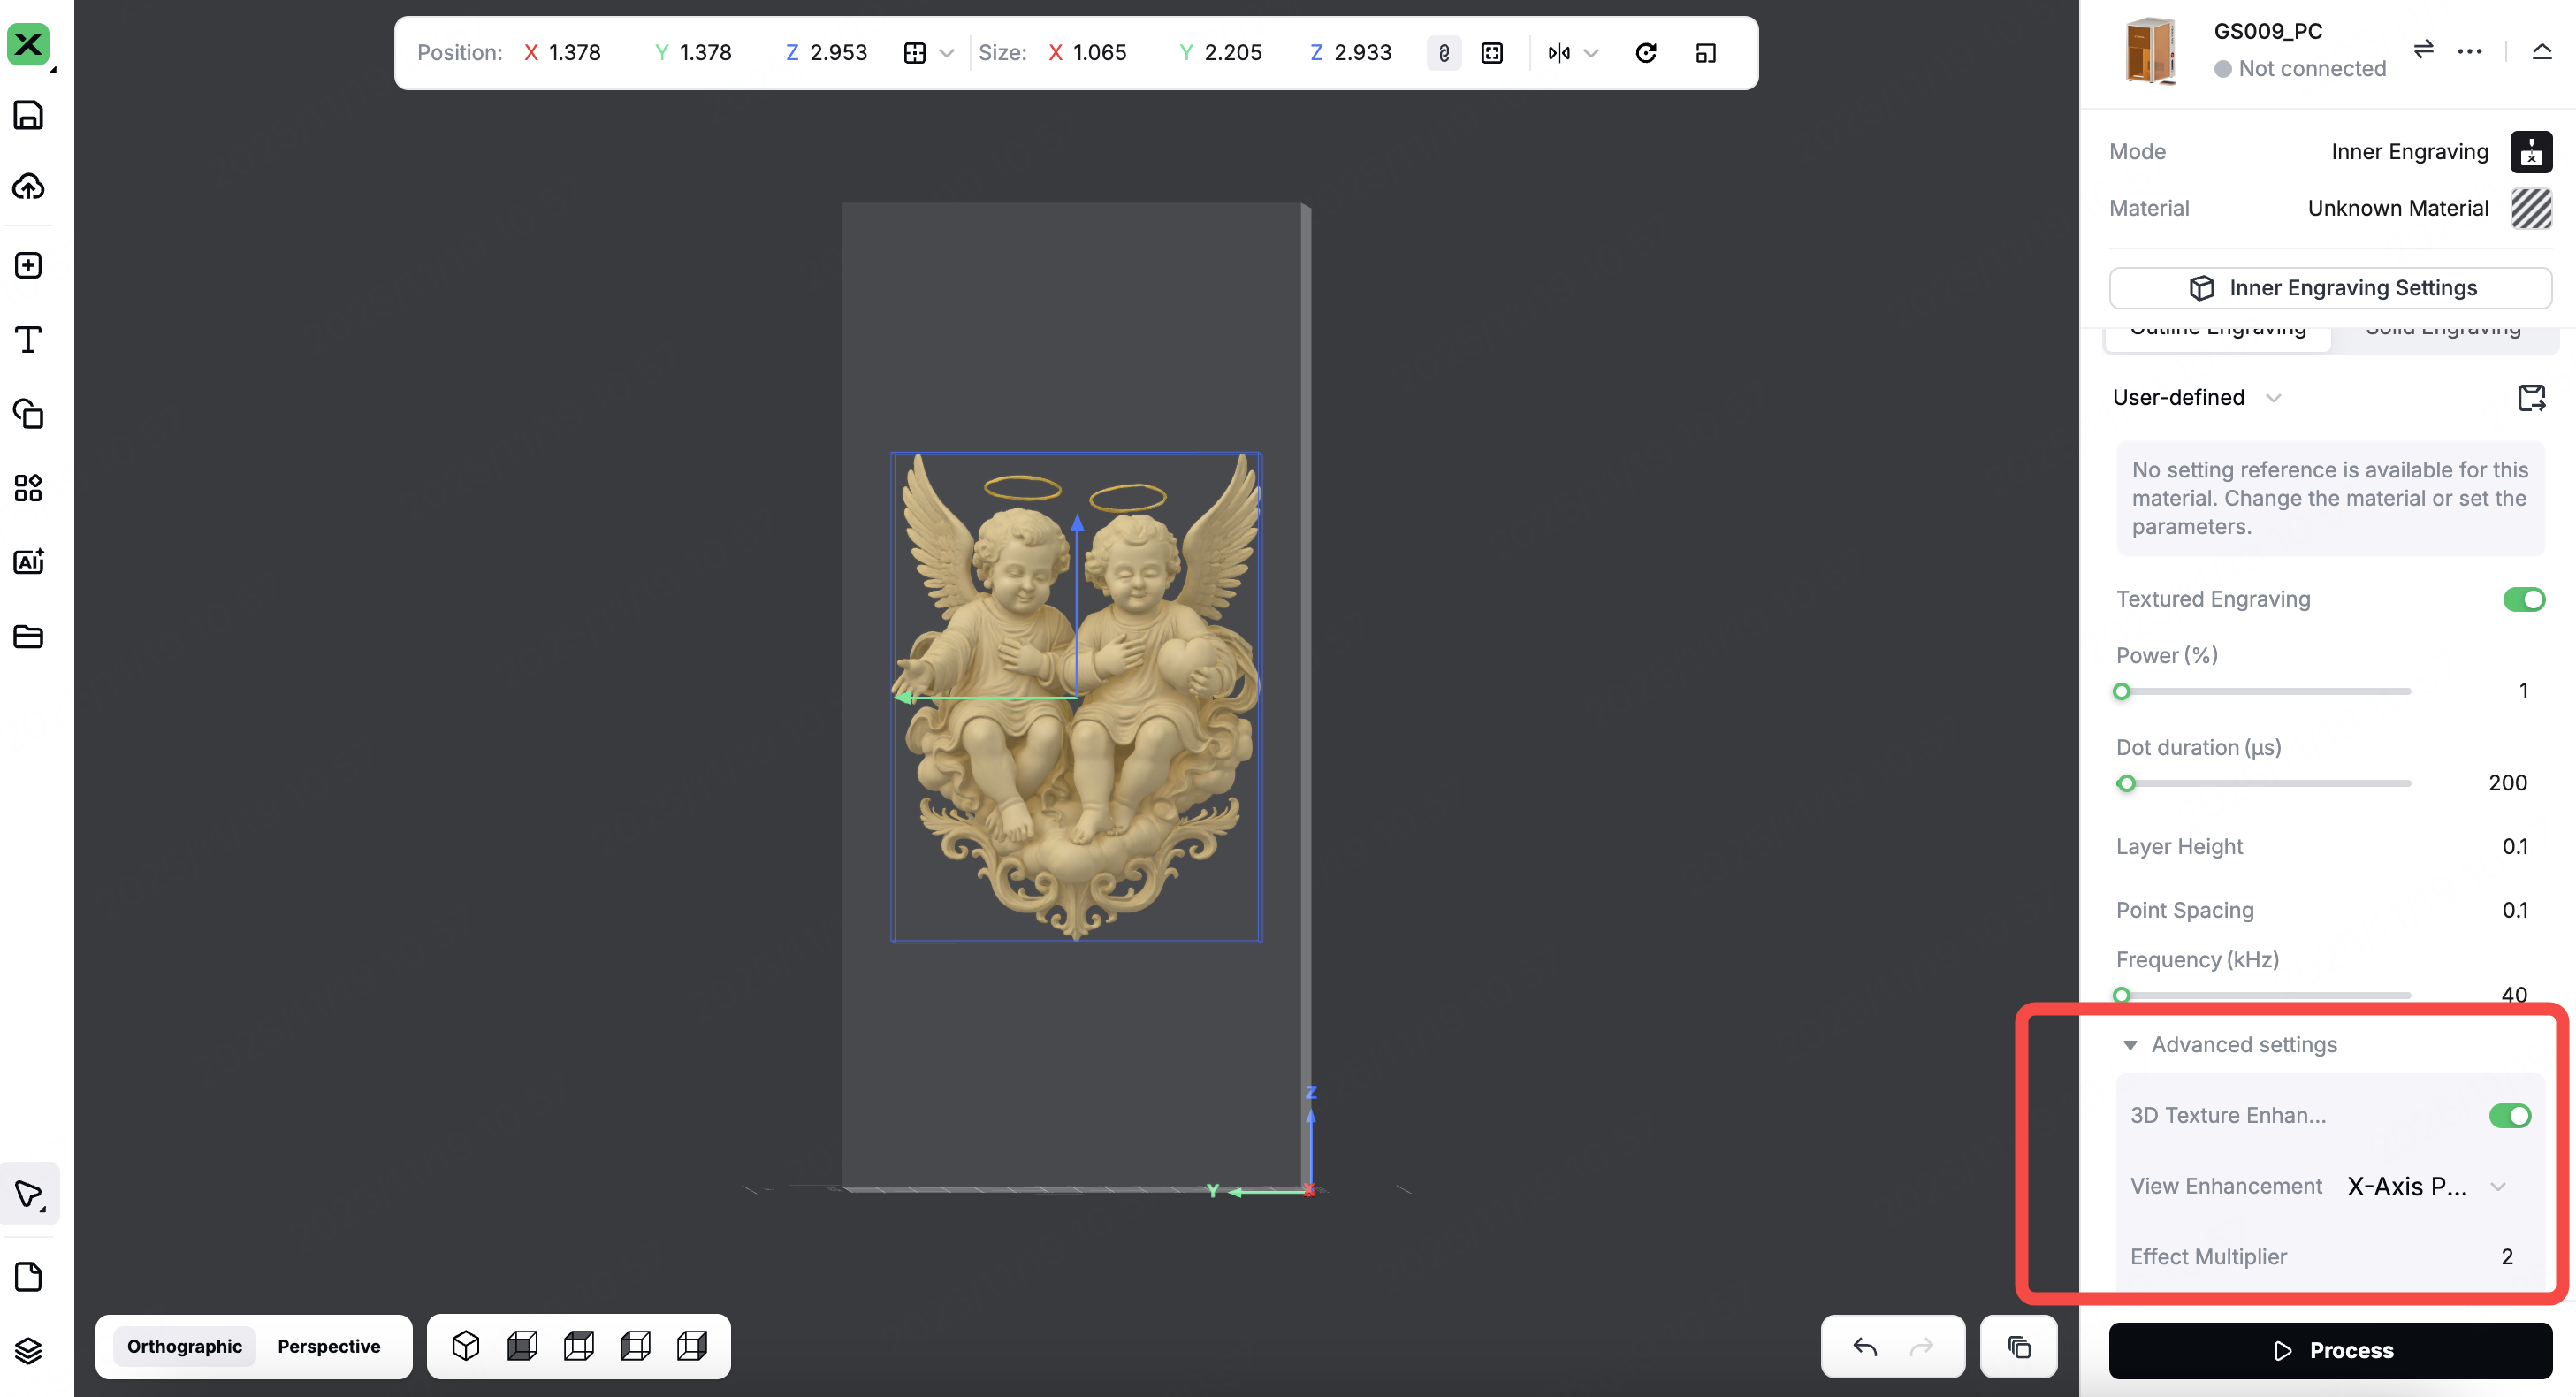
2.2 How to enhance the texture effect on the front side when using 3D Engraving with texture?
- To enhance the three-dimensional sense and detail representation on the front side of the model (especially for faces, portraits, textured areas), use: Advanced Settings > 3D Texture Enhancement
This function can:
- Improve texture contrast.
- Enhance surface details.
- Make front-side textures more visible and prominent.
It is particularly suitable for optimizing 3D character heads, textured engravings, and similar scenarios.