Laser Type
xTool F2 supports two types of laser for processing: blue-light laser and infrared laser light. You need to choose the proper laser type based on the material to be processed.
🔵 Blue light is typically used with materials like Tilia wood, corrugated paper, and leather, and for laser cutting.
🔴IR (infrared) light is ideal for engraving metals such as stainless steel, gold, silver, copper, aluminum, etc.
Power (%)
The power of the laser. The higher the power, the deeper the laser carves into the material surface. Valid value: [1, 100].
Speed (mm/s)
The moving speed of the laser beam. If the laser beam moves slower, the processing time will be longer and the material will absorb more energy. Therefore, the smaller the speed, the deeper the laser carves into the material surface.
Pass
The number of times the laser passes over and engraves the material. The more passes, the deeper the laser carves into the material surface.
Lines per cm
The number of lines engraved within each centimeter.
Engraving mode
- Bi-directional: The laser module emits light beams when it moves both from left to right and from right to left. Compared to the uni-directional mode, it takes less time to process a material. Due to backlashes, however, the processed patterns, especially the edges of the patterns, are not as clear as those processed in uni-directional mode.
- Uni-directional: The laser module emits light beams only when it moves from left to right. Theoretically, it provides more detail as it does not require frequent changes in direction or complex corner paths. Compared to the bi-directional mode, it takes more time to process a material, but the processed patterns are clearer.
Dot duration
When processing bitmap, a complete image is formed by methodically doting each point. Hence the term "Dot Duration" refers to the time spent at each point, measured in microseconds (μs), and it affects the overall processing time.
To ensure stable light output, especially for infrared lasers, we recommend setting more than 100μs. The optimal timing varies with the material but usually falls between 100 and 500. Please note that excessive dot duration could result in a whitening effect and a longer processing time.
DPI (Dots Per Inch)
DPI is a unit of measurement in dot matrix digital image, indicating the number of image pixels per inch. The setting range is [1, 1270]. When converted into linear density (lines per cm), 100 linear density equals 254 DPI.
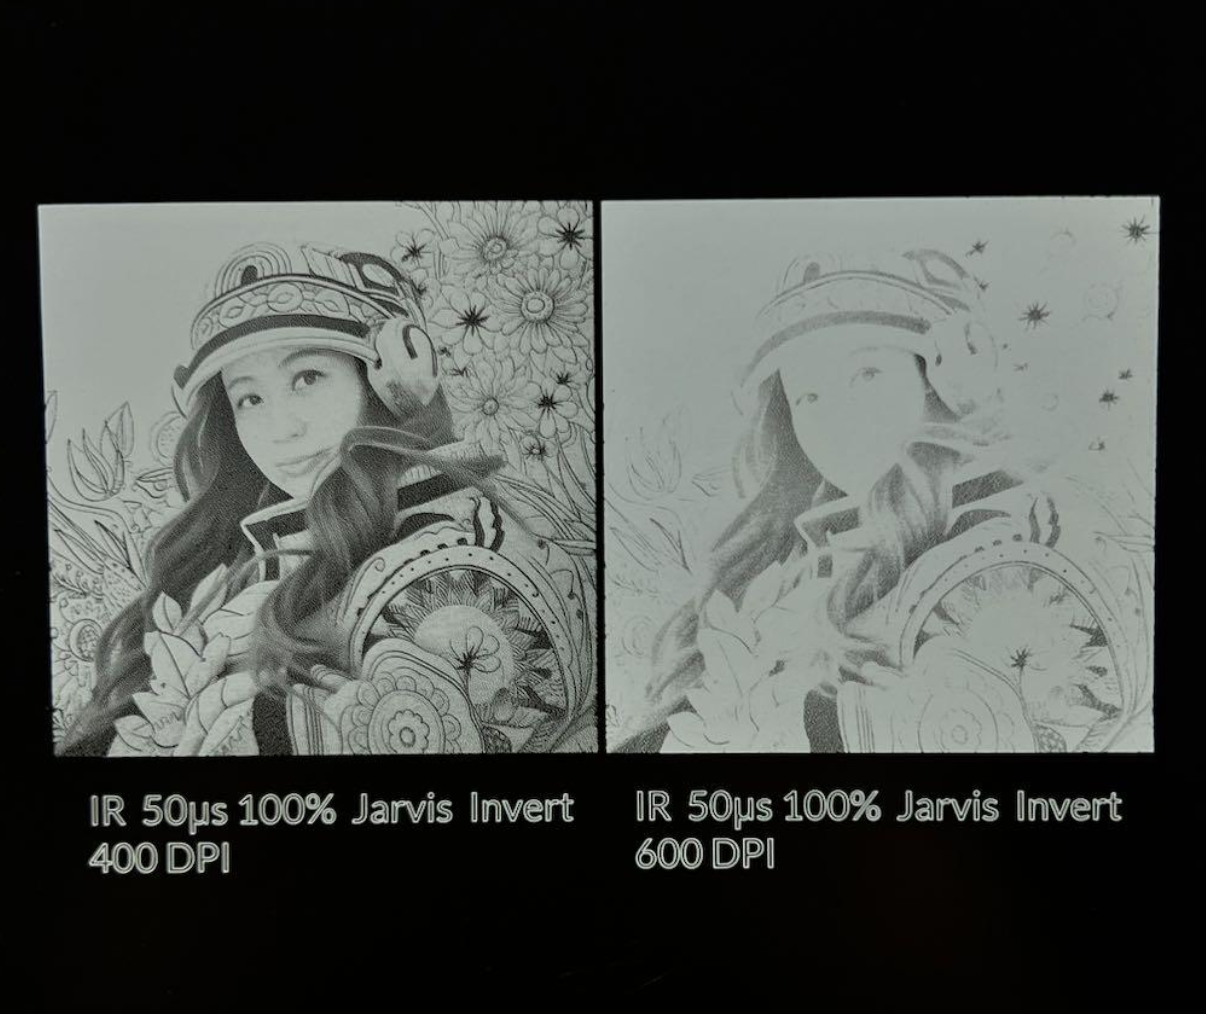
A higher DPI theoretically yields a finer engraving image effect. However, when the DPI surpasses the bitmap's pixel distribution, overly dense dots can have a counterproductive effect, causing darker materials to appear whiter (shown in the image below ).
Bitmap mode
xTool Studio provides multiple bitmap modes for selection, catering to most bitmap usage scenes. You can choose the type that best suits your image. Generally, we recommend Jarvis mode for infrared light and grayscale mode for blue light.
With the other settings unchanged, the output of an image on a wooden board varies according to image mode, as shown in the following figure.
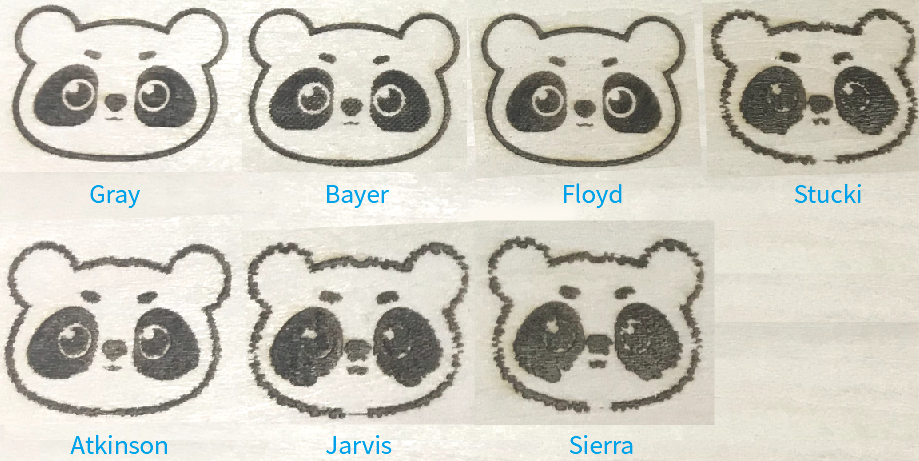
- Grayscale
Transforms an image into the grayscale mode. A grayscale image has pixels that are formed by the shade of gray between black and white, which may be the darkest one in black or the brightest one in white. The darker the grayscale pixel, the deeper the engraving.
- Jarvis
Jarvis is a dithering mode that provides a softer transition between pixels than Floyd mode and renders good results on almost all images.
- Bayer
Looks like adding a special grid mosaic filter to an image.
- Floyd
Dithers the image by using the Floyd algorithm that diffuses the error to neighboring pixels. And the dithering is extremely subtle, resulting in a fine, less distorted, and detailed image. It is recommended for highly-detailed images but not for images with monochrome.
- Stucki
Stucki is a dithering mode that processes slightly faster than Jarvis mode and produces a cleaner and sharper image.
- Atkinson
Dithers is a similar algorithm to Jarvis and Sierra that preserves details well. But we do not recommend using it in a very dark or bright environment, where exposure may occur.
- Sierra
Sierra dithers based on Jarvis mode and they process with similar results on images. But the sharpness of Sierra is higher.
