xTool Studio is an all-in-one software for graphic designing and editing, laser process setting, and machine controlling.
Download xTool Studio
Minimum and recommended PC requirements
Item | Minimum configuration | Recommended configuration |
Processor | Intel Core i5-6200U | Intel Core i5-11600 |
Operating system | Win 10 (64 bit) macOS 10.14 or later | |
RAM | 8 GB | 16 GB |
Display resolution | 1280 × 720 (pixels) | 1920 × 1080 (pixels) or higher |
Hard drive | 8 GB | 12 GB |
- With the minimum configurations, all the functions of xTool Studio can be used properly. When you import a complex image, such as an image larger than 50,000,000 pixels or an SVG image larger than 1 MB, however, xTool Studio may fail to run smoothly.
- With the recommended configurations, xTool Studio can run more smoothly when you import and edit a complex image, the software delay may be shorter, and the performance is better.
Download and install xTool Studio
1. Download the xTool Studio applicable to the operating system that runs on your PC from s.xtool.com/software.
2. Double-click the software you've downloaded to install it.
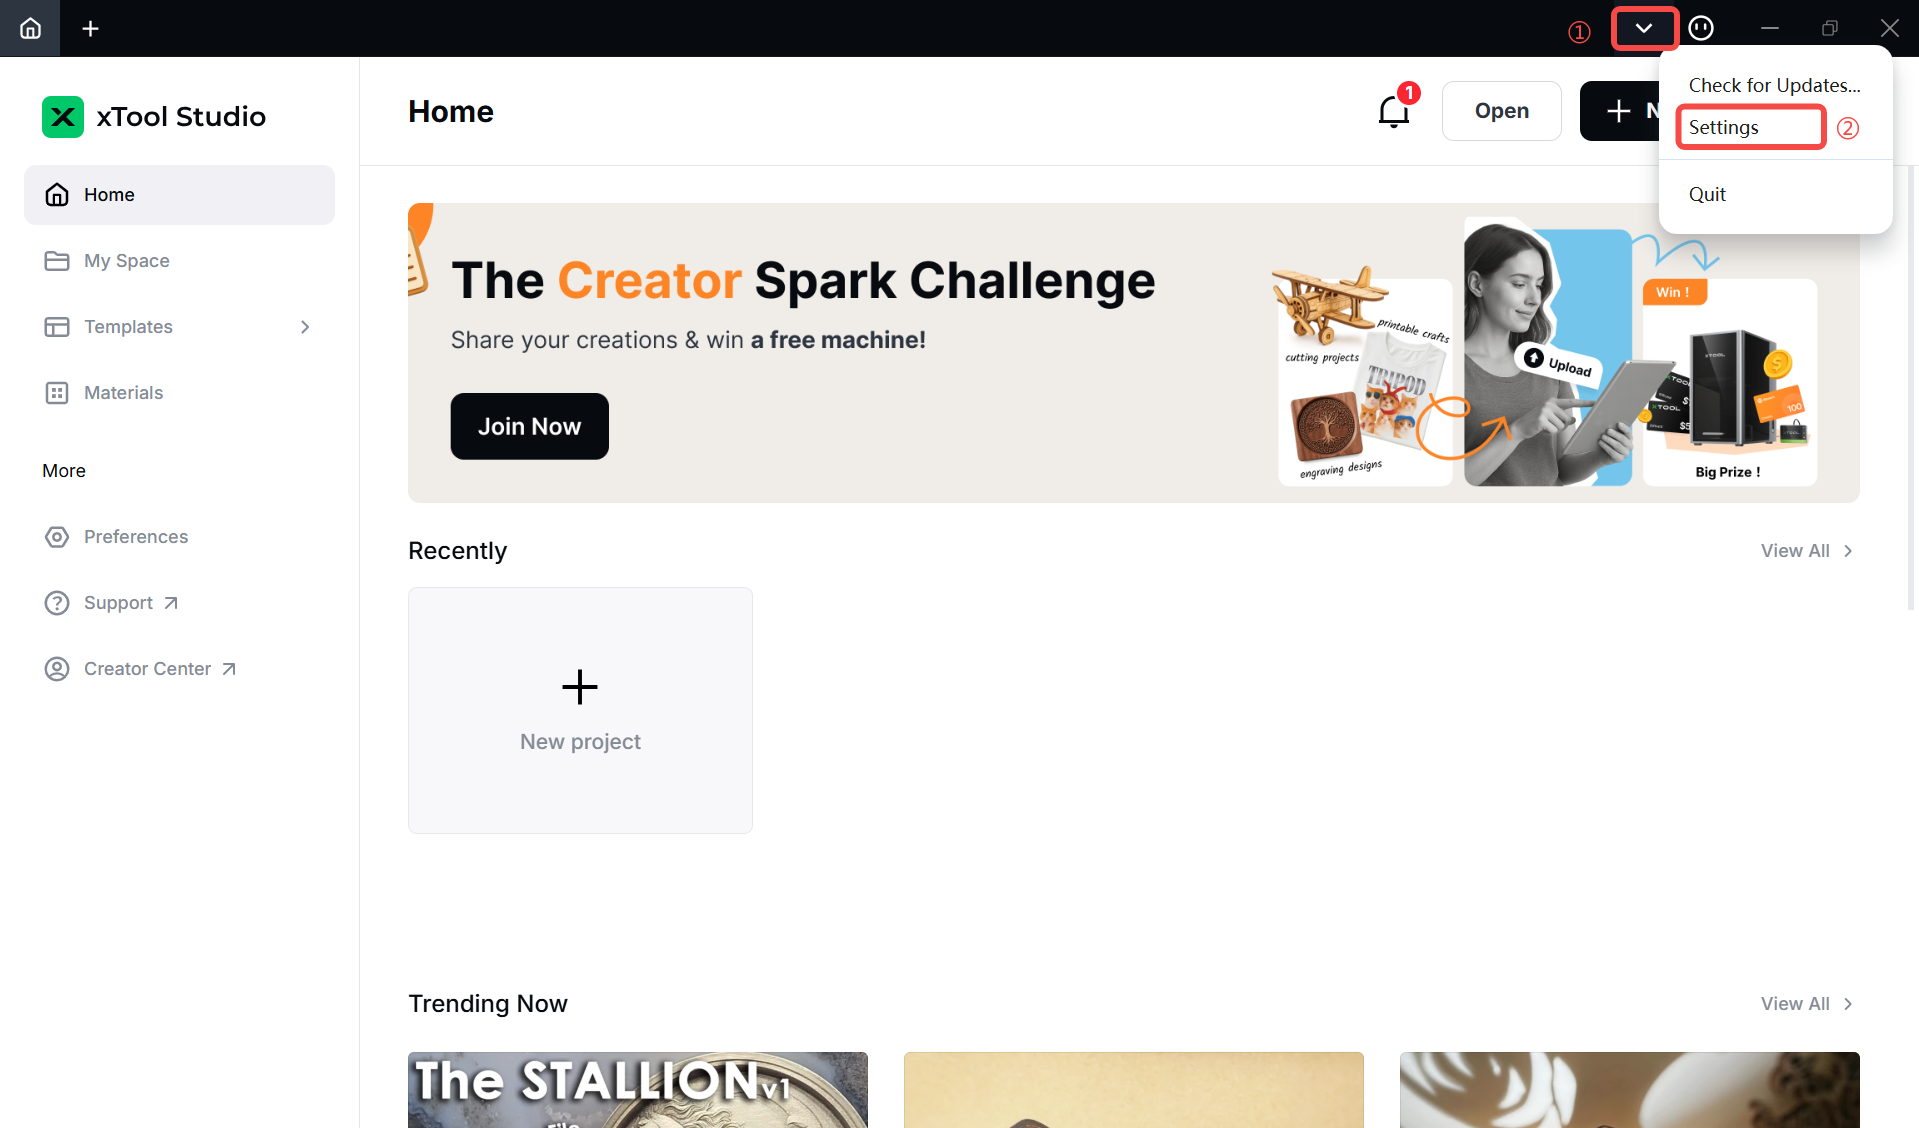
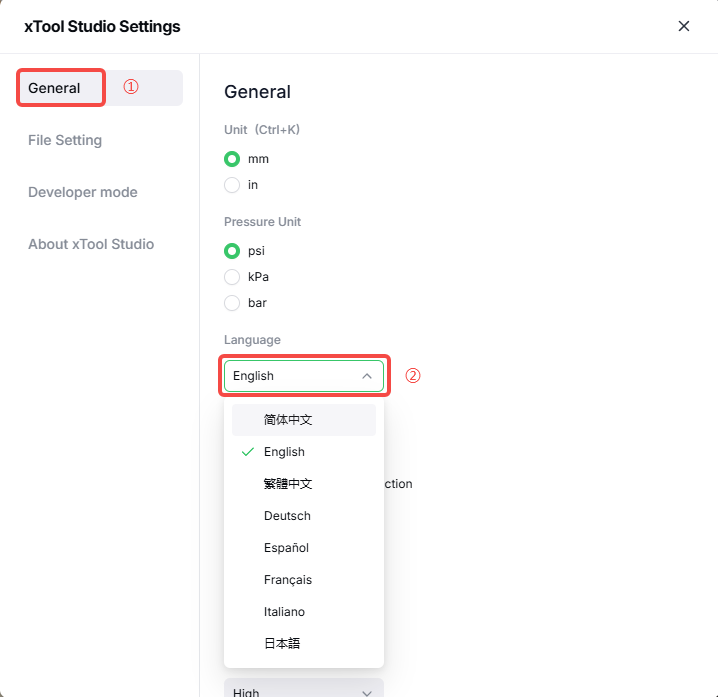
3. Open xTool Studio. On the top-right corner, click the icon  > Settings, and set the language for xTool Studio.
Connect to xTool Studio via USB cable
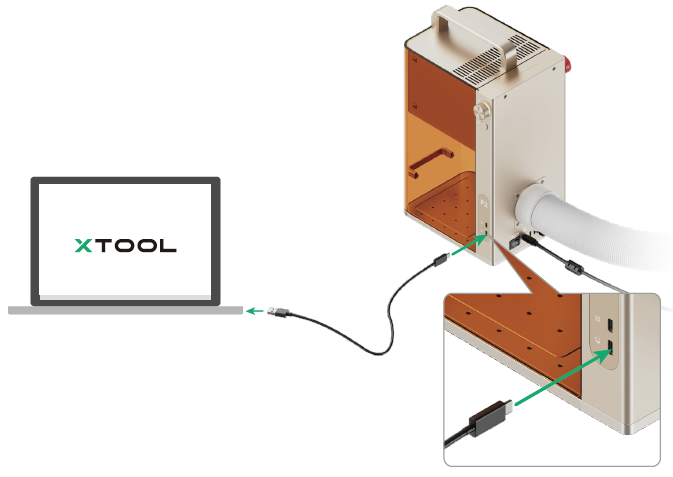
1. Use the USB cable to connect xTool F2 to your computer, and power on xTool F2.
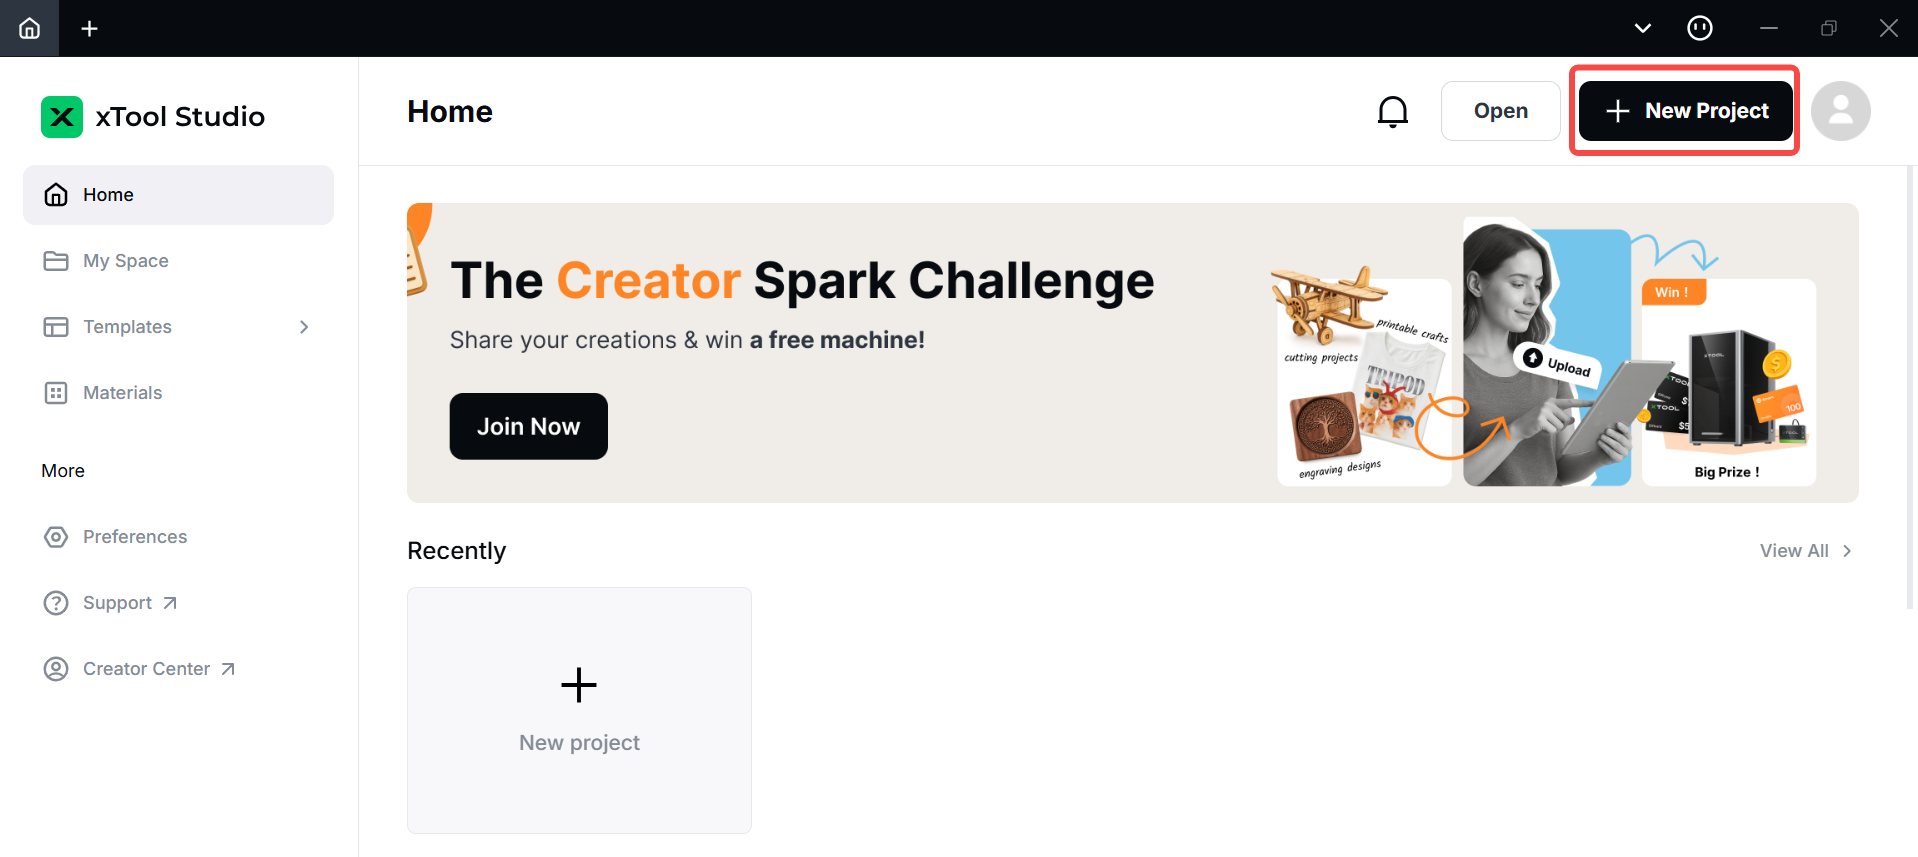
2. Open xTool Studio on your computer. On the top-right corner of xTool Studio, click the + New project button.
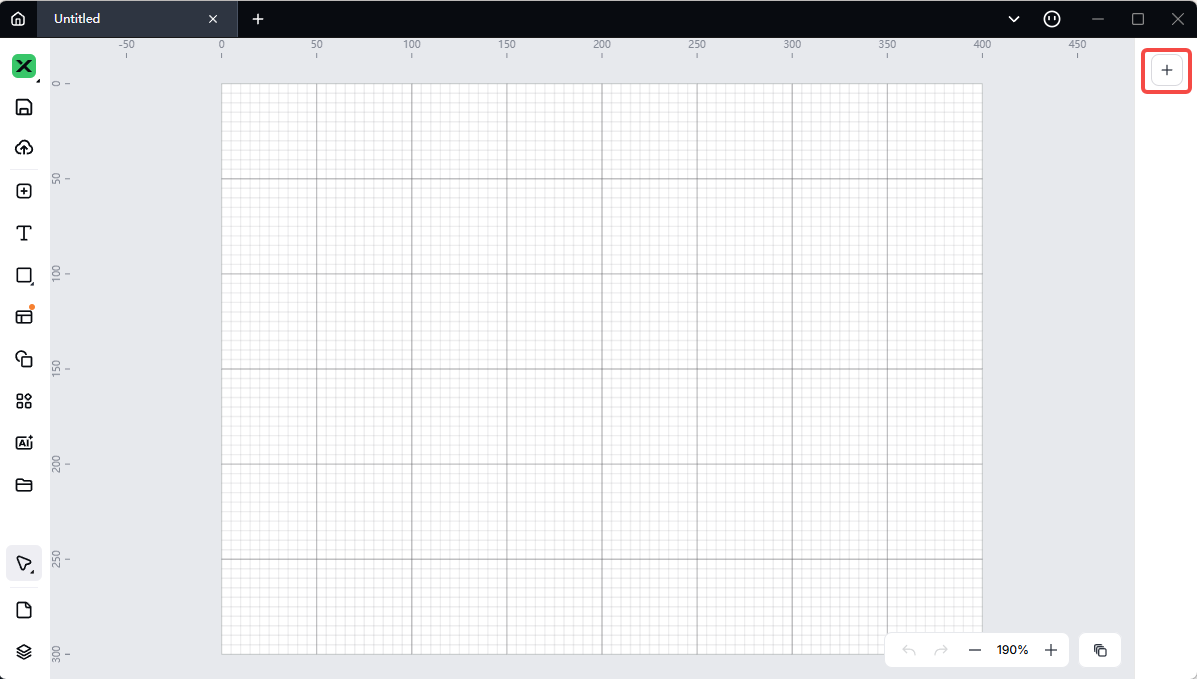
3. On the right side of the project editing page, click ![]() icon.
icon.
Note: If you have connected an xTool device in xTool Studio before, click the  icon to connect to your new device.
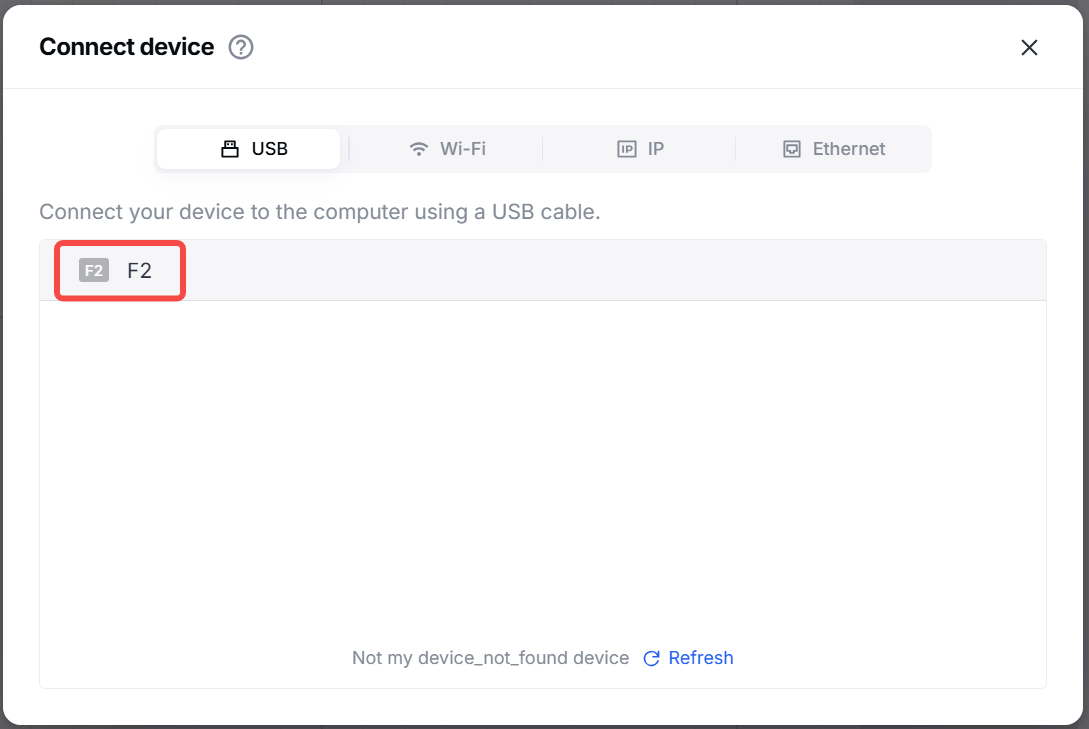
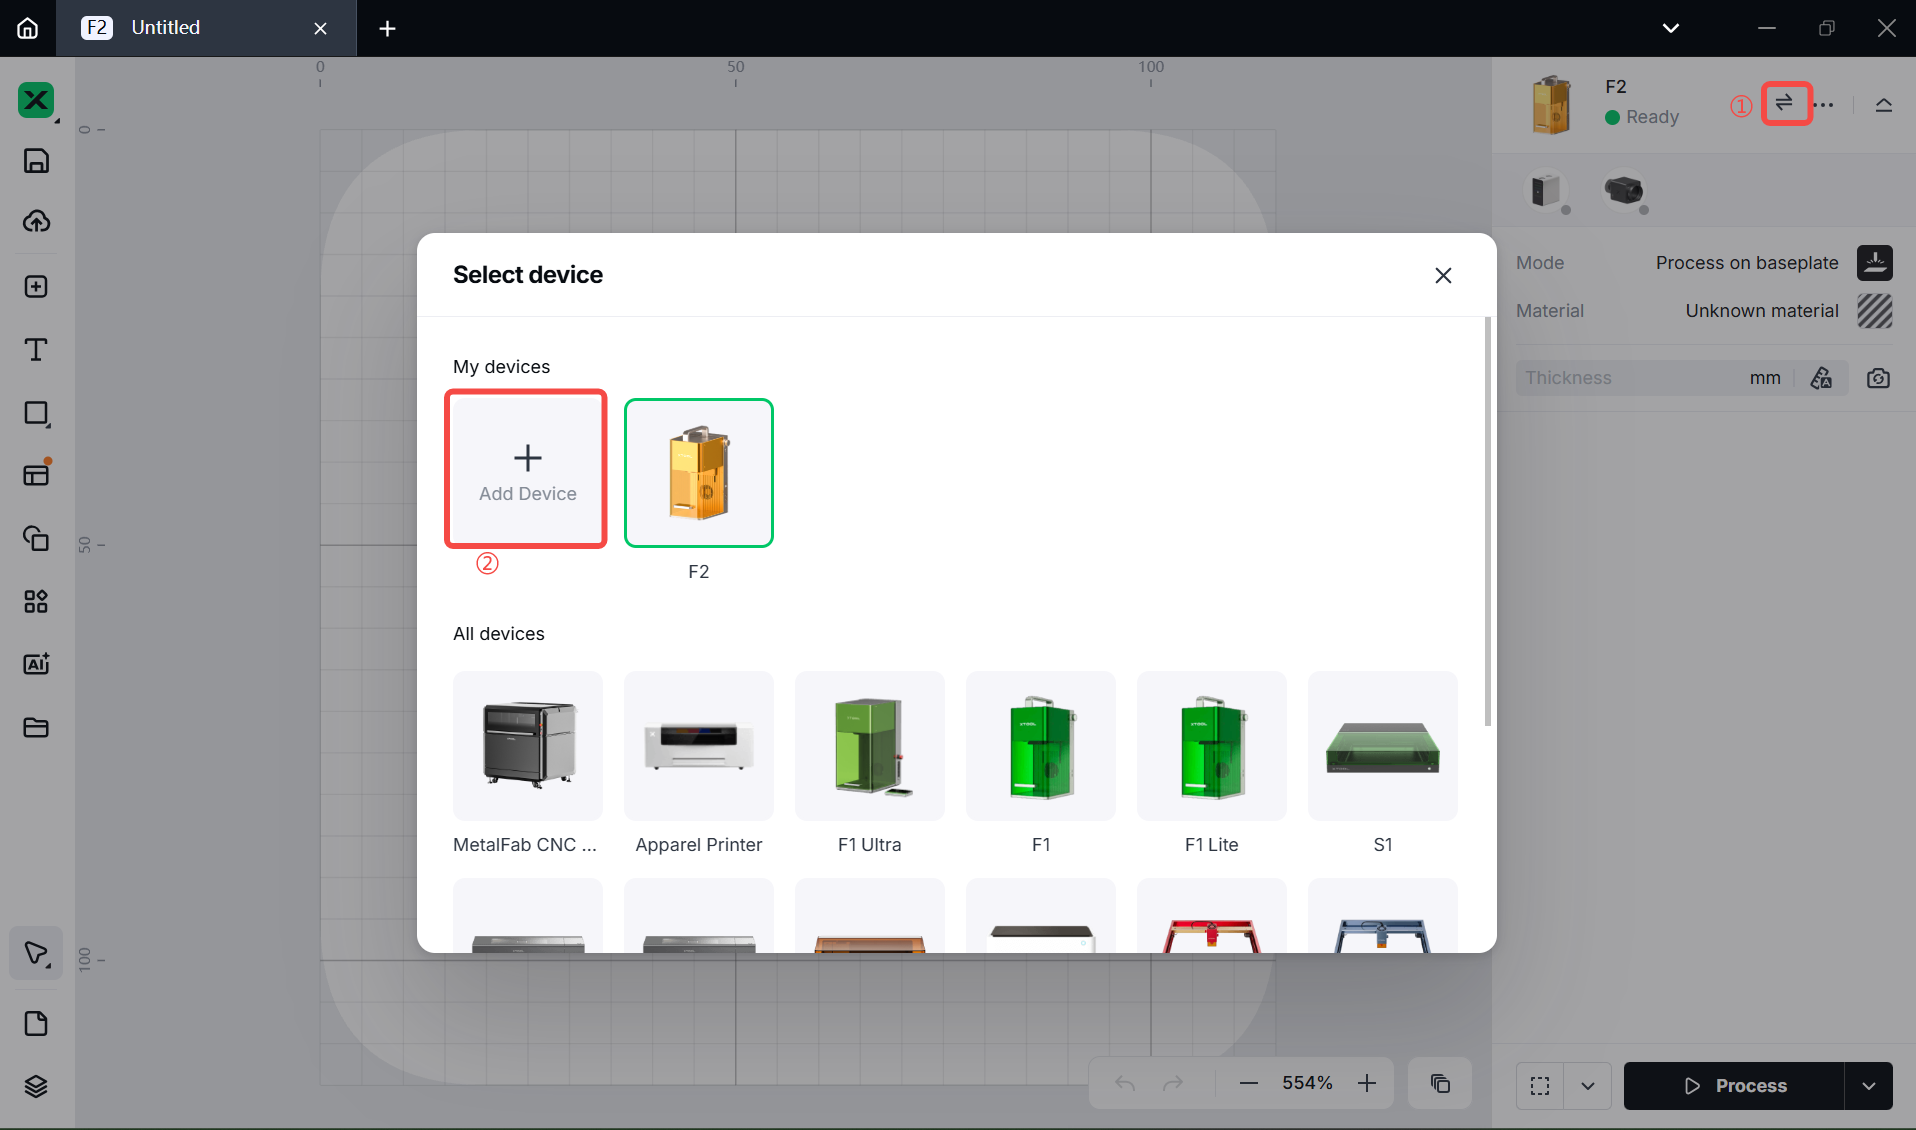
4. On the pop-up window, click Add Device.
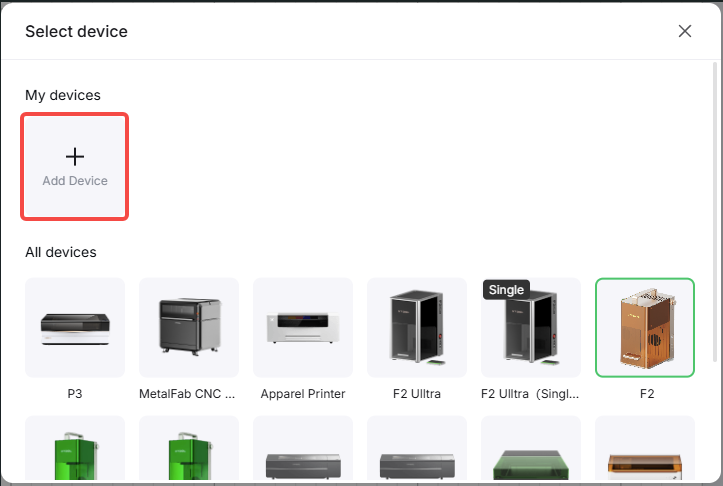
5. On the pop-up window, click the name of your device to connect to it.
Connect to xTool Studio via Wi-Fi
1. Follow the instructions in Connect to xTool Studio via USB cable to connect xTool F2 to xTool Studio by using the USB cable.
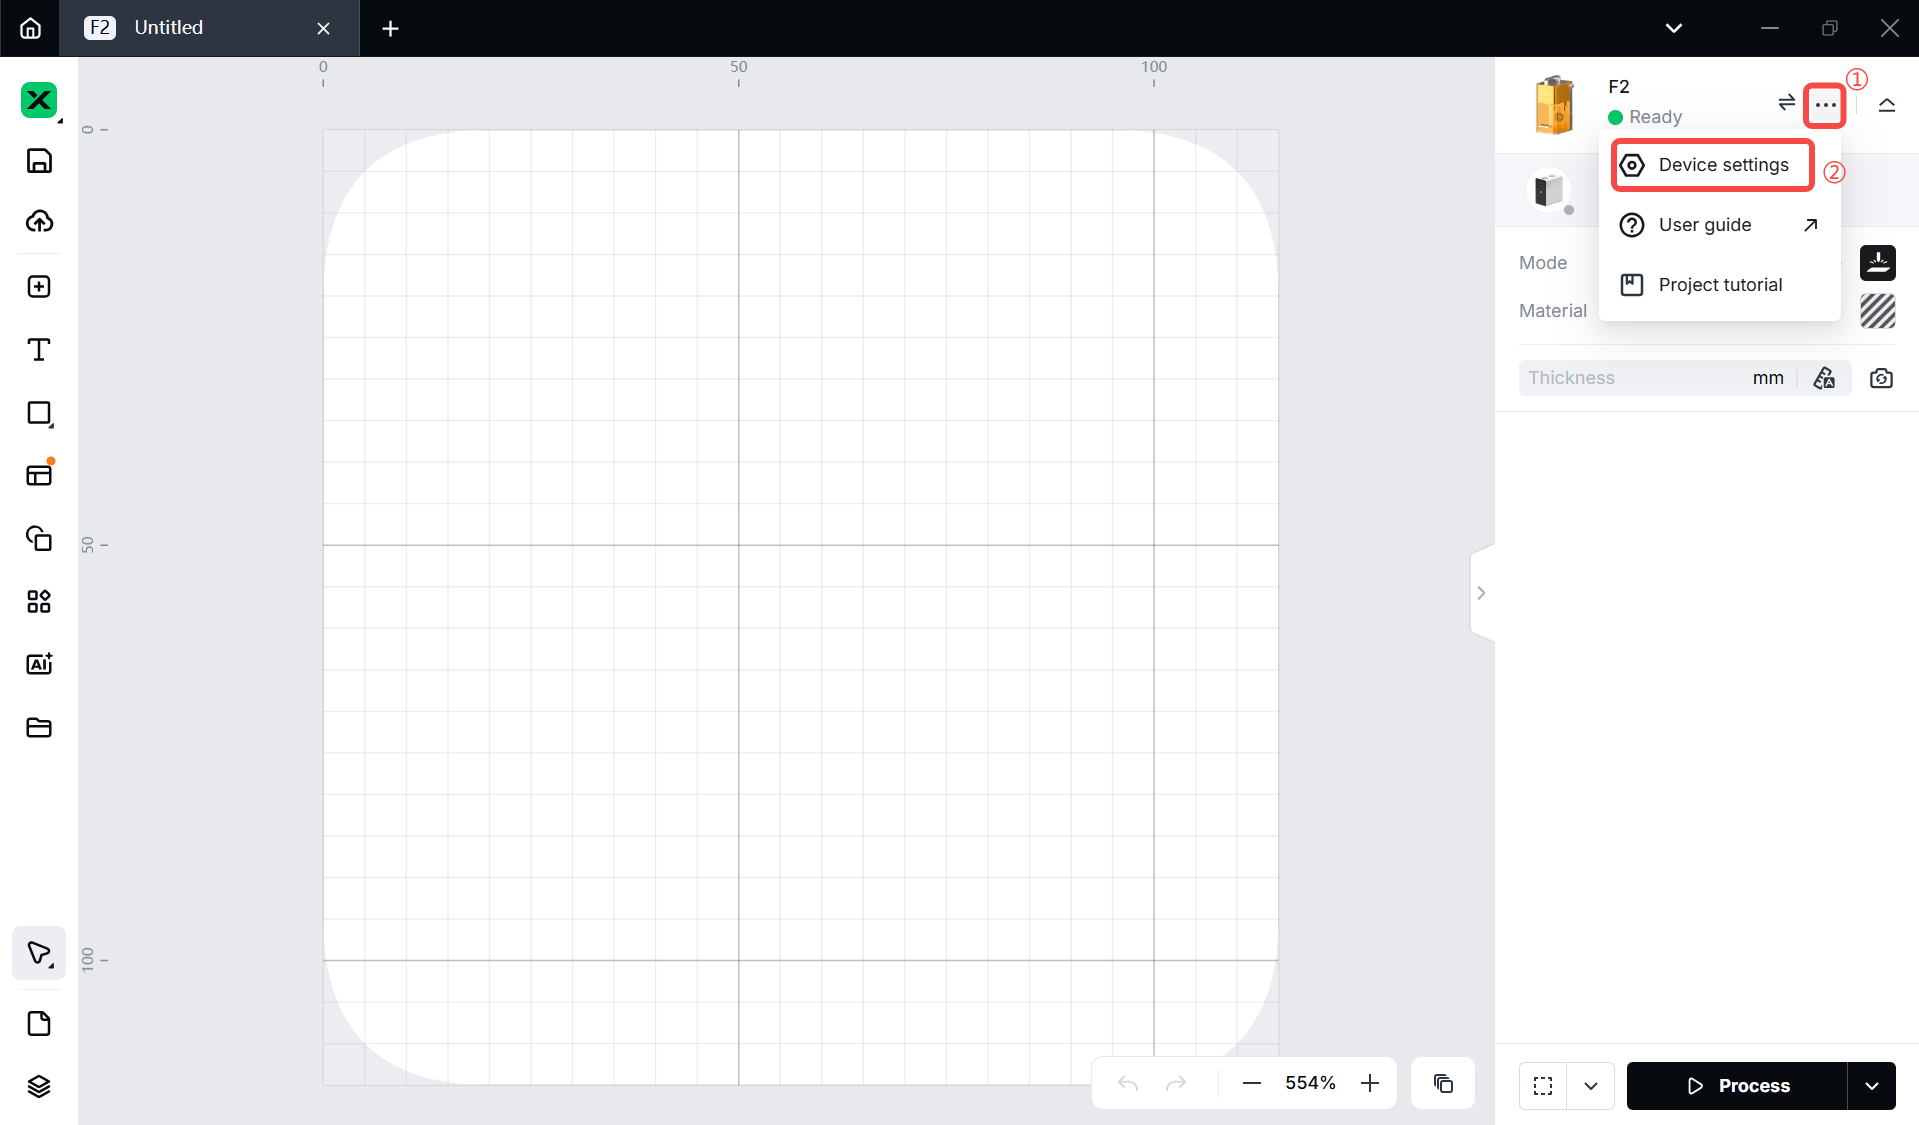
2. In the top-right corner of xTool Studio, click  icon and select Device settings.
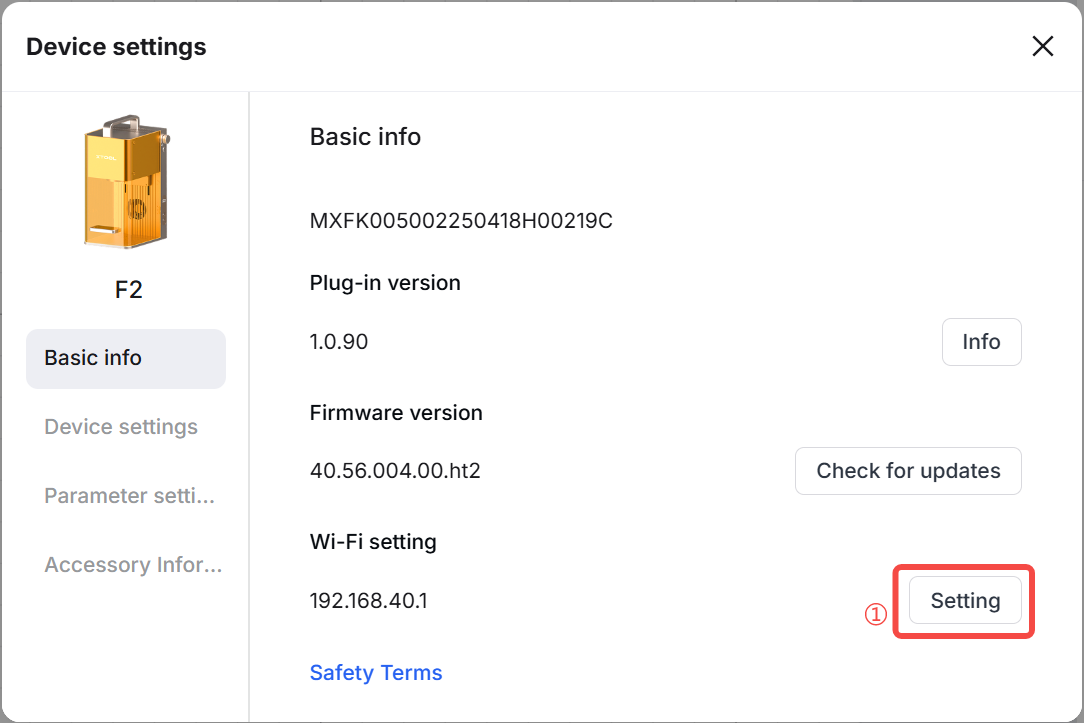
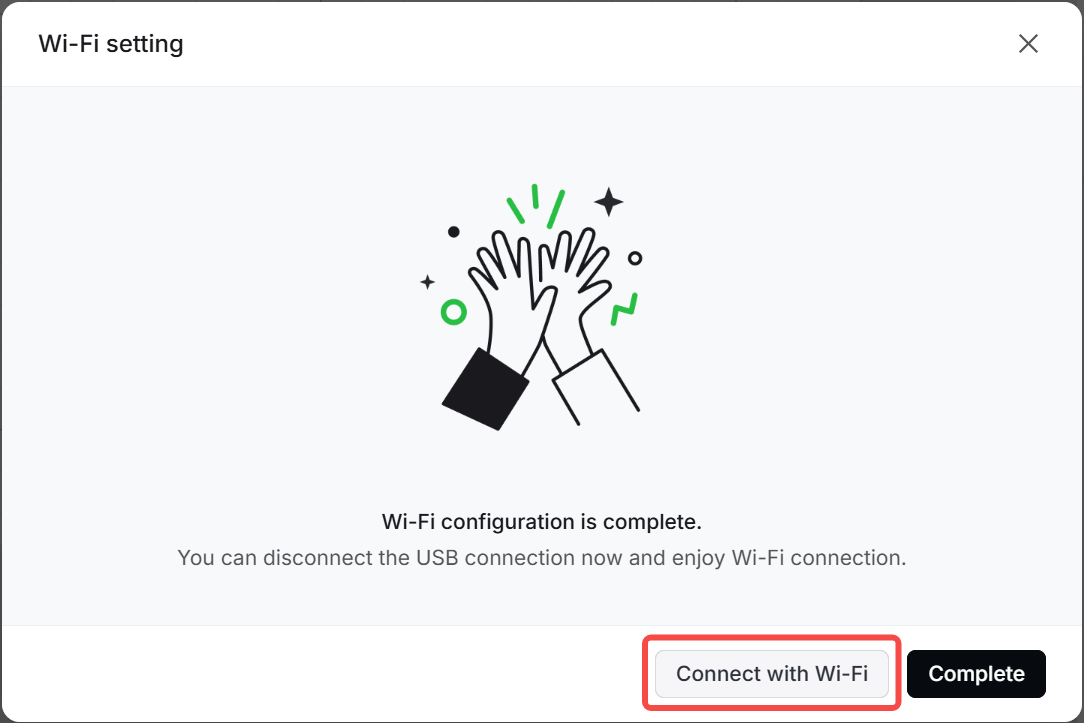
3. In the Device settings dialog box, find Wi-Fi setting in Basic info. Click Setting, select a Wi-Fi network, enter its password, and click Next.

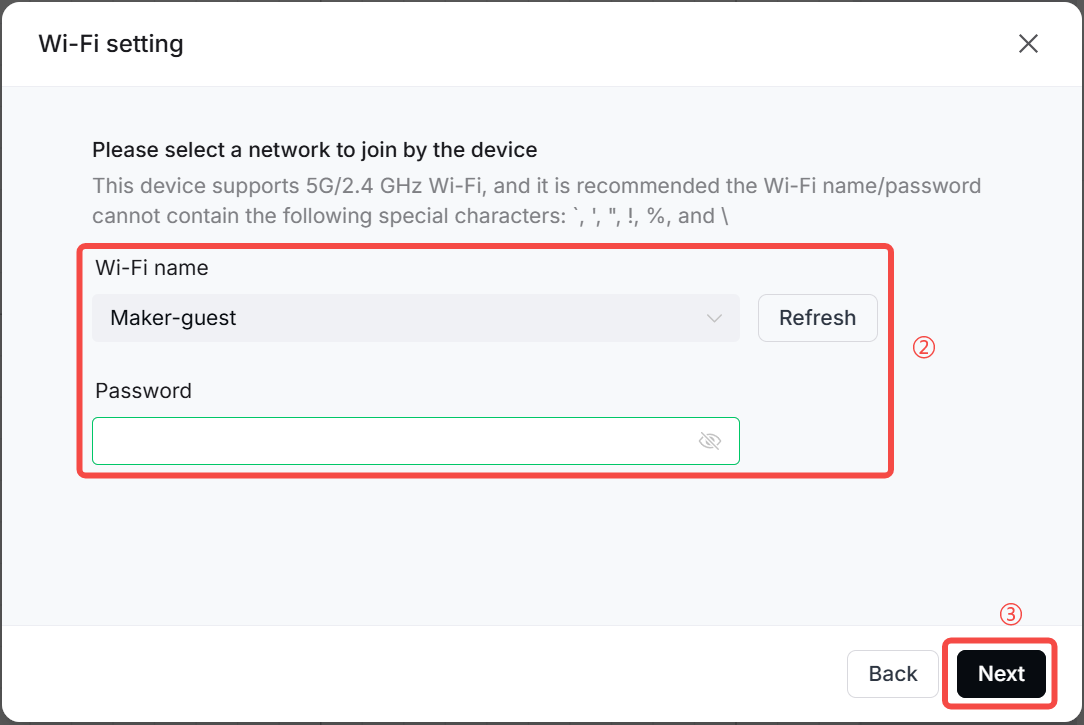
4. Click Connect with Wi-Fi.
Connect to xTool Studio via IP address
1. Follow the instructions in Connect to xTool Studio via Wi-Fi to connect xTool F2 to xTool Studio by a Wi-Fi network.
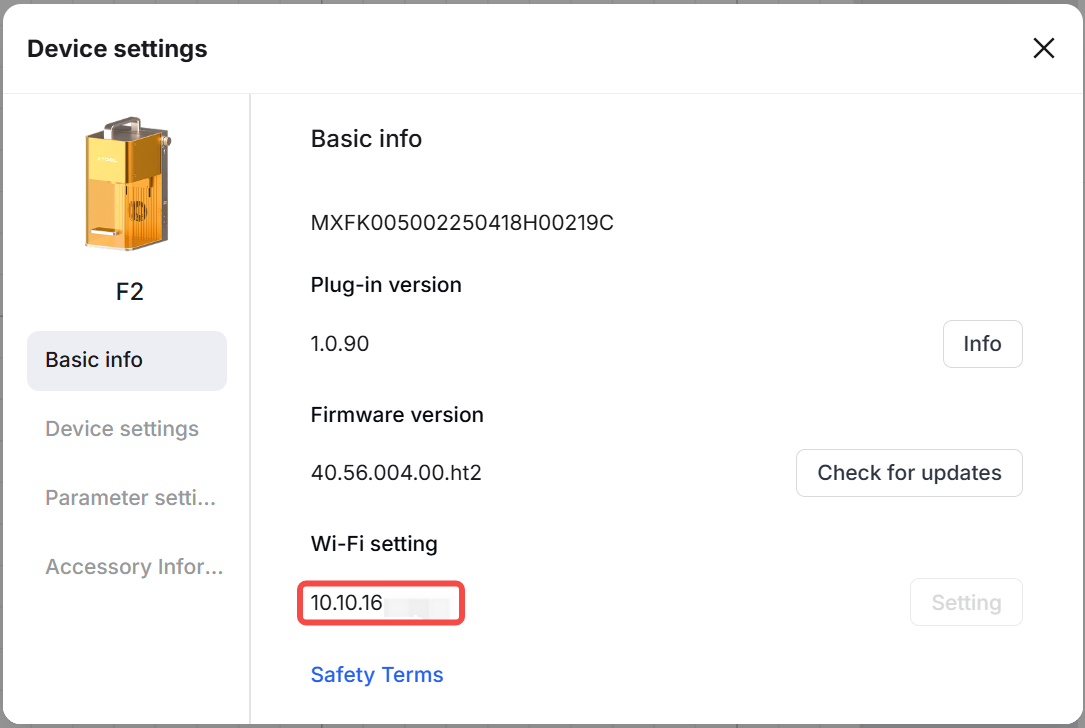
2. In the top-right corner of xTool Studio, click icon and select Device settings.
3. Note down the IP address indicated in Wi-Fi setting under the Basic info tab.
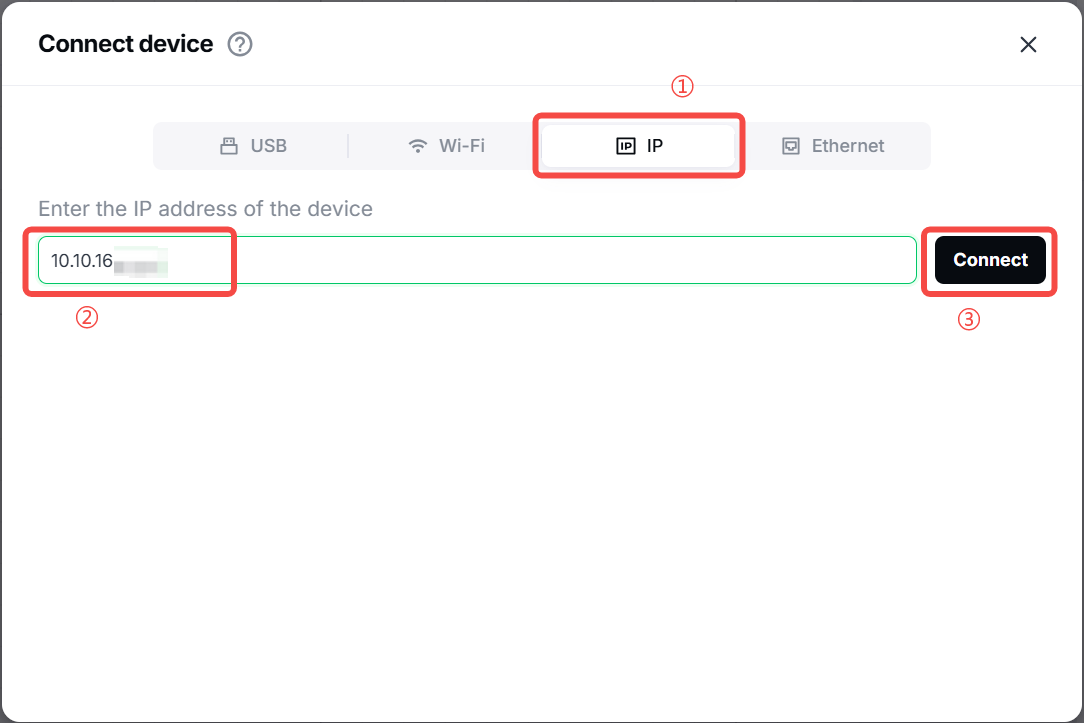
4. Click the icon > Add Device.
5. Select IP, and then enter the IP address of your device to connect it.
Note: If you cannot find your device through Wi-Fi in subsequent processing, try IP connection instead.
