xTool Store
Calibrate Close-up Camera for P3
Updated Sep 16,2025
Updated Sep 16,2025
What is Close-up Camera Calibration
Close-up imaging is a tool on the P3 used to capture photos of smaller processing areas, covering a 140mm × 160mm region. Compared to long-range imaging, it offers higher resolution. When you notice that the processing position deviates significantly from the position shown in the close-up photo after placing processing elements, you need to perform close-up camera calibration to correct the misalignment issue.
Applicable Scenarios
- After replacing the camera module;
- When the camera positioning deviation is too large;
- When missing calibration files cause the camera to fail in taking photos.
Notes
- For calibration, it is recommended to use flat, solid-colored, 300g white cardstock (highest recognition success rate).
- The calibration paper can be larger, but not smaller than the required calibration area.
- The flatness of the calibration paper directly affects calibration accuracy. Do not use paper with obvious creases or deformation, and ensure it remains flat.
- It is not recommended to use regular office A4 paper for calibration, as it may result in poor calibration performance.
- Use white or light-colored tape to secure the paper to improve the camera’s recognition success rate.
Operating Steps
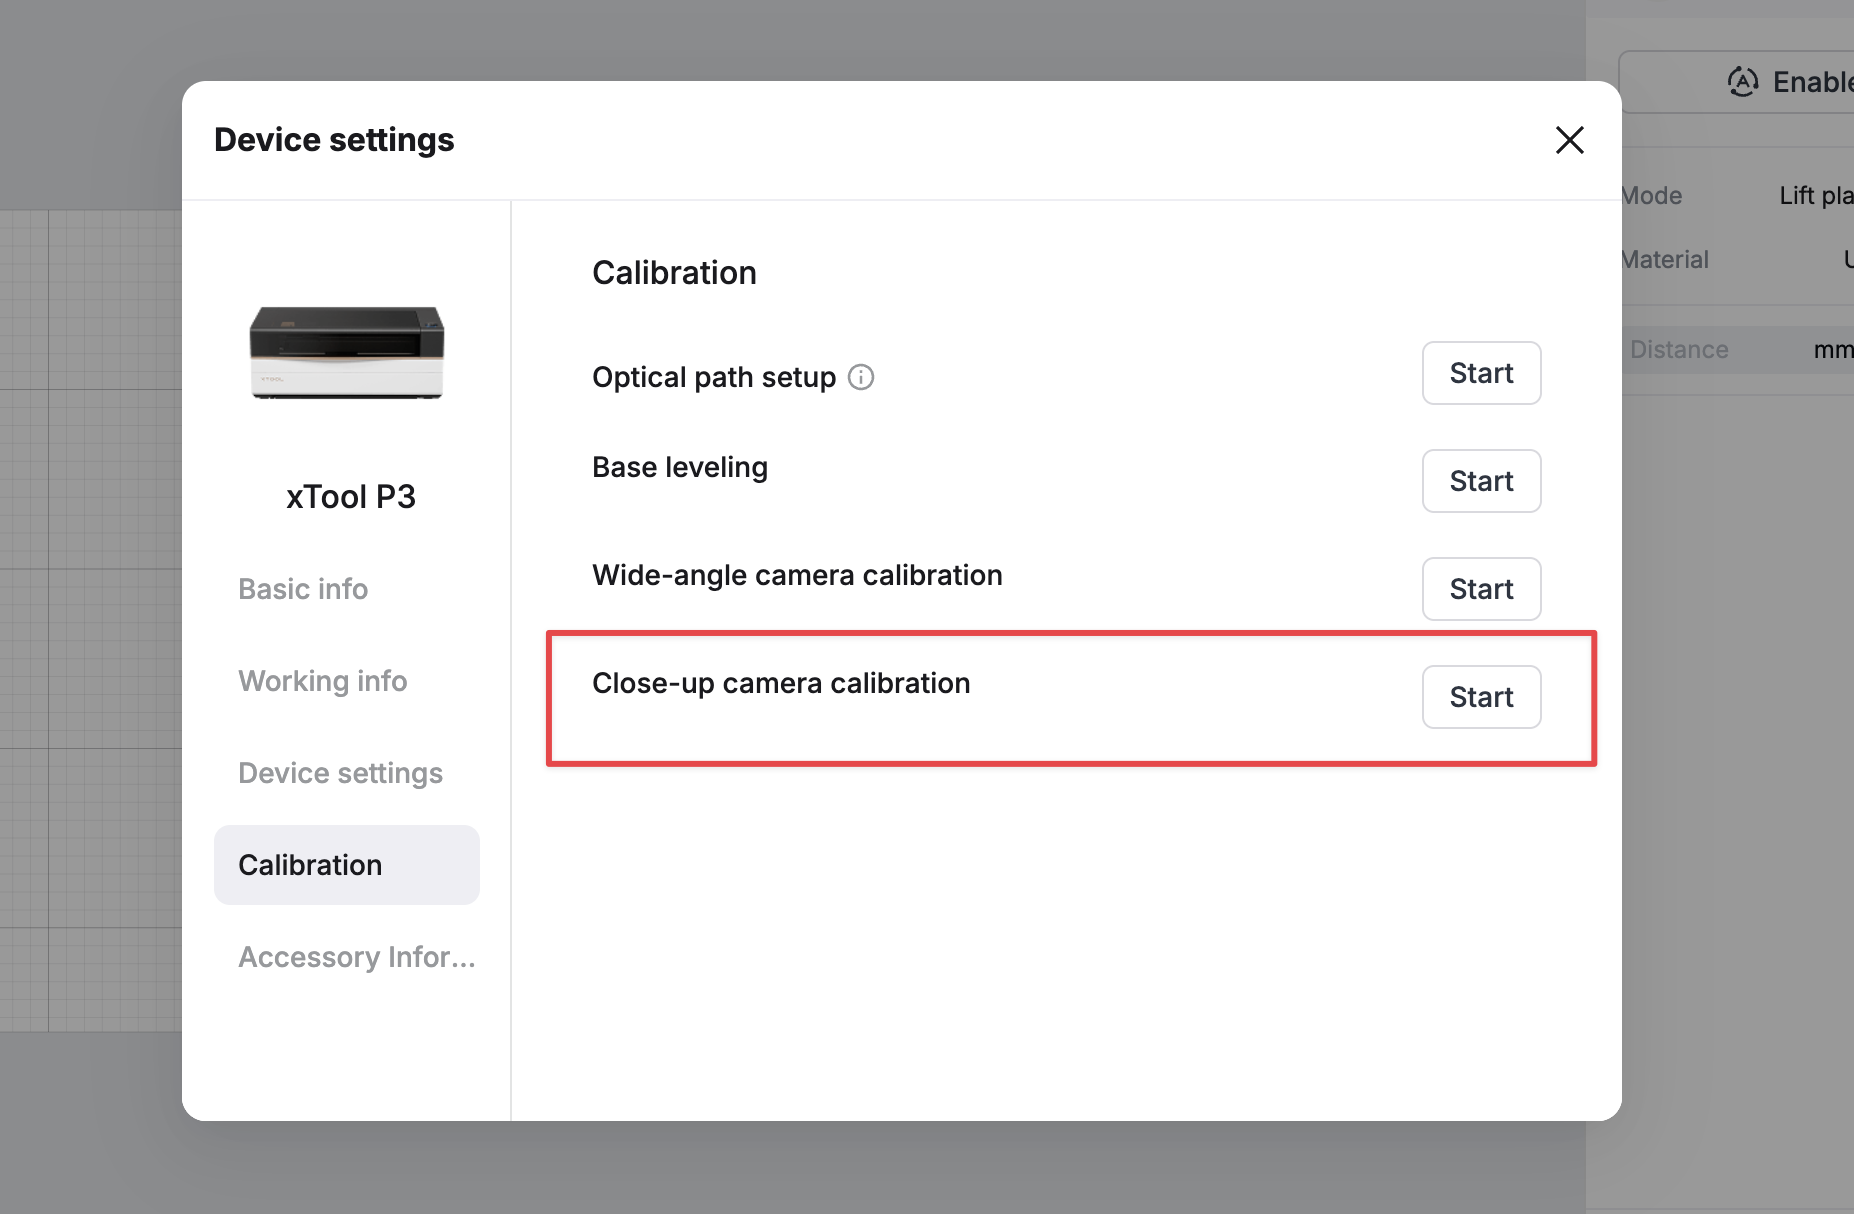
- In the software, open Device Settings → Calibration
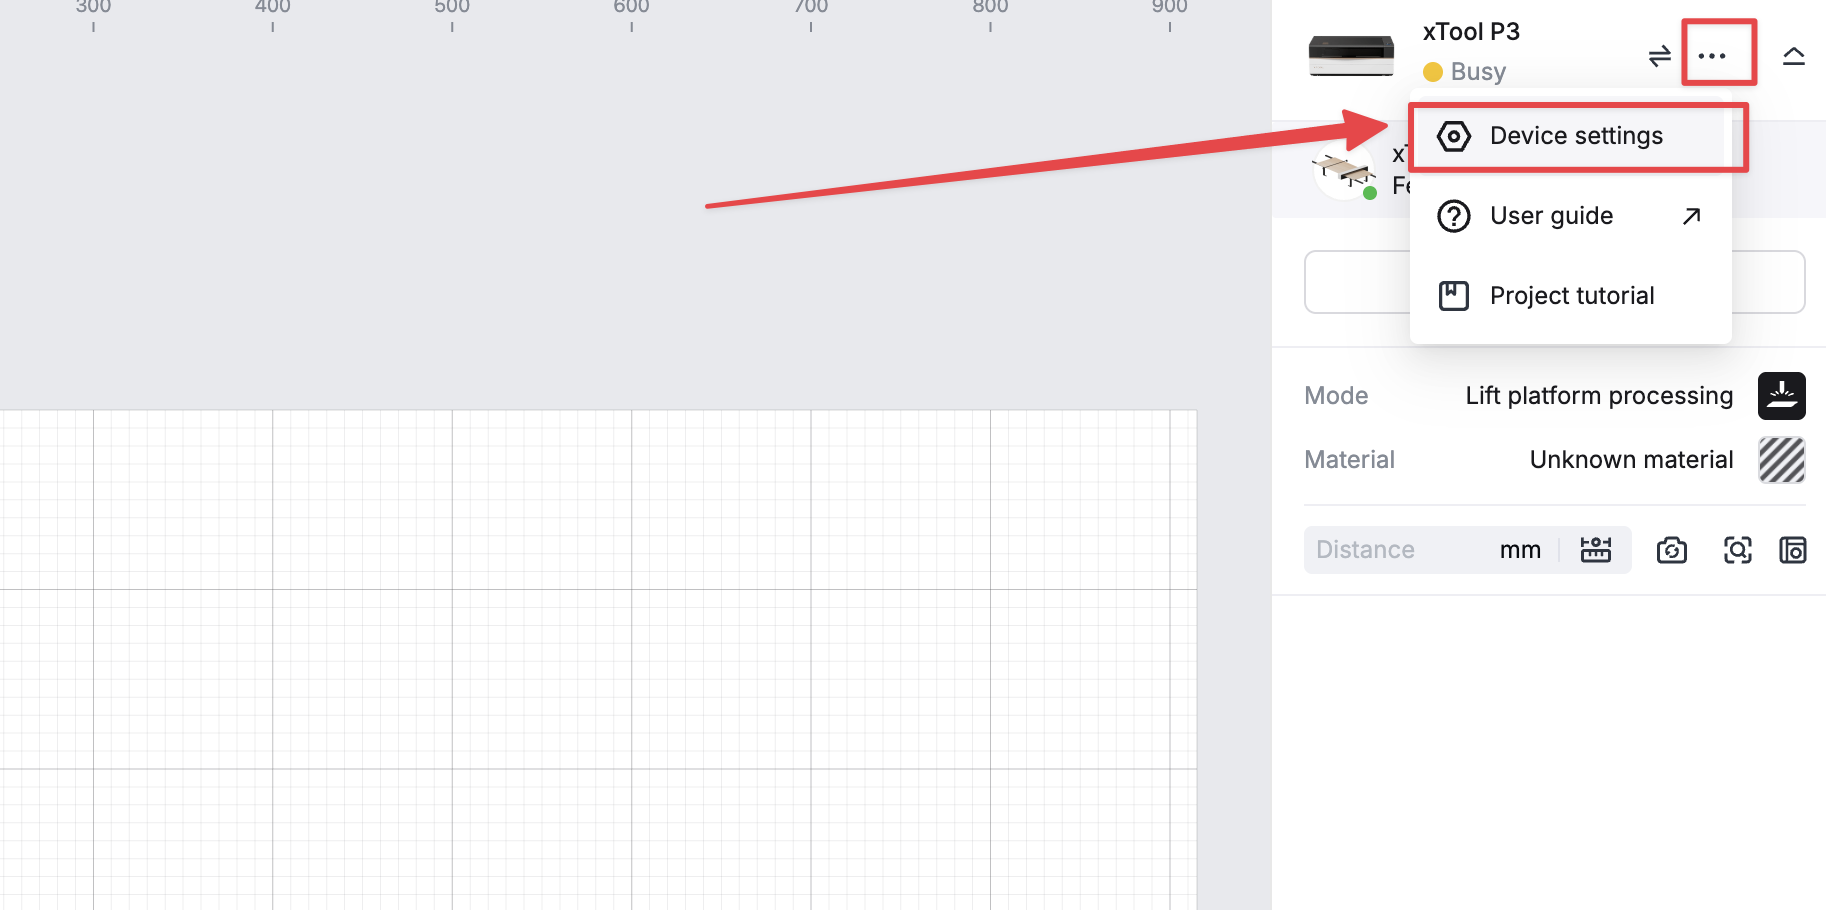
- Select the option Close-up camera calibration, then click Start
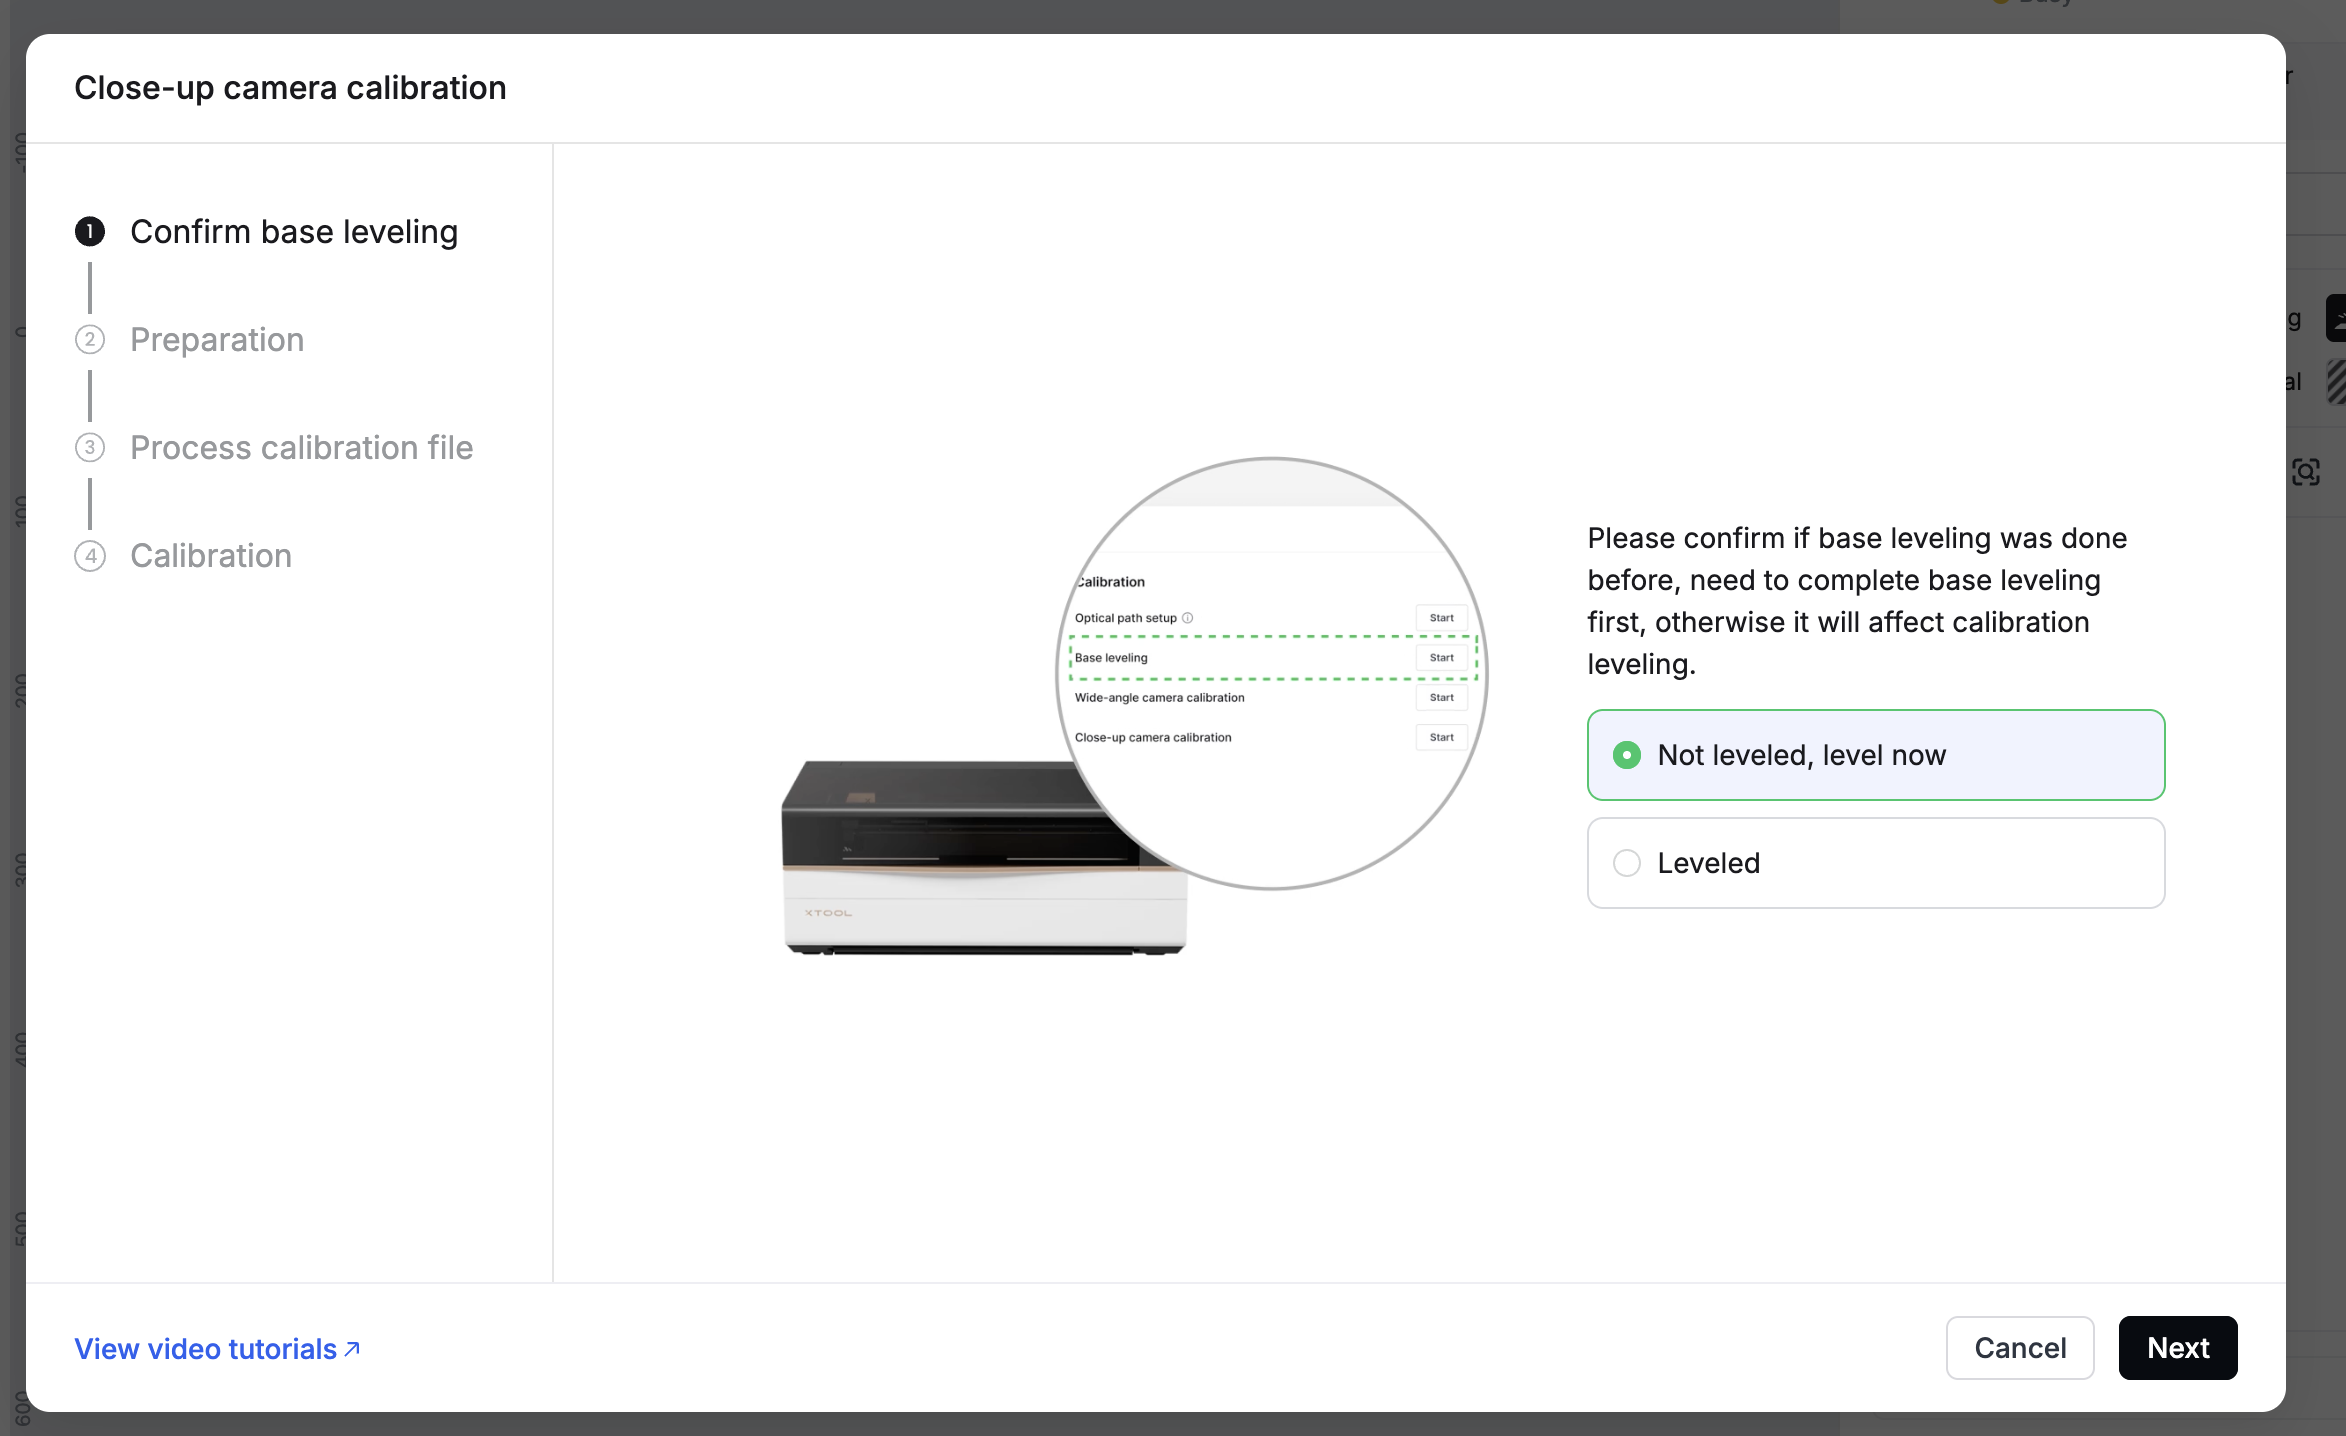
- Follow the on-screen instructions in the software to complete the calibration.
Preview
Was this page helpful?
0 out of 3 found this helpful
Help Ticket
Use this help ticket to submit your issue. We will respond within 1 business day
Submit a Ticket Tags
Help Ticket
Use this help ticket to submit your issue. We will respond within 1 business day
Submit a Ticket Services & Help
Learn & Education

Copyright © 2025 xTool All Rights Reserved.