Issue description
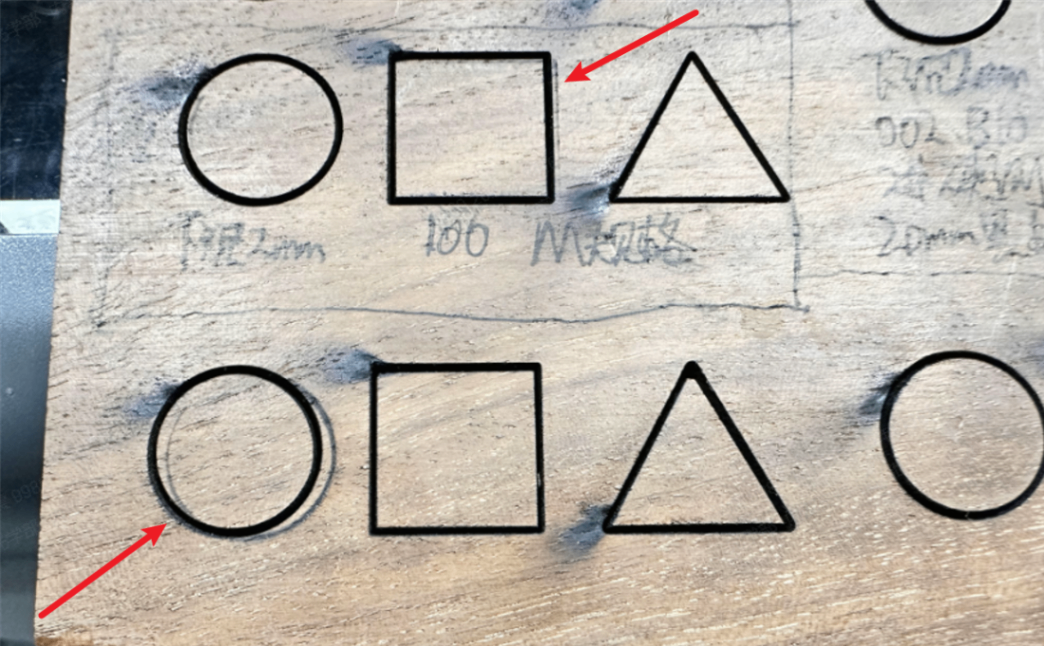
- When you use laser engraving or cutting, double lines appear next to the processing pattern.
- When you use Fill in laser engraving, the ghosting effect may appear.
Possible causes
- Tilted optical path
- Laser mirror issue
- Laser lens issue
- Dirty air nozzle
- Faulty laser tube
- The laser module is not vertical enough
- X-axis transmission failure
Preliminary test
If this issue occurs when processing any file with the laser module, it is typically caused by one of the following reasons:
- Optical path misalignment (CO₂ laser only)
- X-axis transmission/mechanical drive issue (applicable to both CO₂ laser module and the 5W infrared laser module)
- 5W infrared laser module malfunction (5W infrared laser module only)
You can perform the following tests to quickly identify the cause of the issue and then proceed with the corresponding troubleshooting steps.
Test 1: Check the X-Axis transmission system (Applicable to CO₂ laser module and the 5W infrared laser module)
Perform both Bi-directional engraving and Uni-directional engraving.
- If the engraving result is normal in Uni-directional mode and the double-line/ghosting issue only occurs in Bi-directional mode, this indicates a problem with the X-axis transmission system. Please proceed with troubleshooting the X-axis transmission system.
- If the double-line/ghosting issue also occurs in Uni-directional mode:
- For CO₂ laser models, the issue is likely caused by the optical path. Please proceed to Test 2.
- For the 5W infrared laser module, the issue is likely caused by the laser module itself. Please troubleshoot the 5W infrared laser module.

Test 2: Check the optical path (CO₂ laser module only)
Perform the same engraving task with the air nozzle installed and with the air nozzle removed.
- If the double-line/ghosting issue only occurs when the air nozzle is installed, this indicates an abnormality in the Z-axis optical path. The laser beam is likely striking the air nozzle, causing beam scattering and resulting in a split beam effect. Please troubleshoot the Z-axis optical path.
- If the double-line/ghosting issue persists even after removing the air nozzle, the problem is likely caused by the laser module or the optical lenses. Please proceed with troubleshooting the laser module and optical lenses.

Troubleshooting procedures
1. Solve the Z-axis optical path issue
It applies to the scenario where the CO2 laser module installs the nozzle to process.
1.1 Check the nozzle
Check whether the nozzle is dirty. If it is dirty, clean it and reinstall it.
1.2 Check the optical path
Go to Device settings > Calibration > Start to calibrate the optical path. If it is tilted, recalibrate it.

1.3 Adjust the Z-axis verticality
If the problem persists after the optical path is accurate, please adjust the verticality of the Z-axis of the laser head according to the following article.
2. Solve the laser module or lens issue
It is applicable to scenarios where this problem occurs during CO2 laser processing without installing a nozzle.
2.1 Check the focus lens
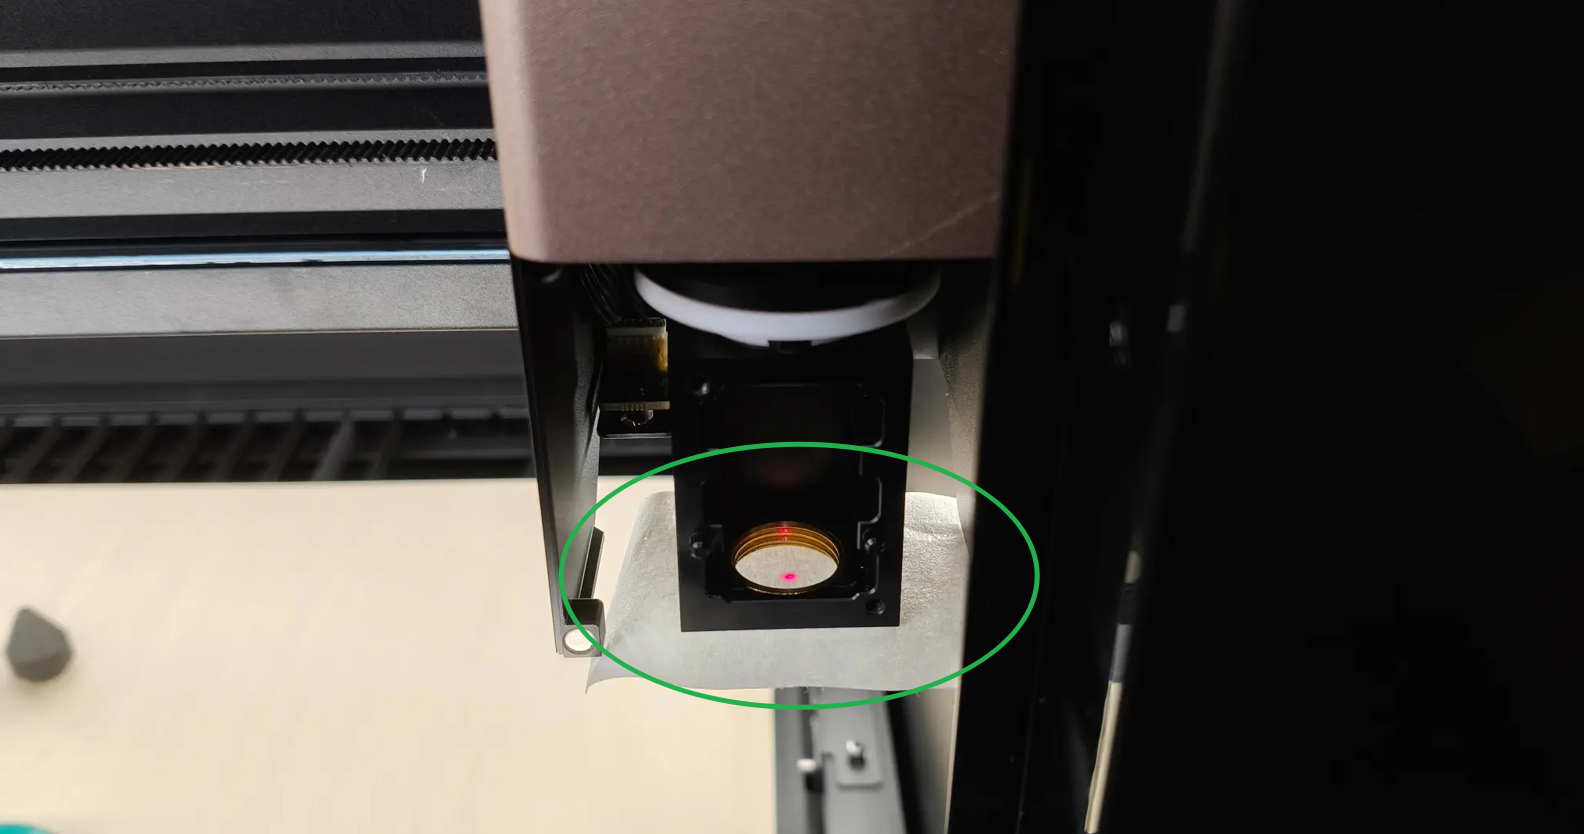
(1) Remove the air nozzle and the focus lens holder, then place a piece of masking tape on the air nozzle mounting area.
(2) Enter the optical path calibration and perform a laser pulse test both with the focus lens installed and with the focus lens removed.
(3) Observe whether the double-spot issue occurs only when the focus lens is installed.
- If the double-spot issue only occurs when the focus lens is installed, replace the focus lens.
- If the issue does not depend on whether the focus lens is installed, continue troubleshooting other possible causes.
2.2 Check the different types of laser mirrors
Clean different types of laser mirrors and reinstall them to avoid looseness. Refer to the video tutorial.


2.3 Test the laser tube

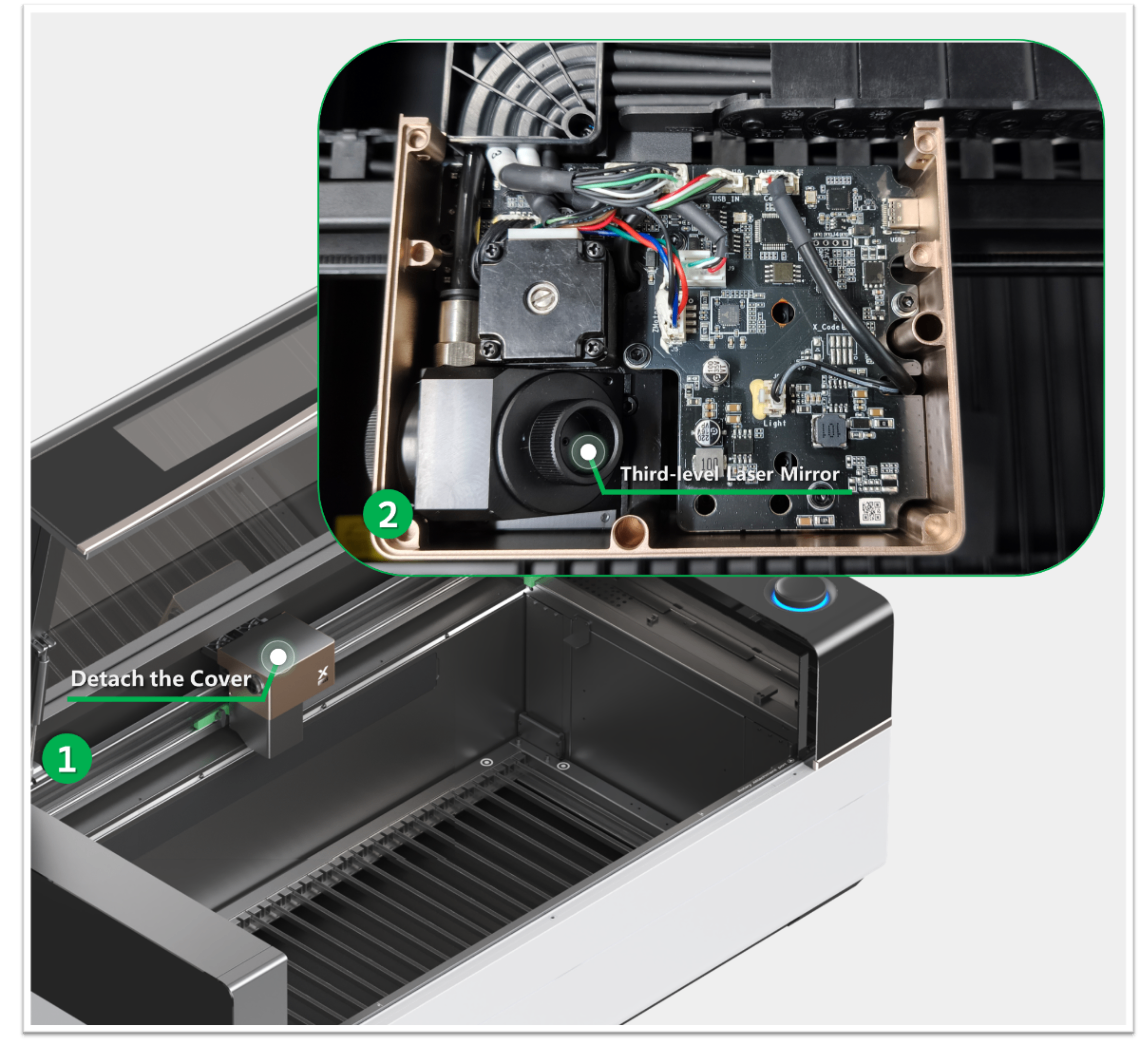
(1) Remove the first mirror (as shown).
(2) Place a piece of wood at the position of the first mirror.
(3) Enter the optical path calibration and perform a laser pulse test.
(4) Observe the shape of the laser spot on the wood surface.
- If a double spot is observed, replace the laser tube.
- If a single spot is observed, continue troubleshooting other possible causes.
3. Solve the X-axis transmission issue
It applies when the double-line/ghosting issue occurs only during bi-directional engraving.
3.1 Check X-axis belt tension
Gently pinch the X-axis belt with two fingers. With proper belt tension, the belt should be able to be pinched together with light finger pressure (approximately 40 – 45 N of tension).
- If the belt feels loose, adjust the belt tension by following the procedure shown in the video.
- If the belt tension is within the normal range, continue troubleshooting other possible causes.

3.2 Check the X-axis motor
Power off the device. Then, refer to the tutorial video to inspect the X-axis motor for any abnormalities.
- If the motor is found to be defective, such as having damaged gear teeth or abnormal resistance when rotated by hand, please replace the motor.
- If no obvious abnormalities are found, disconnect and reconnect the motor cable, then restart the device and test again.
4. Solve the 5W infrared module issue
It applies when the double-line/ghosting issue occurs even during uni-directional engraving with the 5W infrared laser module.
4.1 Adjust the engraving speed
When using the 5W infrared module, the weight of the xTool P3 Z-axis assembly is relatively high. At certain engraving speeds, device resonance may occur, resulting in a ghosting effect in the engraving output. In most cases, this issue can be eliminated by slightly adjusting the engraving speed.
Increase or decrease the engraving speed in increments of 20 mm/s and perform test engravings to determine whether the issue disappears.
- If the issue disappears, continue processing at the adjusted speed.
- If the issue persists, continue troubleshooting other possible causes.
4.2 Check the Lens
(1) Remove the 5W infrared module.
(2) Remove the magnetic protective cover.

(3) Rotate the protective lens anticlockwise to remove it.

(4) Inspect the inner lens (left side, non-removable) and the protective lens (right side).
- If either lens is visibly dirty, gently clean it using a lint-free cloth lightly moistened with alcohol.
- If either lens is cracked or damaged, contact the xTool after-sales team and provide a photo for lens replacement.

Still experiencing issues?
Should the issue persist after completing the preceding steps, submit a ticket via the "Submit a Ticket" button in the "Help Ticket" section below. The standard response time for xTool Customer Service is one business day.
For a prompt resolution, please include the following details:
- Issue description: A detailed explanation of the observed problem.
- Video evidence: Attach a video demonstrating the issue, where applicable.
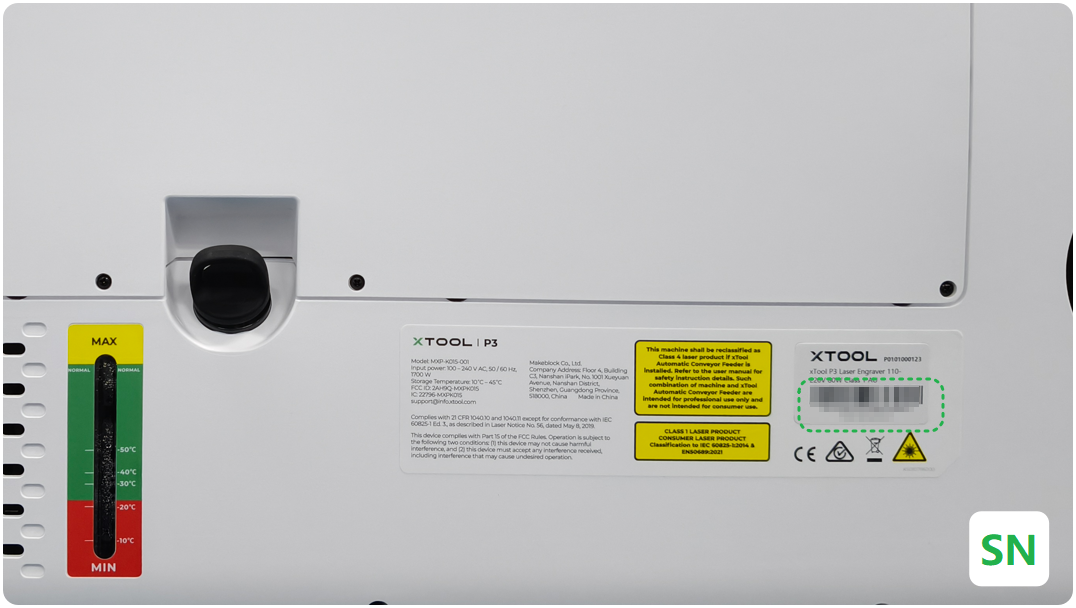
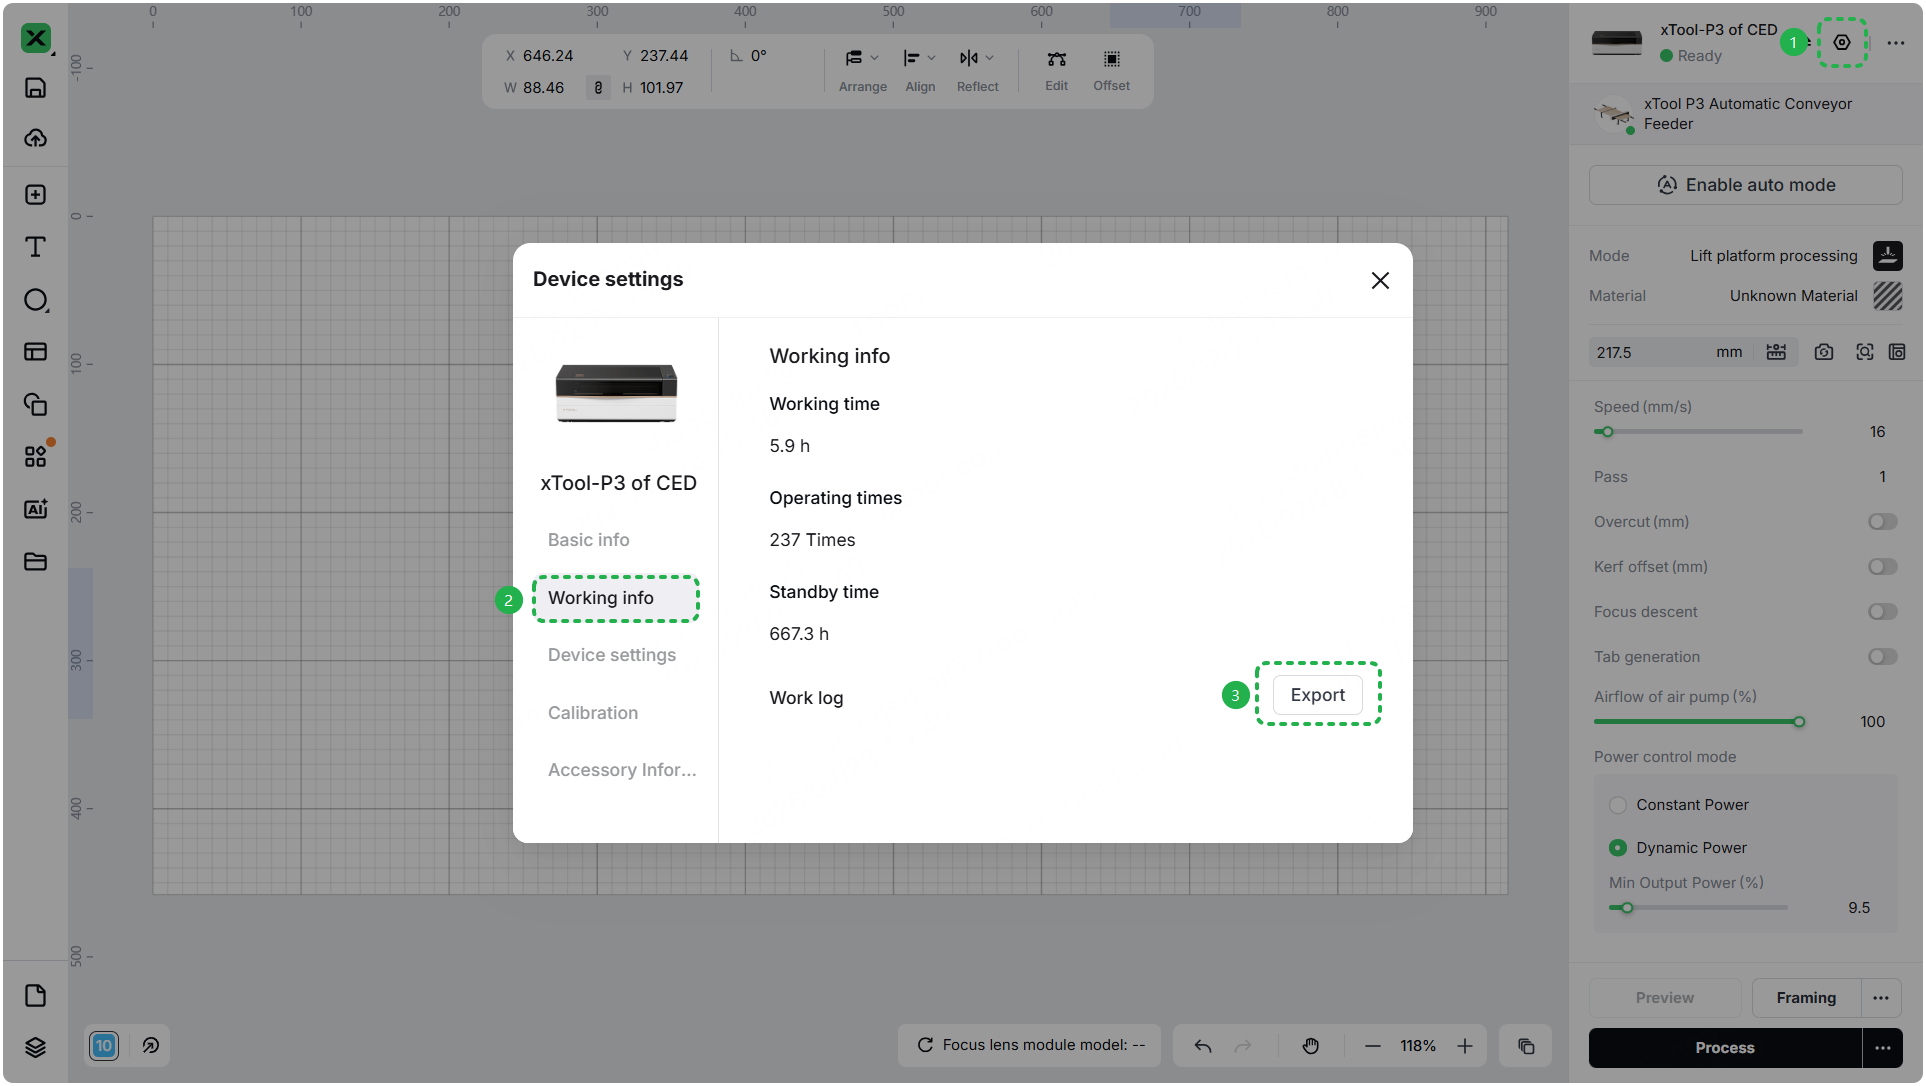
- Device information: Follow the steps to find the SN and export the work log.
- Troubleshooting performed: Any troubleshooting steps you have already attempted, along with their results.
This information is crucial for xTool technical support engineers to provide timely assistance.
Documentation feedback
Help improve this content by providing feedback. If this content did not meet your requirements, select "No" in the "Was this page helpful?" section below. Include specific details about what was unclear or missing in the pop-up suggestion box. Feedback submissions are reviewed by xTool technical writers to enhance future documentation.
