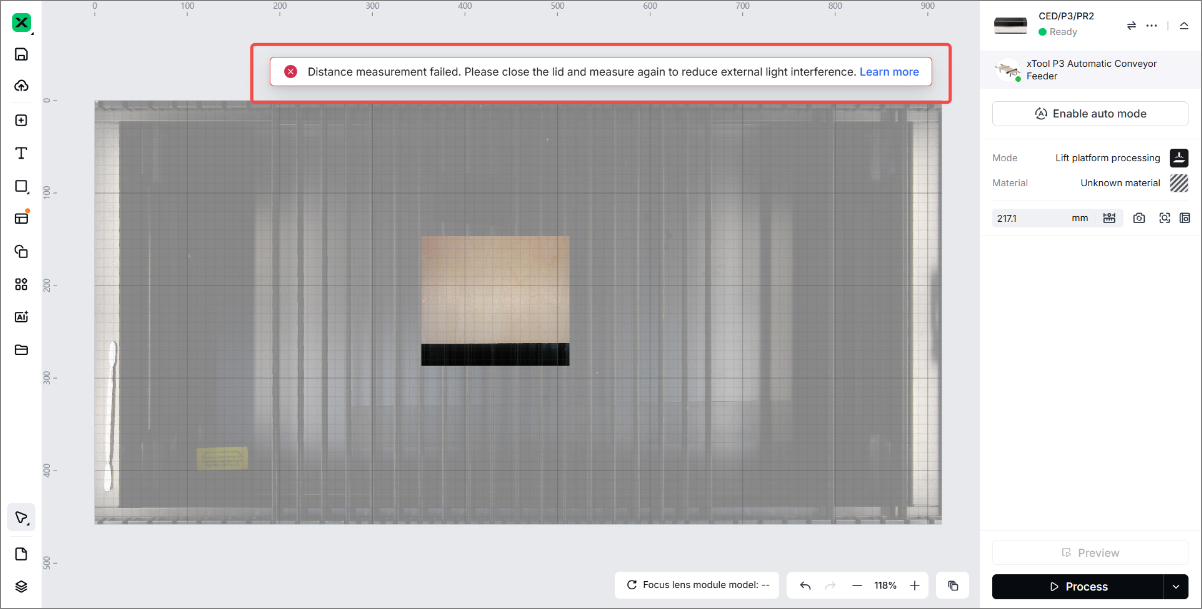
Issue description
After clicking the distance measurement icon, the software may display an error message.
Possible causes
- Some foreign objects are on the origin.
- The measurement points on the slats are covered.
- The lifting platform is too low.
- A strong light interferes with the device.
- Honeycomb panel issue
- Material issue
- The distance measurement sensor is dirty.
- The distance measurement sensor is faulty.
Troubleshoot procedures
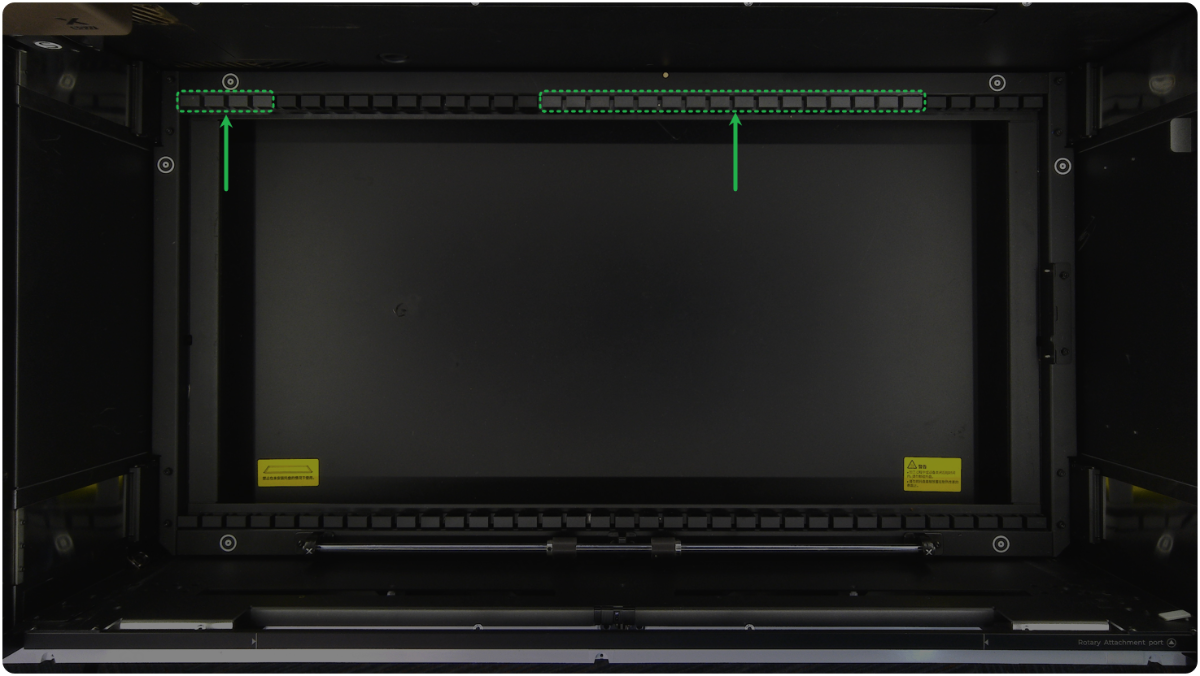
1. Check the position of the material
The origin and the right slat slots (as shown) are the calibration reference point. Do not place material here, as it will cause inaccurate distance measurement, leading to distance measurement failure.
2. Clean the residues on the baseplate (in Auto mode)
Clean the residues on the baseplate. In Auto mode, the residues may be identified as material and measured, but measurement may fail because the baseplate exceeds the measurement range.
3. Check the height of the lifting platform
Turn the knob to elevate the lifting platform to 30 mm above. Ensure that the material surface is at least 4 mm lower than the air nozzle.
Note: In auto mode, the default distance measurement position is at a height of 30 mm on the lifting platform.
4. Check the environmental light condition
Bright light passing through the lid can interfere with automatic measurements and result in failure.
Avoid exposing the lid directly to bright light.
5. Check the types of material
Laser distance measurement relies on the reflection of light off materials.
- Transparent and reflective materials cannot be measured, such as clear acrylic, glass, and mirrors.
- Highly reflective materials, matte black surfaces, and other similar materials may also fail to be measured, such as highly reflective metals and dark-colored fabrics.
If the above materials make it impossible to measure, apply a layer of white masking tape to the surface, and measure the white tape area to complete the focus. Alternatively, follow the steps to measure manually.
6. Check the honeycomb panel
Install the xTool official honeycomb panel or slats to measure the distance.
The official honeycomb panels and slats are black, ensuring high success rates for distance measurement and visual recognition. The grids on third-party honeycomb panels are typically silver, which may interfere with distance measurement and visual recognition.
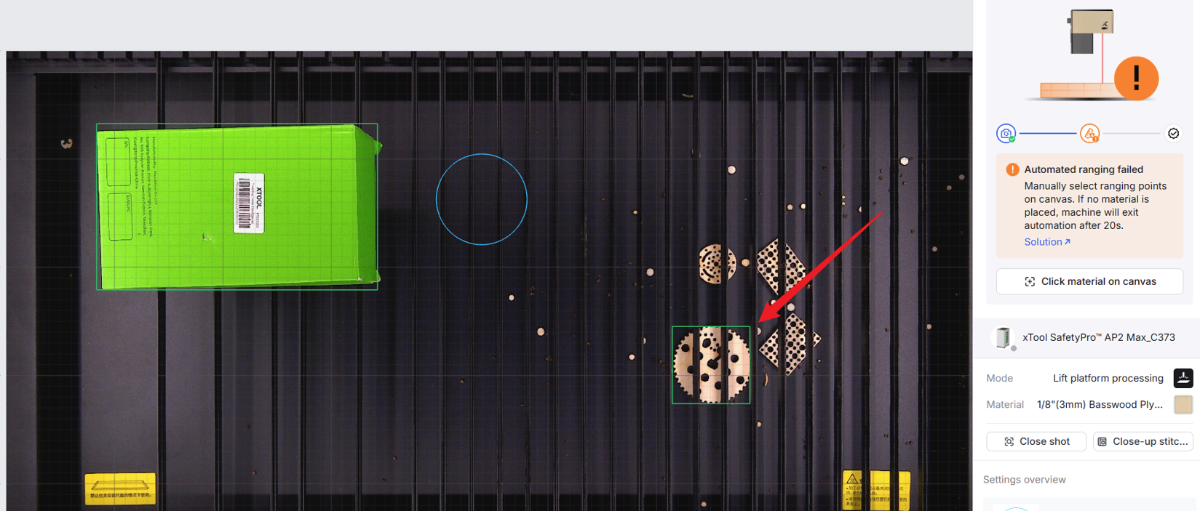
7. Check the measurement point on the material
Check whether the measurement point is located within the material's solid area:
- If so, check for other issues.
- If the measurement point is located in a cutout in the material or outside the material, exit automatic mode and measure manually at the location of the material's solid area.
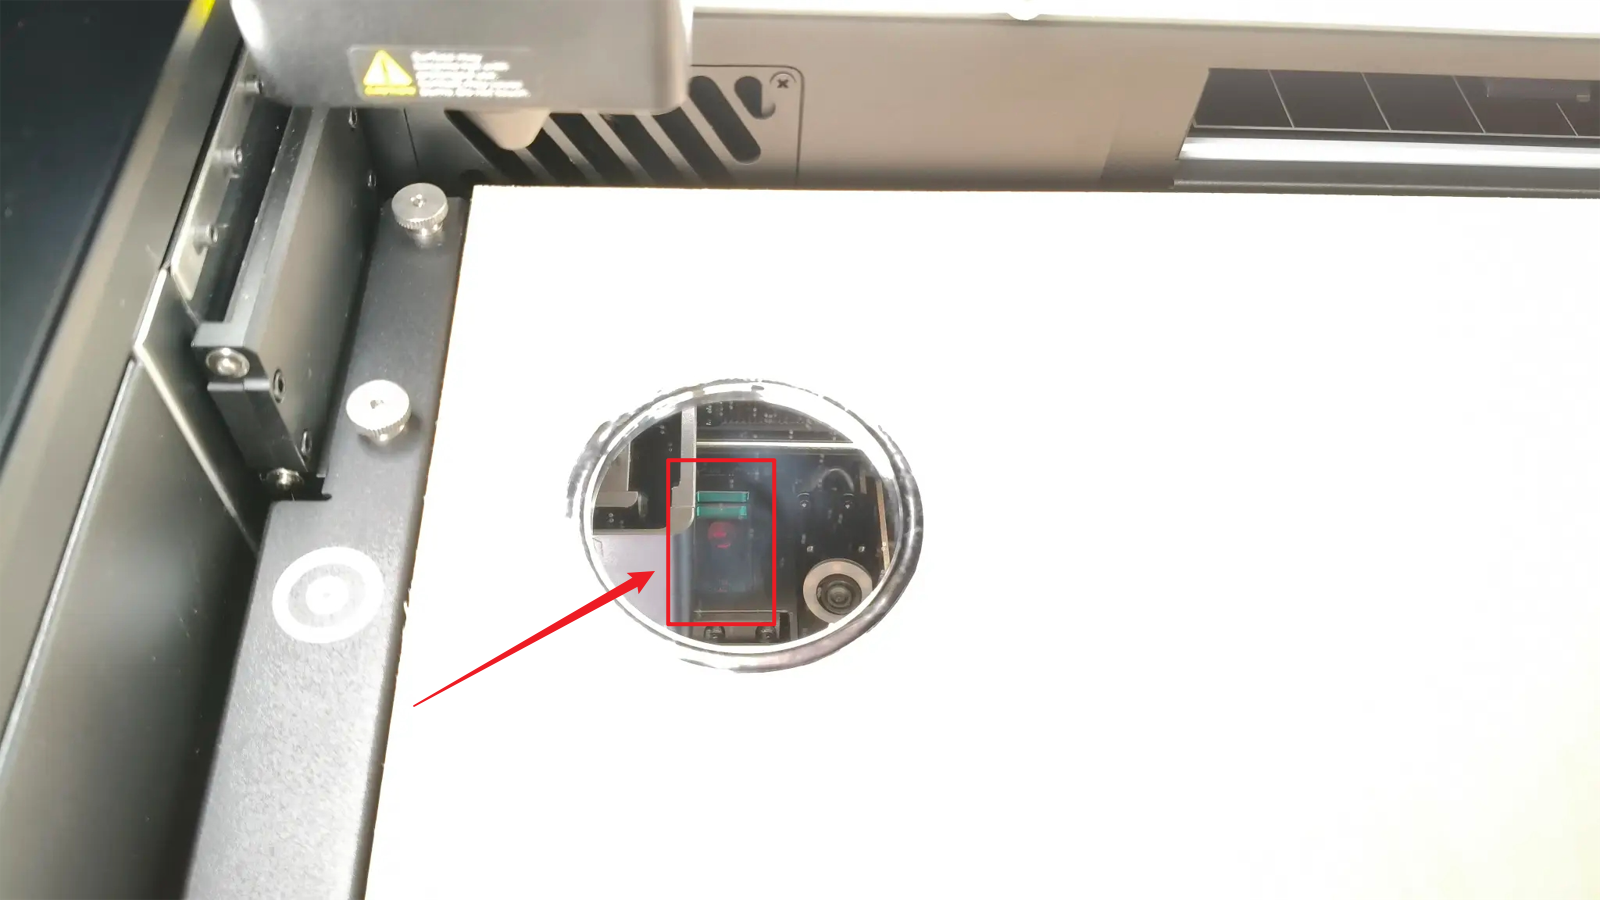
8. Check the mirror of the distance measurement sensor
Prepare a mirror under the laser module, checking whether the distance measurement sensor is dirty.
If yes, use a lint-free cloth moistened with alcohol to gently clean it.
9. Check the red dots
(1) Ensure the distance measurement sensor is cleaned, and turn the knob to elevate the lifting platform to the highest position.
(2) When you measure the material, keep the lid open. Observe whether the red dot from the laser displacement sensor falls on the slat slot when the laser module is at the origin.
Pay attention to distinguishing it from the coaxial red light dot on the left.
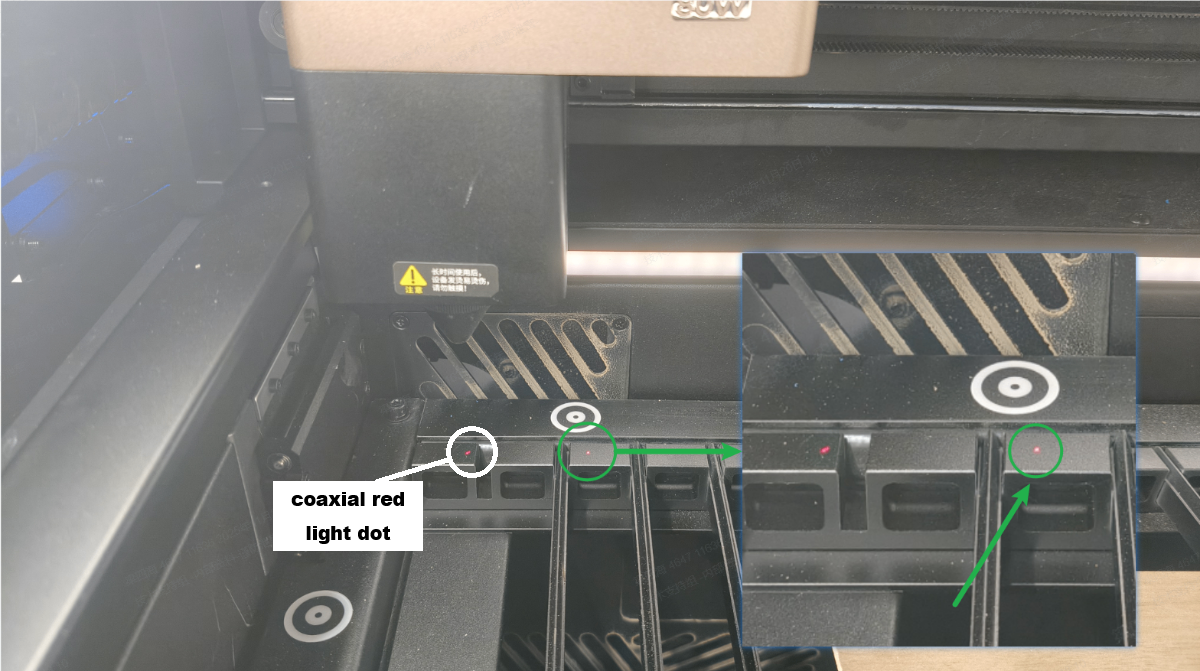
- If the red dot is distinct, check for other issues.
- If the red dot falls outside the slats, follow the tutorial to calibrate the distance measurement sensor.
- If there is no red dot or the red dot is dim,
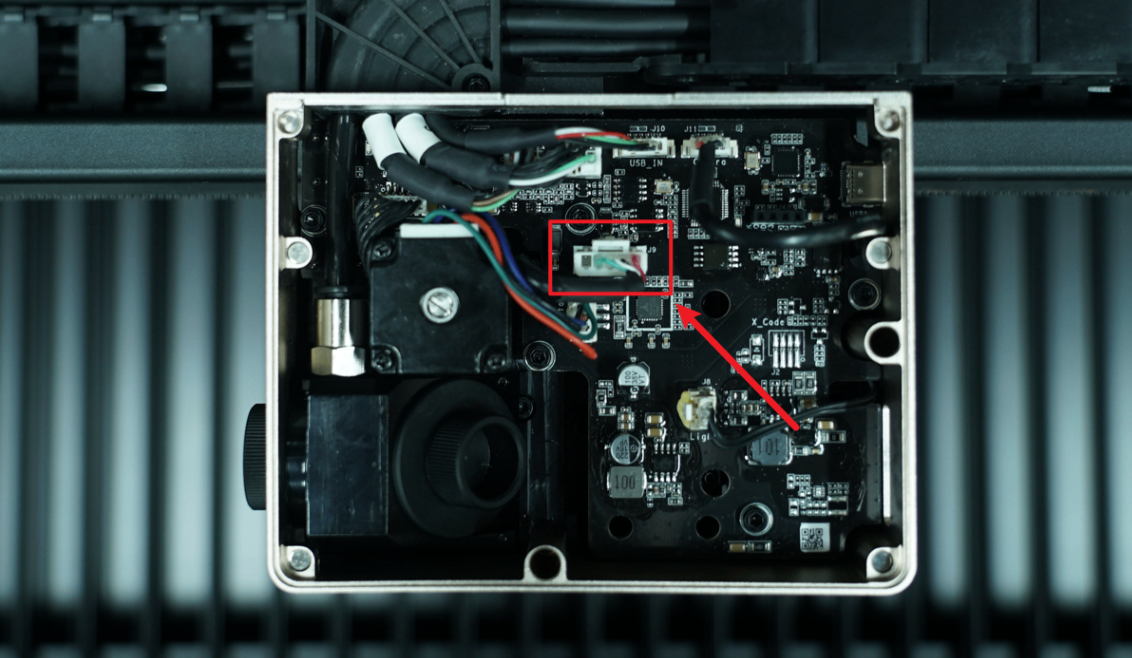
- Remove the magnetic cover of the laser module, unplug and plug the connection cable of the sensor.
- If the red dot fails to fall on the material surface, the measurement sensor needs to be replaced.
10. Check the accuracy of the distance measurement
Significant measurement tolerance may exceed the range, and cause distance measurement failure. Follow the instructions in the link to verify the accuracy.
Still experiencing issues?
Should the issue persist after completing the preceding steps, submit a ticket via the "Submit a Ticket" button in the "Help Ticket" section below. The standard response time for xTool Customer Service is one business day.
For a prompt resolution, please include the following details:
- Issue description: A detailed explanation of the observed problem.
- Video evidence: Attach a video demonstrating the issue, where applicable.
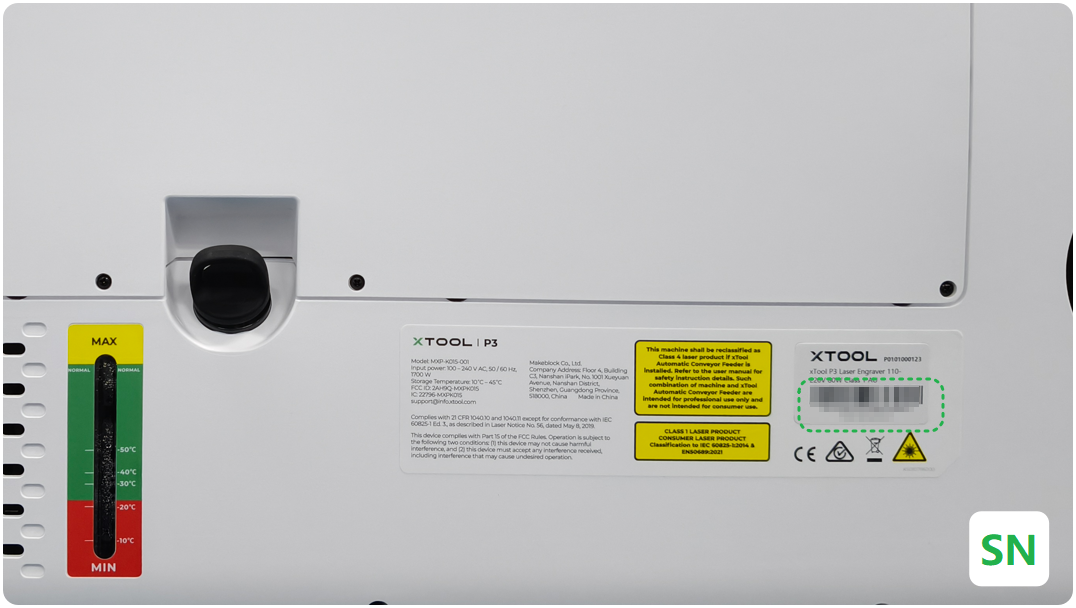
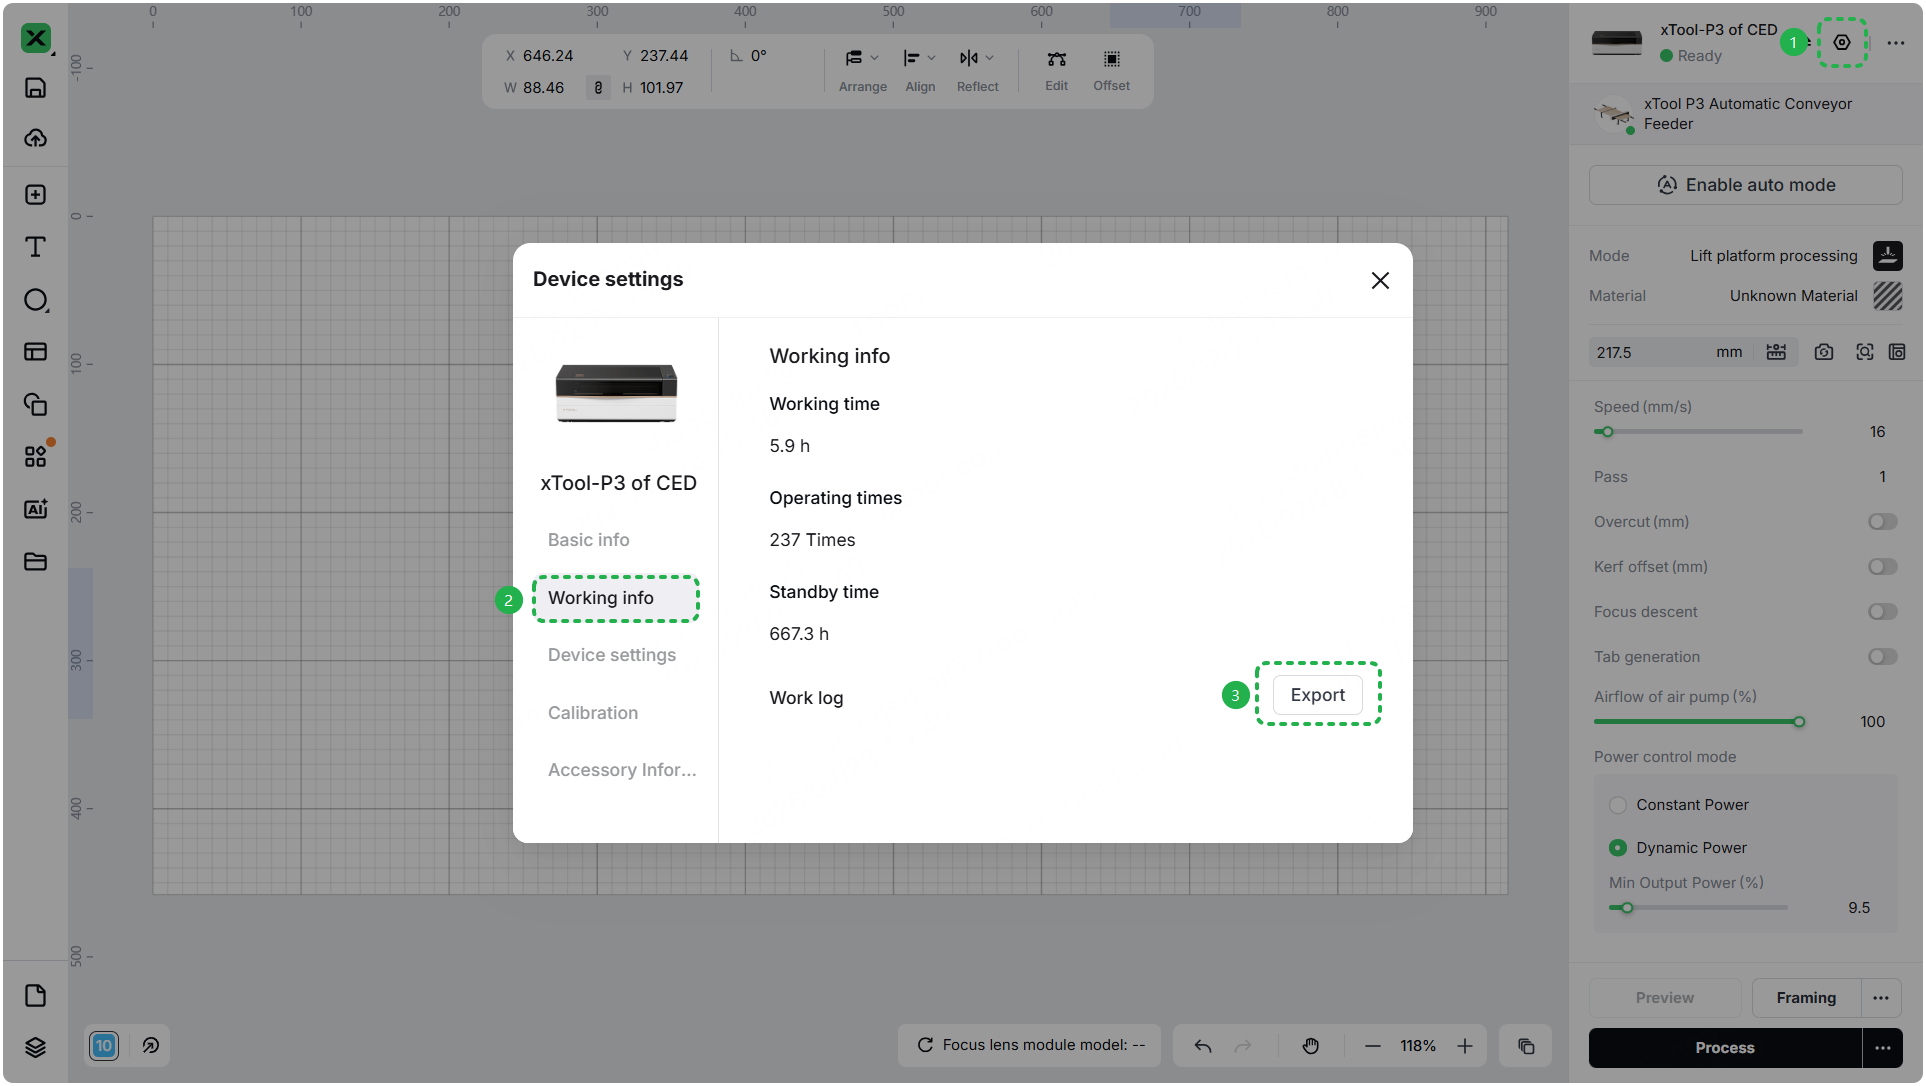
- Device information: Follow the steps to find the SN and export the work log.
- Troubleshooting performed: Any troubleshooting steps you have already attempted, along with their results.
This information is crucial for xTool technical support engineers to provide timely assistance.
Documentation feedback
Help improve this content by providing feedback. If this content did not meet your requirements, select "No" in the "Was this page helpful?" section below. Include specific details about what was unclear or missing in the pop-up suggestion box. Feedback submissions are reviewed by xTool technical writers to enhance future documentation.
