Set up xTool P3 in xTool Software
Updated Dec 8,2025
Updated Dec 8,2025
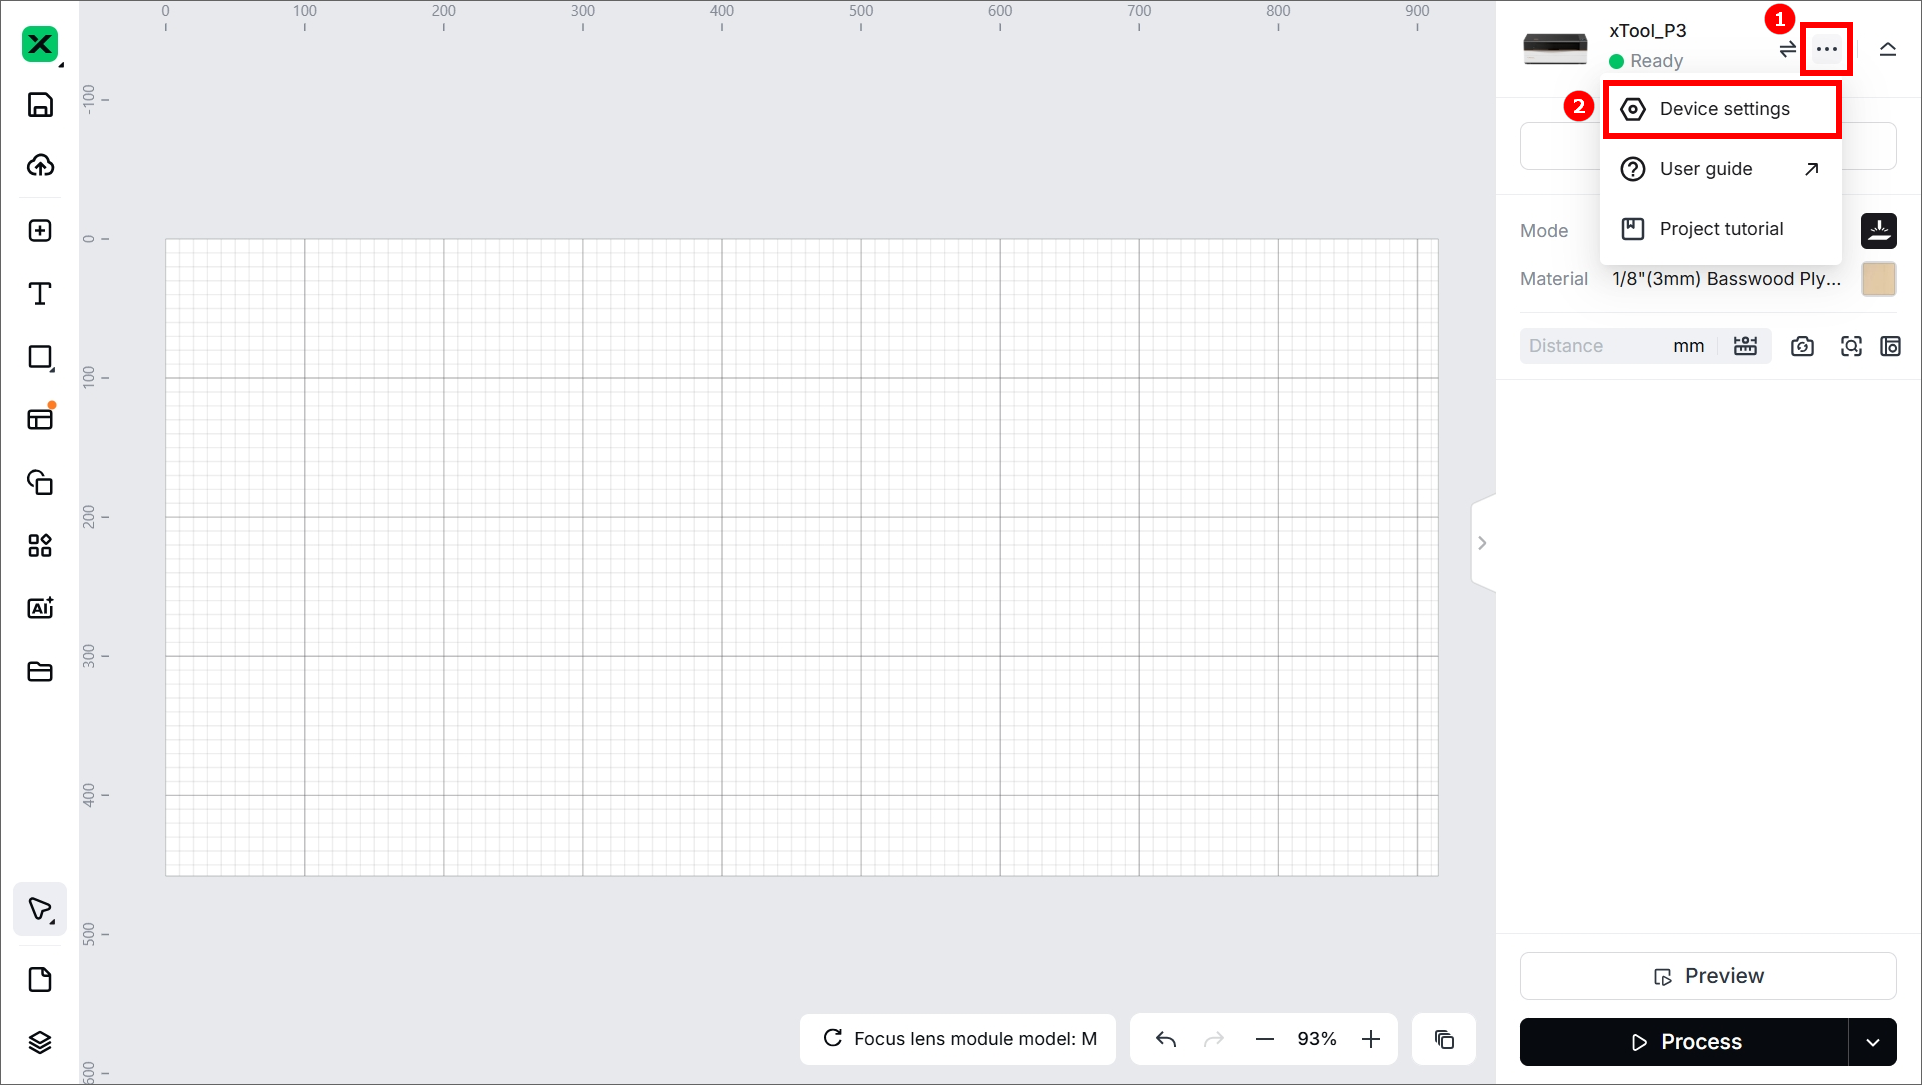
After connecting xTool P3 to the software, you can set up xTool P3 by referring to the following steps.
In the top-right corner of the software, click the settings icon  .
.
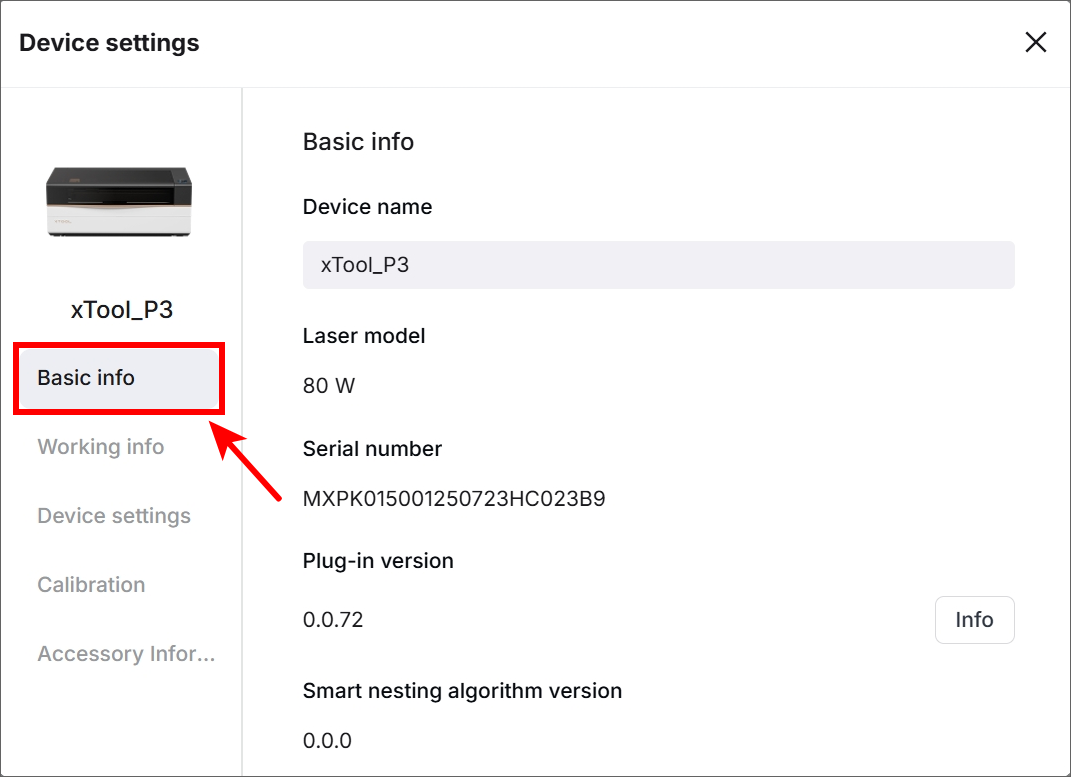
Basic info
In the Basic info tab, you can view:
- Device name: shows the device name. You can enter the text box to change it.
- Laser model: displays the model of the laser module.
- Serial number: displays the serial number of your device.
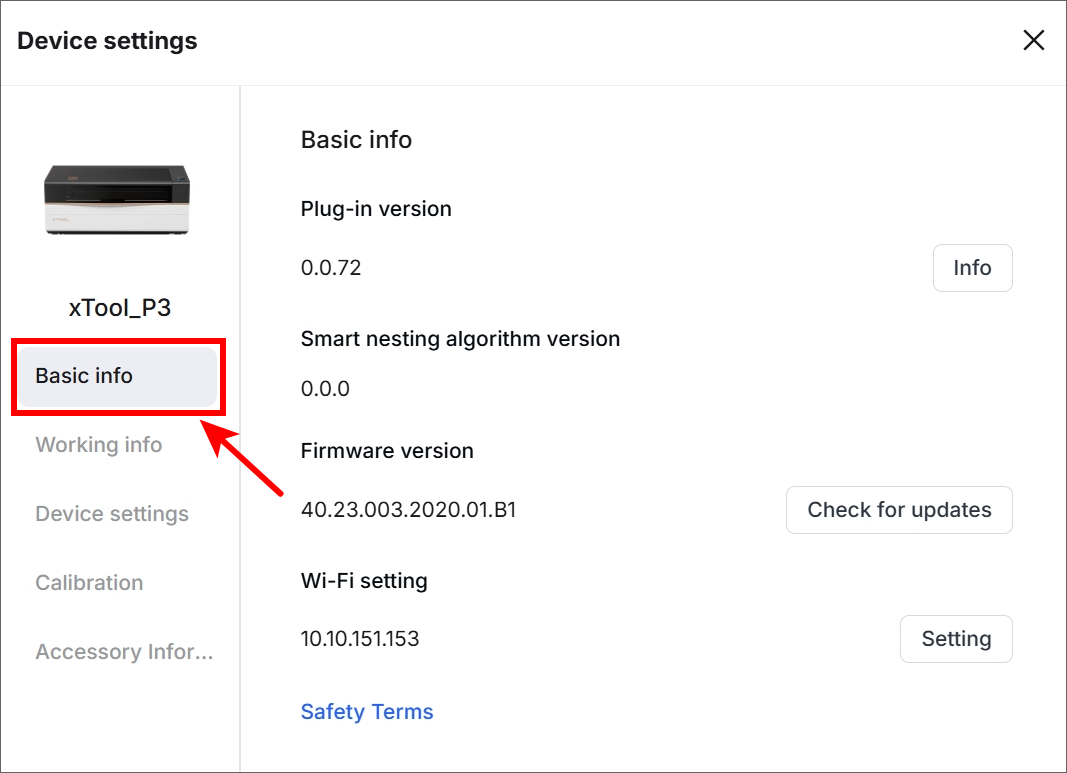
- Plug-in version: displays the plug-in version of your device. You can click Info to view details about it.
- Smart nesting algorithm version: Displays the version of the smart nesting algorithm.
- Firmware version: shows the firmware version. You can click Check for updates to update to the latest version if available.
- Wi-Fi setting: displays the Wi-Fi address.
- Safety Terms: click to view the safety terms.
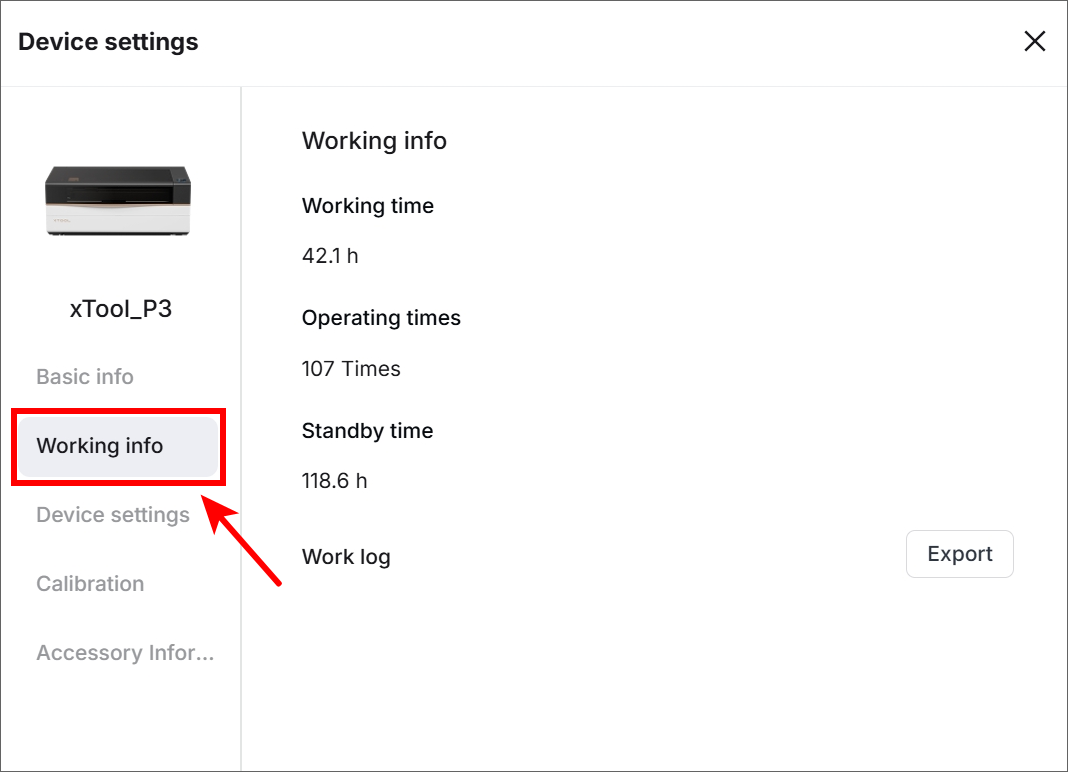
Working info
In the Working info tab, you can view:
- Working time: displays the total time the device processes materials.
- Operating times: displays the total number of times the device has been operated.
- Standby time: displays the total time the device is on standby.
- Work log: You can click Export to export the work log of the device.
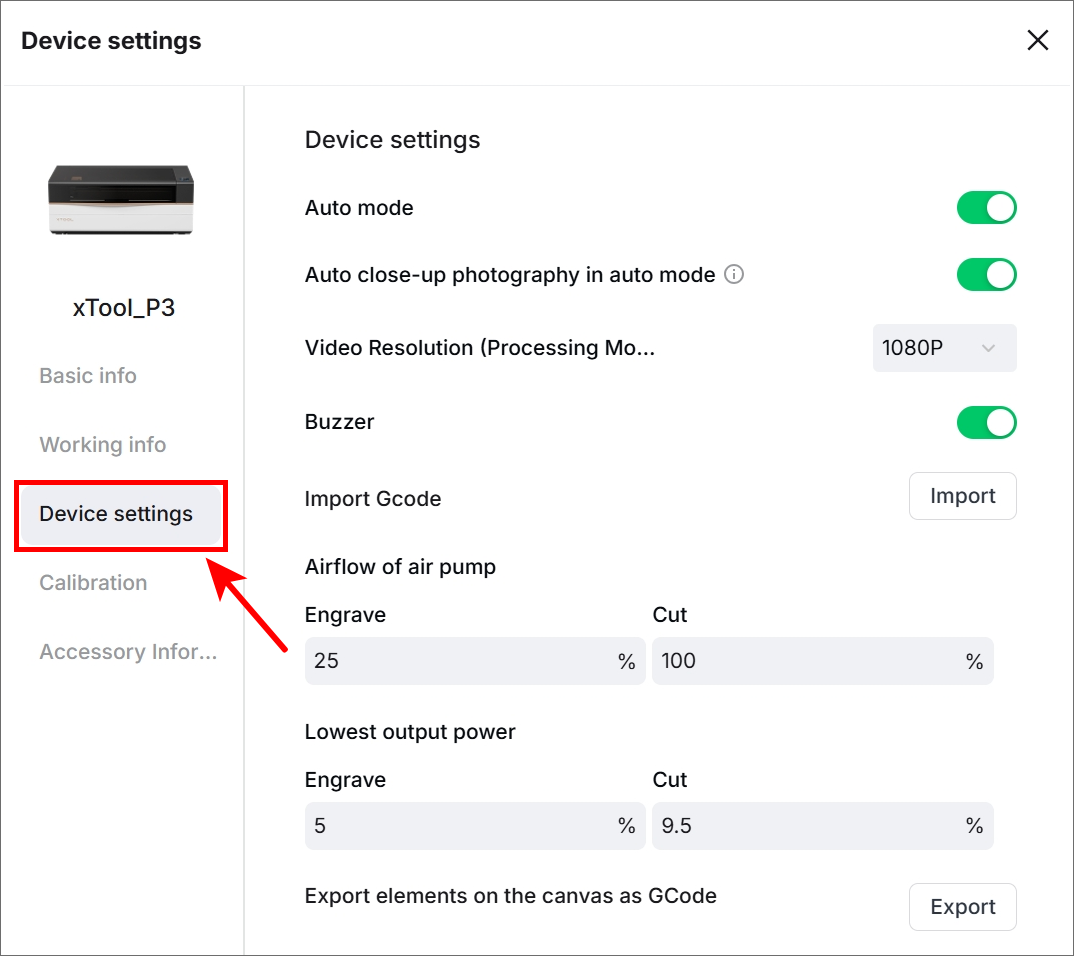
Device settings
In the Device settings tab, you can view:
- Auto mode: enables or disables auto mode during processing.
- Auto close-up photography in auto mode: enables or disables capturing on material size smaller than 150 x 130 mm in auto mode.
- Video Resolution: sets the resolution of the real-time processing view. The default is 1080P.
- Buzzer: enables or disables the buzzer of the machine. After being disabled, the buzzer no longer works as an indicator.
- Import Gcode: allows you to import a G-code file from the local disk. G-code files applicable to your device, exported on xTool software.
- Airflow of air pump:
- Engrave: sets the airflow for engraving. A lower airflow is recommended.
- Cut: sets the airflow for cutting. A higher airflow is recommended.
- Lowest output power: refers to the lowest output power of the laser when processing certain curved paths and decelerating. If the laser fails to cut through the material in turning, you can set to increase the power slightly. However, be careful not to set the power too high, as excessive power during turns may cause the material to get burned and blackened. If your machine works properly, you don't need to set this parameter.
- Engrave: sets the lowest output power for engraving.
- Cut: sets the lowest output power for cutting.
- Export elements on the canvas as Gcode: exports all the elements on the canvas to a G-code file.
Calibration
In the Calibration tab, you can operate:
- Optical path setup: allows you to test and modify the optical path. You can click Start to start testing the optical path.
- Base leveling: allows you to calibrate the leveling of the slat panel.
- Wide-angle camera calibration: allows you to calibrate the distant-view camera.
- Close-up camera calibration: allows you to calibrate the close-view camera.

Accessory information
In the Accessory information tab, you can operate:
- Accessory information: displays the accessory that connects to xTool P3.
- Solutions to Bluetooth accessory connection failures: Click View to see the connection solutions.

Preview
Was this page helpful?
89 out of 93 found this helpful
Help Ticket
Use this help ticket to submit your issue. We will respond within 1 business day
Submit a Ticket 