1. Image Processing
1.1 Processing Mode
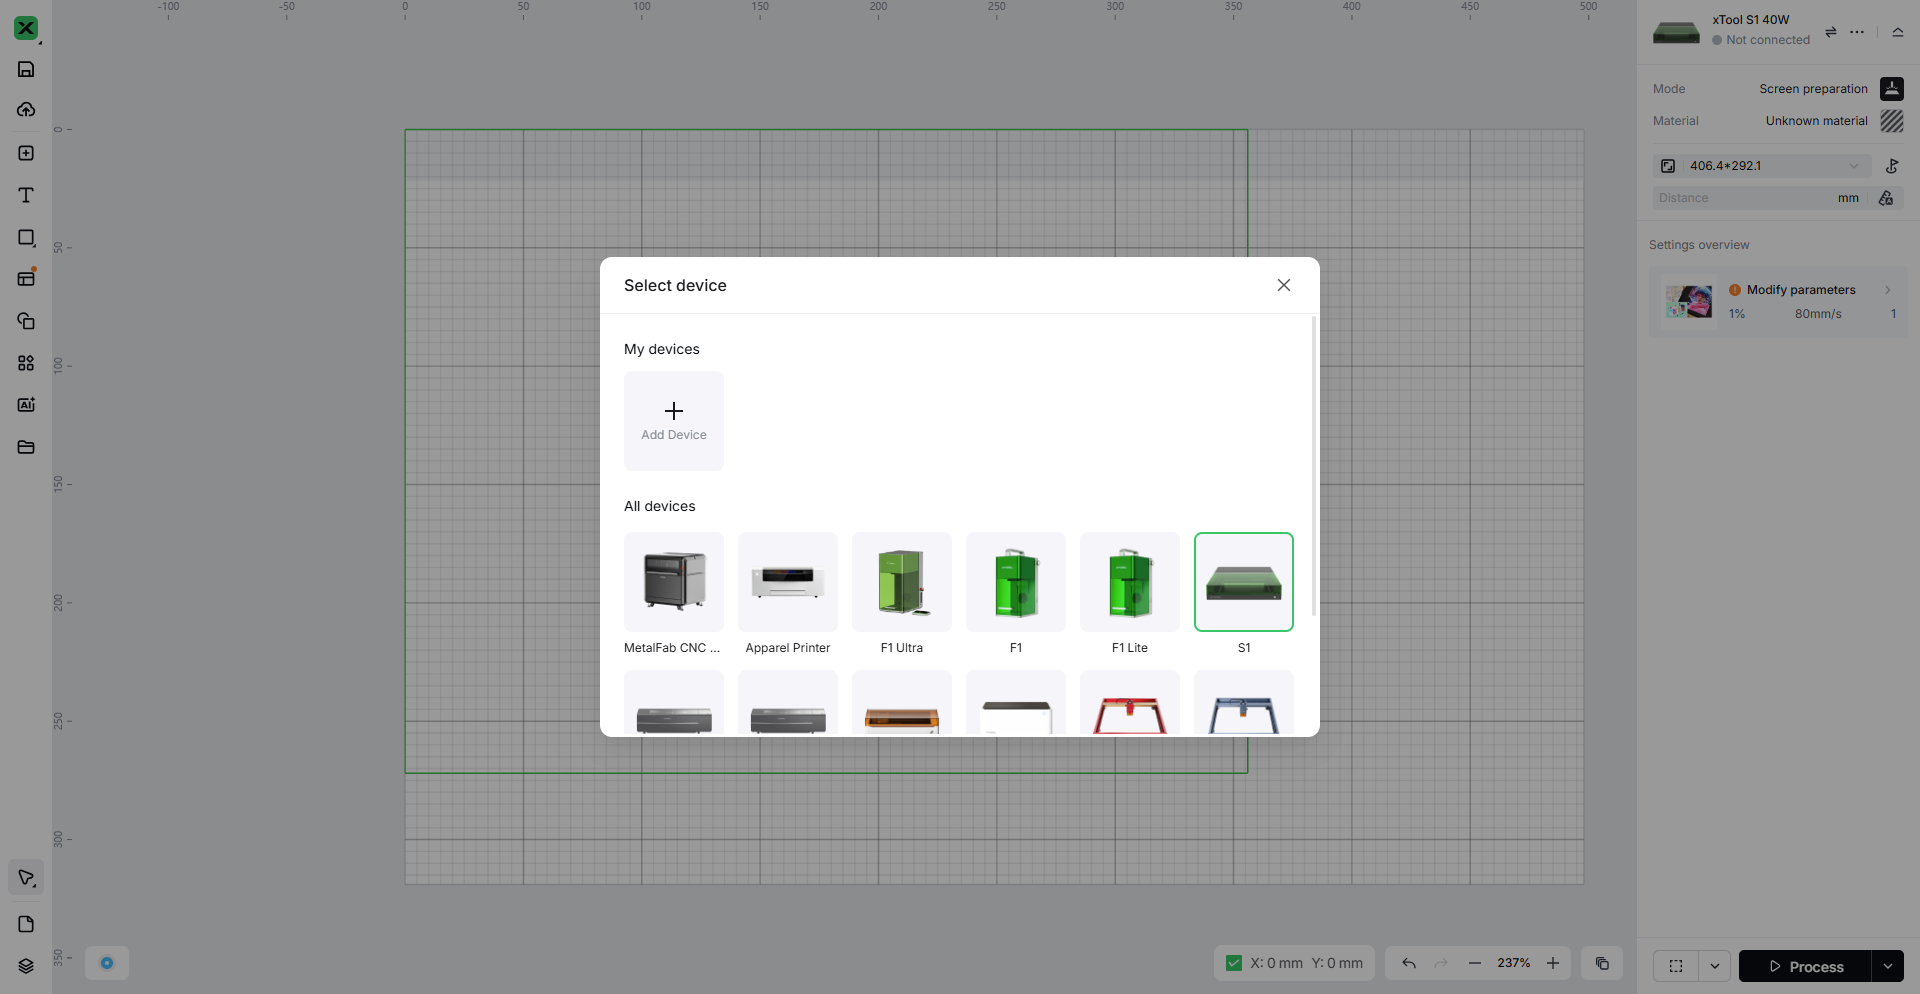
First, you need to connect the software to the processing equipment. In "Select Device," choose the laser processing device you want to use.
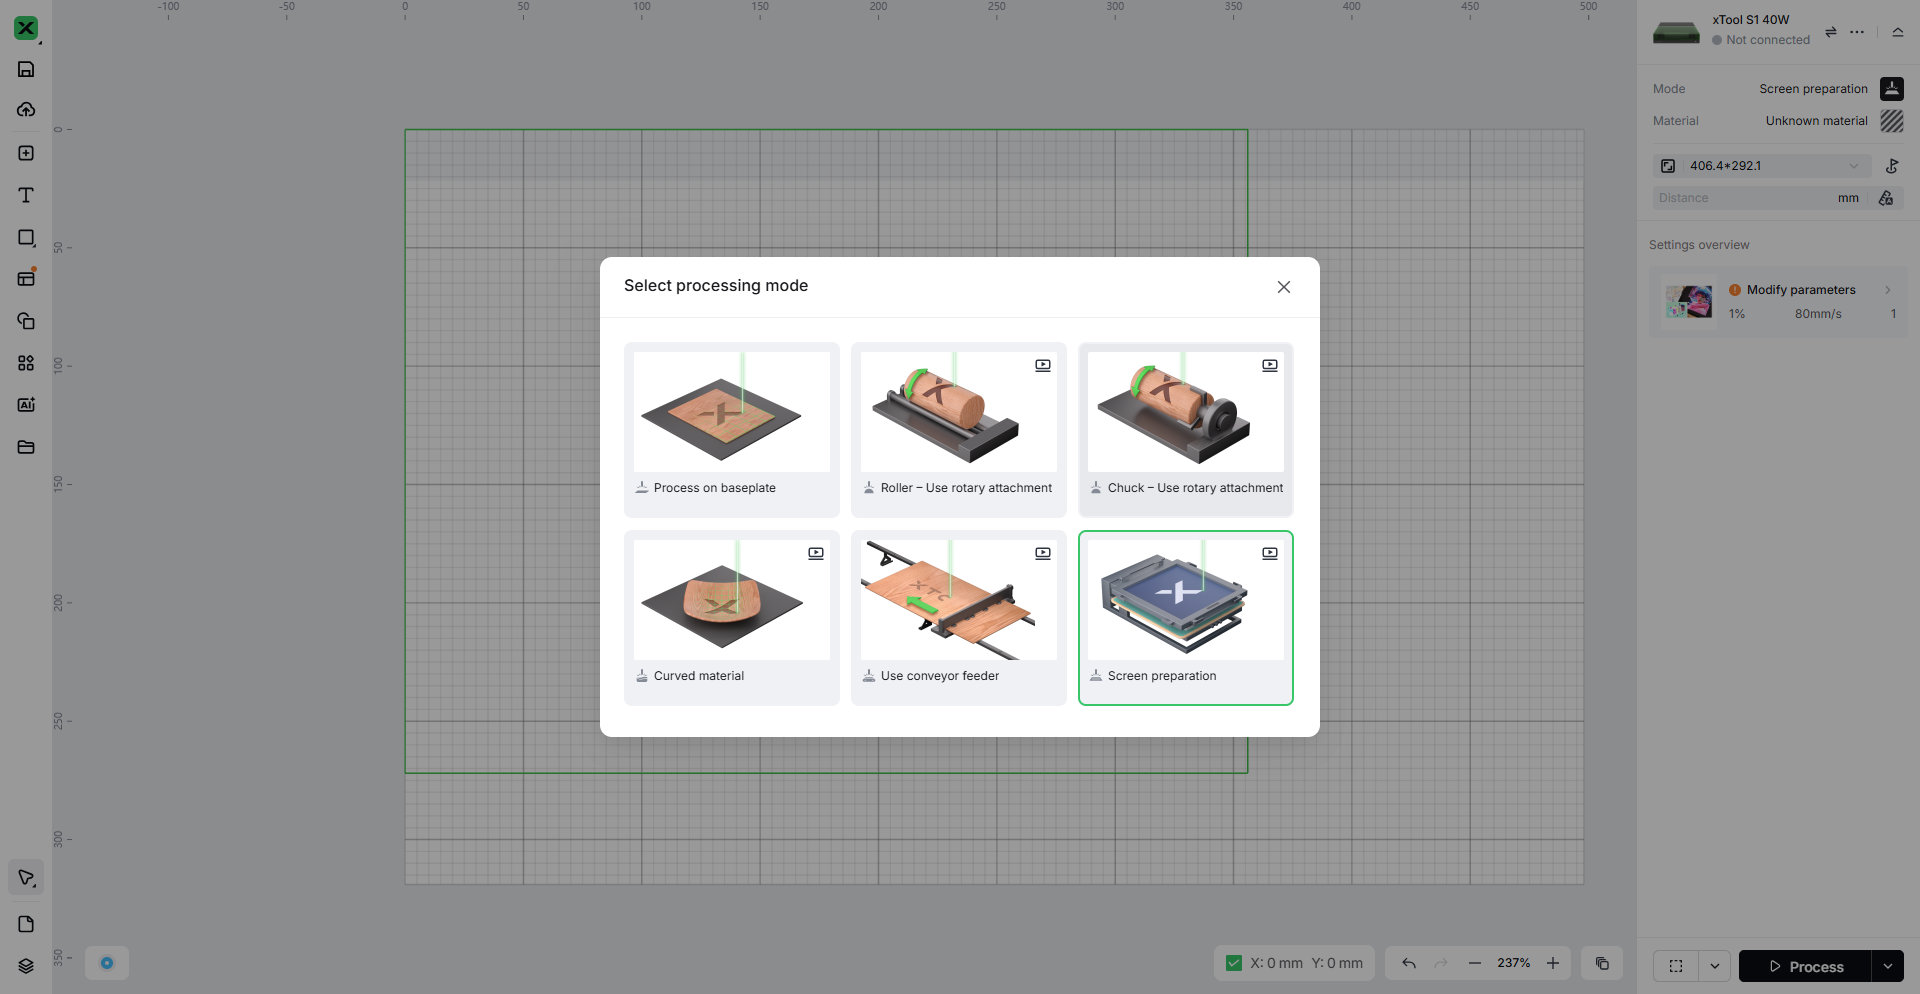
After connecting the device, click on Screen preparation in Select processing mode to choose the processing mode required.
1.2 Optimal Parameter Settings
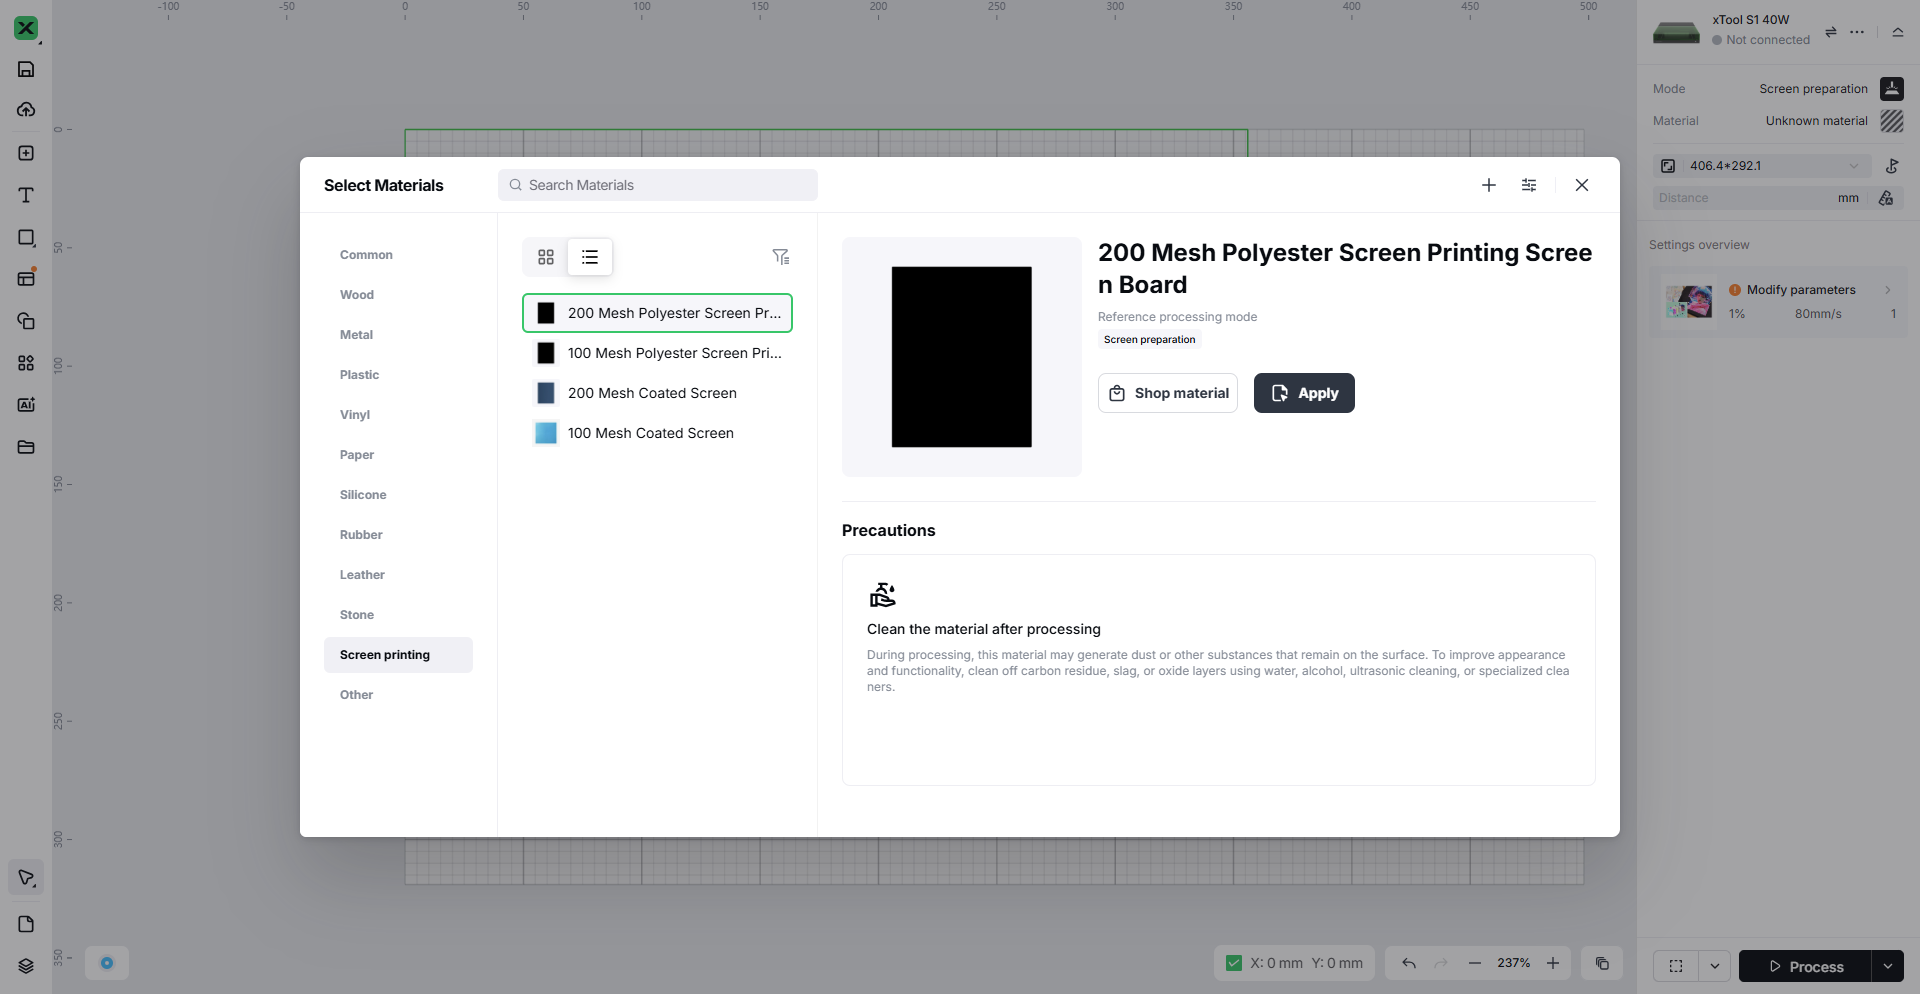
Select the material you need to process and click to set the optimal processing parameters.
1.3 Split CMYK Channels
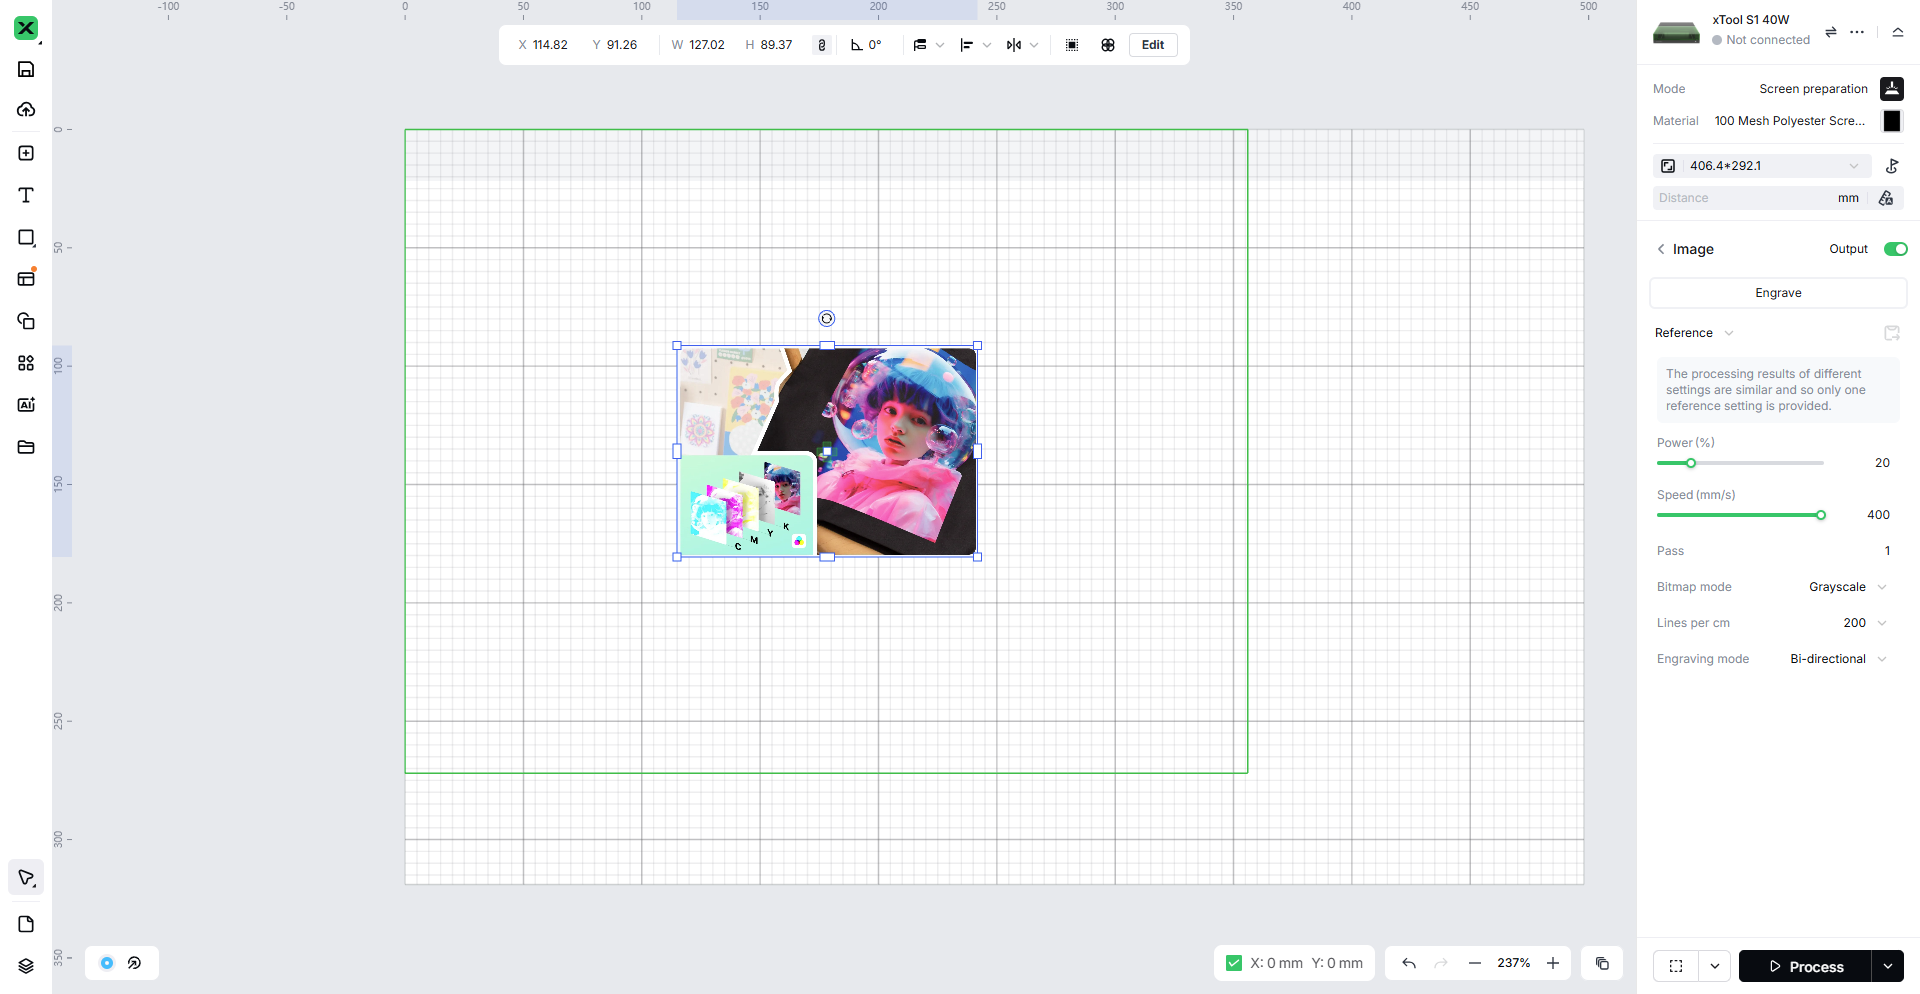
Insert the image you need to process into the software's canvas and adjust it to the appropriate size for printing.
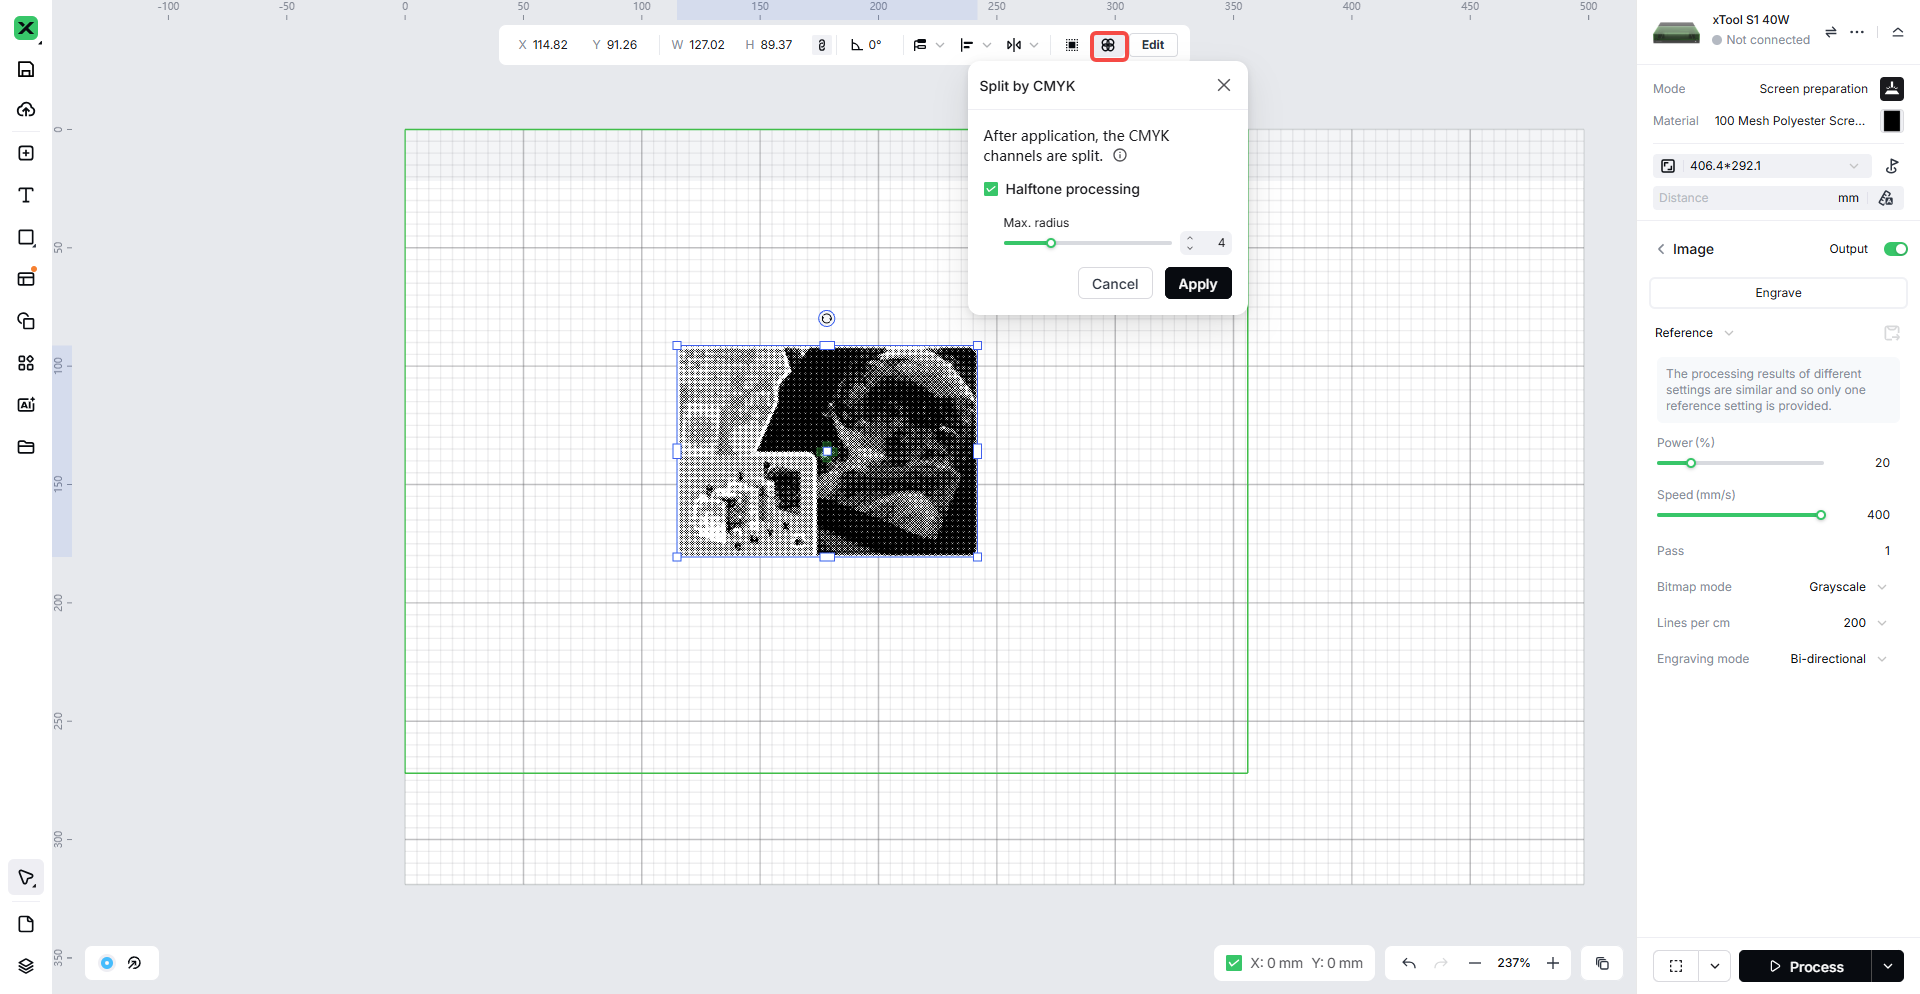
Click to select the image, then click the 'Split by CMYK' option above. After confirming, you will get the layers split into CMYK.
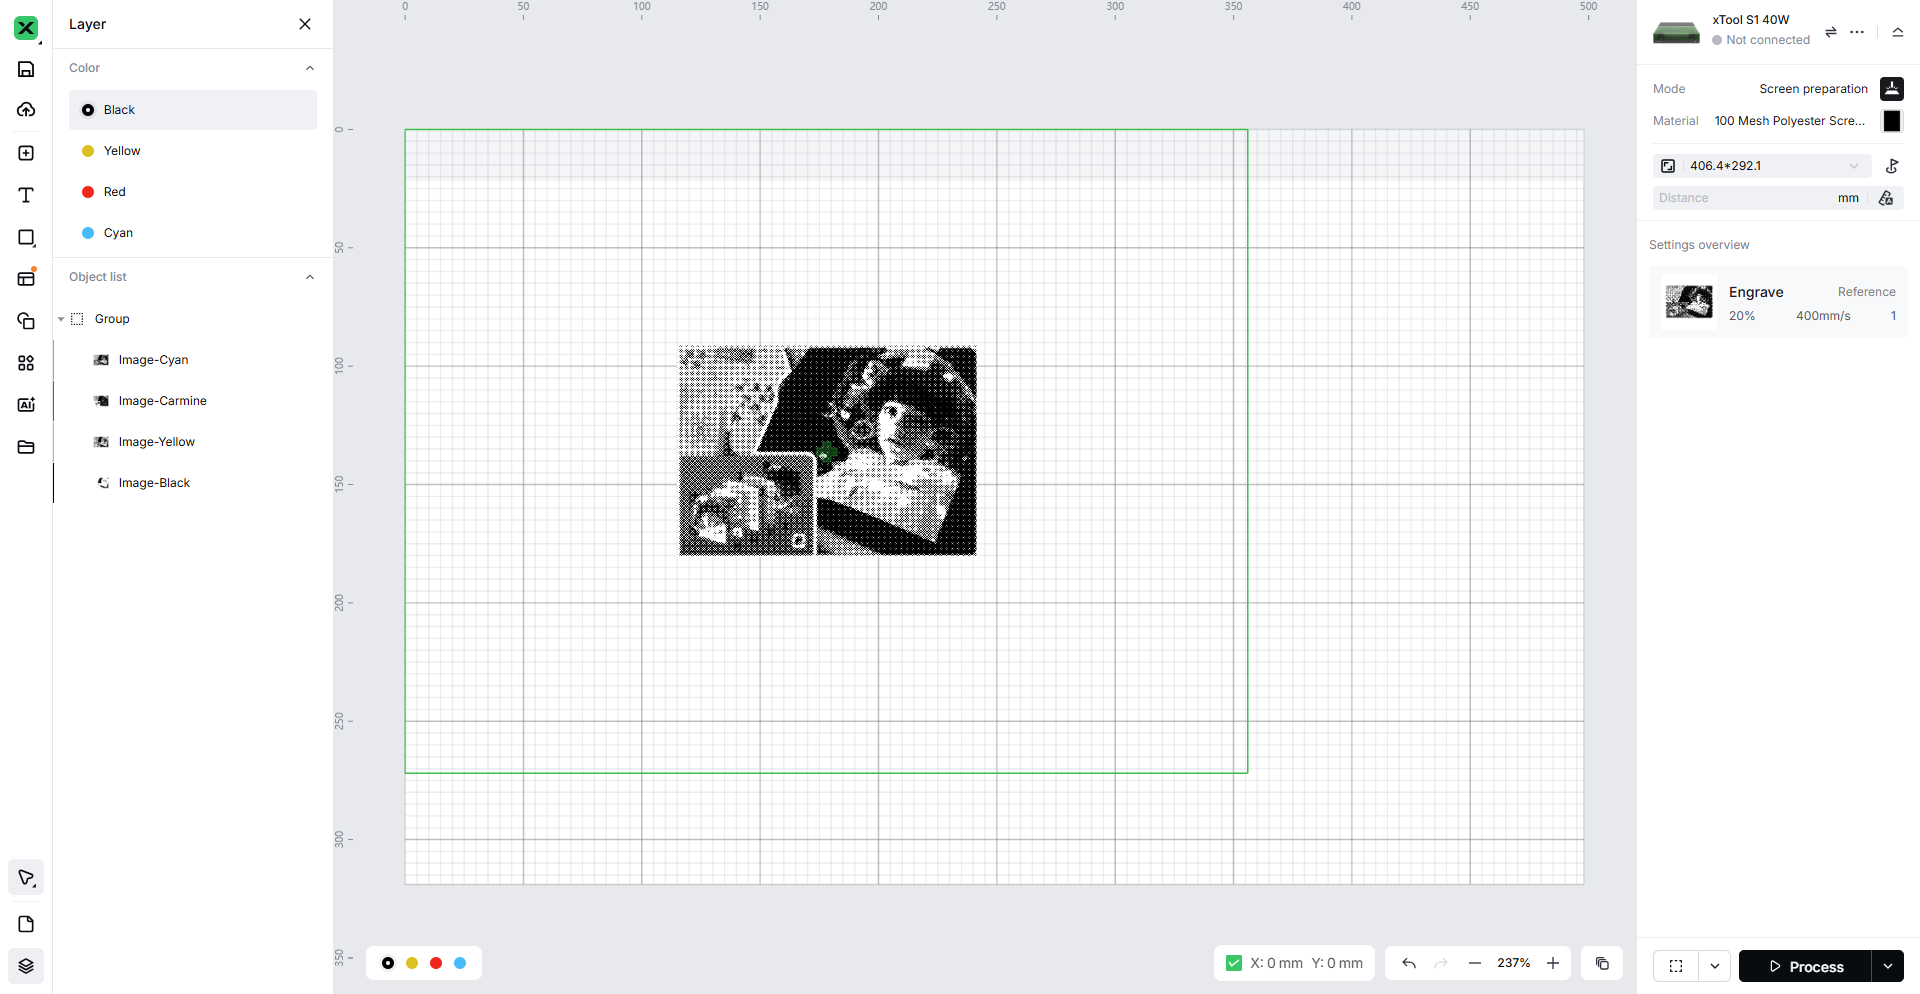
In the lower left corner of the canvas, you can click to view the layer information.
1.4 Layer Settings
Precautions:
When the screen needs to print a complete image, 4 Fast-engrave screens are required.
The ink and layers are printed sequentially according to the printing plate order (cyan-magenta-yellow-black), and printing must be carried out in this color order.
After printing the ink with the previous screen plate, the ink should be allowed to dry slightly, but not completely cure. The ink needs to remain moist before proceeding with the next print, because the ink from the next screen plate needs to react with the ink printed from the previous screen plate to produce a new color. If the printed ink is fully cured, then when the next screen plate is used for printing, the ink color will not change with the previous ink.
It is recommended to complete laser engraving on all four screens before proceeding with ink printing. When engraving the four layers, it is not advisable to remove the screens, as repeated disassembly and installation may cause color misalignment during printing and could disrupt the overlapping positions of the four colors.
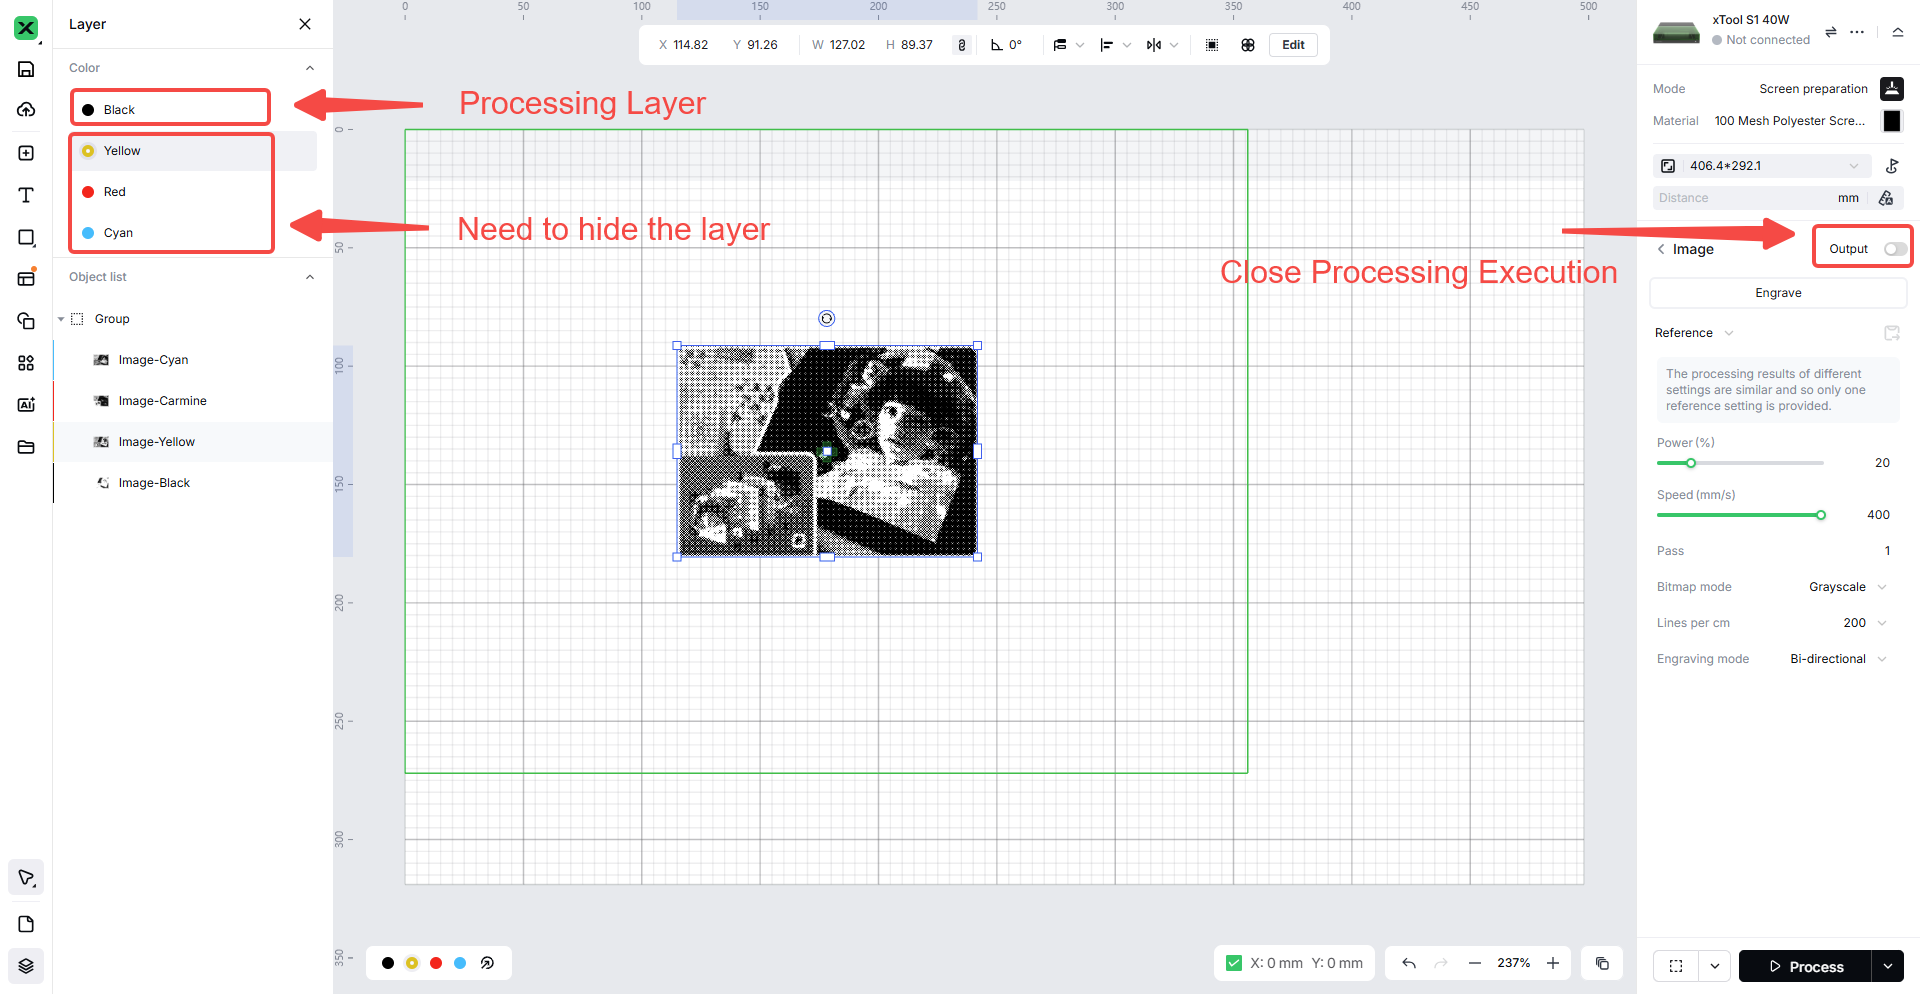
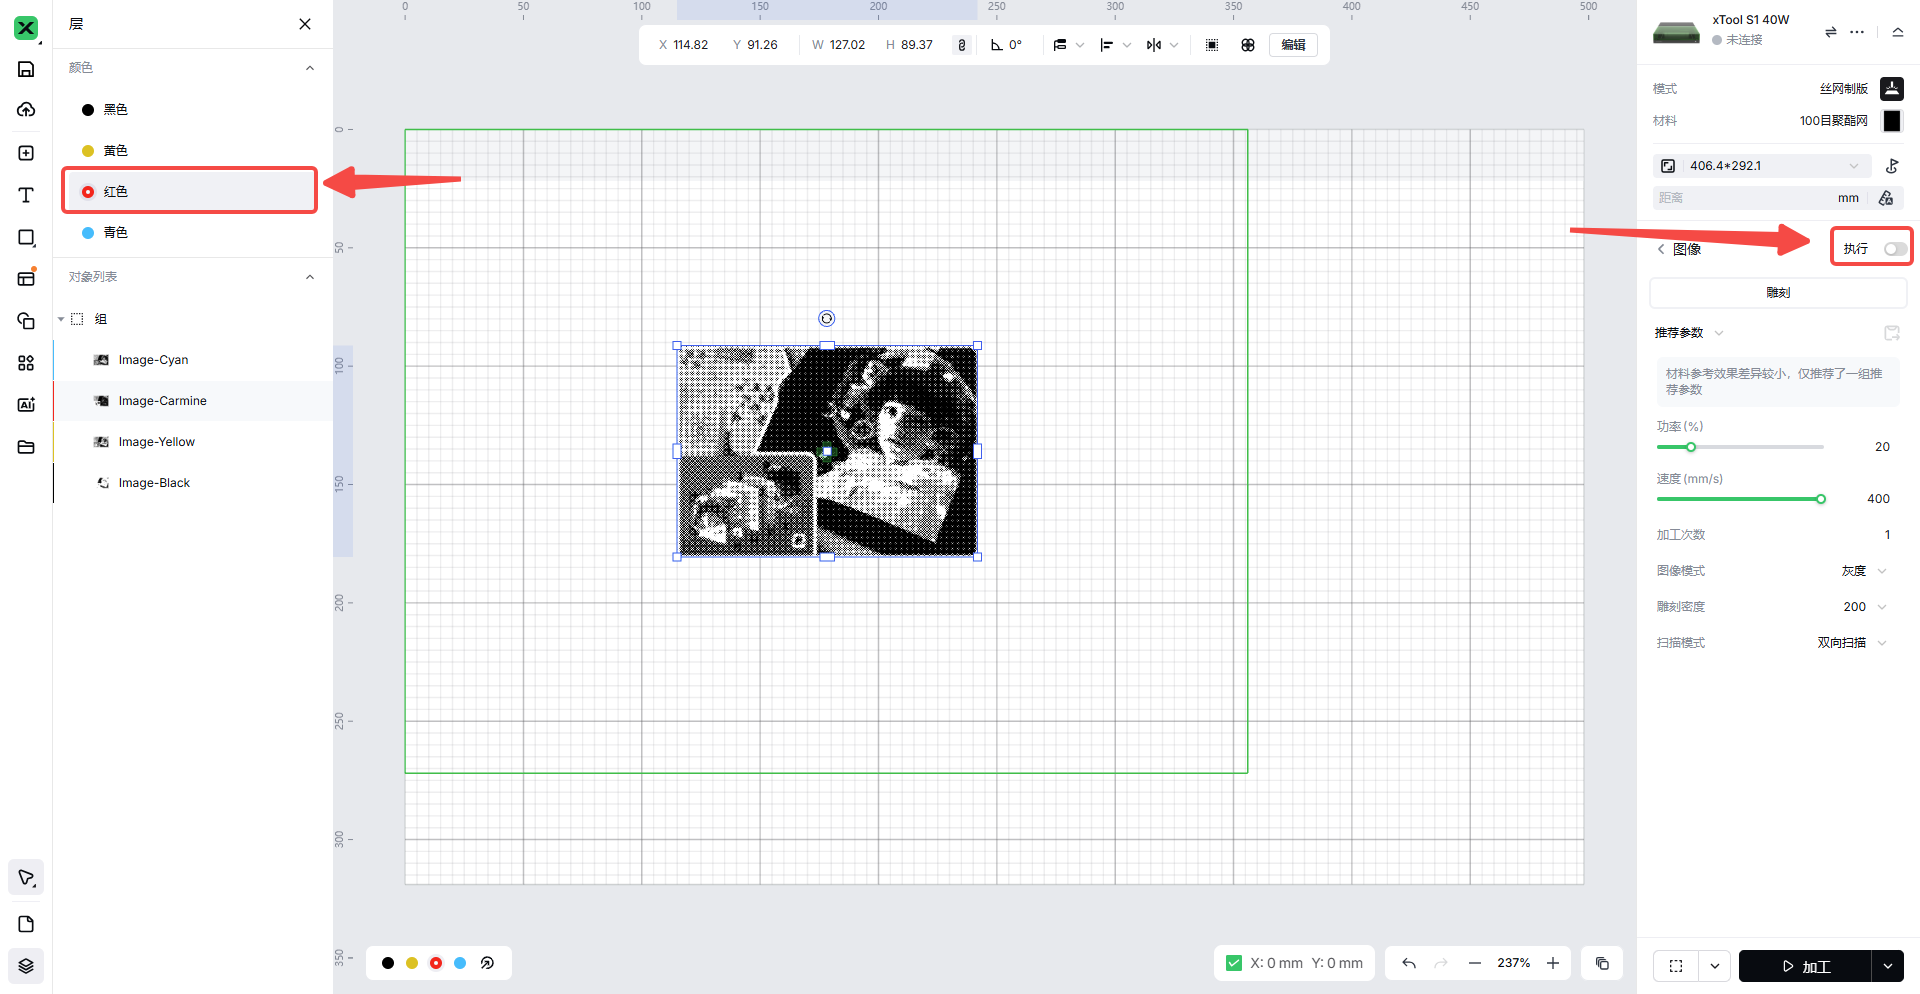
Select one of the layers for sculpting, then you need to click the other layers one by one, and turn off the Output button in the Image Output panel on the right. This way, only the layer with the Output button left on will be processed.
After finishing the pattern engraving on the first layer, replace the processed screen with a new one, switch to a new layer for processing, and for other layers that do not need processing, hide their Output button in the Image Output on the right. After repeating the above steps 4 times, you will get 4 screens representing different colors of the image.
2. Install the screen
2.1 Polyester Mesh Installation
Polyester mesh installation video.
2.2 Steel Mesh Installation
Stencil installation video.
xTool Screen Printer User Guide.
3. Install the frame fixing piece for screen mesh to adapt to the laser equipment
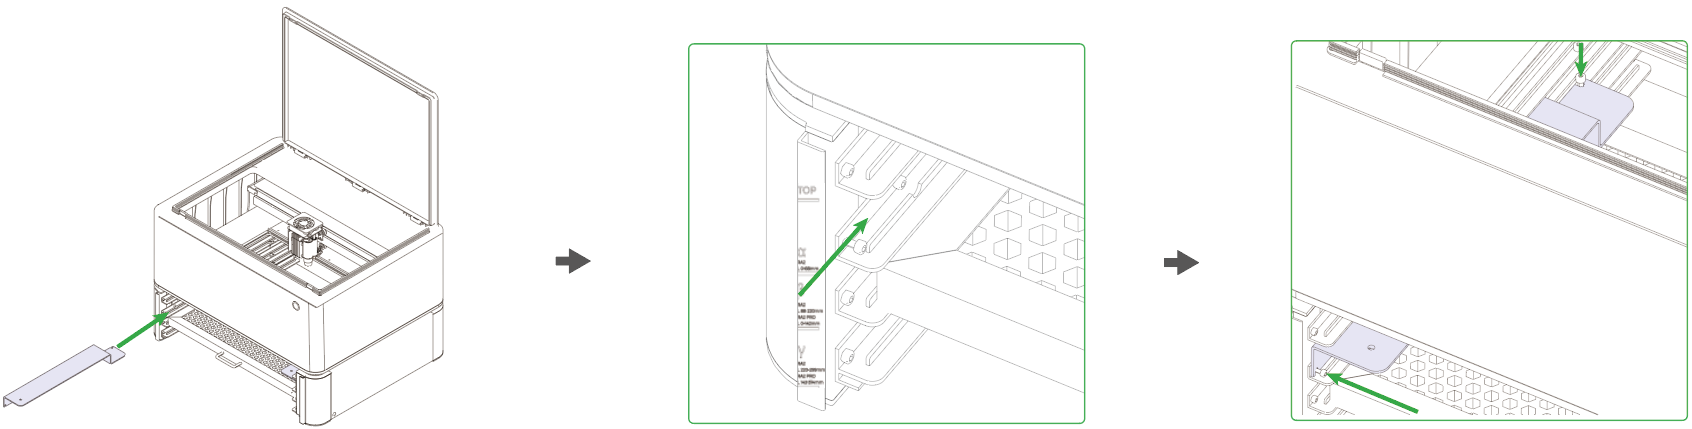
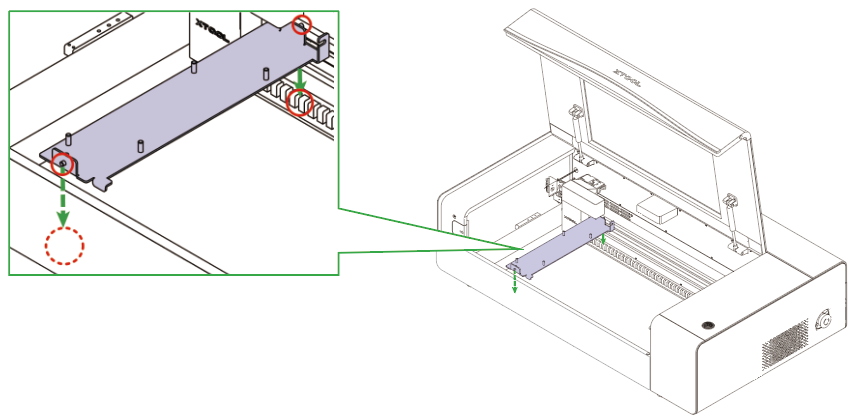
3.1 D Series Equipment Installation Frame Fixing Piece
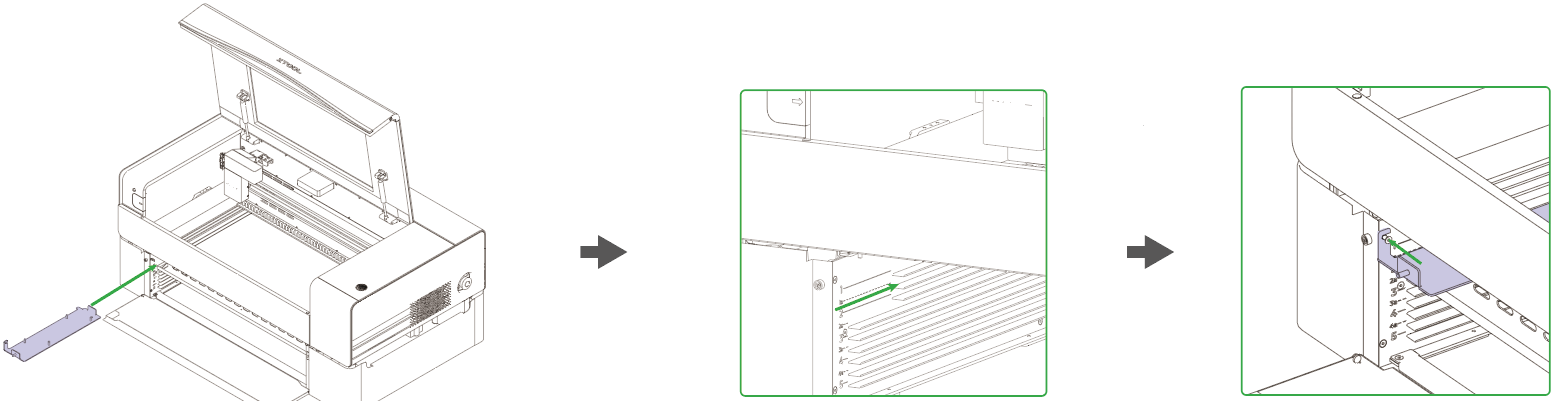
Click this link to view the complete procedure for installing the frame fixing piece on the device.
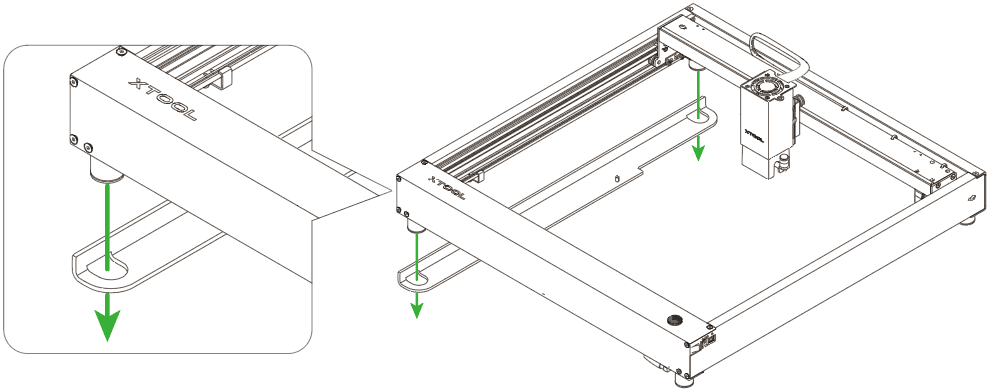
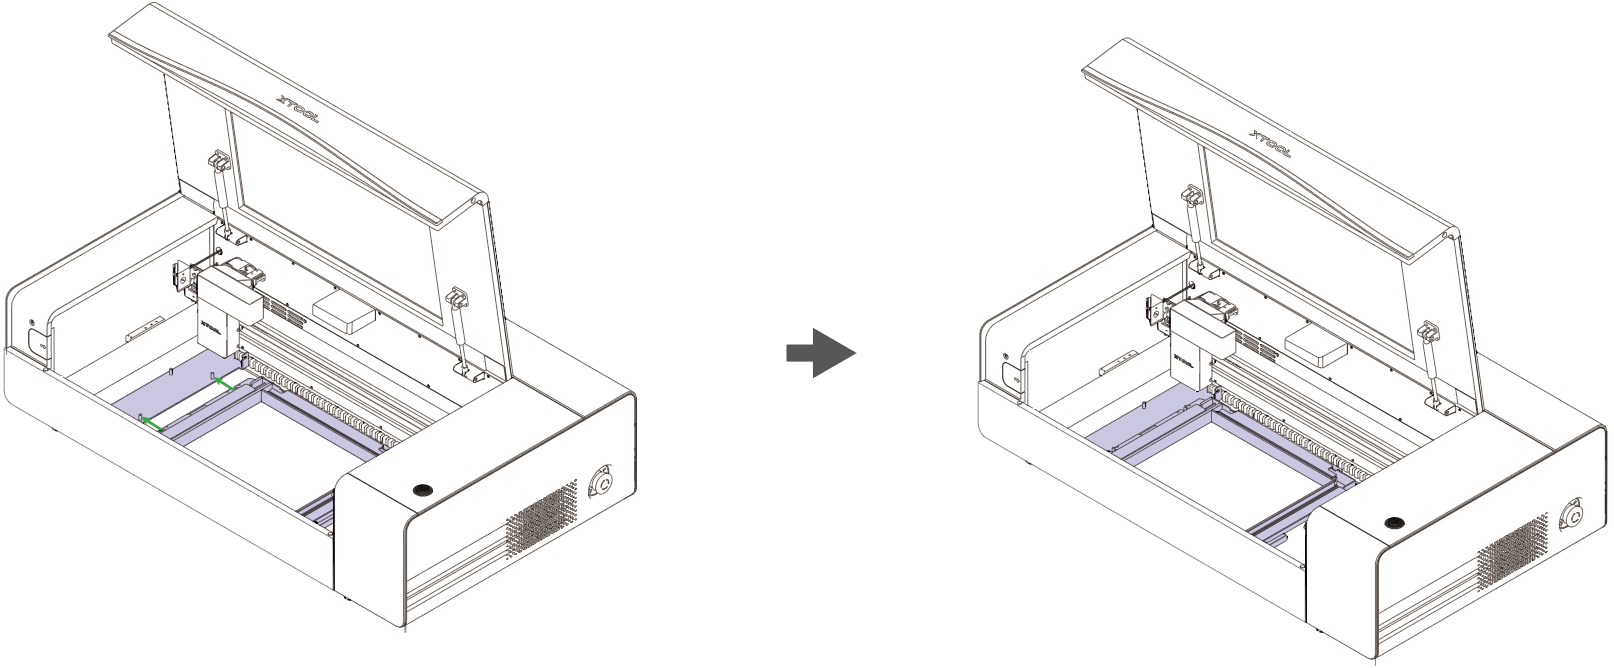
Install the frame fixing piece adapted for the D series model onto the device.
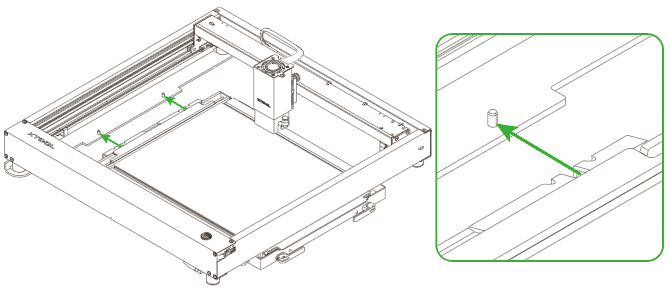
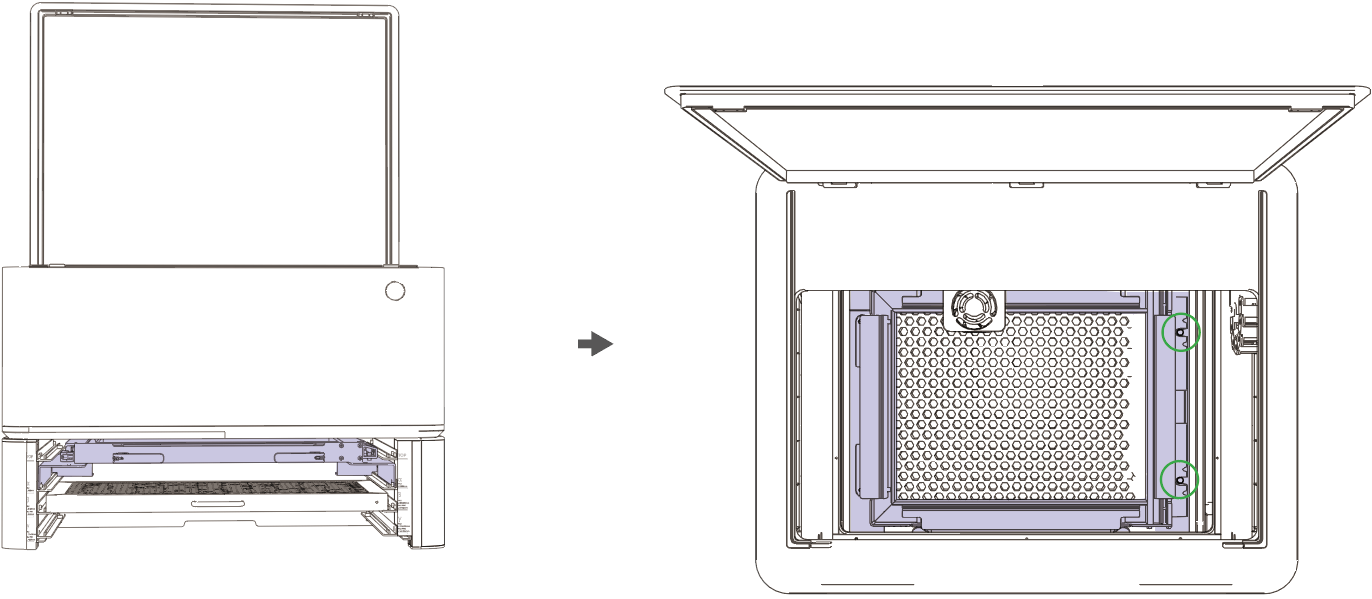
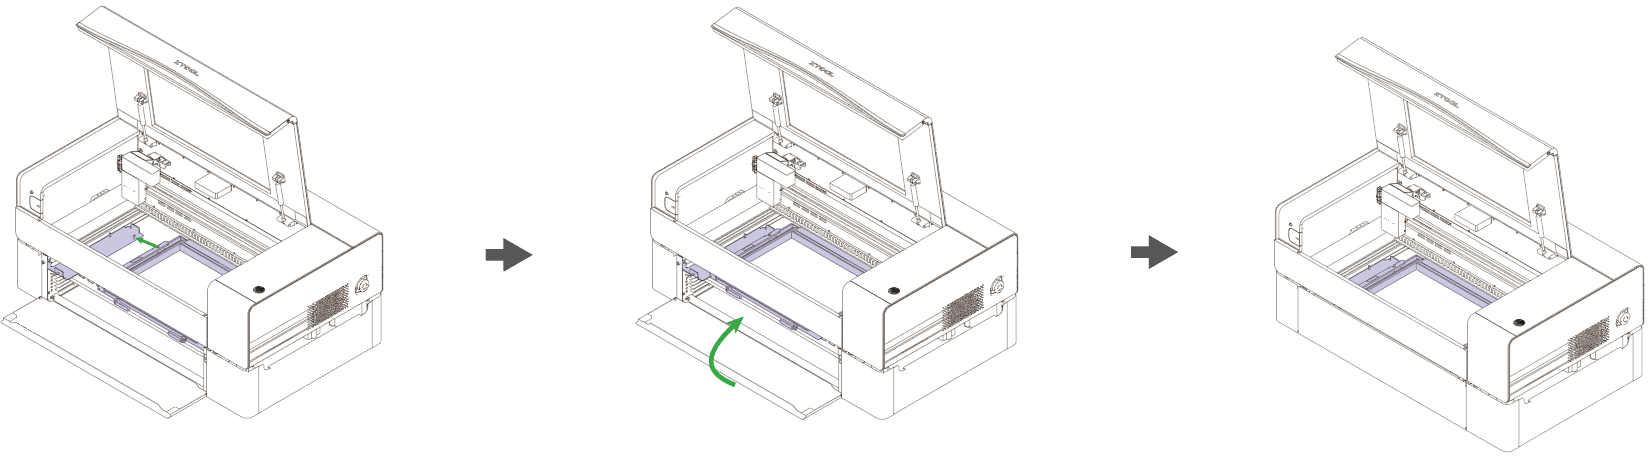
After installing the frame fixing piece on the equipment, place the front side of the screen frame facing up and secure it at the position of the raised metal points on the frame fixing piece.
3.2 S1 Equipment Installation Frame Fixing Piece
Click this link to view the complete procedure for installing the frame fixing piece on the device.
Install the frame fixture compatible with the S1 model onto the device.
After installing the frame fixing piece on the device, place the screen frame with its front side facing up, and secure it at the protruding metal points on the frame fixing piece.
3.3 M1 Device Installation Frame Fixing Piece
Click this link to view the complete procedure for installing the frame fixing piece on the device.
Install the frame fixing piece adapted for the M1 model onto the device.
After installing the frame fixing piece on the device, place the screen frame with its front side facing up, and secure it at the protruding metal points on the frame fixing piece.
3.4 M1 Ultra Device Installation Frame Fixing Piece
Click this link to view the complete procedure for installing the frame fixing piece on the device.
Install the frame fixing piece compatible with the M1 Ultra model onto the device.
After installing the frame fixing piece on the device, place the screen frame with its front side facing up, and secure it at the protruding metal points on the frame fixing piece.
3.5 P Series Equipment Installation Frame Fixing Piece
Click this link to view the complete procedure for installing the frame fixing piece on the device.
Install the frame fixing piece compatible with P series models onto the device.
After installing the frame fixing piece on the device, place the screen frame with its front side facing up, and secure it at the protruding metal points on the frame fixing piece.
These are the steps for installing the frame fixing piece onto the heightening frame.
Install the frame fixing piece compatible with P series models onto the device.
After installing the frame fixing piece on the device, place the screen frame with its front side facing up, and secure it at the protruding metal points on the frame fixing piece.
4. Printing Operation
4.1 Split Image CMYK Channels
Step 1: Split the image into CMYK channels.

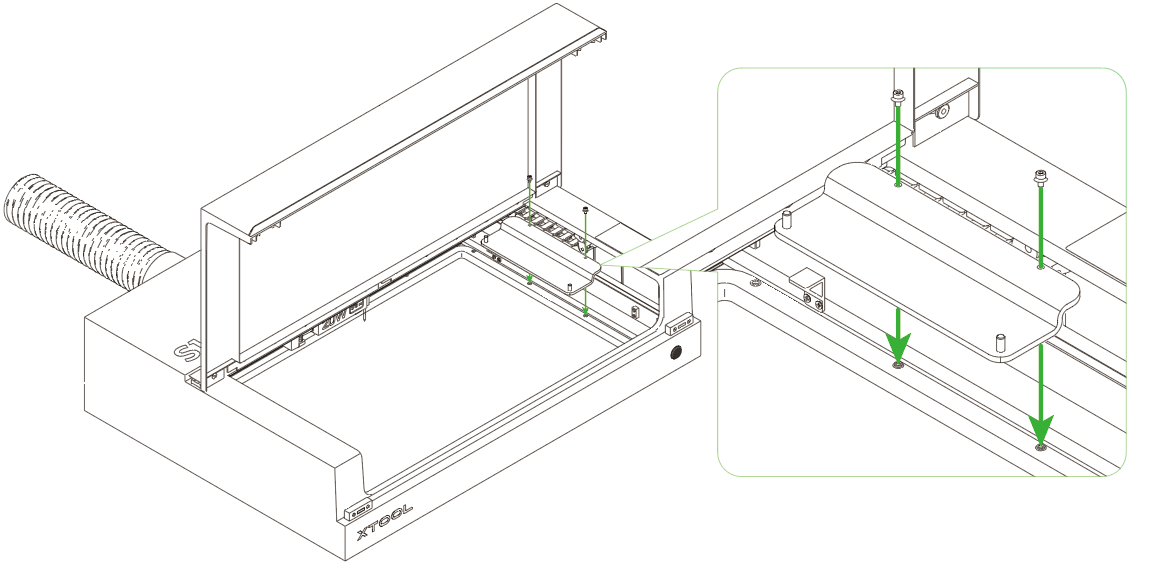
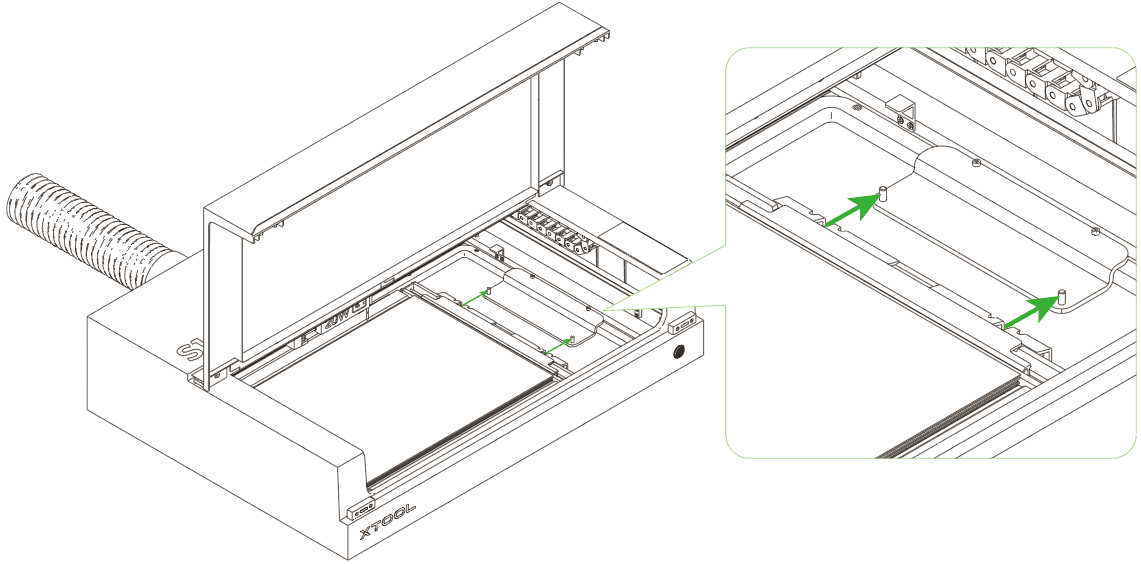
4.2 Install Screen Mesh
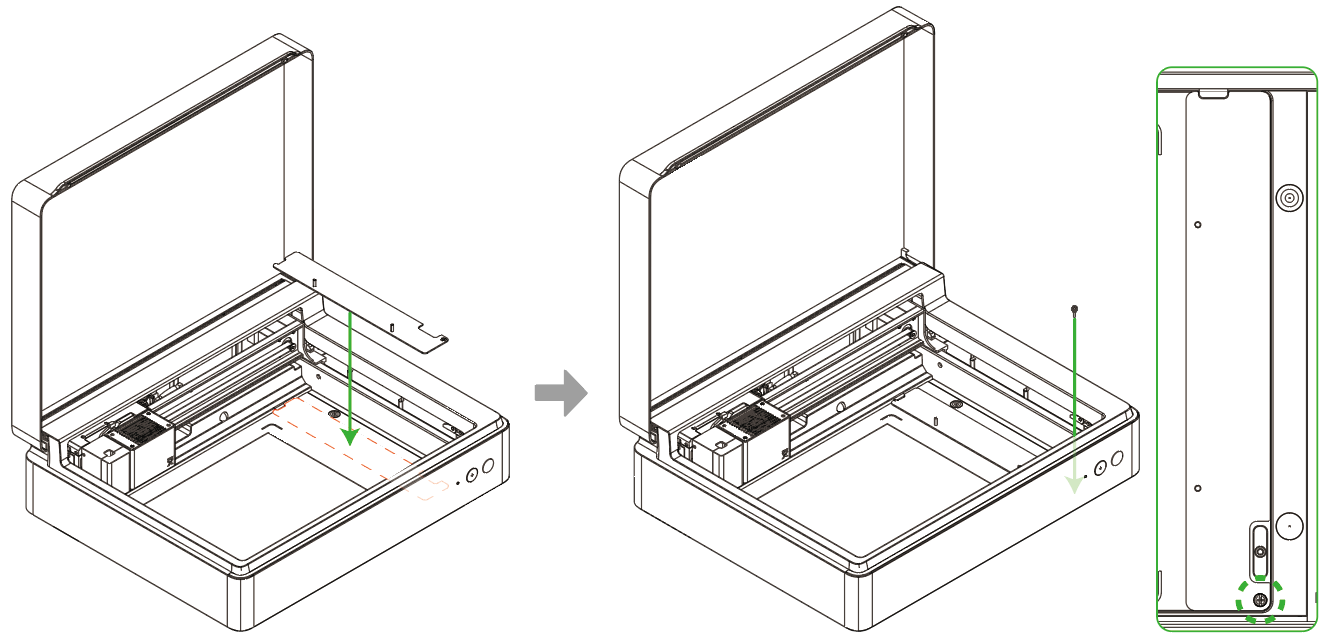
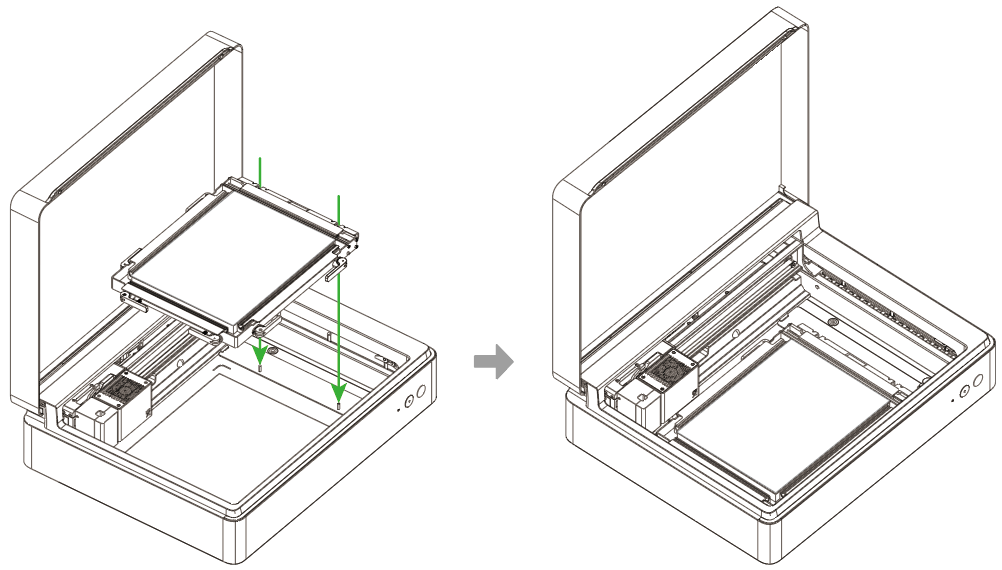
Step 2: Install the screen frame.
4.3 Installation of the frame fixing piece for the adapter device
Step 3: Install the frame fixing piece.

4.4 Laser Engraving
Step 4: Perform laser engraving, engraving each of the 4 split images separately.
Precautions:
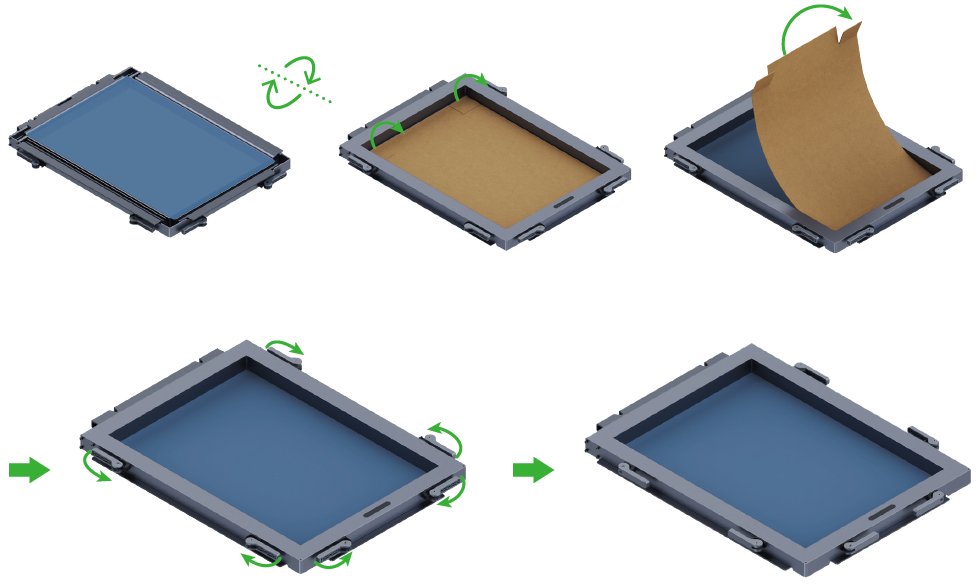
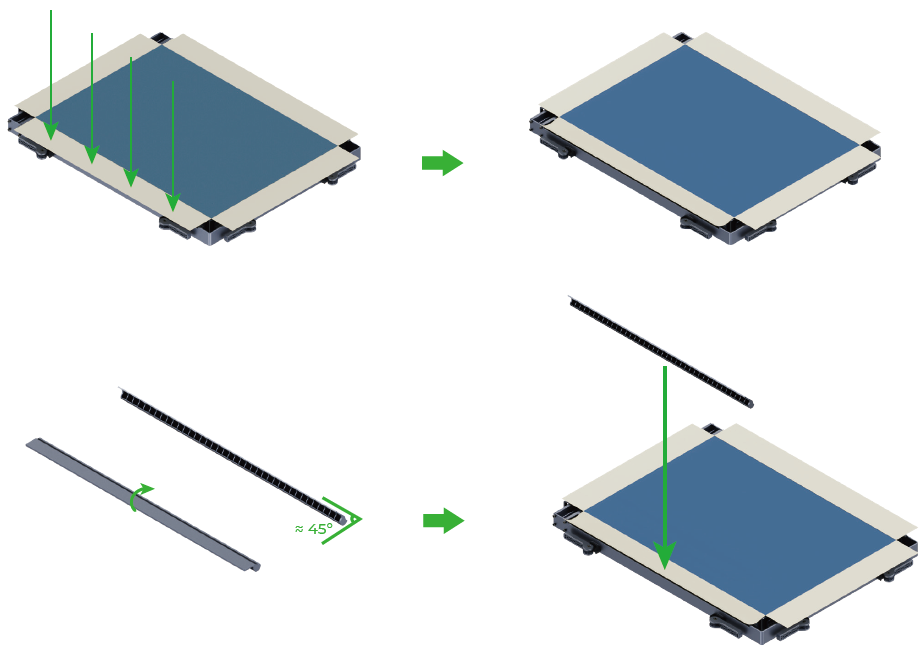
Before processing the steel mesh, the corrugated cardboard on the front side needs to be removed.
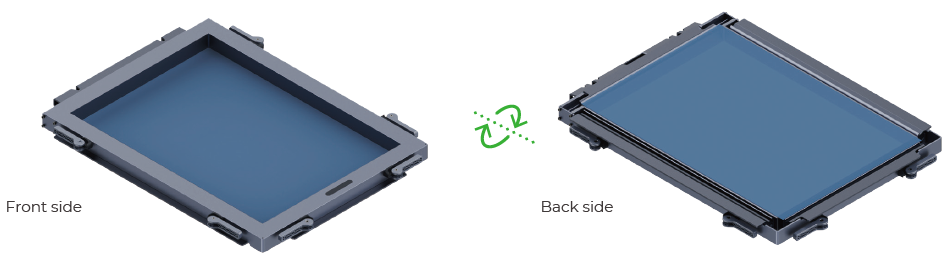
During the laser processing, the frame should be placed with the reverse side facing up.
4.5 Ink Printing
Step 5: Prepare the substrate to be printed and carry out screen printing.
Precautions:
When the screen needs to print a complete image, 4 Fast-engrave screens are required.
The ink and layers are printed sequentially according to the printing plate order (cyan-magenta-yellow-black), and printing must be carried out in this color order.
After printing the ink with the previous screen plate, the ink should be allowed to dry slightly, but not completely cure. The ink needs to remain moist before proceeding with the next print, because the ink from the next screen plate needs to react with the ink printed from the previous screen plate to produce a new color. If the printed ink is fully cured, then when the next screen plate is used for printing, the ink color will not change with the previous ink.
It is recommended to complete laser engraving on all four screens before proceeding with ink printing. When engraving the four layers, it is not advisable to remove the screens, as repeated disassembly and installation may cause color misalignment during printing and could disrupt the overlapping positions of the four colors.
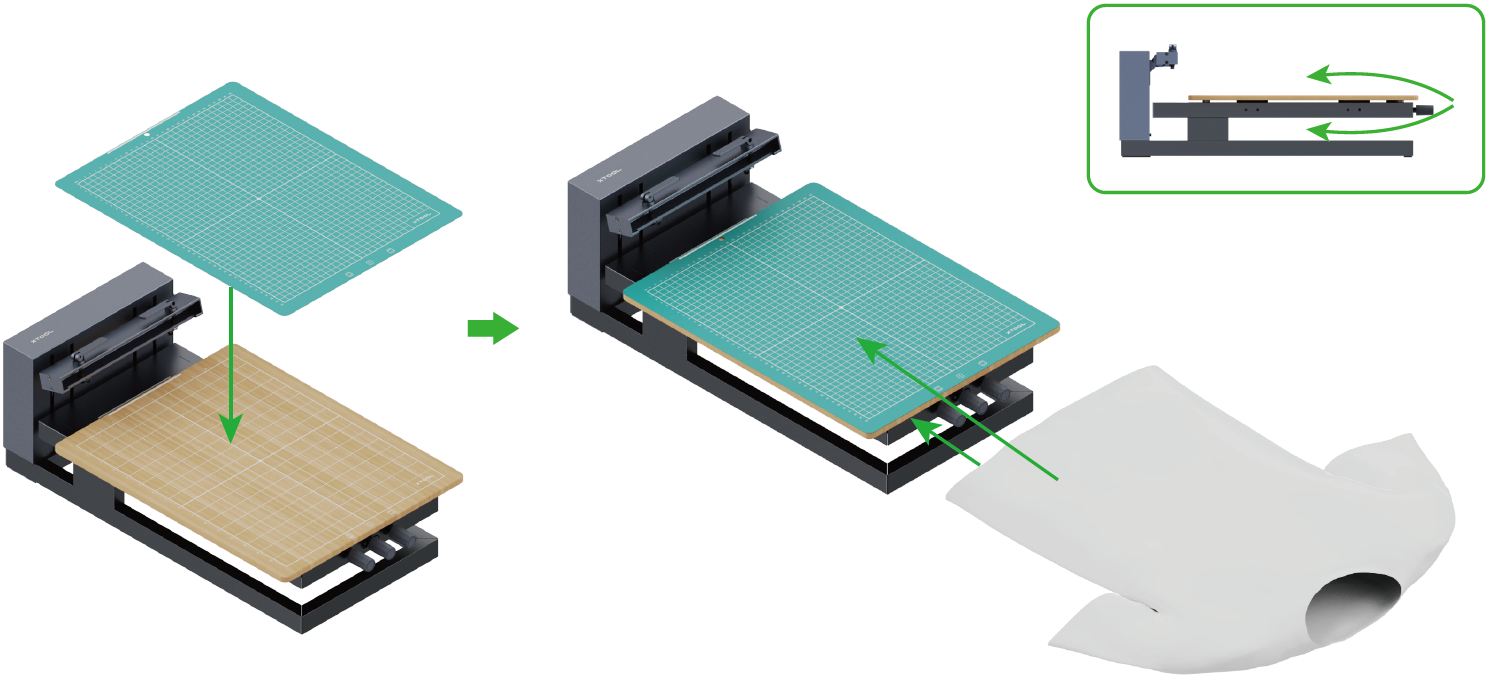
You can determine whether to use the cutting mat based on the texture of your material.
If the material, such as textile fabric, is easy to slide, place the cutting mat on the magnetic board and put the material on the cutting mat.
Ensure that the area to be printed on the material is flat without wrinkles and open the handle toggle locks on the frame connector.
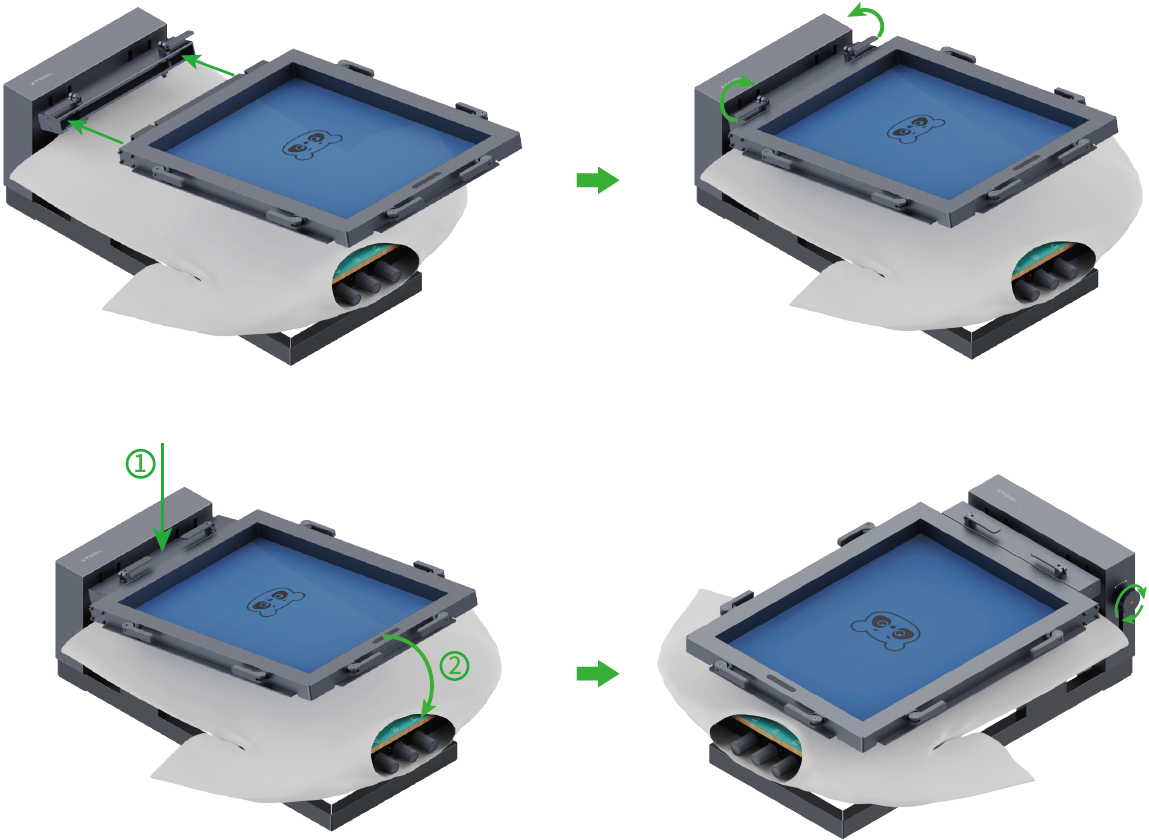
Fit the frame into the frame connector with the bottom side facing up and tighten the locks.
Then, you can turn the screen position lock knob clockwise to lock the position of the screen for printing. Alternatively, you can press the frame on an edge and hold it down during printing.

Use the ink spatula to get enough ink on the screen and use the squeegee to squeeze out the ink quickly to avoid transferring too much ink.
Services & Help
Learn & Education

Copyright © 2025 xTool All Rights Reserved.