
How to Save Your Own Material Parameter Settings and Import / Export Parameter Settings
In xTool Studio, you can save the materials you use often along with the processing parameters you have dialed in, building your own "My Materials" library. Once saved, there is no need to re-tune the settings the next time you process the same material—just select the material and choose the corresponding processing mode and processing type to apply them with one click. You can also export parameters for backup, move them between computers, or share them with others. This article covers two parts: how to save custom materials and parameters, and how to import and export parameter settings.
How to Save Custom Materials and Parameters
There are two ways to save materials and parameter settings: create and save a new material through the material selection window, or save the current parameters directly from the parameter panel.
Method 1: Save Materials and Parameter Settings Through the Material Selection Window
Step 1: Open the material selection window
In the processing settings area on the right, click the "Material" entry to open the material selection window.

Step 2: Add material
Click "Add Material" in the top-right corner of the material selection window. If you are not logged in yet, you will be prompted to log in first; the material you add will be bound to the account you are currently logged in with.

Step 3: Fill in the material information
The Material name is required and helps you distinguish the materials you save. You can also fill in a material cover image, material thickness, material characteristics, brand / supplier, purchase link, and any remarks you want to record during processing.

Step 4: Add a parameter scheme
In the "Parameter Settings" area on the right, click "Add New" to create a parameter scheme. Parameters can be associated in the following three ways.

Option 1: Enter parameters manually
Give the scheme a name (Scheme Name), select the processing mode (Mode) and processing type (Processing Type), upload an effect image / grid test image, and set the specific parameters such as laser type, power (Power), speed (Speed), and passes (Pass).

Option 2: Import from a local project file
Click "Import parameters from file" and select an XCS / Studio project file from your computer to upload. After the upload succeeds, the file is parsed automatically; from the parsed settings, you can choose the processing settings to associate with the current material. After confirming, you can review the related settings and name the parameter scheme, and you can also upload a corresponding effect image so it is easier to preview the result when applying the preset.
Option 3: Import from a cloud project file
In "Import parameters from file," choose "From my space," then select a file from your cloud project list to upload. The subsequent steps—automatic parsing, choosing the settings to associate, naming, and uploading an effect image—are the same as in Option 2.

Set as default
You can set a parameter scheme as the default. Once set as default, the scheme’s parameters are applied automatically when you select this material together with the corresponding processing mode and processing type.


Method 2: Save Parameter Settings Through the Parameter Panel
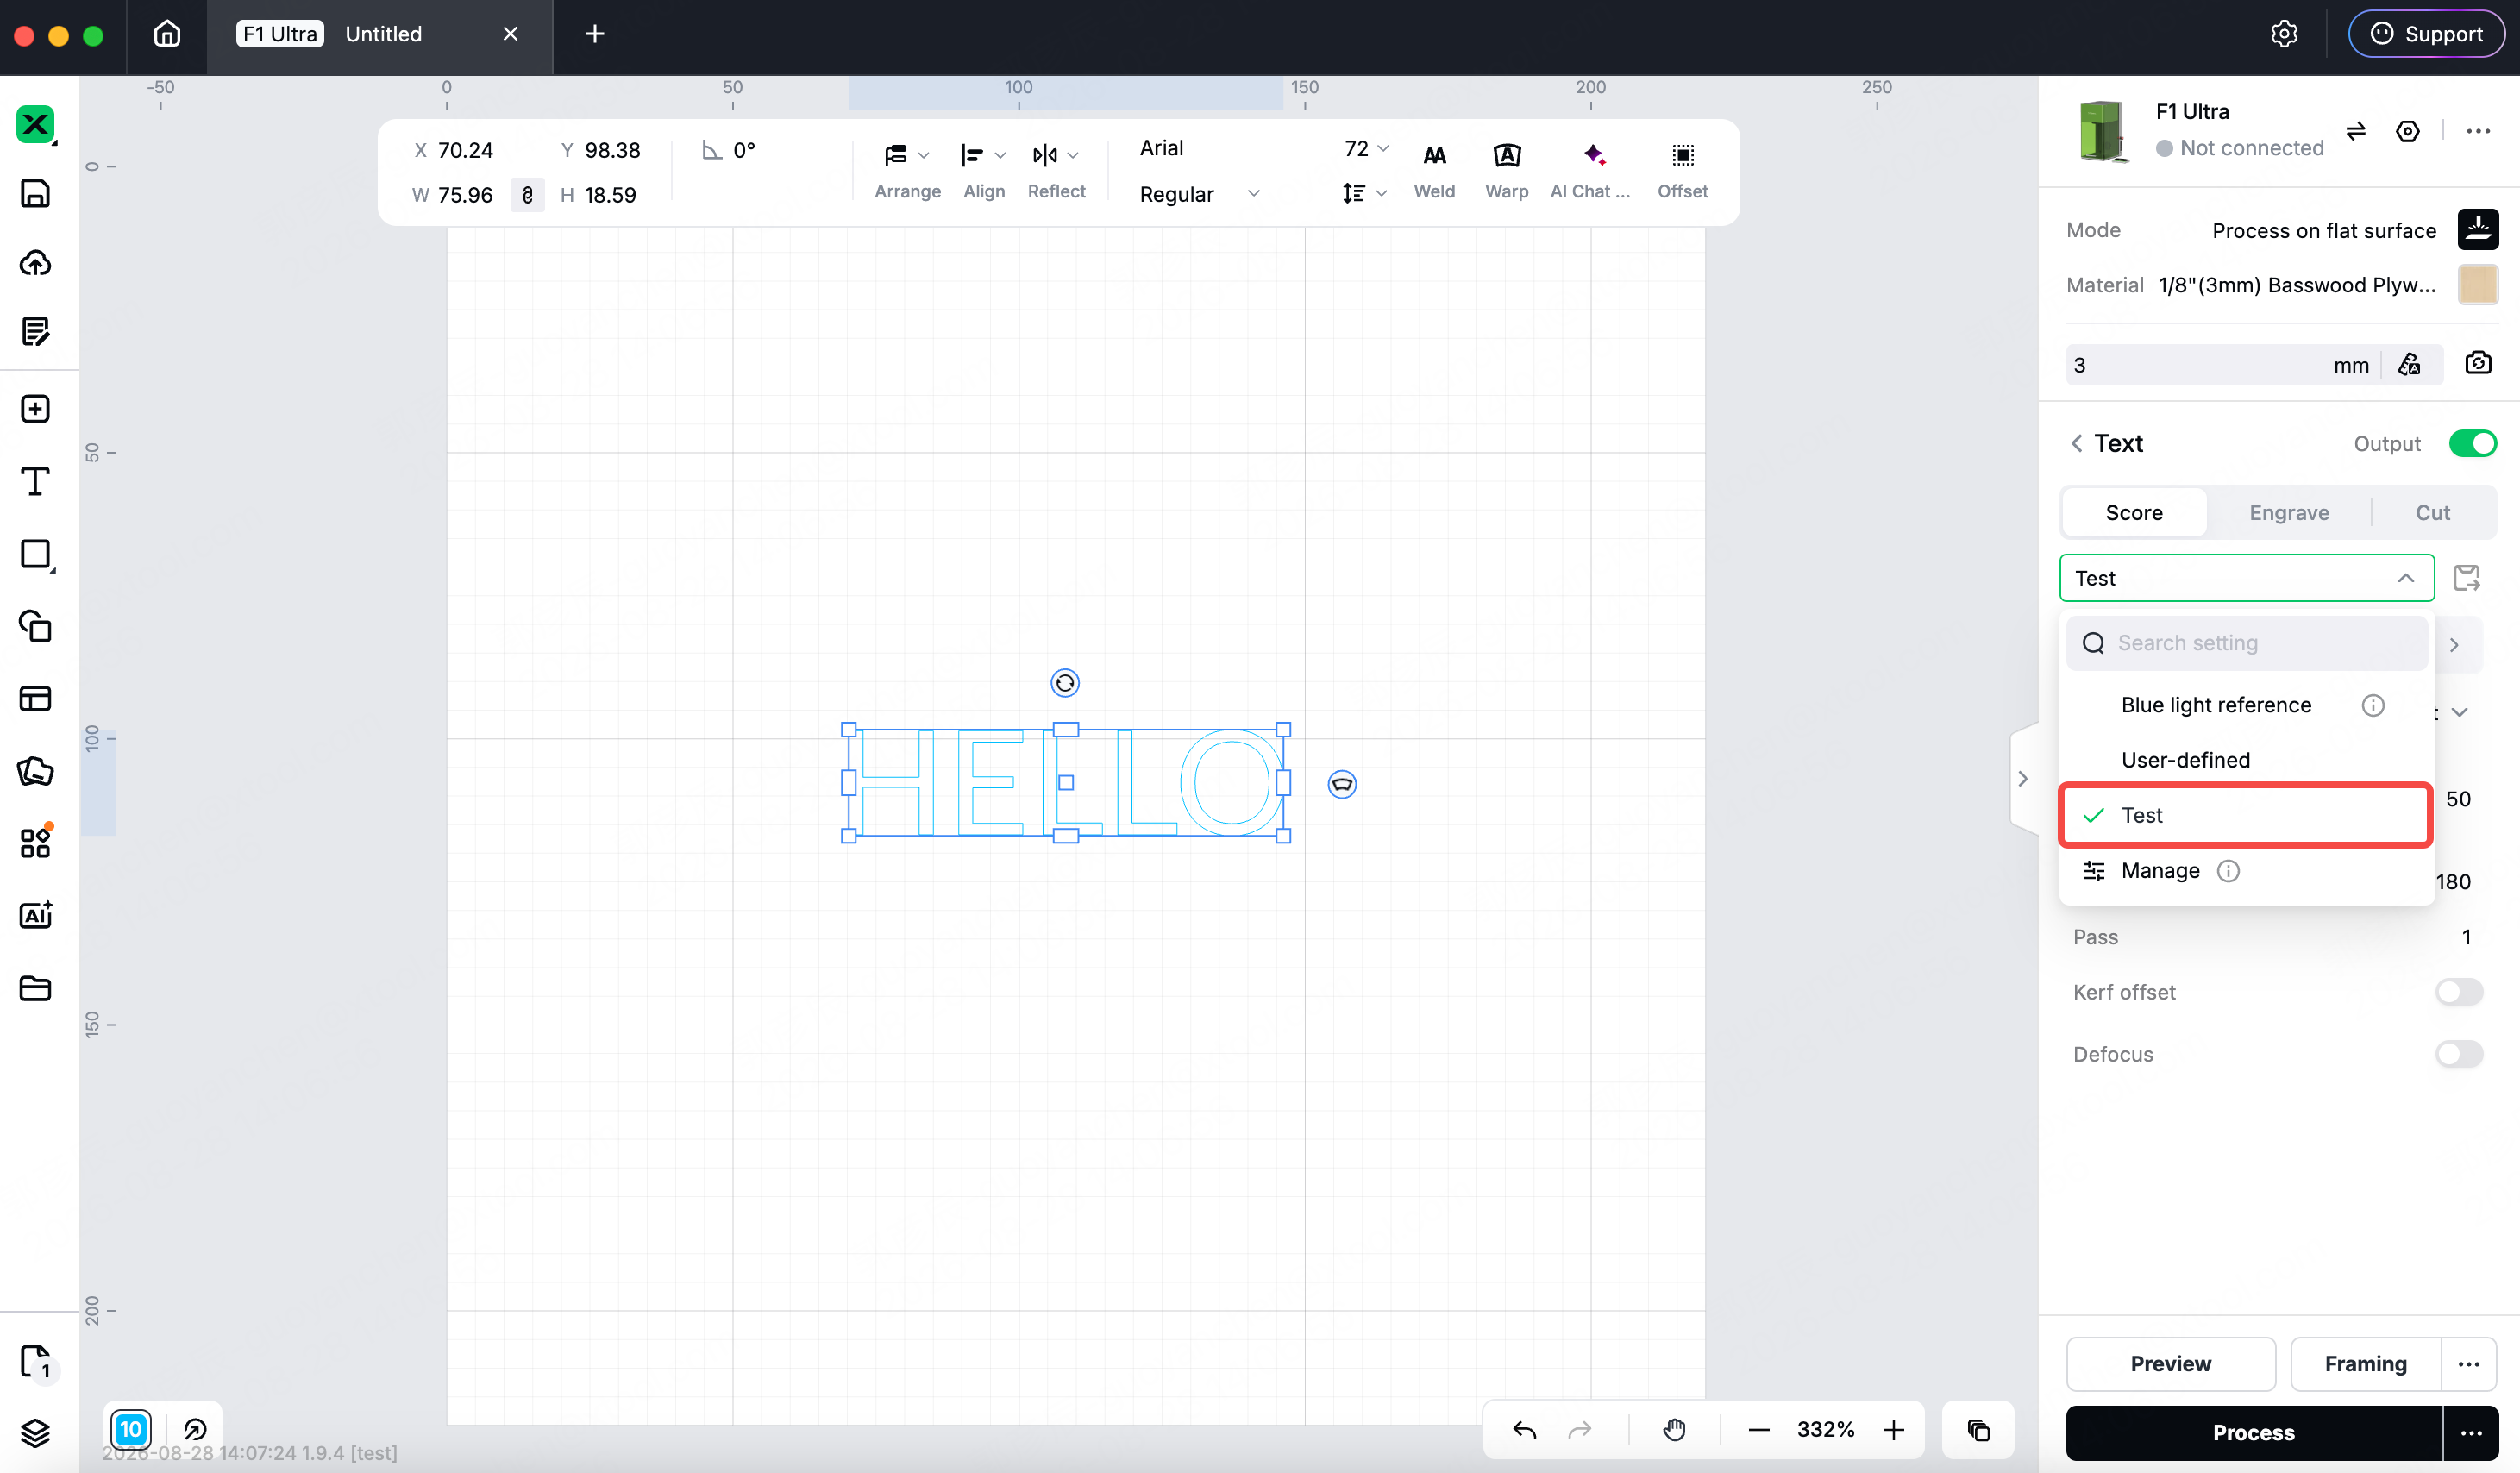
In the processing parameter panel, click the "Save" icon and enter a parameter scheme name in the dialog to save it. The parameter scheme is saved under the material currently in use; afterward, whenever you select this material with the same processing mode and processing type, you can directly choose the saved scheme in the parameter panel.

How to Apply Saved Parameters
After saving, there are two ways to apply a saved parameter scheme:
Material selection window: Open the material window → "My materials" → select the material → click "Apply."
Parameter panel: Expand the parameter scheme drop-down list and select the name of the scheme you saved to apply it; if it has been set as default, it is applied automatically when you select the material.
How to Import and Export Your Parameter Settings
Method 1: Through Home - Material Setting
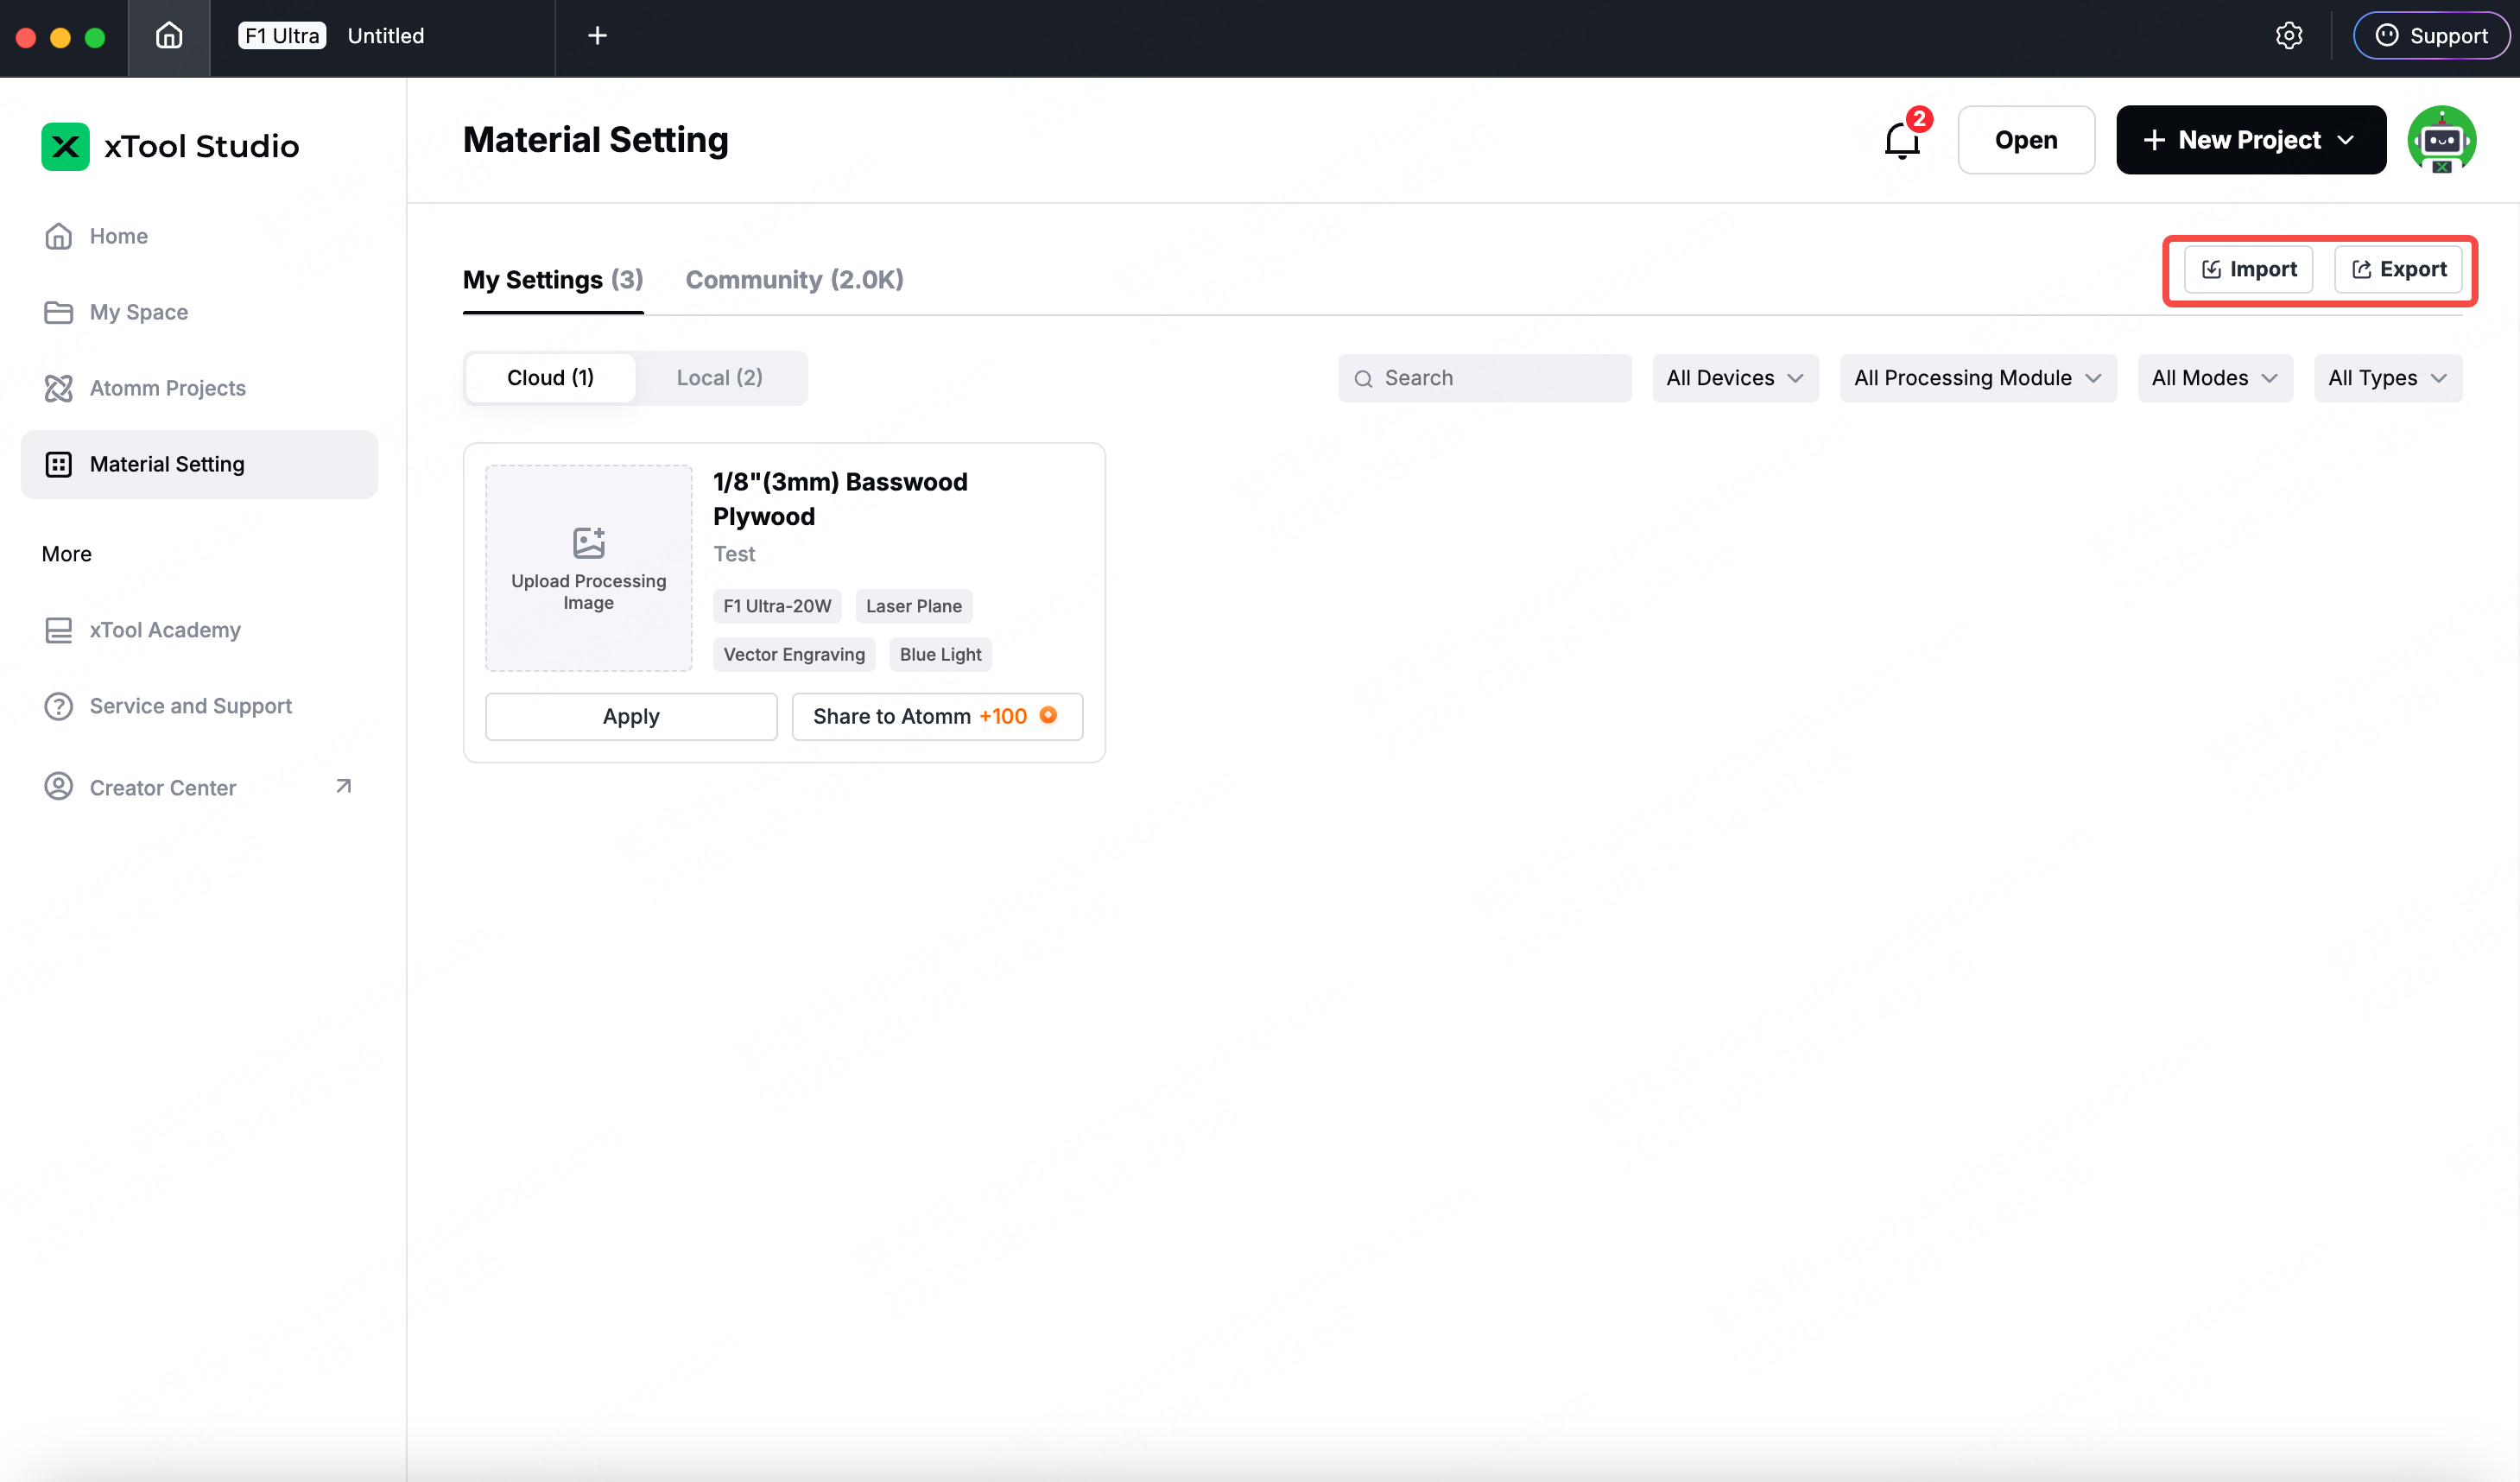
On the left of the xTool Studio home page, click "Material Setting," which displays all of your saved material parameters. Click "Export" in the top-right corner to export them in bulk, and click "Import" to import a previously exported parameter file.
Method 2: Through the Material Selection Window - My Materials Management Entry
Open the material selection window → "My materials" → click "Manage." In the management dialog, select the materials you need and then perform the following actions:
Export: Export the selected material parameters as a file, for backup or to share with others.
Import to Cloud / Sync to Local: Move materials between the cloud and local storage.


Recommended version: xTool Studio 1.8 or later.

