Issue description
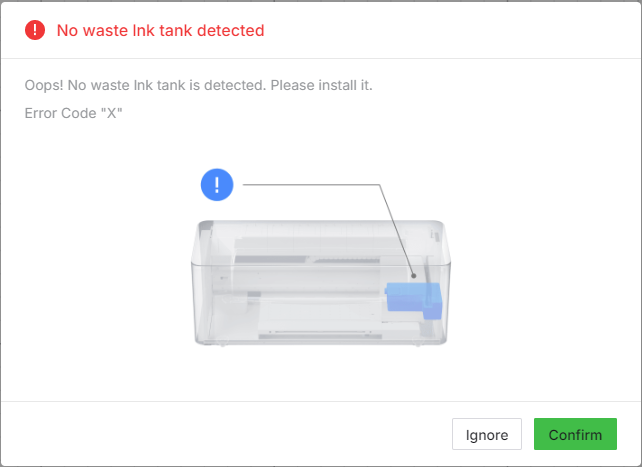
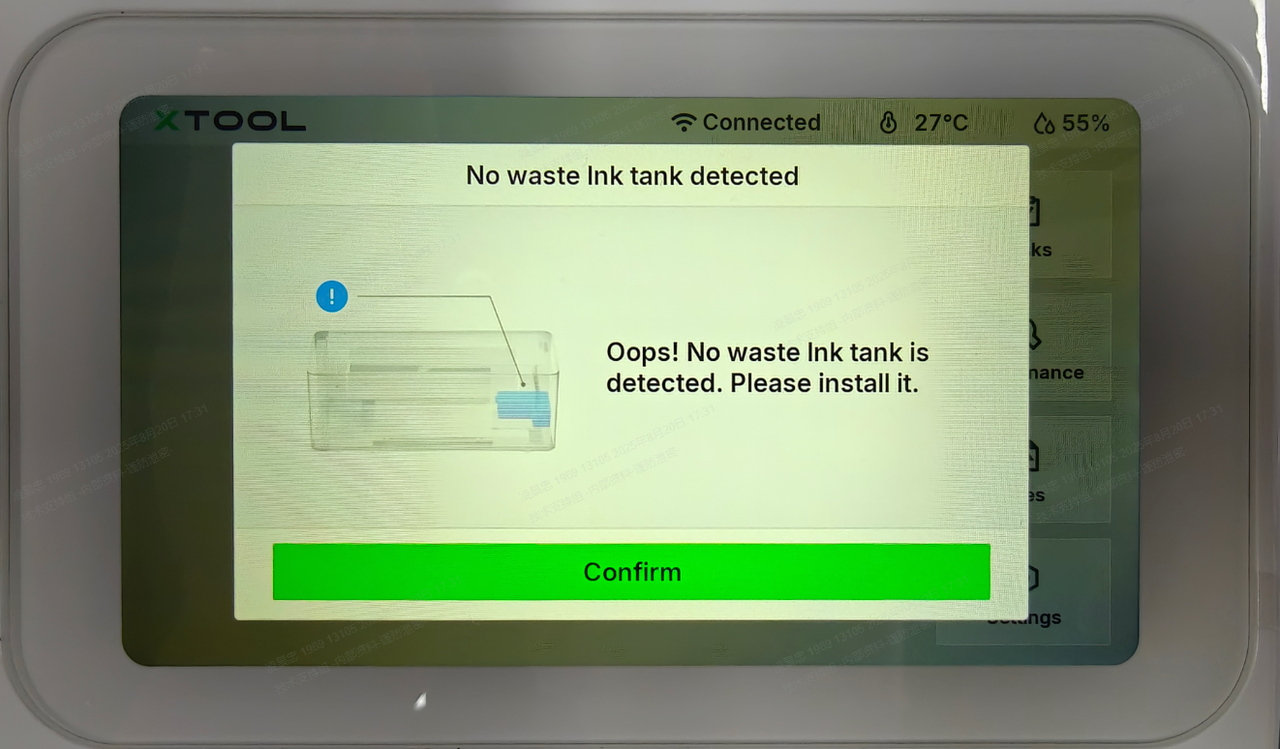
When using xTool Apparel Printer with xTool Creative Space or via the control panel, you may encounter the error message: "No waste ink tank detected" (Error Code: X).
- This guide provides step-by-step troubleshooting to resolve the issue.
Potential causes
- Missing Detection Magnet (Most Common): A small magnet required for detection has fallen off the waste ink tank.
- Multiple Notifications: The system issues repeated warnings if the waste ink tank remains out of position.
- Improper Installation: The waste ink tank is not correctly installed.
- Hardware Malfunction: The detection sensor, its connection cable, or the Controller Area Network (CAN) board that the former two components are connected to has failed.
Troubleshooting
Follow these steps to resolve the issue.
Step 1: Acknowledge error messages
💡 Note: This error message appears when the waste ink tank is missing or removed from its designated position after a set interval. Each new interval will trigger the message again.
Action:
- Click "Confirm" to clear multiple error messages.
- If the message persists, perform a full power cycle. Unplug the printer's power cord from the wall socket, wait for at least 30 seconds, and then plug it back in.
- If the problem continues, proceed to Step 2.
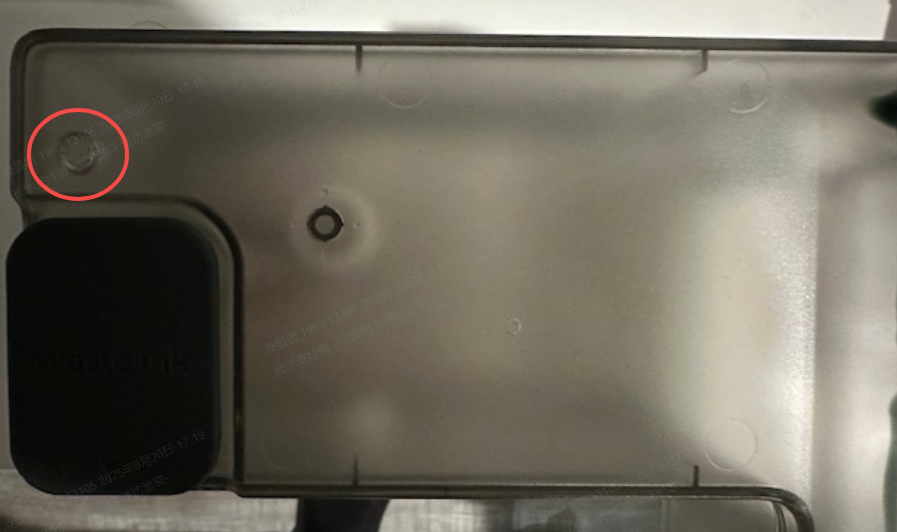
Step 2: Check for missing magnet
Important: The waste ink tank uses a magnetic detection system.
Instructions:
- Remove the waste ink tank from the printer.
- Locate the magnet position shown in the reference image.
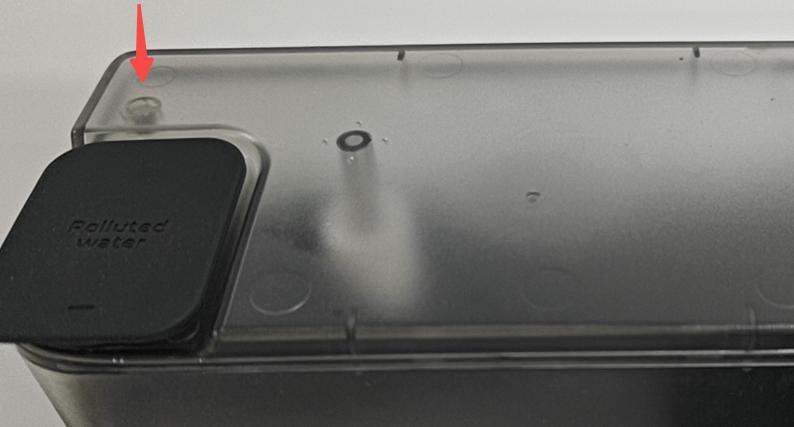
- Test if the magnet is present by bringing a metal object (such as a screw) near the location.
- The metal object should be attracted to the magnet if it's present.
- If no magnet is found:
- Contact xTool Customer Service to request a replacement waste ink tank.
- Provide photos showing the missing magnet location.
- If the magnet is present: Continue to Step 3.
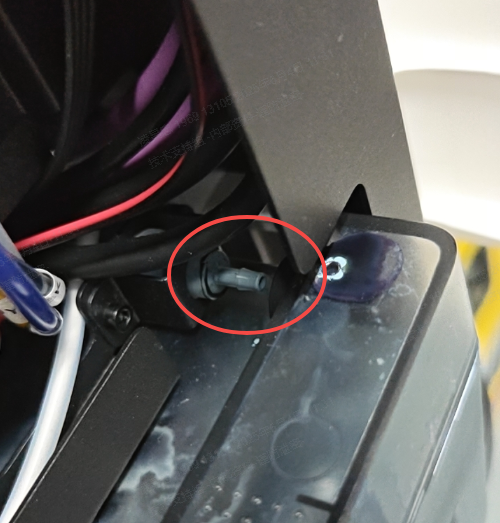
Step 3: Verify proper installation
Check installation positioning:
- Open the right-side panel of the printer.
- Ensure that the waste ink tank is pushed all the way in and is making firm contact with the waste ink outlet at the top.
- If the connection is loose, gently push the tank into position until it's secure.
- If installation appears correct: Continue to Step 4.
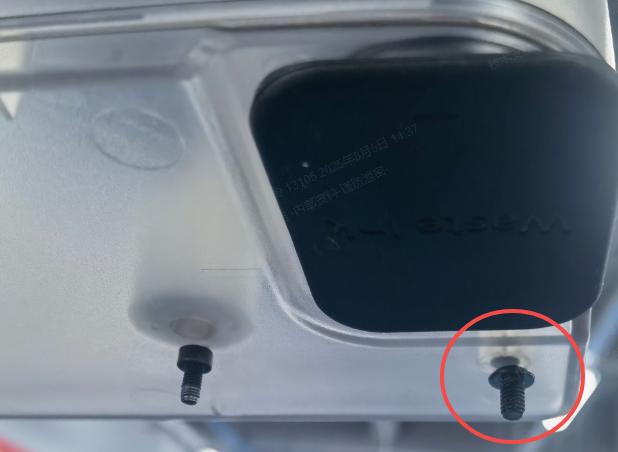
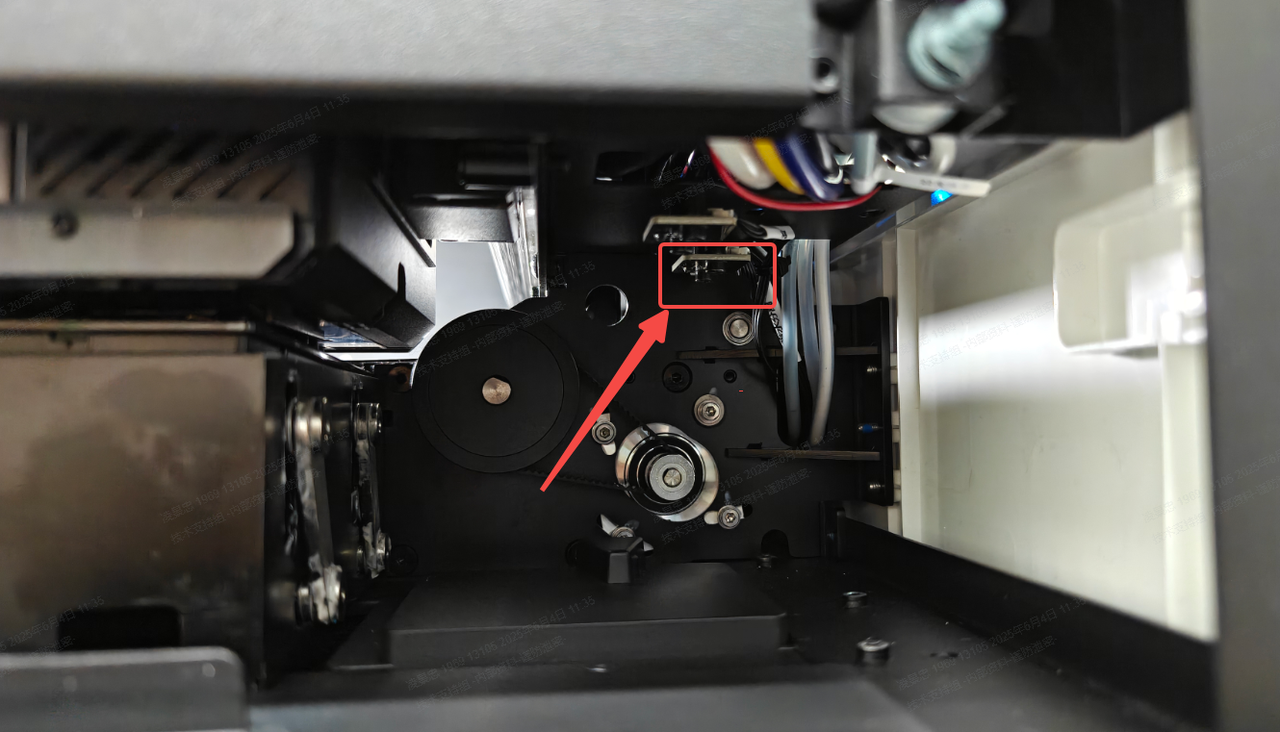
Step 4: Inspect sensor connection cable & sensor
Cable reconnection procedure:
- Open the right-side door and remove the waste ink tank.
- Using tweezers, carefully disconnect and reconnect the connection cable of the waste ink tank detection sensor.
- Reinstall the waste ink tank and test.
If error persists, check bottom connections:
Safety first: Place the printer across two tables of the same height to access the bottom panel.
Tools required: Hex screwdriver (inculded in your package)
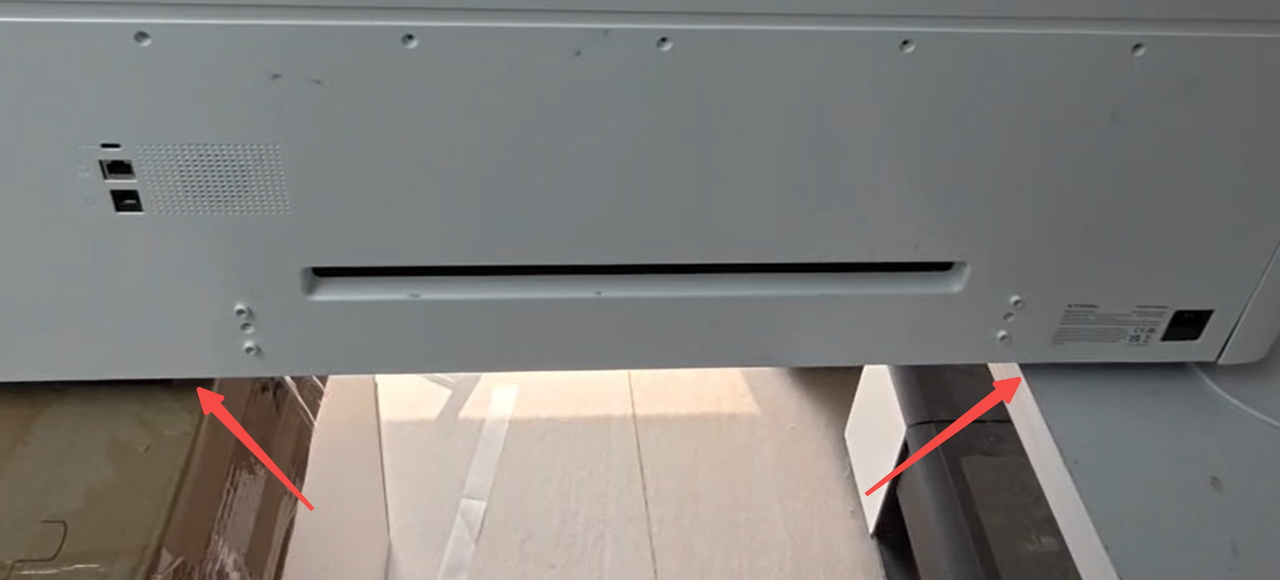
- Remove the 4 hex screws from the bottom protective cover.
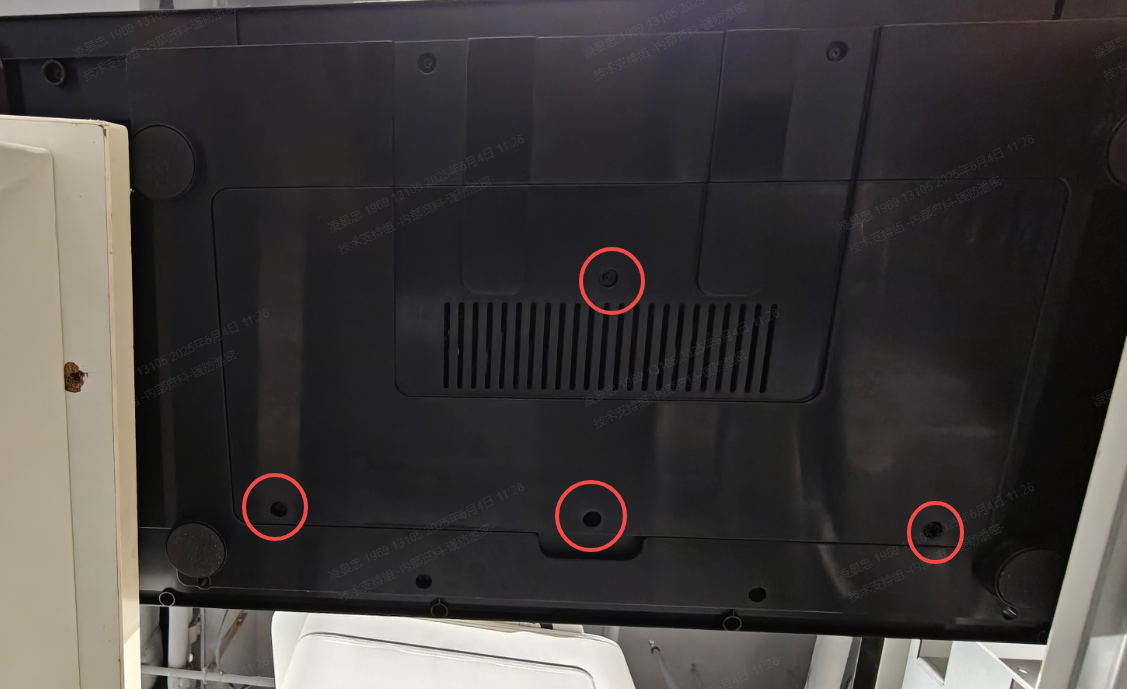
- Locate the connection cable of the waste ink tank detection sensor on the Controller Area Network (CAN) board.
- Disconnect and reconnect the cable firmly.
- Remove any yellow adhesive residue around the connection if present.
- Reassemble the bottom cover.
- If error continues: Proceed to Step 5.

Step 5: Replace hardware
If the error continues after the previous steps, it is likely that the waste ink tank detection sensor or its Controller Area Network (CAN) board has a hardware failure.
Advanced Intervention:
- This step requires advanced technical intervention. Please proceed to the "Still experience issues" section to contact xTool Customer Service for further diagnosis.
- If deemed necessary by xTool technical experts, the waste ink tank detection sensor or its Controller Area Network (CAN) board (or both) may need to be replaced.
Still experiencing issues?
Should the issue persist after completing the preceding steps, submit a ticket via the "Submit a Ticket" button in the "Help Ticket" section below. The standard response time for xTool Customer Service is one business day.
For a prompt resolution, please include the following details:
- Issue description: A detailed explanation of the observed problem.
- Video evidence: Attach a video demonstrating the issue, where applicable.
- Troubleshooting performed: Any troubleshooting steps you have already attempted, along with their results.
This information is crucial for xTool technical support engineers to provide timely assistance.
Documentation feedback
Help improve this content by providing feedback. If this content did not meet your requirements, select "No" in the "Was this page helpful?" section below. Include specific details about what was unclear or missing in the pop-up suggestion box. Feedback submissions are reviewed by xTool technical writers to enhance future documentation.
Services & Help
Learn & Education

Copyright © 2025 xTool All Rights Reserved.