xTool Store
Replace the Switched-Mode Power Supply in xTool OS1 Shaker Oven
Updated Jan 21,2026
Updated Jan 21,2026
About this video tutorial
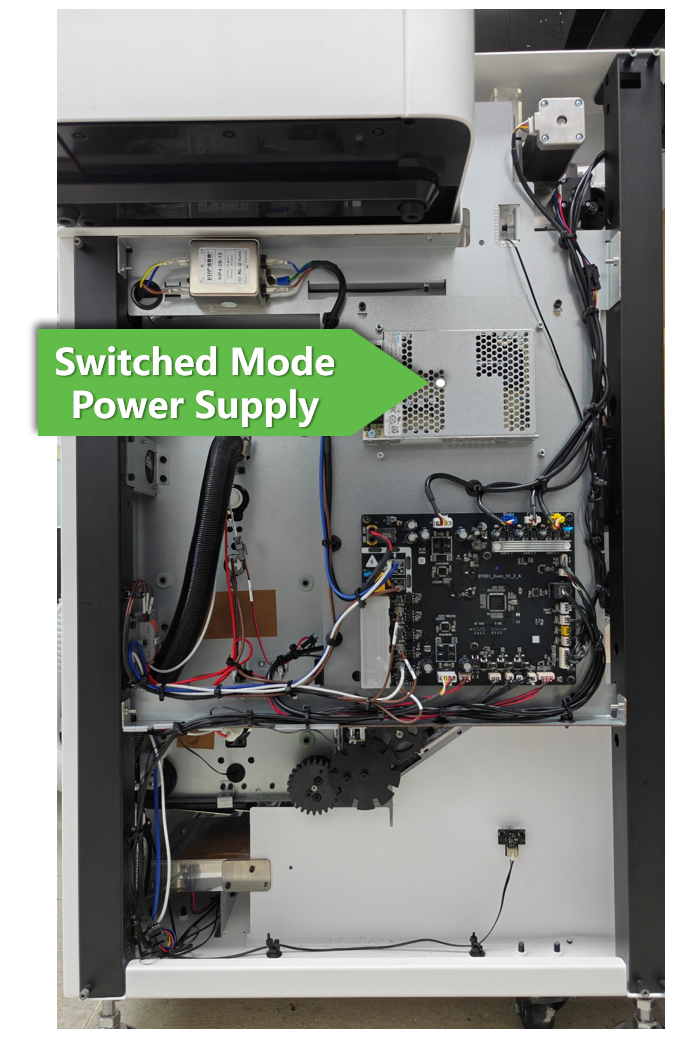
This video tutorial aims to provide step-by-step instructions on replacing both the switched-mode power supply (switched power supply) in xTool OS1 Shaker Oven.
The procedure outlined in this section should be performed ONLY when:
- the oven is connected to the power supply and the power switch is turned on yet the indicator light remains off.
- the switched-mode power supply has been diagnosed as malfunctioning by xTool technical experts and thereupon requires replacement.
⚠️ Important notes
When performing the replacement, please:
- Pay special attention to the voltage level of the switched-mode power supply. Please check whether the voltage level is consistent with the local voltage before replacement.
- Printer Removal: Before beginning the replacement, remove the printer from the oven. Prior to removing the printer, unscrew the two installation screws.
- Power Safety:
- Before replacing the switched-mode power supply, turn off the oven's power switch and unplug the power cord.
- Choose the appropriate AC input voltage according to your region's power standards by toggling the voltage switch before installing the power supply.
- Printer Power: Once the printer is uninstalled from the oven, reconnect its power supply to ensure it remains powered on for auto-maintenance.
- Tool Preparation: Have a variety of Allen wrenches ready as specified in the "Tools required" section.
Tools required
To ensure a smooth replacement process, please prepare the following items:
- M2.5 mm Hex key
- M3.0 mm Hex key
- M2.5mm Hex screwdriver (included in your package)
- A Phillips or flathead screwdriver
- A new switched-mode power supply for the oven*
*To request a replacement, please contact xTool Customer Service by submitting a request in the Help Ticket section below. Select Buy after-sales materials under the After-sales Issue tab to place your replacement order.
Replacement procedure
Preview
Was this page helpful?
0 out of 0 found this helpful
Help Ticket
Use this help ticket to submit your issue. We will respond within 1 business day
Submit a Ticket Tags
Help Ticket
Use this help ticket to submit your issue. We will respond within 1 business day
Submit a Ticket Services & Help
Learn & Education

Copyright © 2025 xTool All Rights Reserved.