Issue description
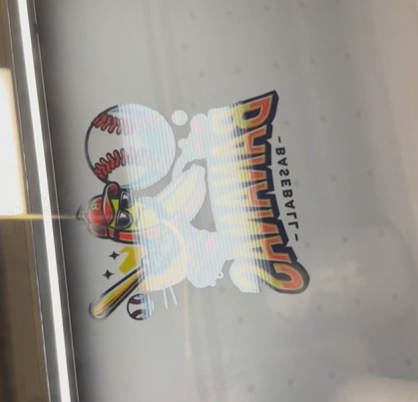
Printed designs display visible horizontal stripes or bands across the image, creating uneven color distribution and poor print quality.
- Consult this content for troubleshooting.
Potential causes
The following factors can cause horizontal striping in DTF prints:
- Uncalibrated print heads - Print head alignment issues
- Disabled feathering - Insufficient blending between print passes
- Low humidity - Environmental conditions affecting ink flow
- Poor ink circulation - Restricted ink flow within the print head system
- Clogged print head - Blocked nozzles preventing proper ink delivery
Prerequisite: Print a test image
Before troubleshooting, print a test image (nozzle check pattern) to diagnose the possible cause of the issue.
- Path: On the printer's LCD control panel, navigate to Maintenance > Print test image, and tap the Start button.
Once you have the printed test image, compare it to the scenarios below and follow the corresponding instructions.
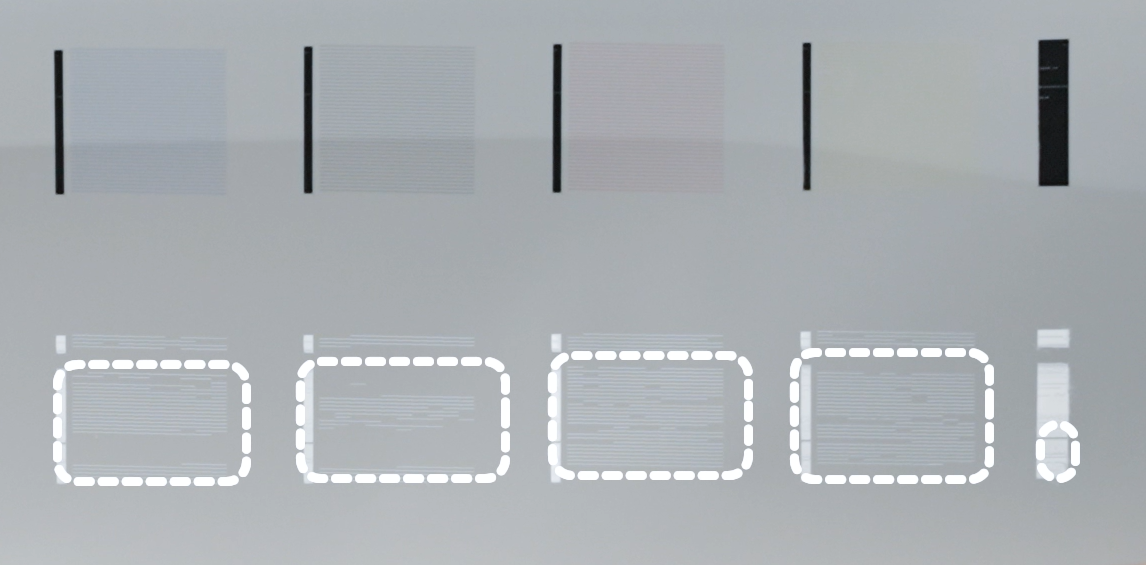
How to evaluate the sample printing test result?
- Nozzle Failure Rate:
- Ensure the nozzle failure rate is ≤3%. This means that in each of the four channels of the print head, no more than 12 nozzles should be clogged (i.e., no more than 12 missing strip lines).
- Interpretation:
- Good Print Quality: If the failure rate is ≤3%, it indicates that the print head is nearly free of clogs, and actual print results should be satisfactory.
- Poor Print Quality: If the failure rate > 3%, perform a standard auto-cleaning.
- If this does not improve the situation, proceed with deep auto cleaning or soaking in cleaning solution as needed.
Scenario A: Missing strip lines (Broken pattern)
Issue:
Test print shows missing lines, gaps, or broken patterns indicating failed nozzles; in other words, one or more print head nozzles are clogged.
Action required:
- Follow the comprehensive troubleshooting procedures in: Troubleshoot Missing Strip Lines / Failed Printing Sample Test for xTool Apparel Printer
- This guide provides detailed nozzle cleaning and maintenance procedures.
Scenario B: No missing strip lines (Complete pattern)
Issue:
Test print shows all lines present but horizontal striping occurs in actual prints.
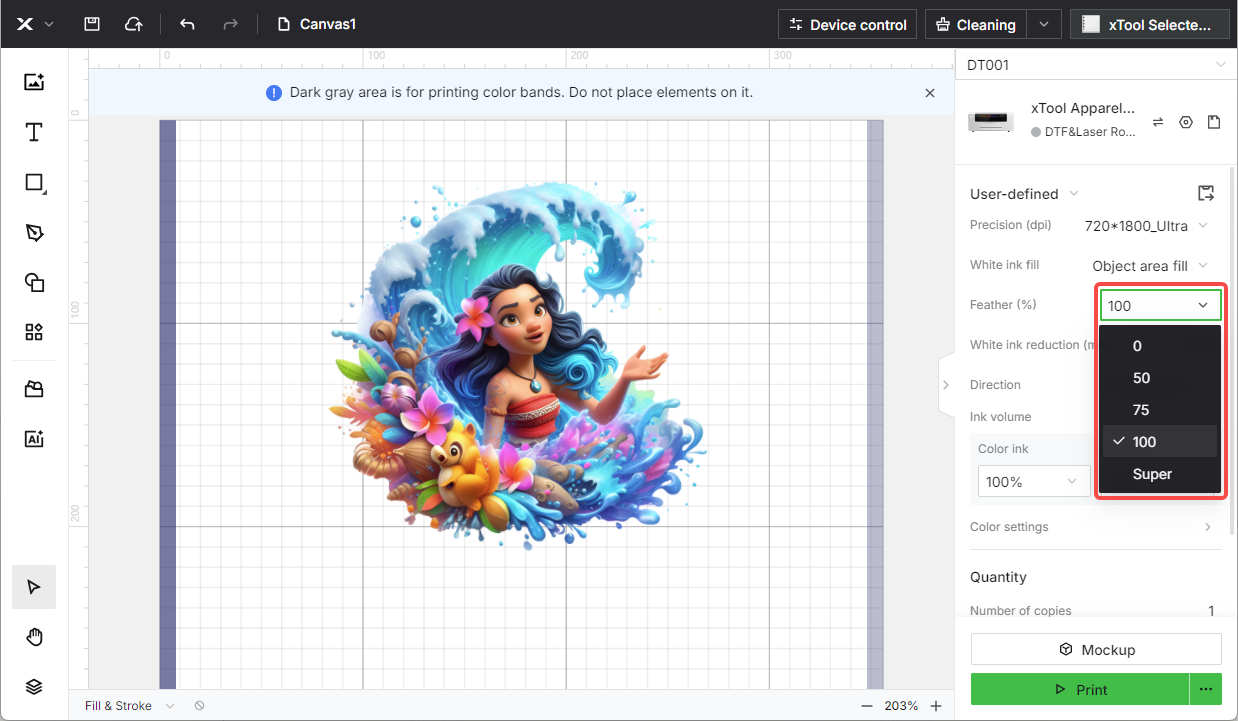
Step 1: Check feathering parameters
💡 Rationale: "Feathering" is a software setting that helps blend the passes of the print head to reduce banding.
Action required:
- In xTool Creative Space (XCS), check the print parameters for feathering settings.
- Select your design to access the parameters seeting.
- Recommended setting: Enable feathering at 100% or Super.
- Adjust feathering percentage if currently disabled or set too low.
- If this does not resolve the issue, proceed to Step 2.
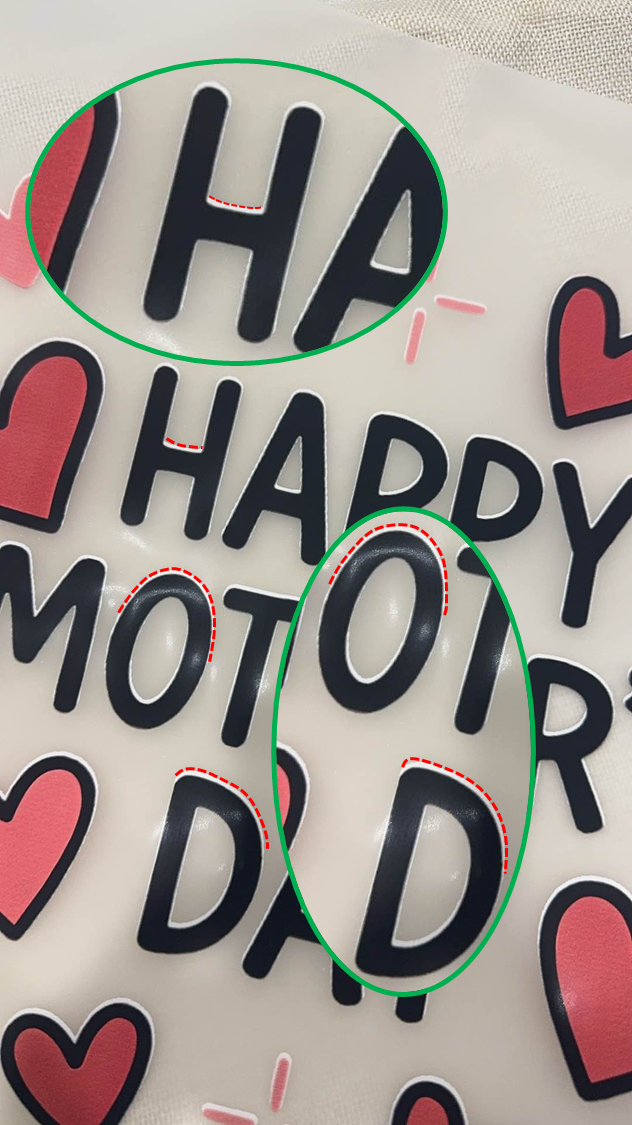
Step 2: Check for uniform white ink offset
💡 Rationale: Misalignment between the color and white ink layers can sometimes be perceived as a type of banding at the edges of a design.
Inspection procedure:
- Examine your printed design for white underbase offset.
- Look for: The white underbase consistently shifting in one direction relative to the color design.
- If offset is detected, perform calibration procedures.
Calibration procedure:
- Automatic calibration (Recommended):
- On the right corner of XCS, click the gear icon to access Device settings.
- Navigate to the Calibration tab and locate Automatic calibration.
- Click the Calibrate button.
- Test print after completion.
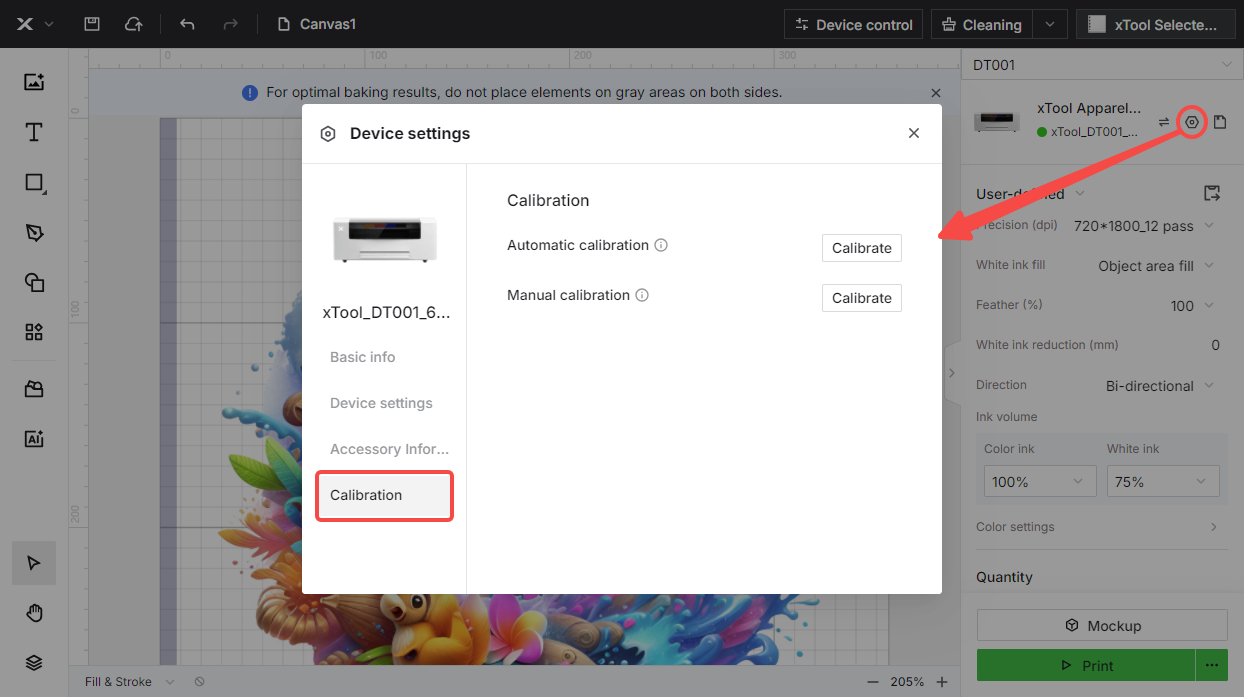
- Manual calibration (If automatic fails):
- On the right corner of XCS, click the gear icon to access Device settings.
- Navigate to the Calibration tab and locate Manual calibration.
- Click the Calibrate button.
- Follow on-screen prompts to complete manual calibration.
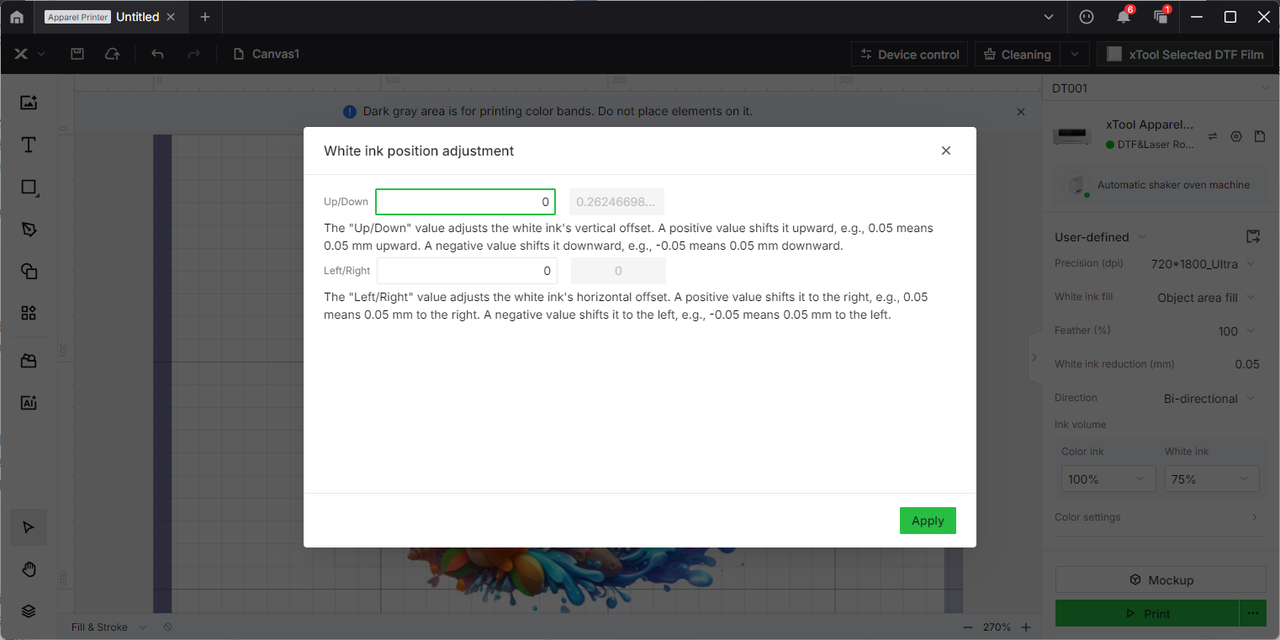
- White ink position adjustment (Advanced):
- If manual calibration fails, quickly click "Manual calibration" 5 times consecutively.
- This accesses the white ink offset adjustment interface.
- Follow interface prompts to fine-tune white ink positioning.
Next step: If the issue persists or no white ink offset is detected, reprint the test image for re-evaluation.
Scenario C: Perfect test image before printing, but missing lines present after a print task
Issue:
Initial test print shows complete nozzle function (i.e., no missing lines), but striping appears during actual printing or subsequent test prints show missing lines.
Step 1: Check environmental conditions
💡 Rationale: Low humidity can cause ink to dry in nozzles during printing, leading to progressive nozzle failure.
Recommended conditions:
- Temperature: 20°C - 30°C (68°F - 86°F)
- Humidity: 50% - 80% RH
Action required:
- Measure current temperature and humidity levels.
- Primary cause: Low humidity (most common issue).
- If humidity is below 50%, increase environmental humidity around the device.
- Use a humidifier or relocate the printer to a more humid environment.
- If environmental conditions are appropriate, proceed to Step 2.
Step 2: Deep Soak Print Head
💡 Rationale: Internal ink circulation problems can cause progressive nozzle failure during extended printing.
Procedure:
- Cause: Poor ink flow within the print head system
- Solution: Follow the "Deep soak the print head" procedure from: Troubleshoot Missing Strip Lines / Failed Printing Sample Test for xTool Apparel Printer
- Important: Use moisturizing solution (NOT cleaning solution)
- Soaking time: 1-2 hours
- Perform test print after soaking to verify improvement
If the issue persists after environmental adjustment and print head soaking, proceed to the "Still experiencing issues?" section to contact xTool Customer Service for advanced diagnosis.
Still experiencing issues?
Should the issue persist after completing the preceding steps, submit a ticket via the "Submit a Ticket" button in the "Help Ticket" section below. The standard response time for xTool Customer Service is one business day.
For a prompt resolution, please include the following details:
- Issue description: A detailed explanation of the observed problem.
- Video evidence: Attach a video demonstrating the issue, where applicable.
- Troubleshooting performed: Any troubleshooting steps you have already attempted, along with their results.
This information is crucial for xTool technical support engineers to provide timely assistance.
Documentation feedback
Help improve this content by providing feedback. If this content did not meet your requirements, select "No" in the "Was this page helpful?" section below. Include specific details about what was unclear or missing in the pop-up suggestion box. Feedback submissions are reviewed by xTool technical writers to enhance future documentation.
Services & Help
Learn & Community
Contact Us

Copyright © 2025 xTool All Rights Reserved.