Issue description
When printing a DTF design, you notice that the white ink underbase is not perfectly aligned with the color (CMYK) ink layer. This can manifest in two different modes:
Failure mode 1: Uniform white ink offset
The white underbase consistently shifts in one direction relative to the color design.
In DTF printing, white ink serves as the foundation layer beneath colored elements and may extend beyond design edges as a border. When properly calibrated, users can adjust white edge thickness in device settings. However, this issue presents as the entire white ink layer is shifted in one direction (e.g., up, down, left, or right) relative to the color design, as shifting slightly upwards in the reference image below. This creates an uneven white border or base.
Failure mode 2: Inward white ink shift
The white ink layer appears to be shifted inwards from opposite sides to the center of the design. For example, the white ink on the top edge of the design is shifted downwards, while the white ink on the bottom edge is shifted upwards.
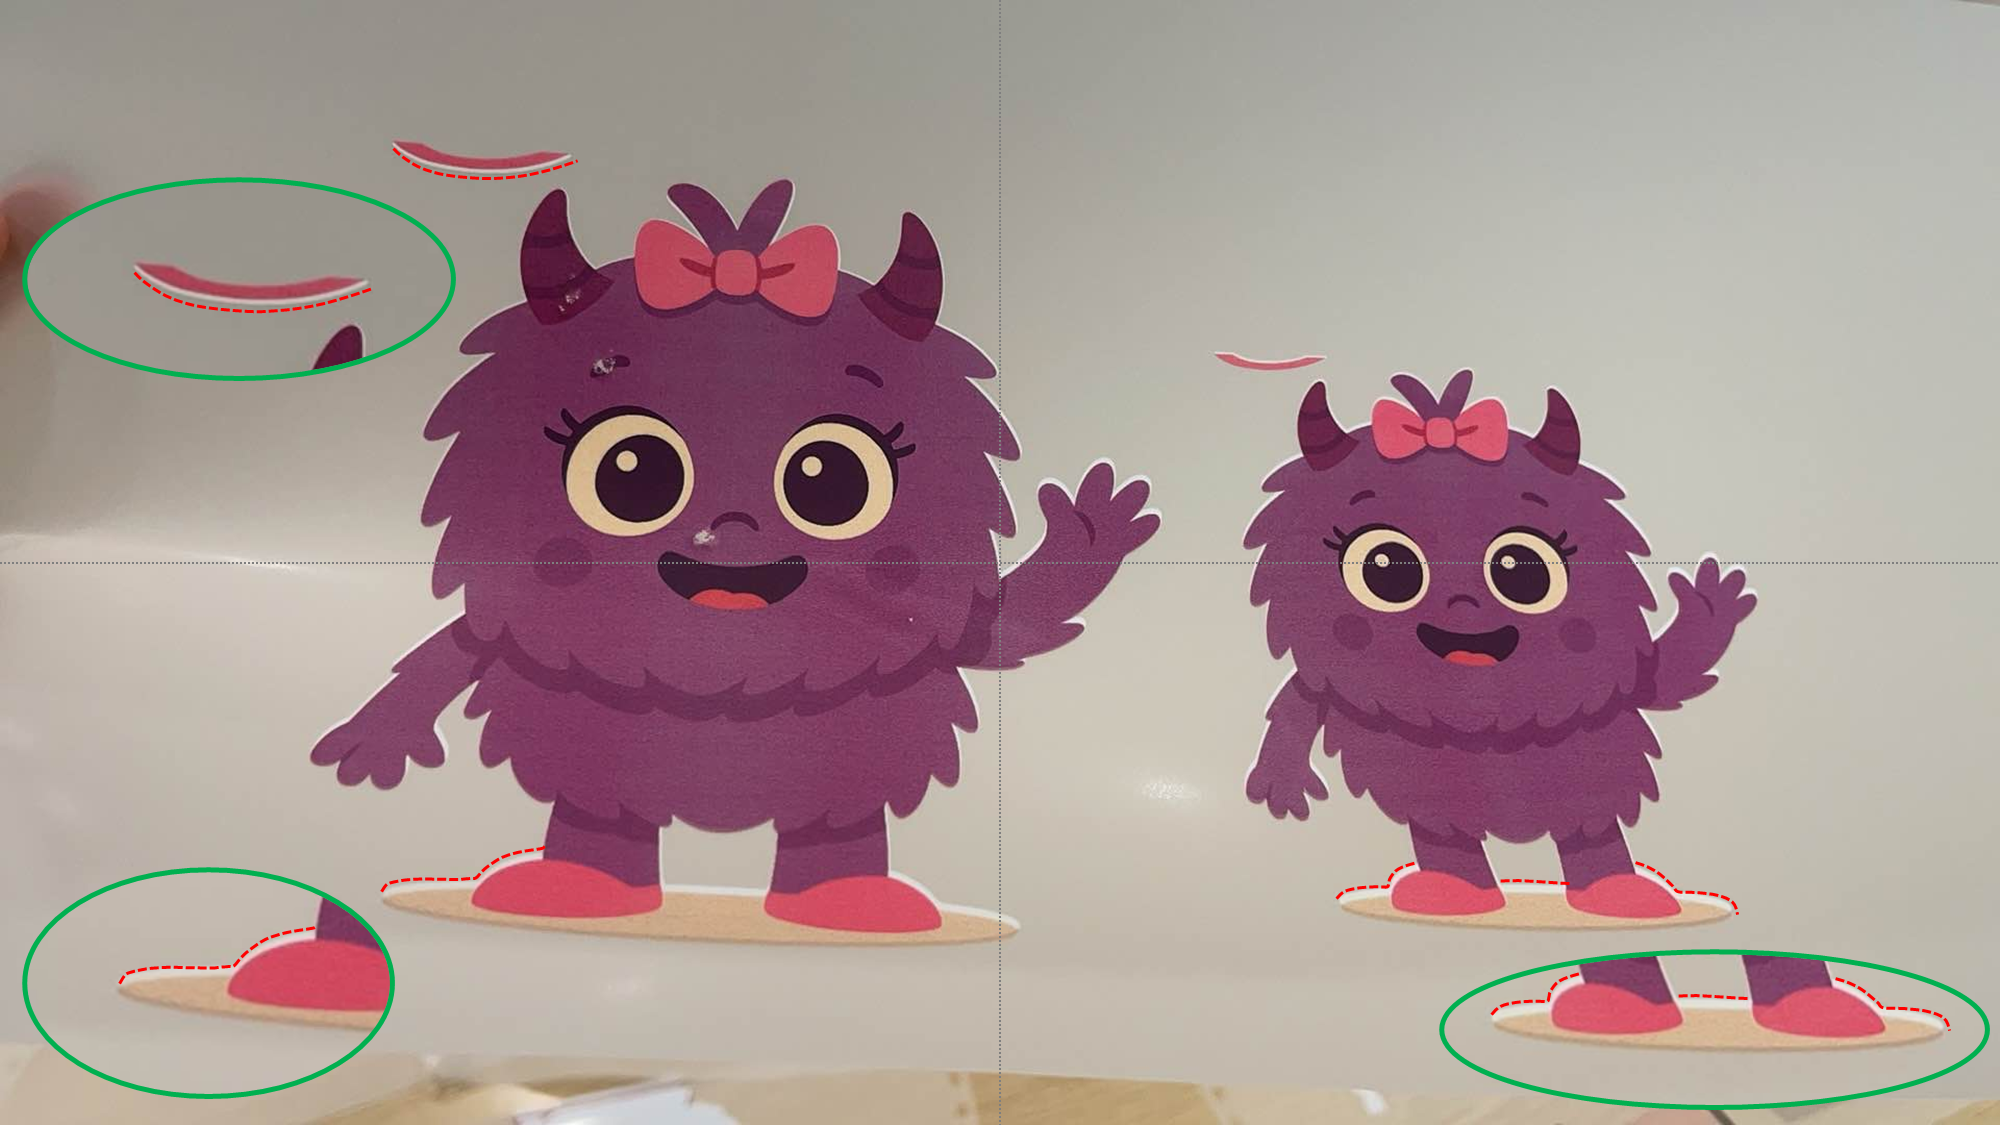
Failure mode 3: White ink overflow or irregular spill
The white ink bleeds out from the edges of the color design in an irregular pattern or covers areas that it shouldn't.

Potential causes
Failure mode 1
- Uncalibrated print heads - Initial setup calibration not performed
- Calibration error - Existing calibration contains inaccuracies
Failure mode 2
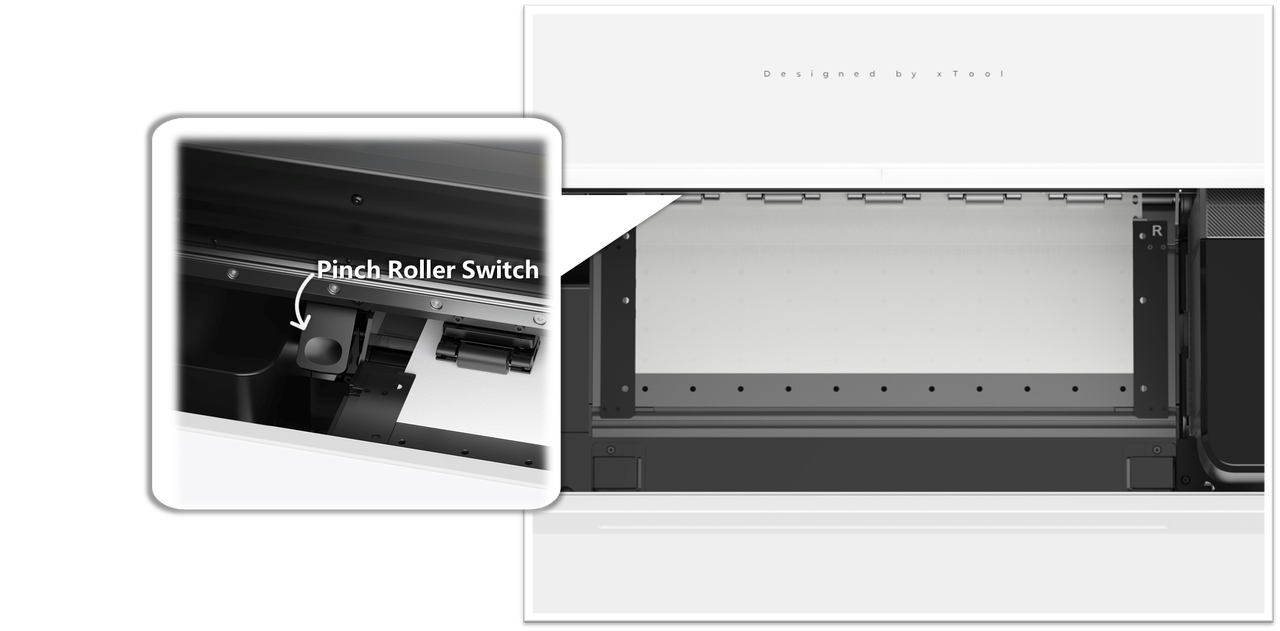
- Loose pinch rollers - Pinch roller switch not fully engaged
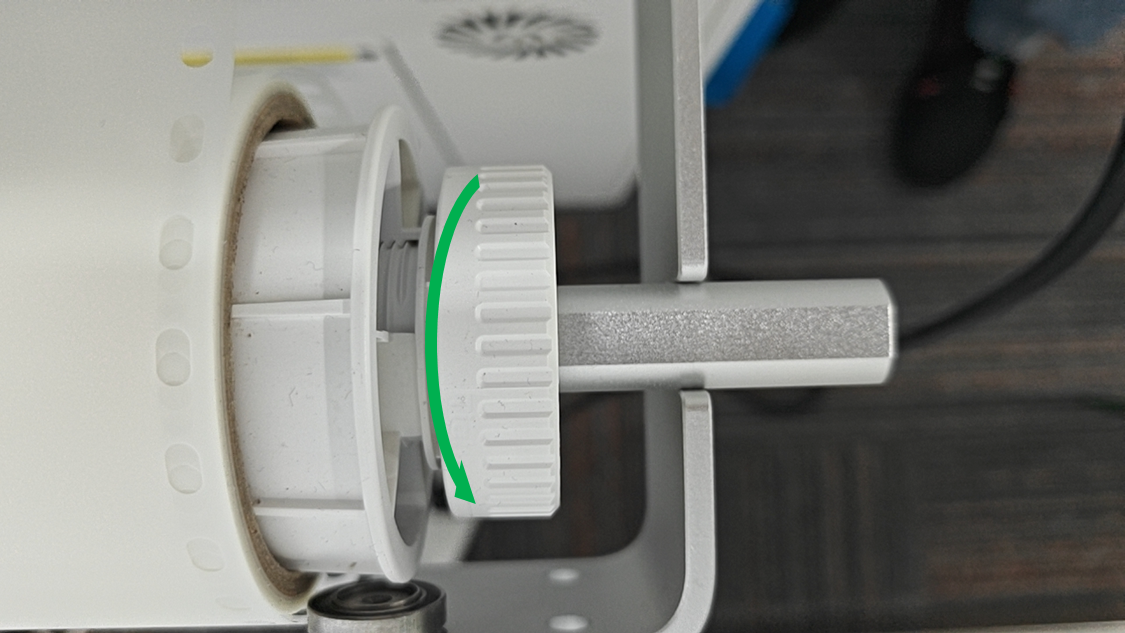
- Overtightened media holder - Excessive tension on media holder knob
- Media holder malfunction - Abnormal media feeding mechanism
Failure mode 3
- Image File Issues - Problems with the original design file
Failure mode 1 troubleshooting
Step 1: Perform automatic print head calibration
- Open xTool Creative Space (XCS) software.
- Access calibration settings:
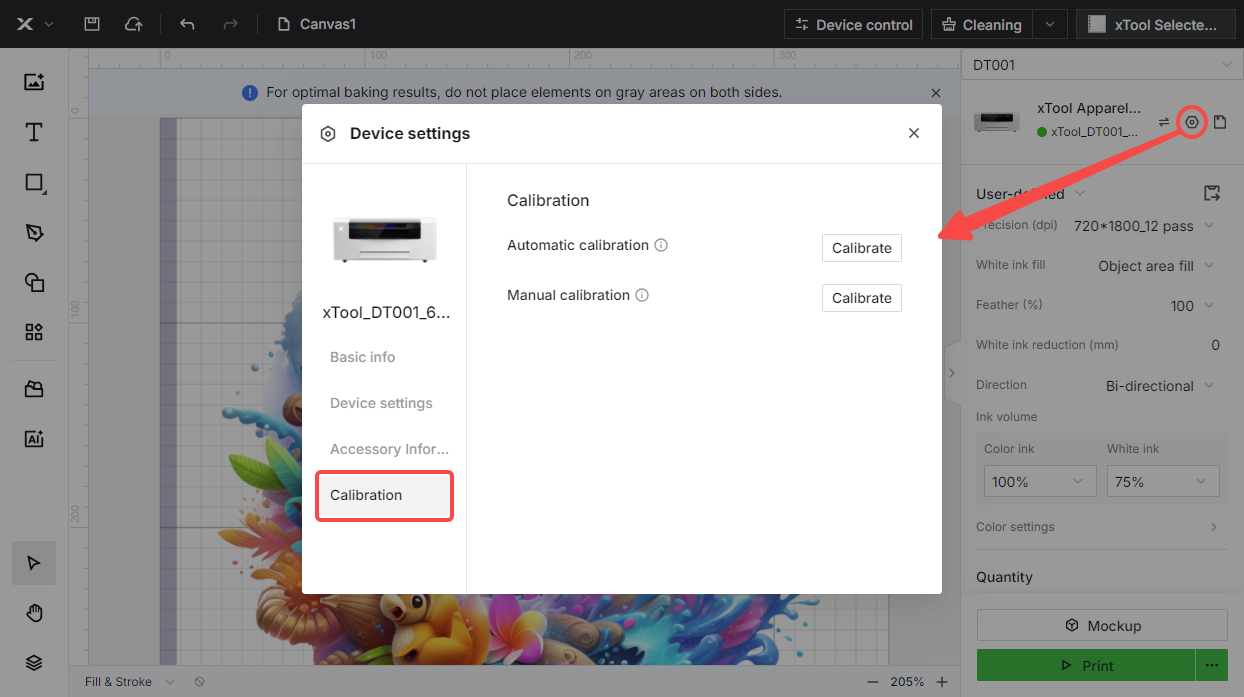
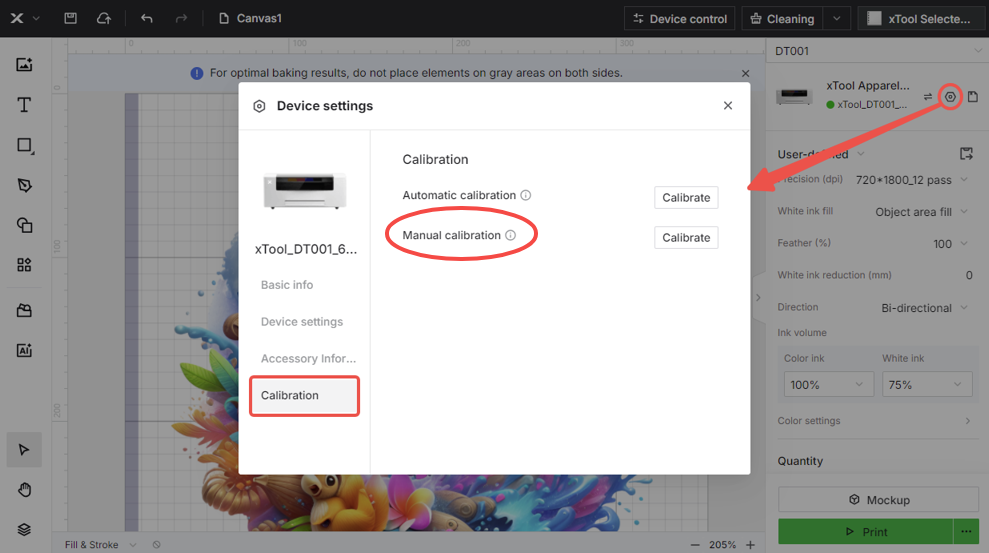
- On the right corner of XCS, click the gear icon to access Device settings.
- Navigate to the Calibration tab and locate Automatic calibration before clicking its Calibrate button.
- Wait for calibration completion.
- Perform a test print to verify results.
- If the issue persists or automatic calibration was previously attempted, proceed to Step 2.
Step 2: Perform manual calibration
If automatic calibration is not accurate, there may be an obstruction, or manual adjustment may be needed.
Preliminary Check:
- Inspect the camera lens for protective film: Access the Camera Module inside xTool Apparel Printer.mp4
- Centre the print carriage by tapping the left arrow icon on the control panel in: Maintenance > Control > Move print head.
- Detach the print carriage top cover.
- Loosen the 4 screws fixing the camera with a Philips screwdriver.
- If protective film is present, remove it and repeat the Automatic calibration.
- If no protective film is found, proceed with manual calibration.
Manual Calibration Procedure:
- Access manual calibration:
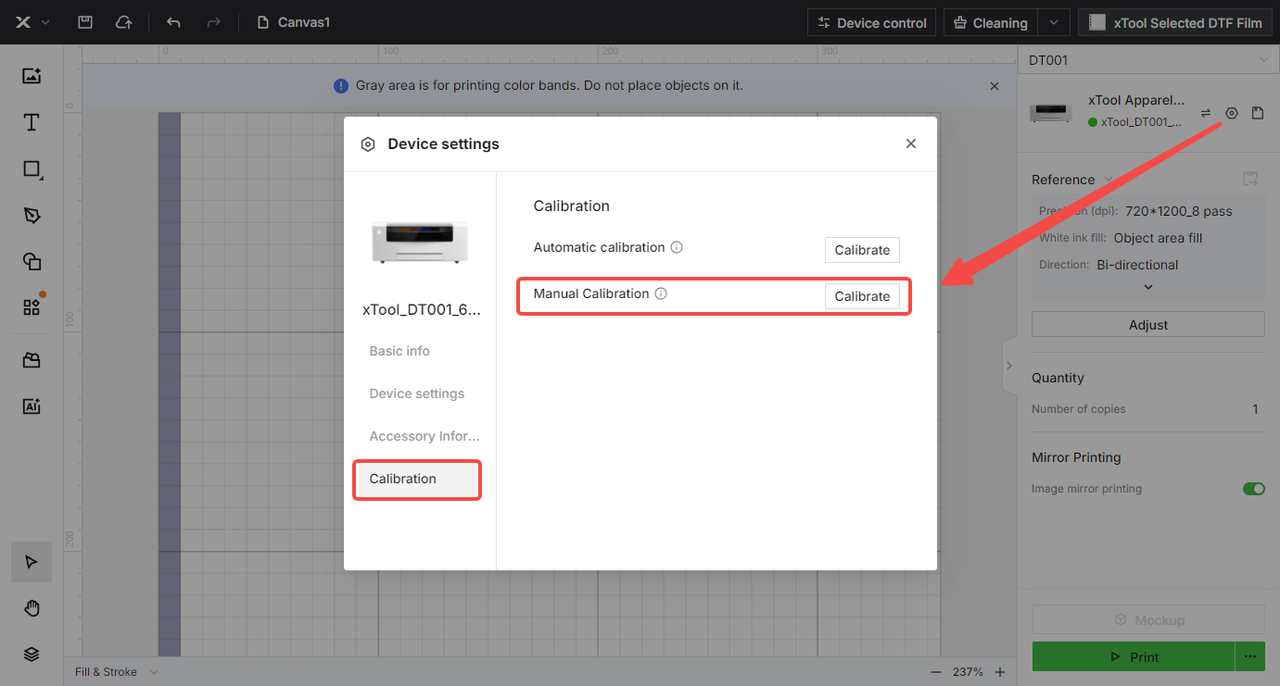
- On the right corner of XCS, click the gear icon to access Device settings.
- Navigate to the Calibration tab and locate Automatic calibration before clicking its Calibrate button.
- Follow on-screen prompts to complete manual calibration.
- Test print to verify alignment.
- If the issue remains unresolved, proceed to Step 3.
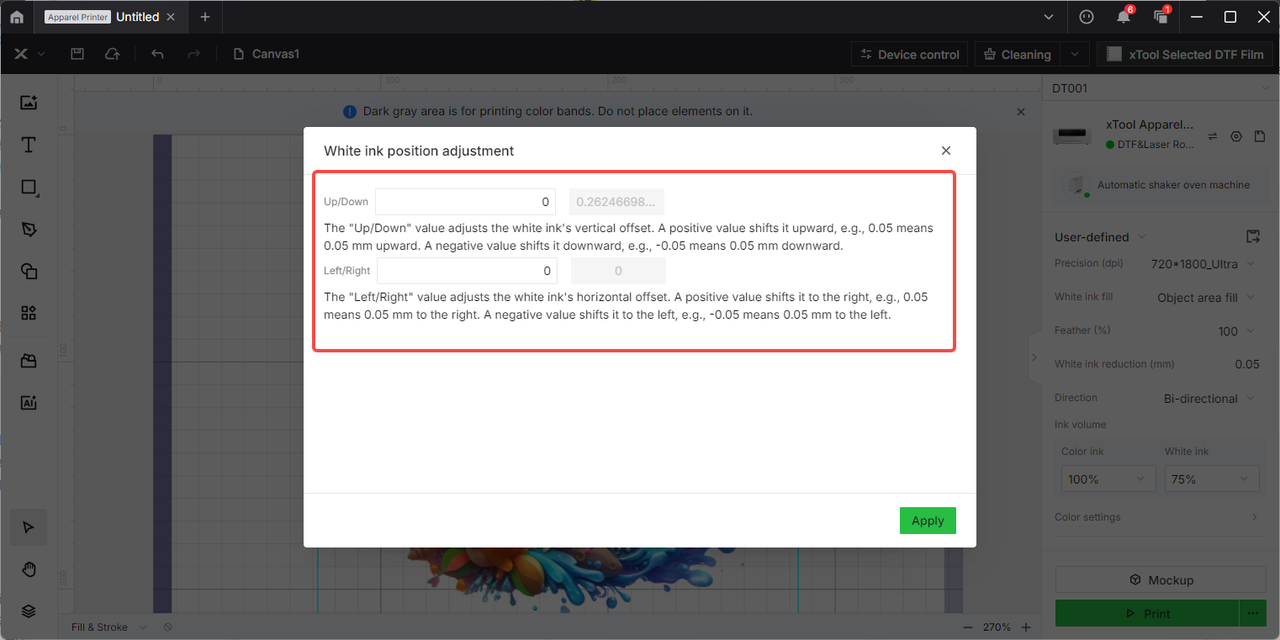
Step 3: Perform White ink position adjustment
Access Hidden Calibration Interface:
- Navigate to the calibration interface.
- Click "Manual calibration" 5 times consecutively to access the hidden "White ink position adjustment" interface.
Adjustment Procedure:
- Observe the printed image.
- Follow interface prompts to adjust white ink offset distance (up, down, left, right adjustments available).
- Recommended method: Use precision measuring tools (such as calipers) to measure the exact offset distance before entering numerical values
- Apply adjustments and test print.
- If the issue persists, proceed to the "Still experiencing issues?" section to contact xTool Customer Service for further assistance.
Failure mode 2 troubleshooting
Step 1: Check pinch roller switch status
- Open the printer's lid.
- Locate the pressure roller switch/lever and ensure it is fully pressed down and engaged.
- If it was not fully engaged, press it down firmly and run a test print.
- If already properly engaged, proceed to Step 2.
Step 2: Adjust film holder knob tension
Adjustment Procedure:
- Locate the knob on the film roll holder.
- Loosen the knob by 1-2 turns (do not exceed 2 turns).
- After loosening the knob, print a test design.
- Observe the result: Check if the inward shift issue is resolved.
- Important: Loosening the knob may convert the "inward shift" (Failure mode 2) into a "uniform shift" (Failure mode 1).
- If this happens, the tension is now correct, but you must now follow the calibration steps outlined in Failure Mode 1 solutions and repeat automatic/manual calibration.
- If the issue persists, proceed to Step 3.
Step 3: Inspect film holder assembly
- Manually pull down and unroll a generous amount of PET film from the roll, providing plenty of slack for the printer to pull from.
- Perform another test print.
- If unresolved, there may be a mechanical problem with the film roll holder assembly. Please proceed to the next section to contact xTool Customer Service for further assistance.
Failure mode 3 troubleshooting
Step 1: Check the design file in XCS
This issue is often caused by the design file itself, not the printer hardware. You can use the "Stroke" function in XCS to check your image.
- Add Stroke to Design:
- In the XCS canvas, click to select your design.
- From the top menu, select "Stroke".
- Choose a bright, obvious color (like red) and set the Width (pt) to a small value, such as 0.5.
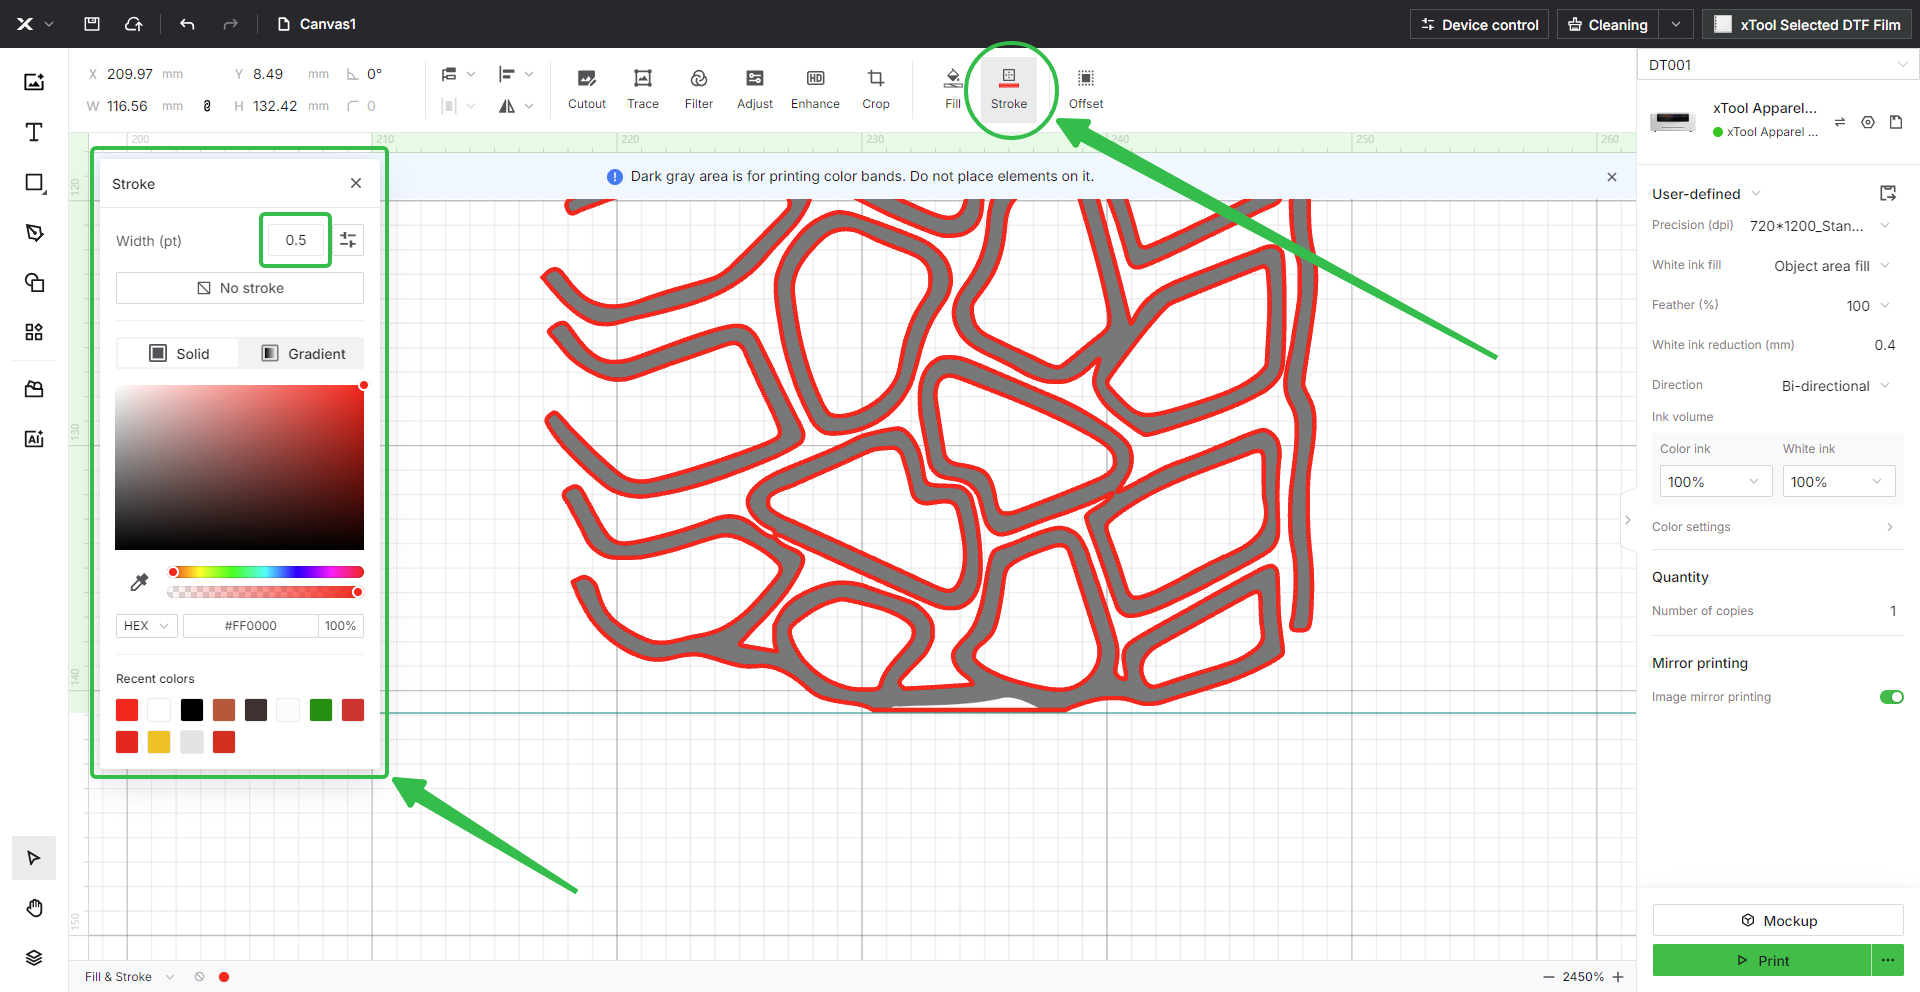
- Analyze the Results:
- This will create a thin, colored outline around your entire design. Zoom in and carefully inspect the edges.
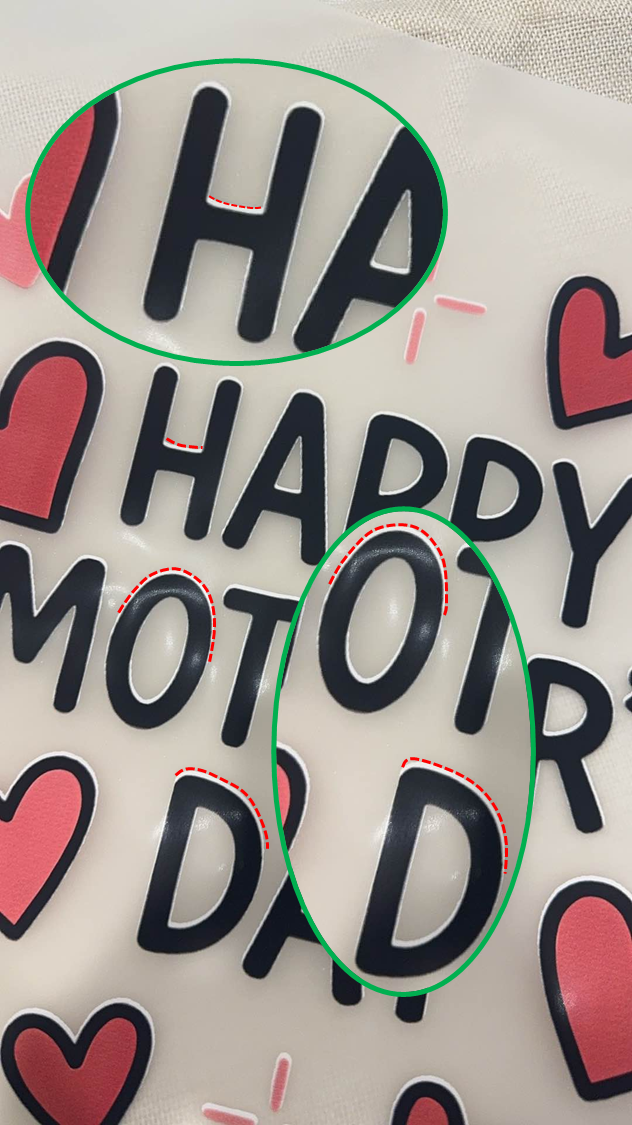
- If you see a thin white line or unexpected artifacts between your design and the new colored stroke, it means your original image file contains unwanted stray pixels or a hidden border. See the demonstration image below for a visual reference.
- These white edges indicate image editing artifacts that cause spillover.
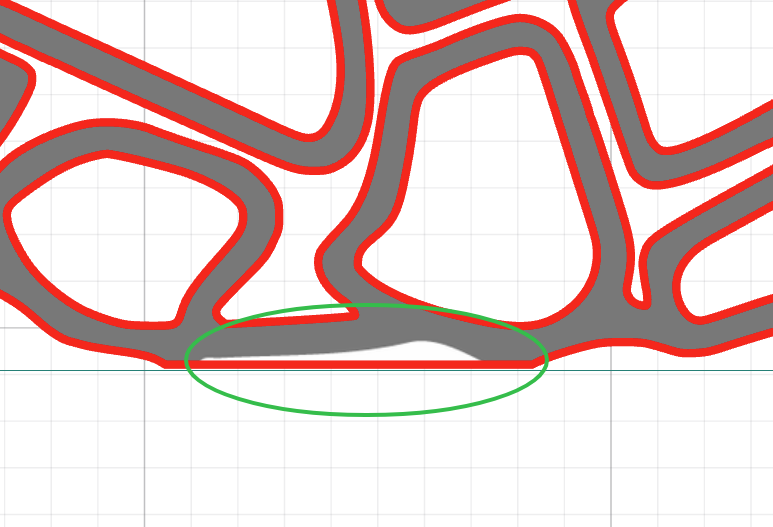
- Identify the Problem:
- White edges visible between the stroke and design indicate file issues.
- These artifacts are typically caused by improper image editing or background removal.
- Proceed to the next step for the corresponding solution.
Step 2: Edit out unexpected artifacts
The issue must be fixed in the source file.
- Use image editing software such as Adobe Photoshop.
- Carefully erase any stray pixels or borders on your design.
- Ensure clean edges without transparent or semi-transparent pixels.
- Save the file in the appropriate format and re-import it to XCS.
Still experiencing issues?
Should the issue persist after completing the preceding steps, submit a ticket via the "Submit a Ticket" button in the "Help Ticket" section below. The standard response time for xTool Customer Service is one business day.
For a prompt resolution, please include the following details:
- Issue description: A detailed explanation of the observed problem.
- Video evidence: Attach a video demonstrating the issue, where applicable.
- Troubleshooting performed: Any troubleshooting steps you have already attempted, along with their results.
This information is crucial for xTool technical support engineers to provide timely assistance.
Documentation feedback
Help improve this content by providing feedback. If this content did not meet your requirements, select "No" in the "Was this page helpful?" section below. Include specific details about what was unclear or missing in the pop-up suggestion box. Feedback submissions are reviewed by xTool technical writers to enhance future documentation.
Services & Help
Learn & Education

Copyright © 2025 xTool All Rights Reserved.