This article introduces two commonly used welding techniques: tack welding and pulse welding, covering their definitions, application scenarios, key parameter settings, steps to get started, and essential precautions.
For a quick-start guide and detailed instructions on using the machine, refer to Start Wire-Filled Welding With xTool Metalfab Laser Welder 1200W.
1. Definitions and applications
Tack welding | Pulse welding | |
|---|---|---|
Definition | Welds at a point using brief bursts of laser emission, creating small, dot-like welds. | Uses pulsed laser beams to weld the workpiece. It keeps the overall heat input of a weld low while still getting proper penetration. |
Applications |
|
|
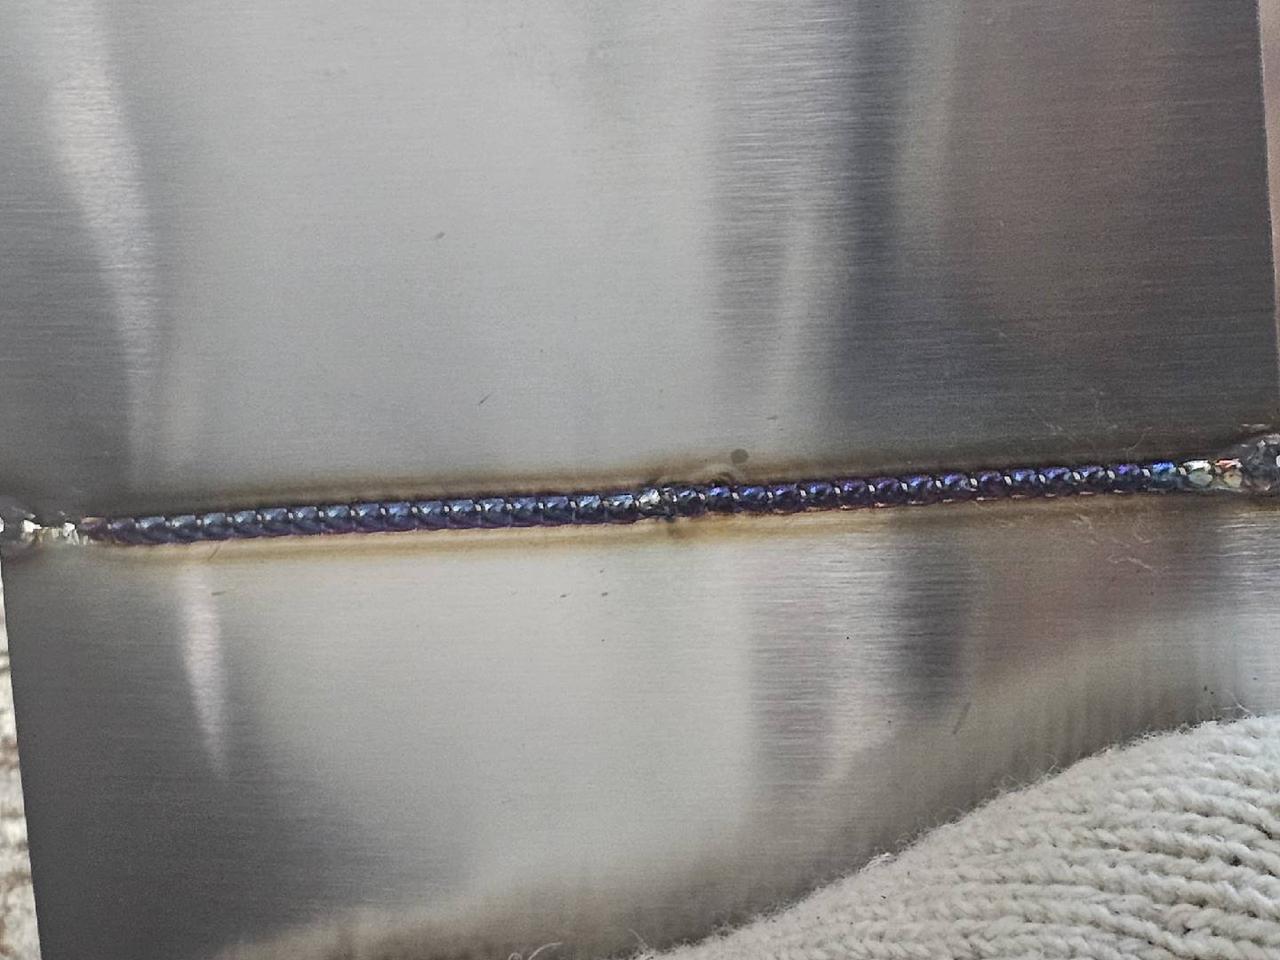
Examples |
|
|

2. Key processing parameters
Parameters | Adjustment range | Effects | |
|---|---|---|---|
Tack welding | Tack time | / | The longer the tack time, the larger the weld spot and the deeper the penetration. |
Laser power | 1%-100% (Set it based on material thickness) | The higher the laser power, the greater the heat generated. | |
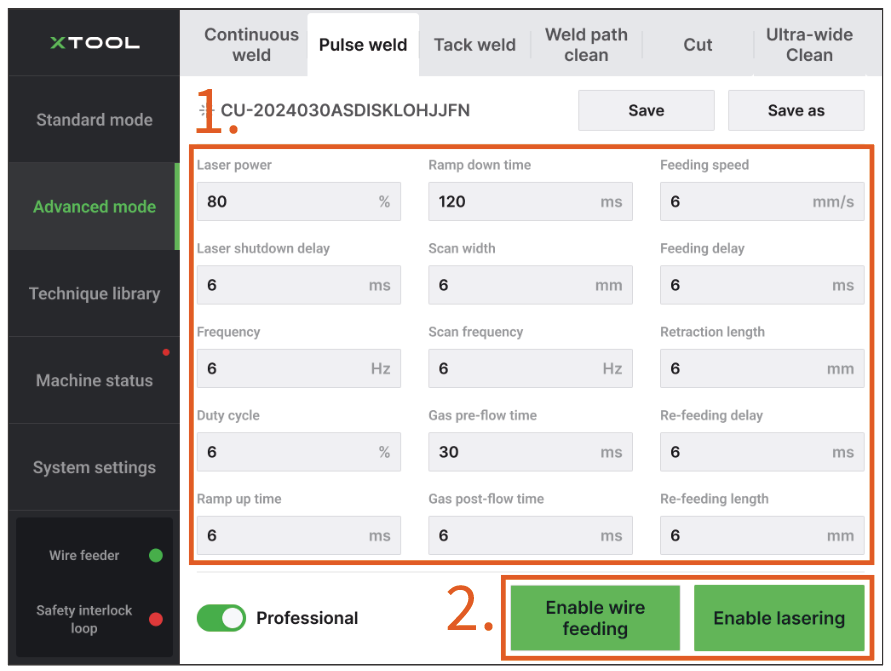
Pulse welding | Frequency | / | The higher the frequency, the shorter the interval between pulses, resulting in more uniform heat input. |
Duty cycle | 1%-100% | The larger the duty cycle, the higher the energy per pulse. Thicker materials require larger duty cycle. | |
Feeding speed | 2-100 mm/s (Default value: 10 mm/s) | The wire feeding speed determines the welding speed. The faster the wire feeding speed, the faster the welding speed, which leads to a shorter laser dwell time and lower laser energy absorption by the material. Thicker materials require slower wire feeding speed. |
3. Welding procedures and precautions
Note: For detailed instructions on using the machine, refer to Start Wire-Filled Welding With xTool Metalfab Laser Welder 1200W. |
Tack welding
(1) On the touchscreen, select Advanced mode > Tack weld, and turn on Professional.

(2) Set the processing parameters, and then turn on Enable wire feeding and Enable lasering.
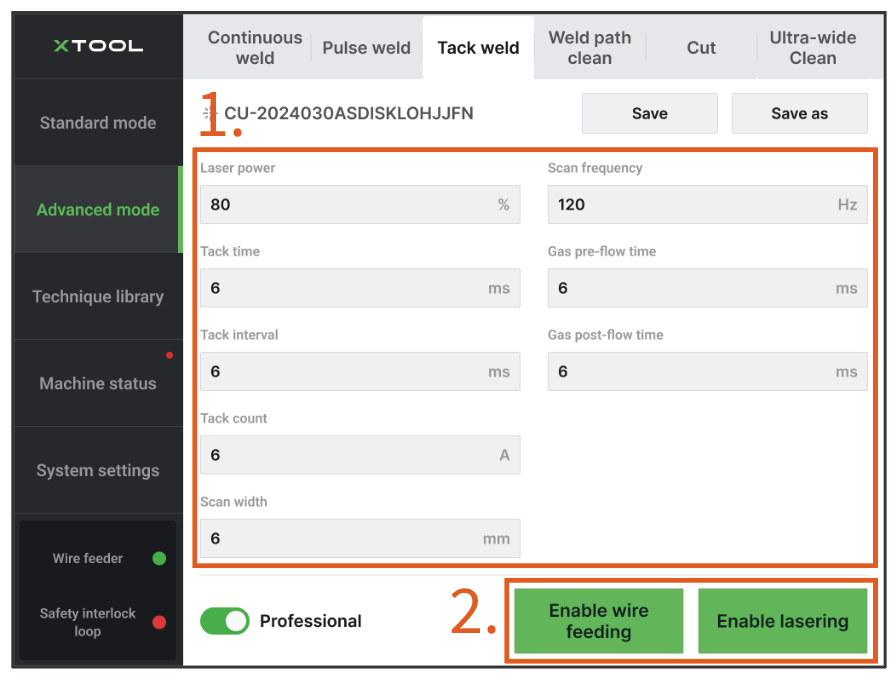
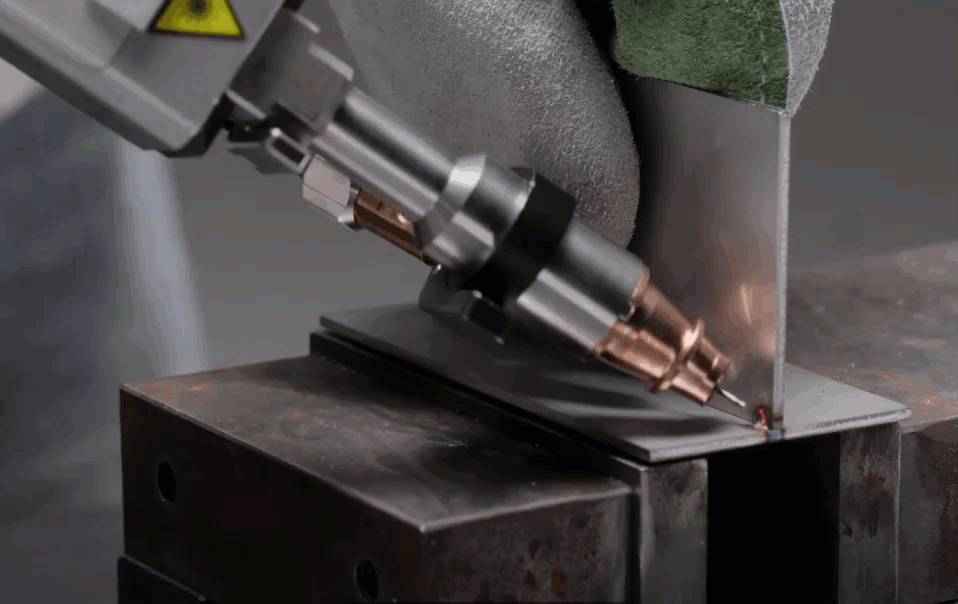
(3) Hold the welding head over the workpiece, with the welding wire tip in contact with the workpiece and the red light spot falling at the welding position. Then, press and hold the grip sensing button and trigger to tack weld the point.

Caution: Ensure that the workpieces align correctly and fit tightly. |
Pulse welding
(1) On the touchscreen, select Advanced mode > Pulse weld, and turn on Professional.
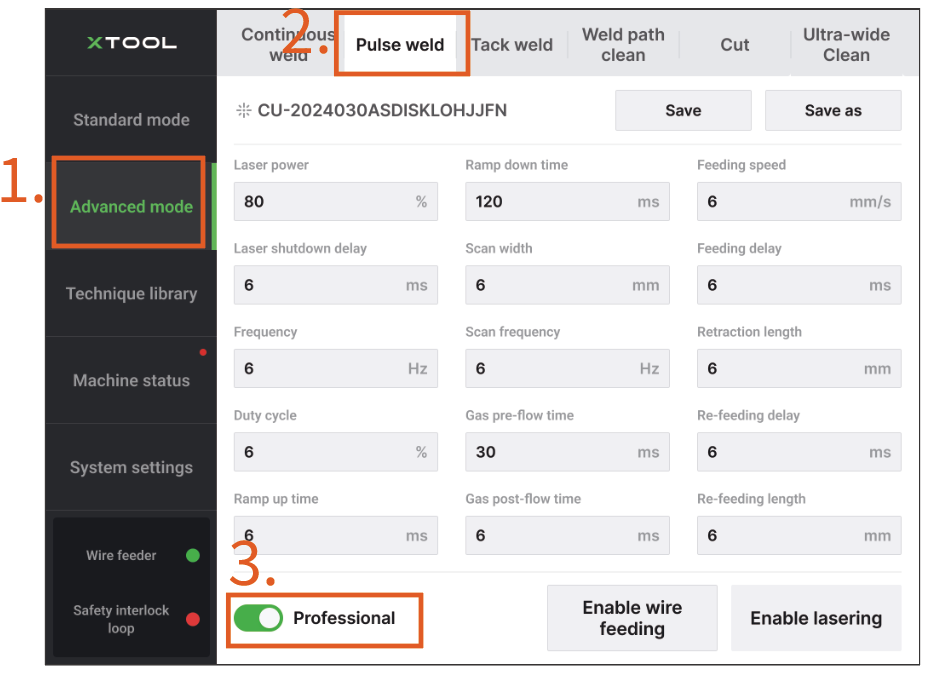
(2) Set the processing parameters, and then turn on Enable wire feeding and Enable lasering.
(3) Hold the welding head over the workpiece, with the welding wire tip in contact with the workpiece and the red light spot falling at the starting position. Then, press and hold the grip sensing button and trigger to start welding.
Caution:
|
