Note: Before use, please check and make sure that your xTool MetalFab Laser Welder's firmware versions are updated to V40.70.012.2425.01.B02 (for machine) and V40.70.010.2425.01.B02 (for screen) or later in xTool software. This helps to ensure the proper use of xTool MetalFab MaxClean Accessory.
For more details about how to update firmware versions, visit xTool MetalFab Firmware Upgrade Guide.
Quick Start Guides in different languages





List of items
|
|
|
|
|
xTool MetalFab MaxClean Accessory | Cleaning lens | Dust plug | Quick Start Guide | Safety Instructions |
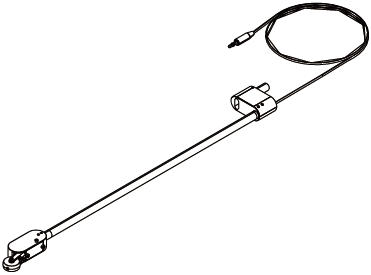
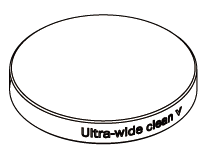
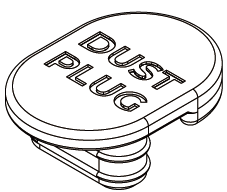
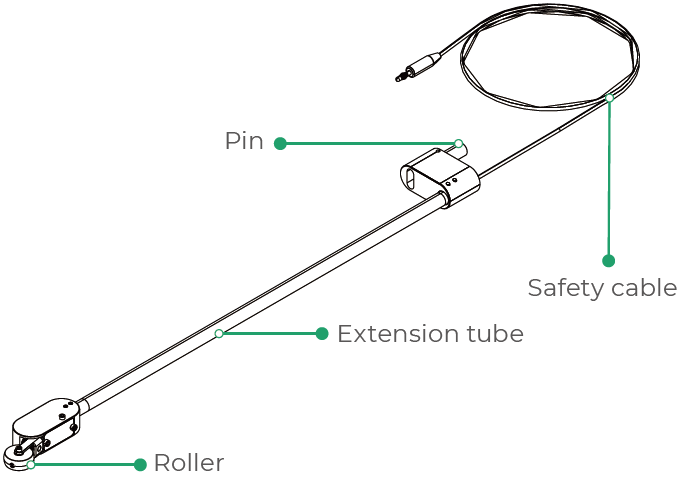
Meet xTool MetalFab MaxClean Accessory
Install xTool MetalFab MaxClean Accessory
Note:
■ xTool MetalFab MaxClean Accessory can work with xTool MetalFab Laser Welder of different powers. This guide illustrates the installation and use of the accessory with xTool MetalFab Laser Welder 1200W.
■ Ensure that xTool MetalFab Laser Welder has been well assembled according to its Quick Start Guide.
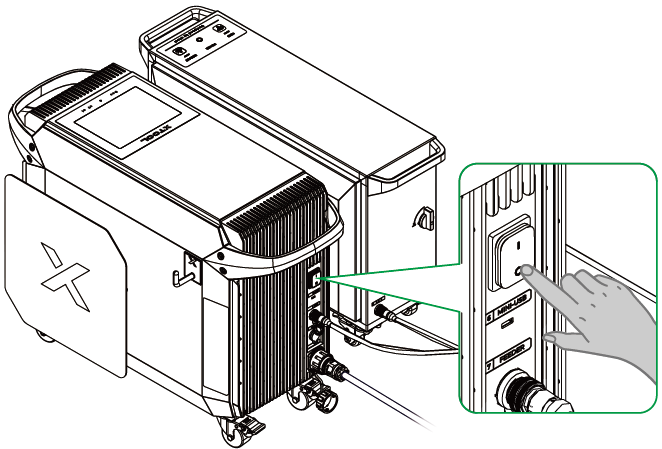
Power off xTool MetalFab Laser Welder
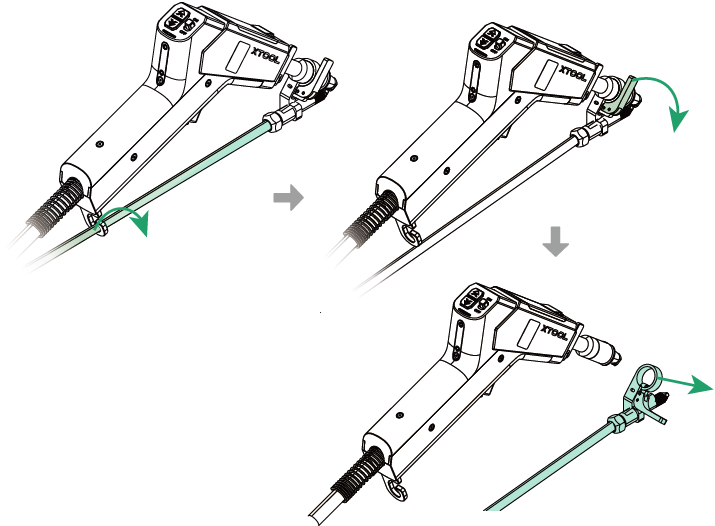
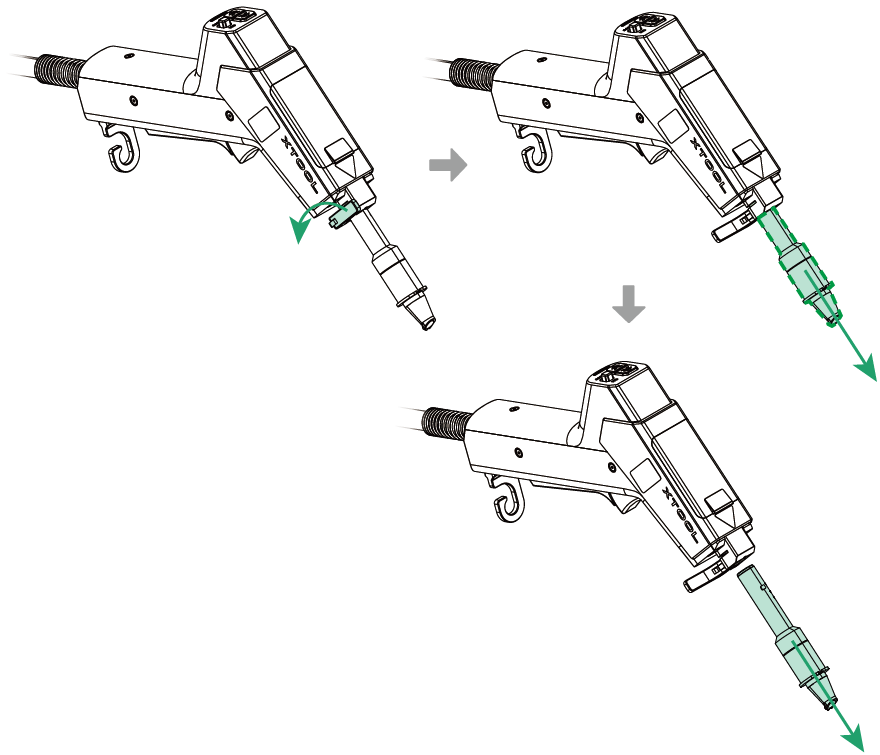
Remove the wire feeding tube
Remove the wire feeding tube from the hook first. Then, open the fastener and detach the wire feeding tube from the welding head.
Install the cleaning lens
Before the installation:
■ Ensure that the environment is clean and dust-free.
■ Wash your hands or wear lint-free gloves (not provided).
■ Clean the welding head with lint-free paper or lint-free cloth.
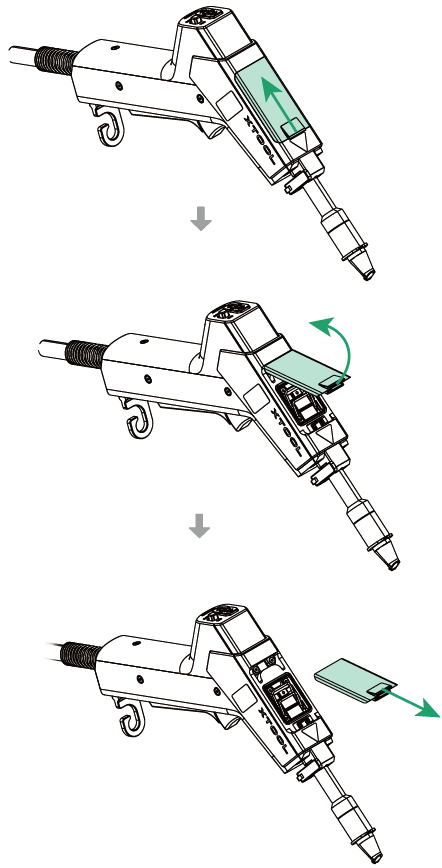
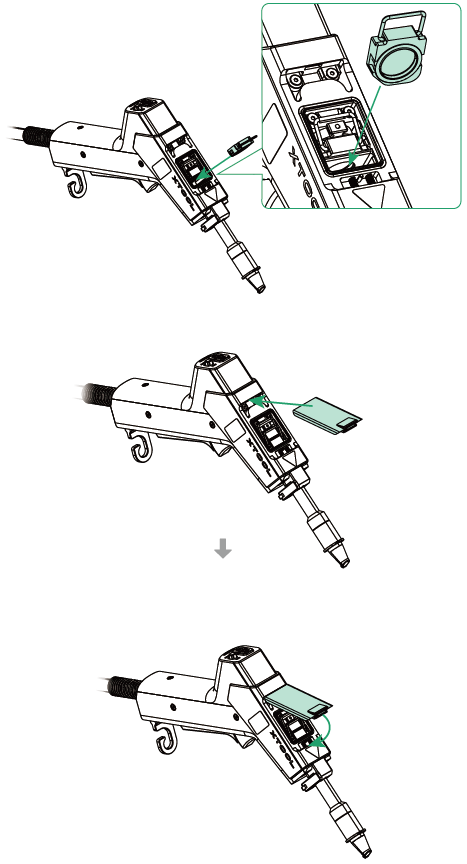
(1) Remove the cover on the top of the welding head.
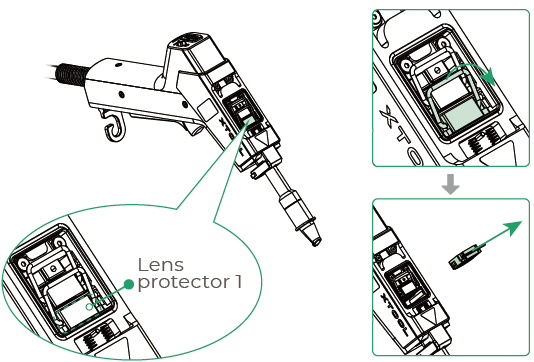
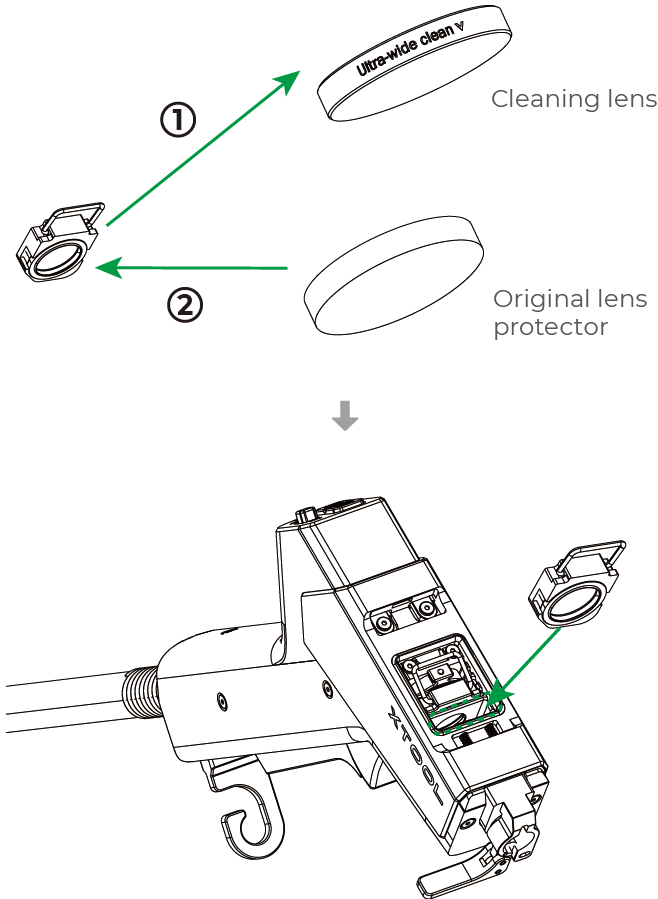
(2) Remove the lens protector 1.
Note:
After the lens protector is removed, it is recommended that you put the cover back to prevent dust from falling inside the welding head and causing damage.
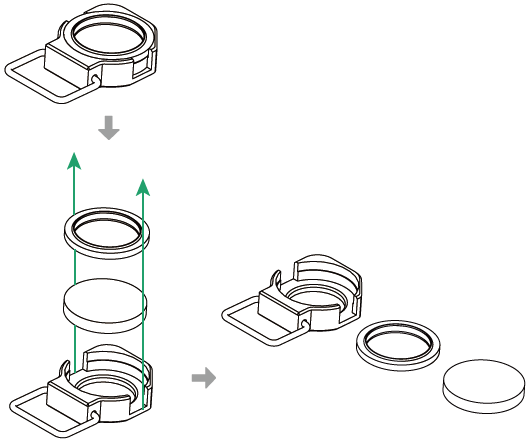
(3) Keep your hands clean or wear lint-free gloves to remove the gasket and lens protector.
Note:
Wrap and store the removed lens protector in a clean lens wipe (not included) or the protective film of the cleaning lens to avoid contamination.
(4) Install the cleaning lens.
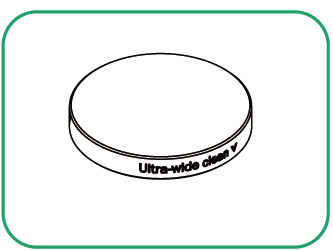
Do not touch the lens with your fingers or other tools during installation as the lens may get dirty. If the lens accidentally gets dirty or dusty, use a cotton swab to clean it.
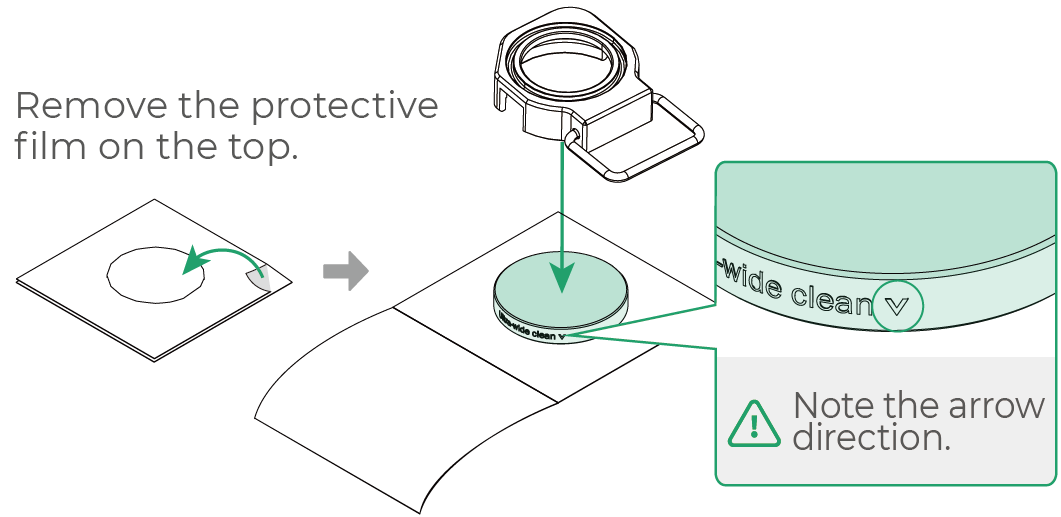
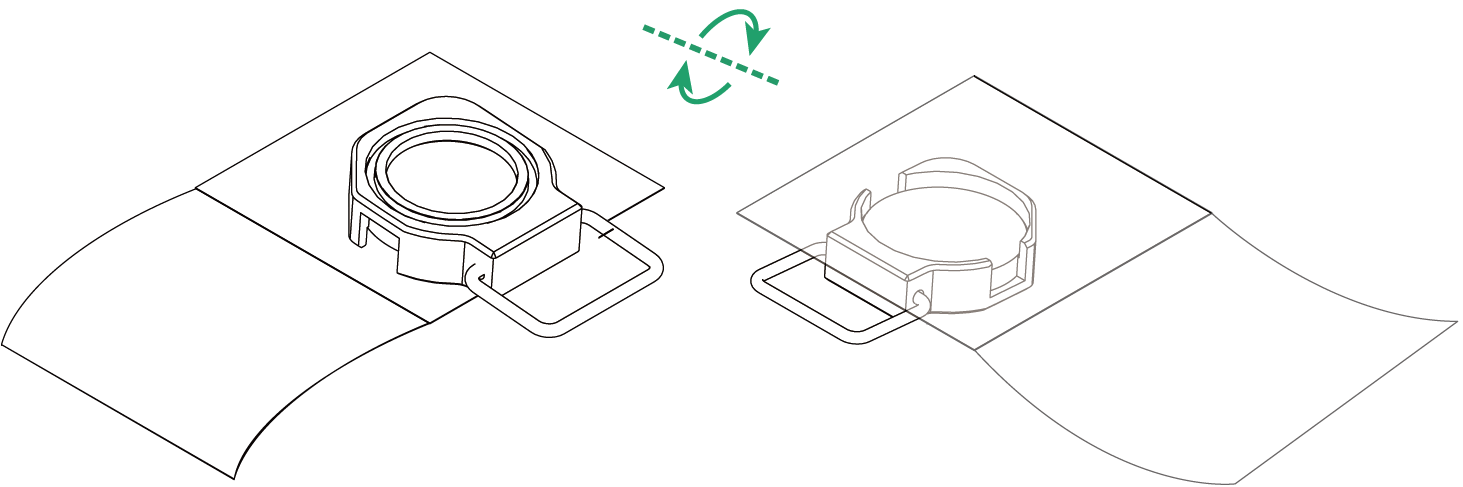
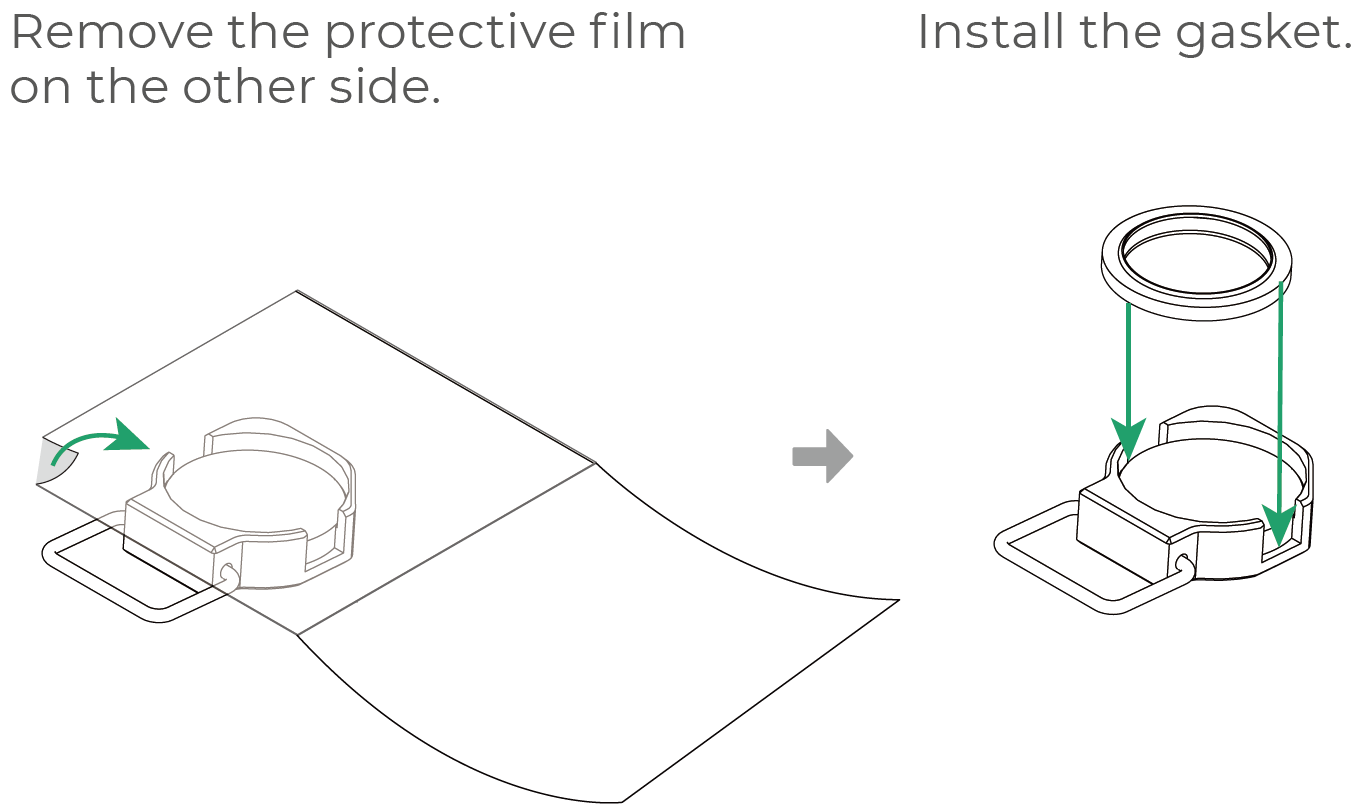
(5) Install the assembled cleaning lens on the welding head.
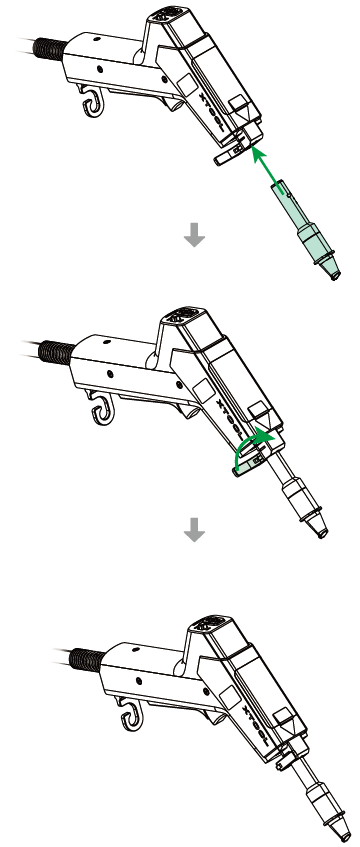
Remove the welding nozzle
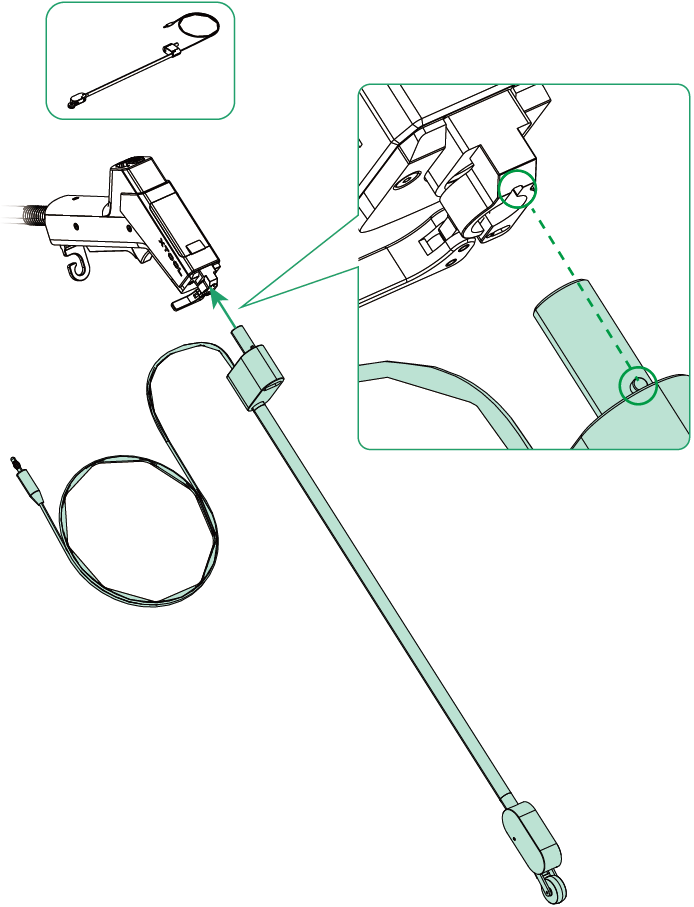
Install xTool MetalFab MaxClean Accessory
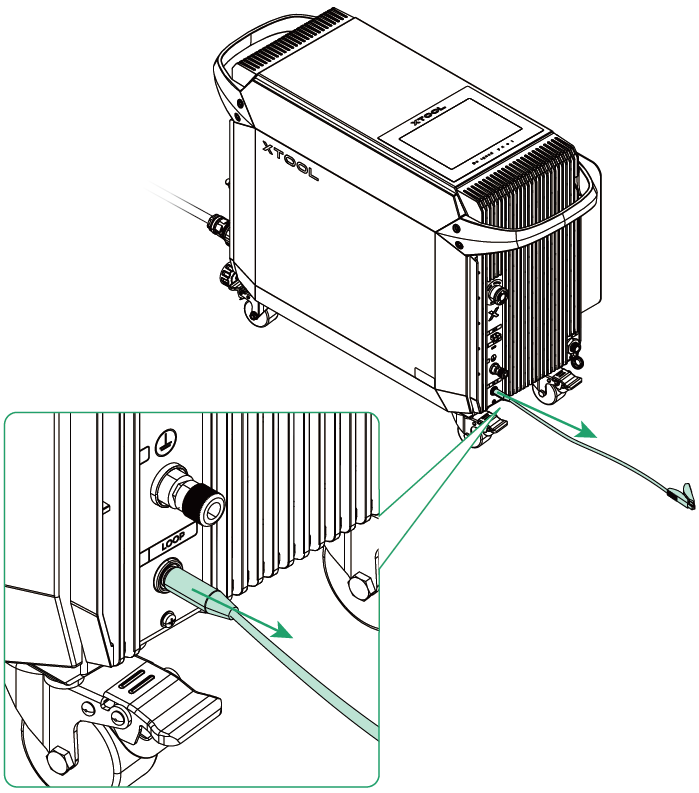
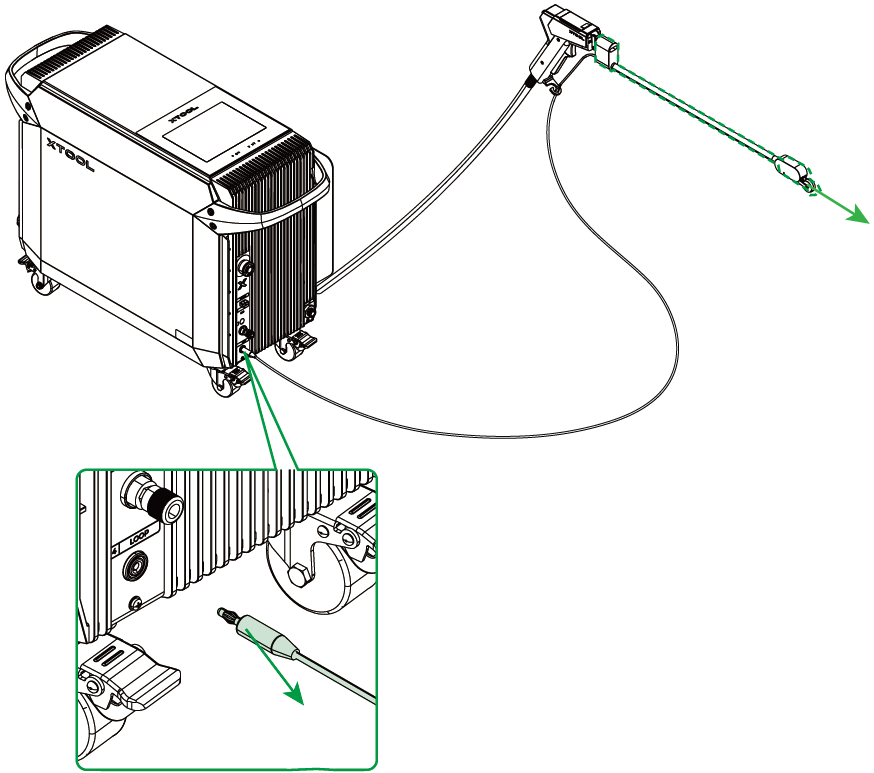
Connect the safety cable
(1) Unplug the workpiece sensing cable of xTool MetalFab Laser Welder.
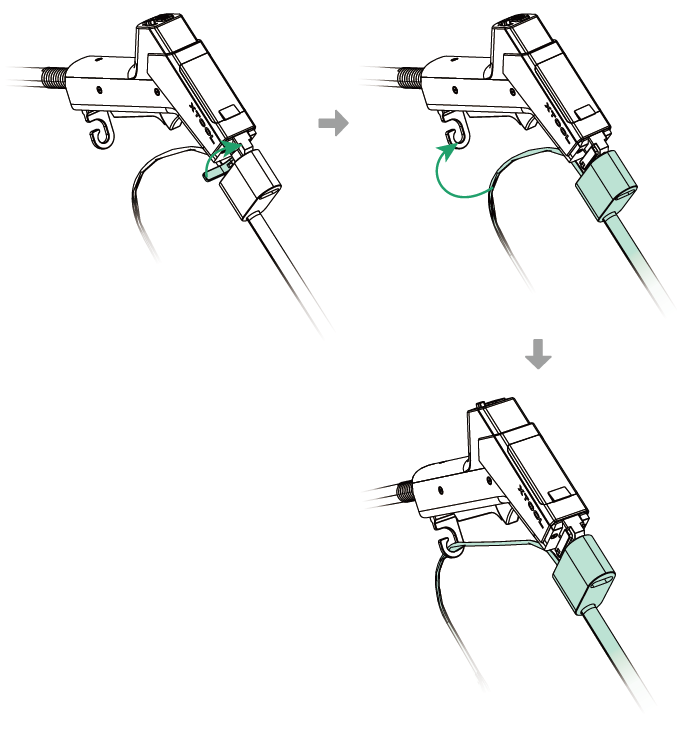
(2) Insert the safety cable into the LOOP port.
Use xTool MetalFab MaxClean Accessory
Before using the accessory, please follow Safety Instructions to put on protective equipment and take proper safety precautions. Necessary protective equipment includes: laser safety goggles, protective helmets, laser and heat-resistant gloves, clothing, and aprons.
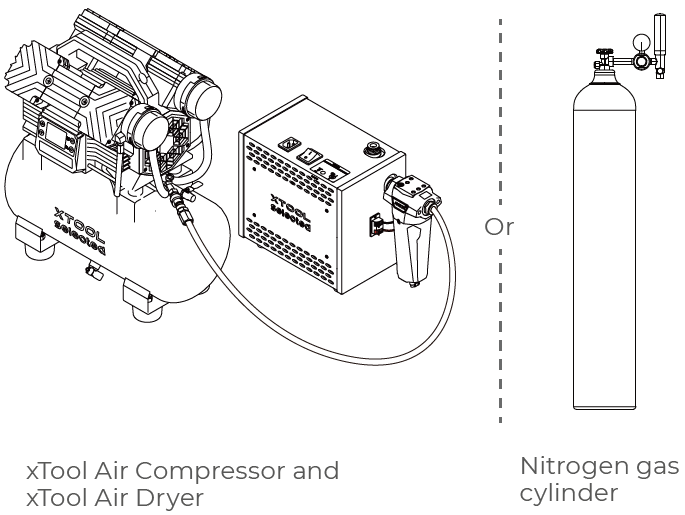
Connect the shielding gas cylinder or gas generators
Requirements for the shielding gas:
■ Gas type: Compressed air or nitrogen
■ Gas pressure: 0.3 MPa to 0.6 MPa
■ Accessory preparation: If you use a gas cylinder, please prepare necessary accessories such as a gas pressure reducing valve for pressure adjustment.
(1) Check if the connected gas cylinder meet the requirements. If not, replace it with suitable gas generators or a gas cylinder with necessary accessories.
(2) Follow the instructions for the gas generators or gas cylinder to open the valve and adjust the gas pressure to the proper range.
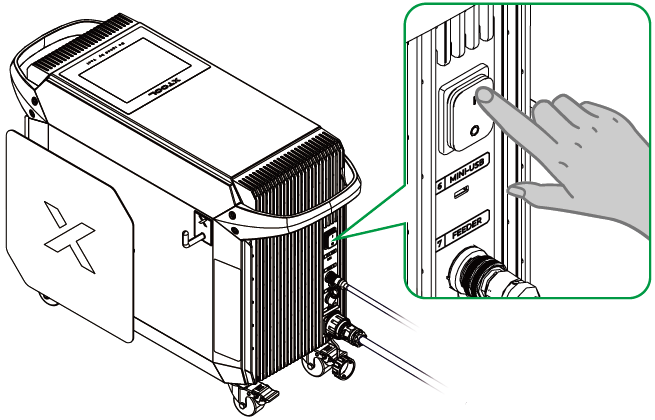
Power on xTool MetalFab Laser Welder
Place a material
Place the metal to be cleaned horizontally on a flat and non-flammable surface.
Set the parameters
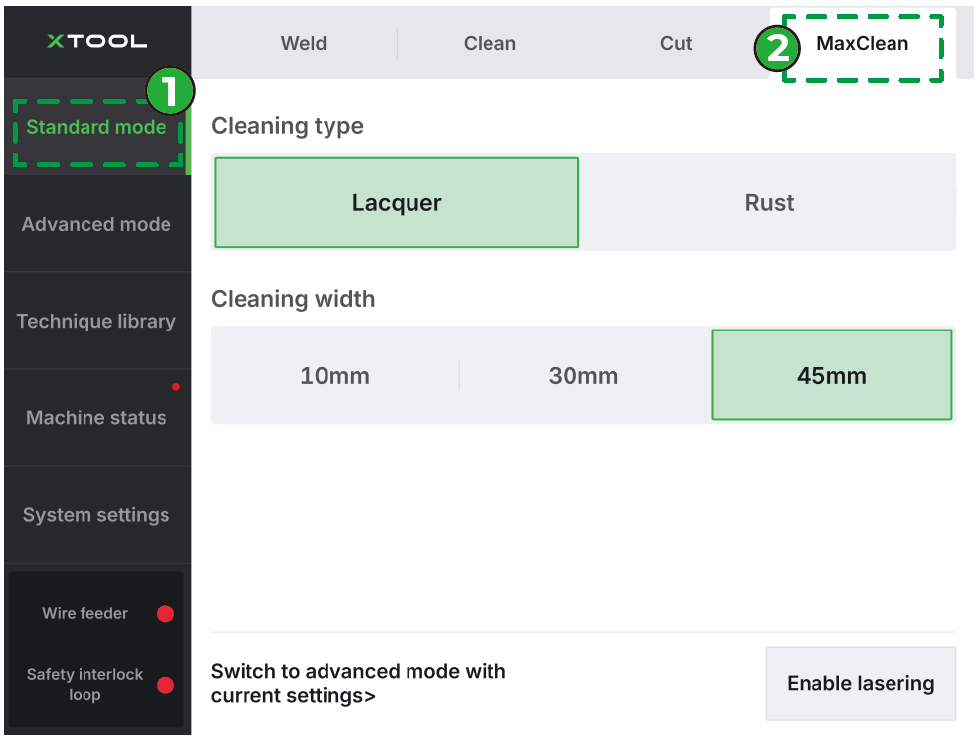
(1) On the touchscreen of xTool MetalFab Laser Welder, tap Standard mode > MaxClean.
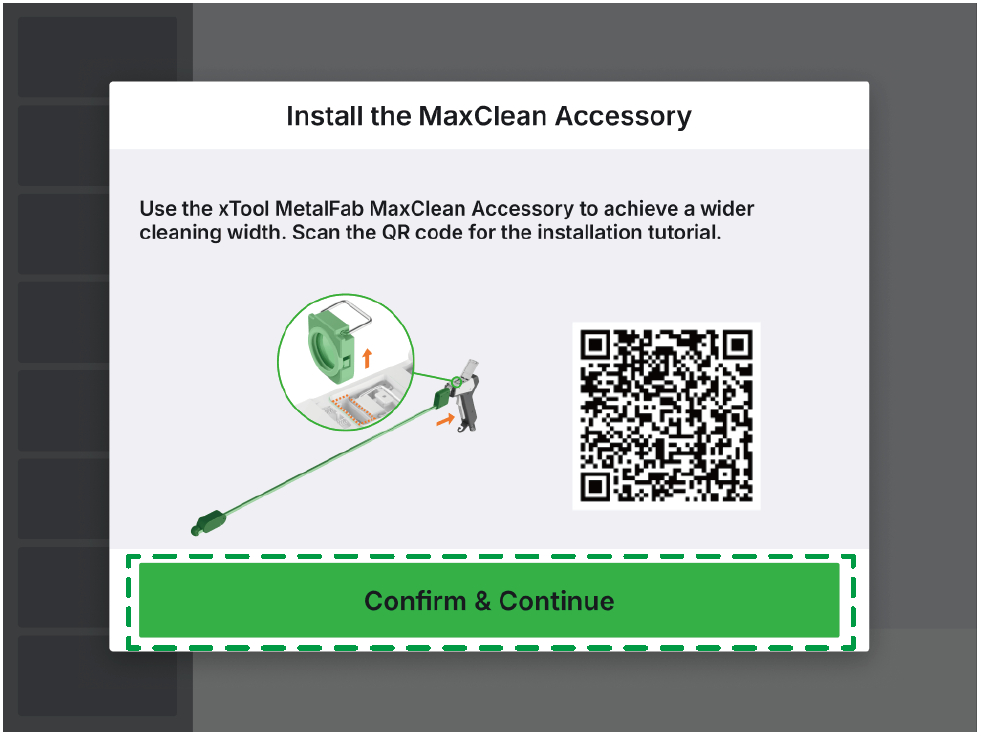
(2) Ensure that xTool MetalFab MaxClean Accessory has been properly installed. Then, tap Confirm & Continue.
(3) Set the cleaning type and cleaning width. Then, tap Enable lasering.
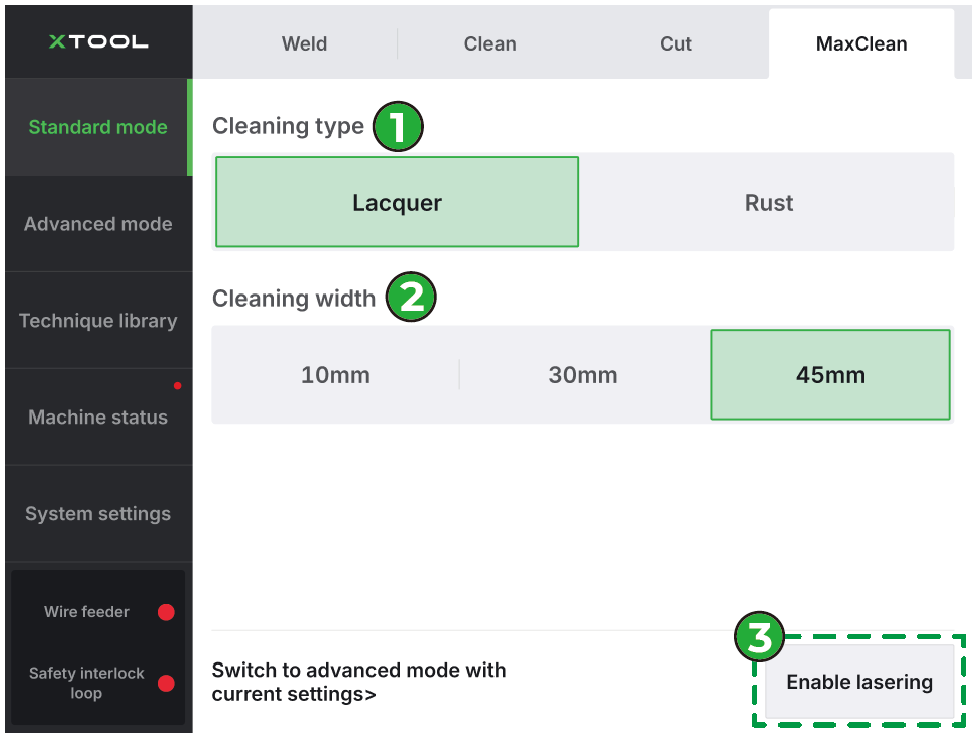
Note: The cleaning width indicated above is for reference only. The actual width depends on the angle between the extension tube and the metal surface.
Start processing
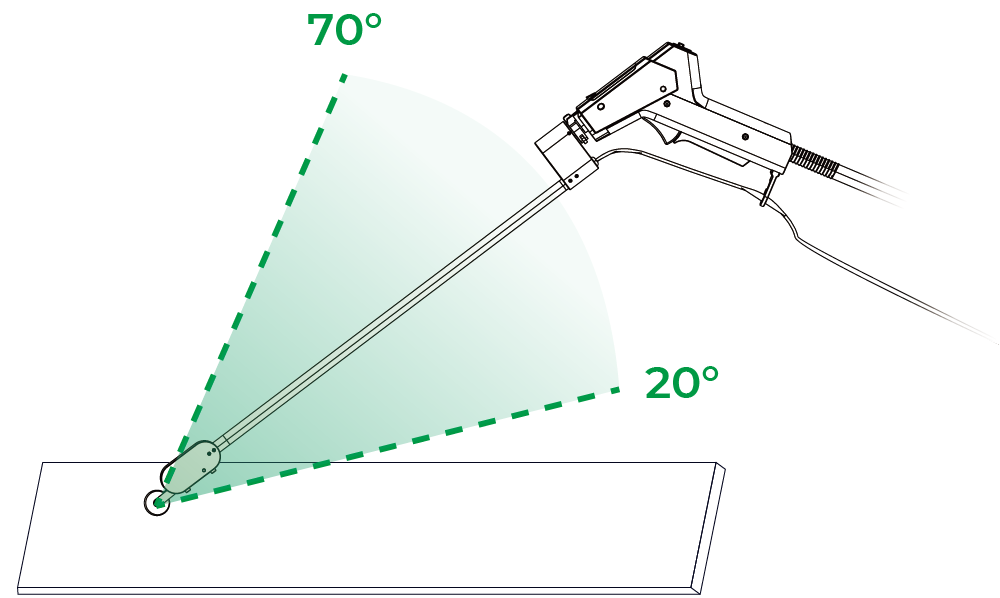
(1) Hold the welding head steady with the roller on the metal surface, keeping the angle between the extension tube and the metal surface 20° to 70°.
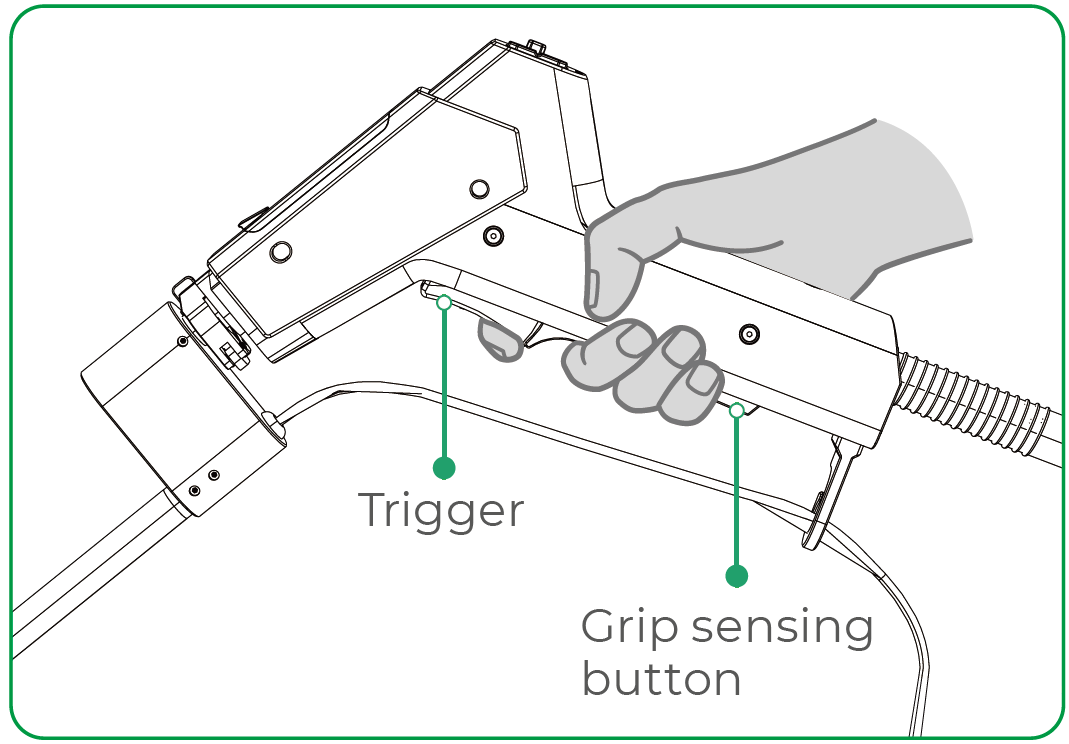
(2) Press and hold both the grip sensing button and trigger. At this point, the welding head starts to release the shielding gas and is ready to emit laser.
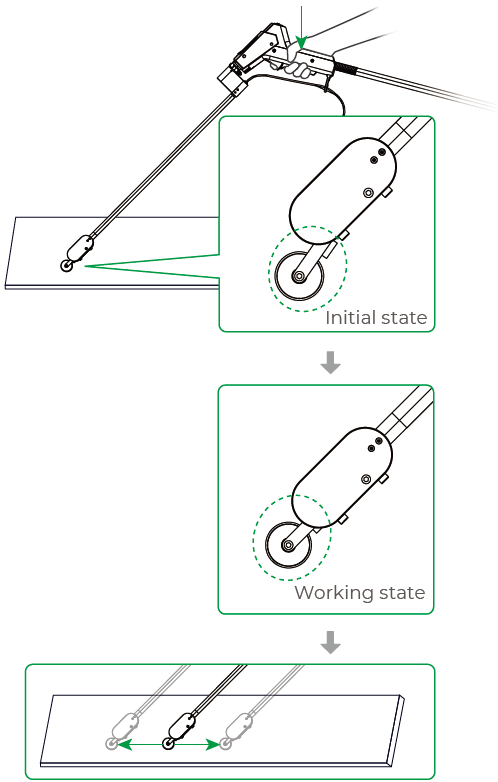
(3) Press the welding head to lift the roller and close the safety interlock loop, after which laser will be emitted. Move the welding head back and forth to clean the metal.
Caution:
■ Ensure that the roller is in the working state, so that the safety interlock loop can be closed and the welding head can emit laser.
■ Avoid prolonged laser cleaning of thin metals (≤ 1 mm thickness) to prevent distortion.
■ In the laser propagation path,
- Do not stand in or reach into the path, which may cause injury;
- Keep flammable objects away to prevent fire hazards;
- Do not place obstructions, which may affect the cleaning process.
■ In the laser reflection zone, do not stand, observe the cleaning process, or reach into it.
■ After the cleaning, the metal surfaces and parts of the xTool MetalFab MaxClean Accessory (such as the roller) will remain hot for some time. Do not touch the hot areas without protection.
■ After the cleaning, turn off Enable lasering on the touchscreen to prevent accidental laser emission.
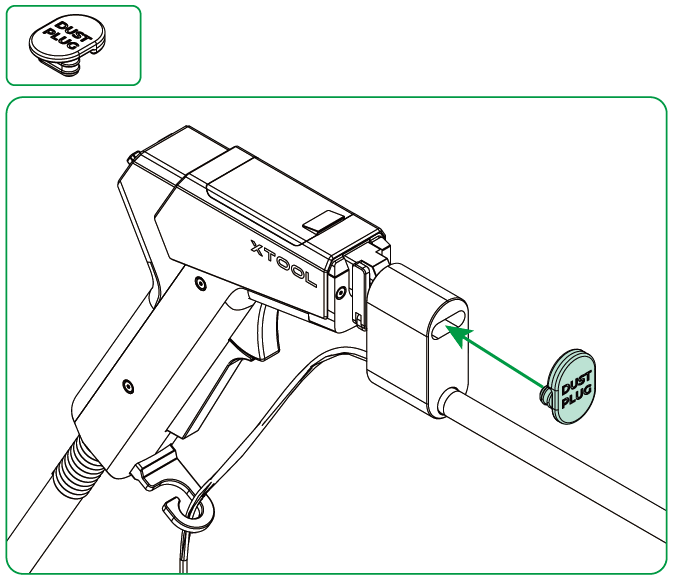
(4) After the cleaning, install the dust plug promptly to prevent dust from contaminating the cleaning lens.
Note:
Before cleaning, always remove the dust plug to prevent device damage.
For more instructions on how to unbox and use xTool MetalFab MaxClean Accessory with the laser welder, visit this page.
Restore the welding head after cleaning
■ This chapter gives brief guides on key restoration steps. For more details, refer to the preceding similar steps.
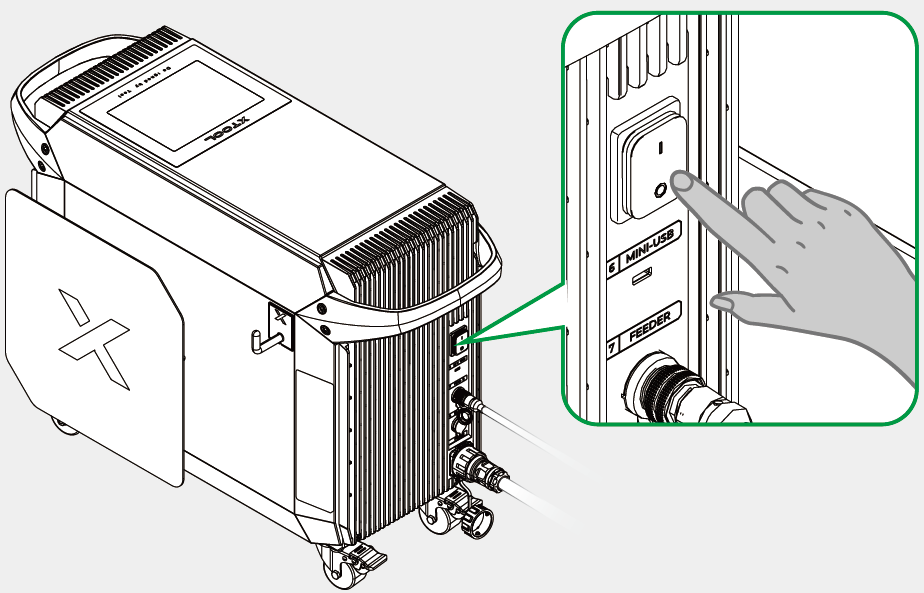
■ Before restoring the welding head, power off xTool MetalFab Laser Welder.
Remove xTool MetalFab MaxClean Accessory
Replace the lens
Install the required nozzle