Issue description
Laser welding produces weld beads of black, yellow, or rainbow-like colors. (A normal weld bead should be of the same color as the workpiece or be silver-white or metallic gray.)
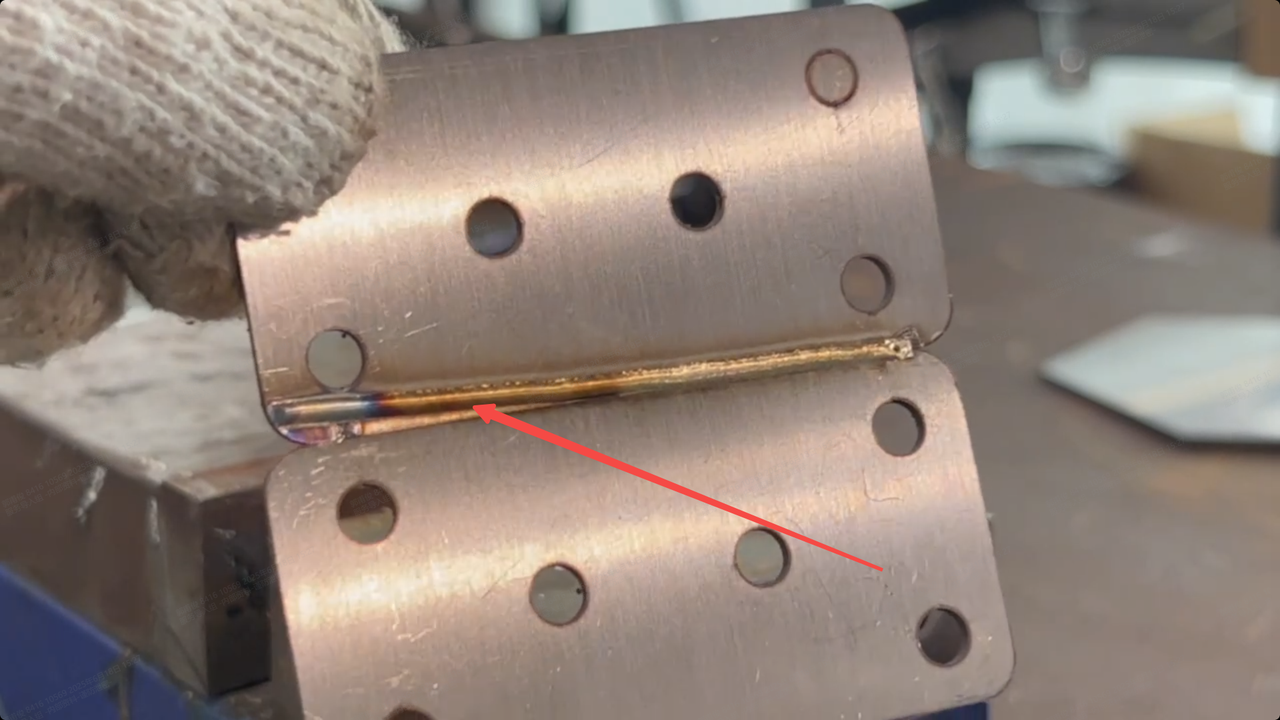 Yellow weld bead | 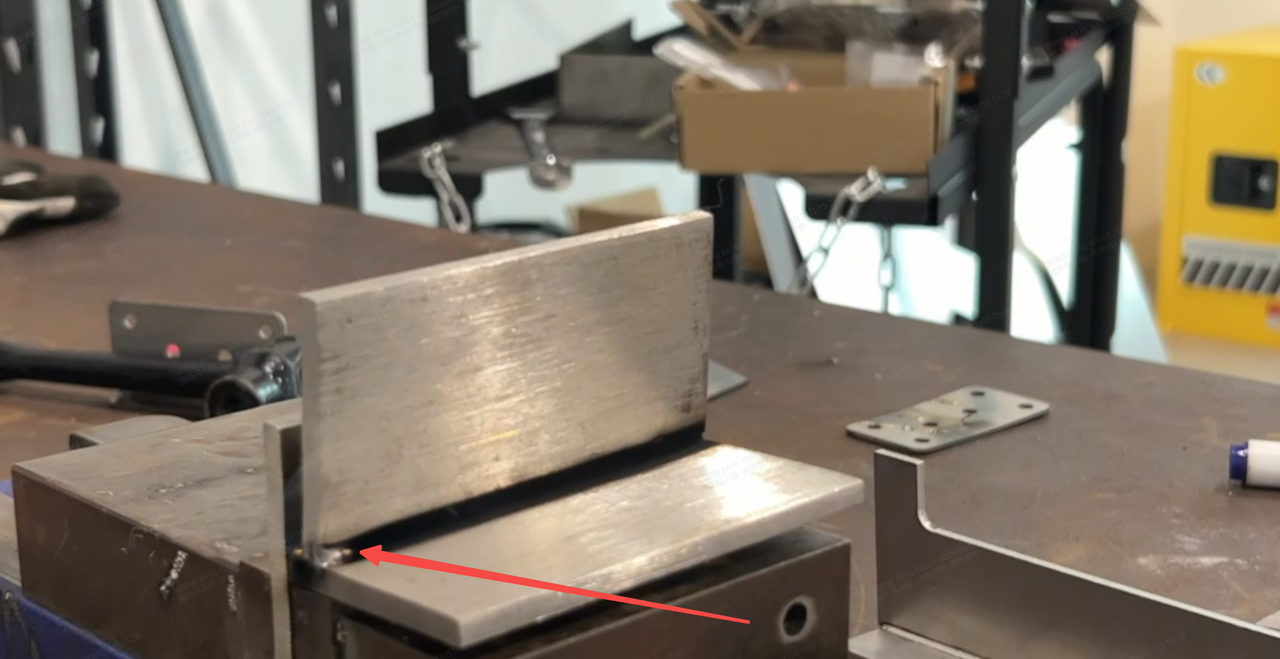 Black weld bead |  Normal weld bead |
Possible causes
- Contaminated workpiece or inferior welding wire: Workpiece contamination or welding wire impurity can decompose under high temperatures, releasing gases or forming oxides. This can pollute the weld bead, resulting in black, yellow, or rainbow discoloration.
- Inappropriate type or flow of shielding gas: Without a proper shielding gas supply, the metal may react with oxygen or nitrogen in the air at a high temperature, forming oxide or nitride layers that cause discoloration.
- Improper welding parameters: The welding parameters are not properly set, for example, the wire feeding speed is too slow or the laser power is too high, causing the workpiece to receive excessive heat.
- Contaminated or damaged lens protector: The lens protector is dirty or burned, covered with grease, dust, spatter, or burn marks, which causes the laser beams to diffuse and scatter, resulting in uneven energy distribution on the welding parts.
Troubleshooting procedure
Please follow these steps in order.
STEP 1: Check the workpiece and the welding wire
(1) Clean the workpiece
Before welding, clean the workpiece surface using alcohol or acetone to remove grease, rust, and oxide layers, and leave it dry.
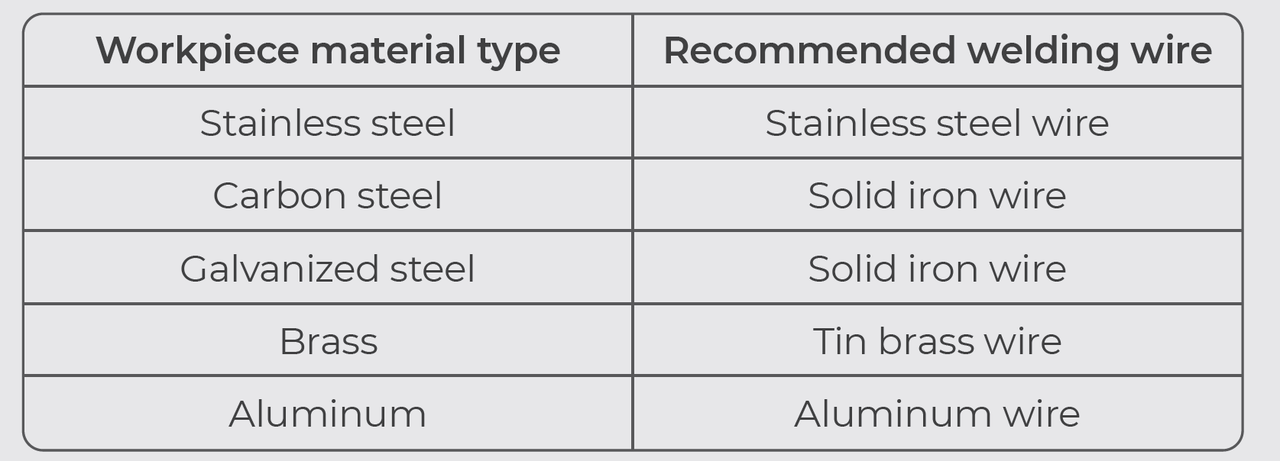
(2) Use quality welding wire
Use welding wire that meets quality standards and ensure that the wire type matches the material of the workpiece.
Refer to the following table to select welding wire.
Note: If the problem persists, go to the next step.
STEP 2: Check the shielding gas supply
(1) Check the gas type.
Laser welding requires the use of nitrogen or argon with a purity of over 99.99% as the shielding gas.
(2) Check the gas flow rate.
For laser welding, it is recommended to set the gas flow rate to 15 L/min – 30 L/min.
If the gas flow rate is set as recommended, but the welding result is still unsatisfactory, you can increase the gas flow rate a bit and try again.
Note: If the problem persists, go to the next step.
STEP 3: Adjust welding parameters
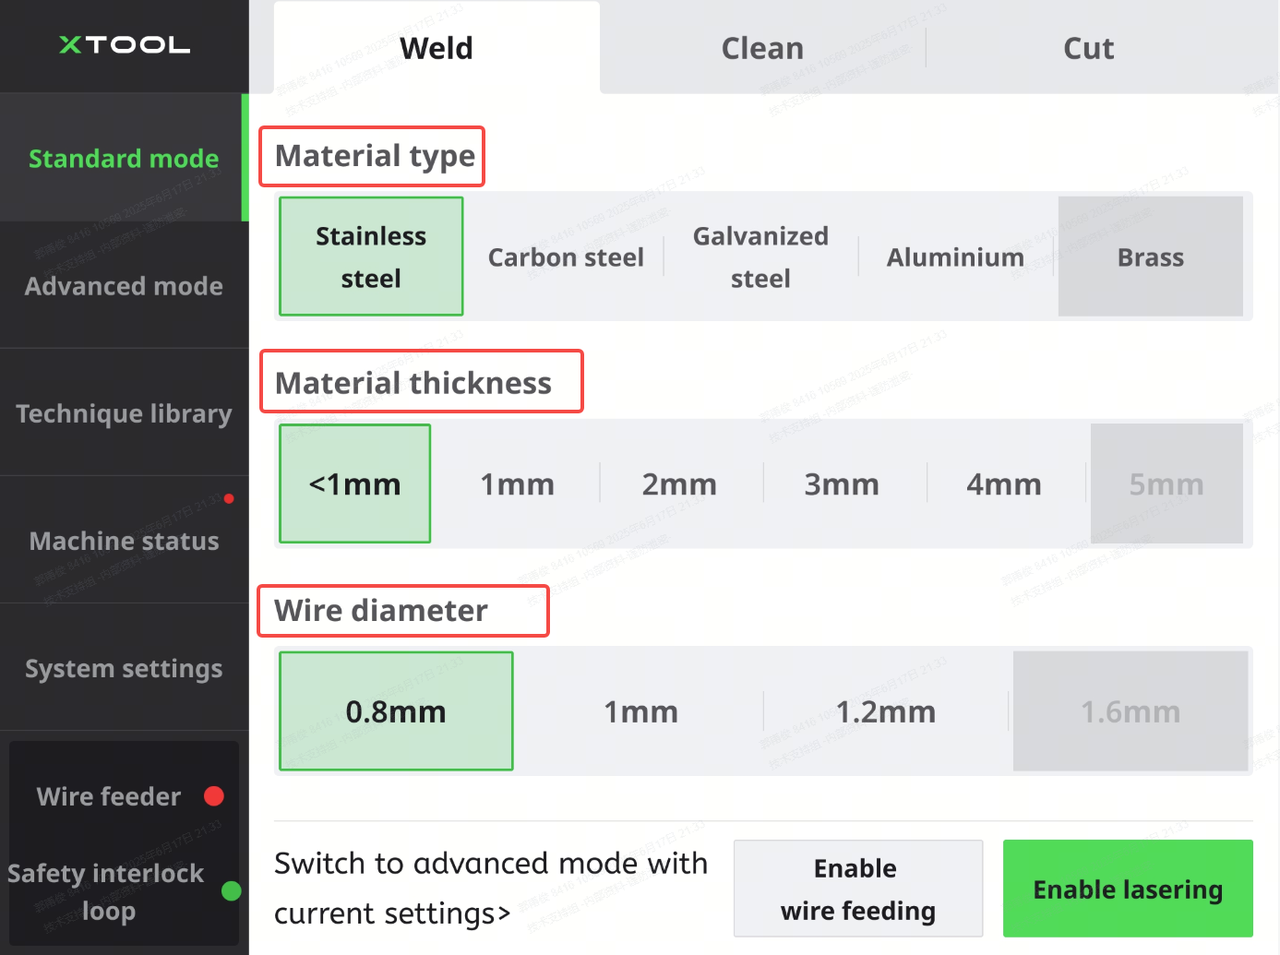
(1) Try Standard mode and use the default settings first.
On the touchscreen, select Standard mode > Weld. Select the material type, material thickness, and wire diameter according to the actual situation.
Then, start laser welding. The machine will automatically use the default settings based on your selection.
Note: If the problem persists, go to the next step.
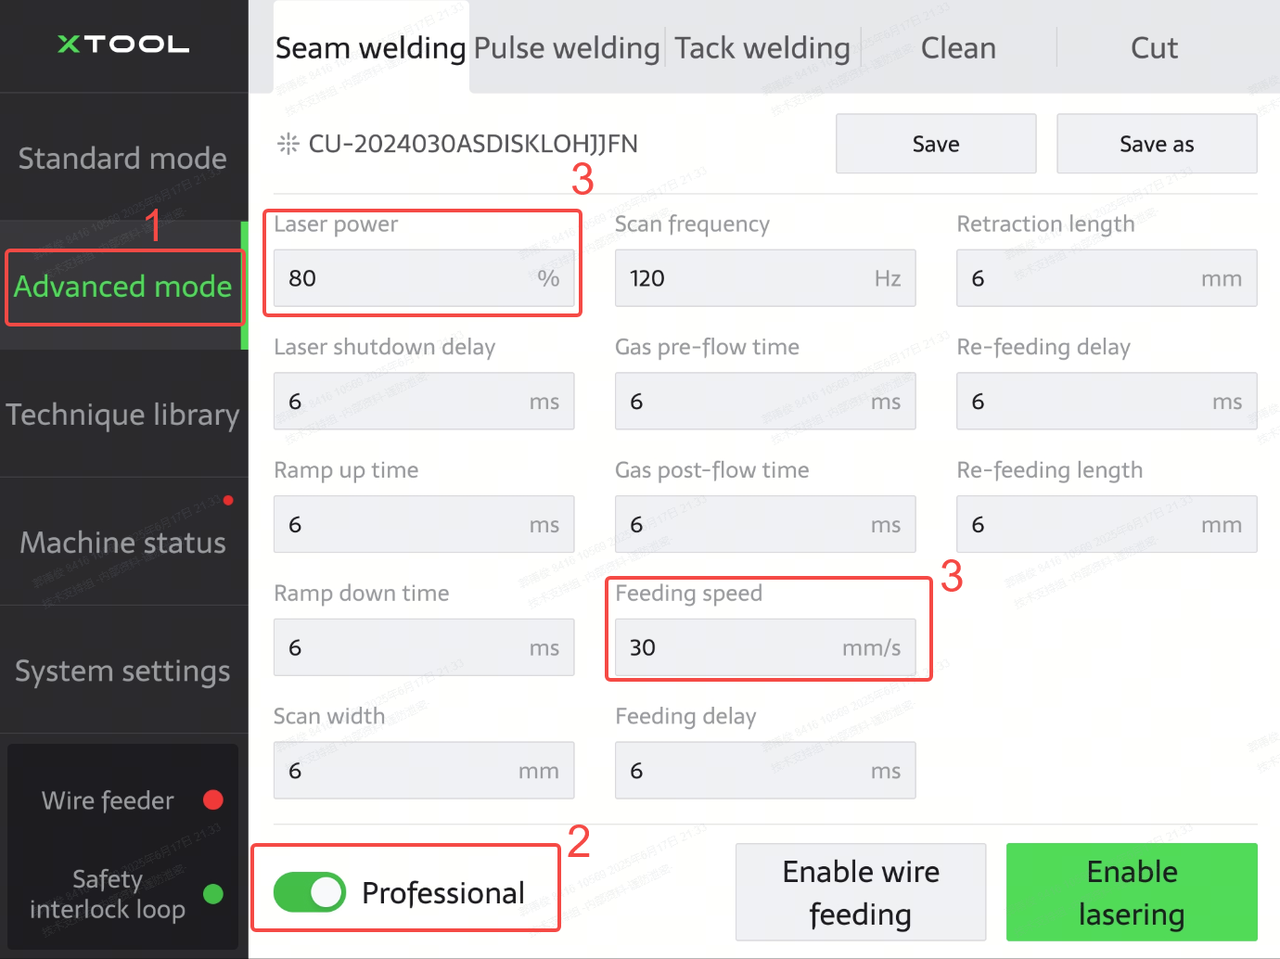
(2) Go to Advanced mode and adjust welding parameters.
On the touchscreen, tap Advanced mode, and turn on Professional. Then, decrease Laser power and increase Feeding speed.
Note: If the problem persists, go to the next step.
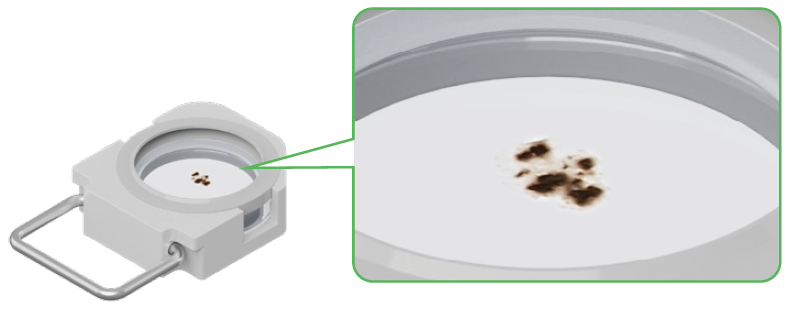
STEP 4: Check the lens protector
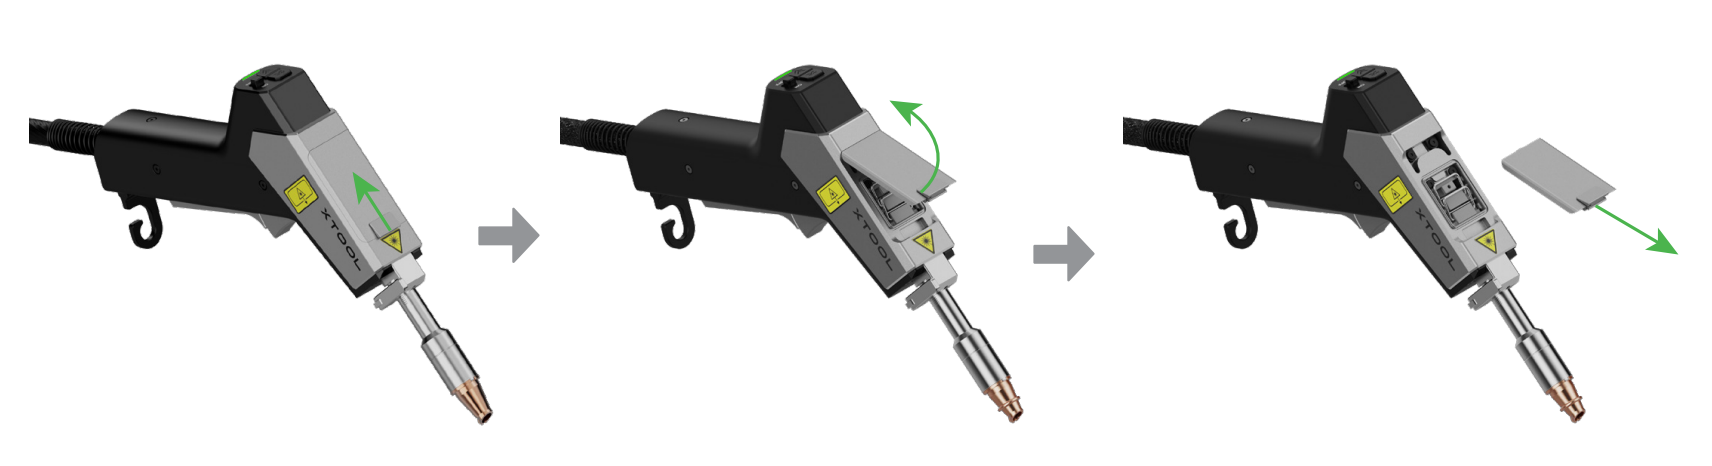
1. Turn off the machine and move it to a relatively dust-free environment.
2. Wear lint-free gloves. Then, remove the cover and take out the lens protector closest to the nozzle.
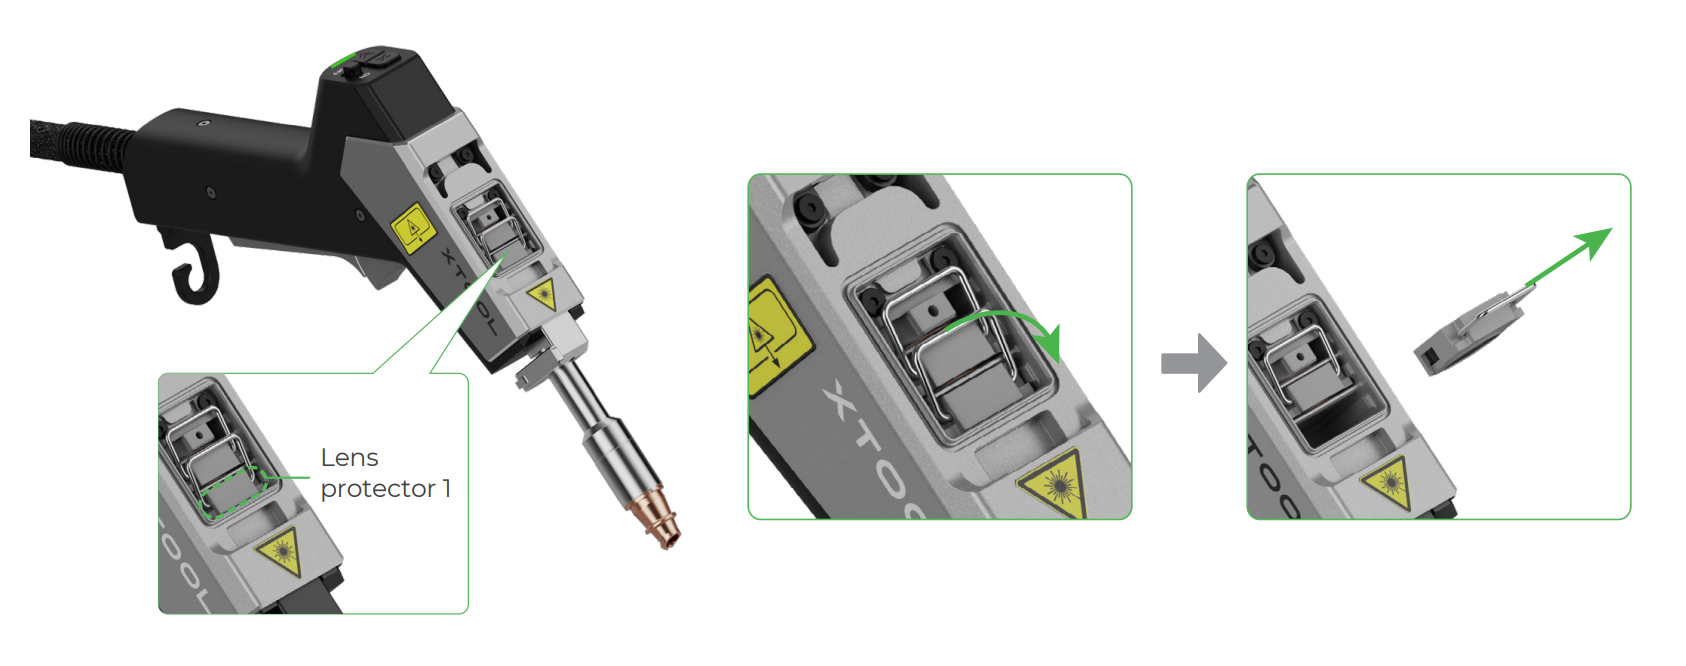
3. Check the lens protector.
■ If the lens protector is slightly dirty, use a cotton swab dipped with alcohol to clean it. Then, install it back to the welding head.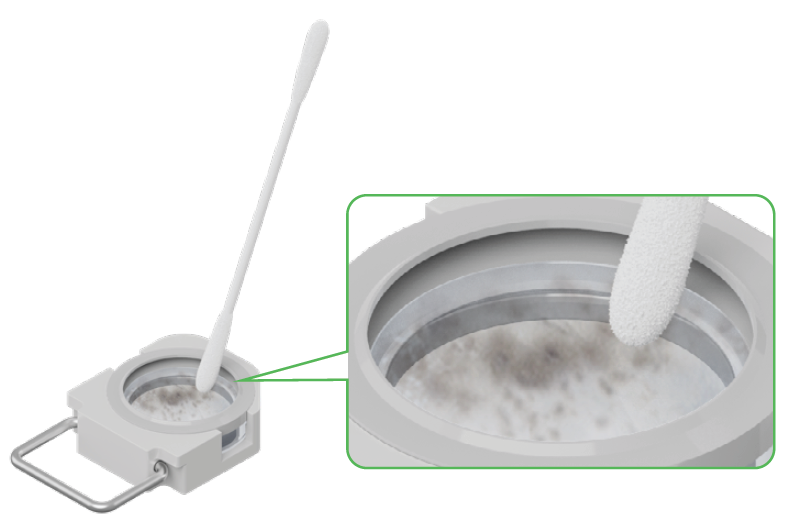
■ If the lens protector is burned or heavily dirty and uncleanable, replace it with a new one.
For the replacement guide, please refer to Clean or Replace the Lens Protector for xTool MetalFab Laser Welder.
Still experiencing issues?
Should the issue persist after completing the preceding steps, submit a ticket via the "Submit a Ticket" button in the "Help Ticket" section below. The standard response time for xTool Customer Service is one business day.
For a prompt resolution, please include the following details:
- Issue description: A detailed explanation of the observed problem.
- Video evidence: Attach a video demonstrating the issue, where applicable.
- Troubleshooting performed: Any troubleshooting steps you have already attempted, along with their results.
This information is crucial for xTool technical support engineers to provide timely assistance.
Documentation feedback
Help improve this content by providing feedback. If this content did not meet your requirements, select "No" in the "Was this page helpful?" section below. Include specific details about what was unclear or missing in the pop-up suggestion box. Feedback submissions are reviewed by xTool technical writers to enhance future documentation.
Services & Help
Learn & Education

Copyright © 2025 xTool All Rights Reserved.