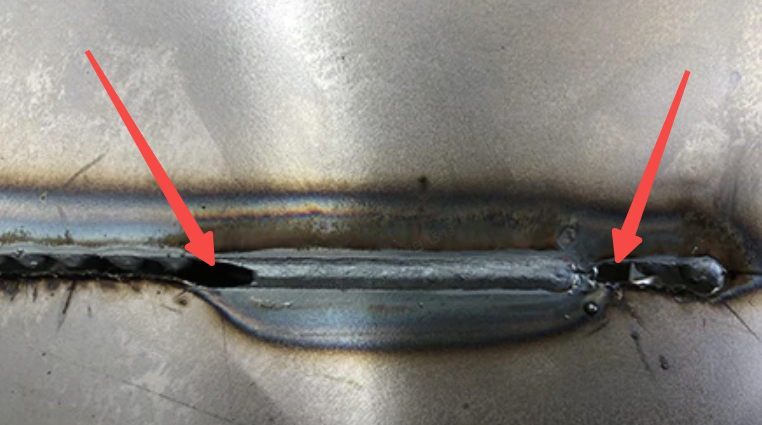
Issue description
In wire-filled laser welding, the base material is burned through, resulting in penetration holes, weld seam deformation, and an enlarged heat-affected zone. Burn-through is especially common when welding thin materials.
Possible causes
- Mismatch between wire diameter and workpiece thickness: The wire diameter is larger than the thickness of the workpiece, leading to an oversized molten pool, an enlarged heat-affected zone, and subsequent deformation or perforation of the workpiece.
- Incorrect focus position: The welding head fails to focus the laser beams on the desired welding position. For example, the focal point falls in the inner or opposite side of the base material, thus burning through the material.
- Improper welding parameters: The welding parameters are not properly set, for example, the wire feeding speed is too slow or the laser power is too high, causing the workpiece to receive excessive heat.
Troubleshooting procedure
Please follow these steps in order.
STEP 1: Check if the welding wire matches the workpiece
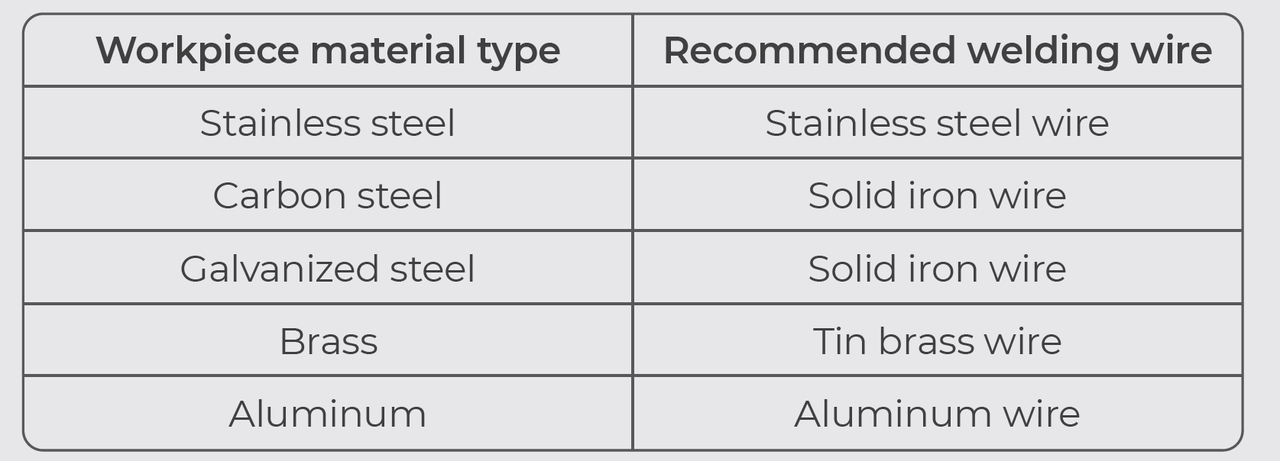
(1) Refer to the following table and check if the welding wire matches the workpiece material type. If not, replace the welding wire. For replacement instructions, refer to Replace the Welding Wire for xTool MetalFab Laser Welder.
(2) Check if the welding wire diameter is larger than the thickness of the workpiece. If it is larger, replace the welding wire. For replacement instructions, refer to Replace the Welding Wire for xTool MetalFab Laser Welder.
Note: If the problem persists, go to the next step.
STEP 2: Check the laser focus
Refer to the following tutorial to check and calibrate the laser focus for the welding head:
Note: If the problem persists, go to the next step.
STEP 3: Adjust welding parameters
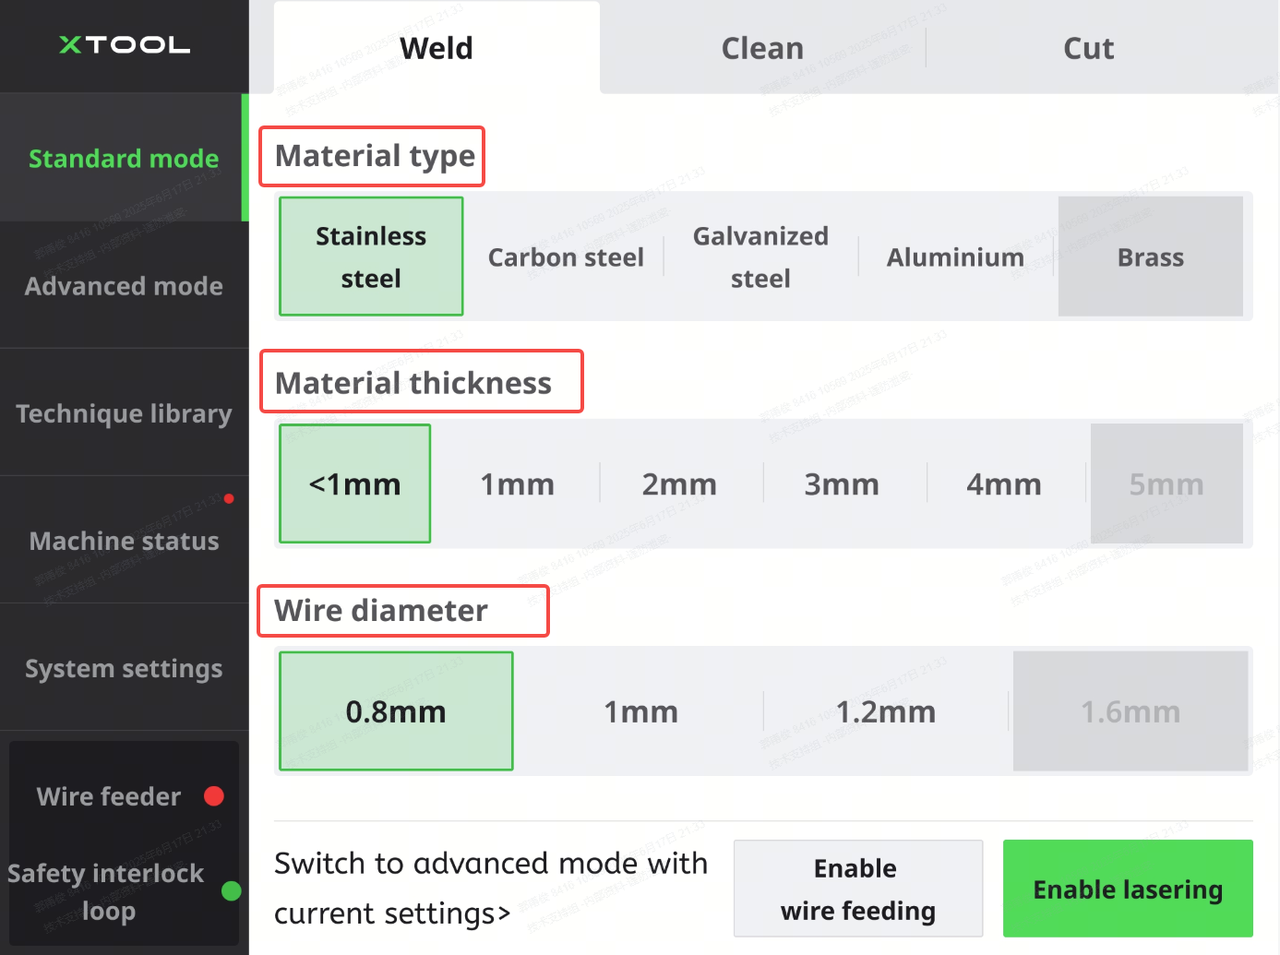
(1) Try Standard mode and use the default settings first.
On the touchscreen, select Standard mode > Weld. Select the material type, material thickness, and wire diameter according to the actual situation.
Then, start laser welding. The machine will automatically use the default settings based on your selection.
Note: If the problem persists, go to the next step.
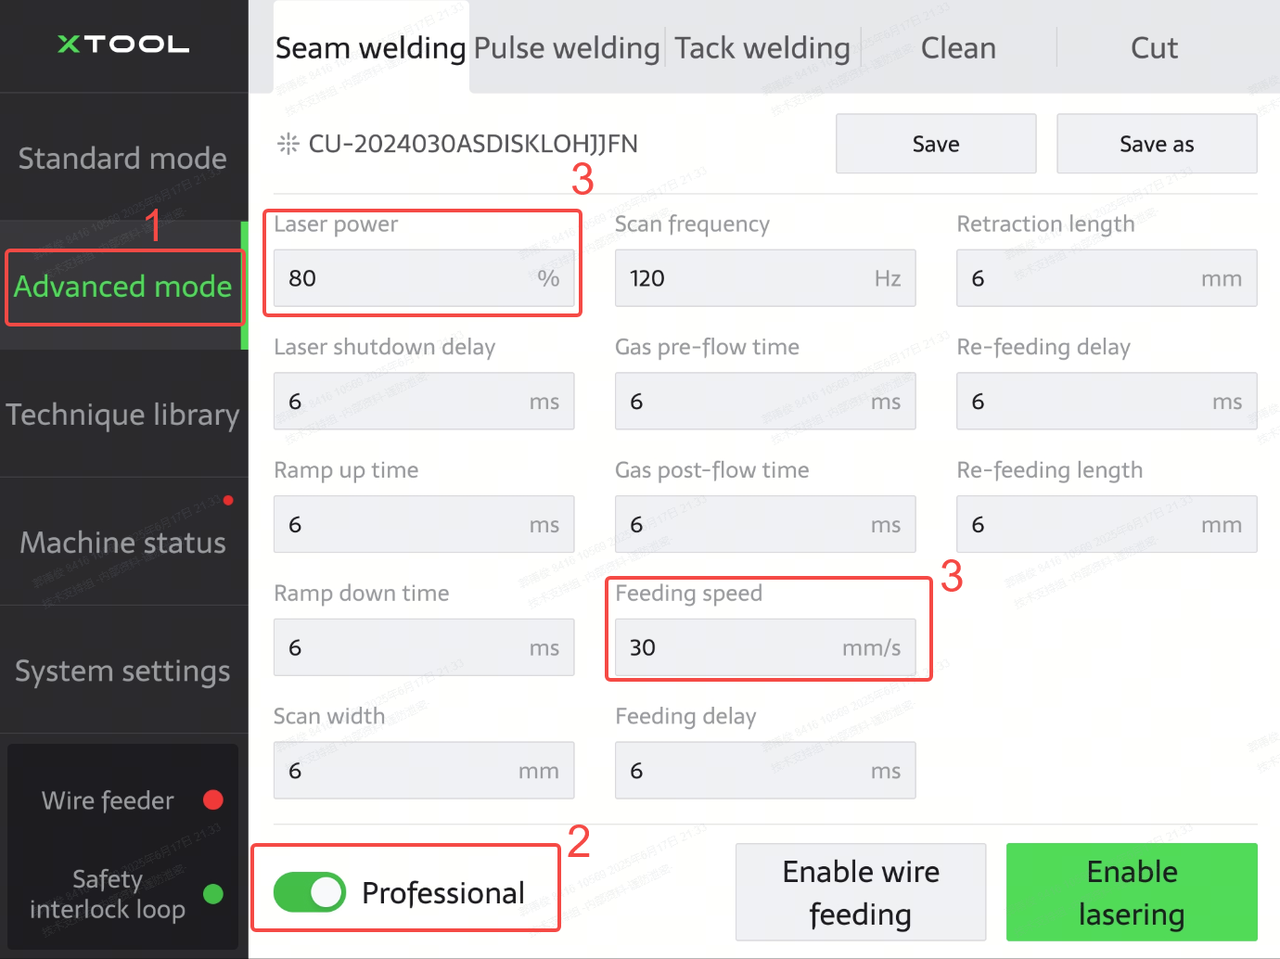
(2) Go to Advanced mode and adjust welding parameters.
On the touchscreen, tap Advanced mode, and turn on Professional. Then, decrease Laser power and increase Feeding speed.
Still experiencing issues?
Should the issue persist after completing the preceding steps, submit a ticket via the "Submit a Ticket" button in the "Help Ticket" section below. The standard response time for xTool Customer Service is one business day.
For a prompt resolution, please include the following details:
- Issue description: A detailed explanation of the observed problem.
- Video evidence: Attach a video demonstrating the issue, where applicable.
- Troubleshooting performed: Any troubleshooting steps you have already attempted, along with their results.
This information is crucial for xTool technical support engineers to provide timely assistance.
Documentation feedback
Help improve this content by providing feedback. If this content did not meet your requirements, select "No" in the "Was this page helpful?" section below. Include specific details about what was unclear or missing in the pop-up suggestion box. Feedback submissions are reviewed by xTool technical writers to enhance future documentation.
