For a faster troubleshooting experience, use the interactive troubleshooting guide.
If a more detailed explanation of each step is preferred, you may continue reading the article below.
Issue description
If the recommended parameter settings in xTool software fail to help you cut through metal materials with xTool MetalFab CNC Cutter, please follow this troubleshooting guide or the tutorial video to resolve this issue.
Tutorial Video
Possible Causes
- Improper lens: Using the cleaning lens during cutting of high-reflective materials causes reflection across most of the material’s surface. This results in insufficient energy reaching the material, leading to incomplete cutting.
- Contaminated lens protector or inaccurate optical paths: The lens protector is contaminated or the optical path is wrong, resulting in power degradation.
- Improper material: The material is too thick or it's not supported by the machine.
- Incorrect settings: The cutting power is too low or the cutting speed is too fast.
- Improper gas supply: The assist gas suffers low pressure or poor purity, reducing slag removal efficiency and weakening cutting performance.
- Unsecured material: The material was not secured using fixtures, causing vertical displacement due to machine vibration during processing. This resulted in suboptimal laser power absorption.
- Clogged nozzle: The nozzle is clogged by slag or dust, impairing gas flow and laser output.
- Incorrect focal position: The focus or the defocus setting is wrong, leading to reduced energy concentration on the material surface and non-cutting-through of the material.
- Improper nozzle usage, pattern design, or software settings
Detailed procedure
Step 1: Check if the cleaning lens is mistakenly installed
There're two types of lens for the welding head: cleaning lens and lens protector.
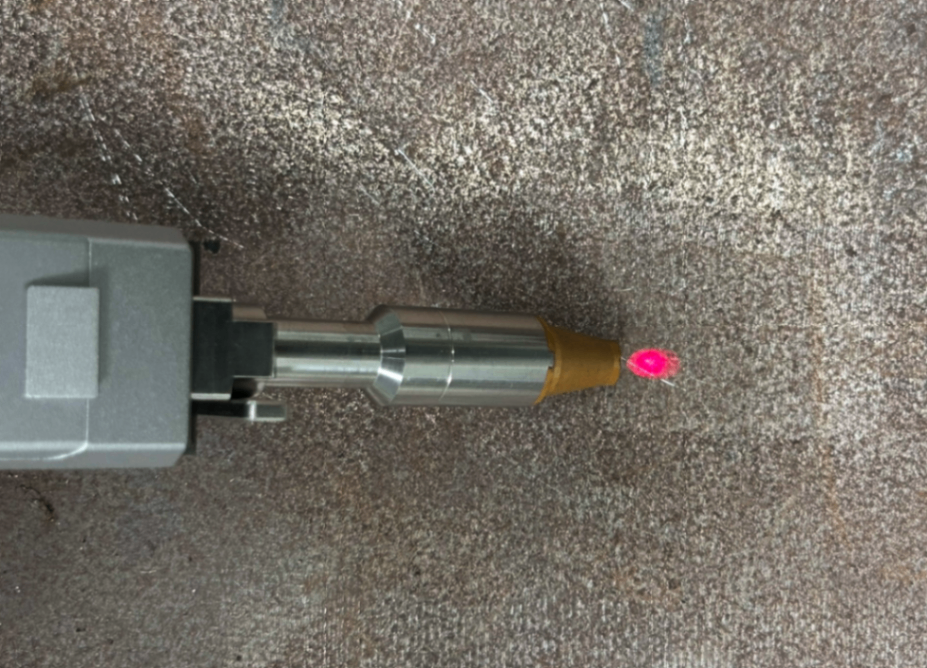
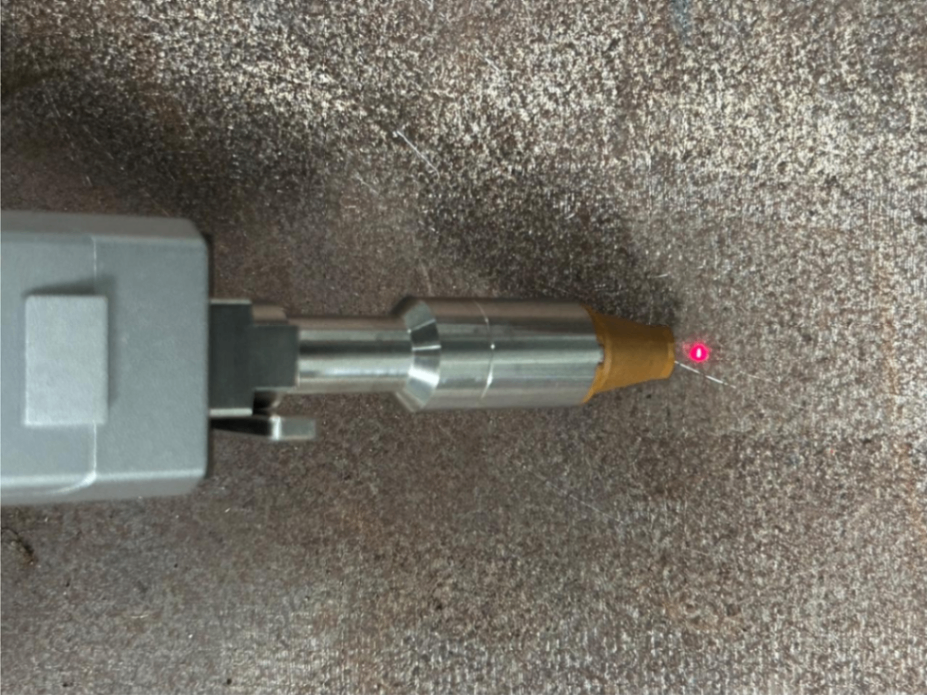
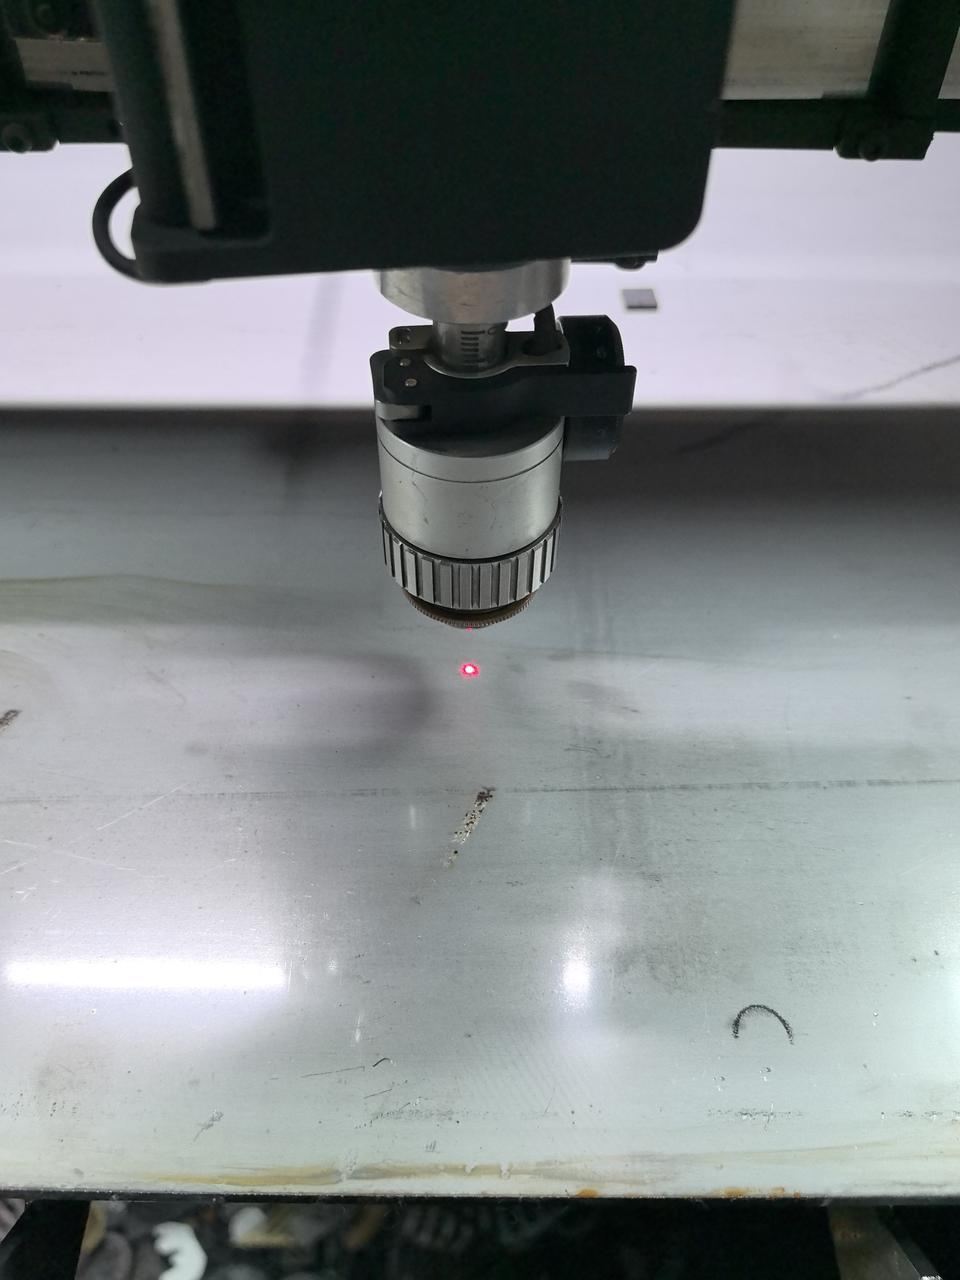
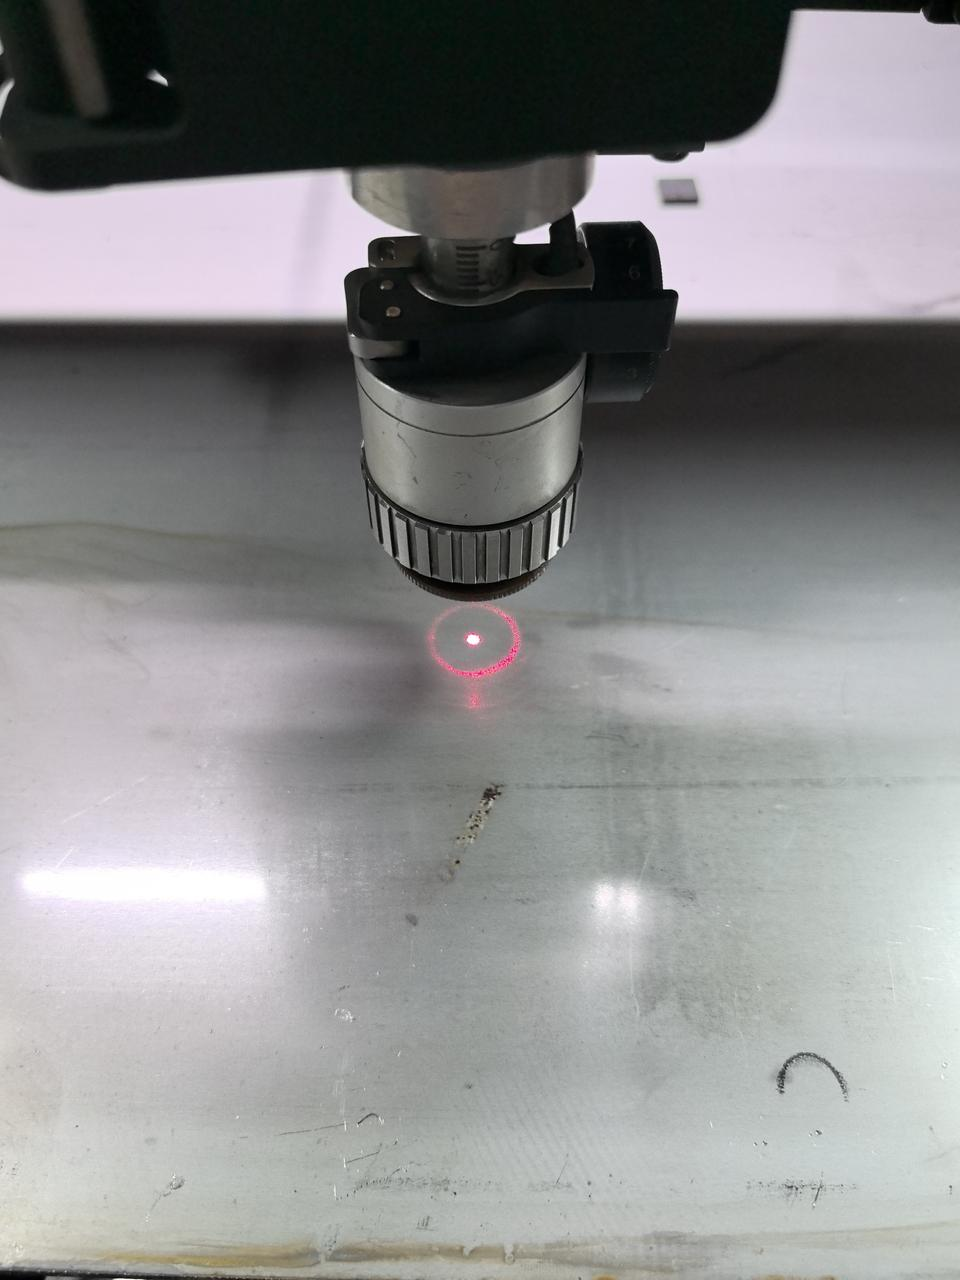
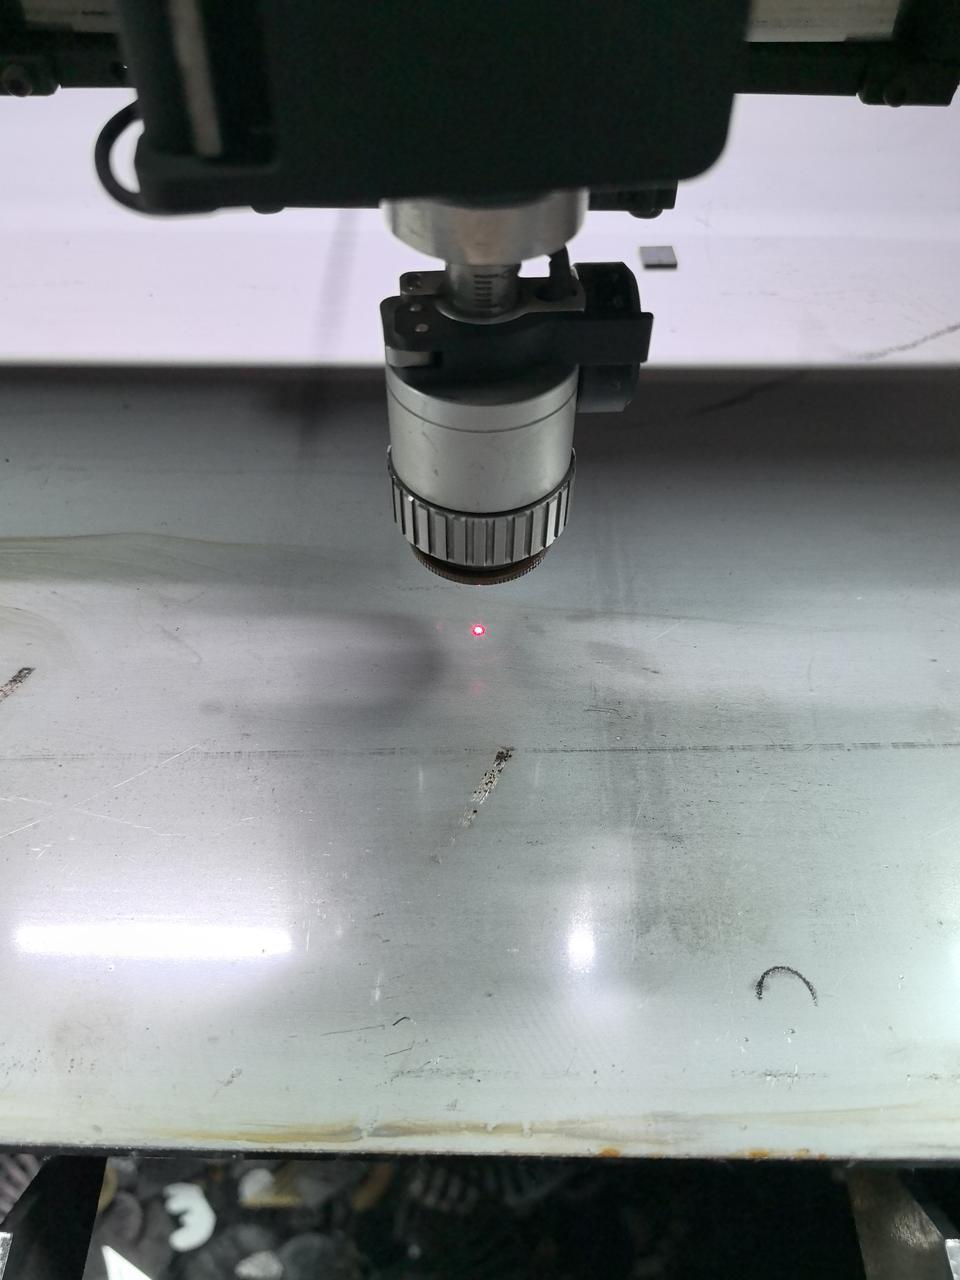
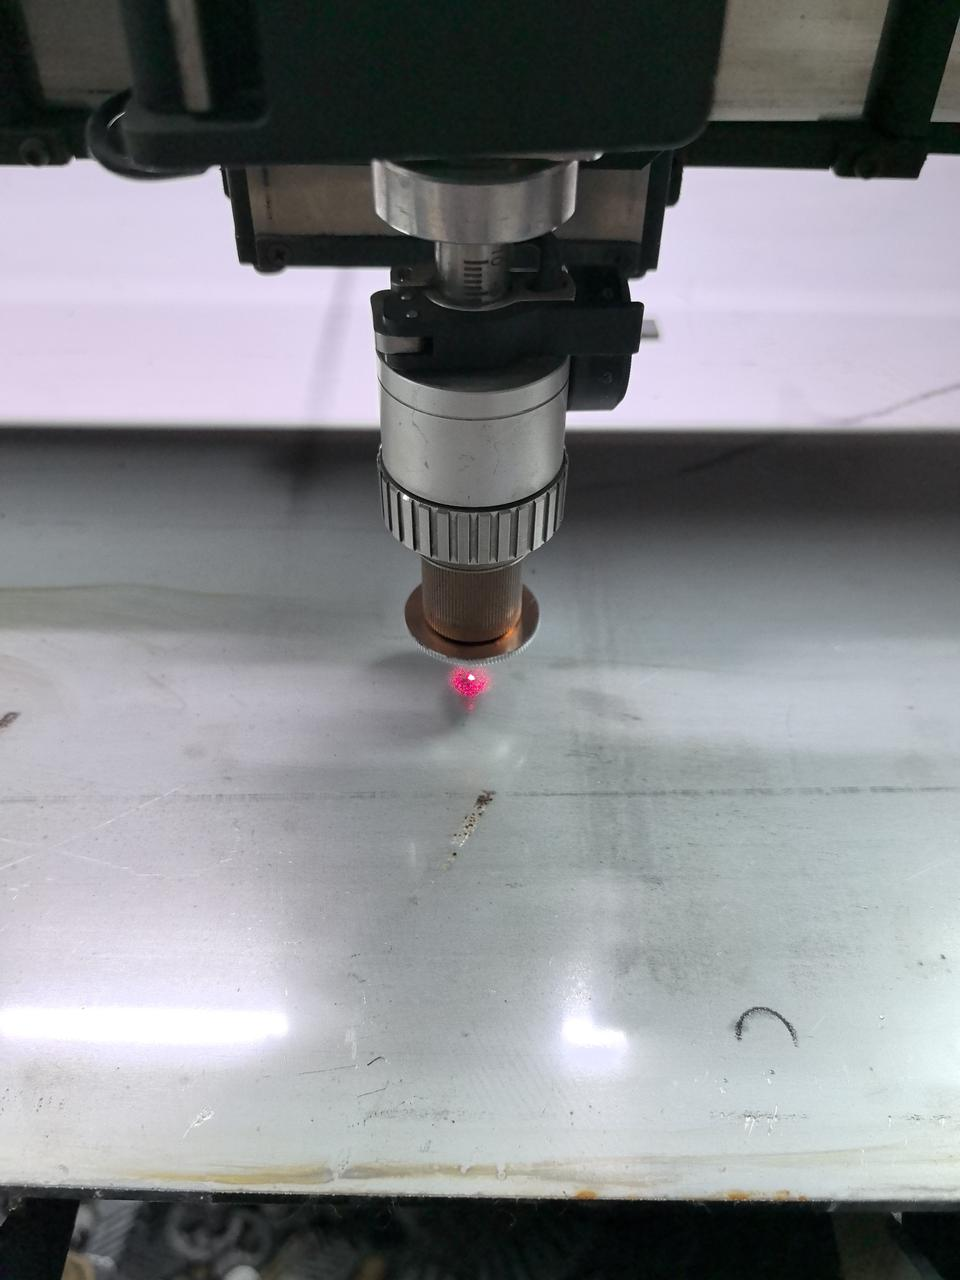
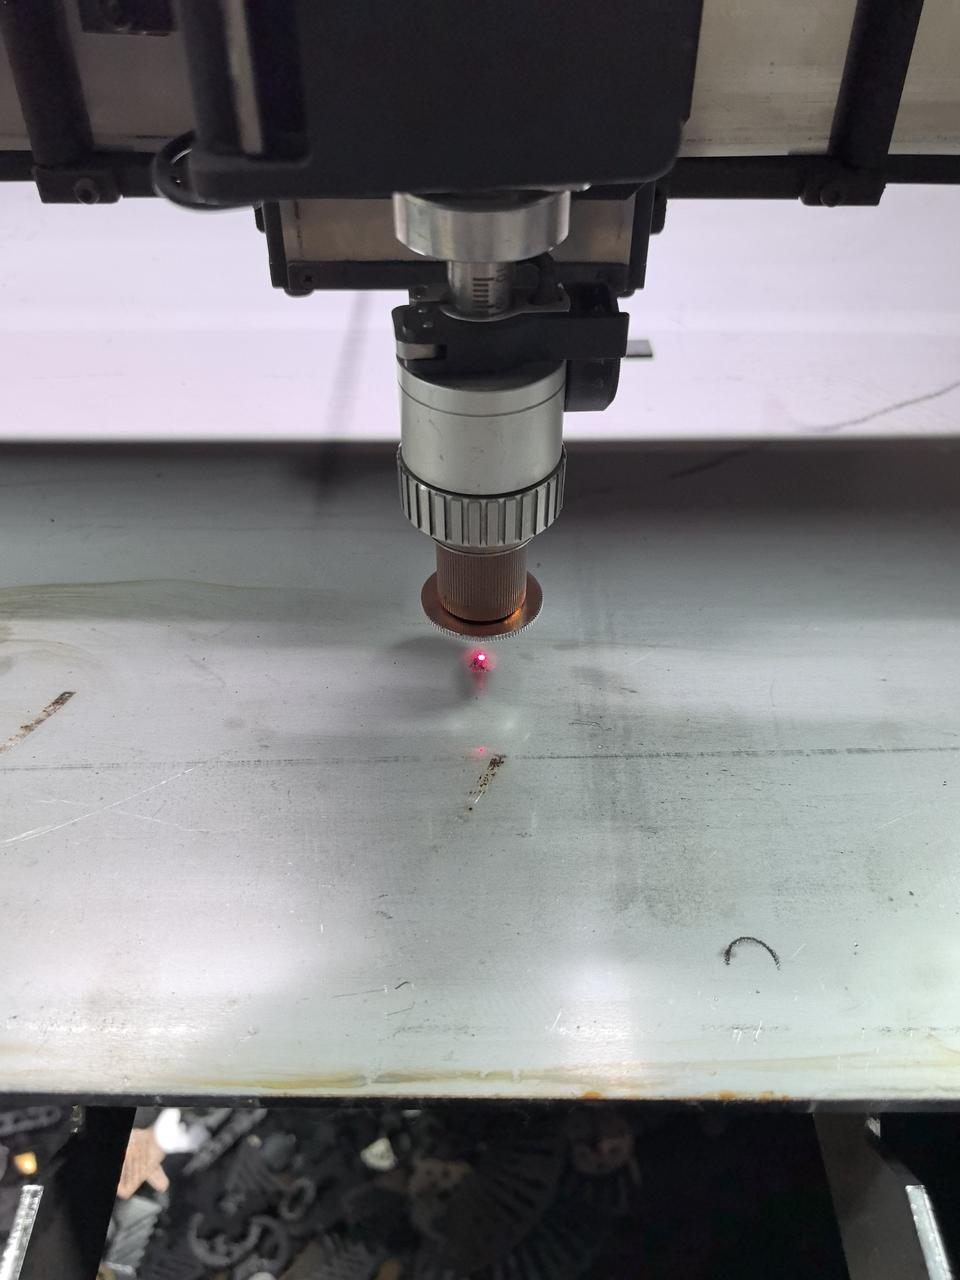
If the red spot emitted from the welding head is comparatively large and blurry, you may need to confirm whether the cleaning lens is installed. If yes, replace it with the lens protector.
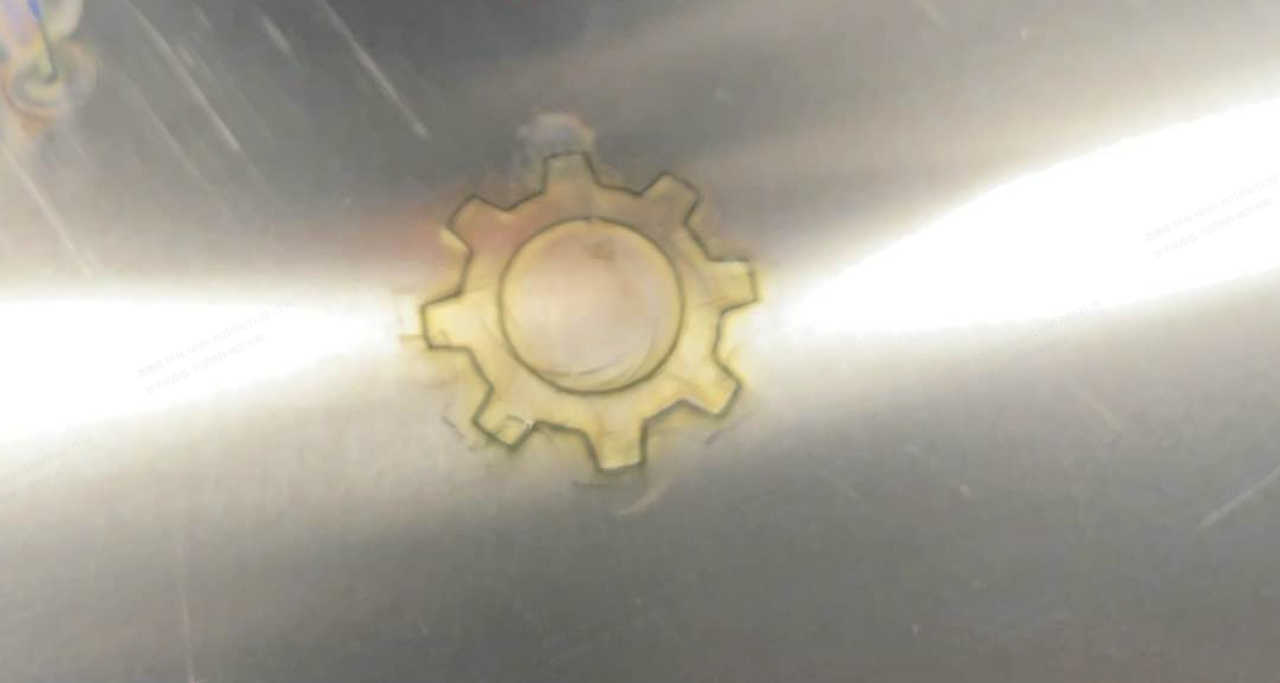
The following table shows the red spot status using different nozzles and lens.
Using cleaning lens | Using lens protector | |
|---|---|---|
Welding nozzle |
|
|
SaveGas™ nozzle |
|
|
2 mm ordinary nozzle |
|
|
1 mm double-layer nozzle + extension tube |
|
|
Note: When testing the red spot size with xTool MetalFab CNC Cutter, adjust the height of the welding head base along the z-axis based on the nozzle used.
- Height requirement for different nozzles:
- Down 40 mm: SaveGas™ nozzle, 2 mm ordinary nozzle
- Down 30 mm: 1 mm double-layer nozzle + extension tube
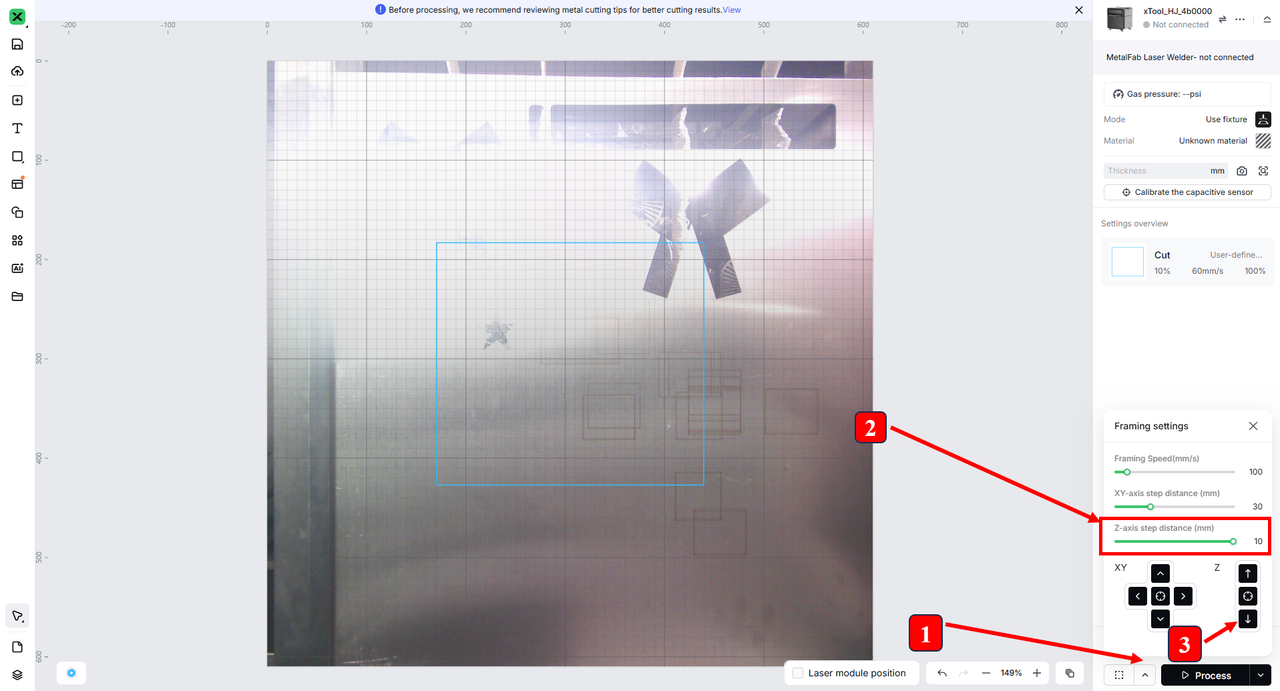
- Steps for adjusting the welding head base height:
- Click the Framing icon at the bottom right corner.
- Set Z-axis step distance (mm) to 10.
- Click the downward arrow beside the letter Z three times (down 30 mm) or four times (down 40 mm) as required.
Step 2: Check the lens protectors
- Check if the two lens protectors of the welding head are contaminated. If yes, follow the video tutorial below to clean it.
- If the lens protectors are normal but the issue persists, proceed to the next step.
Step 3: Check the material
- Check if the material type and thickness are within the machine's processing specifications.
Note: To ensure accurate results and obtain optimal parameters in xTool software, use calipers or other professional tools to confirm the material's exact thickness.
Material type | Maximum material thickness |
|---|---|
|
|
- If the material meets the requirements, slightly increase laser power or reduce cutting speed based on the recommended baseline in xTool software. Then, try to process the material again.
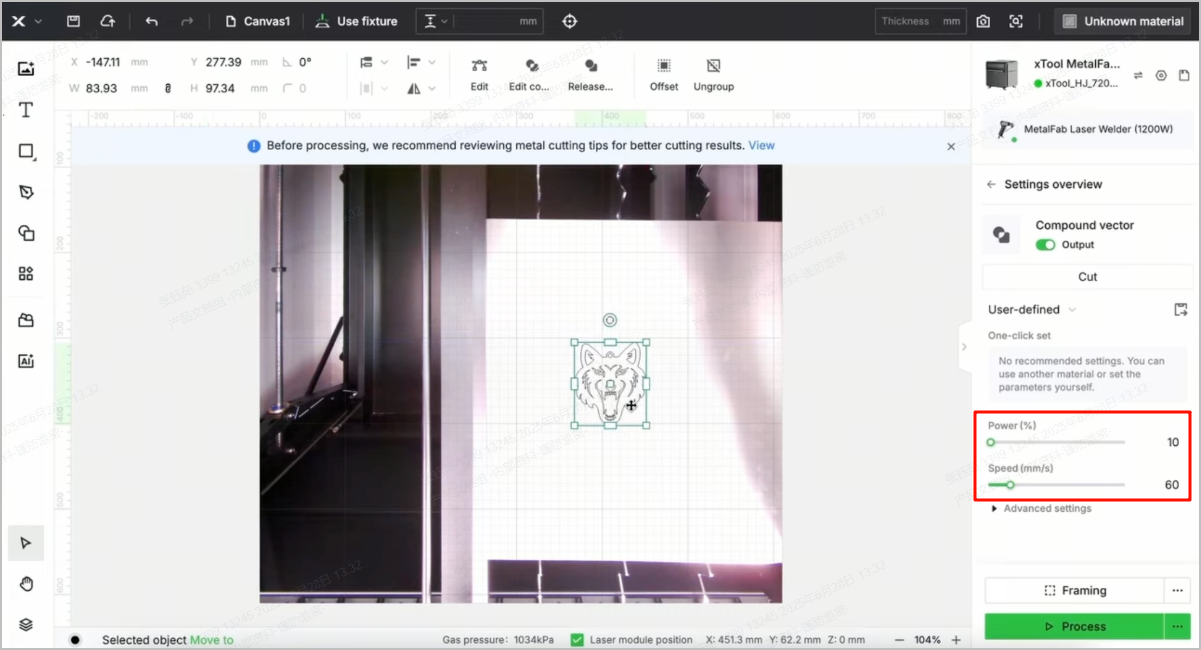
Note: To minimize material waste during setting calibration, you're advised to perform test cuts using 10 x 10 mm square before full-scale cutting
- If this does not resolve the issue, proceed to the next step.
Step 4: Check the shielding gas
- Check if the type, purity, and pressure of the shielding gas for your MetalFab CNC Cutter meets the requirements as shown in the following table.
Processing Type | Material Type | Recommended Gas | Recommended Pressure | Recommended Nozzle |
CNC Cutting | Stainless Steel Aluminum Brass Carbon Steel Galvanized Sheet (0.2mm-1mm) | 99.99% Nitrogen or 99.99% Argon or Compressed Air | Over 87 PSI (0.6 MPa) | Ordinary cutting nozzle (included in CNC cutter package) |
Stainless Steel (2mm-5mm) Aluminum (2mm-4mm) Brass (2mm-3mm) | 99.99% Nitrogen or 99.99% Argon or Compressed Air | Over 174 PSI (1.2 MPa) | Ordinary cutting nozzle (included in CNC cutter package) | |
Over 87 PSI (0.6 MPa) | SaveGas™ Nozzle (included in CNC cutter package) | |||
Titanium Alloy TC4 (1mm) | 99.99% Argon | Over 174 PSI (1.2 MPa) | Ordinary cutting nozzle (included in CNC cutter package) | |
Titanium Alloy TC4 (2mm-5mm) | SaveGas™ Nozzle (included in CNC cutter package) | |||
Carbon Steel (2mm-10mm) Galvanized Sheet (2mm-10mm) |
99.99% Oxygen | 8.7 PSI-10.2 PSI (0.06 MPa-0.07 MPa) | Double-layer Nozzle & focus extension tube (add-on) |
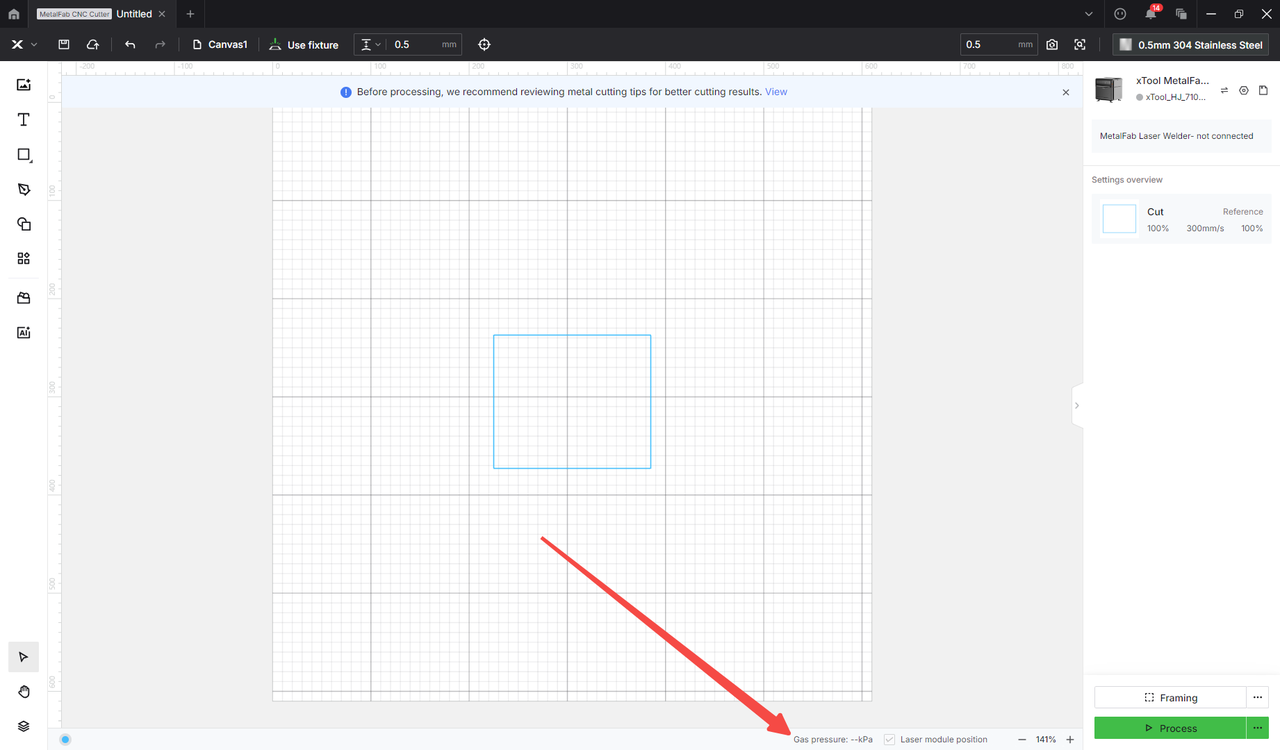
To check the gas pressure, connect the machine to xTool software and pay attention to the value shown in the lower right corner.
- If the shielding gas meets the requirements but the issue persists, proceed to the next step.
Step 5: Check if the material is secured
- Before processing, ensure that the material is secured by the left and right fixtures in the target processing area.
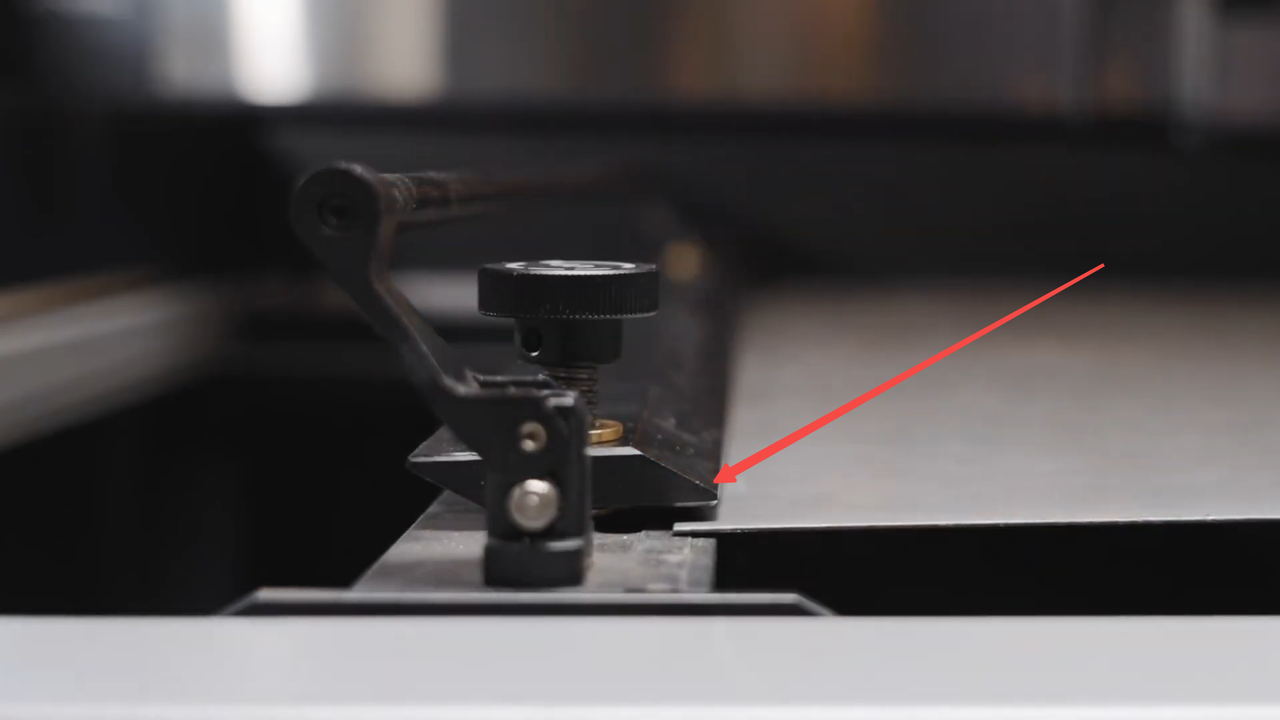
Left fixture
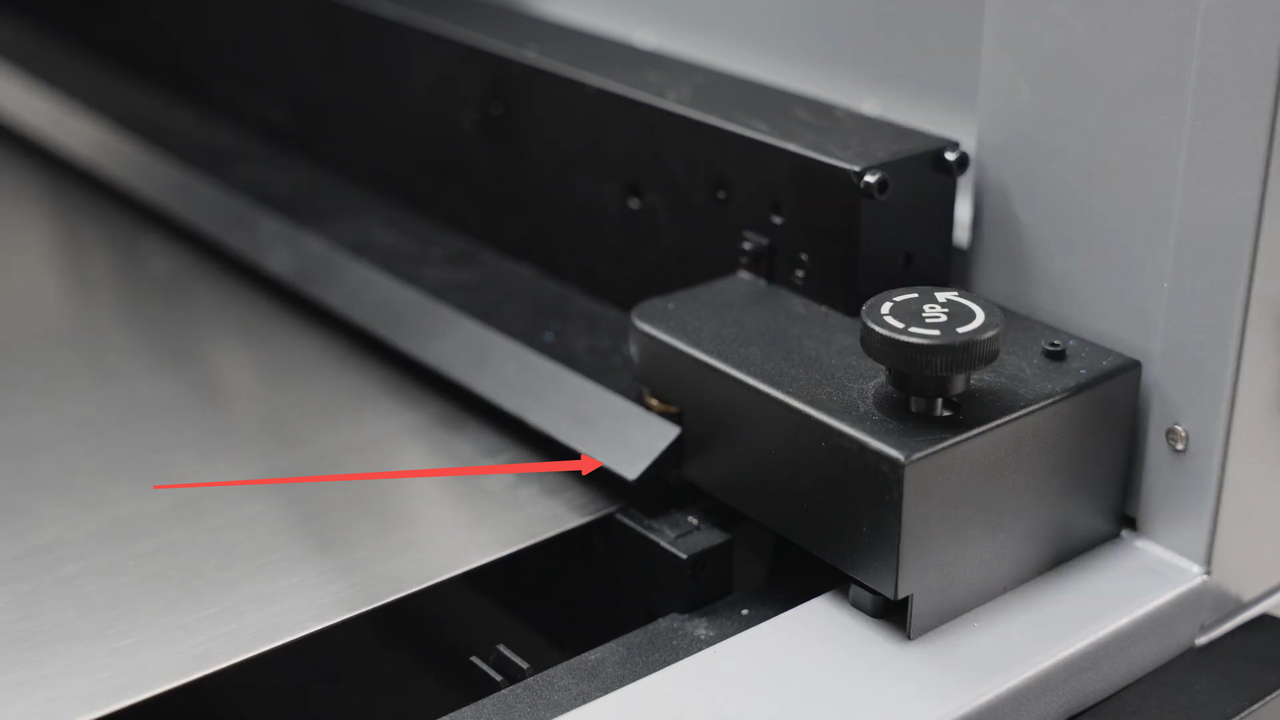
Right fixture
You may follow this tutorial to secure your material.
- If the issue persists after you secure the material, proceed to the next step.
Step 6: Check the cutting nozzle
- Power off the machine.
- Remove the cutting nozzle.
Note: Wear thermal gloves if the machine has just undergone processing.
- Examine the nozzle and check for slag accumulation, oxide deposits, oil contamination, and dust particles.
- Dip a lint-free swab or cloth with anhydrous alcohol and wipe the internal and external surfaces of the nozzle unidirectionally.
- Replace the nozzle if its tip is obviously enlarged, deformed, or possessed with irremovable deposits.
- If this does not resolve the issue, proceed to the next step.
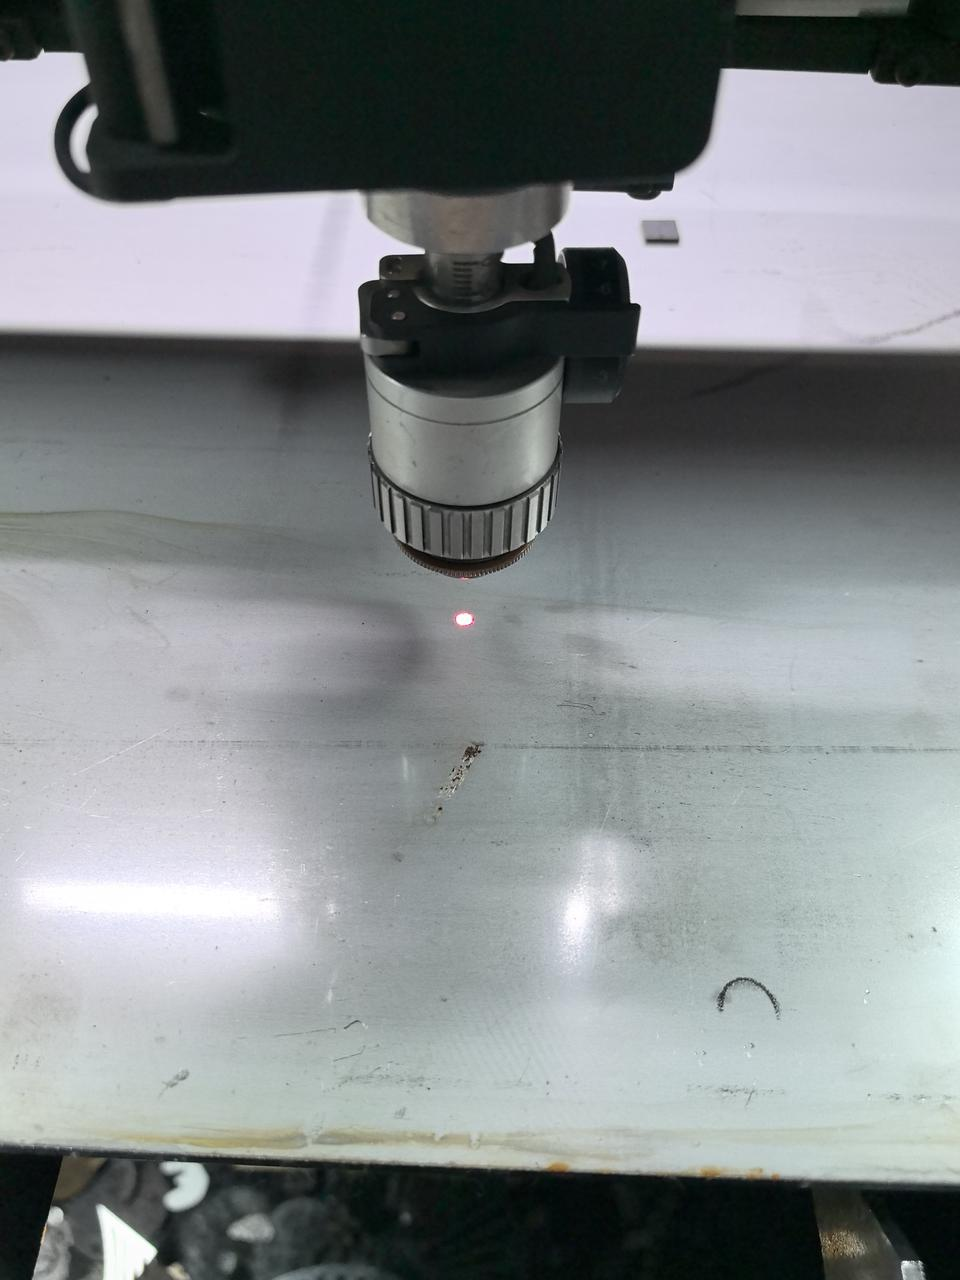
Step 7: Check the focus position
- Power on the machine and connect it to XCS.
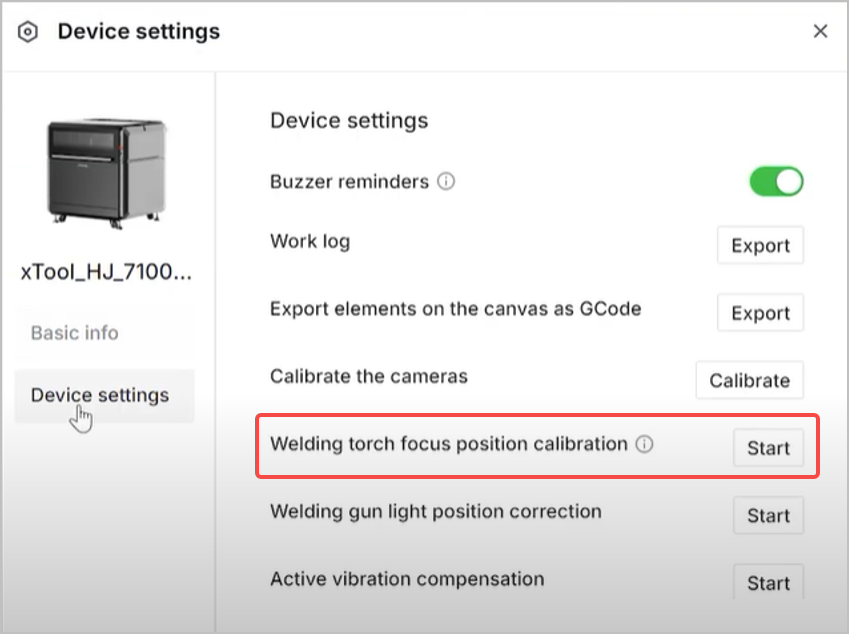
- Click the Device settings icon in the upper right corner.
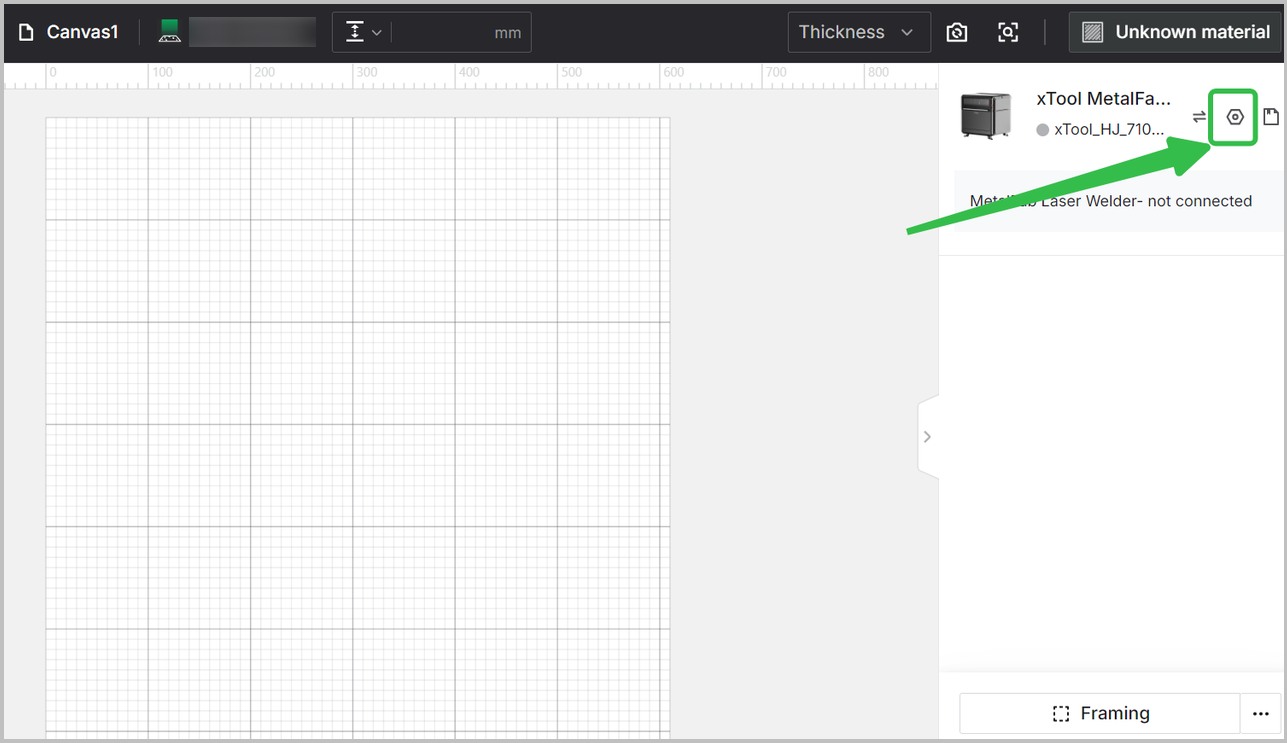
- Click Device settings in the left panel, and Start right to Welding torch focus position calibration.
You may follow the video tutorial below for optimal adjustment.
- Before clicking Start in the Preview page in xTool software, ensure that the defocus value on the cutting tip is the same as that indicated in xTool software.
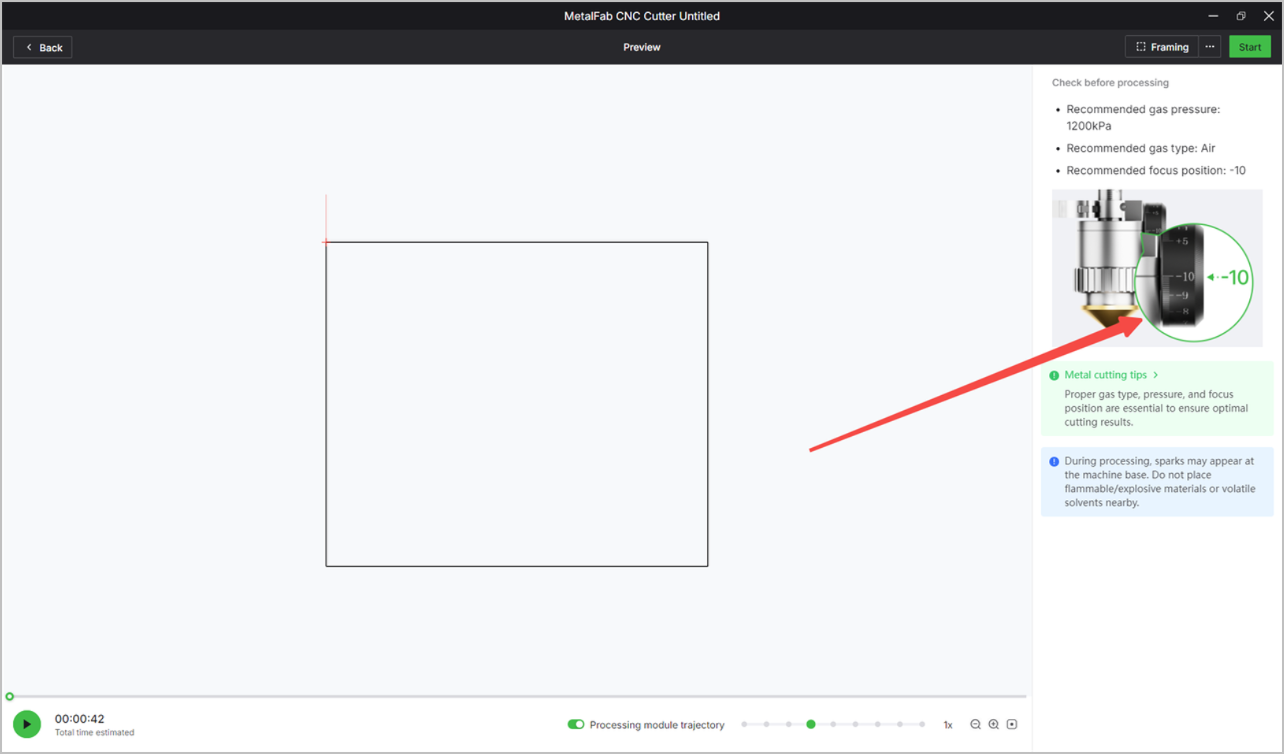
You may follow the video tutorial below to adjust the defocus setting.
- If this does not resolve the issue, proceed to the next step.
Step 8: Check the optical path
- Click the Device settings icon in the upper right corner.

- Click Device settings in the left panel, and Start right to Welding gun light position correction.
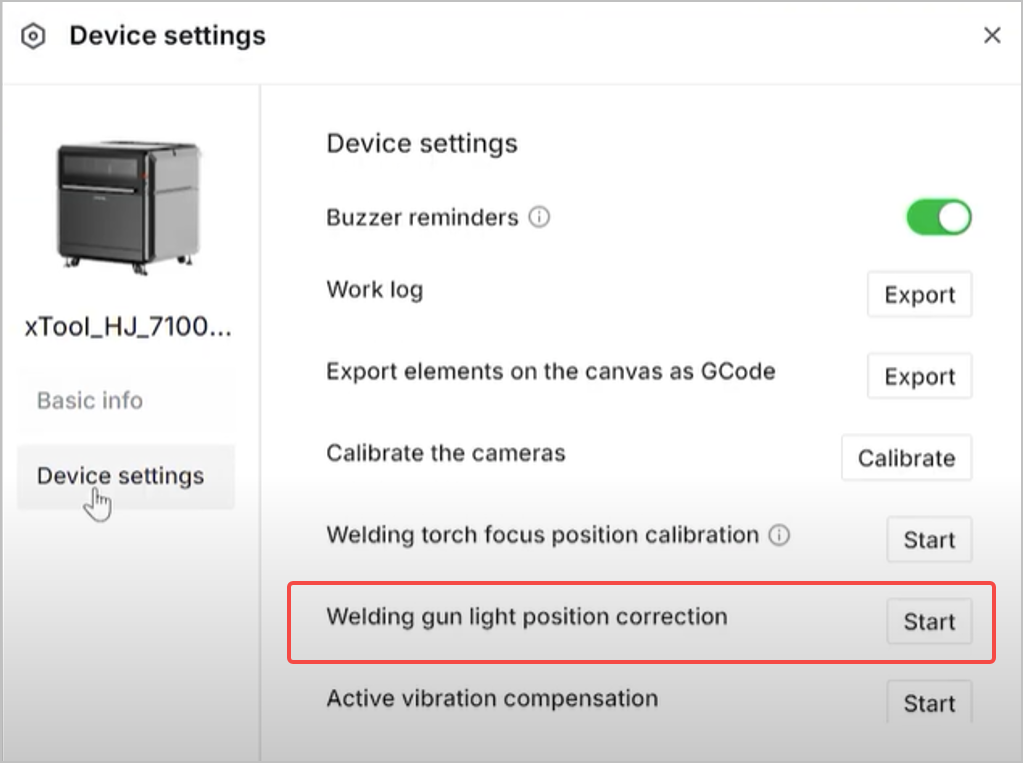
You may follow the video tutorial below to ensure that the red spot is well calibrated.
Step 9: Check the nozzle type, pattern placement, and settings in xTool software
- Check the patterns cut by your xTool MetalFab CNC Cutter and see if the nozzle is appropriate.
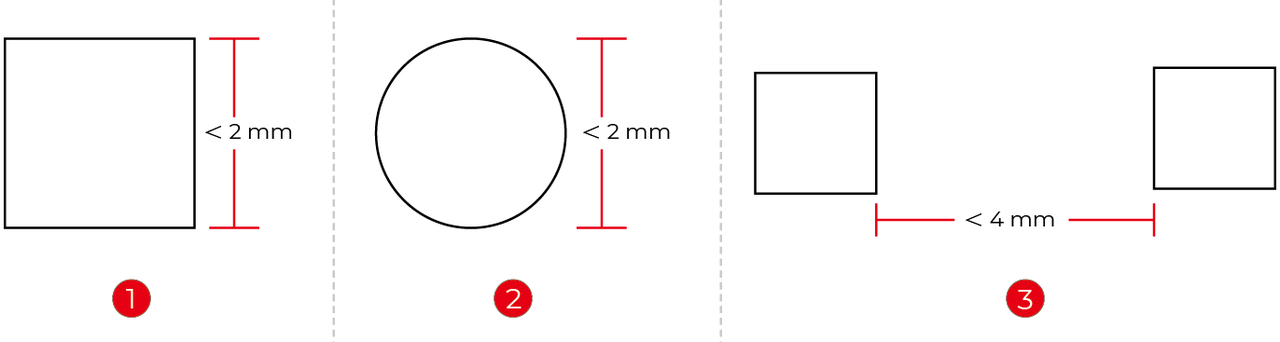
- If the patterns are small, such as circles under 2 mm in diameter or squares with sides shorter than 2 mm, or patterns with narrow spacing (under 4 mm), please use a 2 mm cutting nozzle rather than a SaveGas™ nozzle.
- This is because the SaveGas™ nozzle has a larger diameter and makes direct contact with the material during operation, which can cause air leakage or collisions with adjacent cut parts, ultimately affecting cutting quality.
2 mm cutting nozzle
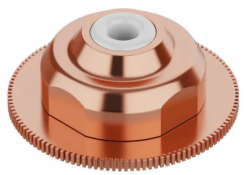
Telescopic cutting nozzle (SaveGas™ nozzle)
- Check if the minimum spacing between patterns is appropriate according to the shielding gas used and materials processed.
Shielding gas | Material type | Minimum spacing |
|---|---|---|
Compressed air |
| 2 mm |
Nitrogen | ||
Oxygen |
| 4 mm |
- Check if the minimum pattern dimension is greater than the material thickness.
For example, when processing a 3 mm thick material, the diameter of a round pattern or the side length of a square pattern must be greater than 3 mm. Otherwise, the material may not be cut through due to heat concentration, localized overheating, or adhesions.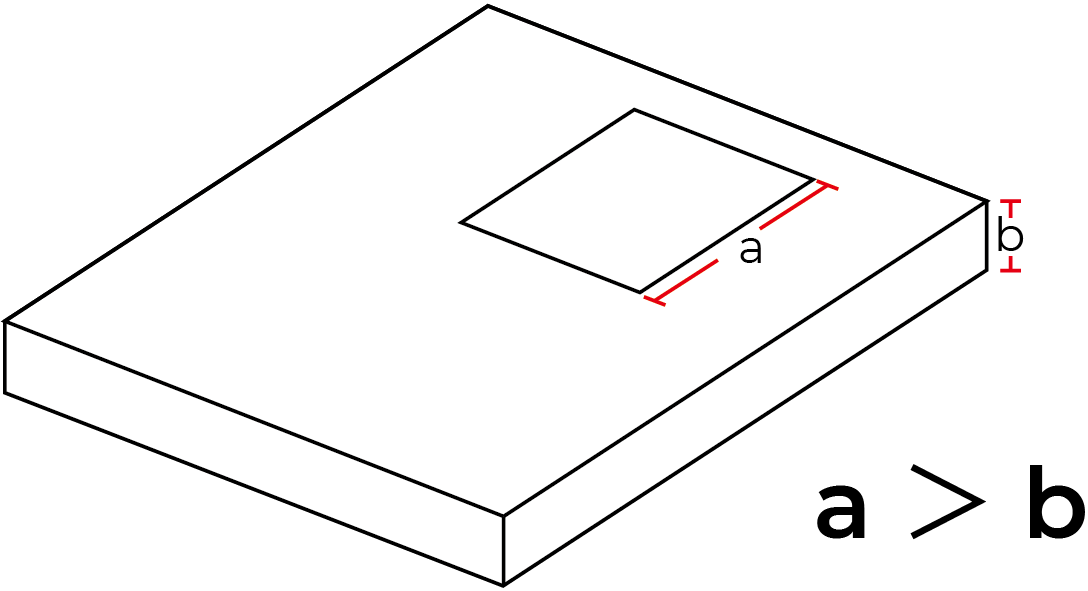
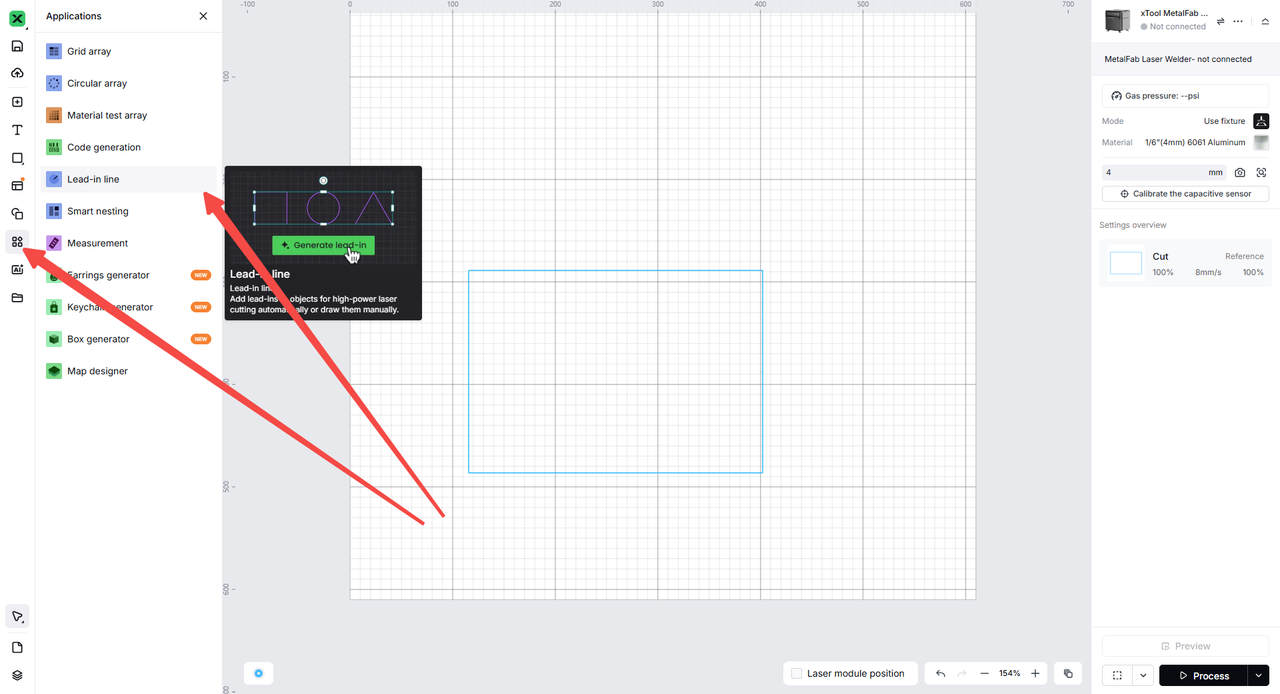
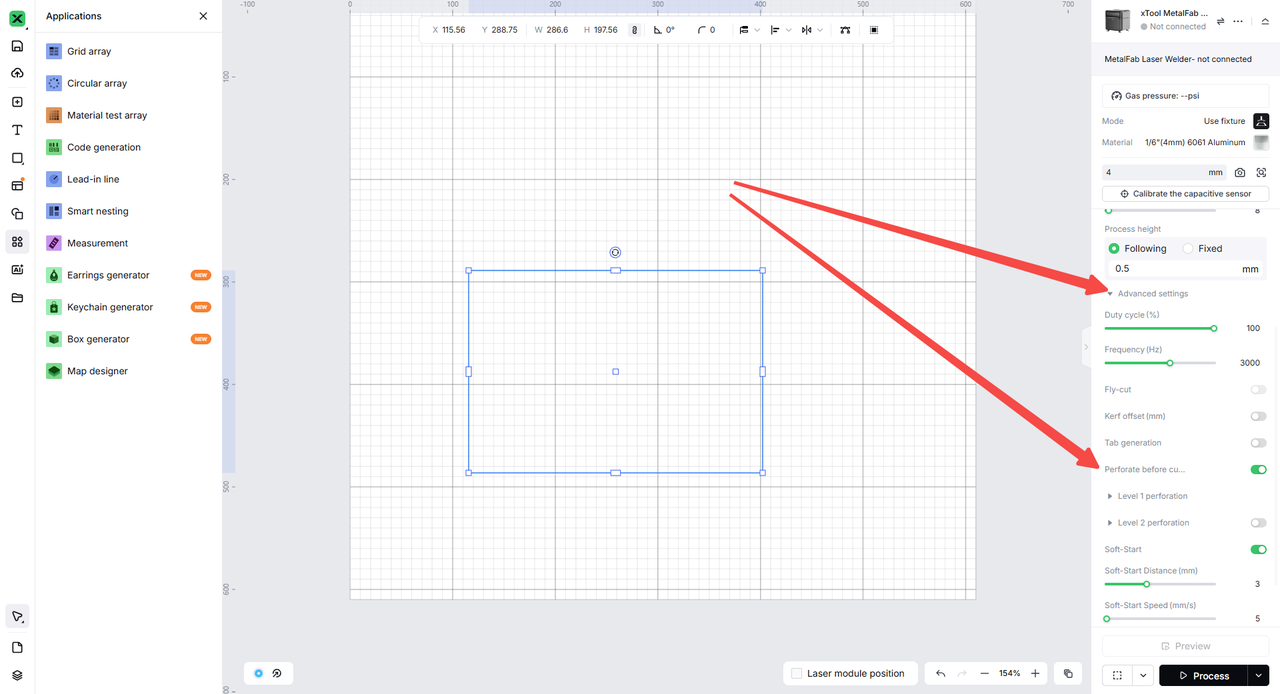
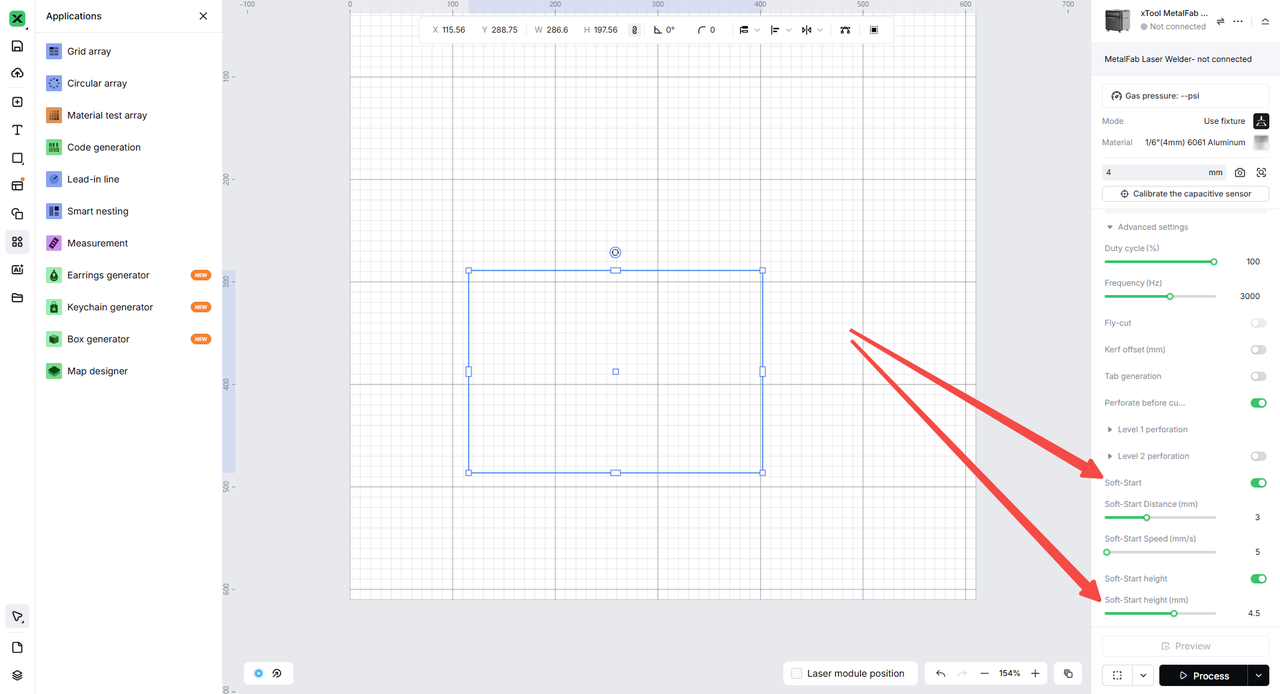
- For better cutting results, enable corresponding functions in xTool software based on the material type and thickness.
Material | Material thickness | Function in xTool Software | Navigation path | Relevant image |
|---|---|---|---|---|
All types of supported metal materials | > 2 mm | Lead-in line |
|
|
Perforate before cutting |
|
| ||
| > 3 mm | Soft start |
|
|
- If the issue still persists, please prepare the following information and materials, and contact xTool Customer Service for further assistance.
- Information
- Nozzle name
- Material type and thickness
- Shielding gas type and gas pressure
- File
- xTool software file and screenshots of parameter settings
- Video and images
- A video recording your troubleshooting process and results
- Images of the cutting results
- Images of lens protectors
Video index
This guide contains four video tutorials. See the table below for quick reference.
Related step | Video content |
|---|---|
All steps | |
Step 2 | |
Step 7 | |
Step 7 | |
Step 8 |
Still experiencing issues?
Should the issue persist after completing the preceding steps, submit a ticket via the "Submit a Ticket" button in the "Help Ticket" section below. The standard response time for xTool Customer Service is one business day.
For a prompt resolution, please include the following details:
- Issue description: A detailed explanation of the observed problem.
- Video evidence: Attach a video demonstrating the issue, where applicable.
- Troubleshooting performed: Any troubleshooting steps you have already attempted, along with their results.
This information is crucial for xTool technical support engineers to provide timely assistance.
Documentation feedback
Help improve this content by providing feedback. If this content did not meet your requirements, select "No" in the "Was this page helpful?" section below. Include specific details about what was unclear or missing in the pop-up suggestion box. Feedback submissions are reviewed by xTool technical writers to enhance future documentation.
