This content is designed
for xTool Apparel Printer & OS1 Automatic Shaker Oven
Overview
This guide provides step-by-step procedures for maintaining your xTool Apparel Printer after a sudden power outage during printing operations. Following these procedures helps ensure your printer will function properly when you resume printing.
⚠️ Safety first
- Cutter hazard: When the machine's cutter is active, DO NOT put your hands inside the printer to avoid injury.
Preparation
Before you begin, gather the following items:
- Disposable nitrile rubber gloves;
- Scissors or a cutting blade.
Recovery procedure flowchart

Recovery procedures
Please identify which of the following situations best matches your machine's state after power is restored.
Scenario 1: Printer powers on; film not fed to oven
Situation
The printer can power on normally, but the printed film failed to feed into the OS1 oven machine.
Recovery steps
1. Move printed film away from cutting area
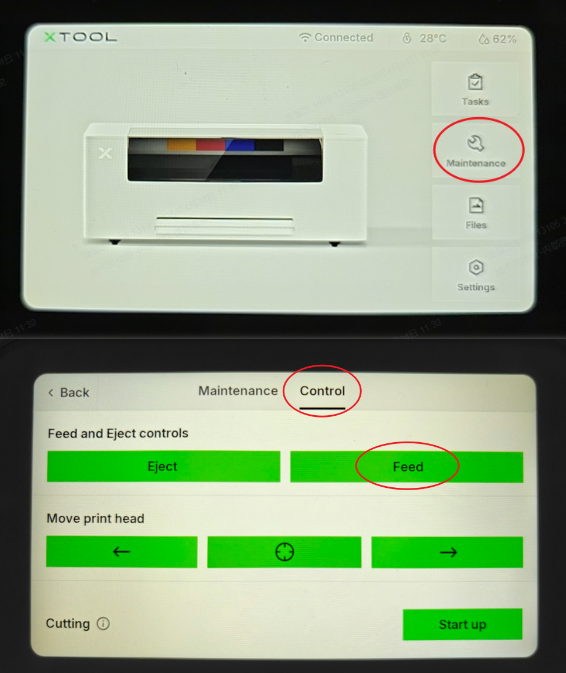
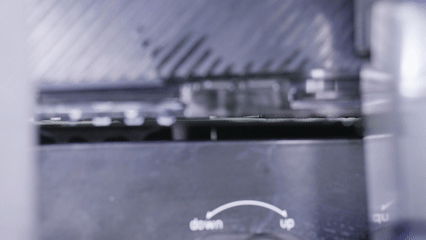
- On the LCD control panel, navigate to: Maintenance > Control.
- In the "Feed and Eject controls" section, tap the Feed button.
- Continue feeding until the waste film is clear of the processing area.
2. Cut the printed film
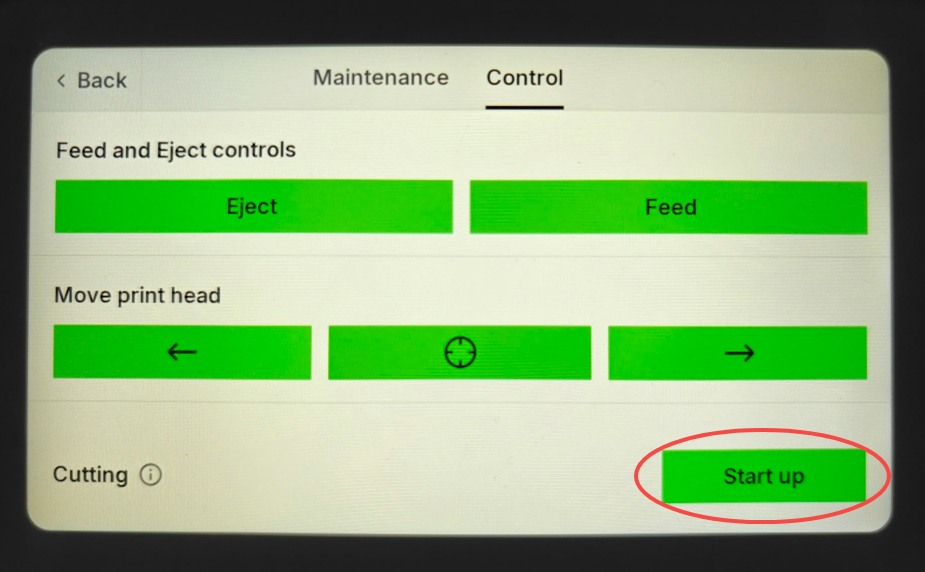
- On the LCD control panel, navigate to: Maintenance > Control.
- In the "Cutting" section, tap the Start up button.
- Wait for the cutting process to complete.
3. Remove cut film from printer
- Open the printer's lid.
- Carefully remove the cut film from inside the printer.
- Dispose of the film appropriately.
4. Close printer lid
- Ensure the top cover is securely closed before resuming operations.
Scenario 2: Film entered oven but not connected
Situation
The printer powers on normally, and film seems to enter the oven machine but is not properly delivered to the system.
Recovery steps
1. Move printed film away from cutting area
- On the LCD control panel, navigate to: Maintenance > Control.
- In the "Feed and Eject controls" section, tap the Feed button.

2. Cut the film in the printer
- On the LCD control panel, navigate to: Maintenance > Control.
- In the "Cutting" section, tap the Start up button.

3. Remove film from oven chamber
- Detach the magnetic cover from the OS1 oven machine.
- Carefully extract the waste film from inside the oven powder chamber.
- Handle the film gently to avoid powder spillage.

4. Reattach oven cover
- Reinstall the magnetic cover securely on the oven machine.
Scenario 3: Film entered oven & smoothly delivered
Situation
The printer powers on normally, film has entered the oven machine and is properly delivered to the system.
Recovery steps
1. Eject film from oven
- Using xTool Creative Space (XCS) software or the LCD screen, locate the oven eject controls.
- Press the oven Eject button to withdraw the delivered PET film from the oven system.
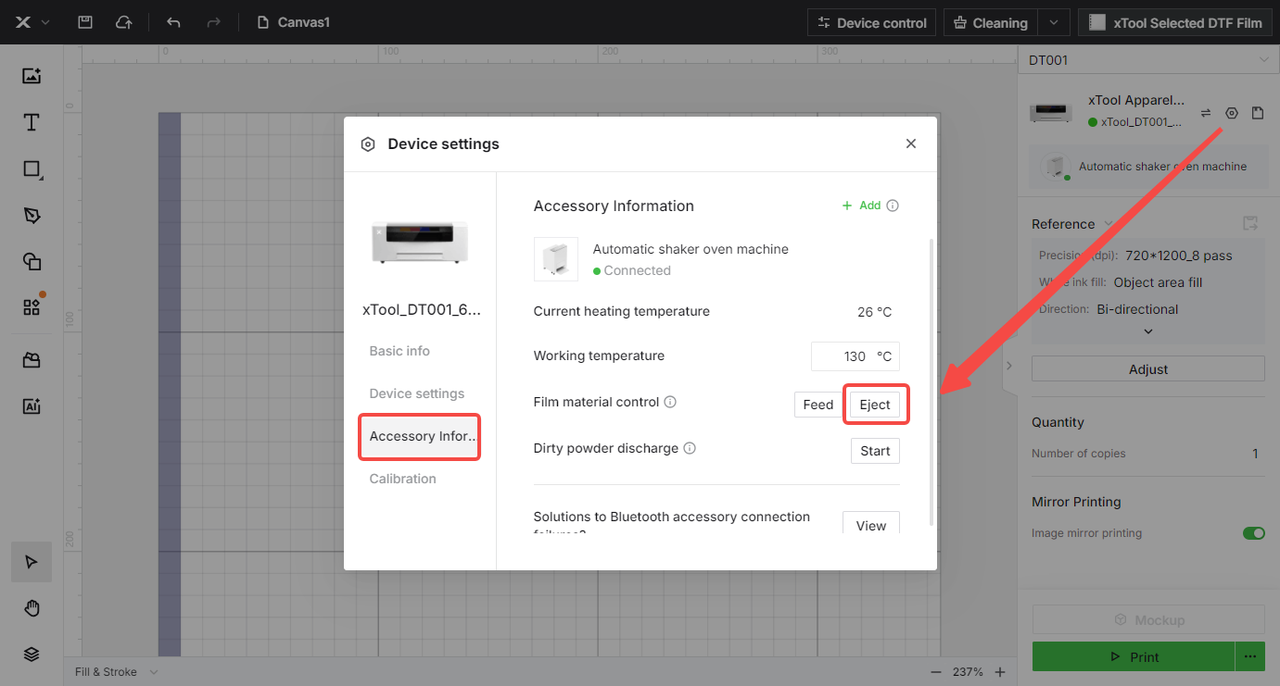
- On the XCS interface, navigate to: Device settings > Accessory information and click the Eject button in the "Film material control" section.
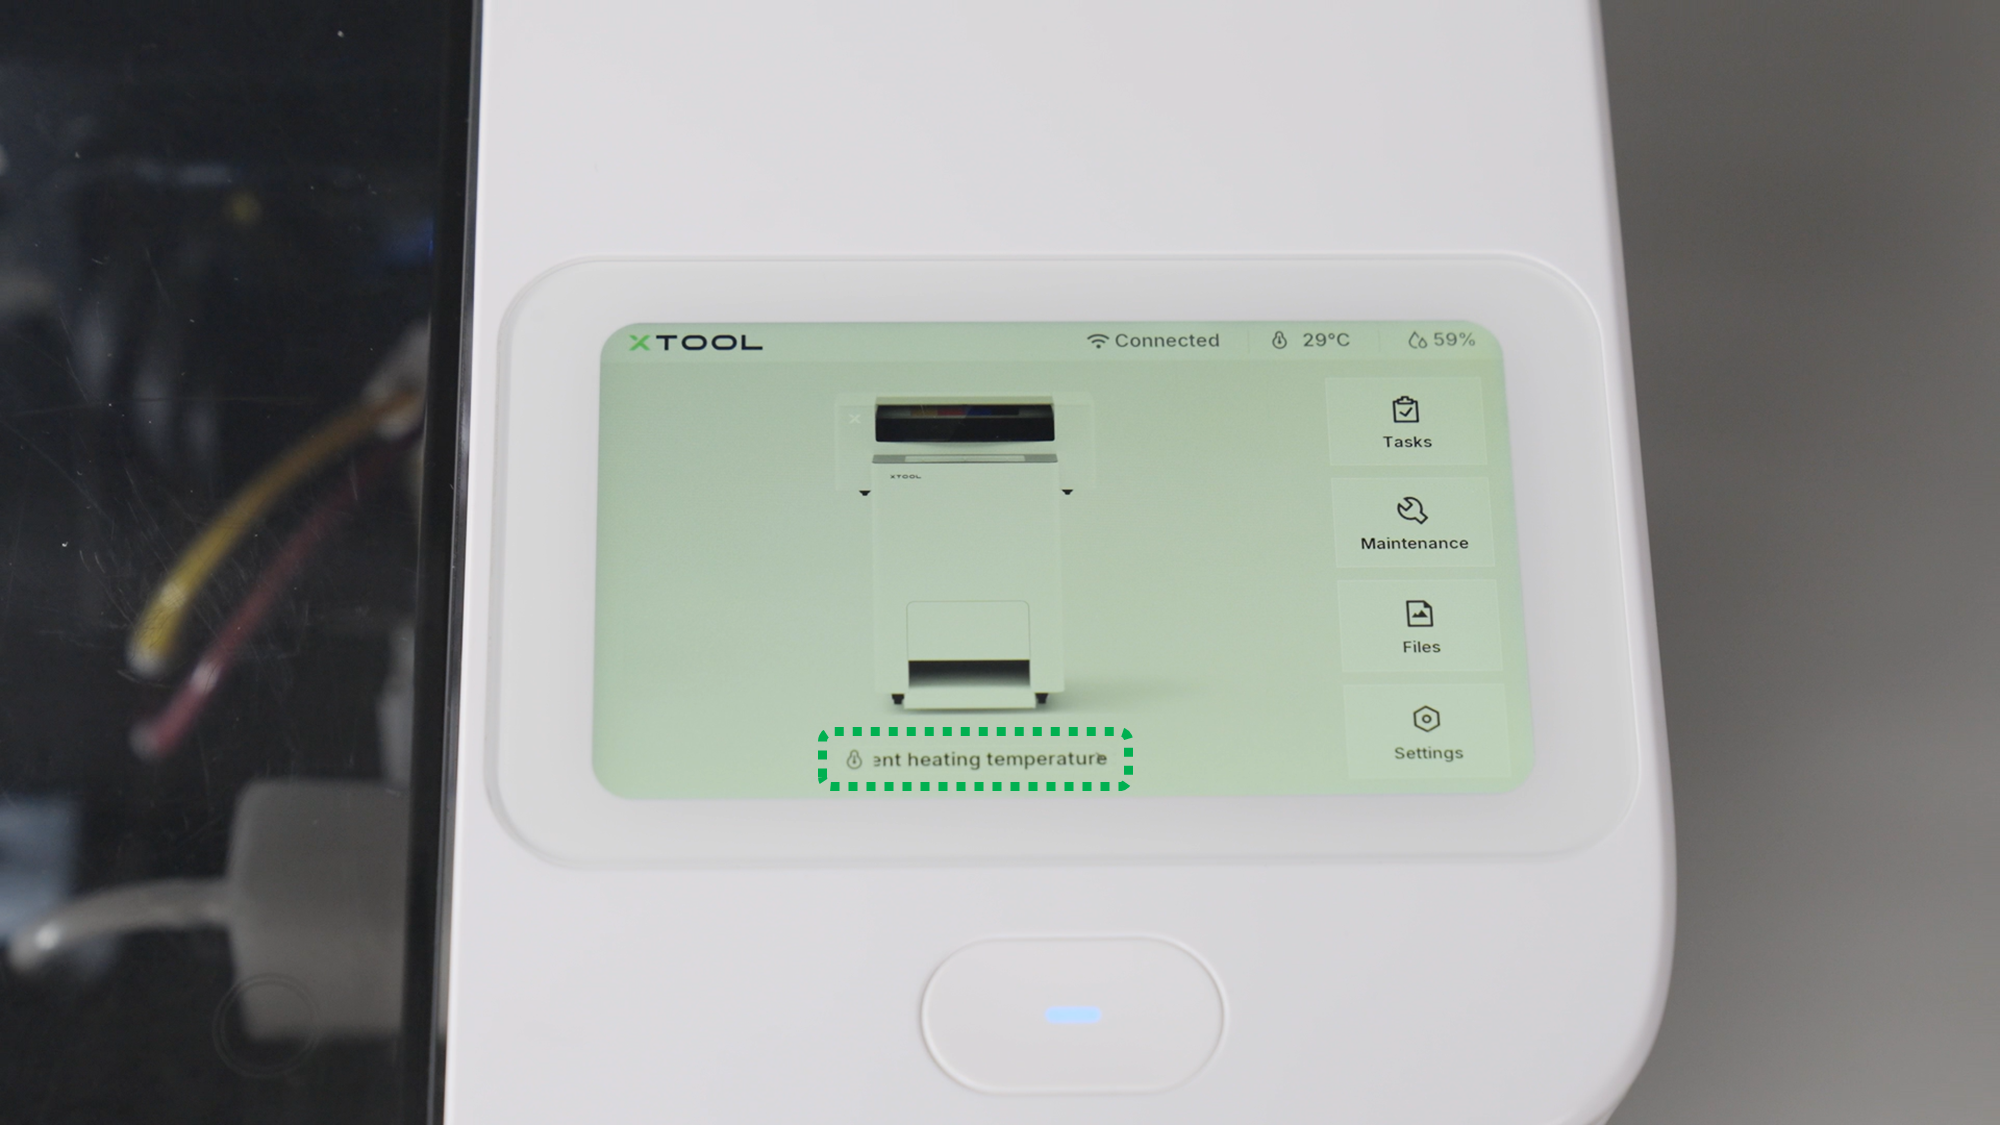
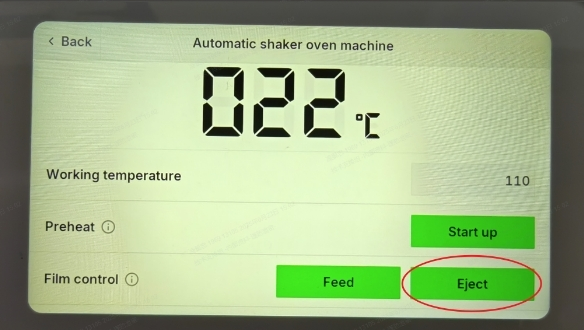
- On the LCD control panel, tap the Current heating temperature section and the Eject button in the "Film control" section.
 |  |  |
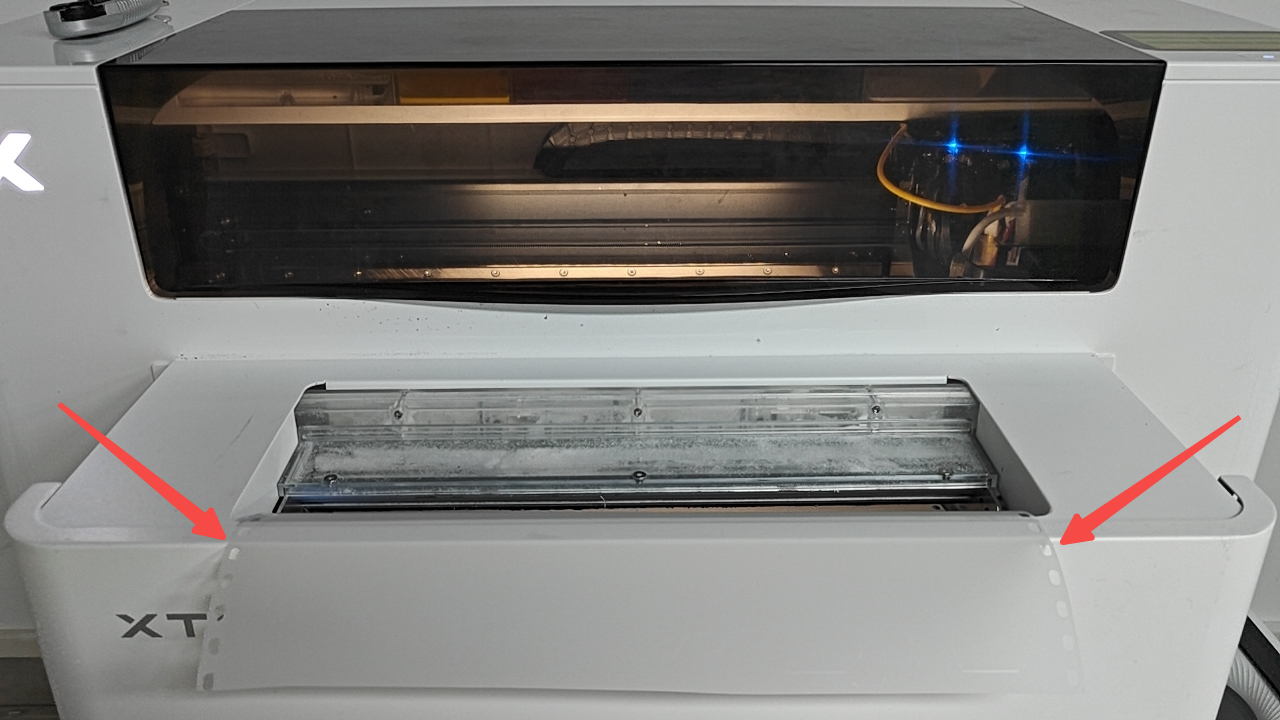
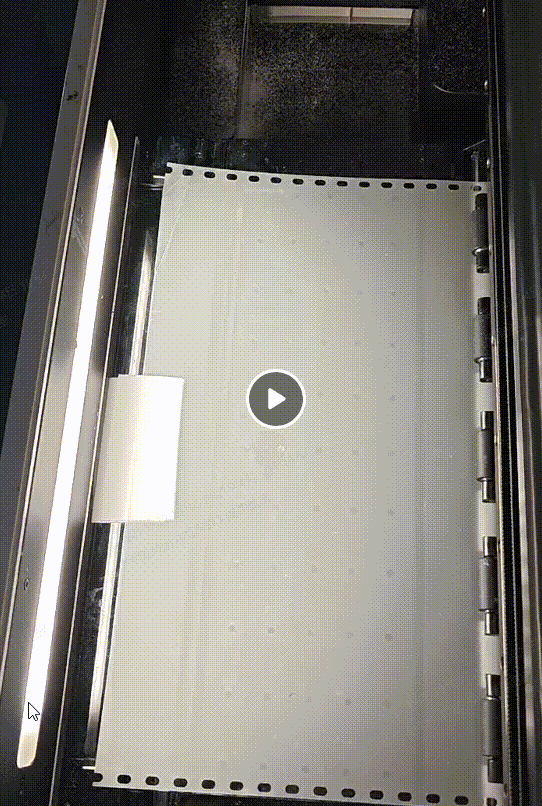
2. Remove film from oven
- Detach the oven's magnetic cover.
- Carefully remove the waste film from inside the oven.
- Place the film flat on the front edge of the oven machine.
 |  |
3. Move remaining film in printer
- On the LCD control panel, navigate to: Maintenance > Control.
- In the "Feed and Eject controls" section, tap the Feed button.
- Continue feeding until the waste film is clear of the processing area.

4. Cut the waste film
- On the LCD control panel, navigate to: Maintenance > Control.
- In the "Cutting" section, tap the Start up button.

5. Remove cut film
- Take the cut film from the oven area.
- Dispose of the film appropriately.
6. Reattach oven cover
- Reinstall the magnetic cover securely on the oven machine.
Scenario 4: Printer cannot power on
Situation
The printer cannot power on and there are no immediate conditions to restore power.
Recovery steps
‼️ Print head protection: Manually engaging the ink capping station is critical to prevent print head damage during extended power outages.
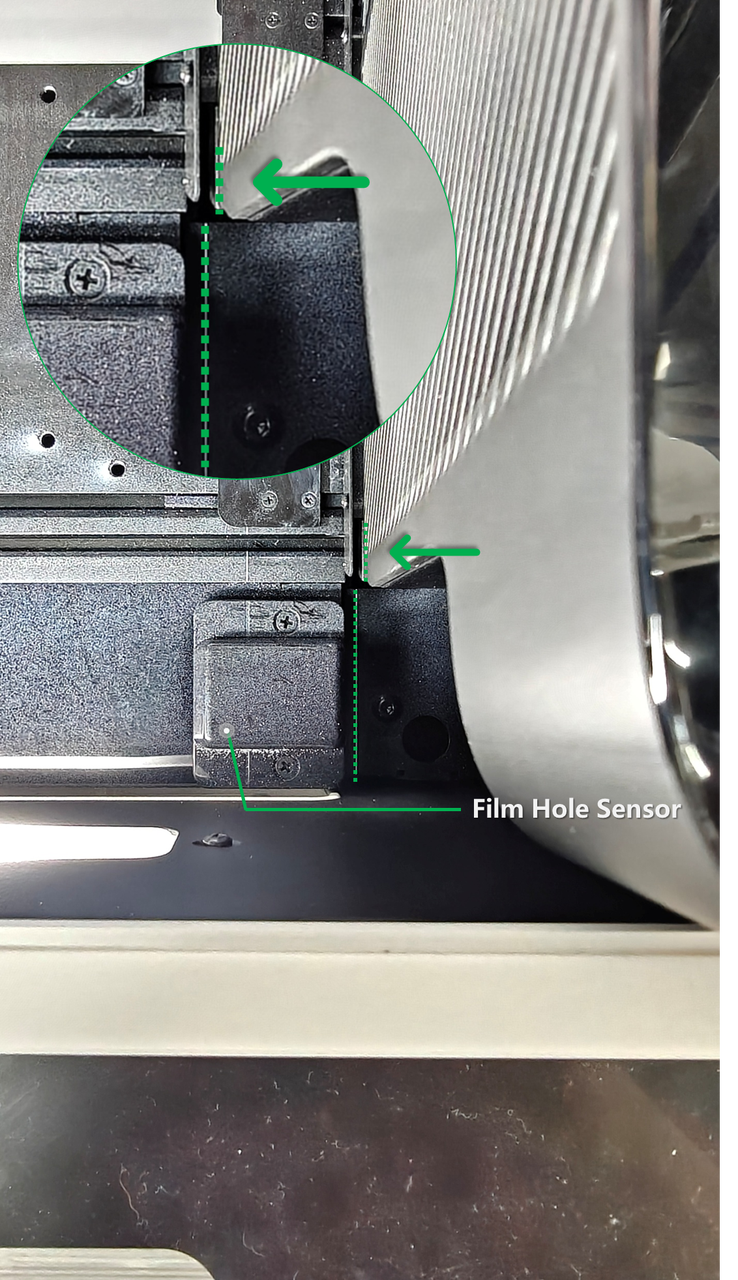
1. Manually position print carriage
- Manually move the print carriage to the far right side of the machine.
- Align the white marking line on the left side of the carriage body with the white marking line on the baseplate near the film hole sensor.
- The lines should be vertically aligned when properly positioned.
2. Manually engage ink capping station
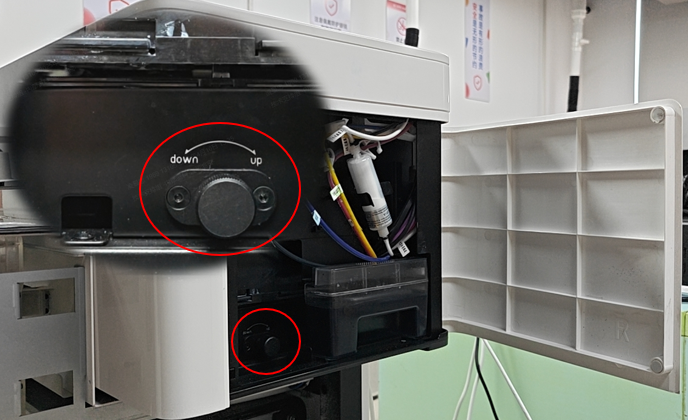
- Open the right-side panel of the printer.
- Locate the ink capping station adjustment knob inside the panel.
- Turn the knob to raise the ink capping station until it makes complete contact with the print head surface.
💡 Note: The knob will become tight and you'll feel resistance when proper contact is achieved.
 |  |
3. Manually cut printed film
- Using scissors or a cutting blade, carefully cut the printed film.
- Remove the cut film from the printer.
⚠️ Safety reminder: Mind your hands when handling cutting tools.
4. Remove waste film
- Completely remove all cut film pieces from the printer.
5. Complete recovery when power restored
- Once power is restored to the printer, perform one final cutting operation.
- On the LCD control panel, navigate to: Maintenance > Control.
- In the "Cutting" section, tap the Start up button.
- Remove any remaining manually cut film pieces.
Next steps
After completing the appropriate recovery procedure, your xTool Apparel Printer should be ready to resume normal printing operations.
Documentation feedback
Help improve this content by providing feedback. If this content did not meet your requirements, select "No" in the "Was this page helpful?" section below. Include specific details about what was unclear or missing in the pop-up suggestion box. Feedback submissions are reviewed by xTool technical writers to enhance future documentation.
Services & Help
Learn & Education

Copyright © 2025 xTool All Rights Reserved.