Download PDF files (multi-language)
|
Unboxing and First Use
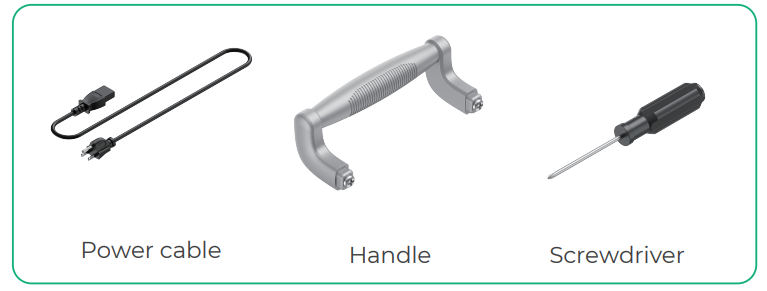
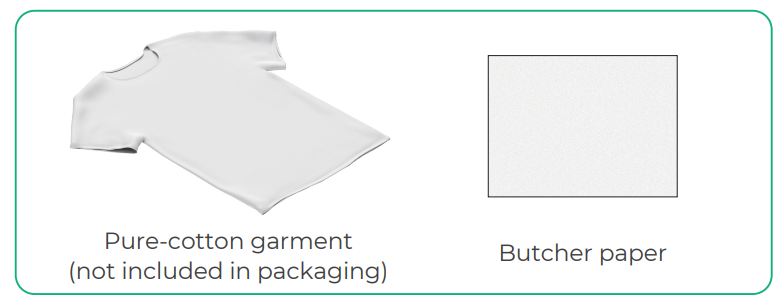
List of items
xTool Selected HP2 | Handle |
Power cable | Screwdriver |
Butcher paper |
Quick start guide |
Safety instructions |
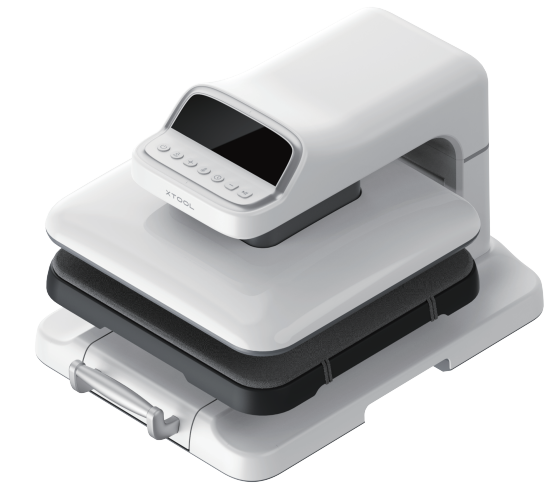
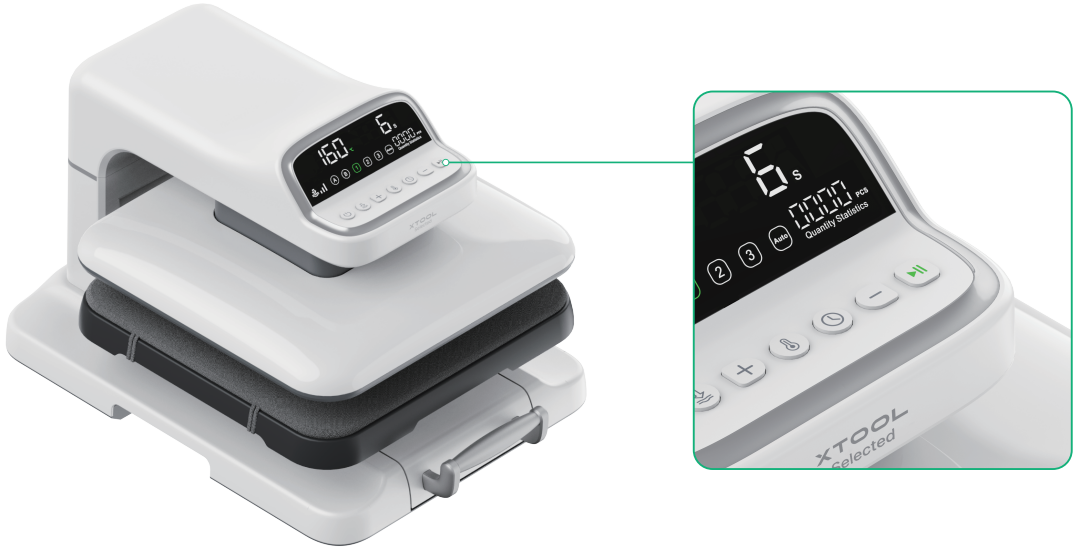
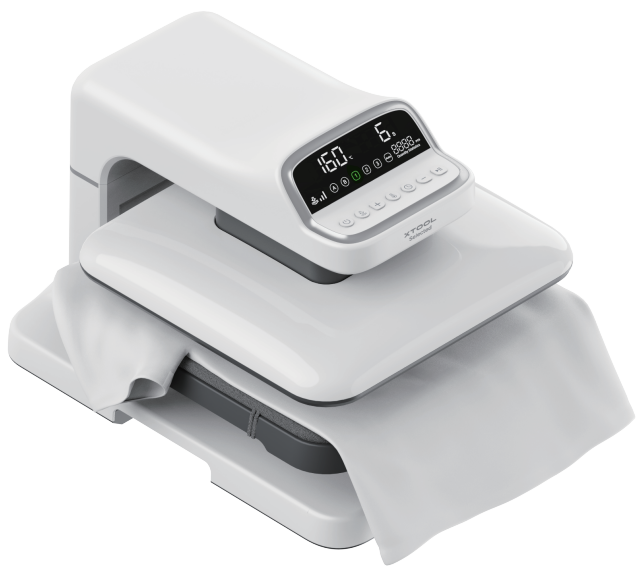
Meet xTool Selected HP2
Product structure
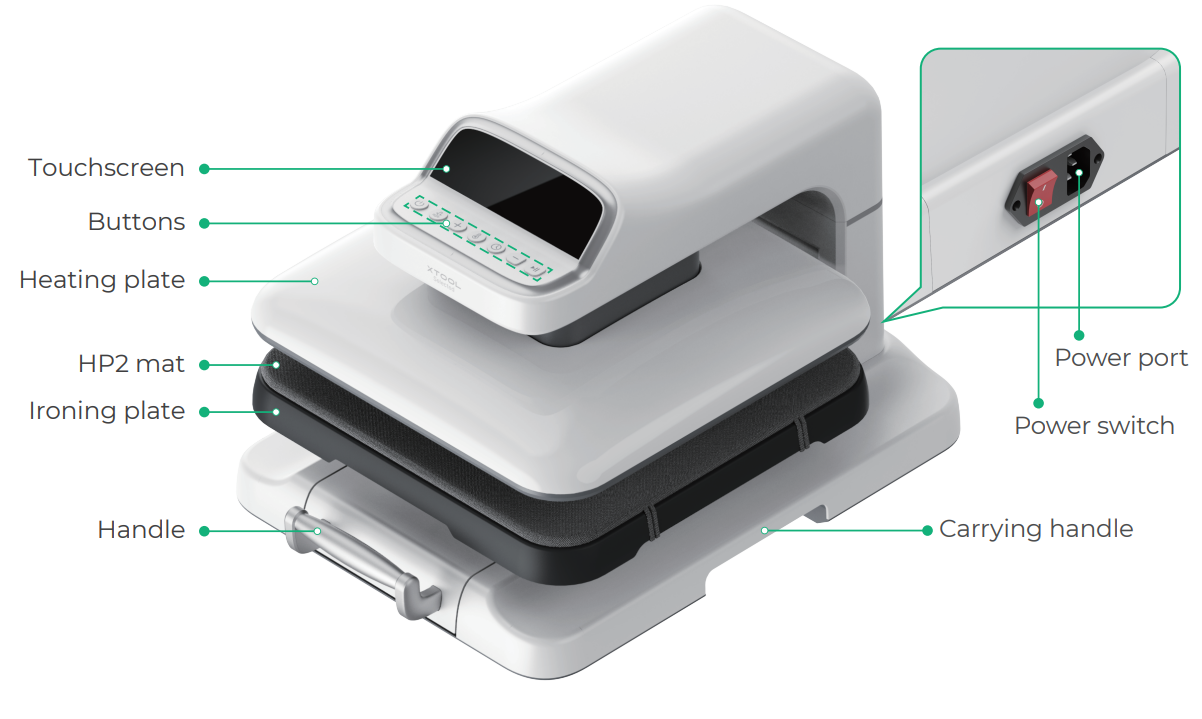
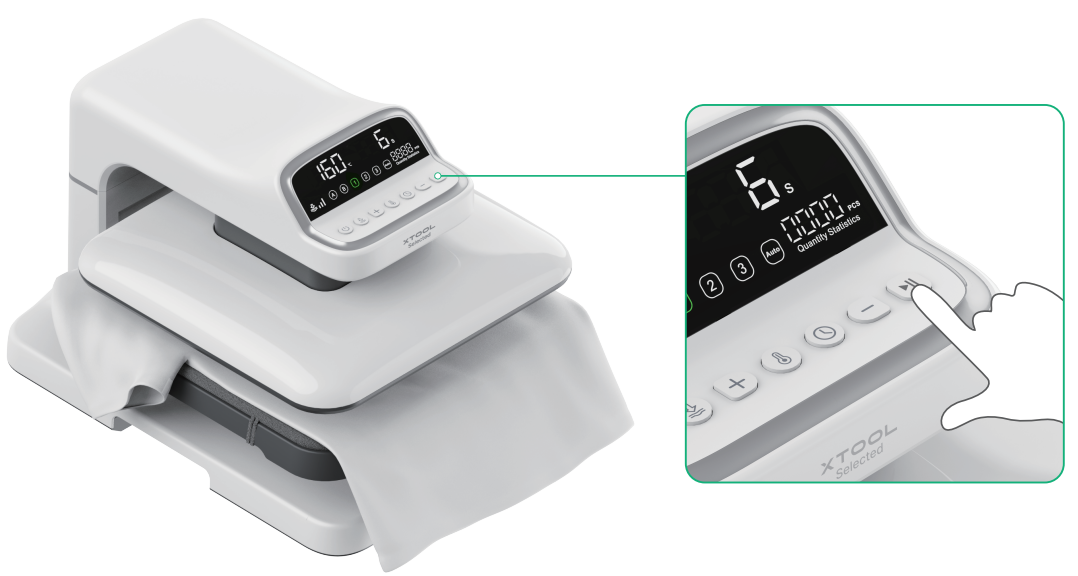
Touchscreen and buttons

Buttons | Descriptions |
|---|---|
|
|
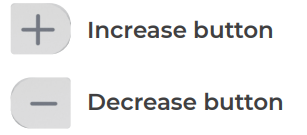
| Press to set the pressure level. After the pressure icon flashes, press the increase or decrease button to switch between the pressure levels of 60 kg, 100 kg, 140 kg, and 180 kg. |
| Press to set the pressure, temperature, and time.
|
|
|
|
|
| Press to start pressing down and the device starts countdown. Press again to pause. |
| Press to select "A" or "B" mode; after selection, you can adjust the pressure, temperature, and time. The default mode is A mode. |
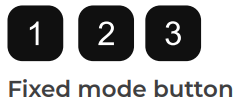
| Press to select from three fixed modes of which pressure, temperature, and time are pre-set; long press for 3s to adjust the pre-set values. |
| Press to enter automatic ironing mode. The heating plate automatically presses down each time the ironing plate is pushed back. Another press will exit this mode. |
Use xTool Selected HP2
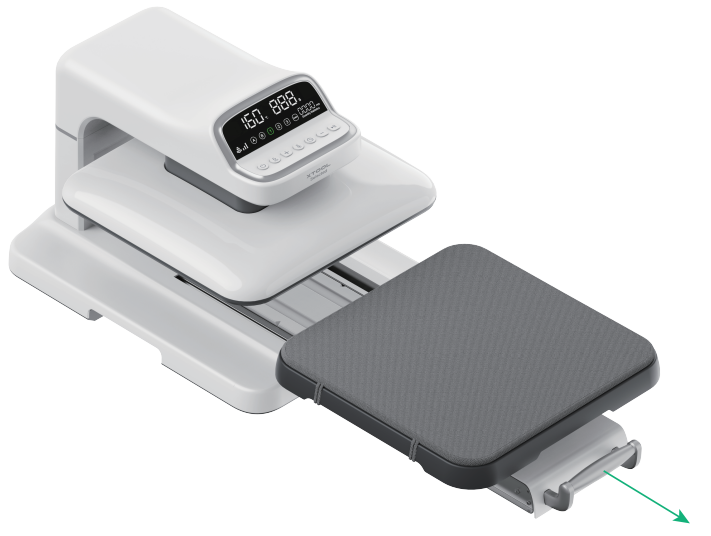
1. Install the handle
1) Connect to power and turn on the device.
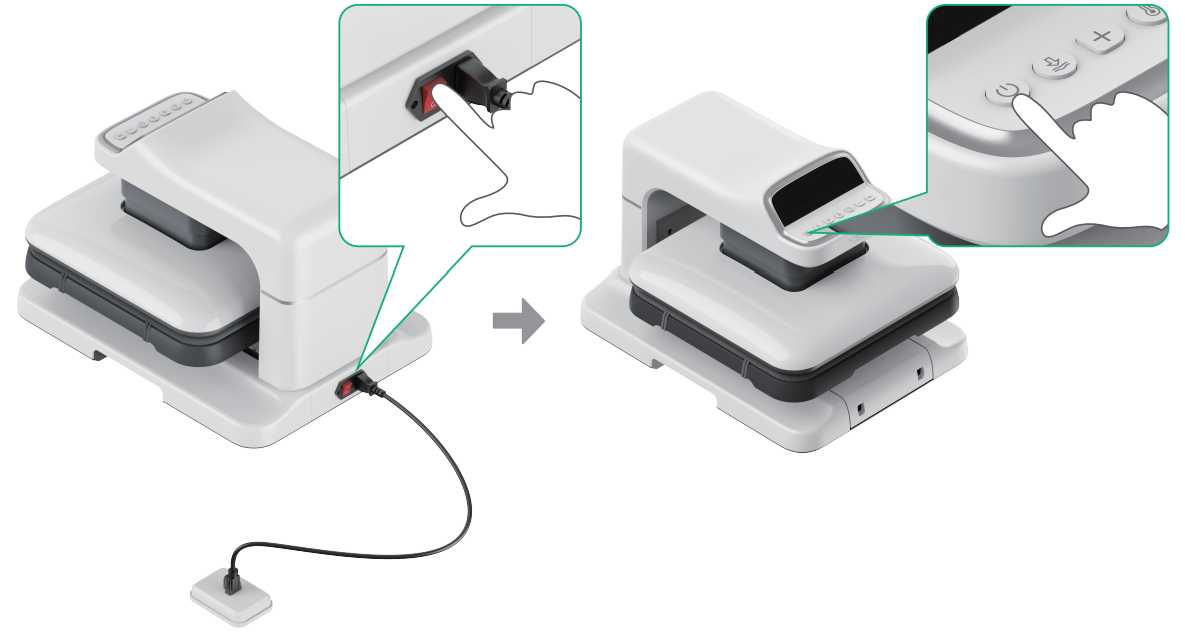
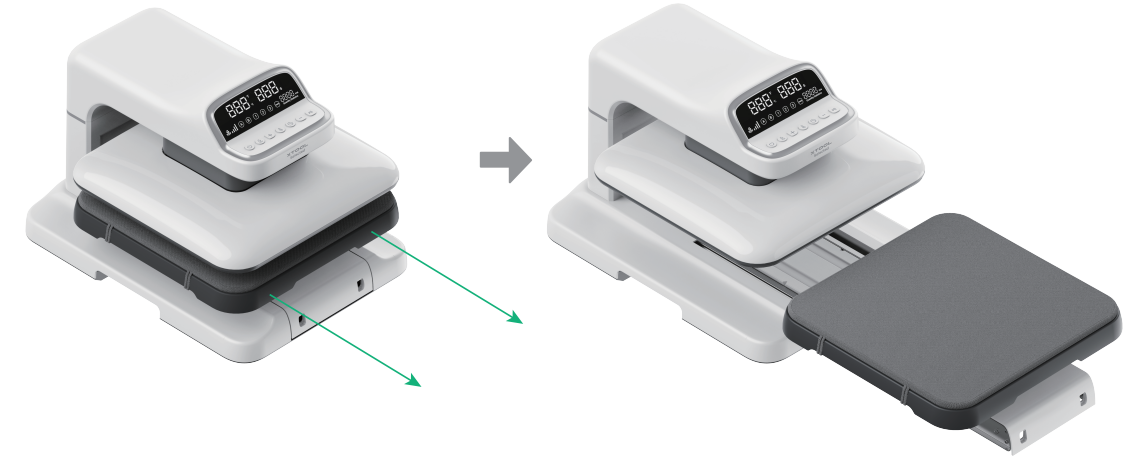
2) Pull out the ironing plate.
After the device is turned on, the heating plate will lift automatically. At this time, the ironing plate can be pulled out.
3) Install the handle.
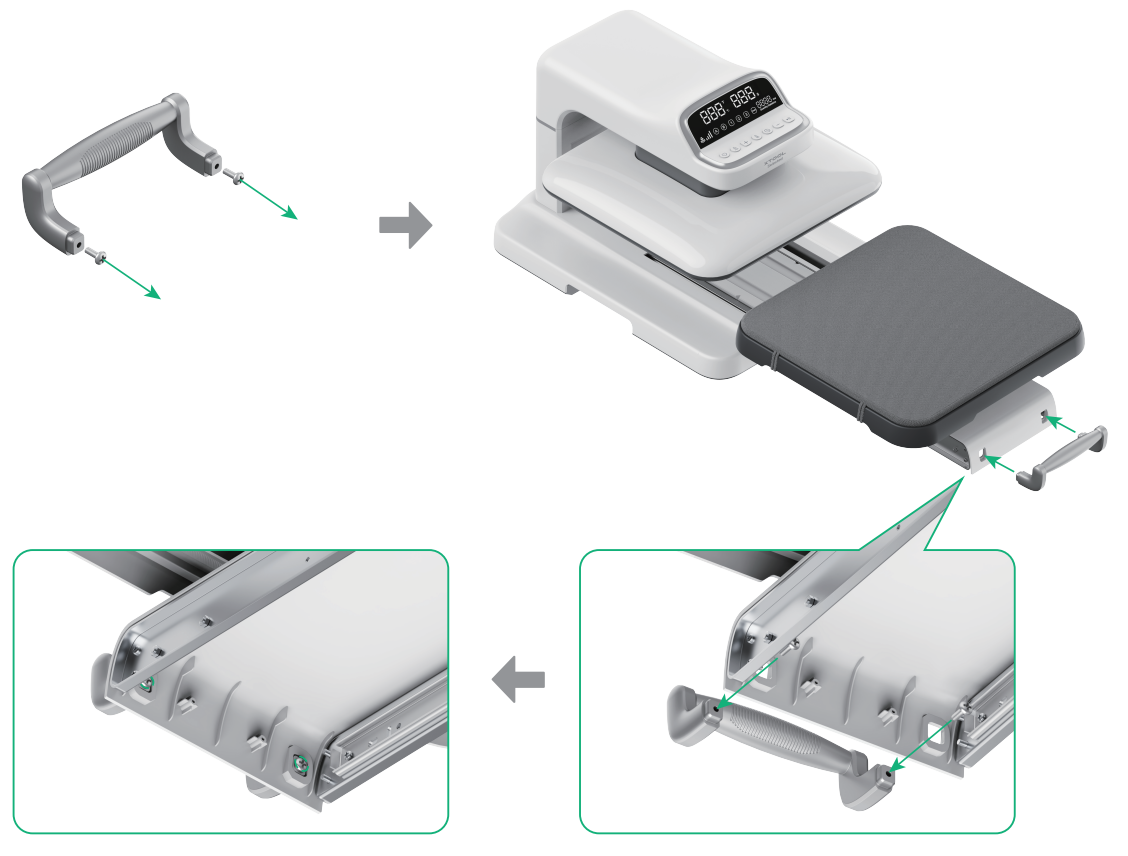
4) Push the ironing plate back.
2. Select the pressure level
Option | Description | Temperature | Time | Pressure level |
|---|---|---|---|---|
| Custom mode A | Defaults to 160℃ (320℉) | 15s | Level 2 |
Custom mode B | Defaults to 180℃ (356℉) | 10s | Level 3 | |
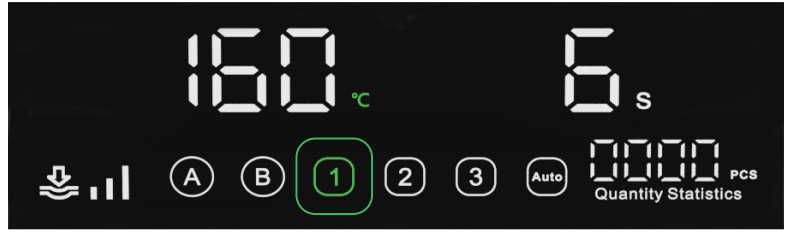
Fixed mode 1 | 160℃ (320℉) | 6s | Level 3 | |
| Fixed mode 2 | 200℃ (392℉) | 40s | Level 3 |
Fixed mode 3 | 210℃ (410℉) | 10s | Level 4 | |
Automatic ironing mode | / | / | / |
If no operation is performed on the device within the set automatic shutdown time (15 mins by default), it will automatically shut down.
The following table describes applicable materials and recommended parameter settings. For details, see supported materials and recommended parameter settings.
Material | Temperature | Time | Pressure level |
|---|---|---|---|
160℃ | 6s | Level 3 | |
170°C | 10s | Level 3 | |
170°C | 10s | Level 4 | |
165°C | 10s | Level 1 | |
170°C | 10s | Level 1 | |
145°C | 10s | Level 3 | |
165°C | 10s | Level 1 | |
170°C | 10s | Level 1 | |
155°C | 10s | Level 3 | |
145°C | 10s | Level 2 | |
205°C | 40s | Level 1 |
This guide exemplifies film transfer on a pure-cotton garment using level 1 pressing mode.
Wait for the device to heat up until the start/pause button turns green.
3. Place processing materials
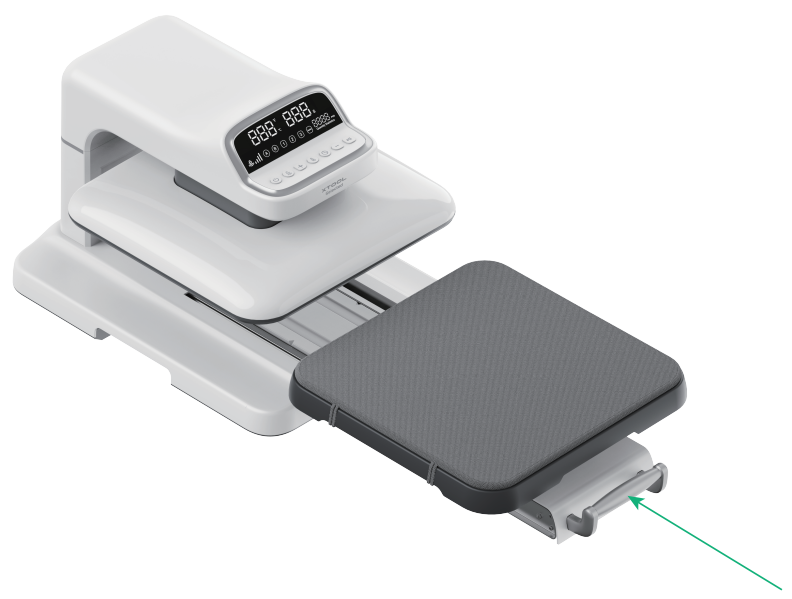
1) Pull the handle to extend the ironing plate.
2) Place the garment and butcher paper.
Ensure that the garment is smooth and free of wrinkles.
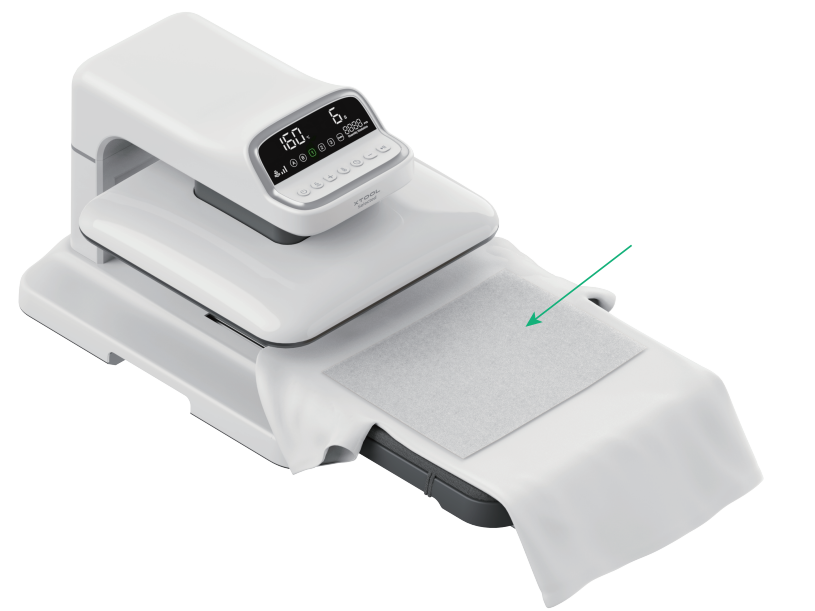
Placing butcher paper on the surface of the garment before heat pressing can prevent dirt on the heating plate from contaminating the garment.
3) Push the ironing plate back. Ensure that you push it all the way to the innermost position.
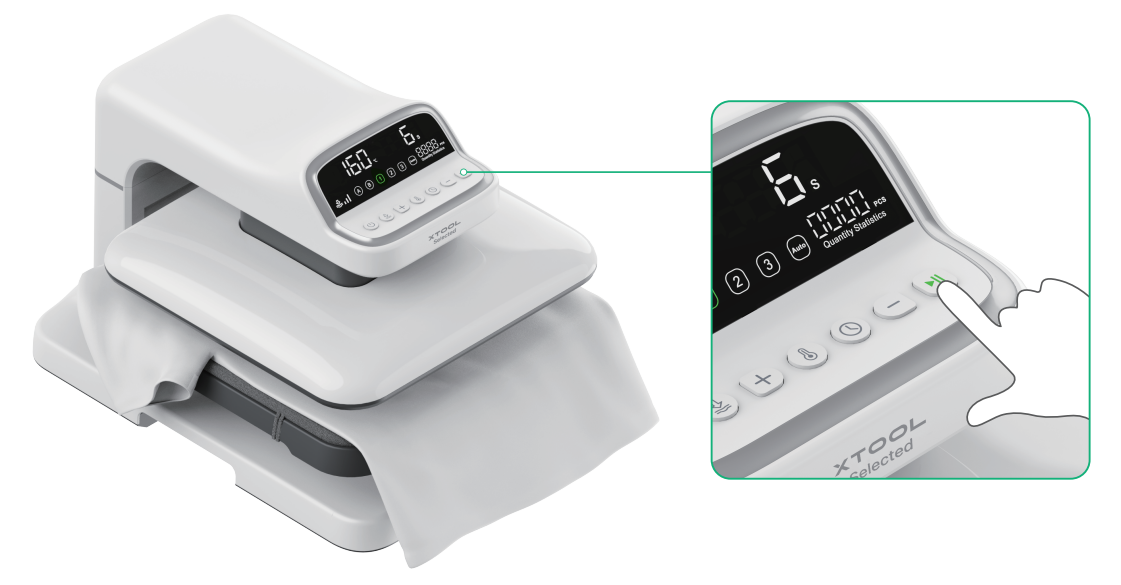
4) Press the start/pause button to preheat the processing material for 5 – 10s.
Emergency stop: During the preheating process, pressing any button will pause the device, and the heating plate will automatically lift.
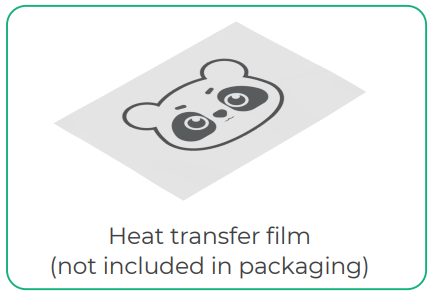
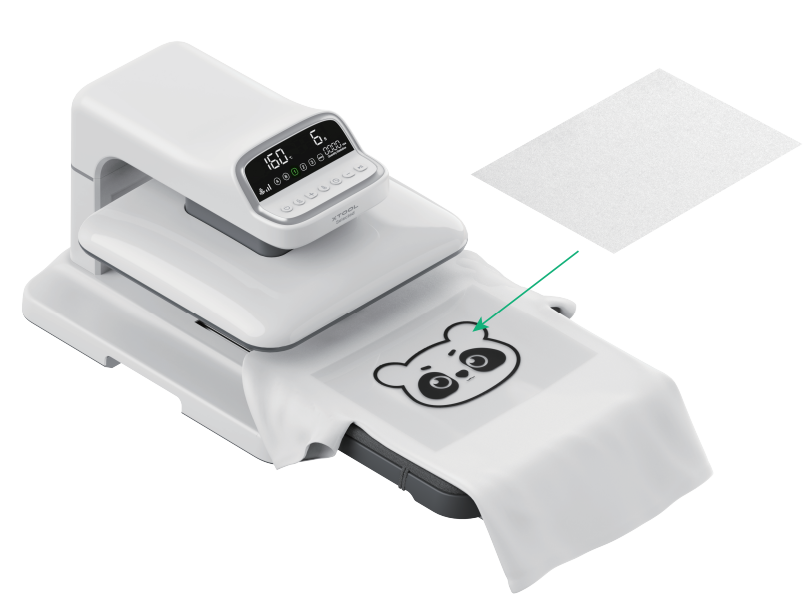
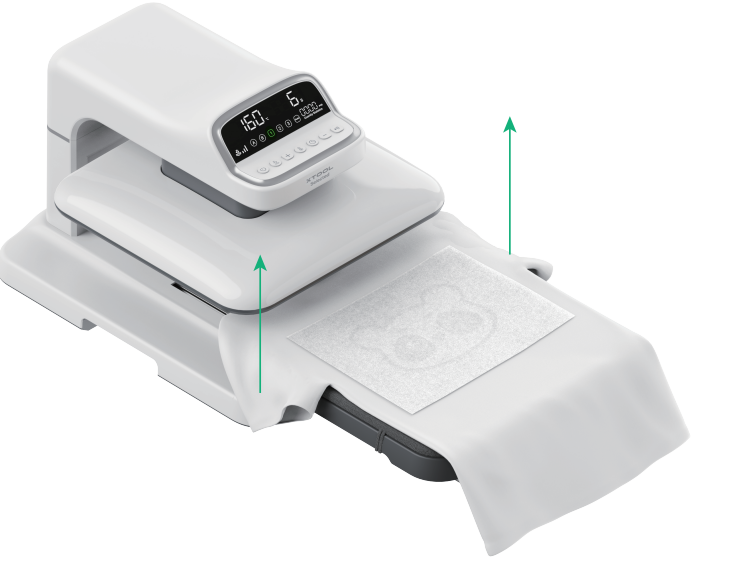
4. Place the heat transfer film
1) Extend the ironing plate and remove the butcher paper.
2) Place the heat transfer film.
The heat transfer film can be fixed on the garment with high-temperature tape.
3) Place the butcher paper on the heat transfer film. Then push the ironing plate back to its original position.
5. Processing
1) Press the start/pause button. The heating plate will lower down and start processing with countdown displayed.
During the processing, please do not touch the device to avoid pinching or burns.
2) After processing is done and the heating plate rises, remove the butcher paper and tear off the heat transfer film.
To tear off the heat transfer film more easily, wait for the garment to cool for 10s.

3) Heat press again to ensure optimal result.
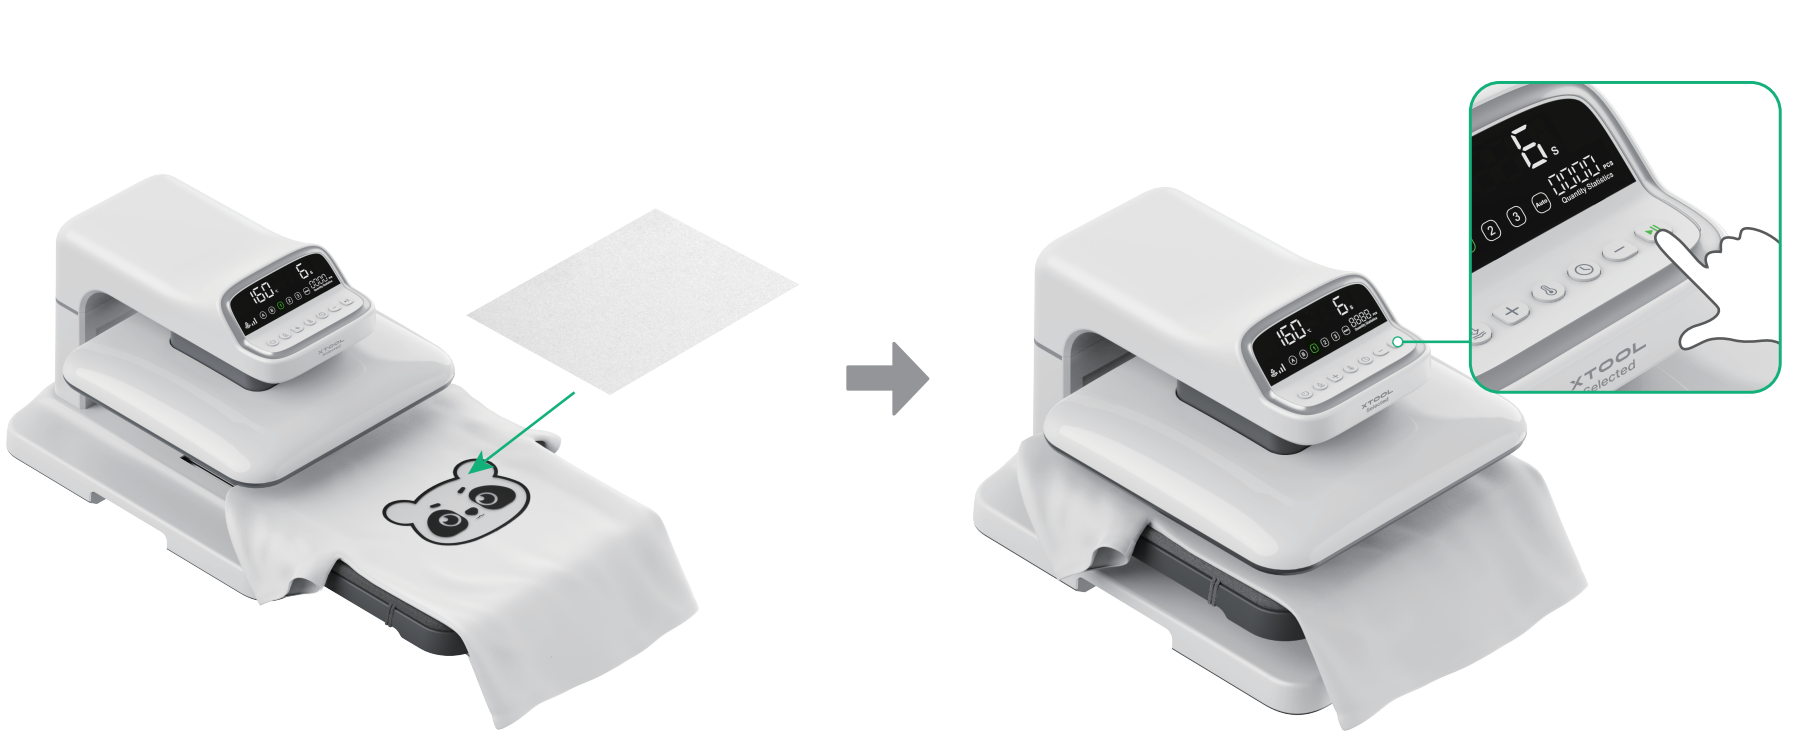
After processing is done, remove the butcher paper and get your processing work.
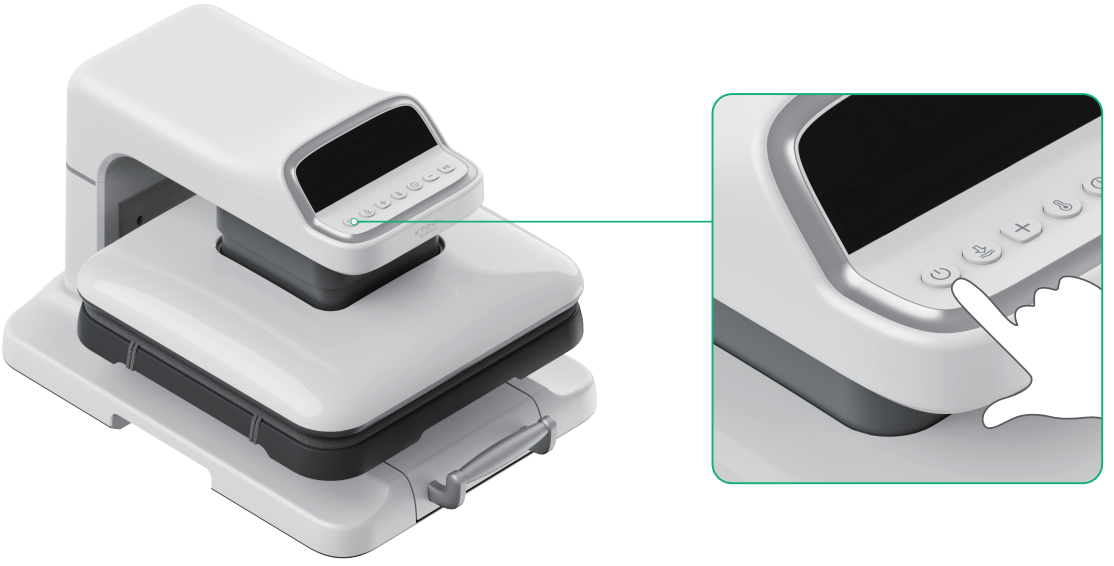
6. Shutdown
If you have completed processing, press the power button to turn off the device. After shutdown, the set parameters will be automatically saved.
If no operation is performed on the device within the set automatic shutdown time (15 mins by default), it will automatically shut down.
More information
Services & Help
Learn & Education

Copyright © 2025 xTool All Rights Reserved.