
Use the wire feeder with xTool MetalFab Laser Welder 1200W
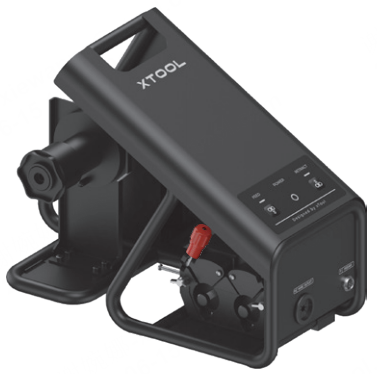
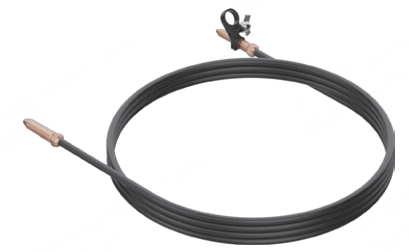
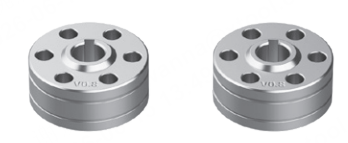
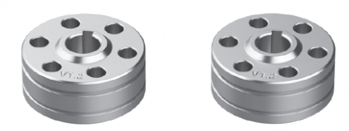
List of items for the wire feeder
| Wire feeder |
| Wire feeding tube |
| Drive roll 0.8 mm / 1.0 mm |
| Drive roll 1.2 mm / 1.6 mm |
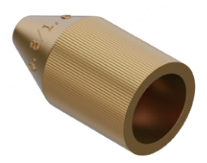
| Wire feeding nozzle 1.2 / 1.6 |
Basic information about the wire feeder
Structure of the wire feeder

Specifications
Item | Specification |
|---|---|
Dimensions (W x D x H) | 528 mm x 226 mm x 378.25 mm |
Weight | 8.9 kg |
Wire feeding speed | 2 mm/s to 100 mm/s |
Working voltage | 24 V DC |
Maximum wire spool weight supported | 15 kg |
Maximum external diameter of wire spool supported | 300 mm |
Maximum thickness of wire spool supported | 105 mm |
Supported wire diameters | 0.8 mm, 1.0 mm, 1.2 mm, 1.6 mm |
Length of the wire feeding tube | 3 m |
Connect the wire feeder to the laser welder
Note: The wire feeder is used to feed wire in laser welding, and it is not needed in metal cleaning or cutting.
1. Place the wire feeder

Place the wire feeder on the left side of the main unit, ensuring that its control buttons face the same side as the touchscreen.

2. Connect to the main unit

Connect one end of the cable to the FEEDER port on the wire feeder and the other end to the FEEDER port on the main unit.
Note: The wire feeder cable has identical connectors on both ends. You do not need to distinguish between them.

3. Install the drive rolls
How to check the specifications of the drive roll
Each drive roll has two rails, and the size of each rail is marked on the cross-section that is not adjacent to the rail. For example, a drive roll with a "1.0V" marking indicates that its inner rail transfers 1 mm welding wire.

Use appropriate drive rolls based on the diameter of the welding wire to be used. This guide uses 1 mm welding wire for illustration.
(1) Open the wire tensioners.

(2) Install the drive rolls.


Note: The other pair of drive rolls supplied with this product can be stored in the wire feeder for replacement.

4. Install the wire feeding tube
(1) Lift the right tensioner, and loosen the screw under it.

(2) Insert the end of the wire feeding tube without a fastener to the wire feeder. Ensure that the wire feeding nozzle shows up at the upper right side of the drive roll.

(3) Tighten the screw to fix the nozzle.

5. Load the welding wire
Select a proper wire
Refer to the following table to select a proper wire based on the material type of the workpiece to be welded.
A roll of 1 mm stainless steel wire is included with this product. Use it as needed.
Workpiece material type | Recommended welding wire |
|---|---|
Stainless steel | Stainless steel wire |
Carbon steel | Solid iron wire |
Galvanized steel | Solid iron wire |
Brass | Tin brass wire |
Aluminum | Aluminum wire |
(1) Unscrew the cap of the wire turntable, and take out the cap and sleeve.

(2) Install the wire spool to the turntable.

Note: When installing the wire spool, keep the end of the wire fixed. Do not release the wire yet, as it may unravel and become unusable.

Note: Ensure that the wire spool is installed in the correct direction. After released, the wire comes out from the bottom of the wire spool to enter the wire feeding driver. During wire feeding, the wire spool rotates counterclockwise.


(3) Install the sleeve and cap back.

(4) Take out the wire end, cut off the bent part, and thread the wire into the wire feeding driver.

Thread the welding wire through the three holes as shown and into the feeding tube.

(5) Lock down the drive rolls and close the tensioners.
Note:
- Pull the wire tight until you close a tensioner.
- Before locking down the drive rolls, ensure that the welding wire is correctly seated within the wire guiding rail. Manually reposition it if misaligned.

(6) Rotate the tensioners' knobs to adjust the wire feed tension.

Adjust the roller tensioners based on the wire diameter by referring to the table below. Then, fine-tune the tension according to the actual situation.

(7) Check the spindle tension of the turntable.
- If the wire spool rotates freely without any external force, the spindle tension is too low. Use an 8 mm hex key to tighten the spindle clockwise.
- Try to manually rotate the wire spool counterclockwise. If it is difficult to turn, the spindle tension is too high. Use an 8 mm hex key to loosen the spindle counterclockwise.

6. Feed the welding wire
Note: The wire feeder is powered by the main unit. To feed wire electrically, ensure that the main unit is turned on and properly connected to the wire feeder.
(1) Based on the table below, check if the wire feeding nozzle is of the right size to feed the wire you use.
Wire feeding nozzle | Supported wire diameter |
|---|---|
| 0.8 mm / 1.0 mm |
| 1.2 mm / 1.6 mm |


Note: When delivered, the wire feeding tube is installed with a 0.8 / 1.0 nozzle at the end with a fastener, and can feed either 0.8 mm or 1.0 mm wire. If you use a 1.2 mm or 1.6 mm wire, please replace the 0.8 / 1.0 nozzle with the provided 1.2 / 1.6 wire feeding nozzle. For more replacement instructions, see the "Maintenance" chapter.

(2) Ensure that the wire feeding tube is not twisted. Then, press and hold the feed button on the wire feeder until the wire extends out of the nozzle.

Note:
- When feeding the wire, observe the inside of the wire feeder. If the wire spool rotates counterclockwise at a constant speed, the wire feeder is working properly.
- The wire feeding tube cannot store aluminum wire for extended periods. If you use aluminum wire, retract it and secure it back onto the wire spool after you finish welding.
7. Install the wire feeding tube on the welding head
Caution: To prevent accidentally triggering laser emission, ensure that Enable lasering is off on the touchscreen before operations.
(1) Pick up the welding head and remove the dustproof cap.

Note: Keep the dustproof cap properly. When you are not using the welding head, cover the welding tip with the cap to prevent dust from getting inside and damaging the welding head.
(2) Loosen the fastener on the wire feeding tube.

(3) Slide the fastener onto the welding head until the ring reaches the marking line. (You can further fine tune its position as needed.)

(4) Ensure that the wire feeding nozzle is centered and that the wire comes out from the groove of the welding nozzle. Then, tighten the fastener.

(5) Secure the wire feeding tube in the wire clamp of the welding head. Then, place the welding head back to the cradle.

Replacement & maintenance
For instructions on part replacement for the wire feeder, refer to the following documents:
- Replace the Welding Wire for xTool MetalFab Laser Welder
- Replace the Wire Feeding Nozzle for xTool MetalFab Laser Welder
If you encounter any exceptions related to welding wire, refer to the following documents for troubleshooting:
- Troubleshoot Wire Feeding Failure for xTool MetalFab Laser Welder 1200W
- Troubleshoot Erratic Wire Feeding for xTool MetalFab Laser Welder
- Troubleshoot Improper Wire Melting and Filling for xTool MetalFab Laser Welder

