Issue description
An "Image recognition failure" error message may appear in xTool Studio, xTool Creative Space (XCS) or xTool Studio software, or on the printer's LCD control panel. This issue typically occurs during one of two processes:
- Automatic calibration (often during the initial, first-time setup of the device); or
- When you are using the nozzle compensation function.
Please refer to the following content for troubleshooting.
Potential causes
- Environmental Issue: Ambient temperature is outside the recommended range (20°C–30°C).
- Ink Issue: Severe nozzle clogging or failure to eject ink.
- Consumable Issue: The PET film is dirty or stained.
- Hardware Issue: The processing platform (pre-heating plate) is dirty.
- Hardware Issue: The camera lens is dirty.
Troubleshooting procedures
Important notes
If this error occurs during the initial device setup and calibration, complete the troubleshooting steps below before restarting the calibration process:
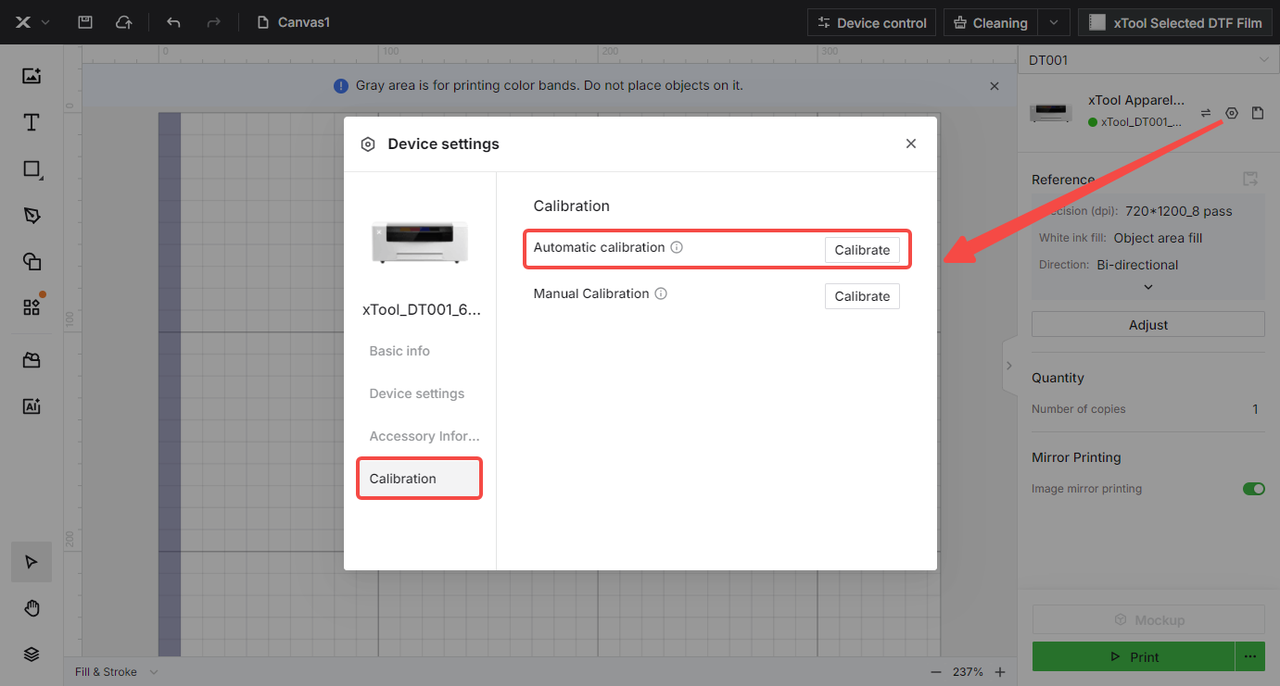
- To restart calibration in XCS: Navigate to Device settings > Calibration > Automatic calibration and follow the on-screen prompts.
Step 1: Check for ink output & clogged nozzles
Proper ink ejection is essential for accurate image recognition during calibration.
Print a test image
- Print a test pattern to verify whether all colors in the ink tube system are ejecting properly and to identify any severe clogs.
- On the control panel, tap: Maintenance > Print Test Image
- Evaluate the test image:
- Normal: Each color block shows no more than 5 missing lines.
- Problematic: Any color block shows more than 5 missing lines or is completely absent of color.
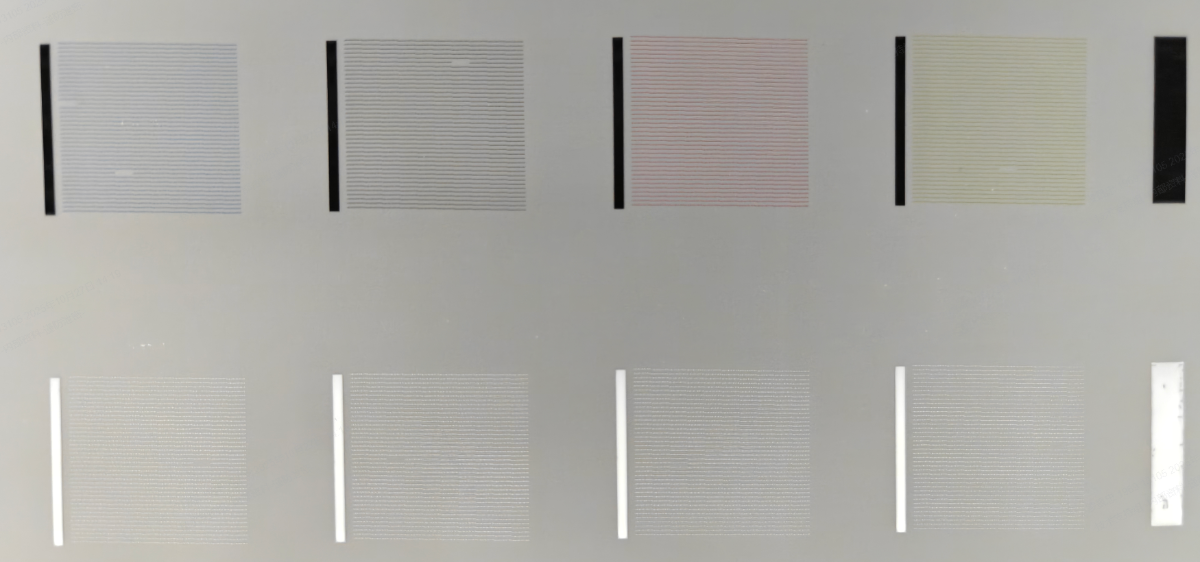
Normal Test Image
All color blocks print correctly with minimal or no missing lines.
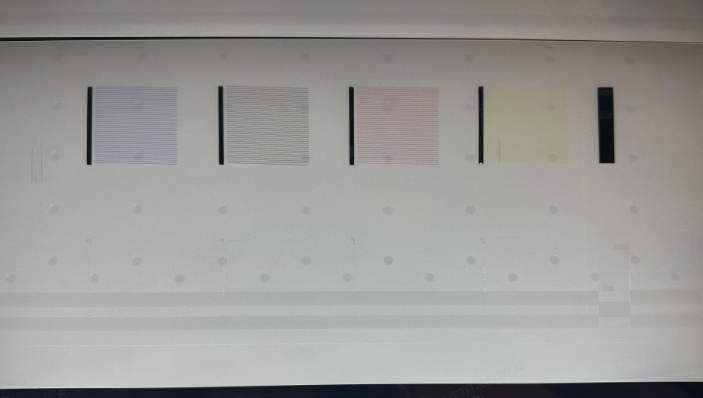
Blank Test Image
Cause: Complete clog in the print head or ink tube system.

Test Image with Missing Lines
Cause: Jammed or partially clogged print head.
Address clogged nozzles
If the test image fails (Missing lines/Blank):
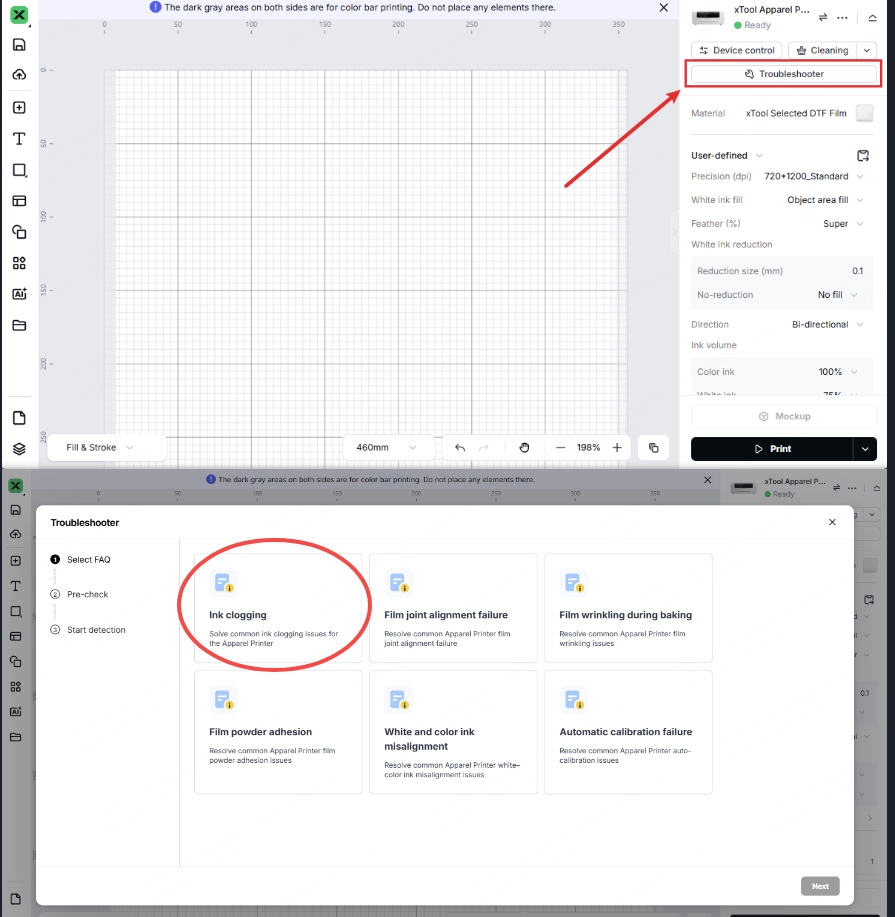
- In the xTool Studio software, click the "Ink clog check" button.
- Note: This function is currently available in xTool Studio only, not in xTool Creative Space.
- Follow the on-screen troubleshooting prompts step-by-step.
- If the issue cannot be resolved:
- Follow the software prompts to submit diagnostic information.
- This enables rapid analysis by xTool technical support.
If the Test Image is Normal (but Error Persists):
- Please export the Temp folder (this file is critical for analysis).
- In xTool Studio, click the X Menu icon (top left) > Settings.
- Open the File Setting tab.
- Under the "Log level" section, click the Open button.
- This opens a folder on your computer. Locate the
temp_projectfolder, compress it into a.zipfile, and save it for the final step of this guide. - Refer to the video guide for details: Exporting temp_project Folder for xTool Apparel Printer
- After exporting the Temp folder, compress it into a ZIP file and keep it for support submission and proceed with the following troubleshooting steps.
Step 2: Check room temperature
Low temperatures can cause ink to thicken, leading to poor print quality that the camera cannot recognize.
- Check Environment: Ensure the workspace temperature is within the recommended range of 20°C to 30°C (68°F to 86°F).
- Workaround: If the room is too cold, turn on your xTool OS1 Oven to preheat for 30 to 60 minutes. This can temporarily raise the ambient temperature around the printer.
- Retest: If the temperature is within range, proceed to Step 3.
Step 3: Check film condition
Stains, dust, or previous print residue on the film can confuse the camera.
- Inspect: Look for dirt, ink stains, or debris on the film surface, especially in the area where the calibration patterns will be printed.
- Fix:
- If the film is dirty, cut away the contaminated section.
- Feed fresh, clean film into the processing area.
- Retest: Attempt the calibration again. If the error persists, proceed to Step 4.
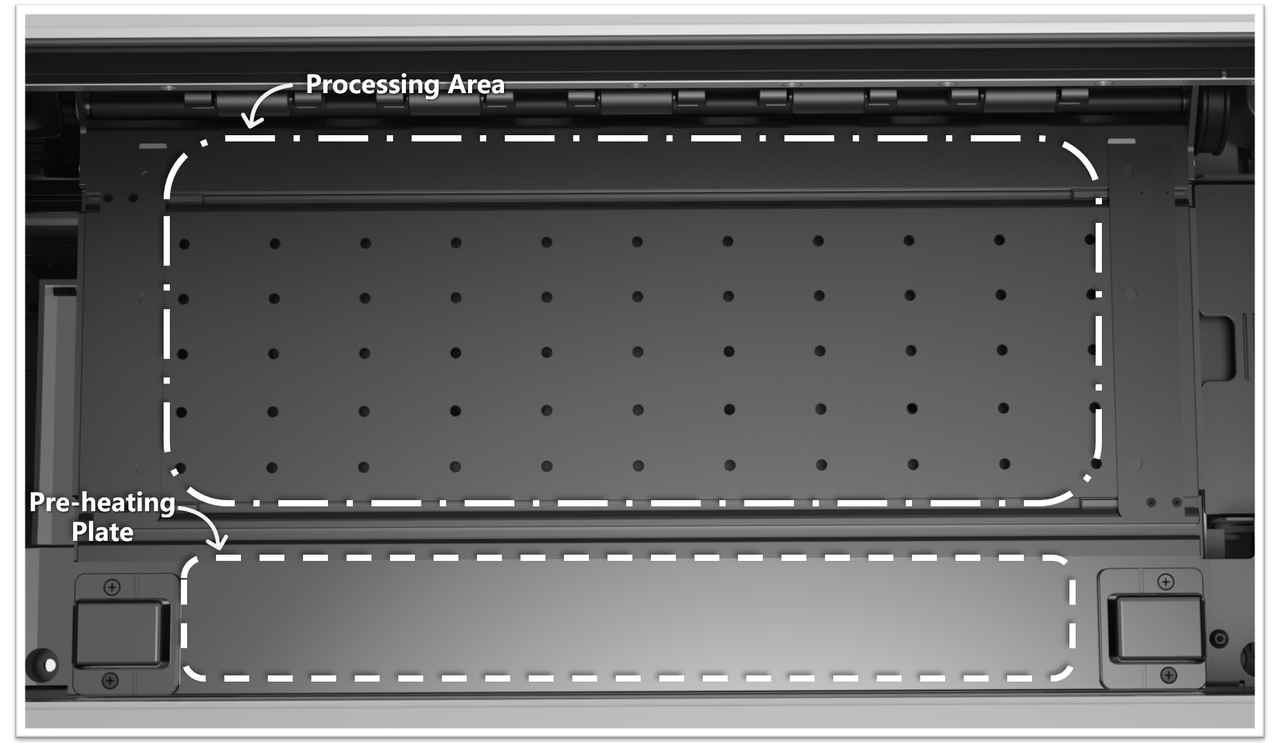
Step 4: Clean the processing area
A dirty processing area can compromise image recognition accuracy.
Required tools:
- Lint-free cloth
- Anhydrous ethanol
- Inspect the processing area:
- Check for ink residual, dust, or other contaminants.
- Pay special attention to the pre-heating plate surface.
- Clean the processing area (if needed):
- Use a lint-free cloth sprayed with anhydrous ethanol.
- Wipe the entire processing area clean.
- Remove any ink traces or debris.
- Clean the pre-heating plate (if needed):
- ‼️Important: Focus on cleaning the pre-heating plate thoroughly.
- Use a lint-free cloth with anhydrous ethanol to remove all contamination.
- Pre-heating plate cleanliness is critical for accurate recognition.
- Allow to dry completely:
- Wait for all alcohol to evaporate before testing.
- If the error persists, proceed to Step 5.
Step 5: Clean the camera
A smudge or dust on the camera lens is a common cause of this error.
Required tools:
- Lint-free cloth
- Anhydrous ethanol
- M2.5mm Philips screwdriver
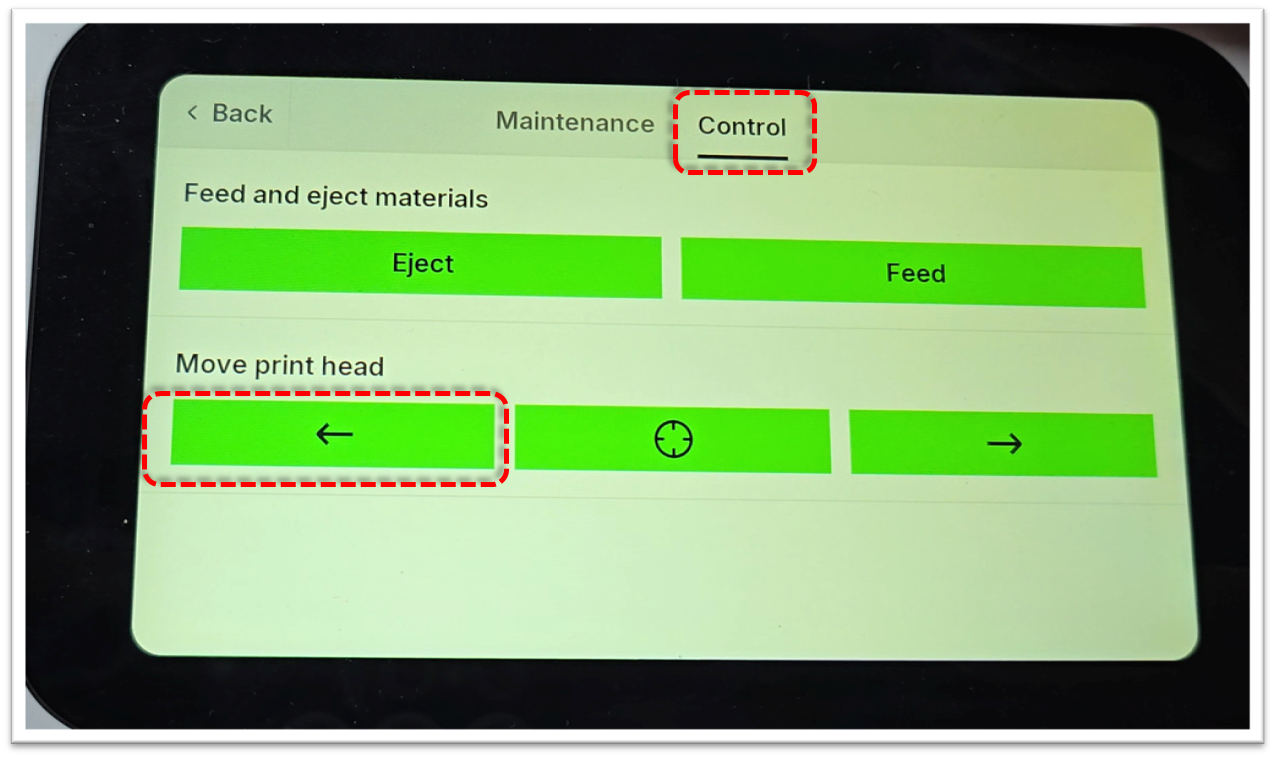
Centre the carriage:
- On the LCD touchscreen control panel, tap Maintenance > Control, before tapping the "Left arrow" to move the carriage to a central position.
Clean the camera on the print carriage:
- Open the printer's lid.
- Use a clean, lint-free cloth lightly sprayed with anhydrous ethanol.
- Gently wipe the camera lens inside the print carriage.
- Avoid applying excessive pressure to prevent damage.
Camera Location
Camera Close-up View
Alternative: Remove and clean the camera module (Advanced)
- For thorough cleaning, uninstall the entire camera module.
- Refer to the following video guide to access the camera module for cleaning:
- Video Guide: Accessing the Camera Module
Test the calibration:
- If cleaning doesn't resolve the issue, proceed to Step 6.
Step 6: Perform manual calibration
If automatic calibration fails repeatedly, you can use Manual Calibration. This method uses your eyes to align the patterns instead of the camera, achieving the same result.
What is Manual Calibration:
- Manual calibration is an alternative calibration method with results equivalent to automatic calibration
- Key difference: Manual calibration uses human visual assessment instead of camera-based image recognition
- Success rate: Manual calibration resolves the majority of image recognition issues
- In xTool Studio, click the three dots icon (top-right) > Device settings.
- Select the Calibration tab.
- Under the "Manual calibration" section, click Calibrate.
- Follow the on-screen instructions to complete the process.

If the problem persists
Should the issue persist after completing the preceding steps, please submit a ticket via the "Submit a Ticket" button in the "Help Ticket" section below. The standard response time is one business day.
Please include the following details to facilitate a quick diagnosis:
1 Temp folder (CRITICAL)
Attach the compressed .zip of the temp_project folder you exported in Step 1. This is vital for analyzing why the recognition failed.
2 Work Log Files
Please export the logs twice (Before and After the cable swap in Step 3).
- Method A: Via xTool Creative Space (XCS)
Settings (gear icon) > Basic info > Export log.- Compress the folder into a .zip file.
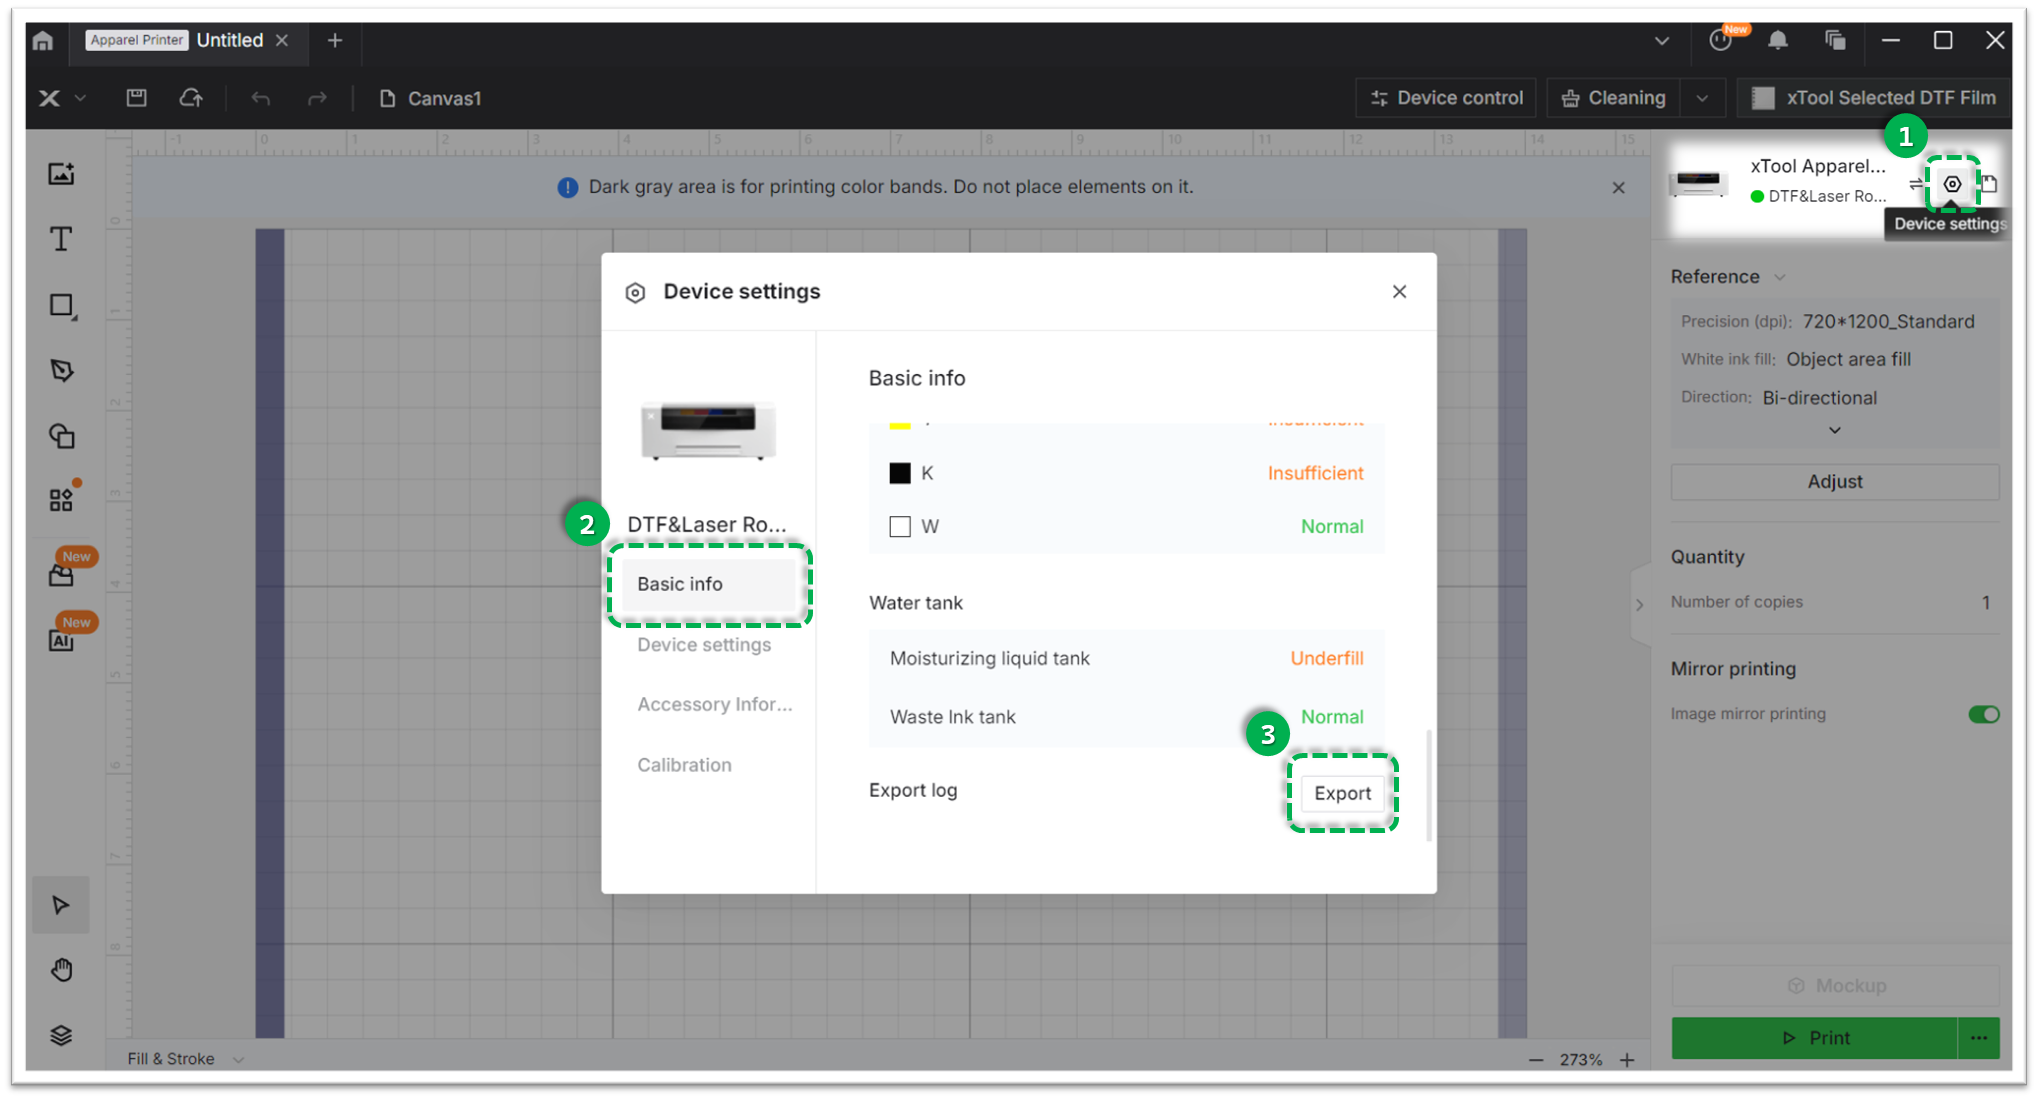
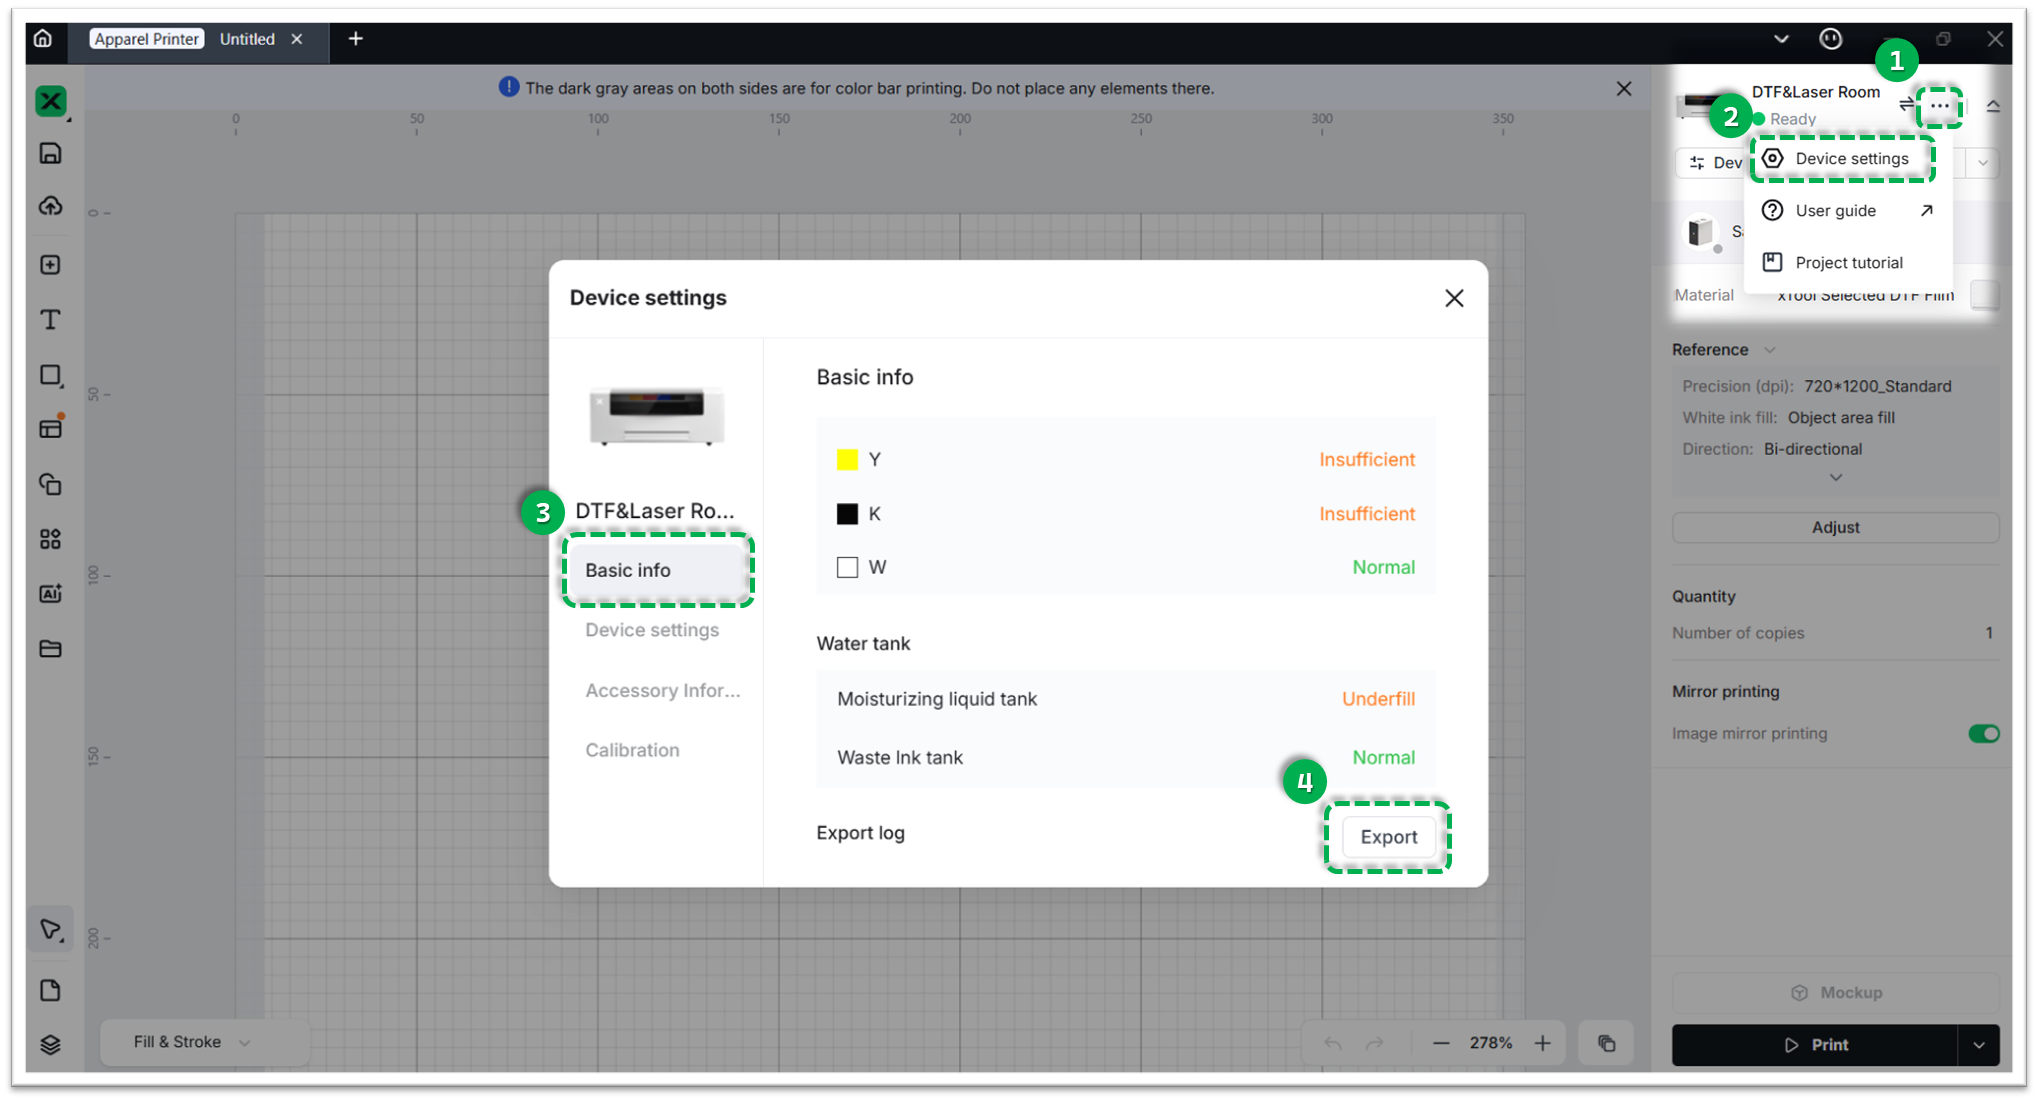
- Method B: Via xTool Studio
Three dots icon > Device Settings > Basic info > Export log.- Compress the folder into a .zip file.
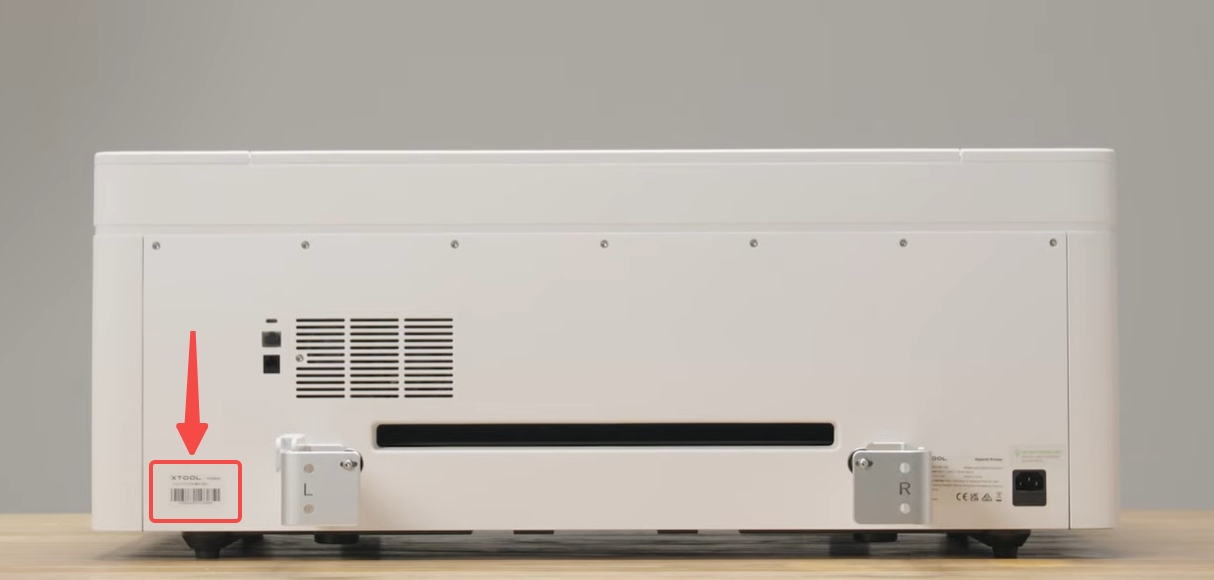
3 Device Information
- Serial Number (SN): Located on the rear panel label.
Documentation feedback
Help improve this content by providing feedback. If this content did not meet your requirements, select "No" in the "Was this page helpful?" section below. Include specific details about what was unclear or missing in the pop-up suggestion box. Feedback submissions are reviewed by xTool technical writers to enhance future documentation.
Services & Help
Learn & Education

Copyright © 2025 xTool All Rights Reserved.