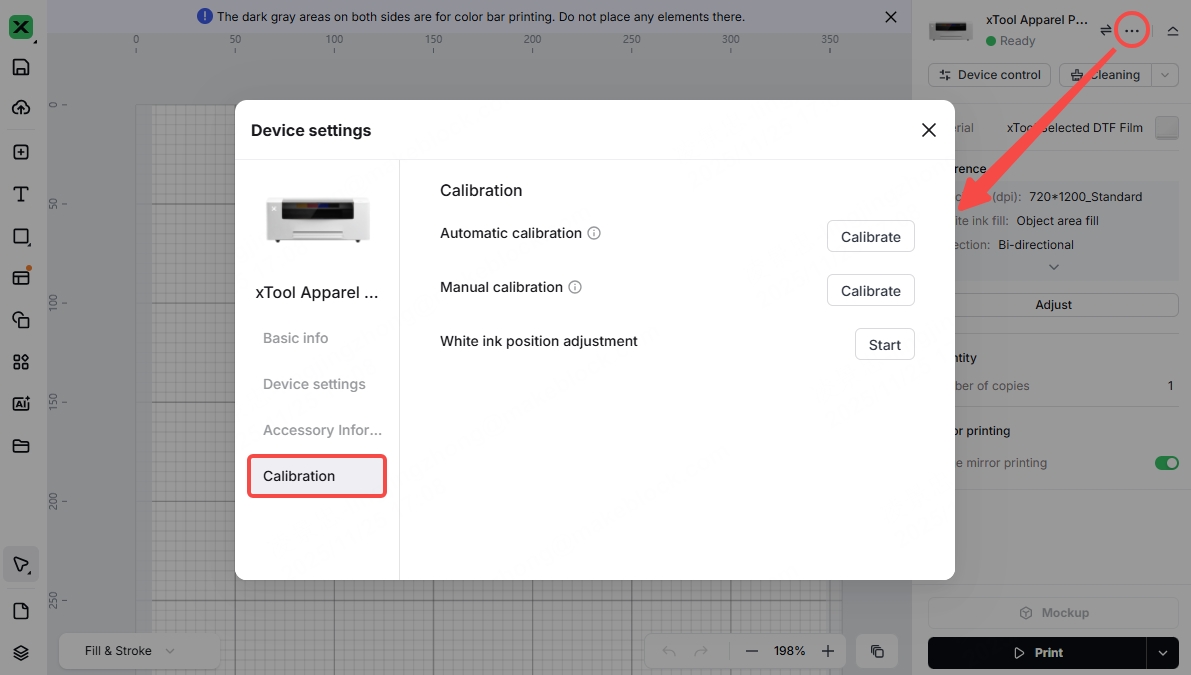
Issue description
During xTool Apparel Printer operation, you may receive an error message stating "Bump exceptions". This message may appear as a pop-up window in xTool software (xTool Creative Space or xTool Studio) or directly on xTool Apparel Printer's LCD panel. The error indicates that the system is unable to correctly detect the encoder strip.
Common causes
Scenario A: The printing carriage did not touch the film
- Accidental touch
- Incorrect installation of the front cover of the printing carriage
- Incorrect installation of the side impact guards on the print carriage
- Bump sensor malfunction
Scenario B: The printing carriage has touched the film
- xTool Apparel Printer cannot recognize the xTool Oven
- Uneven film front end
- Misalignment with the marking line
- Guide Plate Mispositioning
Troubleshooting procedure
Note before troubleshooting
If Bump exceptions occurred during calibration, please resolve them and then re-enter the calibration screen to calibrate again.
Scenario A: The printing carriage did not touch the film
The printing carriage did not touch the film, or a bump exception suddenly pops up during normal printing.
- Accidental touch
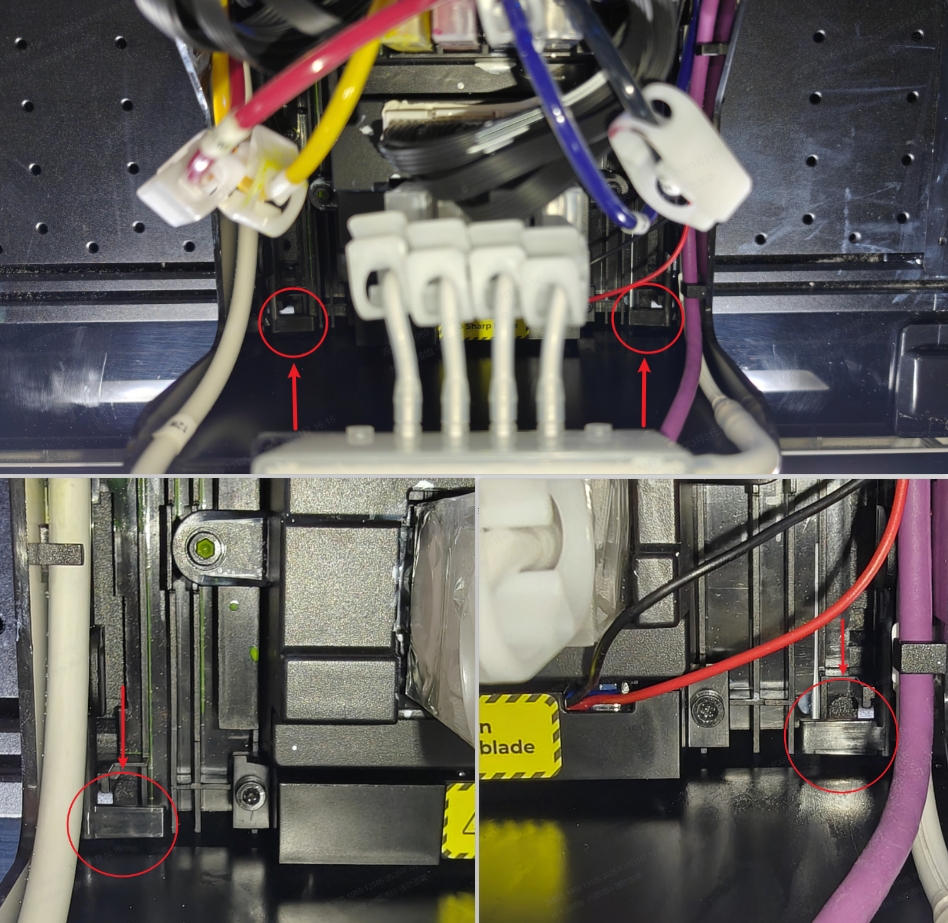
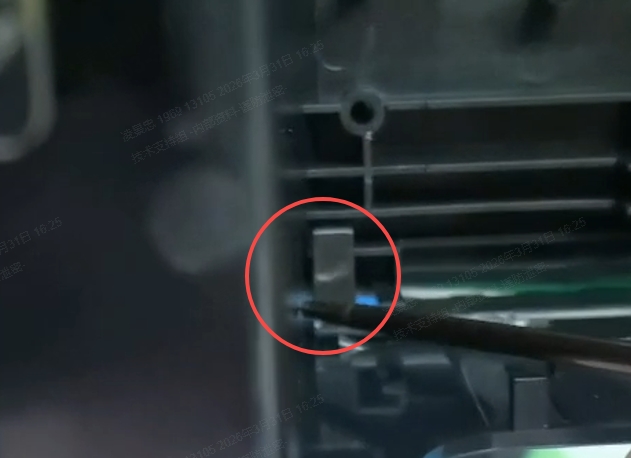
1. Check the positions of the side bump sensors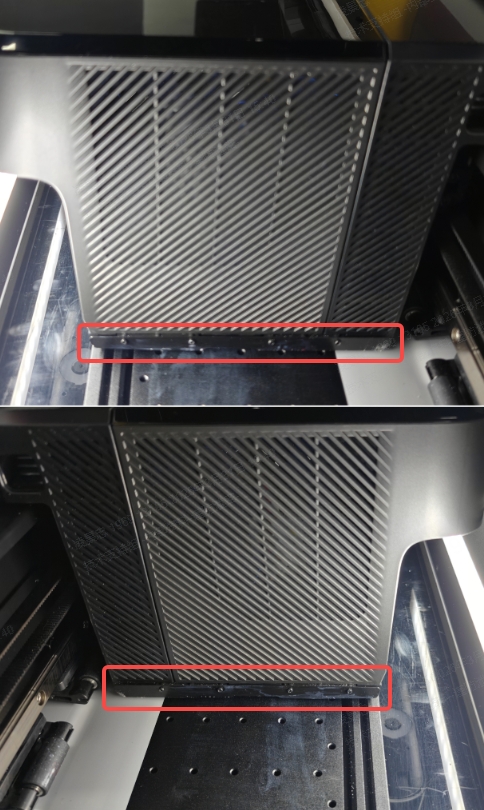
2. Click "Confirm" and then check if the Bump exception still occurs. If it does, proceed to the next step. - Reinstall the front cover of the print carriage
1. Watch this video to check if the front cover is installed incorrectly. Please note that the front cover must be aligned with the slots during installation. If installed incorrectly, it may cause bump exceptions during printing: Reinstall the front cover of the print carriage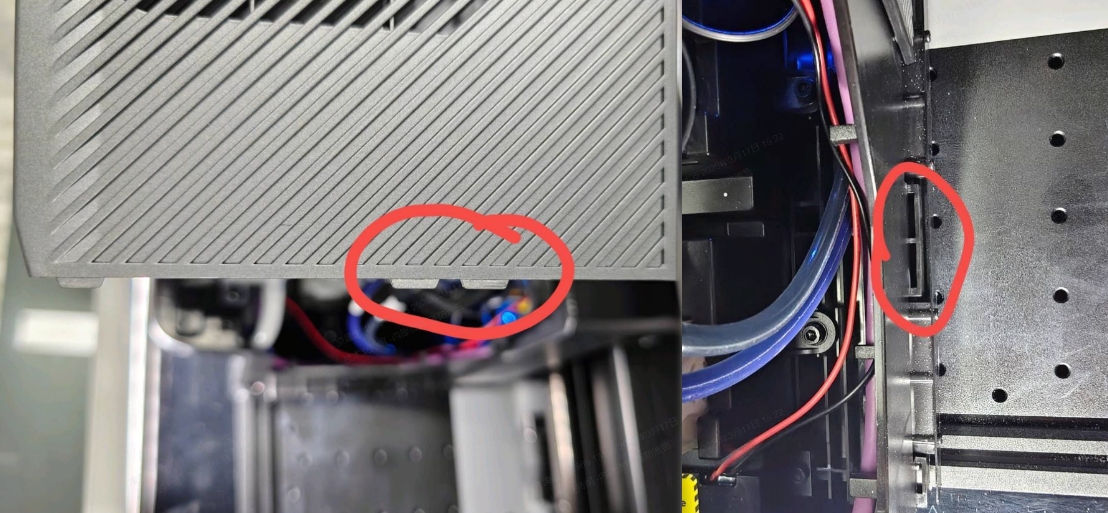
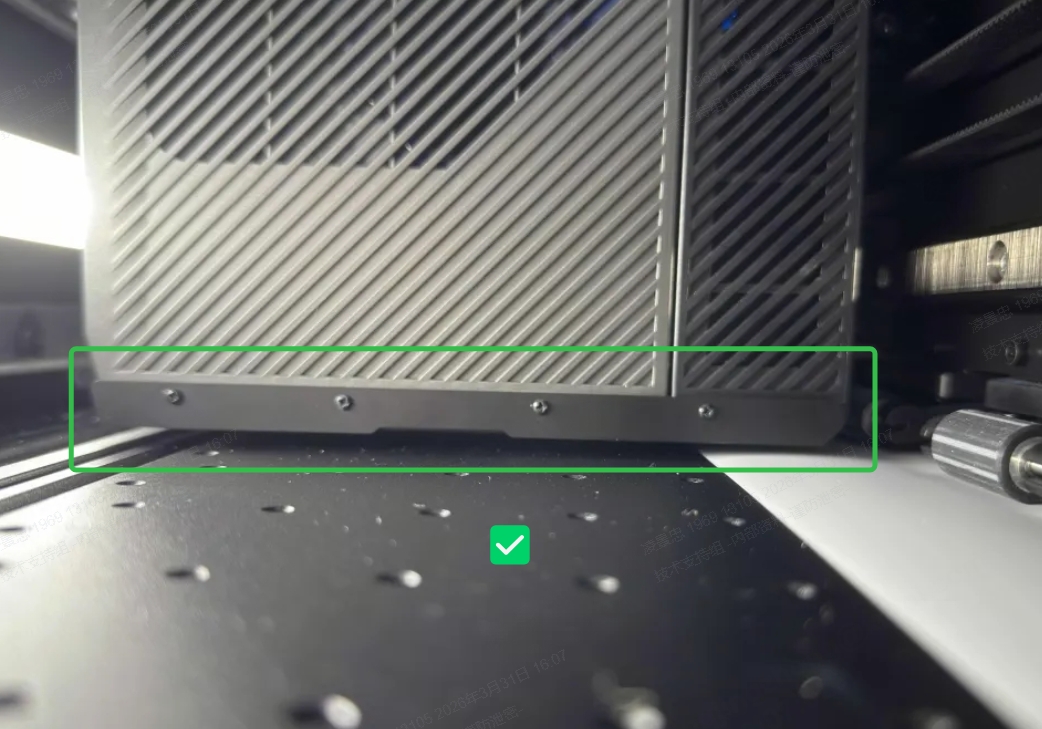
2. If the problem persists even after a correct installation, please proceed to the next step. - Reinstall the side impact guards on the print carriage
1. Check the installation of the side impact guards inside the print carriage
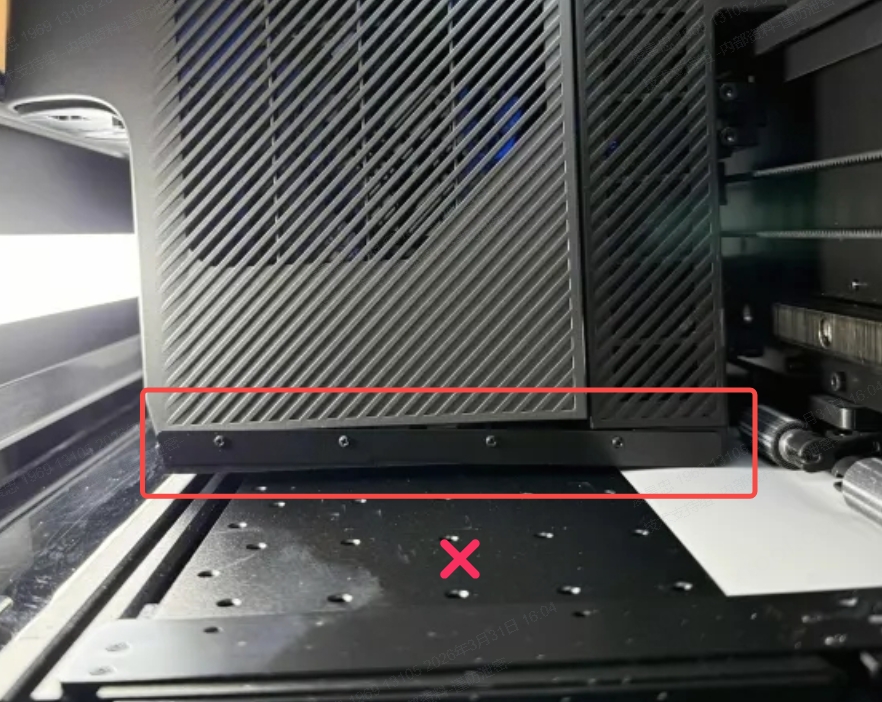
2. If an installation problem occurs on the right side, please remove the front cover of the printhead, check the side impact guard clips, and use a tool to press the clips.
- If the side impact guards are installed correctly and flush, please proceed to the next step.
- Change the bump sensor (low probability)
1. This may be caused by a malfunction in the bump sensor, resulting in a false trigger of the sensor signal.
2. If you have confirmed that there are no issues with the preceding steps, please contact customer service, send us the photos you took during your troubleshooting for analysis, and let us know what troubleshooting steps you have already taken.
Scenario B: The printing carriage has touched the film
The print carriage collided with the film, triggering the bump sensor and causing a bump exception.
- Manually handle abnormal film
1. Collisions can cause unevenness at the front end of the film, affecting the connection between the film and the xTool Oven. Please use scissors or other tools to cut off all wrinkles in the film.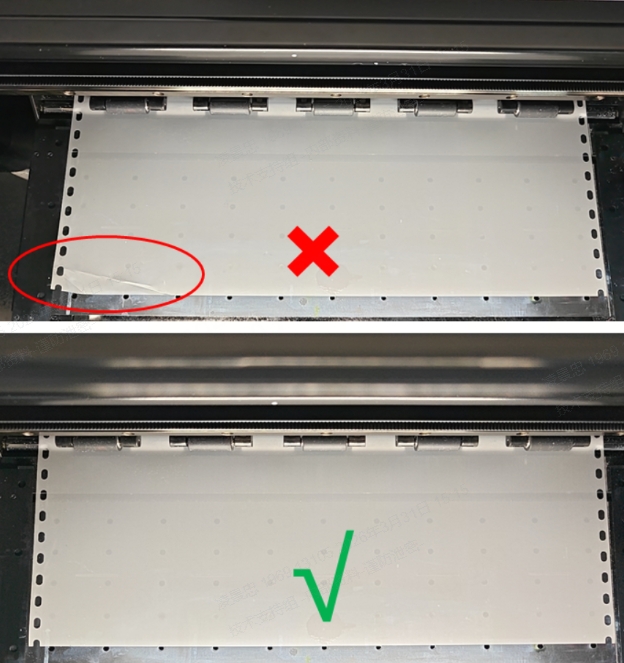
2. After correctly installing the film, ensure that the pressure plates on both sides press the film firmly (halfway through the holes), then restart the device.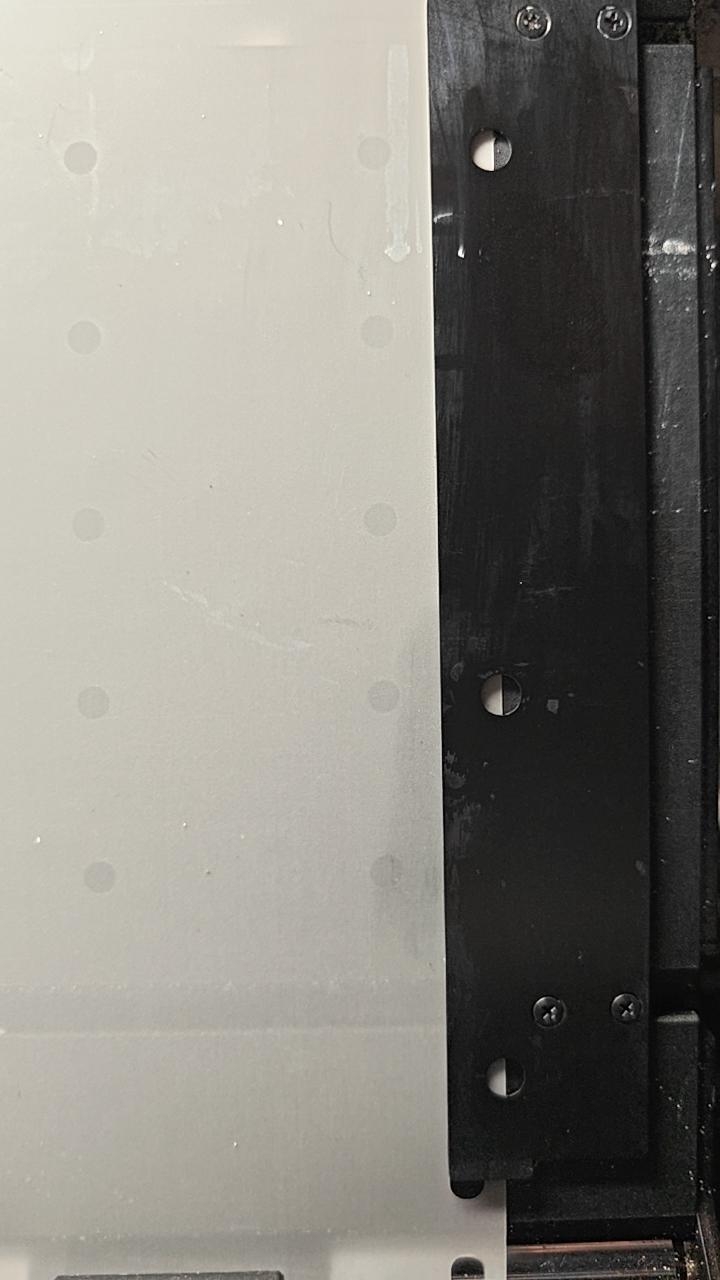
3. Click "Maintenance" to start up cleaning.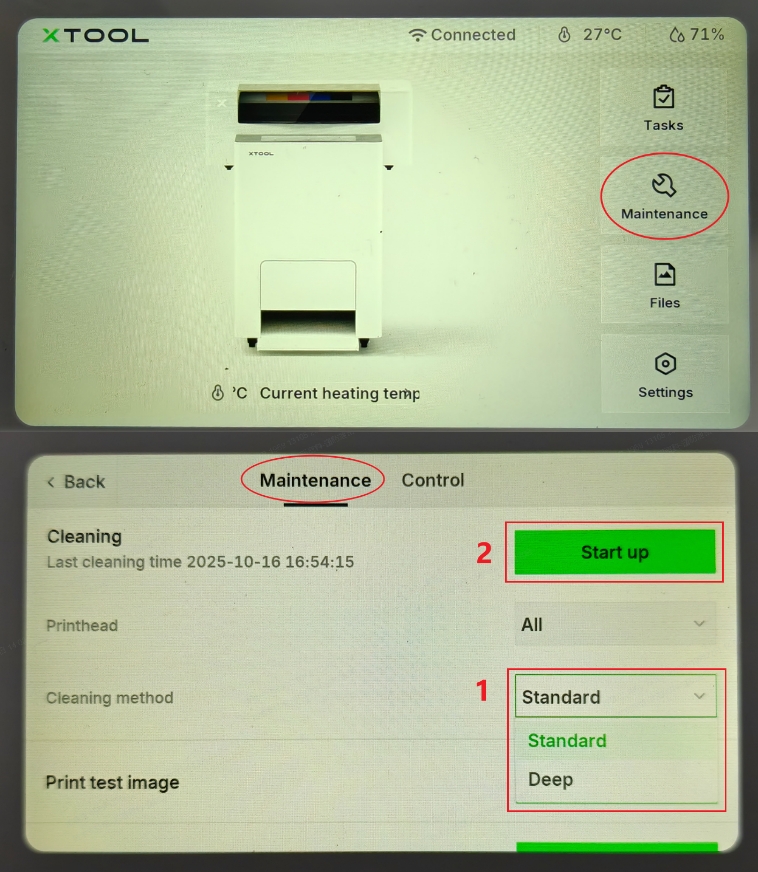
4. Once cleaning is complete, proceed to the next step - Check the status of xTool Oven
1. Confirm that xTool Oven is powered on and can be recognized.
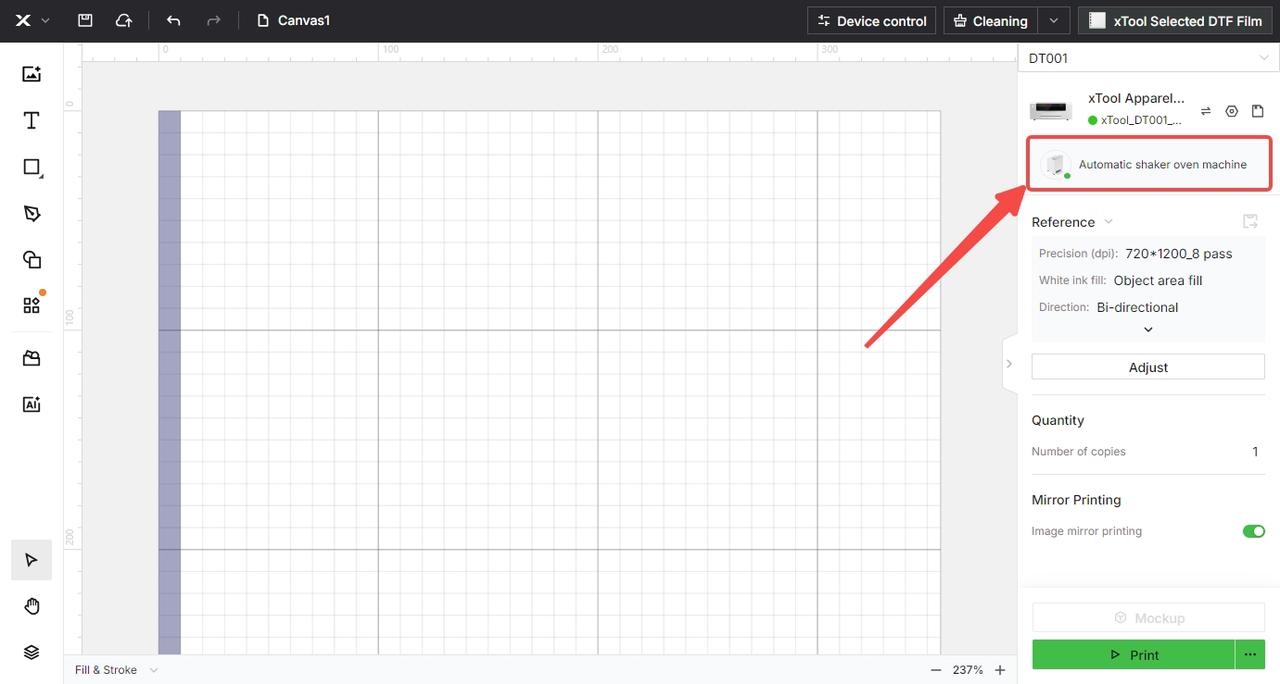
2. If it cannot be recognized, please follow the troubleshooting steps in this article: xTool Apparel Printer & OS1 Troubleshooting: Printer Cannot Recognize the Oven (Connection Failure)
3. If the device is recognized properly, proceed to the next step.
- Properly adjust PET film alignment
1. When aligning the film with the white line on the right, ensure it is taut and properly aligned—do not allow it to sag. The film must not overlap the white line, nor should it be too far from it. It is recommended that the distance from the film to the left edge of the white line be 0.5–1 mm.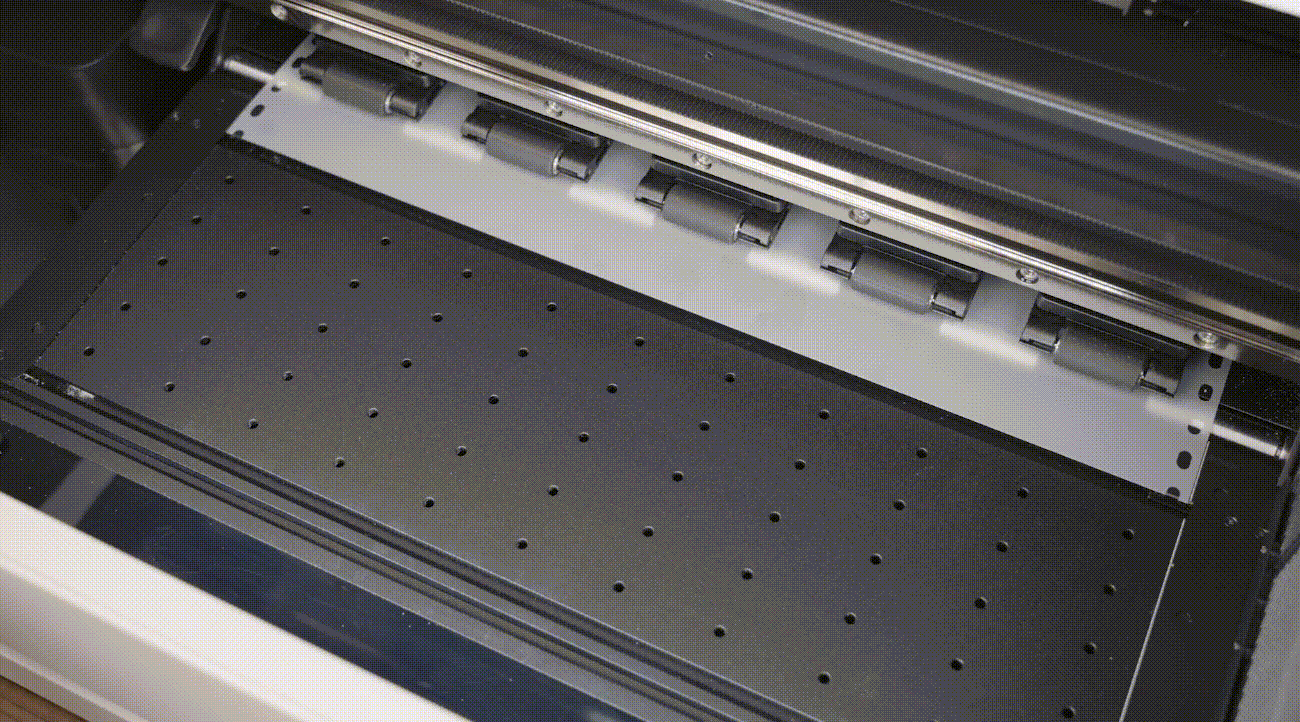
2. If the film is in the correct position, proceed to the next step. - Inspect both guide plates
1. Ensure that the holes on the guide plates cover roughly half of the film edge. The pressure applied should be balanced—neither too tight nor too loose.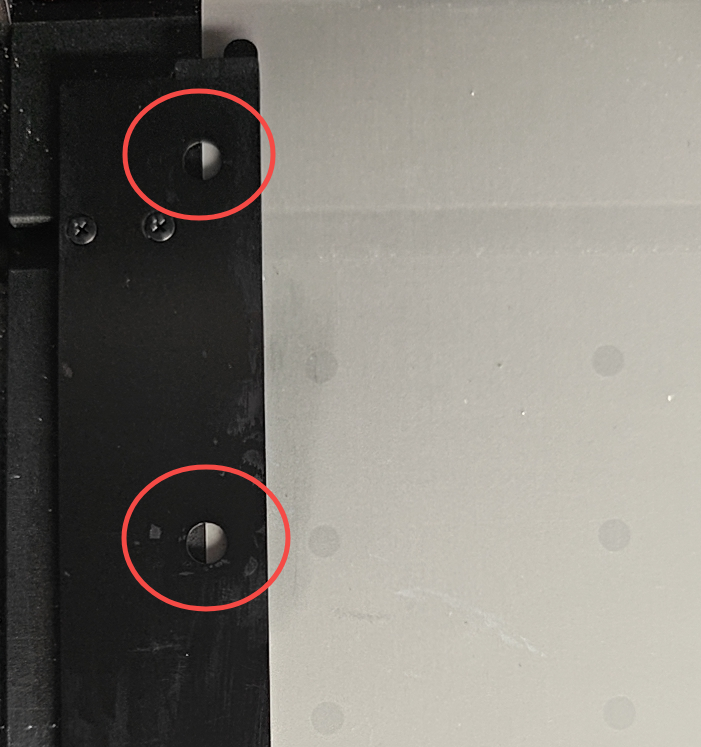
2. If the guide plates are correctly positioned, proceed to the next step. - Perform “Device self-check”
Please refer to this video for the self-check procedure. If an error occurs, follow the troubleshooting steps in the video to resolve it: Troubleshoot "Device Self-Check" Failure for xTool Apparel Printer & xTool OS1
If the error remains unresolved after following the previous steps, it might be necessary to replace one or more components. Proceed to the "If the problem persists" section to contact xTool Customer Service for further assistance.
If the problem persists
Should the issue persist after completing the preceding steps, submit a ticket via the "Submit a Ticket" button in the "Help Ticket" section below. The standard response time for xTool Customer Service is one business day.
Please include the following details to facilitate a quick diagnosis:
- Firmware version
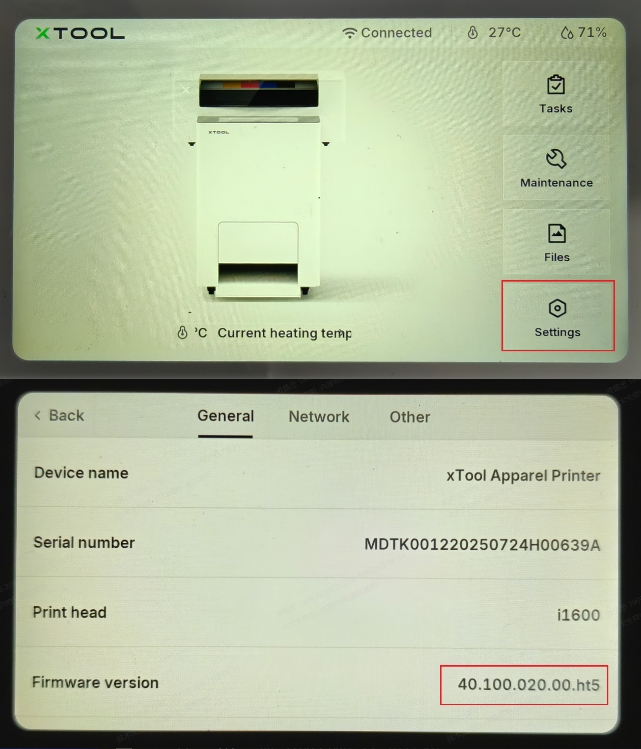
- Work log files
- Serial Number
- Installation of the side impact guards
- Installation of the front cover of the print carriage
- Position of the film and the white marking line
- The condition of the guide plates on both sides
Documentation feedback
Help improve this content by providing feedback. If this content did not meet your requirements, select "No" in the "Was this page helpful?" section below. Include specific details about what was unclear or missing in the pop-up suggestion box. Feedback submissions are reviewed by xTool technical writers to enhance future documentation.
Services & Help
Learn & Education

Copyright © 2025 xTool All Rights Reserved.