Applicable scenarios
Explanation of the distant-view camera positioning accuracy:
- When processing 3 mm material at the center of the processing area, the distant-view camera’s theoretical positioning accuracy is <1 mm.
- The closer the processing position is to the edge, or the more the height of the processing position deviates from the top surface height of the slats, the greater the error will be.
Before performing the official calibration, please review the article to rule out the issue of excessive positioning errors caused by false faults.
Calibration tools
- Windows/macOS computer
- 2 flat boards (300*300*3mm) *2, or one whole board of equivalent size, such as acrylic sheets
- A4 paper * 3
- Masking tape
Precaution
- The flatness of the material and the white paper directly affects calibration accuracy. Make sure they are flat.
- The paper must be pure white and free of any stains or color. Otherwise, it interferes with the camera's recognition.
- During calibration, avoid exposing the lid to direct bright light, as this may affect the camera's exposure settings.
- During calibration, please temporarily turn off any external equipment, such as exhaust fans and air purifiers, to prevent airflow from disturbing the paper.
- If you are unable to click Next during calibration, exit the calibration function and try again.
Troubleshooting procedures
1. Access calibration mode
- Click on the gear icon in the upper-right corner to access Device settings.
- Based on your computer's operating system, press the corresponding keyboard shortcut to load the Distance measurement option:
- For Windows: Ctrl+Shift+C
- For macOS: Command+Shift+C
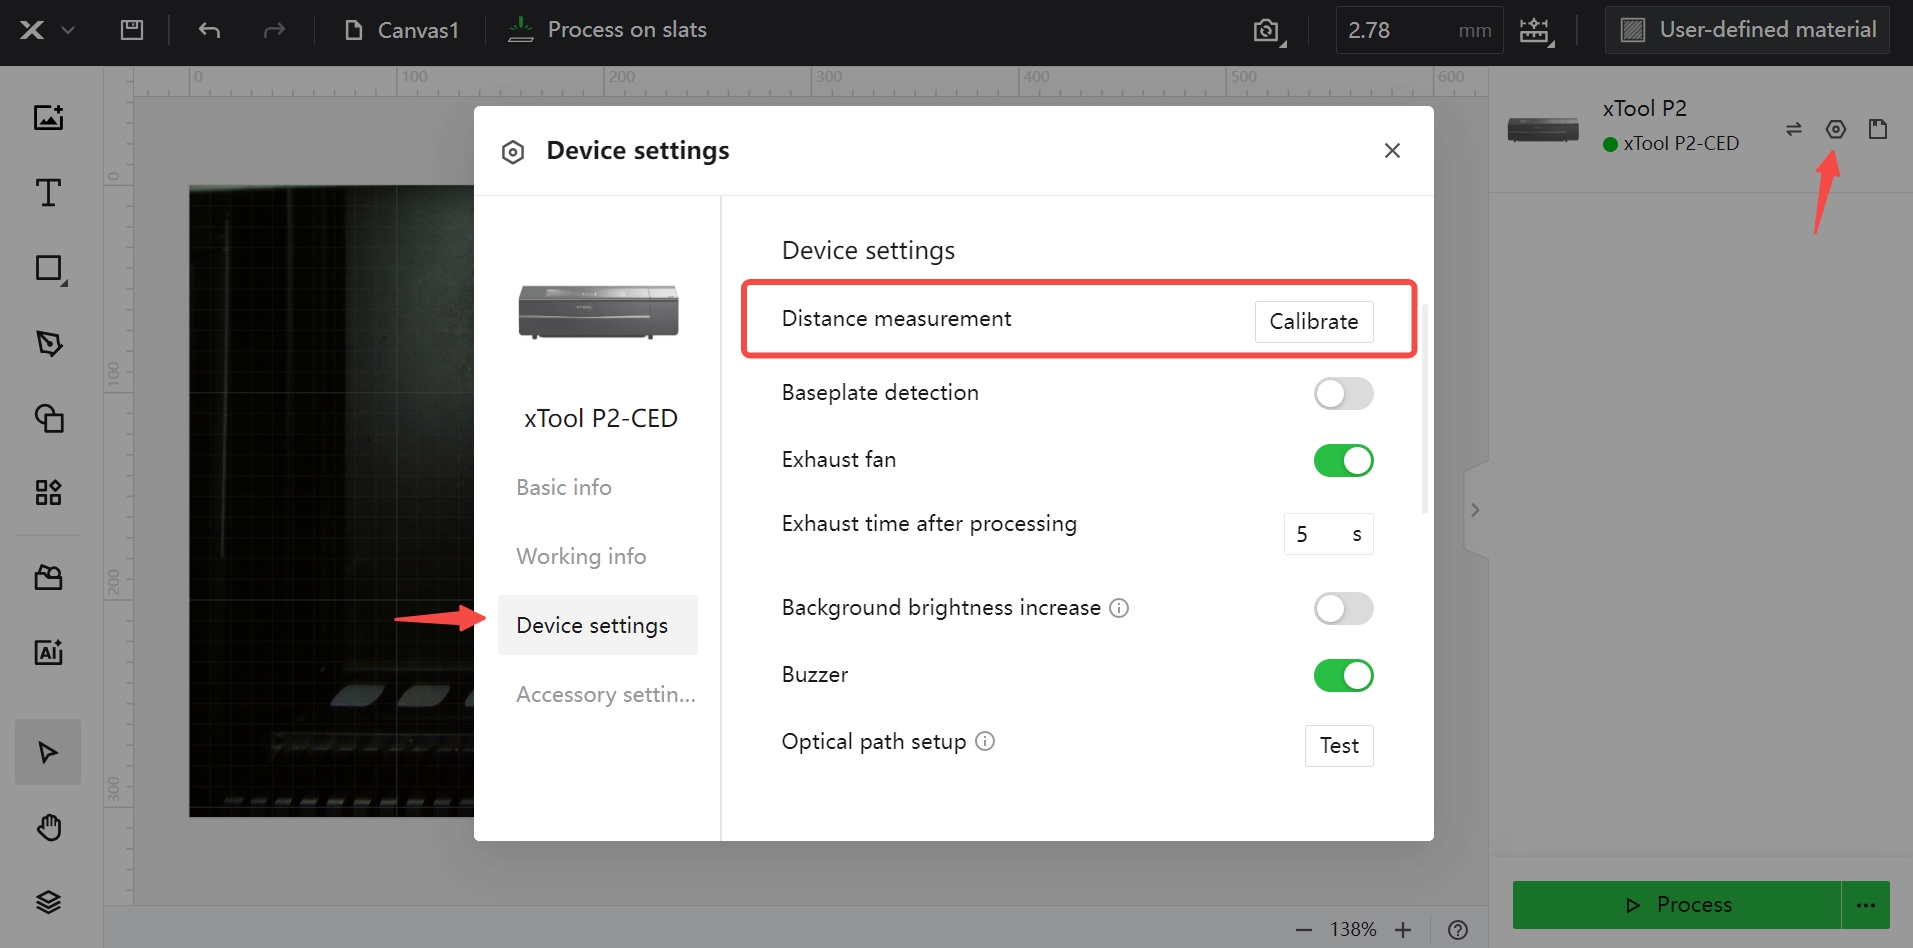
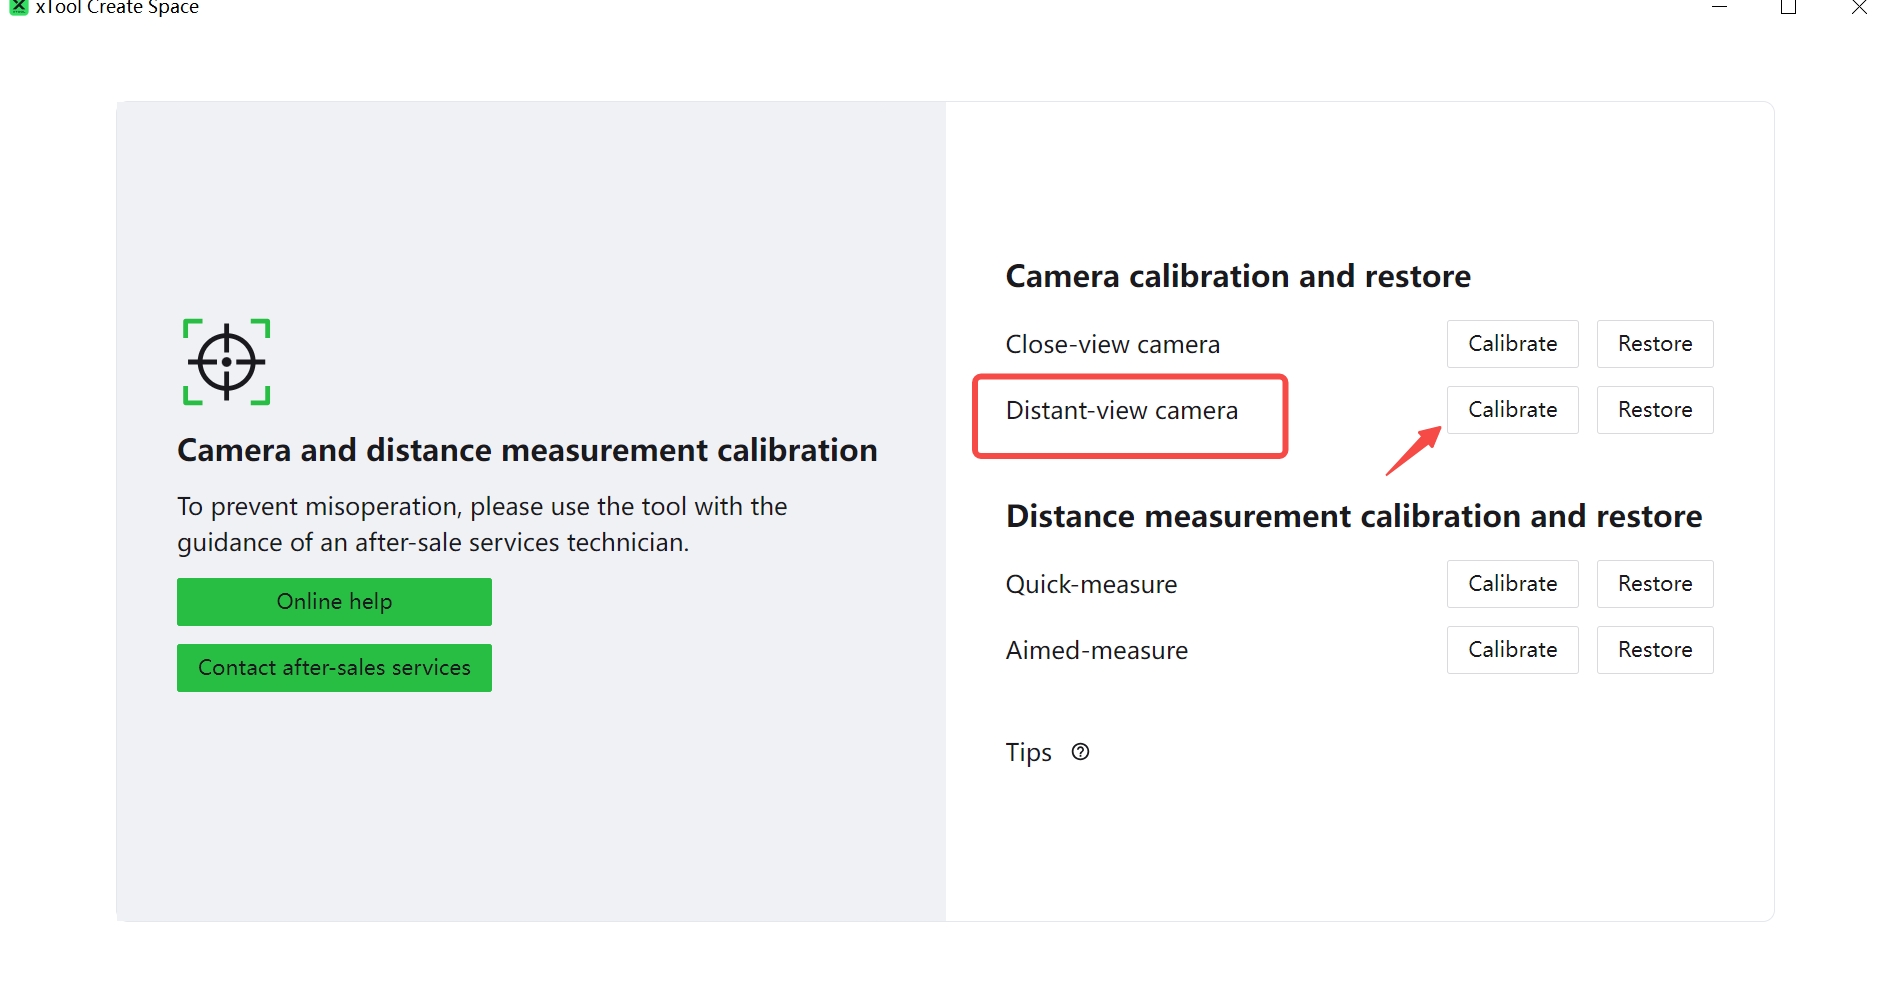
- Locate the Distant-view camera and click on Calibrate.
2. Set up materials
- Install all slats onto the device.
- Place 2 acrylic sheets on the slats and attach 3 sheets of A4 paper to the acrylics.
- Secure the paper with white tape and ensure the paper covers all the acrylic sheets as smoothly as possible (refer to the image below). The higher flatness of the paper will result in greater calibration accuracy.
- Click Next to proceed.

3. Start calibration
- Press the button on the device to initiate the calibration file processing.

- Await the processing to complete.
If processing stops, return to the software interface to check whether an error pop-up appears, and after resolving the issue indicated in the pop-up, try again.

4. Verify calibration results
Once processing is completed, xTool Studio will automatically assess the calibration accuracy.

- If successful, a Calibration done message will appear.
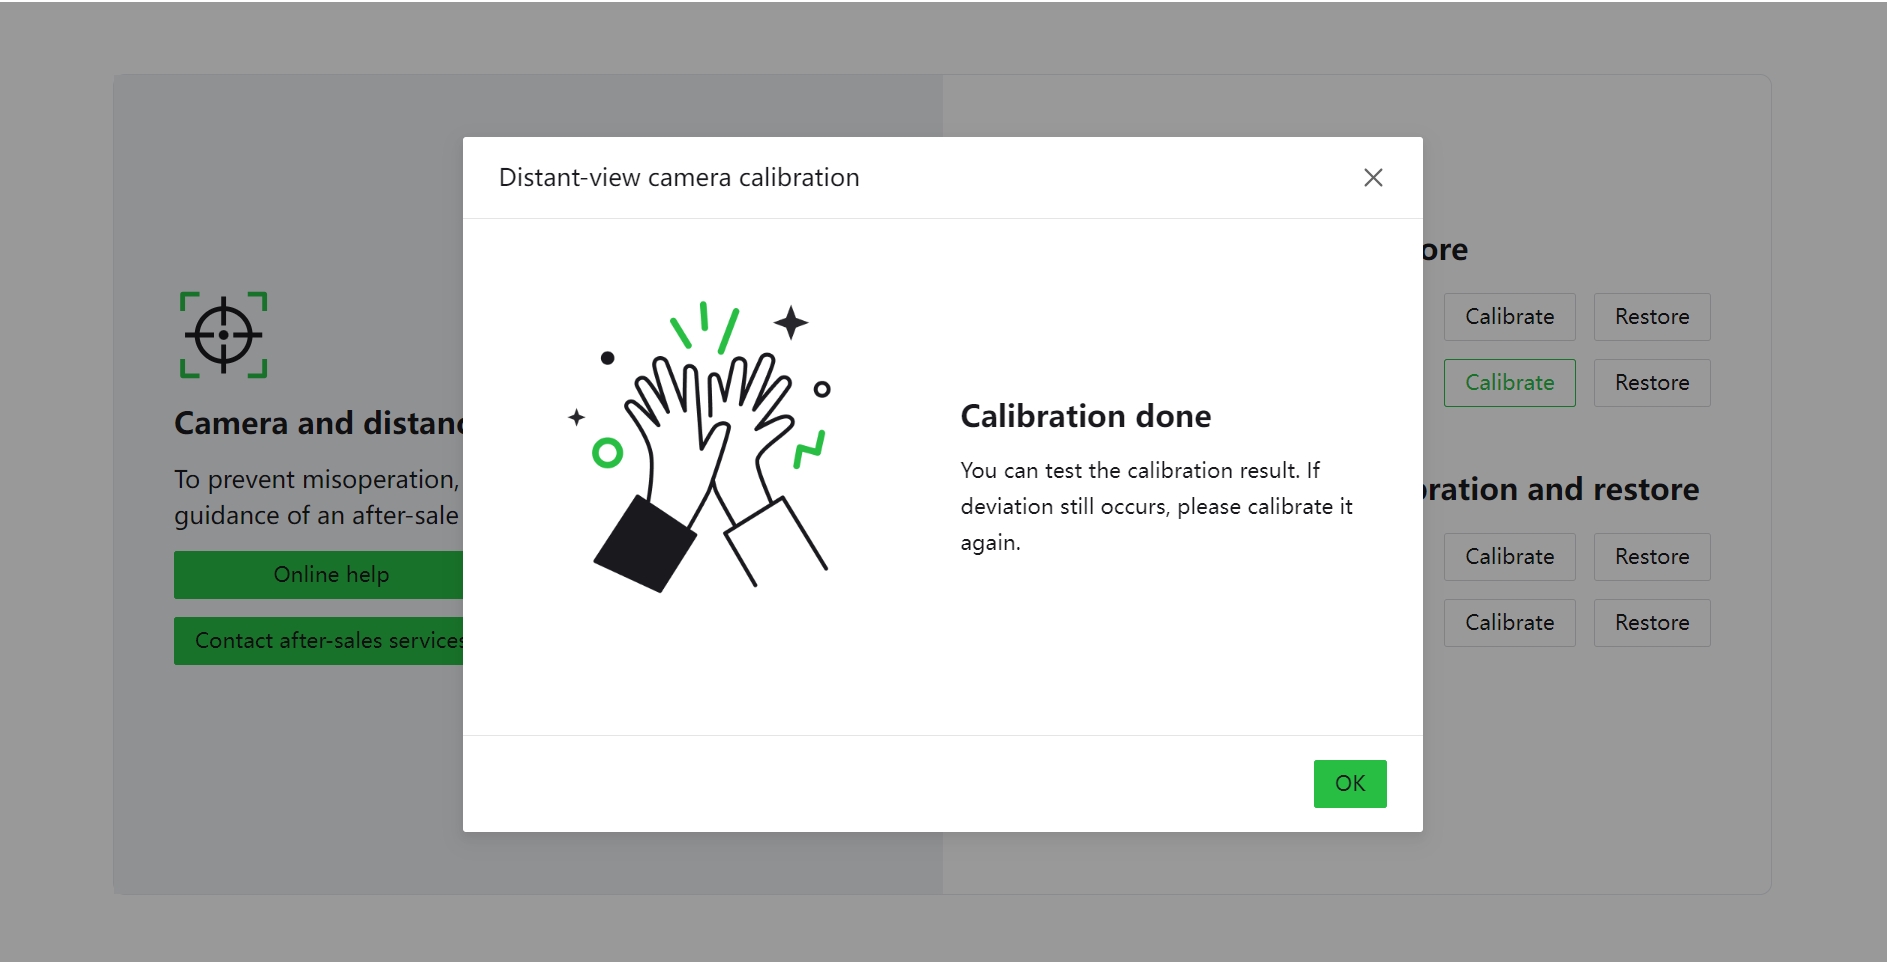
- If calibration fails, repeat the steps above to recalibrate.
If none of the above works
1. Clean the camera's lens
Use a lint-free cloth dipped in alcohol to clean the lens.
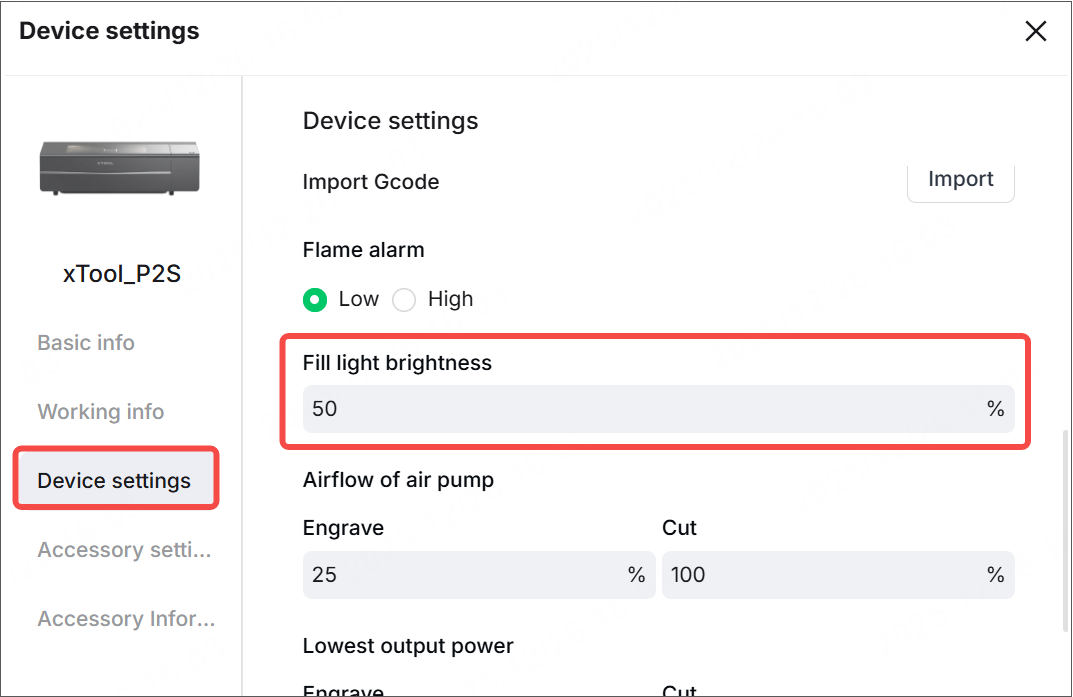
2. Adjust the fill light and brightness
Disable the Background brightness increase and adjust Fill light brightness to 50%.
3. Restore the calibration data
Go to Distant-view camera to calibrate the distant-view camera. Click Restore.

4. Restart the device and computer
Restart the device and the software before performing calibration.
5. Recalibrate
Perform camera calibration again following the previous steps:
- If calibration is successful, proceed to the next step to verify the calibration results.
- If the calibration process still indicates calibration failure, adjust the brightness up or down based on the actual calibration conditions. Draw the curtains and turn off the ambient lights. Then recalibrate.
6. Check the calibration result
Return to the software and test the image capture performance and positioning accuracy of the calibrated camera:
- If there is no obvious distortion in the camera preview and the positioning accuracy is close to 1 mm, the calibration is complete.
- If there are obvious distorted areas in the camera preview or the positioning accuracy is still significantly off, please try using a flatter board and white paper to continue the calibration. If the problem persists after multiple attempts, please follow the steps below to test the camera imaging quality.
What should I do if calibration keeps failing repeatedly?
1. Test the camera capturing quality
This step applies only to xTool P2 and P2S with firmware version 40.22.010 and earlier. If a P2S with a firmware version after 010 requires this step, refer to this tutorial to downgrade the firmware.

1. Turn off the VPN, connect the device via USB, and open the link below in your browser according to your computer's operating system to obtain the camera's raw image.
- For Windows: 201.234.3.1:8329/snap?stream=0&mode=origin
- For macOS: 201.234.4.1:8329/snap?stream=0&mode=origin
2. View the original fisheye camera photo in your browser (the image below is a normal photo):

- If the image is distorted or warped, contact xTool after-sales service (support@xtool.com) for a new camera to replace it.
- If the image is not distorted or warped, it indicates that the camera is functioning properly. Proceed to the next step and send the camera calibration data to the xTool team for analysis.
2. Collect the information
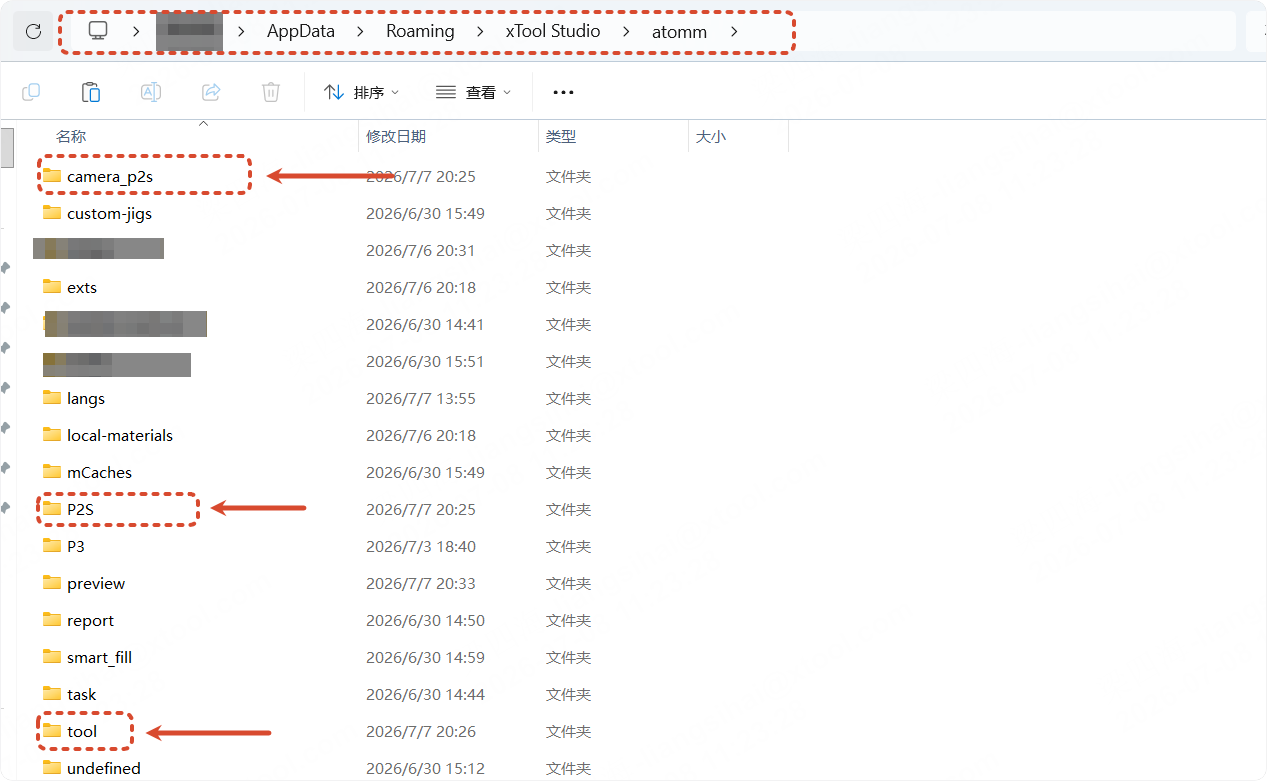
Follow the steps below to locate and open the folder containing the camera calibration data and image files. Compress them into a single archive and email the archive, along with the device work log, to the xTool support team (support@xtool.com) for analysis.
- Calibration data and calibration images folders


- Work log

