Introduction to xTool Screen Printer
To learn more about screen printing and xTool Screen Printer before use, you can refer to:
- Introduction to xTool Screen Printer
- FAQs on Basics and Specs About xTool Screen Printer
- FAQs on xTool Screen Printer
Download PDF files (multi-language)
|
|
|
|
|
|
|
|
|
|
|
|


List of items
Basic kit (small frame)
|
|
|
|
xTool Screen Printer | Magnetic board | Small frame 9" x 12" | Fixing pin |
|
|
|
|
Cutting mat | Small squeegee 8.2" x 4.8" | Silicone strip | Fast-engrave screen 9" x 12" |
|
|
|
|
Ink spatula 8" x 0.8" | Water-based ink | Oil painting canvas | Screen for test |
|
|
|
|
User manual | FAQs | Sticker | Screen & frame card |
|
|
| |
Accessory & material card |
|
|


Basic kit
|
|
|
|
xTool Screen Printer | Magnetic board | Frame 11.5" x 16" | Fixing pin |
|
|
|
|
Cutting mat | Squeegee 10.7" x 4.8" | Silicone strip | Fast-engrave screen 11.5" x 16" |
|
|
|
|
Ink spatula 8" x 0.8" | Water-based ink | Oil painting canvas | Screen for test |
|
|
|
|
User manual | FAQs | Sticker | Screen & frame card |
|
|
| |
Accessory & material card |
|
|


💡 Note: The screens included in the kits are 100-steel-mesh screens. You can buy 200-steel-mesh screens at xtool.com. The screen printing process works the same for both types of screens.
Meet your xTool Screen Printer


Use your xTool Screen Printer
Mount the screen on the frame

(1) Get the screen frame, flip it to the bottom face, and release all wrenches.


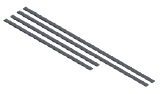
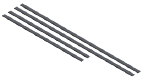
(2) Fit a silicone strip to the screen frame.


(3) Press the silicone strip back and forth to secure it.

(4) Fit other three silicone strips in the same way.

Note: Silicone strips are not needed for steel screens.
(5) Tear off the film of the screen's printing face and flip it over.

(6) Fit the screen into the frame and make sure the four corners are all in place and the screen is centered in the frame.

Note: Ensure that the screen is on top of the screen. Do not press the screen when mounting it.

(7) Get the four fixing pins and fit one into a side groove.

(8) Position the fixing pin properly and rotate to secure it.

(9) Fit other three fixing pins in the same way.

(10) Flip the screen frame back to its printing face, and lock all wrenches.

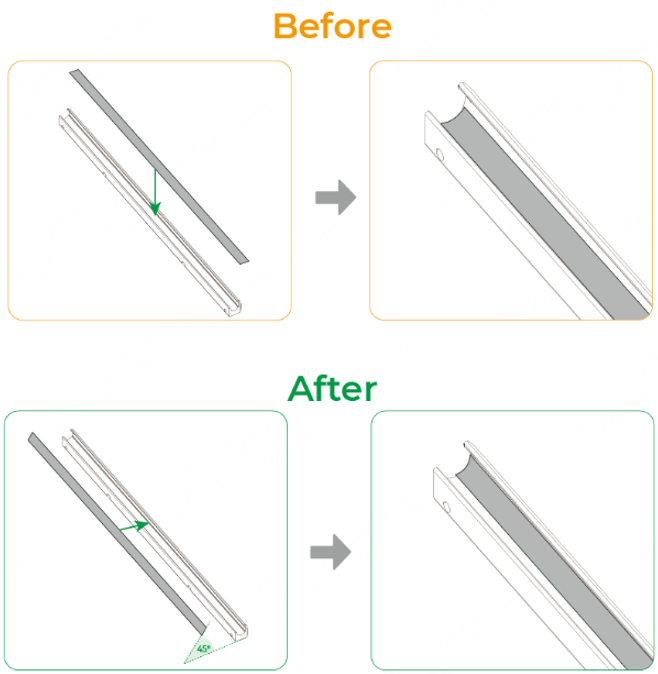
Note: If any fixing pin falls after you turn the frame over or the screen is not fully tightened, reattach the silicone strips at a 45° angle and follow the same subsequent steps to install other components.
Prepare the screen
You can use a laser machine to prepare your screen easily.
(1) Design or import a pattern on the software that works with your laser machine.
If your pattern is a bitmap image, pre-process it using the halftone technique. For details, you can read this article or watch this video tutorial.
(2) Flip the frame and screen over so the back side faces up.

(3) Place the screen, which has been mounted on the frame, in the processing area of the laser machine to engrave your design on it. For details about preparing your screen with xTool products, you can watch this video tutorial.
Print your design

(1) Align the three magnetic pieces on the back of the magnetic board with the magnets on the printer.

(2) After you mount the magnetic board on the screen printer, you can fine-tune the position of the magnetic board by using the three position fine-tuning knobs.

(3) You can determine whether to use the cutting mat based on the texture of your material.
If the material, such as textile fabric, is easy to slide, place the cutting mat on the magnetic board and put the material on the cutting mat.

(4) Ensure that the area to be printed on the material is flat without wrinkles and open the handle toggle locks on the frame connector.

(5) Fit the frame into the frame connector with the bottom side facing up and tighten the locks.
Then, you can turn the screen position lock knob clockwise to lock the position of the screen for printing. Alternatively, you can press the frame on an edge and hold it down during printing.

(6) Use the ink spatula to get enough ink on the screen and use the squeegee to squeeze out the ink quickly to avoid transferring too much ink.


(7) After squeezing the ink through the screen, pull up the frame and check out the printing result.


Note: After printing, wait about 10 minutes for the ink to air-dry. If your material is a textile fabric, you are advised to wait 48 hours before you wash it.
Software Guidance
Operate xTool machines
XCS
You may operate xTool D1 Pro, S1, F1, or F1 Ultra with XCS when engraving screens, refer to the following articles for details:
- FAQs on Using xTool Screen Printer with xTool D1 Pro Series
- FAQs on Using xTool Screen Printer with xTool S1
- (XCS V2.0) Use xTool S1 to Engrave Screen Printing Meshes
- Use Cardboards of Packaging Boxes as Materials for Creation
- Use xTool F1 Ultra to Engrave a Screen with XCS
- Use xTool F1 to Engrave a Screen with XCS
xTool Studio
- Use xTool S1 to Engrave Screen Printing Meshes
- (xTool Studio) Use Cardboards of Packaging Boxes as Materials for Creation
- Use xTool F1 Ultra / F2 Ultra Series to Engrave a Screen in xTool Studio
- Use xTool F1 Series / F2 to Engrave a Screen in xTool Studio
Processing parameters
As the power of different machines may vary, we encourage you to test the processing parameters for your laser device:
- xTool Screen Printer Engraving Parameters for Reference
- Test Processing Parameters for Your Screens
- (xTool Studio) Test Processing Parameters for Your Fast-engrave Screens
Multi-color printing
For some xTool machines, frame fixing pieces are designed to help you achieve better multi-color printing results. You can purchase frame fixing pieces at xtool.com.
To use a frame fixing piece, you can refer to:
- Use the Frame Fixing Piece for xTool S1
- Use the Frame Fixing Piece for xTool D1 Pro
- How to Use xTool Screen Printer for Multi-Color Printing
To make a frame fixing piece or tool by yourself, you can refer to:
- DIY Frame Fixing Pieces for xTool P2
- Make and Use Frame Fixing Pieces for xTool M1
- How to Mount a Screen Along the Same Margins Every Time You Use It
To prepare the screen using XCS for multi-color printing, see How to Process Images for Multi-Color Printing.
To prepare the screen using xTool Studio for multi-color printing, see (xTool Studio) How to Process Images for Multi-Color Printing
To process materials in batches, you can use the stickers delivered with xTool Screen Printer. For details, see How to Use xTool Screen Printer for Batch Printing.
Maintenance
After completing the printing, you can clean the screen and keep it for subsequent use. Clean it based on the type of ink you've used.
Water-based ink
Rinse the screen to remove the ink. You can use a soft brush to remove the ink gently. If the ink is dry and hard to remove, use water or some non-corrosive detergent to clean it.
Other ink
You can purchase other ink, including acrylic ink, plastisol ink, oil-based ink, UV ink, and featured ink such as thermochromic ink, photochromic ink, and puff plastisol ink, at xtool.com. For more information about how to remove these kinds of ink from screens, visit support.xtool.com/article/1593.
Before using detergent or solvent to clean the screen, test it in a small area of the screen to see whether it damages the screen. After cleaning, rinse the screen to remove the remaining detergent or solvent, and then air-dry the screen or dry it with compressed air.
Warnings
- Before you use any detergent or solvent, be sure to read its user manual carefully and follow all the safety instructions. Ensure that you use it in a well-ventilated place.
- Do not use a hard or sharp tool to scrape the ink from the screen, or damage may be caused to the screen.
