Screen printing mainly includes three steps: mount the screen, engrave the screen, and print the design. You can use xTool F1 to engrave the screen for printing with frame fixing pieces.
Note: xTool F1 Ultra only supports fast-engrave screens and small frames, which you can buy at xtool.com.
For more information on how to start screen printing , see xTool Screen Printer (Fast-Engrave Screen).
1. DIY Frame Fixing Pieces for xTool F1 Ultra
To engrave a screen with xTool F1 Ultra, you need to keep it in place before processing.
This page describes how to make frame fixing pieces by using 3 mm basswood boards, and how to use them to keep a small screen in place inside xTool F1 Ultra.
Preparations
(1) Get the following ready:
xTool F1 Ultra, 3 mm basswood boards
(2) Download the following project file:
Frame Fixing Pieces for xTool F1 Ultra
Steps
(1) Open the downloaded project file on XCS and cut the pieces with xTool F1 Ultra.


Note: During processing, there may be flames on the boards. To continue cutting boards, click False alarm > Got it in XCS.

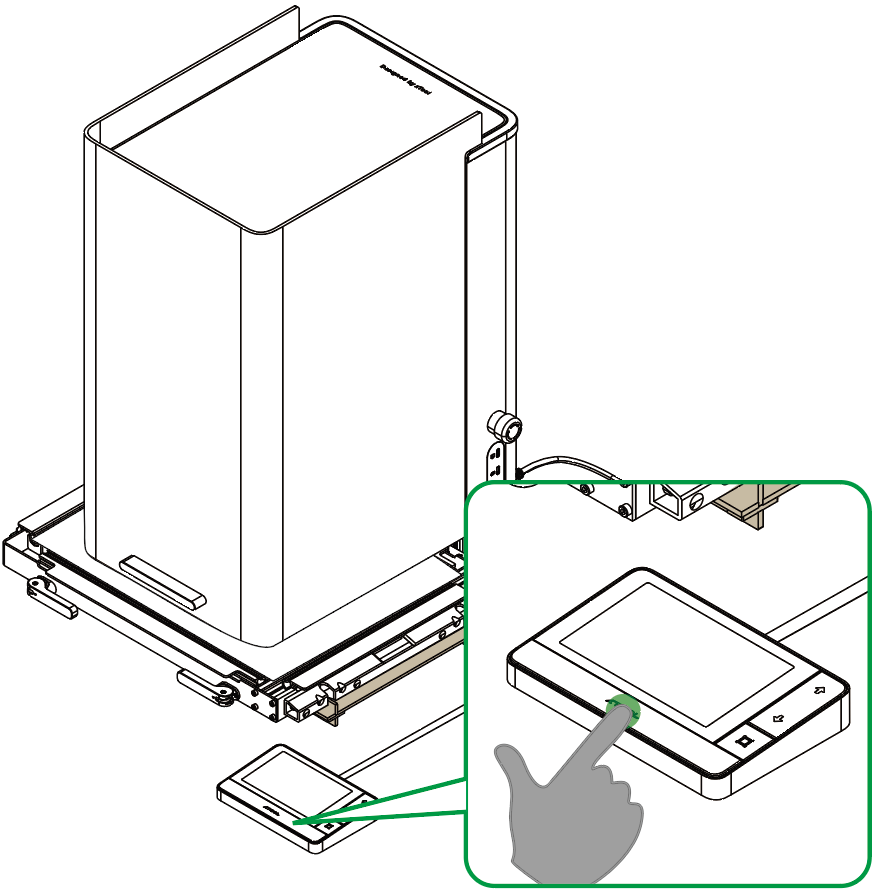
Then, tap Confirm on the screen and the start/stop button on the touchscreen controller.
Back in XCS, click Continue in the upper right corner and tap the start/stop button on the touchscreen controller.
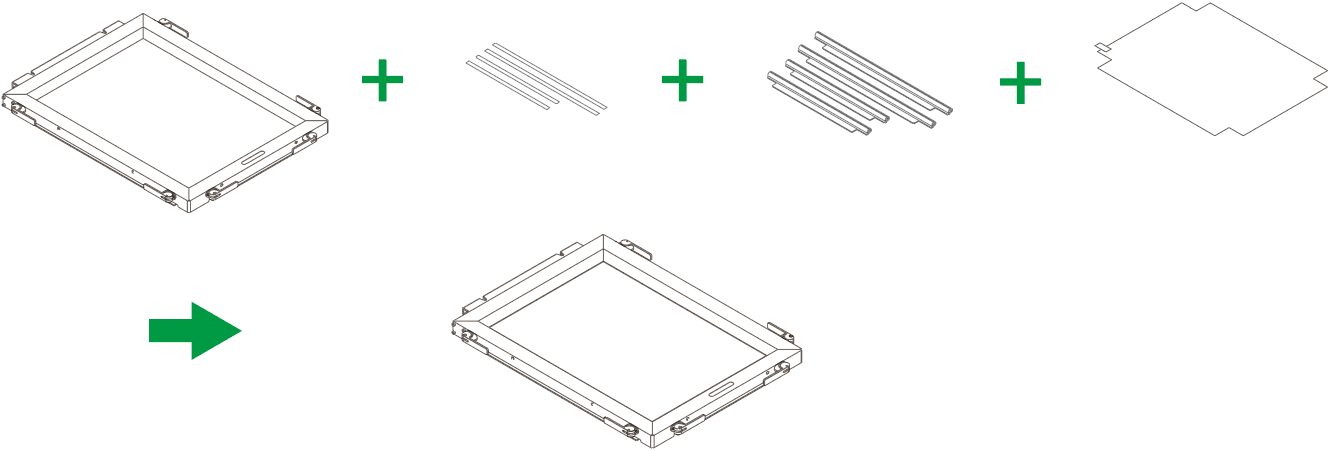
(2) Fit the pieces together to make the fixture with the letter “R”. This fixture is to be placed on the right side of xTool F1 Ultra later.


(3) Place the fixtures on the baseplate of xTool F1 Ultra.
Align four holes of the fixutres with those on the baseplate and tighten the fixtures with four M4 screws.

2. Mount the screen and place it in the working area
(1) Follow the instructions in xTool Screen Printer (Fast-engrave Screen) to mount the screen on the frame.
(2) Turn over the screen assenbly, with the back of the screen facing up.
.png)
(3) Lift the protective enclosure of xTool F1 Ultra and place the mounted screen on the baseplate, keeping it in place with the fixtures.
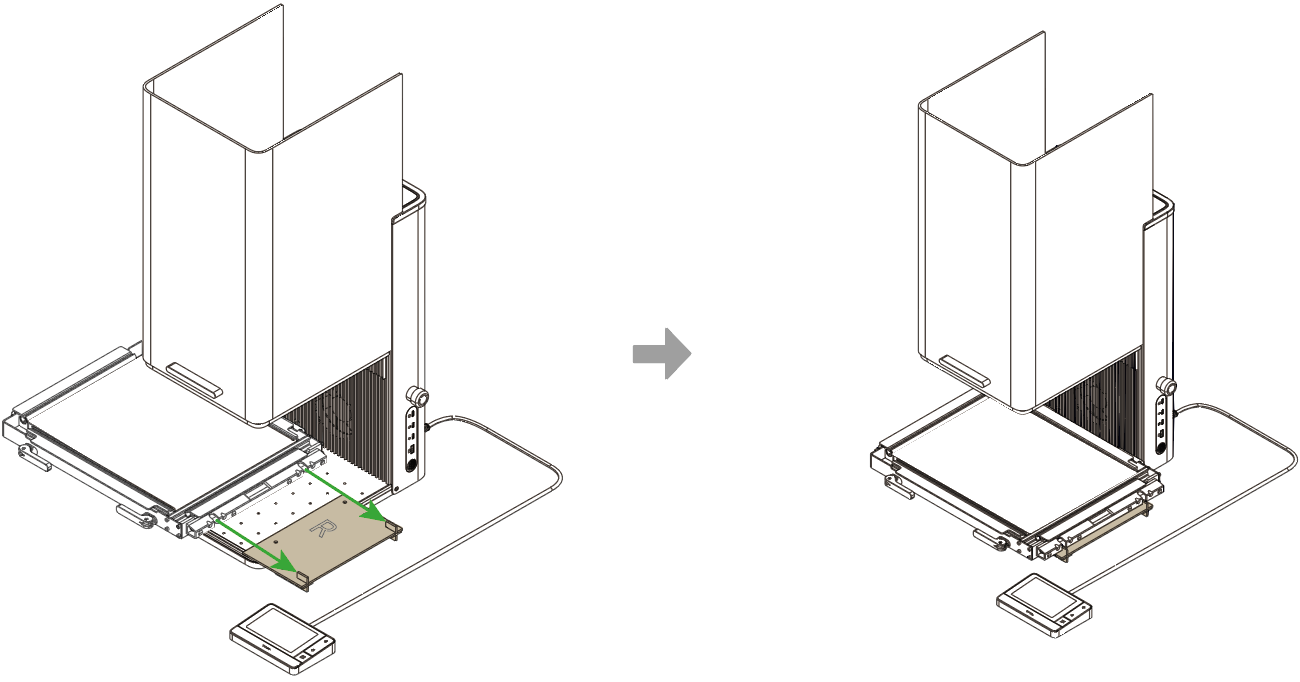
Note: Ensure that the fixing pieces are secured in place before you put the frame on them, so that they don't loose or move during screen engraving.
3. Open or create a project
You can open a project to start processing or create a new project. If you create a new project, you need to design patterns and set parameters from scratch.
Open a project
On the home screen of xTool Creative Space (XCS), click Open from computer. In the pop-up window, select a file of the xTool Creative Space Project (. xcs) type and click Open.
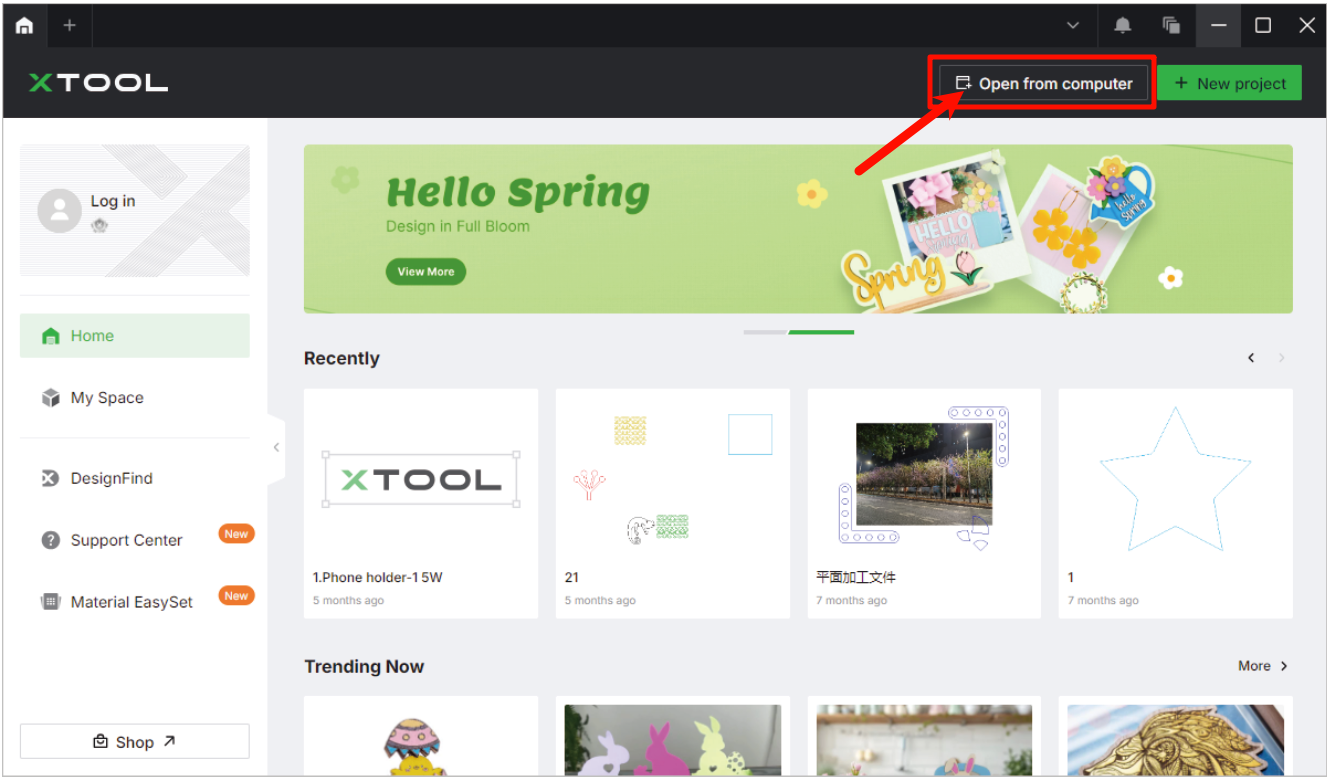
Note: The project file can contain information such as processing patterns, processing modes, and processing parameters. However, if the machine model, processing mode, or material thickness used in the project varies from the current situation, you need to reset the corresponding parameters.
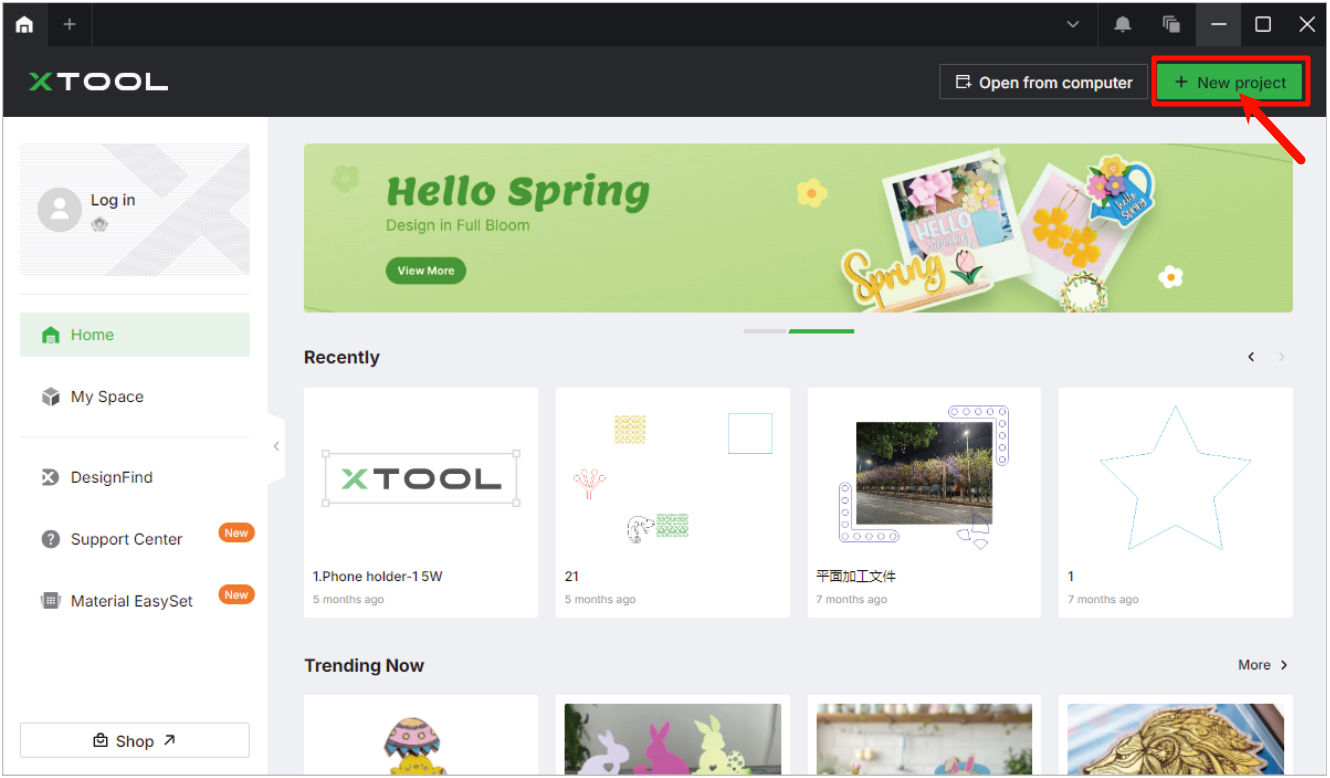
Create a new project
On the home screen of XCS, click + New project.
4. Select the processing mode and material name
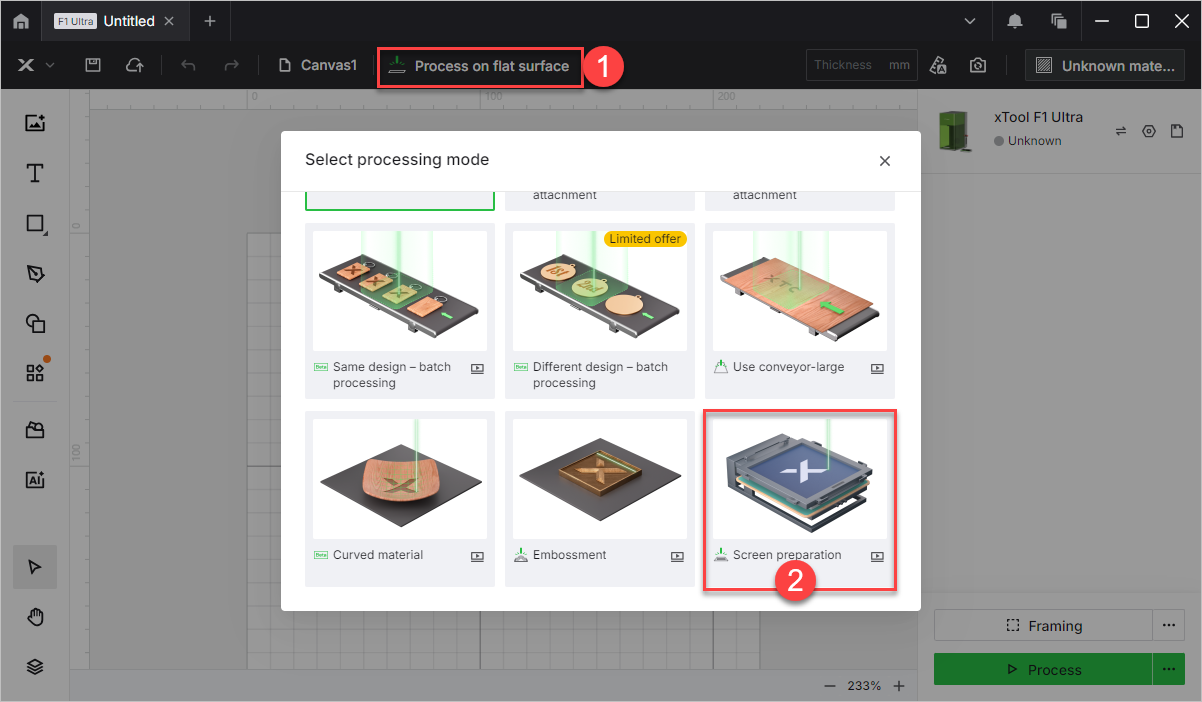
(1) On the top of XCS, click the name of the current processing mode, and then select Screen preparation as the processing mode.
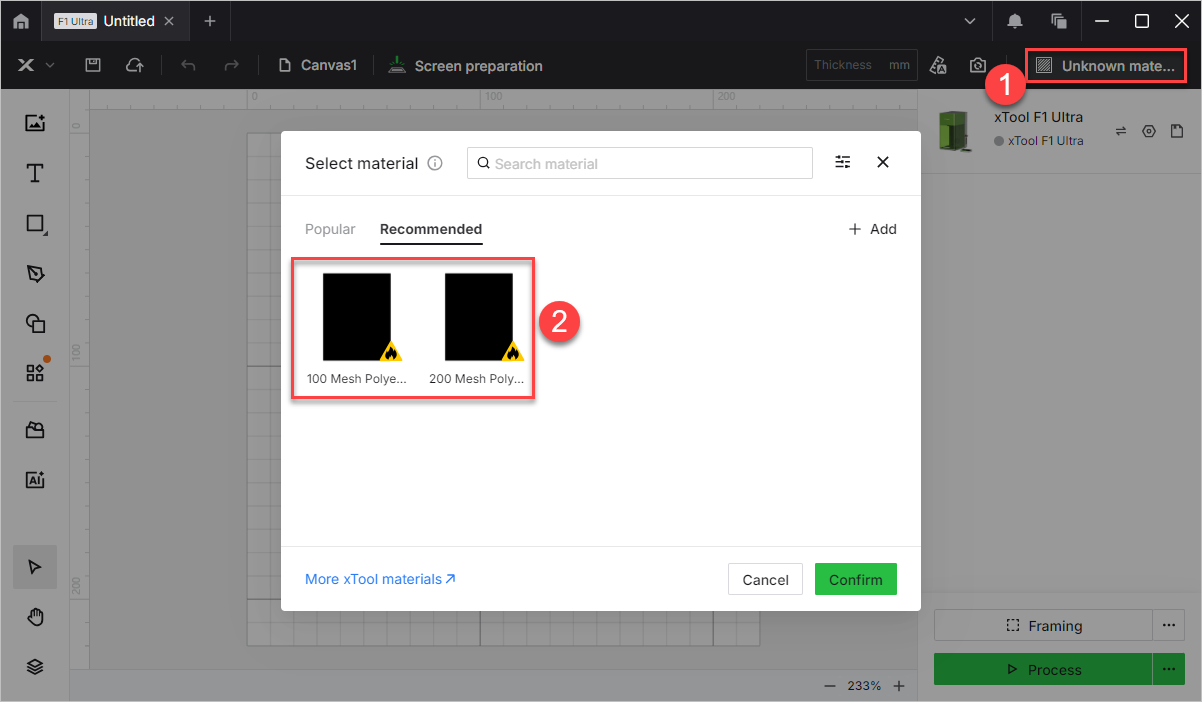
(2) In the top-right corner, click User-defined material. Then, depending on the material you have purchased, select 200 Mesh Coated Screen. And click Confirm.
Note: We do not recommend you to use customized materials. Because after you choose the official coated screen, the parameters will be matched automatically and the procesing effect is basically guaranteed.
5. Set the laser focus
In the top-right corner of XCS, click the Auto-measure icon .
.
When auto-focusing is complete, XCS displays the thickness of the material, and on xTool F1 Ultra, the red and blue light spots overlap.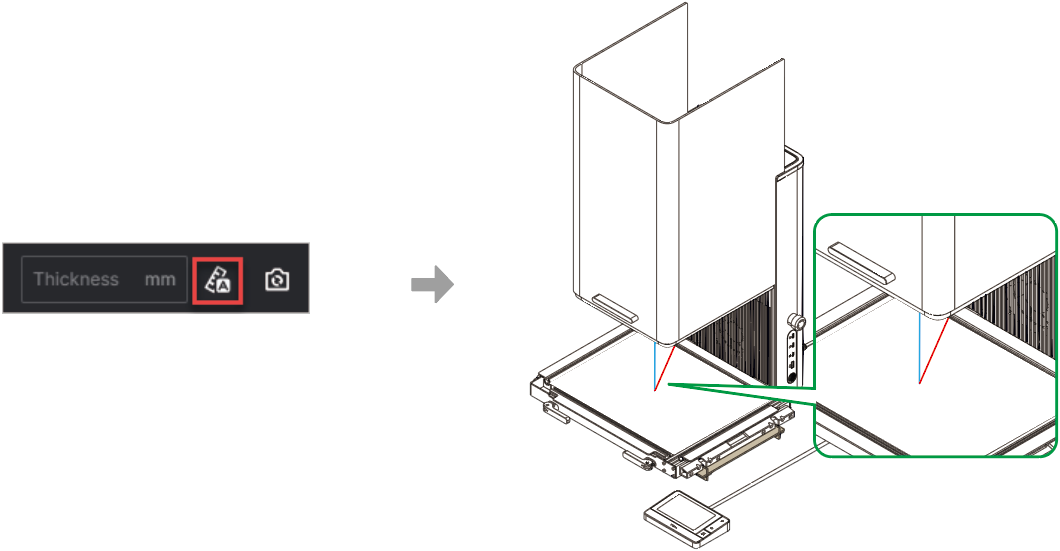
Note: If the red and blue spots overlap but the measured thickness is inaccurate, perform Z-axis homing and try again. For details about Z-axis homing and manual-focus, see support.xtool.com/article/1336.
6. Refresh background and design objects for processing
(1) On the upper right of XCS, click Refresh background.

Note: XSC takes a photo of xTool F1 Ultra’s processing area and uses it as the canvas background. You can position processing objects based on the background.
(2) Use the tools to the left side of the canvas to create objects. You can import images, insert shapes, enter text, or draw vector graphics.
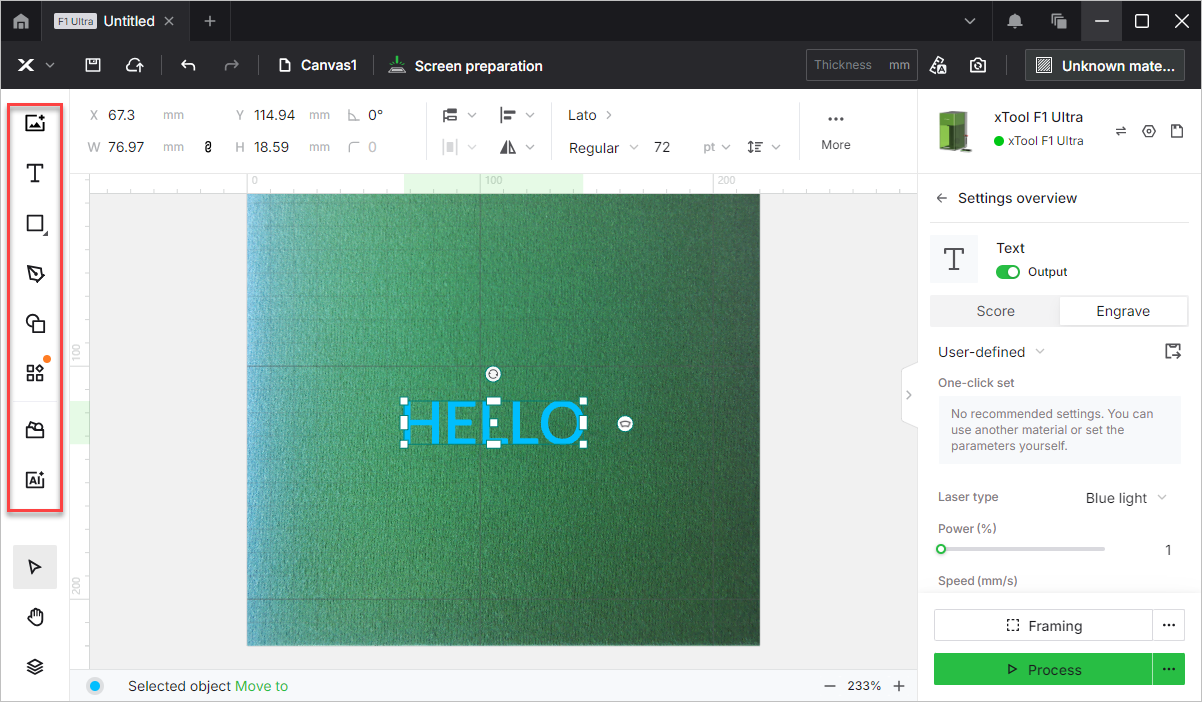
Note: Ensure that the objects are placed inside the material.
(3) Reflect the pattern horizontally or vertically.
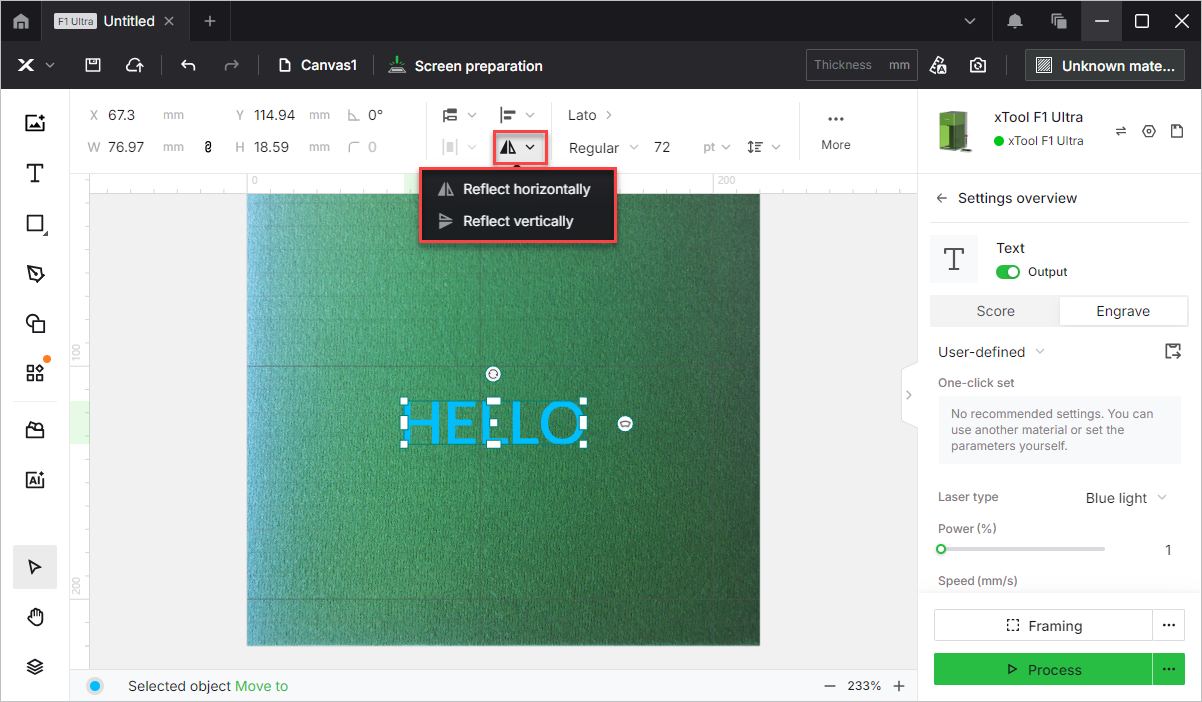
xTool F1 Ultra will engrave on the back of the screen, so you need to reflect the pattern horizonally or vertically.
Note: You may need to rotate the pattern depending on how you will place the material to be printed.
For example, a T-shirt is usually slid onto the working platform for printing, so you need to rotate the pattern by 90 degrees. The rotating direction depends on how you place the screen assembly in the working area of xTool F1 Ultra.
Note: XCS provides recommended processing parameters for coated screens, you only need to select the fast-engrave screen as the material, and XCS will automatically set processing parameters for the screen.
7. Preview the processing area
You can preview the processing area on the material by framing. Framing means laser dots walk along the border of the processing objects on the material. Take the following steps to start framing:

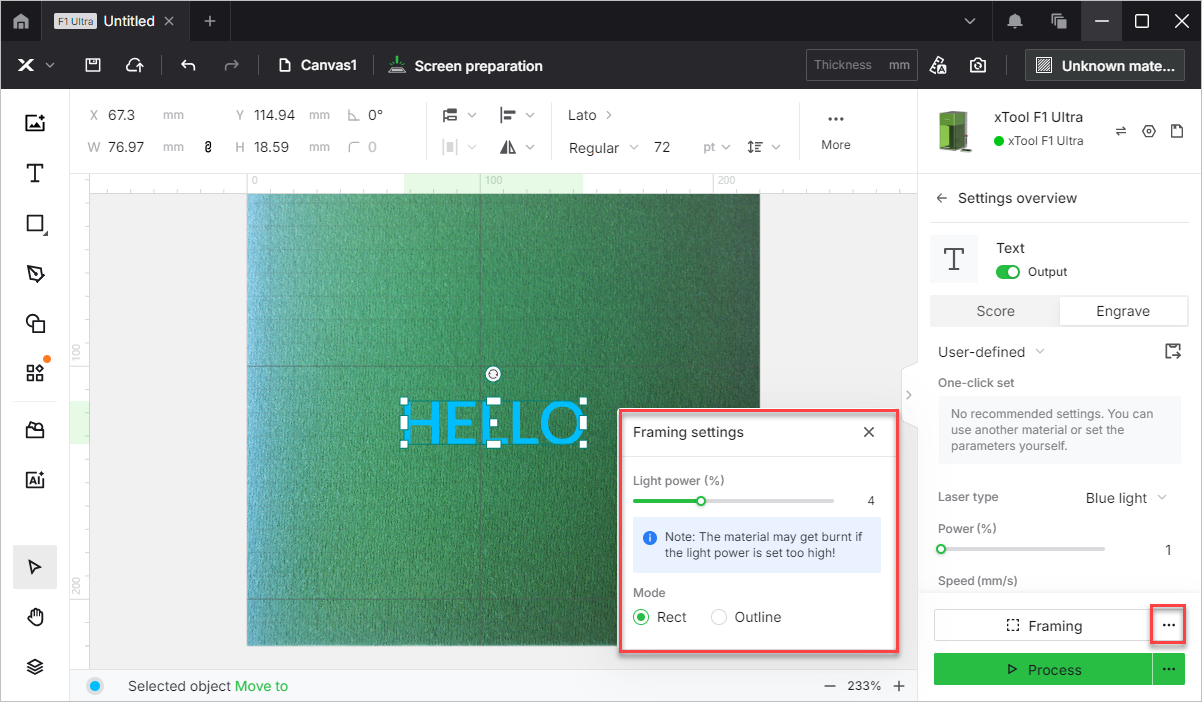
● Light power: Sets the laser power for framing.
● Mode:
In the Rect mode, laser dots walk along the rectangle border of the processing objects.
In the Outline mode, laser dots walk along the outline of the processing objects.
(2) Click Framing in the software. The laser dots will move along the boundary of the processing objects on the material, allowing you to preview the processing area.
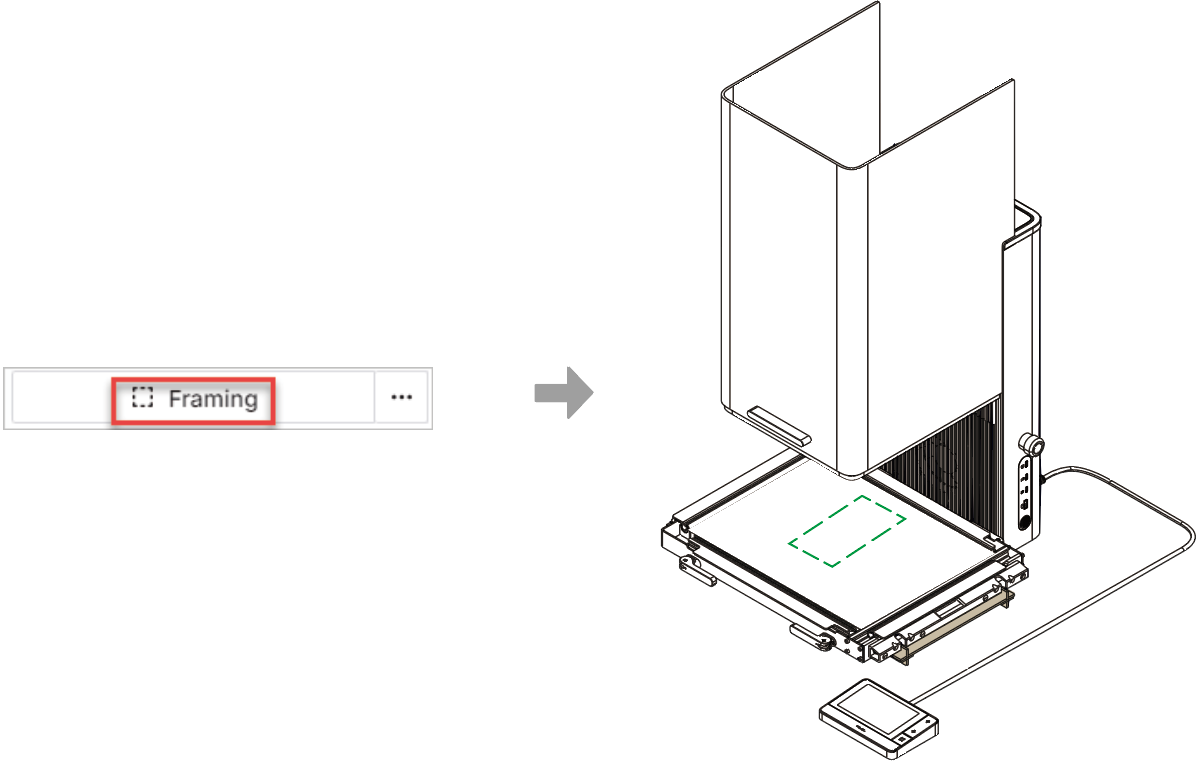
To stop framing, click the Stop Framing button at the bottom-right corner of XCS.

Note: If the processing area is not ideal, you can adjust the material position or adjust the object positions in the software.
8. Start processing
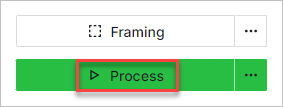
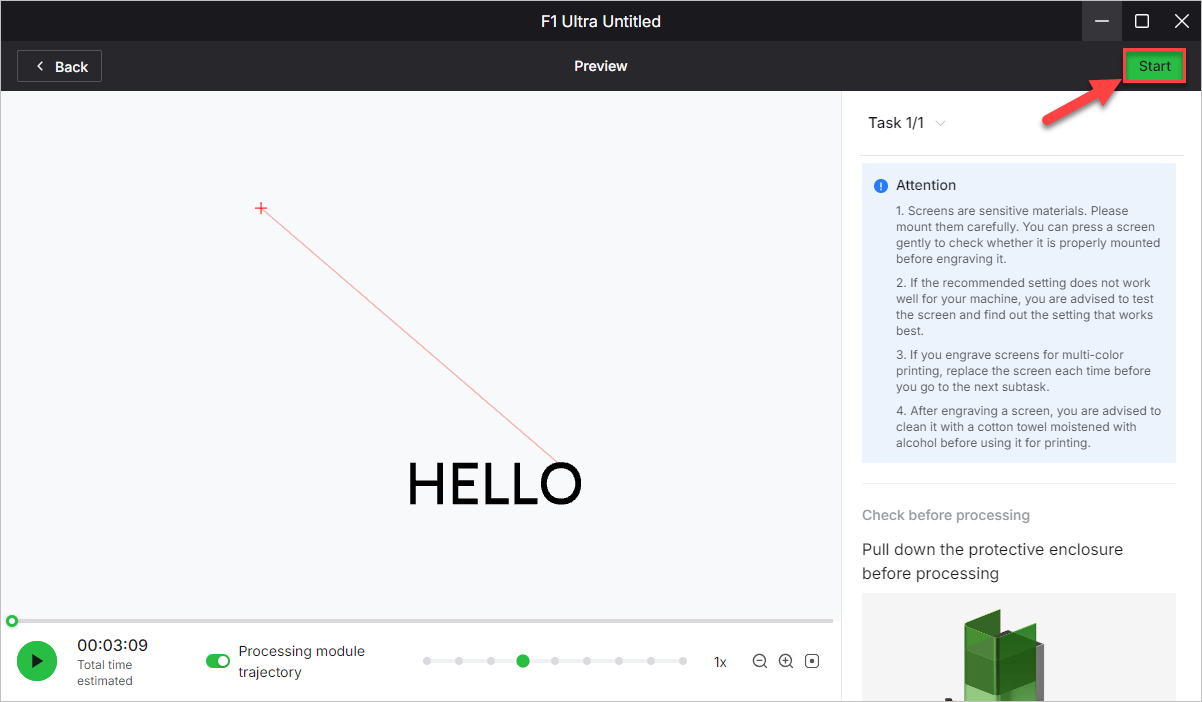
(1) In the bottom-right corner of XCS, click Process.
(2) Preview the processing pattern and path.
On the bottom-left corner, click the button, and XCS will show you the processing path.
(3) Close the protective enclosure. In the upper right corner of XCS, click Start. When the software shows “Ready”, press the XTOOL Start/Stop button on the touchscreen controller to start processing.
Note: During laser processing, keep the protective enclosure closed or wear goggles that can shield laser beams of 455 nm and 1064 nm wavelengths.
