Issue description
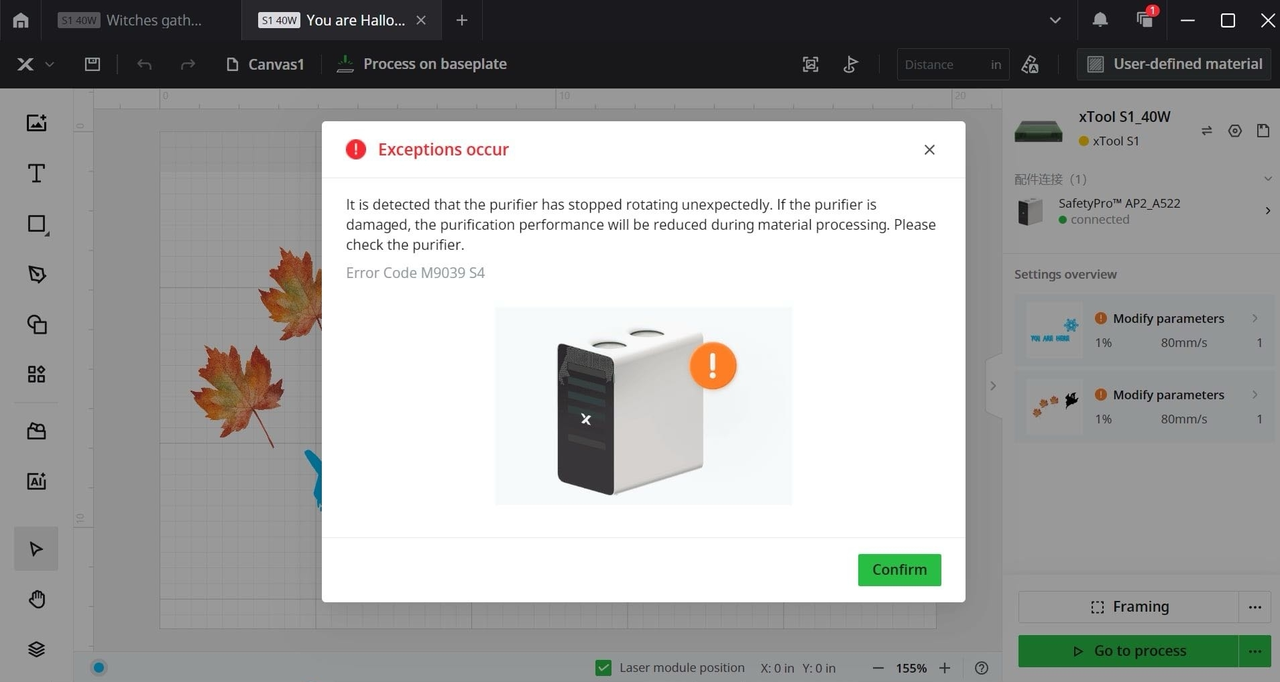
You may encounter an "Exceptions occur" error in your software, which indicates a significant airflow obstruction within the system. The symptoms vary depending on how your laser machine is connected to the xTool Air Purifier (AP Series).
- For laser devices (e.g., M1 Ultra, S1) connecting a Bluetooth dongle: A pop-up message stating "Exceptions occur" with the error code M9039 S4 appears in the software. The purifier will stop running, and its fault indicator light will turn solid red.
- For laser devices (e.g., P2, F1) not connecting a Bluetooth dongle: The xTool software will not display an error pop-up. But you may encounter an unexpected operation halt where the air purifier will stop running during operation, and its fault indicator will turn solid red.
Exceptions occur | Error code: M9039 S4 |
Location: Fault indicator |

Potential causes
- The air purifier is used at an excessively high altitude.
- The exhaust system of the laser device is clogged.
- The air inlet or outlet on the purifier is blocked.
- The cyclone tray or the filter cartridge(s) inside the purifier are clogged.
Troubleshooting procedures
Step 1: Check your altitude
If you are at an altitude higher than 1500 m, the thinner air can make the fan spin faster and may cause a false blockage alarm. The purifier fan works best below 1500 m. If you are above 1500 m, please take a short video of the error and share it with our technical support along with your location for further help.
Step 2: Clean/remove engraver's exhaust system
Only xTool S1, F1 Ultra, M1 Ultra, and P2S models are compatible with Bluetooth dongle connection.
For Bluetooth dongle connection models:
xTool M1 Ultra:
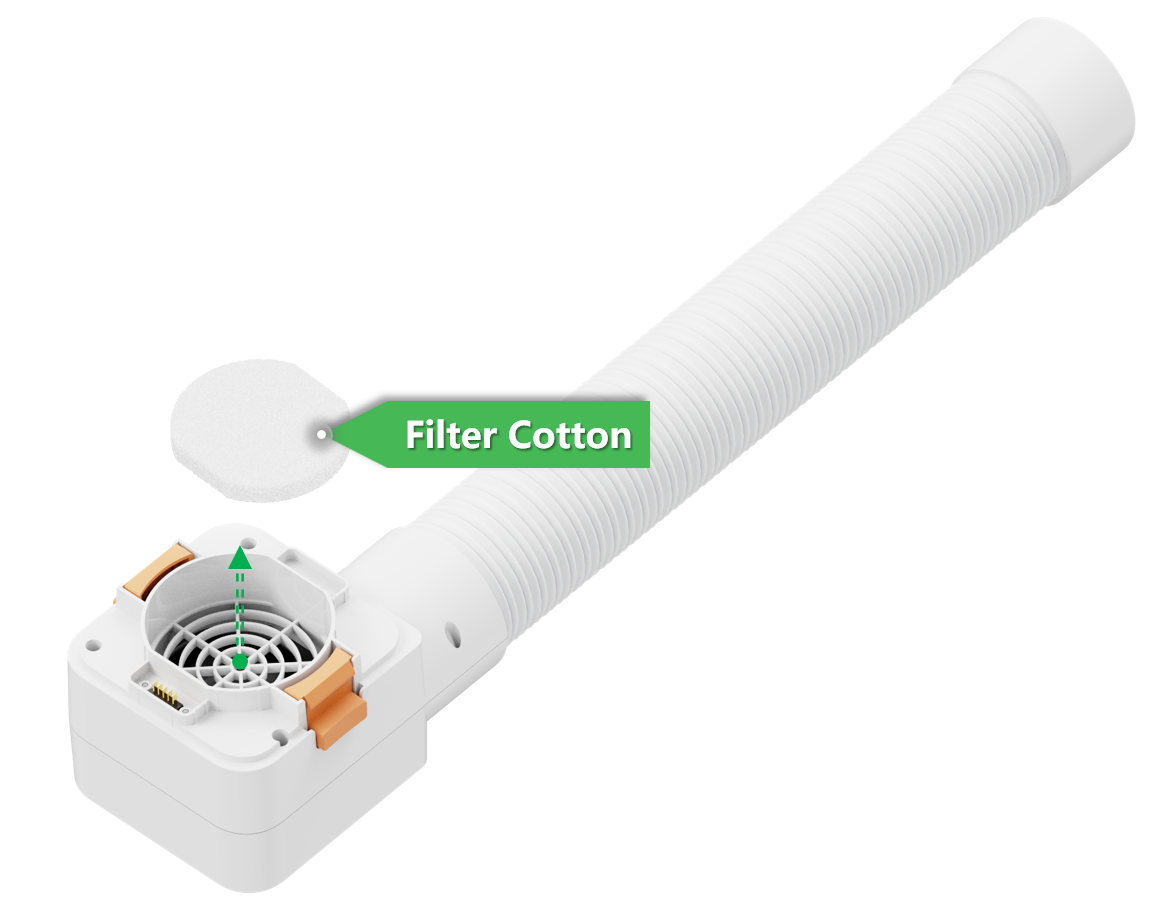
- When using purifier with M1 Ultra, you must remove the machine's built-in exhaust fan and the filter cotton inside the smoke exhaust module.
- Refer to the video tutorial below for detailed fan removal instructions.
Note that you should install back the shell case of the smoke exhaust module.
M1 Ultra exhuast fan inside the smoke exhuast module |
Filter cotton |

xTool P2S:
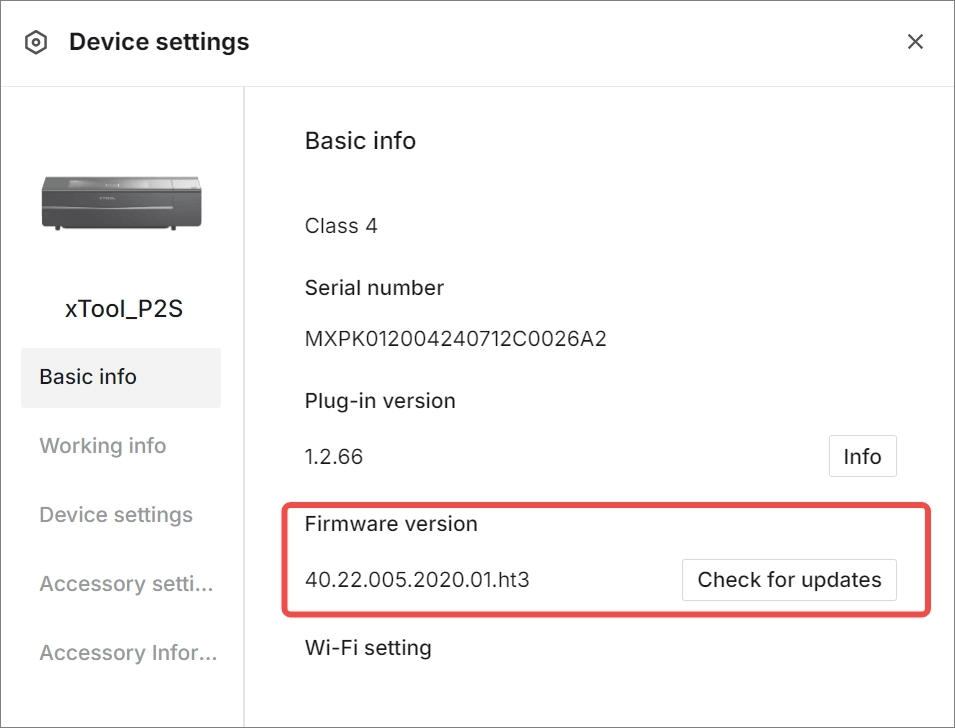
- Ensure the firmware of your xTool P2S is up-to-date.
- In XCS, navigate to Device settings > Basic info > Firmware version and click Check for updates.
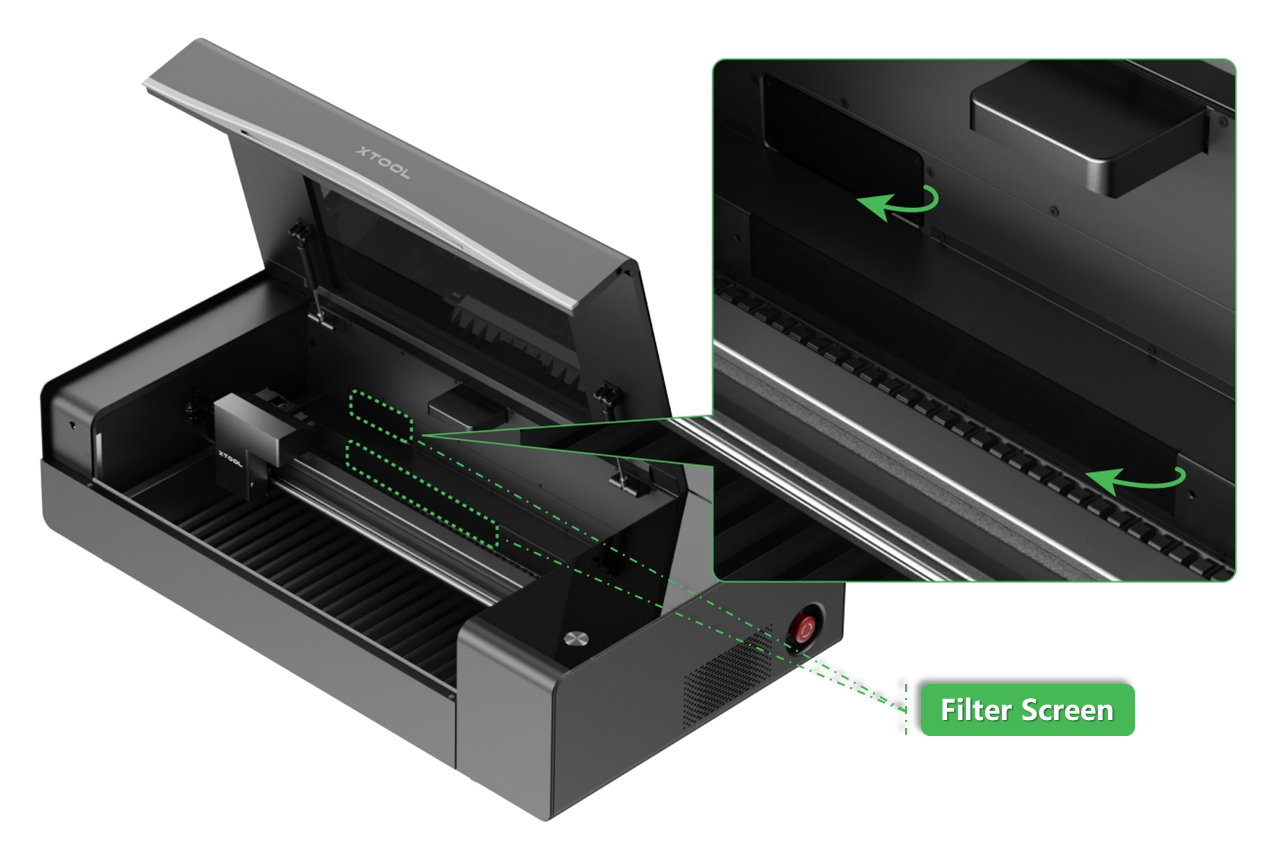
- Inspect the P2S filter screens (located above the internal processing area) for blockages.
- Clean the filter screens if necessary according to the video tutorial: How to Clean the Filter Screens of P2S
Check P2S firmware version |
Filter screens inside P2S |
xTool S1:
- Inspect the exhaust fan of your xTool S1 for dirt buildup.
- Clean the fan if necessary according to the video tutorial below.
xTool F1 Ultra:
- Inspect the exhaust fan of your xTool F1 Ultra for dirt buildup.
- Clean the fan if necessary. Refer to the video tutorial below for the operations for fan removal.
For other models:
xTool P2:
- Inspect the exhaust fan of your xTool P2 for dirt buildup.
- Clean the fan if necessary according to the video tutorial below.
xTool F1/F1 Lite:
Inspect the exhaust fan of your xTool F1/F1 Lite for dirt buildup.
- Clean the fan if necessary.
- Use a cotton swab dampened by anhydrous ethanol to clean the fan and outlet
- Slightly tilt the device while cleaning to avoid dust falling into the internal.
Clean F1/F1 Lite smoke exhaust fan
If the issue persists after cleaning or removing the laser engraver's exhaust fan, proceed to the next step.
Step 3: Inspect & clean air inlet and outlet
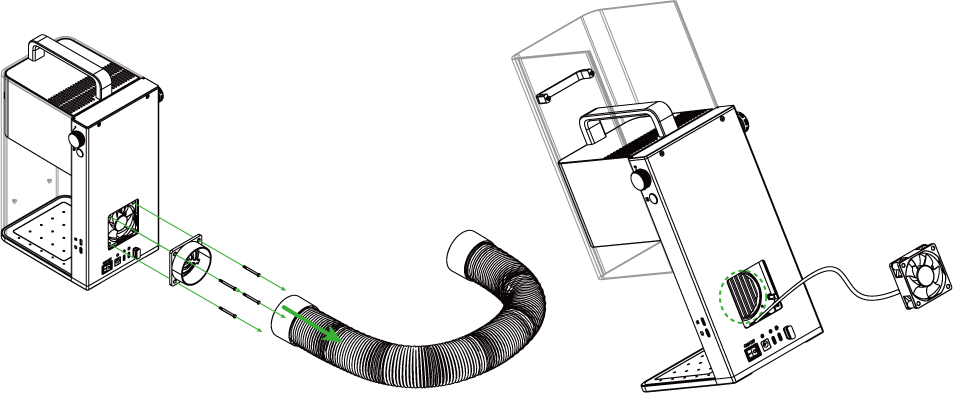
- Disconnect the exhaust pipes from both the airflow inlet and airflow outlet on your xTool AP series.
- Inspect the pipes and the outlets themselves for any blockages or accumulated debris.
- Clean the inlet and outlet ports thoroughly
- After cleaning, restart the AP series and test if the issue is resolved. If not, proceed to the next step.
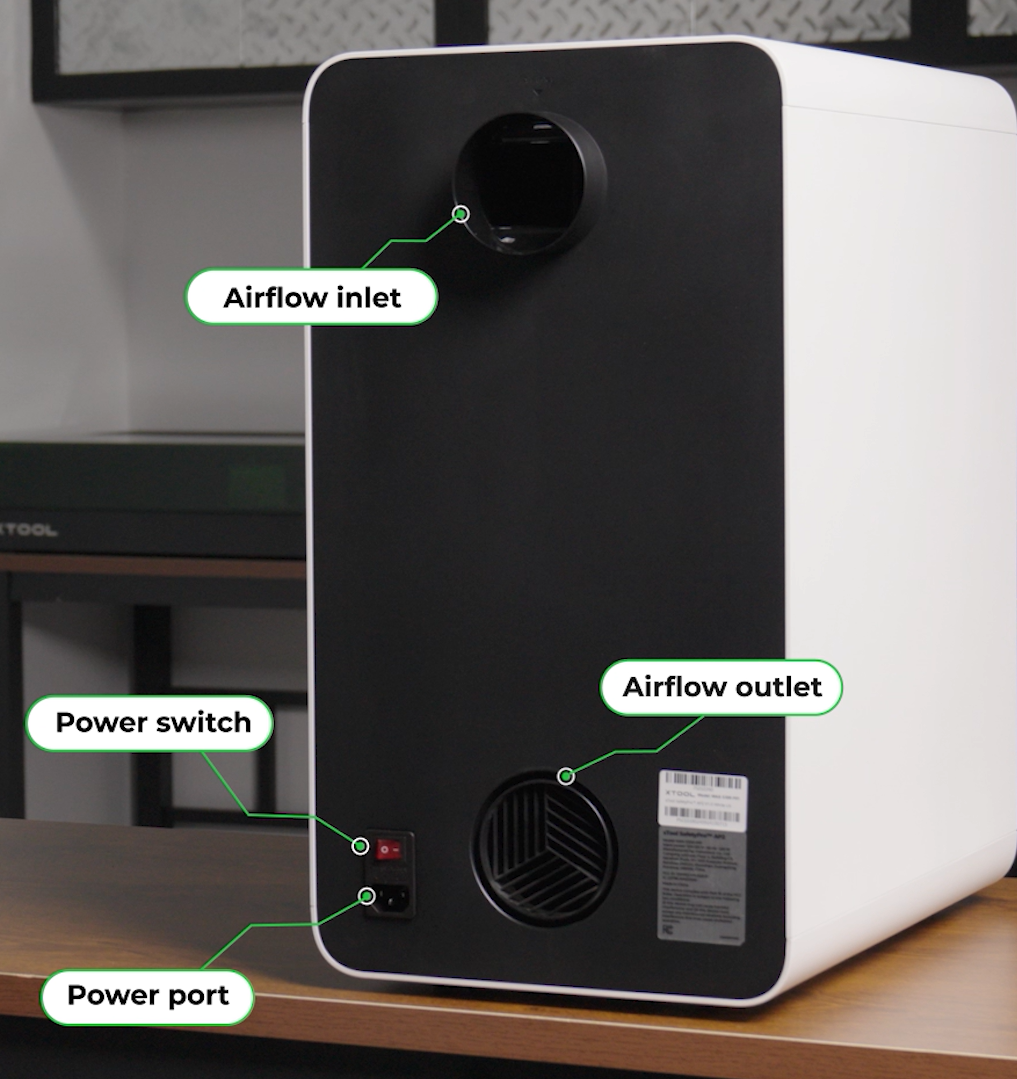
Airflow inlet & outlet location
Step 4: Inspect & clean the AP series cyclone and filters
Clean the cyclone tray:
The cyclone tray separates larger particles. If clogged, it will severely restrict airflow.
Remove and clean the cyclone tray (alkaline kitchen degreaser recommended as it effectively removes oil buildup from the cyclone). After washing, ensure it is completely dry before re-installing. Refer to the unboxing video at approximately 1:20 - 1:49 for cyclone tray cleaning guidance.
‼️ Important: When re-installing the cyclone tray, ensure the side with the mesh screen is facing upwards.
If the issue persists after cleaning the cyclone, continue to the next sub-step.
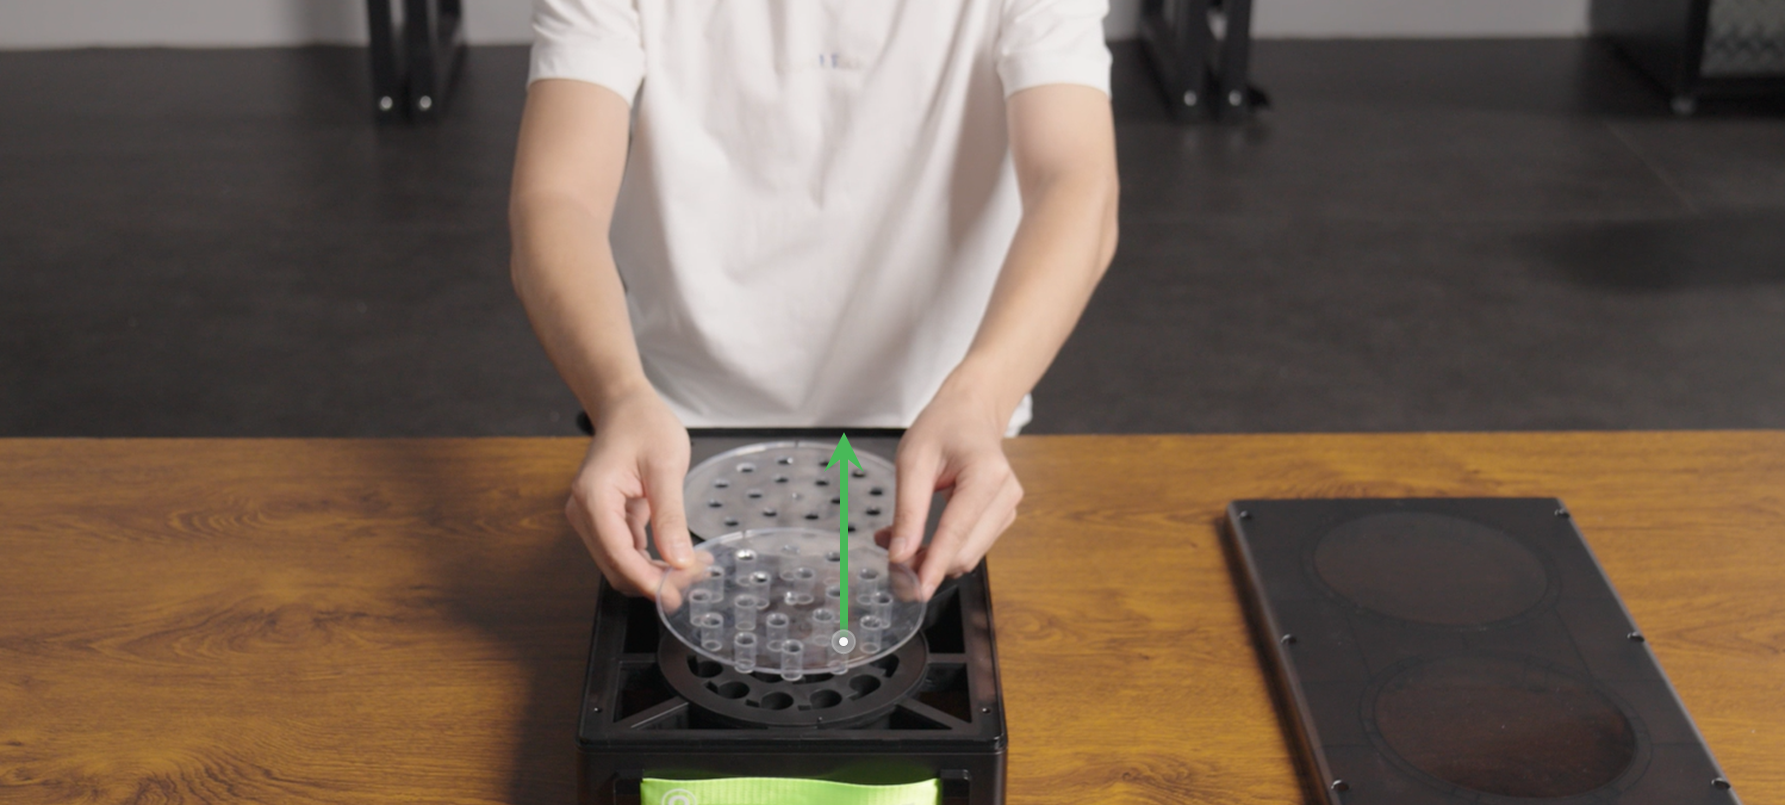
Reassemble the cyclone tray
Clean the pre-filter:
- Remove the pre-filter (Filter #1).
- Take it outdoors. Gently tap it on a solid surface to dislodge loose dust and debris.
- If the issue persists, proceed to the next sub-step.

Pre-filter (Filter #1) location
Test filter performance:
- Switch the purifier to manual mode by tapping the airflow switch button.
- Select the appropriate setting based on your processing needs (four settings available).
- In manual mode, remove the #1 Pre-filter and set the purifier airflow to level 4.
At this time, if the xTool software prompts a message of a missing filter, ignore it and continue.
4. Observe the air purifier operation for 2-5 minutes.
- If the air purifier runs continuously without stopping: No. 1 Pre-filter is clogged and needs to be replaced. You can click Filters for SafetyPro™ AP2 to purchase a new one to resolve the issue.
‼️IMPORTANT: Always switch the website to your country/region before placing an order.
- If the air purifier still stops with the error: The issue lies elsewhere. Proceed to the "Still experiencing issues?" section to contact xTool Customer Service.
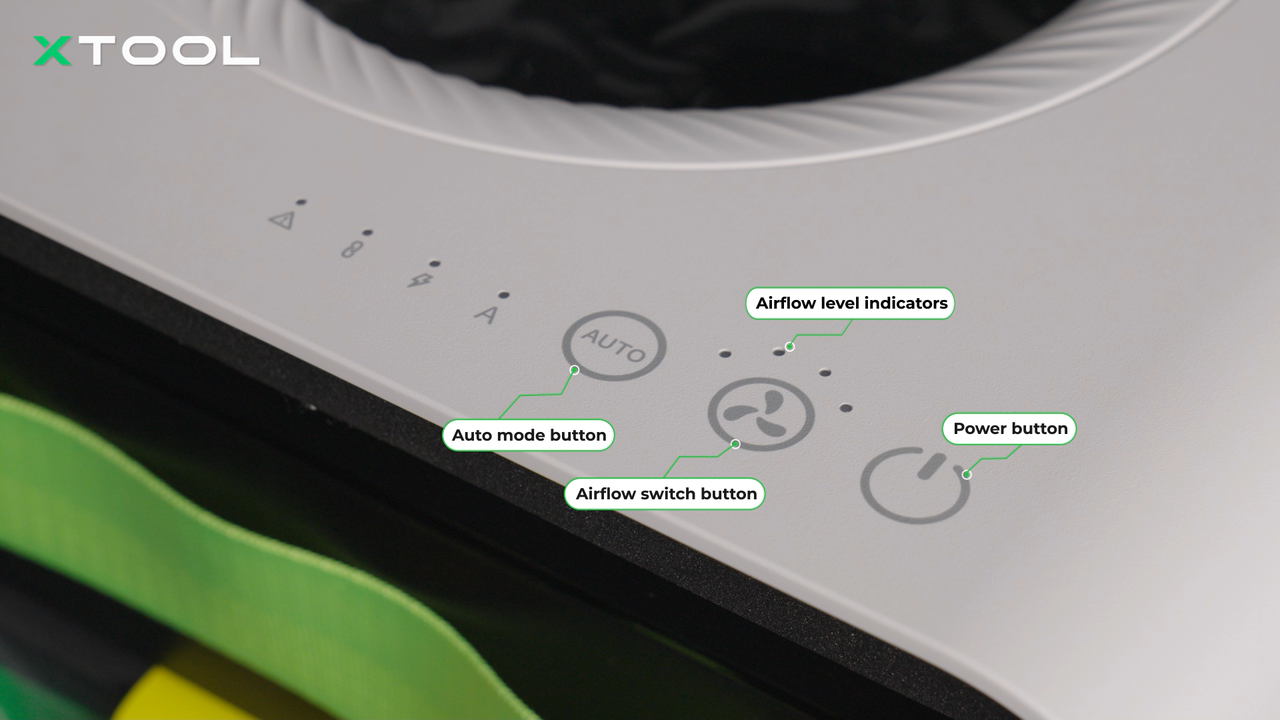
Airflow switch button location
Still experiencing issues?
Should the issue persist after completing the preceding steps, submit a ticket via the "Submit a Ticket" button in the "Help Ticket" section below. The standard response time for xTool Customer Service is one business day.
For a prompt resolution, please include the following details:
- Issue description: A detailed explanation of the observed problem.
- Video evidence: Attach a video demonstrating the issue, where applicable.
- Troubleshooting performed: Any troubleshooting steps you have already attempted, along with their results.
This information is crucial for xTool technical support engineers to provide timely assistance.
Documentation feedback
Help improve this content by providing feedback. If this content did not meet your requirements, select "No" in the "Was this page helpful?" section below. Include specific details about what was unclear or missing in the pop-up suggestion box. Feedback submissions are reviewed by xTool technical writers to enhance future documentation
Services & Help
Learn & Education

Copyright © 2025 xTool All Rights Reserved.