The frame fixing piece for xTool P2 is not included in the xTool Screen Printer kit. You can click here to buy it.
This page describes how to install the frame fixing piece inside xTool P2.
Fit the frame fixing piece on the baseplate
This method works for small frames.

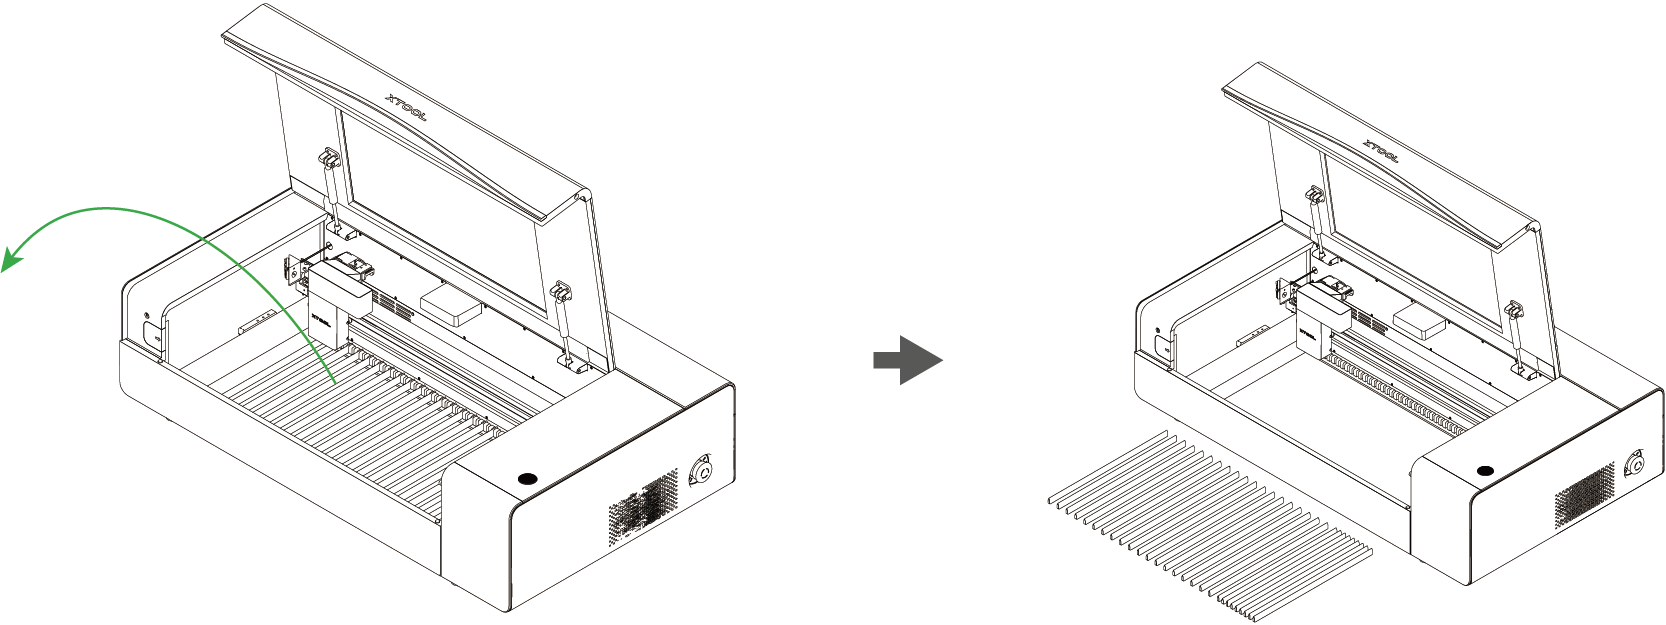
1. Take out all the slats from the machine.
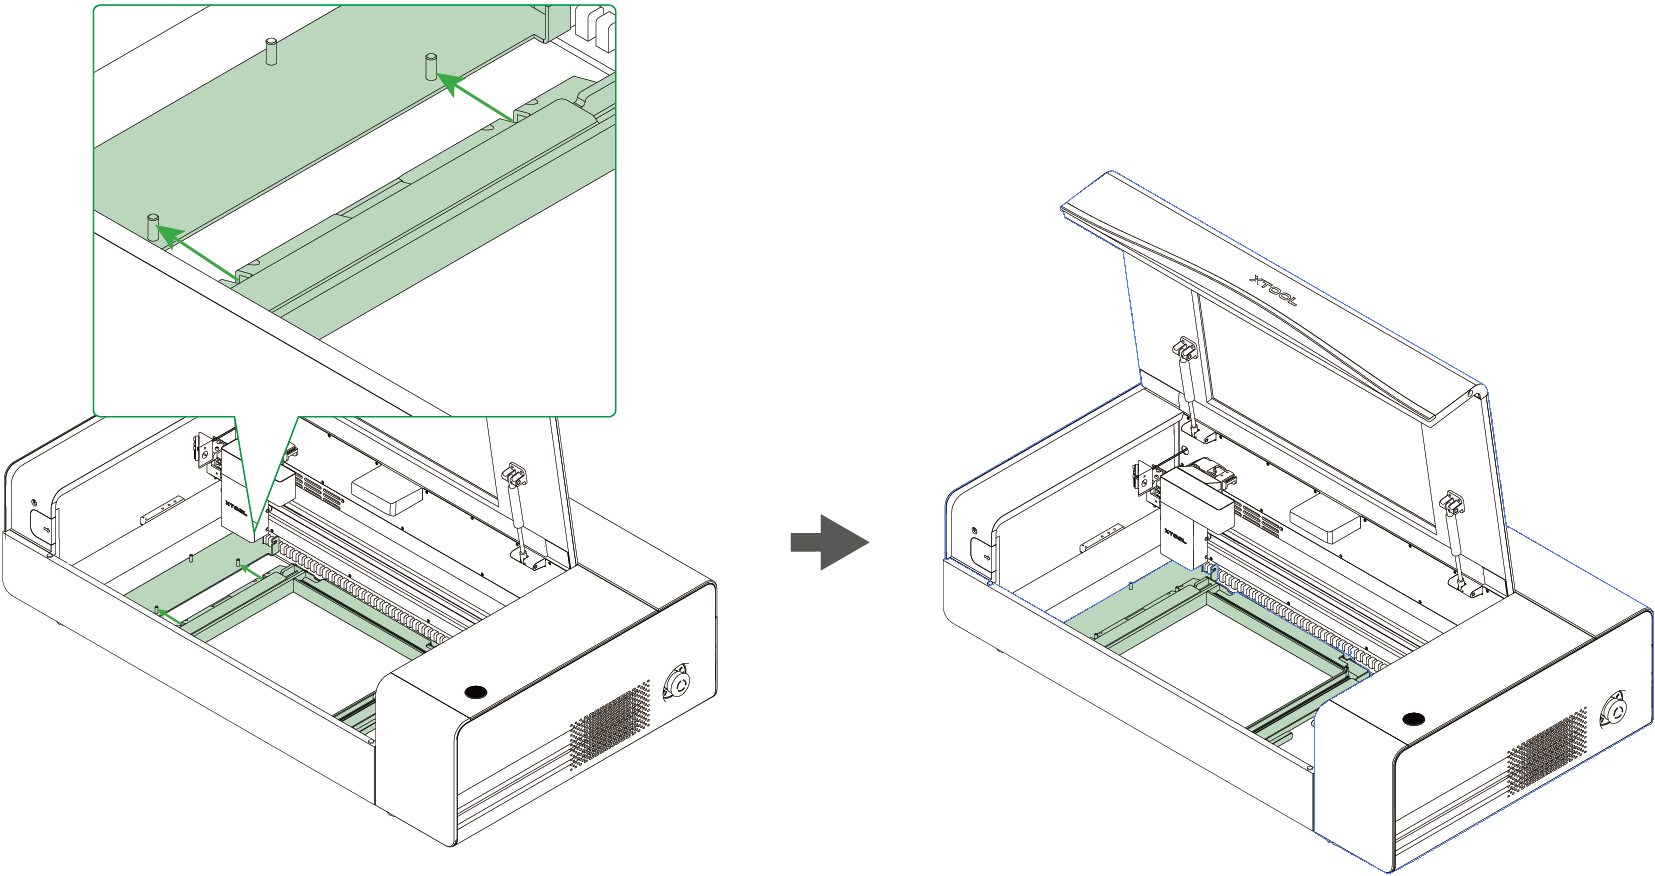
2. Snap two notches beside the frame fixing piece onto the slots of the machine.
Make sure you've saved enough space for the small frame on the right.
3. Flip the frame and screen over so the back side faces up.
4. Fit the small frame and the fixing piece together, with the tabs inserted into the notches.
Note that a screen should be mounted on the small frame.
5. Connect xTool P2 to xTool software to engrave on the screen.
Note: In screen printing, the frame is placed with the front side facing up. You may need to rotate and reflect the design objects based on how you will place your material.
Fit the frame fixing piece on the riser base
This method works for normal-sized frames.

1. Take out the baseplate.
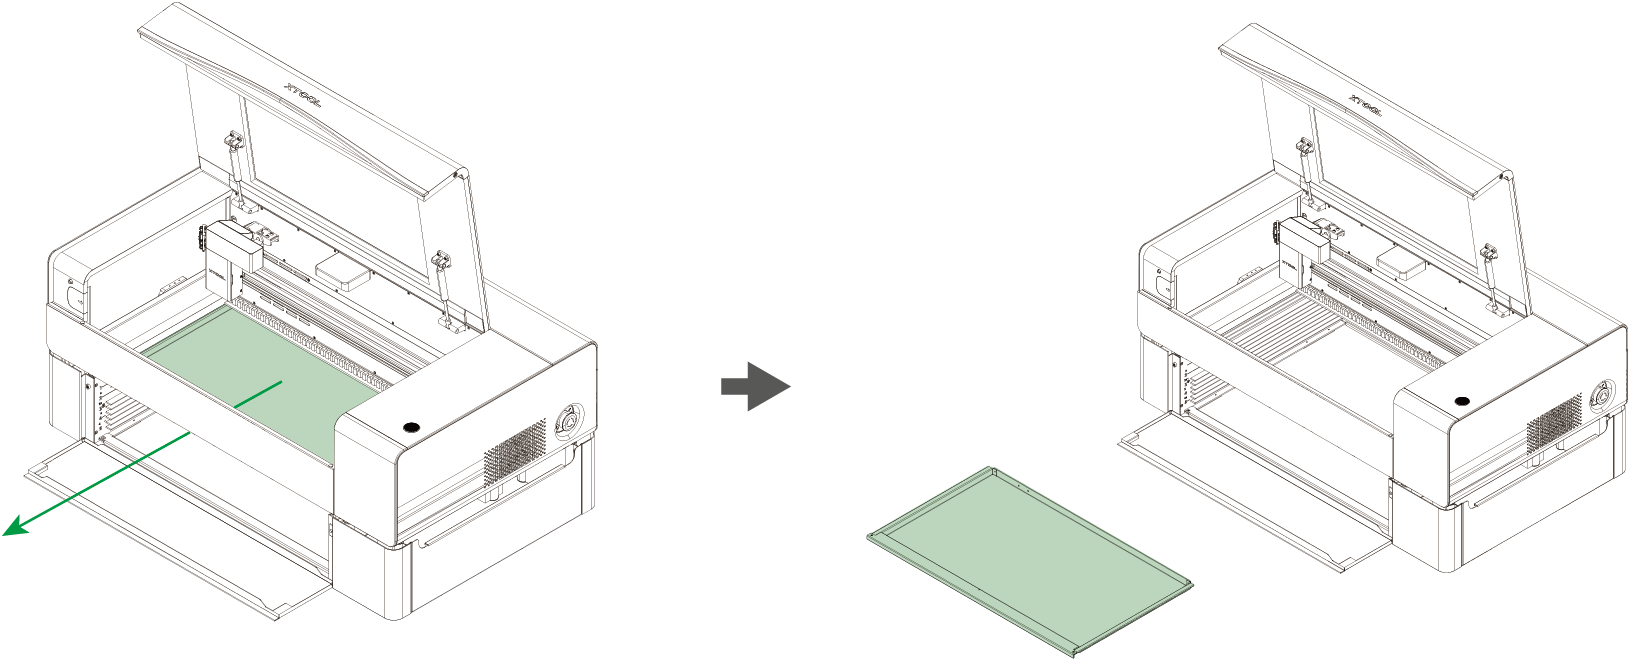
2. Flip the baseplate.

3. Slide the baseplate into the 2 layer and make sure it is pressed to the right side of its limit.
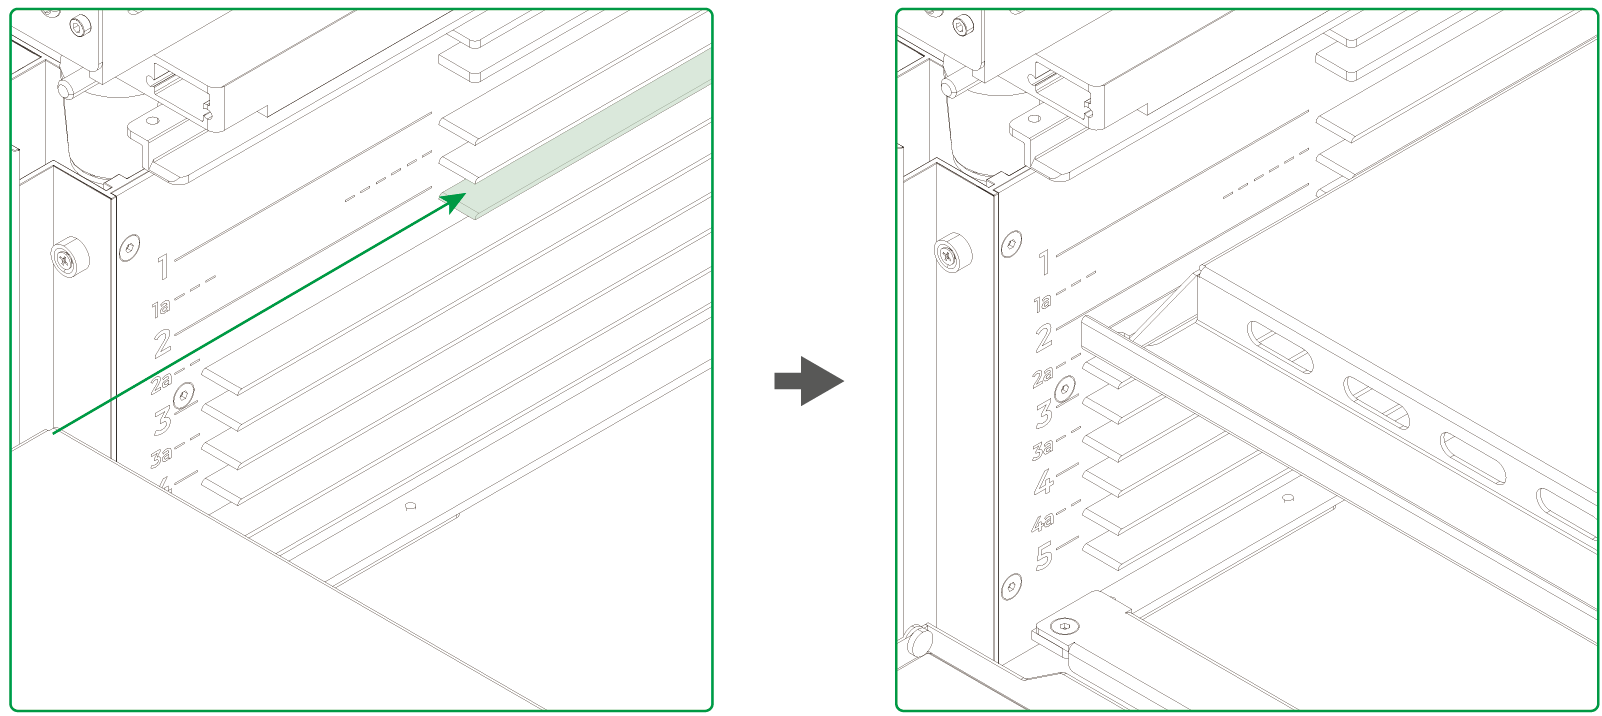
4. Loosen the screw on the left side of the machine with the screwdriver provided in the xTool P2 kit.
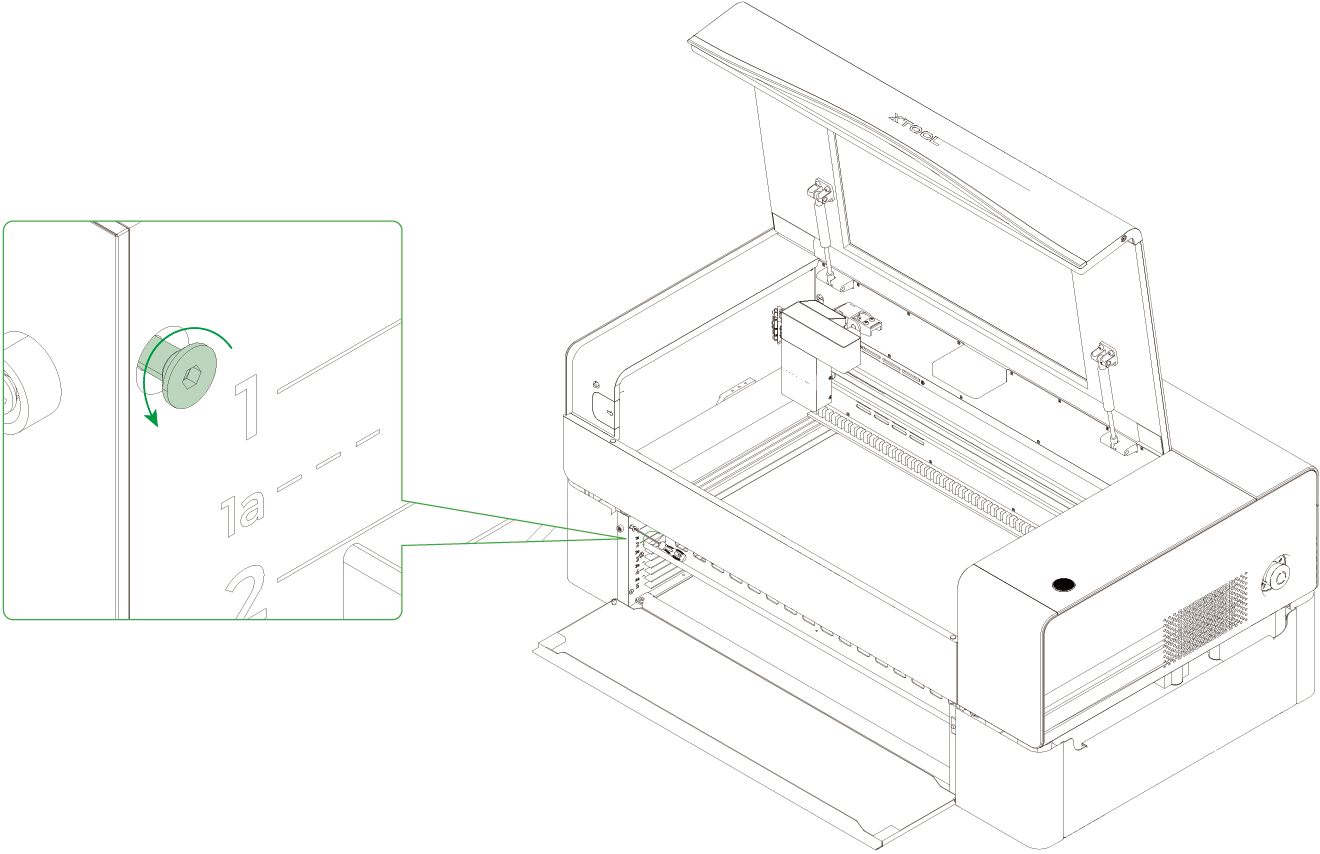
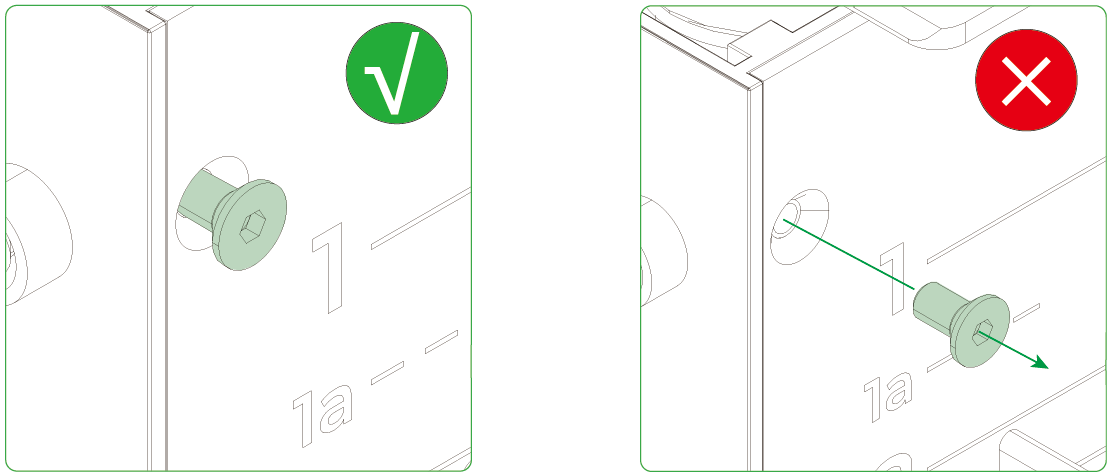
Note: Loosen the target screw for subsequent installation. Don't remove it.
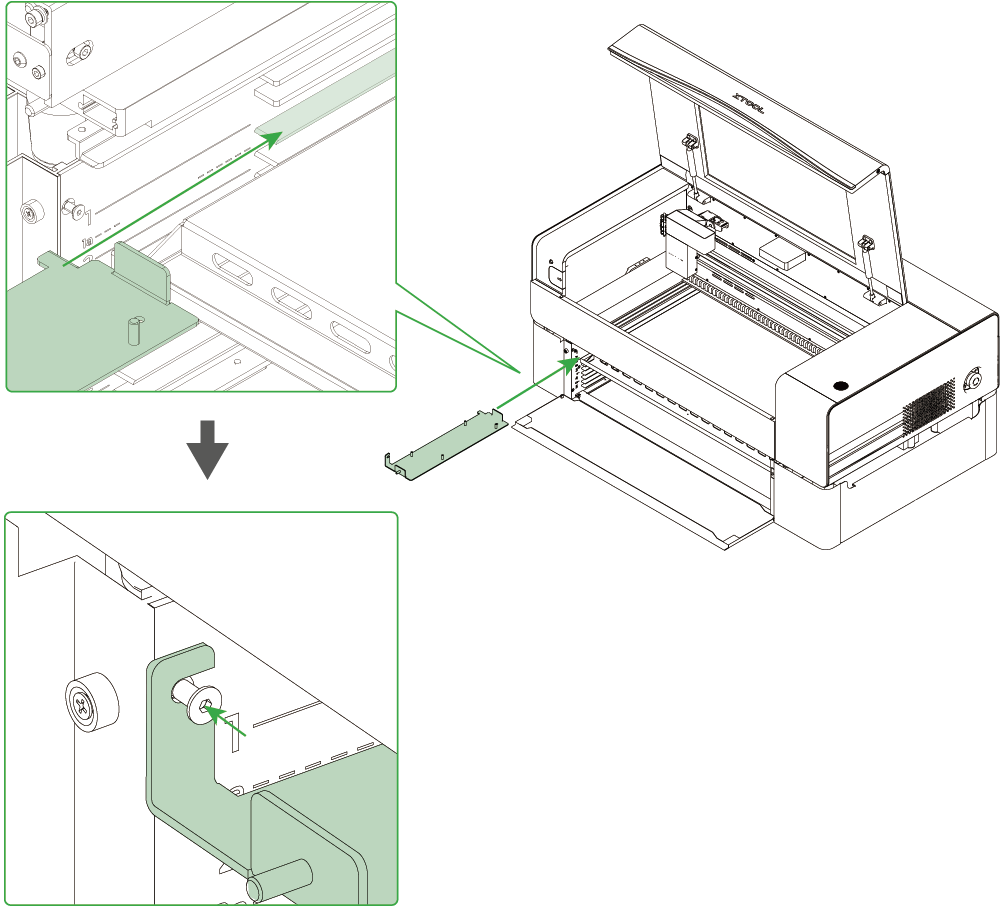
5. Slide the frame fixing piece into the 1a layer and tighten the screw.
6. Flip the frame and screen over so the back side faces up.
7. Fit the frame and the fixing piece together, with the tabs inserted into the notches.
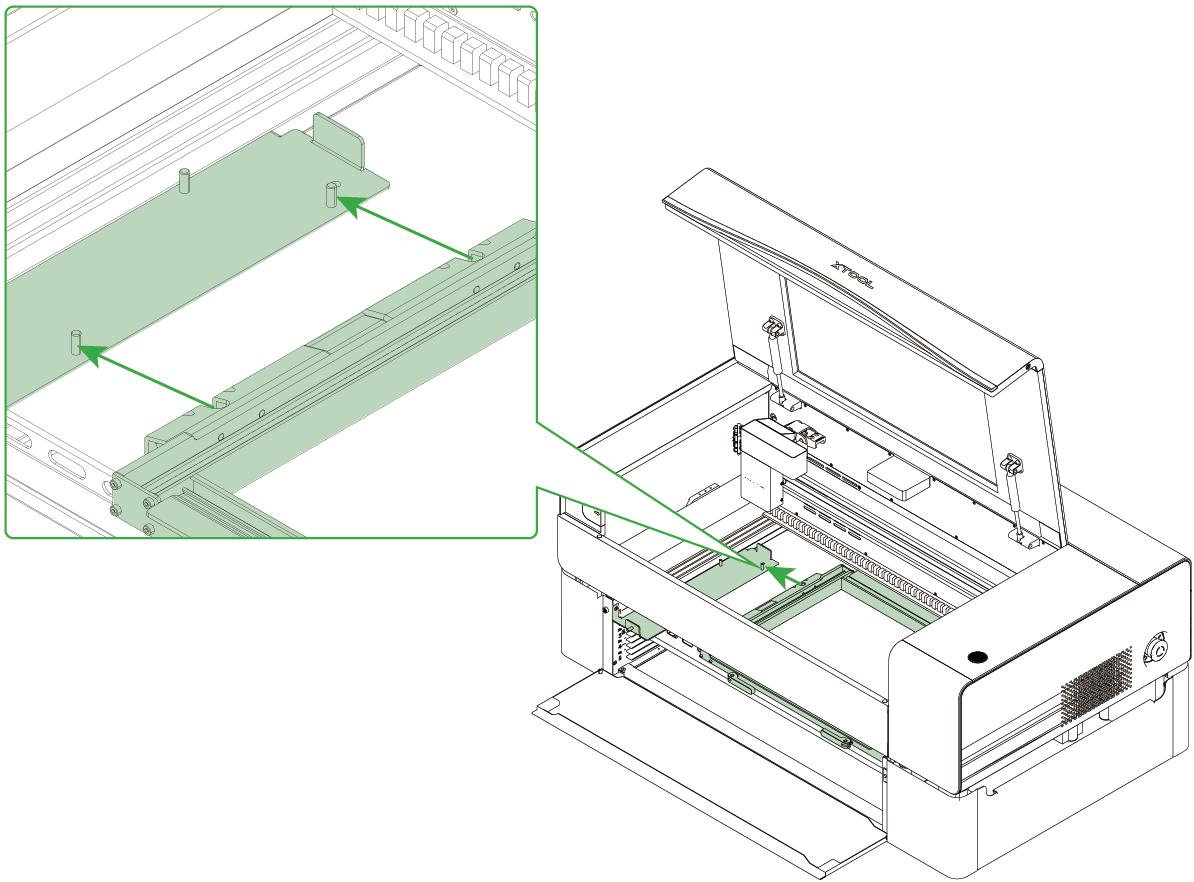
8. Then, close the front shield of the machine.
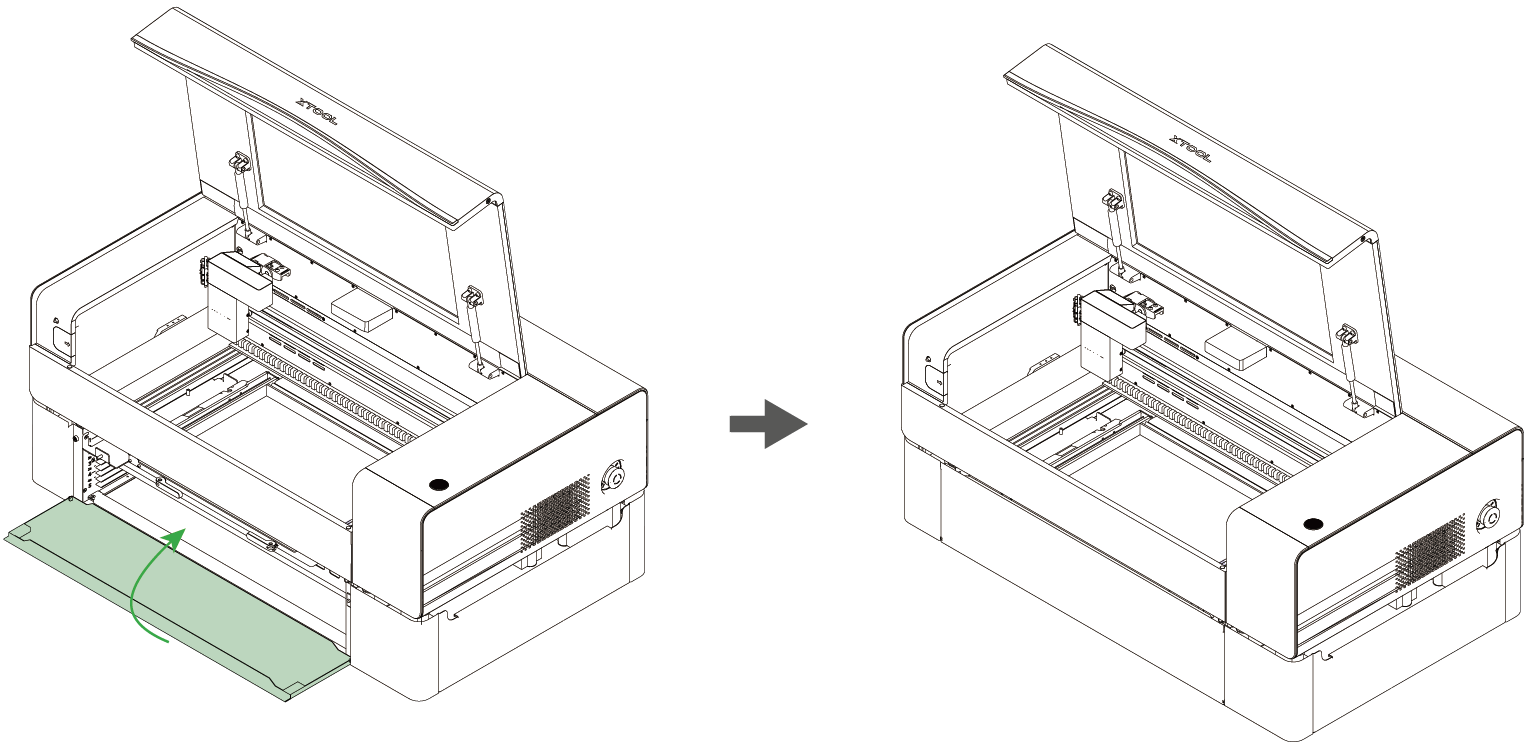
9. Connect xTool P2 to xTool software to engrave on the screen.
Note: In screen printing, the frame is placed with the front side facing up. You may need to rotate and reflect the design objects based on how you will place your material.

Services & Help
Learn & Community
Copyright © 2025 xTool All Rights Reserved.
