Contents:
- Assemble xTool Smoke Purifier
- 1. Install filters
- 2. Install the smoke exhaust pipe
- Use xTool Smoke Purifier
- 1. Precautions
- 2. Operation steps
Assemble xTool Smoke Purifier
1. Install filters
Open the lid, place the HEPA filter, the medium filter, and the pre-filter one by one, cover with the lid, and then fasten the buckles at both sides. The following figure shows how to install the filters.
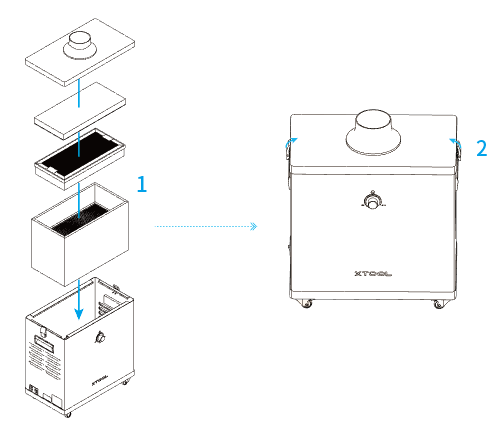
(1) Place the HEPA filter right side up into the chassis.
(2) Place the medium filter right side up into the chassis.
(3) Place the pre-filter with the rough surface up into the chassis.
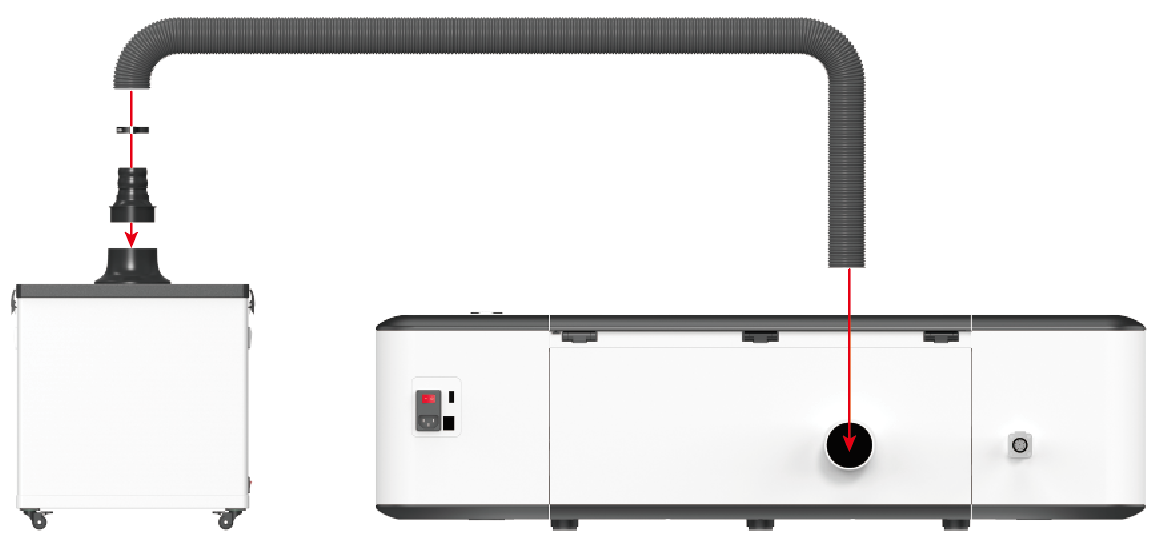
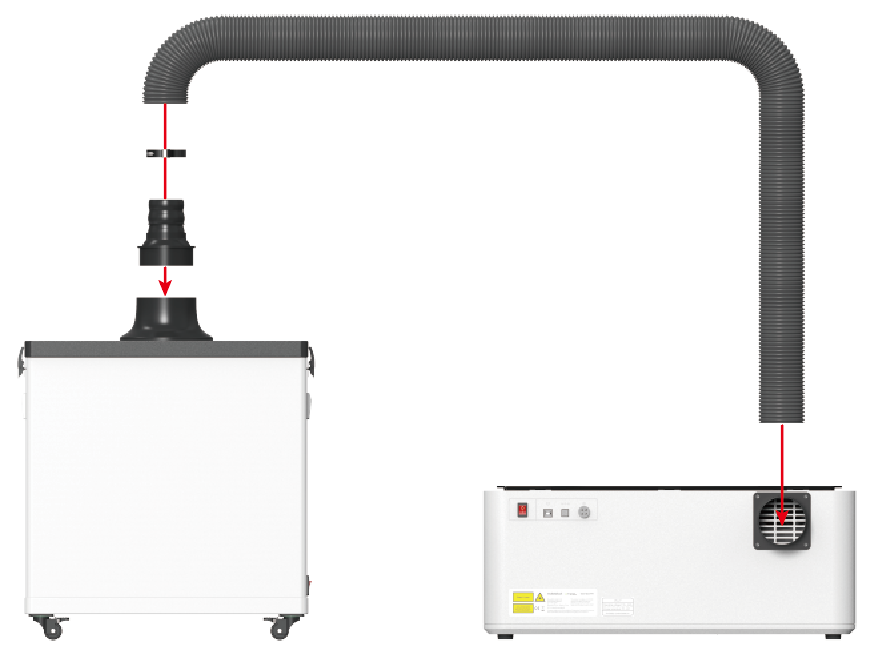
2. Install the smoke exhaust pipe
Step 1: Fit the smoke exhaust pipe adapter on the flange of the lid.
Step 2: Connect one end of the smoke exhaust pipe to the adapter and fasten it with a clamp.
Step 3: Connect the other end of the smoke exhaust pipe to the air outlet of the Laserbox and fasten it with a clamp.
Use xTool Smoke Purifier
1. Precautions
Check the following before you connect the xTool Smoke Purifier to a power supply for the first time to ensure operation safety and stability.
1. Whether the surface of the purifier chassis is damaged.
2. Whether the filters are properly placed in the chassis.
3. Whether the lid is properly fitted on the chassis.
4. Whether the power switch is OFF.
5. Refer to the following steps to disable the purifier detection in software if you are using it in Laserbox Rotary. Otherwise, the machine will falsely report a fault code.

2. Operation steps
Step 1: Connect the purifier to a power supply, and check whether the power plug is properly connected.
Step 2: Turn on the purifier.
Step 3: Rotate the rotary knob to start the purifier and set the airflow as required. After processing, rotate the rotary knob to turn the purifier off and turn off the power switch.
Note: Set the airflow as required. Do not set the airflow too strong or weak. If you set the airflow too strong, more power is consumed and larger noise is made.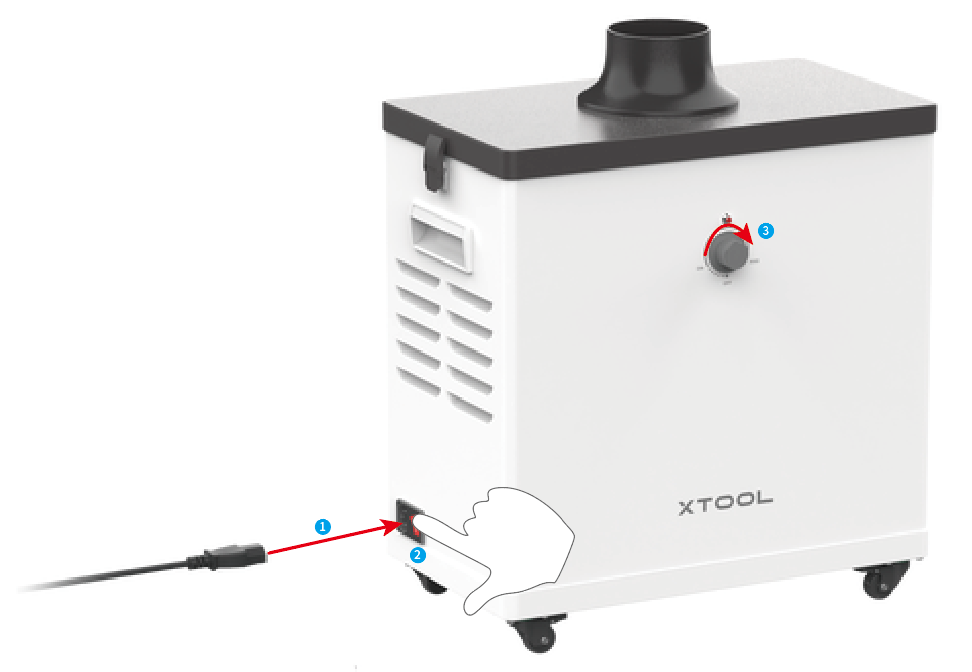
Services & Help
Learn & Education

Copyright © 2025 xTool All Rights Reserved.