Overview:
Every xTool laser device is equipped with an xTool Access Control Key, designed to manage the operational access and safety control of the laser device.
The key serves two primary purposes:
- Basic Safety Mode: Acts as a physical key to lock or unlock the laser device.
- Safety Enhancement Mode: When modified, the key can also serve as a remote interlock connector, expanding control from the device itself to the entire workspace, providing enhanced operator safety in compliance with the Machinery Directive 2006/42/EC.
Usage 1: Basic safety mode
Example device: xTool S1 | Operation is similar to other models.
The basic function of the key is its default access control feature—controlling laser device usage permissions through insertion and removal.
Insert key: Unlock device access
This unlocks the processing and related functions, allowing you to operate the device.
Remove key: Disable device access
This immediately disables the processing and related functions, preventing unauthorized or accidental use.
💡 Important: The port for inserting the key varies according to the machine model. Refer to your device's quick start guide for the specific location.
Usage 2: Safety enhancement mode
Introduction:
The xTool Safety Enhancement Mode is a feature designed for users in the European Union, in accordance with the Directive 2006/42/EC of the European Parliament and of the Council on machinery. It provides an advanced level of operational safety for users who prioritize a secure working environment.
When this mode is activated, the operational procedures and the availability of certain functions on your laser device will be adjusted accordingly. This guide provides instructions for setting up and using this mode.
Note:
- This section primarily uses xTool F2 Ultra UV version as the operational example. Usage is consistent across other models.
- For software activation on different models, refer to the similarly named function buttons in the software interface.
Important notice:
⚠️ Regional Availability
Safety Enhancement Mode is currently available only on xTool laser devices sold within the European Union.
For Users Outside the EU
If you wish to enable Safety Enhancement Mode on an xTool laser device sold outside the EU, please refer to the section "Preparation before use: Key adjustment". By modifying the xTool Access Control Key and installing it on your workspace doorframe, you can achieve the same level of safety functionality.
Notes
- For devices sold outside the EU, the software interface will not provide an option to activate this mode.
- However, once xTool Access Control Key has been modified and properly installed on the doorframe, similar functionality of the safety enhancement mode can still be used, and its core logic remains the same.
Tools required:
Prepare the following tools:
- One small metal sheet (for the door contact)
- Slotted screwdriver
- Two wires with metal terminals on one end (length depends on the distance from your machine to the door)
- Scissors or a utility knife
- Electrical tape
- Double-sided tape
Preparation before use: Key adjustment
💡 Working principle:
Inside the key is a simple circuit consisting of two metal plates and a metal reed. By removing the rear cover of the key, you can bypass the internal reed and directly connect external wires to the two metal plates.
More specifically, extend the wires to the workspace door and doorframe:
- When the workspace door is closed: the metal plate on the door makes contact with the two terminals on the frame, forming a closed circuit.
- When the workspace door is open: the circuit is broken.
Once this new circuit is established, the opening and closing of the workspace door will control the connection and disconnection of the circuit, thereby enabling access control for the device.
In other words, the modified key functions as a remote interlock switch linked to the door status. The laser device will only operate when the workspace door is securely closed, ensuring a safer and controlled working environment.
🛠️ Modification steps:
- Prepare the Wires: Use scissors or a knife to strip about 2-3 cm of the plastic insulation from the non-terminal end of both wires, exposing the metal strands.
- Open the Key Casing: Place the key on a flat surface. Carefully insert the slotted screwdriver into the seam of the key and gently twist to detach the rear cover. Keep the removed rear cover safe in case you need to revert to the basic safety mode in the future. See Images 1-3.
- Connect the Wires: Thread the exposed metal strands of each wire through the holes on the two separate metal sheets inside the key. Twist the strands tightly to ensure a secure connection with the metal sheets. Use electrical tape to secure the wires in place. See images 4-5.
- Mount the Terminals: Use double-sided tape to stick the terminal ends of the two wires onto your workspace doorframe. See image 6.
- Mount the Contact Plate: Stick the small metal sheet onto the door itself, at the same height as the terminals on the frame. Ensure that when the door is closed, the metal sheet makes firm contact with both terminals, completing the circuit. See images 7-8.

- Insert the Modified Key: Insert the key (now connected to the door wiring) into the Access Control Key port on your laser device. See image 9.
With this setup, xTool Access Control Key functionality is now expanded to the entire workspace.
- Workspace Door Closed: Complete circuit is formed → processing and related functions are unlocked
- Workspace Door Open: Circuit is broken → processing and related functions are locked
Prerequisites:
Ensure your xTool laser device is connected to your computer via Wi-Fi or a direct IP connection.
Due to the distance limitations of a USB cable, this mode is not practical for USB connections.
For setup instructions, refer to:
- Configure Wi-Fi for Your xTool Device via xTool Creative Space
- Configure Wi-Fi for Your xTool Device via xTool Studio
Device operation flowchart:
Processing Sequence under the Safety Enhancement Mode:
- Preparation → Complete design on canvas → Click "Process"
- Preview → Verify design → Click "Start"
- Initiation → OPEN workspace door → Press the device’s physical button → Click "Start" in the software
- Processing → Close the workspace door → Monitor progress
- Completion → Click "Finished" → Retrieve workpiece 🎉
Operation instructions:
Example device: xTool F2 Ultra UV | Operation is similar to other models.
1️⃣ Activate the mode:
- In the xTool Studio software interface, click the three dots icon to the right of the device image.
- From the dropdown menu, select the gear icon labeled "Device settings".
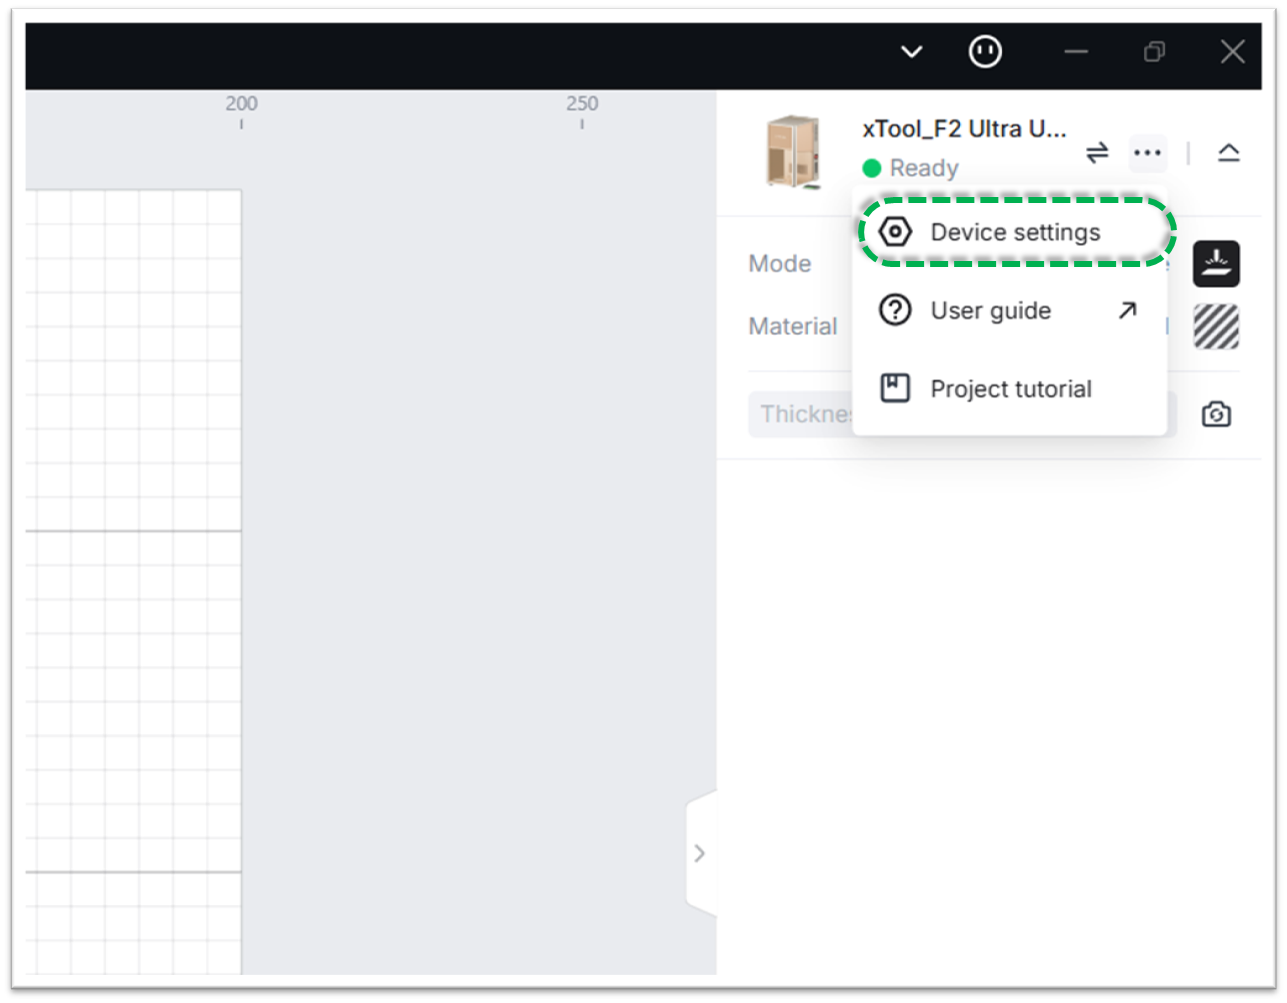
- In the pop-up window, select the "Device settings" tab.
- Scroll down and toggle the switch for Enable Access Control key to the ON position. Read through the tips before clicking on the Yes button.
2️⃣ Prepare for processing:
- On the canvas, prepare your design.
- Prepare the material:
- Open the device's protective enclosure/device lid (for xTool F2 Ultra UV, this is the protective enclosure).
- Place the material in the working area.
- Close the protective enclosure/device lid.
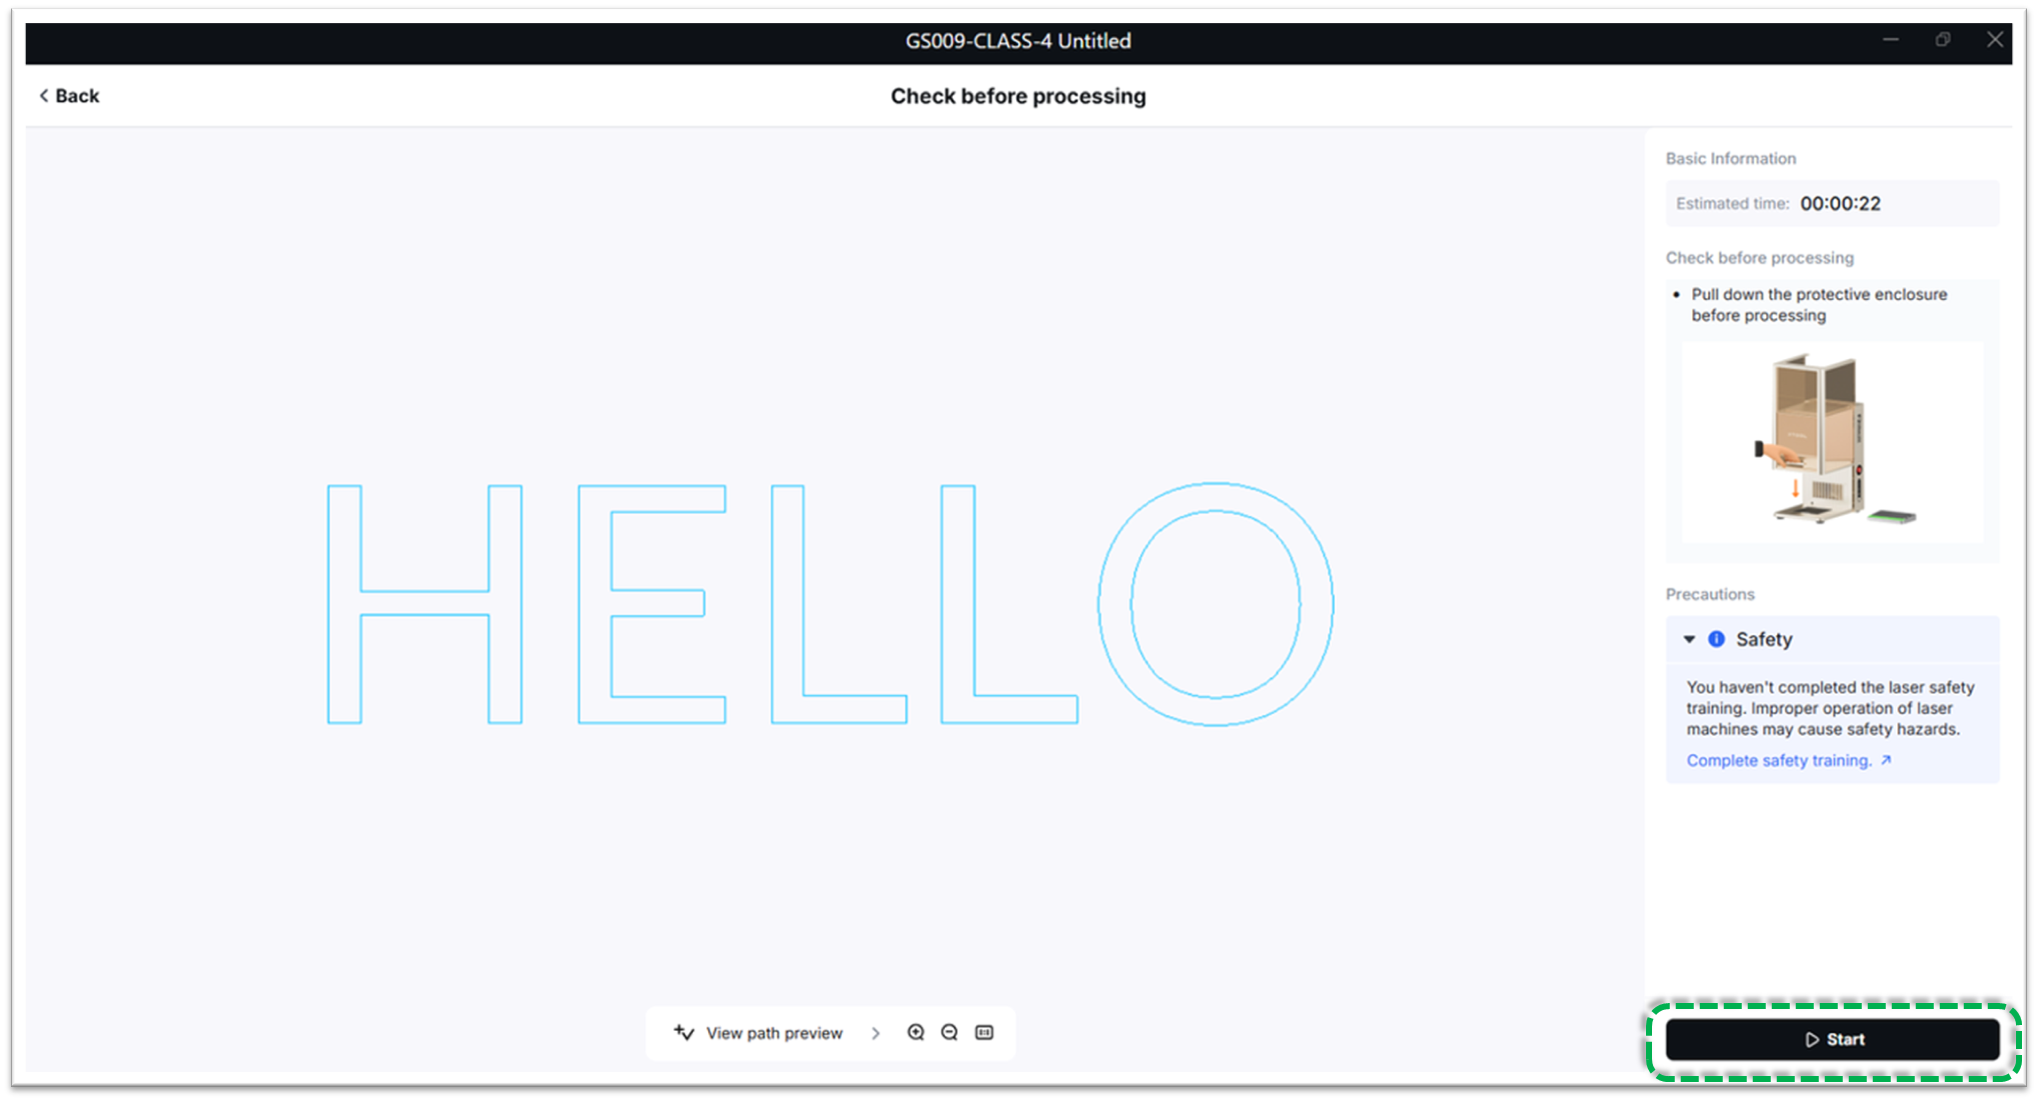
- Click the "Process" button in the bottom-right corner.

- In the preview window, confirm your settings and click the "Start" button.
3️⃣ Start processing:
This mode requires a specific sequence to start a job safely.
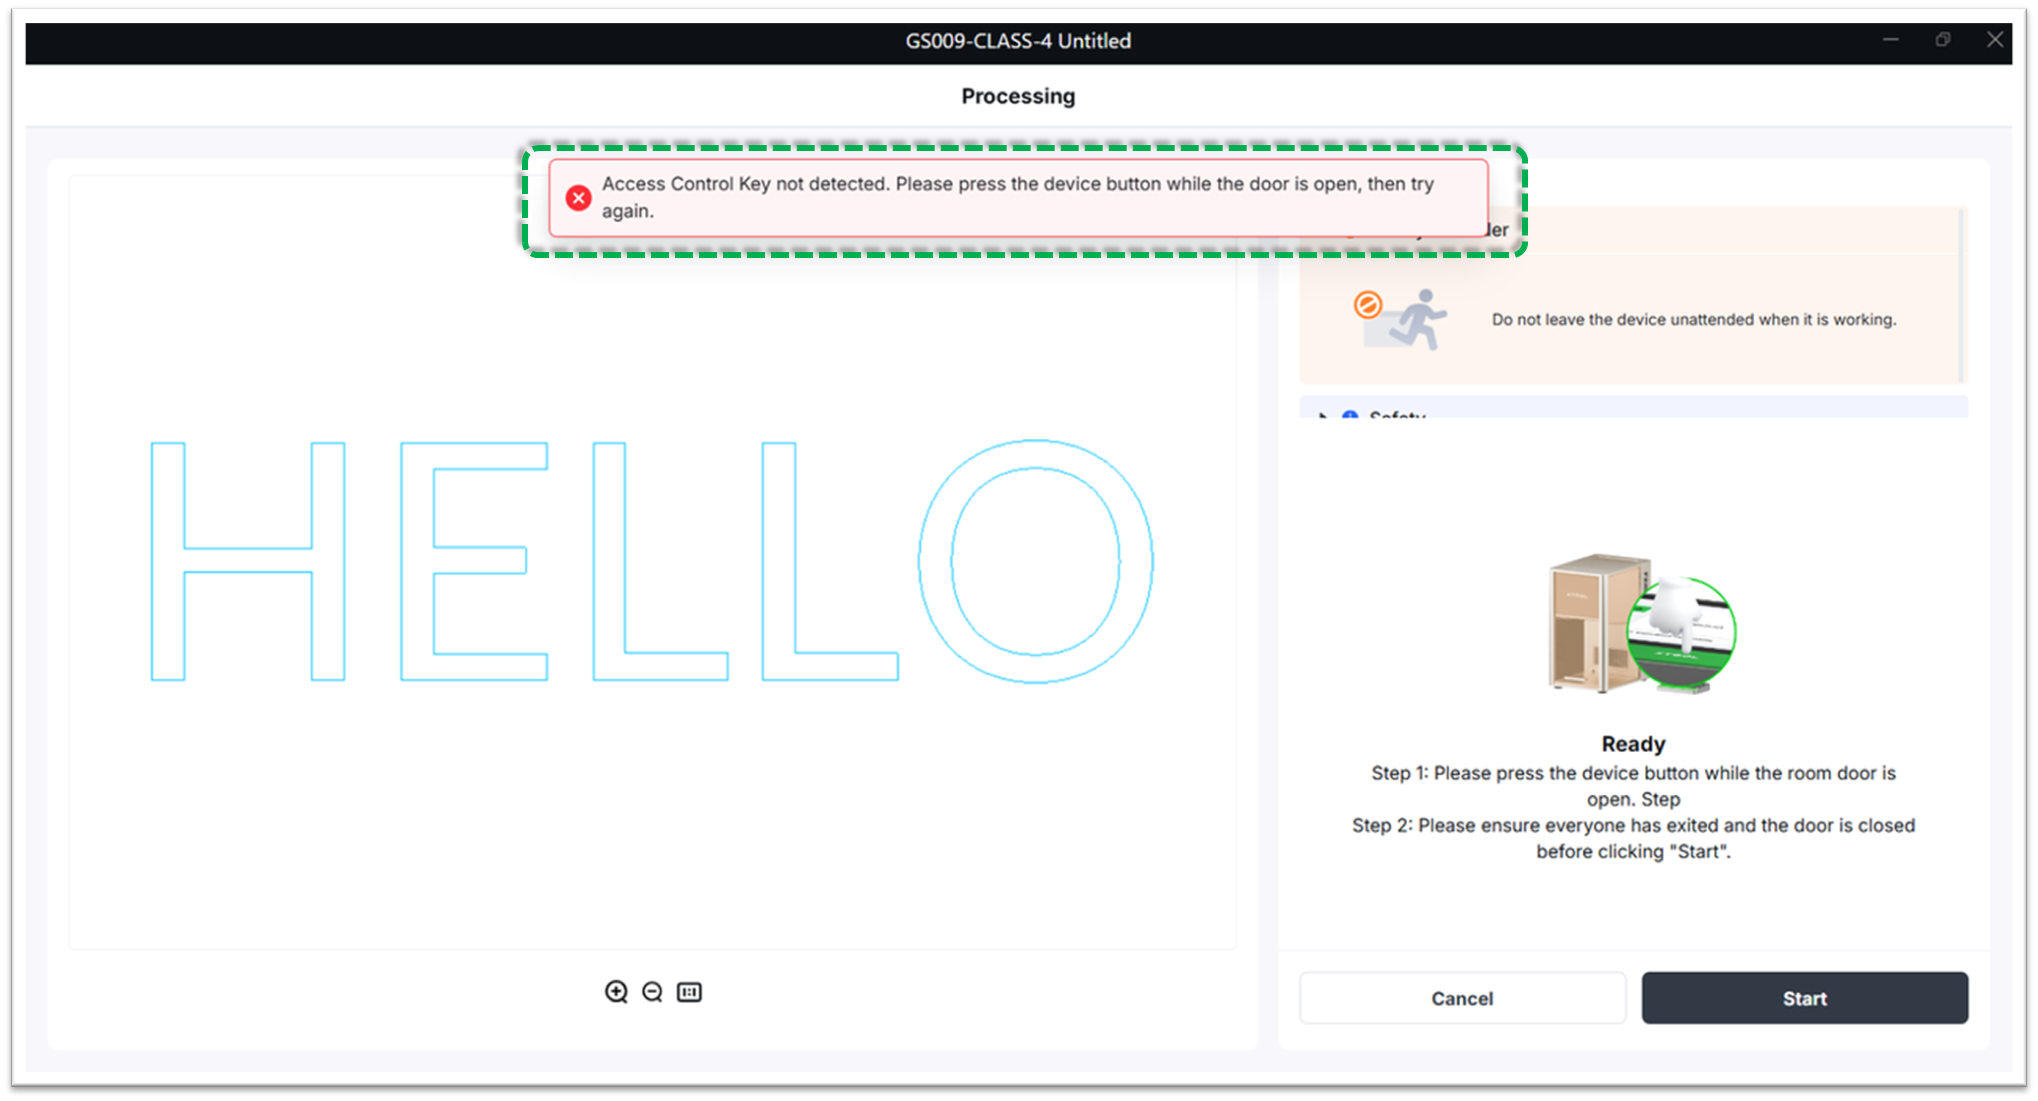
- First, open the workspace door to your workspace (this breaks the interlock circuit).
- With the workspace door OPEN, press the physical processing button on the laser device itself.
- Finally, close the workspace door (this completes the interlock circuit) and click the Start button. The device will begin processing.
⚠️ Important: If you attempt click the Start button to initiate a job while the door is closed, the software will display the following error message: "Access Control Key not detected. Please press the device button while the door is open, then try again."
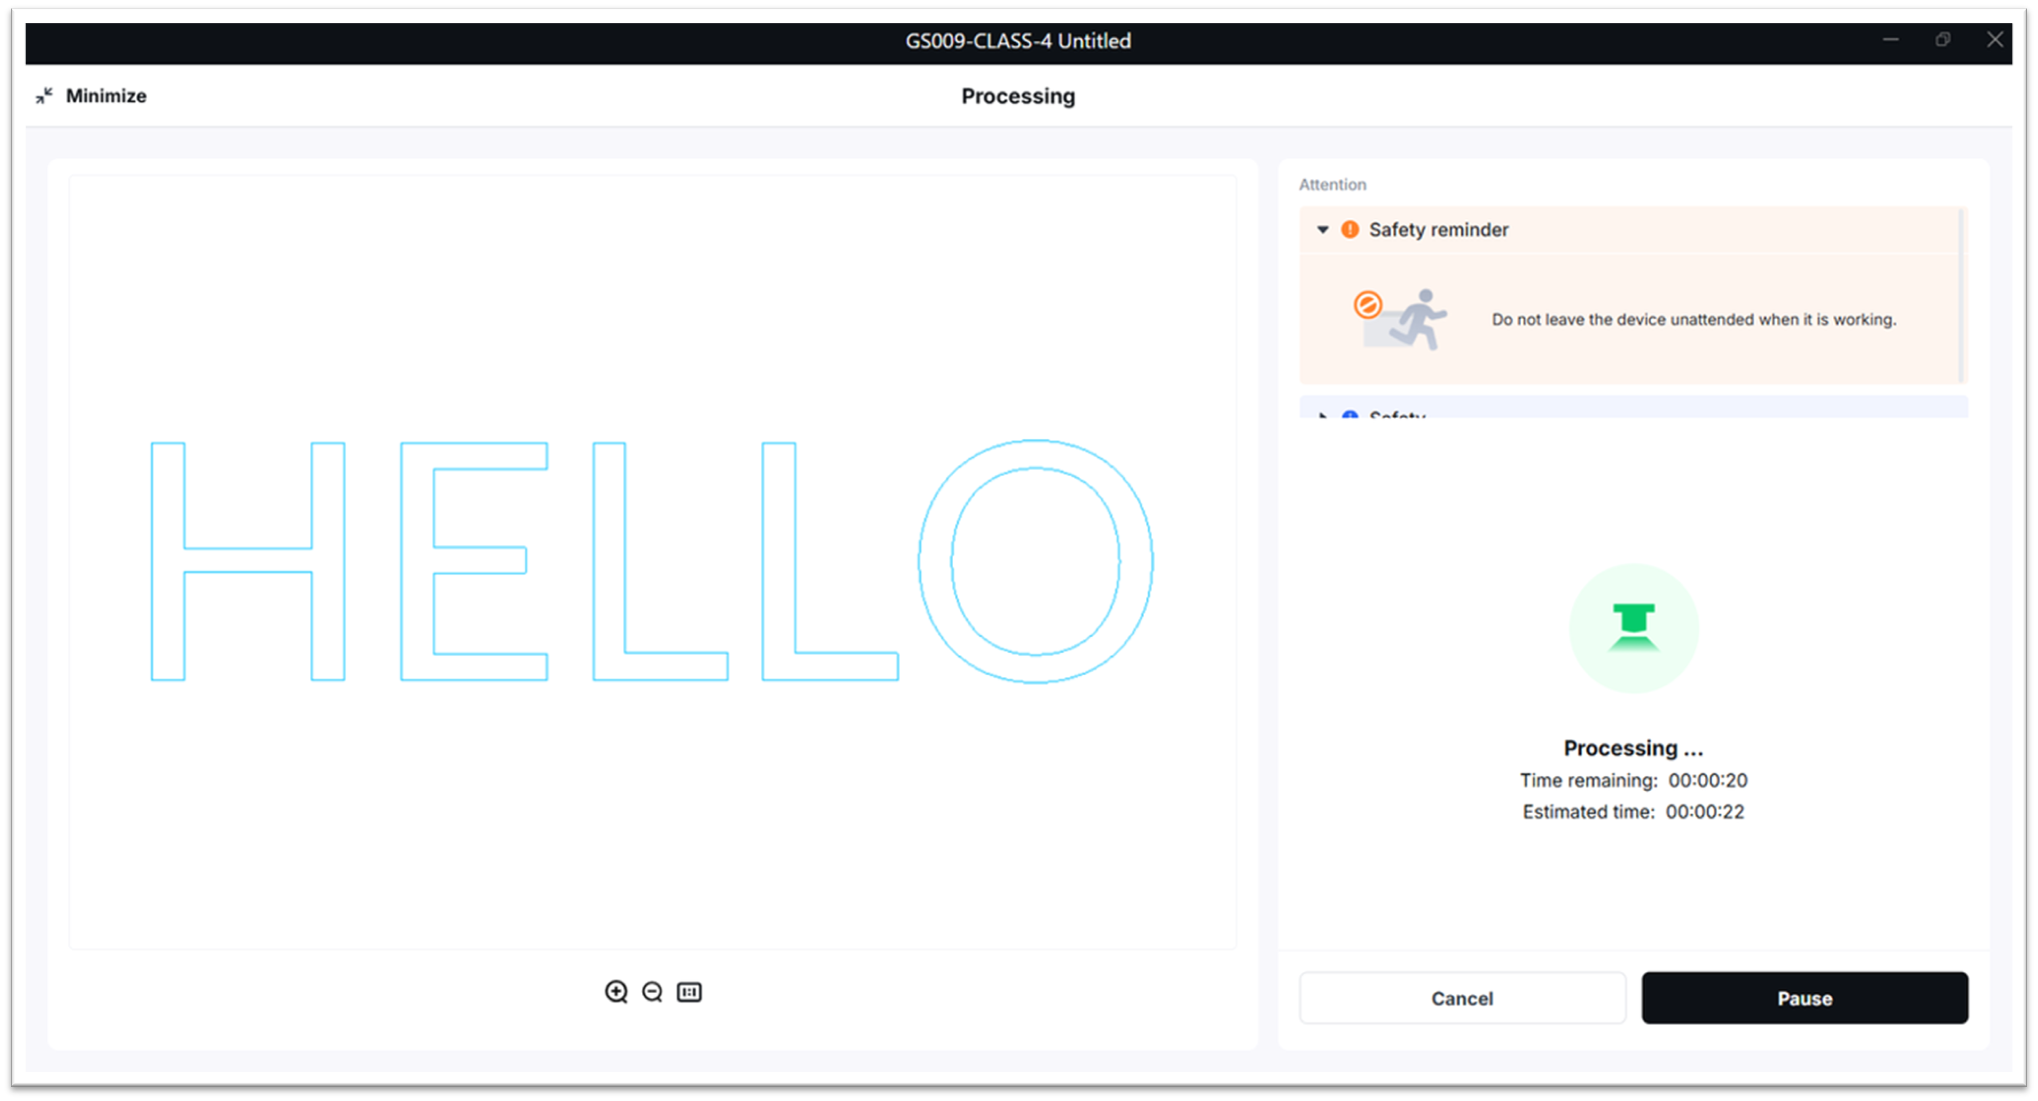
4️⃣ During processing:
- Wait for processing to complete.
- Do not open the workspace door to interrupt the process unless necessary.
Resume After Pause
- To resume processing, click Continue in xTool Studio.
- Device buttons cannot resume processing in this mode.
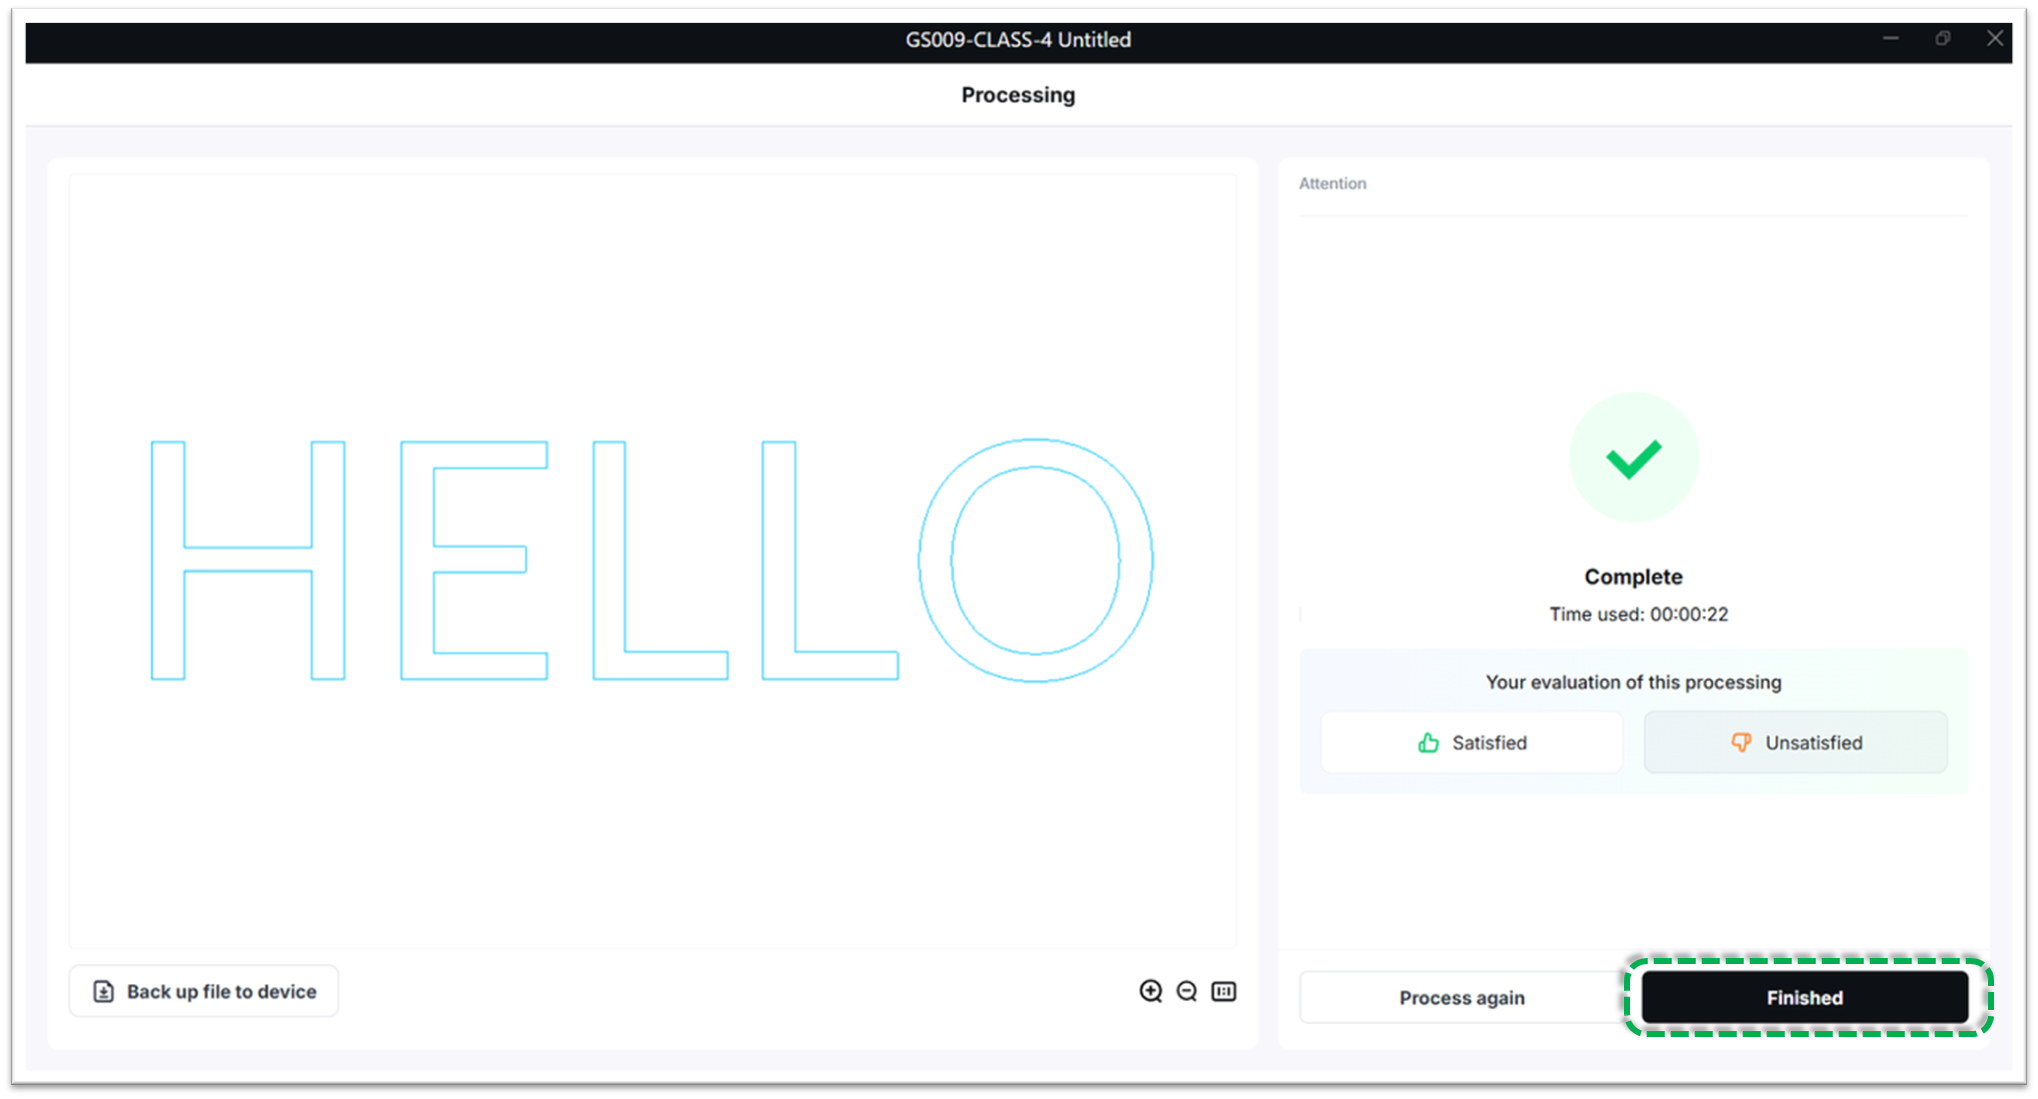
5️⃣ After processing:
- Click "Finished" in the software to complete the processing task.
- Open the device's protective enclosure/device lid and retrieve the completed workpiece.
- 🎉 Congratulations — processing is complete!
Key takeaways:
When Safety Enhancement Mode is active:
- The Processing button on the laser device cannot be used to resume a task if processing was halted due to the workspace door being opened.
- On xTool laser devices equipped with a dedicated physical Framing button, this button is disabled.
- Offline Processing is disabled.
If you attempt to toggle the mode during processing, autofocus, framing, or a firmware upgrade, the switch will remain in its current position. A message will appear: "Device is busy. Please try again shortly."
