Issue description
Users have connected their xTool Air Assist Set to xTool S1 using the provided connection cable, but experience the following issues:
- The Smart Air Assist does not turn on or produce airflow, either automatically when a job starts or when attempting to use the pump's manual mode settings (if available).
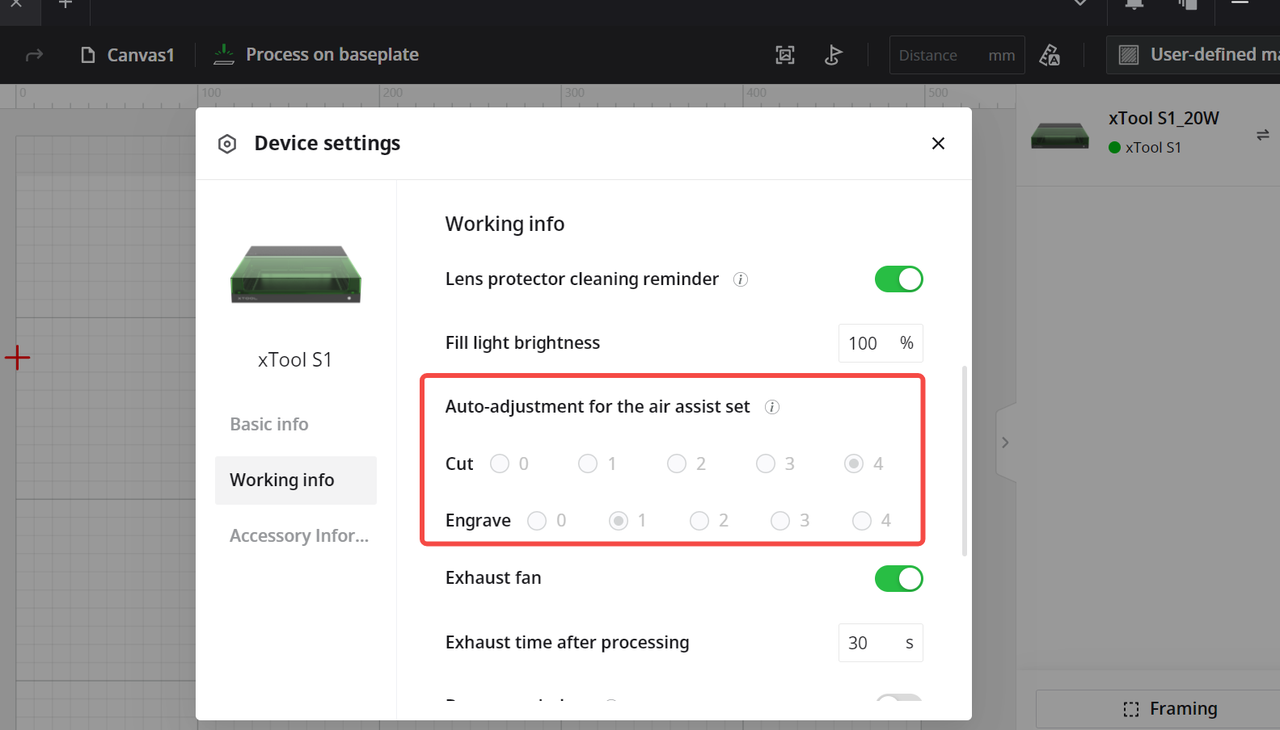
- The Smart Air Assist settings section is missing or unavailable in the xTool Creative Space (XCS) software interface. Normally, users would see options to control the pump here when it's properly connected and detected.
Possible cause
- The Smart Air Assist connection cable is faulty or damaged.
- The Smart Air Assist itself has malfunctioned.
Troubleshooting procedure
STEP1: Isolate the Smart Air Assist
- Disconnect the Smart Air Assist connection cable from both devices.
- Unplug the S1's main power adapter cable from the back of S1.
STEP2: Test pump directly
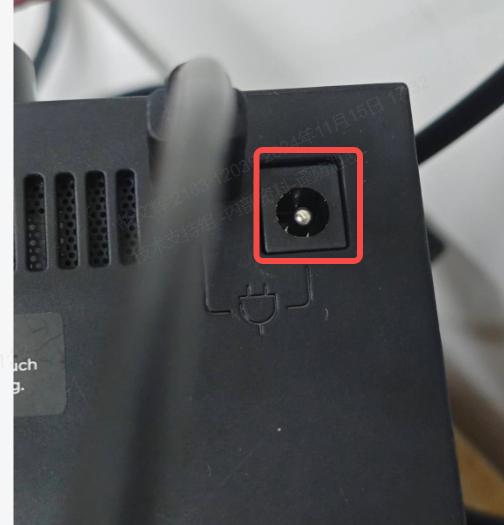
- Plug the S1's power adapter cable directly into the round power input port on the Air Assist. (Note: This is a different port than the one used by the connection cable).
STEP3: Check for Power
Attempt to turn Smart Air Assist on using its manual controls.
- If Smart Air Assist WORKS when powered directly by S1's adapter.
- The Smart Air Assist pump unit itself functions correctly. The problem is highly likely due to a faulty Smart Air Assist connection cable.
- Please contact xTool support by submitting a ticket on https://support.xtool.com/submit-ticket. Please make sure to select “Technical Support” under the After-Sales Issues section. And provide a detailed description of the problem and the troubleshooting procedures you have taken.
- Smart Air Assist STILL DOES NOT WORK when powered directly by S1's adapter.
- Since Smart Air Assist fails to operate even with a known good power source connected directly, the issue is likely within itself.
- Please contact xTool support by submitting a ticket on https://support.xtool.com/submit-ticket. Please make sure to select “Technical Support” under the After-Sales Issues section. And provide a detailed description of the problem and the troubleshooting procedures you have taken.
Still experiencing issues?
Should the issue persist after completing the preceding steps, submit a ticket via the "Submit a Ticket" button in the "Help Ticket" section below. The standard response time for xTool Customer Service is one business day.
For a prompt resolution, please include the following details:
- Issue Description: A detailed explanation of the observed problem.
- Video Evidence: Attach a video demonstrating the issue, where applicable.
- Troubleshooting Performed: Any troubleshooting steps you have already attempted, along with their results.
This information is crucial for xTool technical support engineers to provide timely assistance.
Documentation feedback
Help improve this content by providing feedback. If this content did not meet your requirements, select "No" in the "Was this page helpful?" section below. Include specific details about what was unclear or missing in the pop-up suggestion box. Feedback submissions are reviewed by xTool technical writers to enhance future documentation.
Services & Help
Learn & Education

Copyright © 2025 xTool All Rights Reserved.