This article applies to:
xTool S1 with all laser modules.
Issue Description
When this issue happens, you may experience the following:
- A pop-up error message: "Baseplate or riser base exceptions".
- The ring indicator flashes yellow and the alarm is triggered.

Troubleshooting
xTool S1 uses different sets of fixing screws as a media to detect if the base plate, and the riser base (if you have one installed), are in place. If any of the screws is damaged, missing, or not fastened properly, the machine may not be able to detect the plates as required, hence the alarm.
Depending on if you use a riser base and what types of riser base (class 1 or 4) you use, the troubleshooting steps are a bit different. In the following we will explain it in three different situations.
Here is a video troubleshooting guide for when using no riser base and using the class 1 riser base. For full text guide, please read on.
The following is the full text guide:
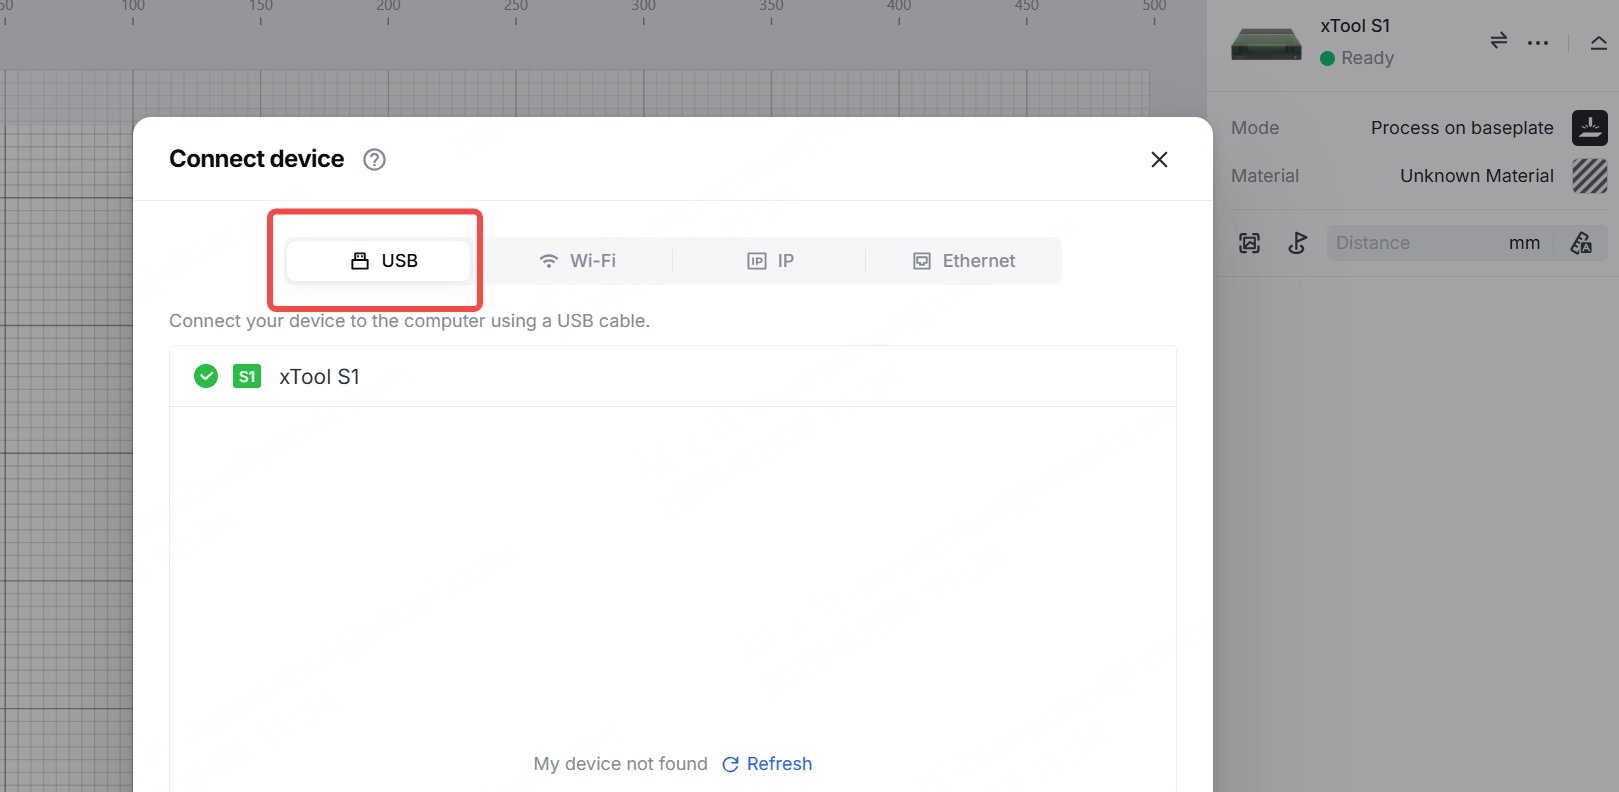
#1 Check device connection
Check the device connection mode. If you use a Wi-Fi connection, xTool Studio may fail to read the device information in time due to network instability and report a false alert. Therefore, we recommend you connect the device to the software using a USB cable.
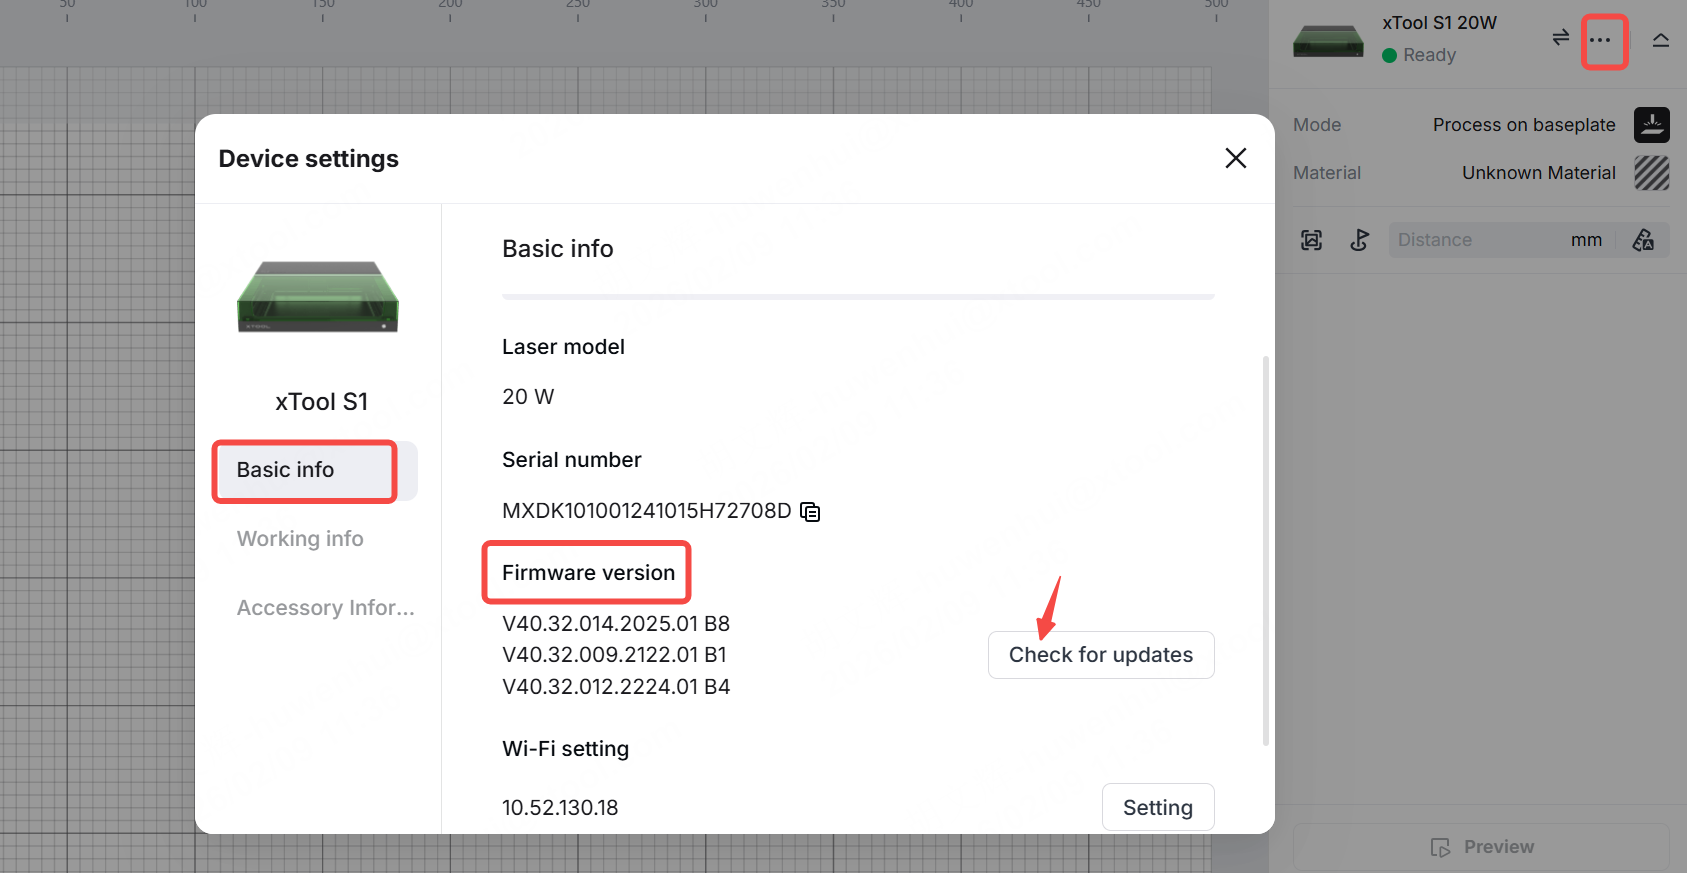
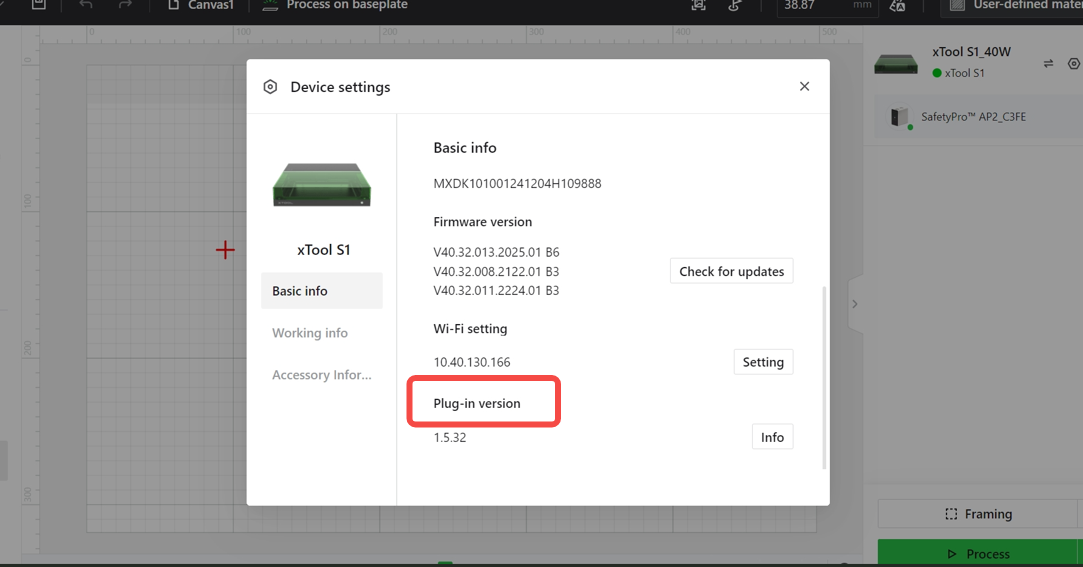
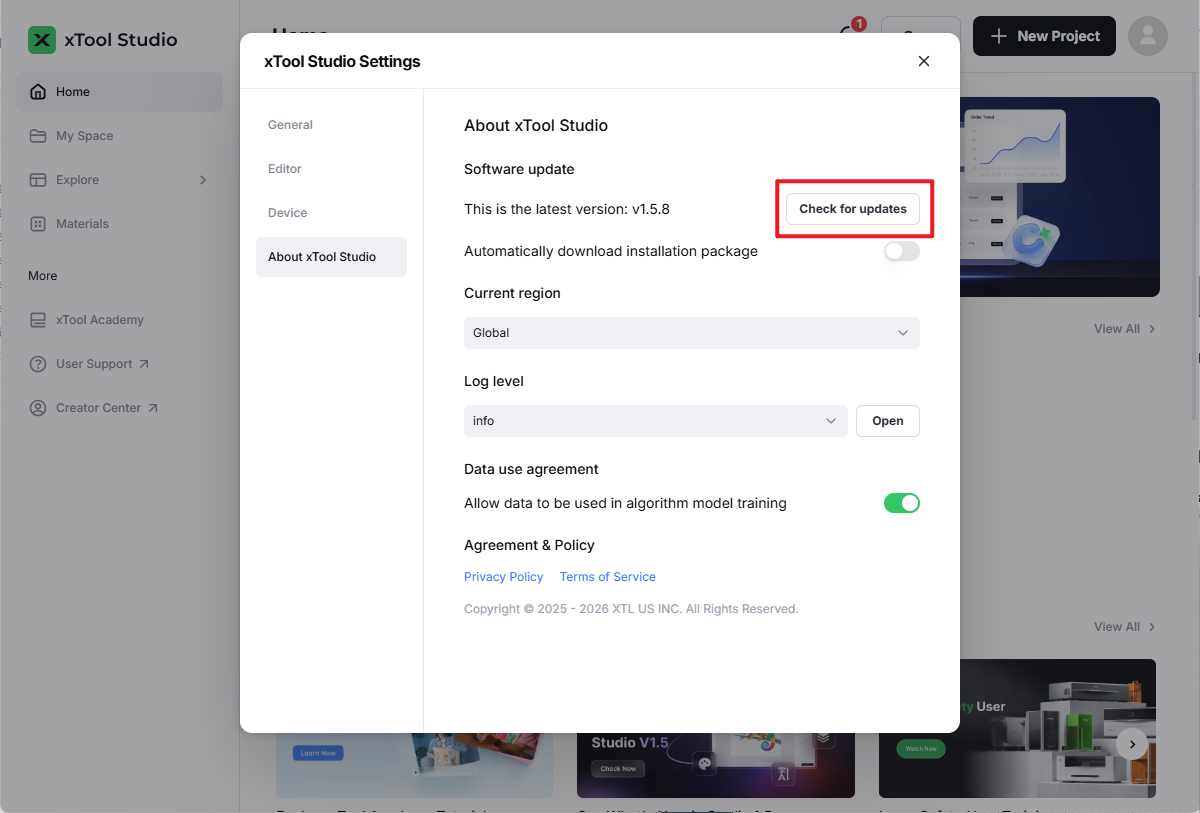
#2 Check the firmware, plug-in, and software versions
Ensure that the firmware and plug-in versions for xTool S1 and the version of xTool Studio are all up-to-date.
- Latest firmware version: V40.32.016.2025.01.V01 B1.bin
- Latest plug-in version: 1.8.35
- Latest software version: click Check for updates to verify
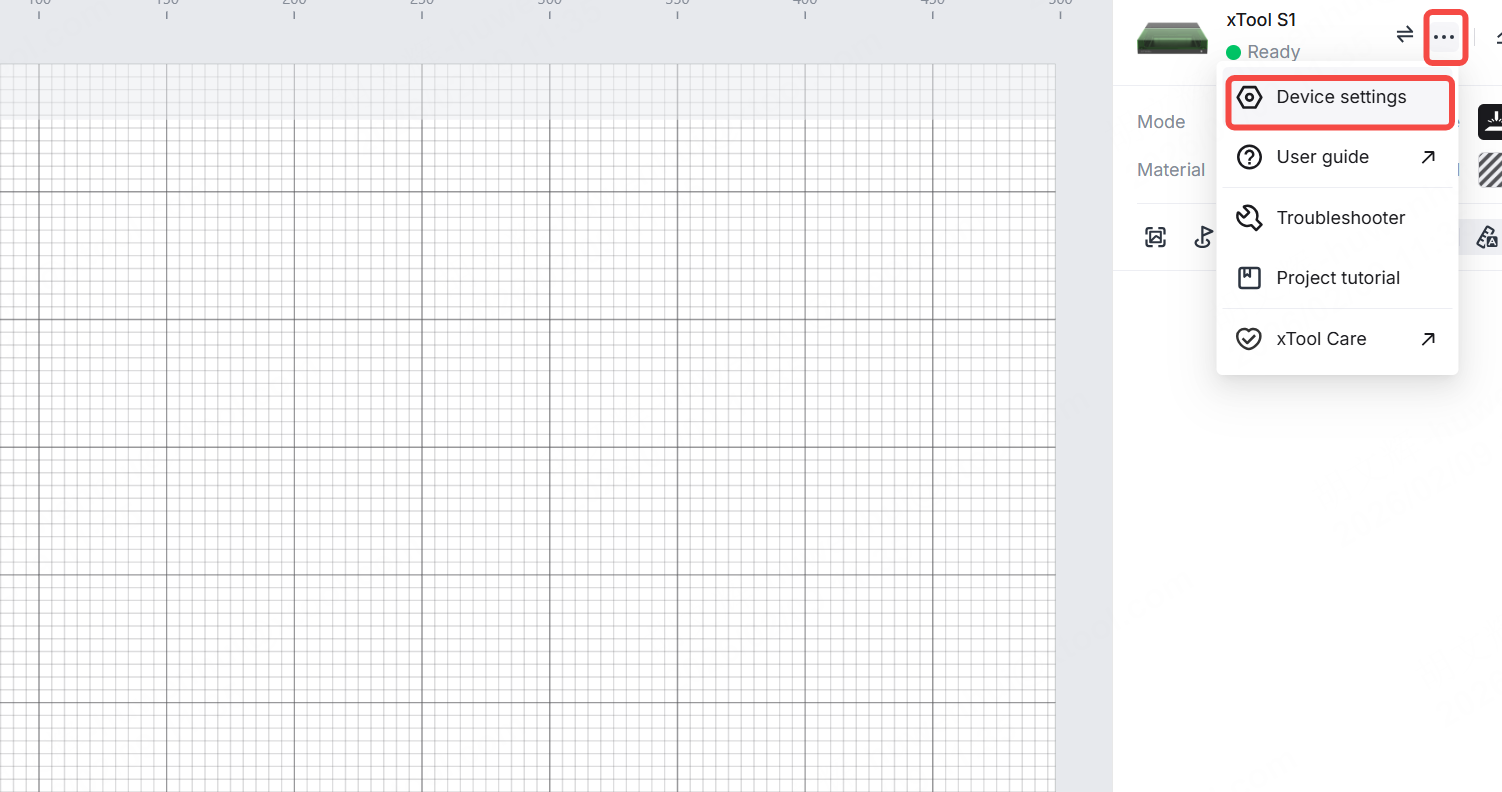
#3 Open the Device settings window
Click the icon > Device settings to open the Device settings window, and check if the error message disappears.
#4 When using no riser base
This is the case where you use S1 with its baseplate as-is. The screws for detection purpose are the three M3*12 screws at the left side of the base plate’s upper surface. Make sure you check the following:
- The three screws are installed properly into the slots.
- The three screws are undamaged and have no noticeable cracks.
- The three screws are the correct type: “M3*8”.

#5 When using a riser base (class 1)
This is the case where you use S1 with a class 1 riser base. The class 1 riser base comes in one piece and does not support a conveyor feeder due to its enclosed design. This is to provide better health protection. For details, please refer to this LSO training guide for xTool S1.
The screws for detection purpose are the three M3*14 screws at the left side of the baseplate’s bottom surface and another three on the upper surface. Make sure you check the following:
- The six screws are installed properly into the slots.
- The six screws are undamaged and have no noticeable cracks.
- The six screws are the correct type: “M3*14”.
For details about the installation, please refer to this video guide: unboxing guide for riser base class 1.

#6 When using a riser base (class 4)
This is the case where you use S1 with a class 4 riser base. The class 4 riser base comes in four pieces and needs to be assembled manually. It can work with the conveyor feeder as the front and back panels can be opened for material to pass through.
The screws used for detection are one M3*20 screw and two M3*14 screws, all located at the inner left side of the machine. The M3*20 screw is in the middle and the M3*14 screws are at the upper and lower sides. Make sure you check the following:
- The three screws are installed properly into the slots.
- The three screws are undamaged and have no noticeable cracks.
- The one screw in the middle is “M3*20” and the other two are “M3*14”.
For details about the installation, please refer to this video guide: unboxing guide for riser base class 4.

#7 For Screen Printer
If you see the same error code when using S1 with the Screen Printer:
- Make sure your XCS's device plug-in for S1 is up-to-date.
- Check if you install the screen in the correct way. Please see this guide for details.
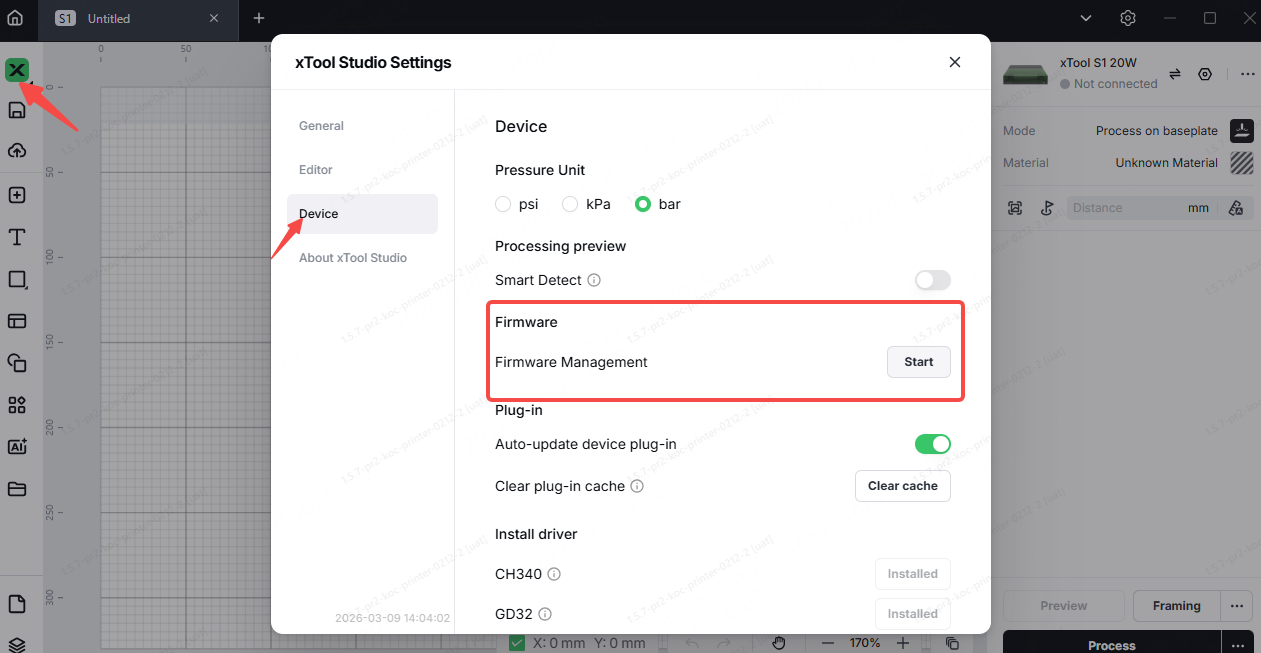
#8 Force firmware upgrade
Download the following file to perform a forced firmware upgrade. This firmware blocks the baseplate or riser base exception message, thereby resolving the issue. However, after installing this firmware, the xTool S1 will no longer comply with Class 1 laser safety standards and can only be used as a Class 4 laser machine. Please use caution when operating xTool S1 with this firmware.
Click here to download the firmware installation file.
Notes: We recommend that you first check whether the machine screws are properly installed. After upgrading to this firmware, the machine will no longer comply with Class 1 laser safety standards. To avoid direct exposure of the laser to skin and eyes, do not use the machine without the baseplate or riser base installed.
Steps:
- Click here to download the firmware installation file.
- Find the Firmware Management section in xTool Studio, and click Start.
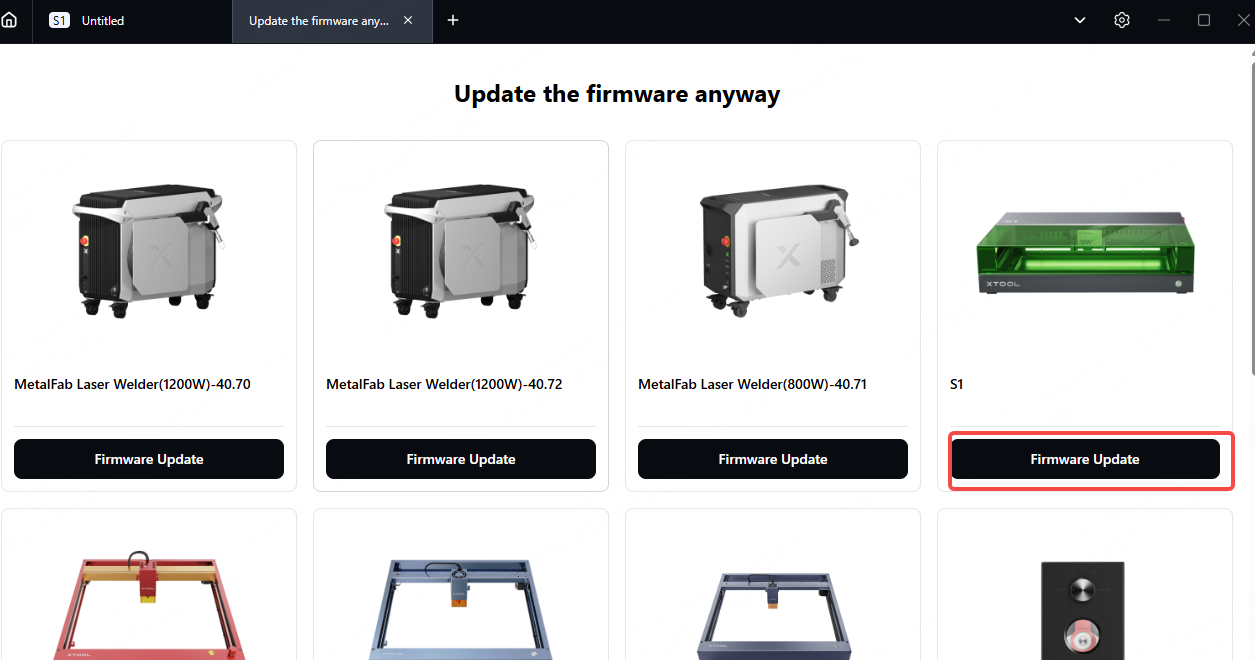
- Select the machine model and click Firmware Update
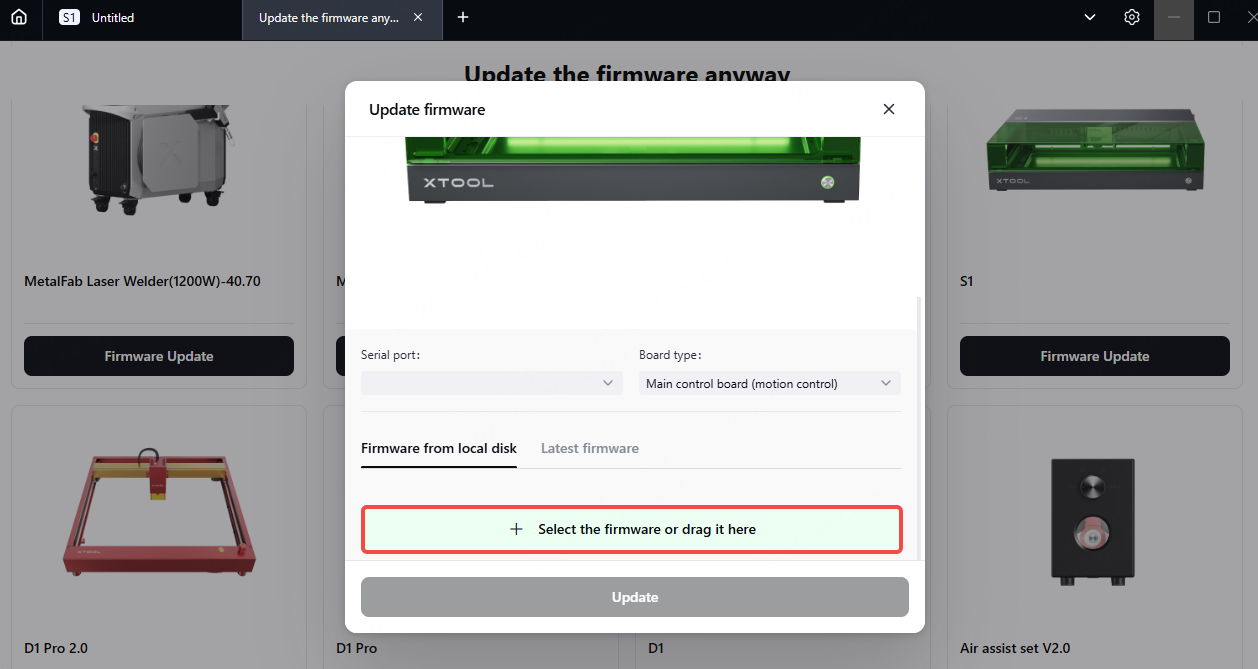
- Drag the firmware installation file xtool_d2_gd470_V40.32.017.2025.01.V01 B1.bin into Firmware from local disk, then click Update.
Help us improve
If this article or video doesn't effectively assist you in resolving the issue, please let us know by clicking the “No” button in the “Was this page helpful?” section below, and leave your feedback in the pop-up suggestion box. Our knowledge base team will review it and consider it for future updates.
Still need help?
If you need any human assistance, please create a ticket by clicking the “Submit a Ticket” button in the “Help Ticket” section below. Our service team will get back to you in 1 business day via E-mail.
Services & Help
Learn & Education

Copyright © 2025 xTool All Rights Reserved.