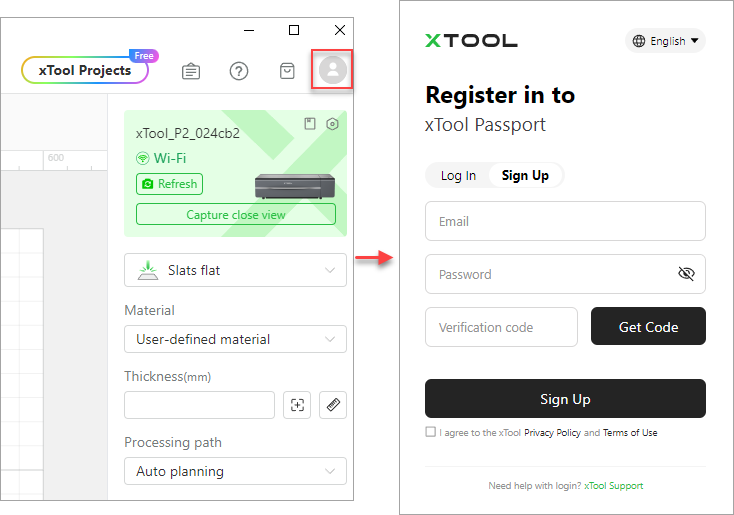
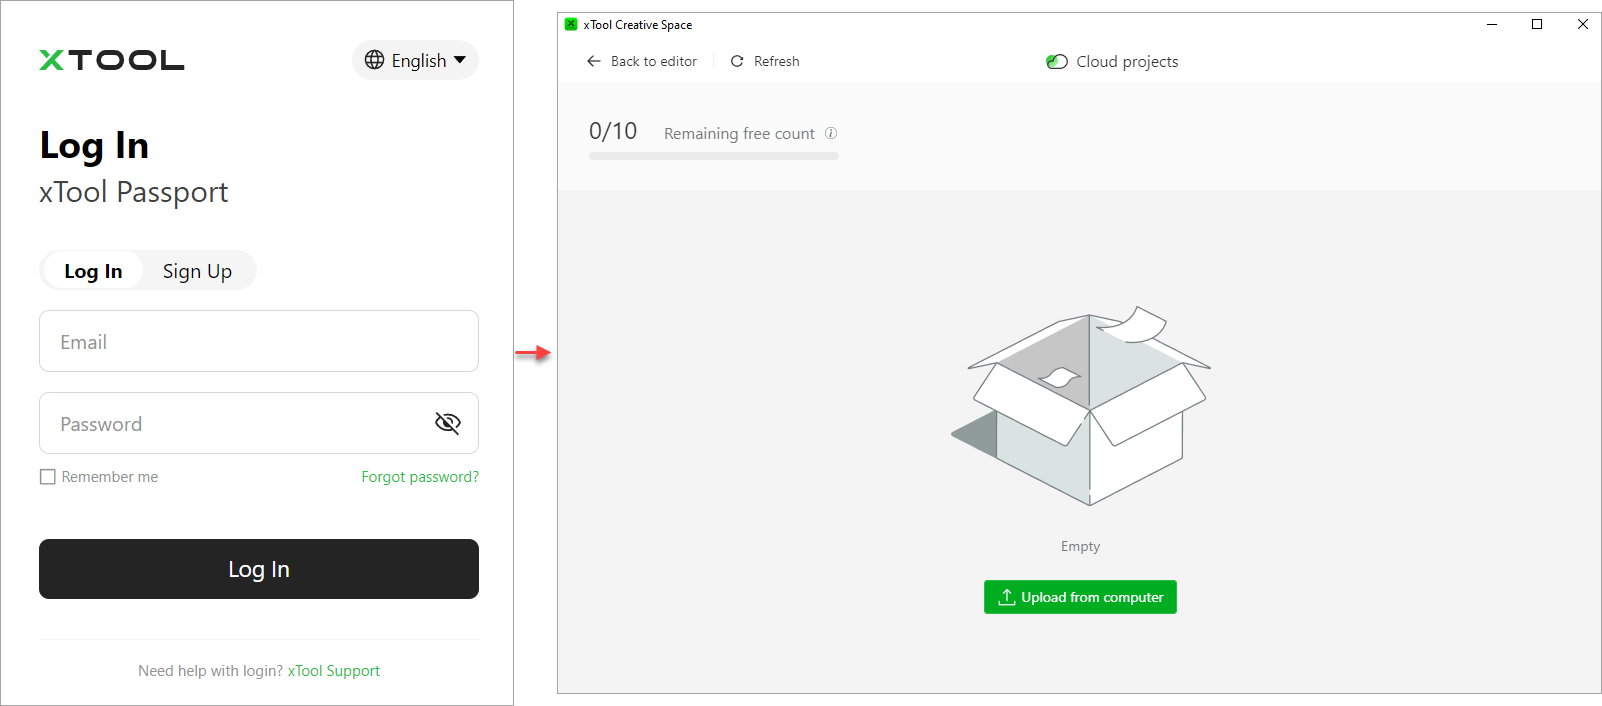
xTool Passport
xTool Creative Space (XCS) provides the entry to xTool Passport. By signing up and logging in to xTool Passport, you can use the Cloud storage space and sync data across your PC, mobile phone, and tablet.
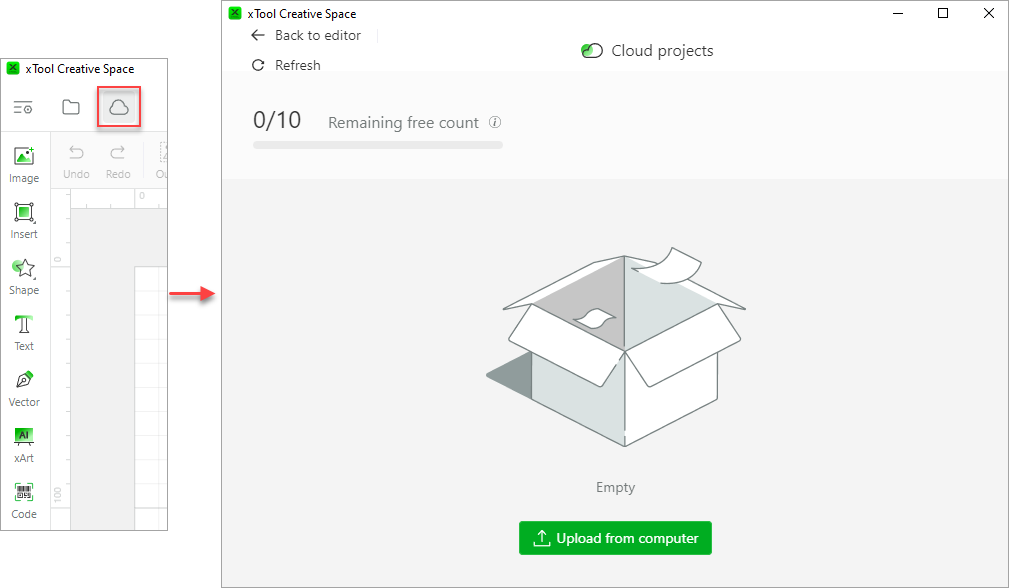
After storing a project in the Cloud, you can use it on your PC, mobile phone, and iPad with the same xTool Passport account.
Function unavailability description
- Smart fill
This function is available only after you have connected your device to XCS. Note that this function is supported only for machines with cameras, such as xTool M1. Machines without cameras, such as the xTool D series, do not provide this function.
- Align
This function is available only after you have selected two or more design elements.
- Combine
This function is available only for vector elements and can be used only after you have selected two vector elements.
Menus
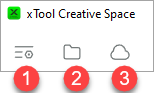
① Settings
General
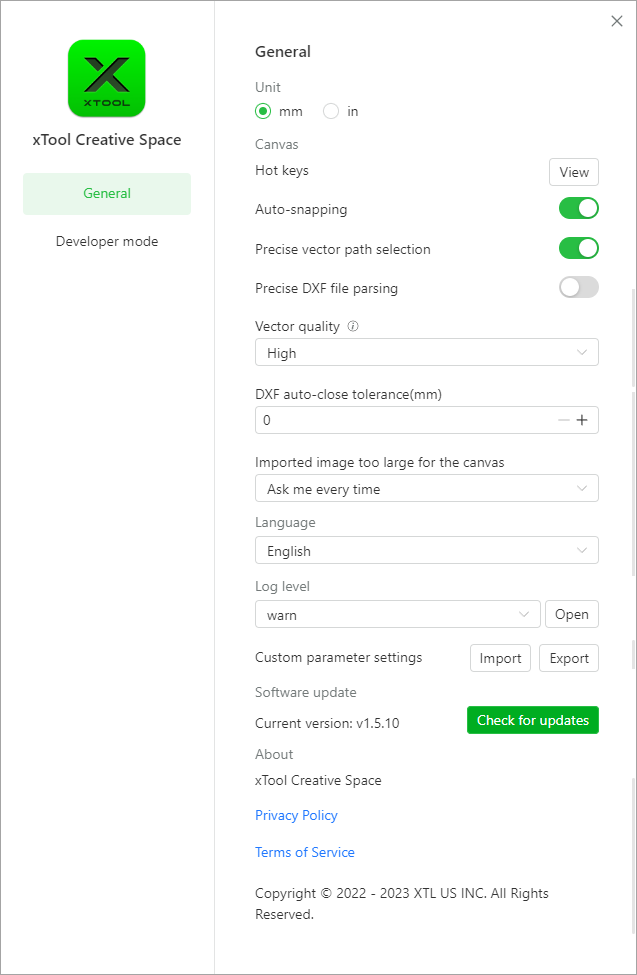
- Unit: sets the unit for displaying the size and position of a design element
- Hot keys: You can click View to view all the hot keys supported by XCS
- Auto-snapping: enables or disables the auto-snapping function of the canvas. The function is enabled by default.
When it is enabled, guides appear when you move an element on the canvas to help you align the element with another element or the grids.

When it is disabled, no guide appears when you move an element.
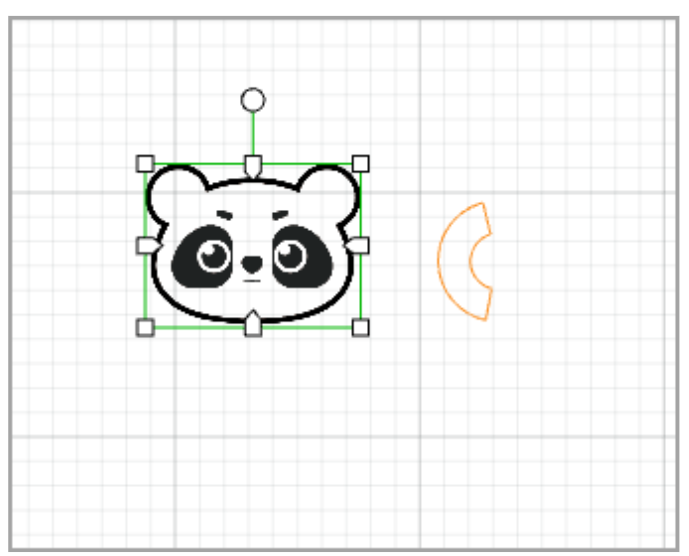
- Precise vector path selection: By default, this function is disabled.
When this function is disabled, you can select a vector path by clicking on the selection box of it. The selections boxes of multiple vector paths, however, may overlap, causing difficulty in selecting the target vector path.
As shown in the following figure, it is difficult to select the purple line because it is located within the selection box of another line.
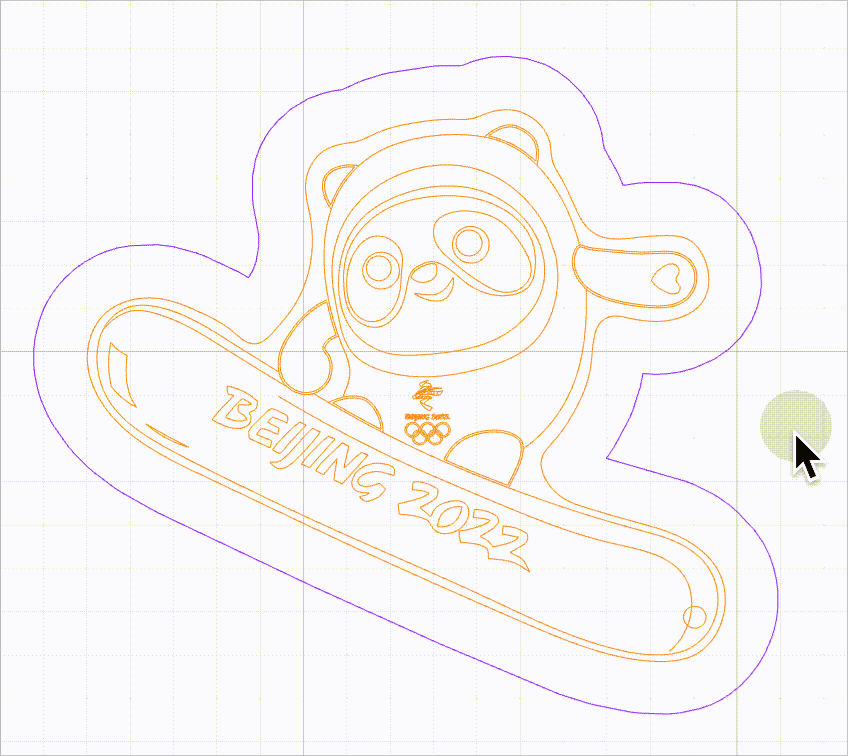
When this function is enabled, no selection box is provided for vector paths. You need to move the mouse pointer close to a line to select it. In this way, you can select a vector path without selection box interfering.
As shown in the following figure, you can select a line by moving the mouse pointer close to it and then clicking.
- Precise DXF file parsing: sets whether to parse DXF files with new algorithms. The new algorithms ensure better parsing results without line missing or deformation and therefore use more PC memory. It is disabled by default. You are advised not to enable this function when your DXF files are properly parsed on XCS.
- Vector quality: sets the quality of vector paths, including the following options:
- Optimal (ideal for patterns larger than 20 inches and allows for an average speed)
- High (good for patterns of 10 to 20 inches and allows for a moderately faster speed)
- Medium (good for patterns smaller than 10 inches and allows for a fast speed)
- The higher the quality, the lower the speed. If you need to edit complicated vector paths, which may cause software lag, empty screen, or crashes, you can set the quality to Medium to improve the performance of XCS. You don't have to worry much about the processing results. In most of the cases, the differences in processing results between the Medium and High quality are not observable. The processing precision is observably reduced only when you scale a small vector path to a very large one, for example, scale a 2-inch pattern to a 20-inch one.
- DXF auto-close tolerance (mm): automatically closes paths, imported from a DXF file, that include split points.
- A vector with split points fails to be filled. The default value is 0, and you are recommended to set it to 0.1 for the first time. After setting it, you need to import the DXF again to make it take effect.
- Imported image too large for the canvas: sets how to process an imported image that is too large for the canvas, including the following options:
Ask me every time: XCS asks you every time when you import an image that is too large for the canvas.
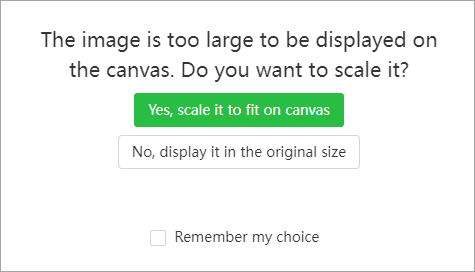
Auto-scale it: XCS automatically scales an image that is too large for the canvas when you import it.
Keep its size: XCS displays an image that is too large for the canvas in the original size when you import it.
- Language: sets the language of the UIs
- Custom parameter settings: allows you to export the processing parameter settings you've saved before or import parameter settings into XCS from a local disk
- Software update: displays the software version and checks for later versions
- About: displays information about the software
- Privacy Policy and Terms of Service: click to view the Privacy Policy and Terms of Service
- Developer mode
Enter the developer mode to update the firmware of a machine forcibly. Currently, the function is available only for xTool D1 and xTool D1 Pro.
② File

- New: creates a new project file
- Open project...: opens a local project file, supporting only .xcs files
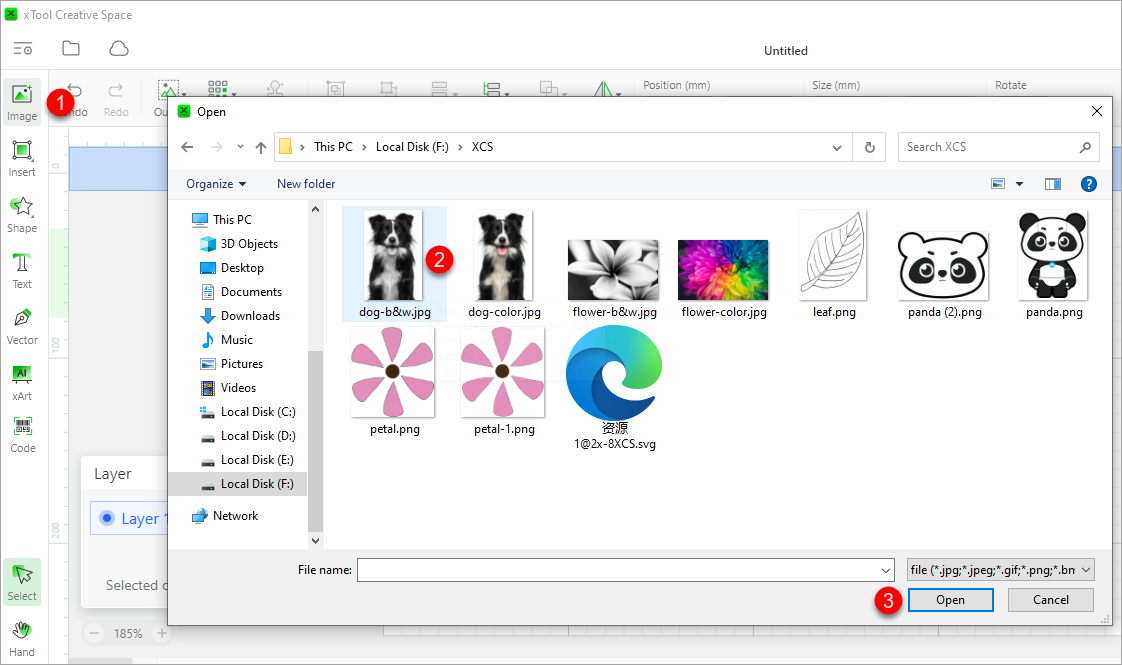
- Import image...: imports an image file. Currently, XCS supports the importing of only JPG, JPEG, GIF, PNG, BMP, SVG, DXF, and WEBP files.
- Save: saves all the changes to the project
- Save as: saves the project to another file
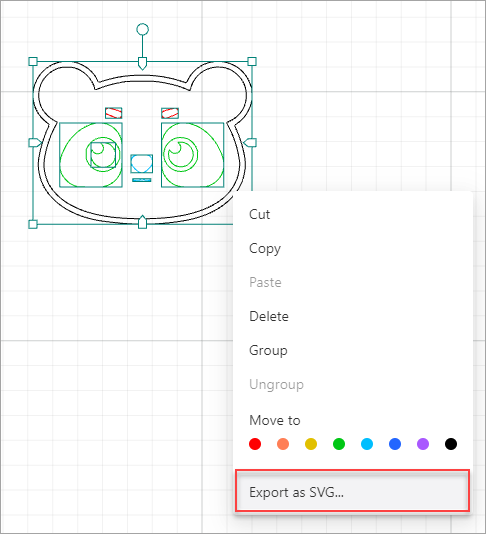
- Export as SVG...: saves the content on the canvas as an SVG file
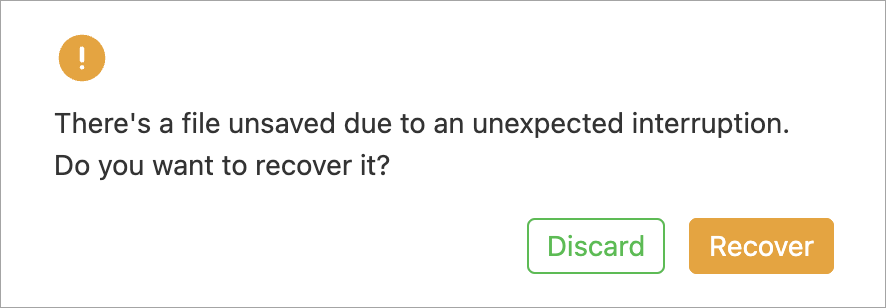
If XCS exits due to exceptions and the project has not been saved, you can decide whether to recover the project file or not when you open XCS the next time.
③ Cloud projects
To use cloud projects, you need to log in to xTool Passport.
Project name
It displays the name of the project, and you can double-click it to enter a project name.
Links
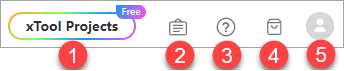
- xTool Projects: links to the example project center, where you can find various example projects by category and start or participate in dicussions
- Announcement: links to the announcement window of XCS, where you can find the latest announcement released
- Support: links to the xTool support website, where you can find online help for xTool products
- Shop: links to the xTool online store, where you can purchase xTool products, accessories, and materials
- Account center: links to your account center. You need to log in before entering your account enter.
Vertical toolbar
 |
|
Image
Image: click to import an image. Currently, XCS supports the importing of only JPG, JPEG, GIF, PNG, BMP, SVG, DXF, and WEBP files.
Note: Currently, text objects can't be properly parsed on XCS. If you are to import an SVG file including texts, please convert the texts into paths and then import the SVG file into XCS, so that the SVG image can be properly processed.
If you import a bitmap image, you can set it by using the image setting panel on the right after importing it.
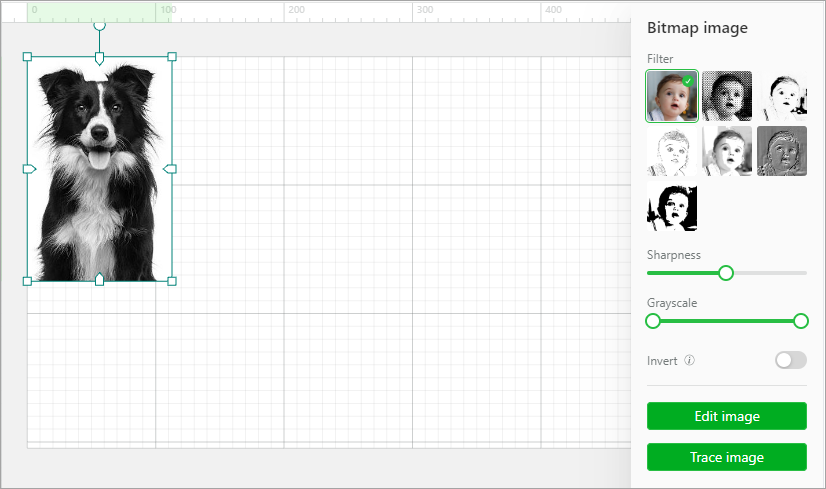
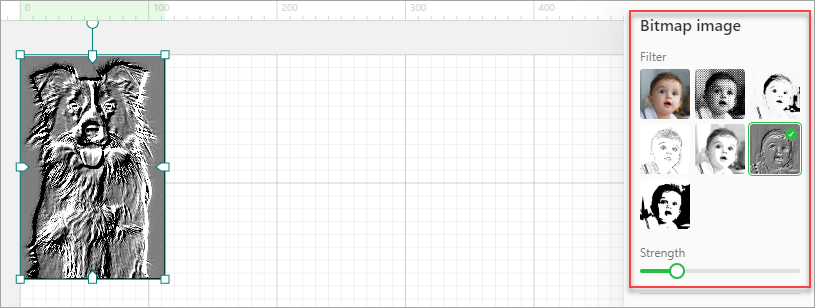
Filter: You can add a filter for your image. The following options are provided: original, grid, sketch, comic 1, comic 2, embossment, and black-and-white. For embossment, you can set the strength.
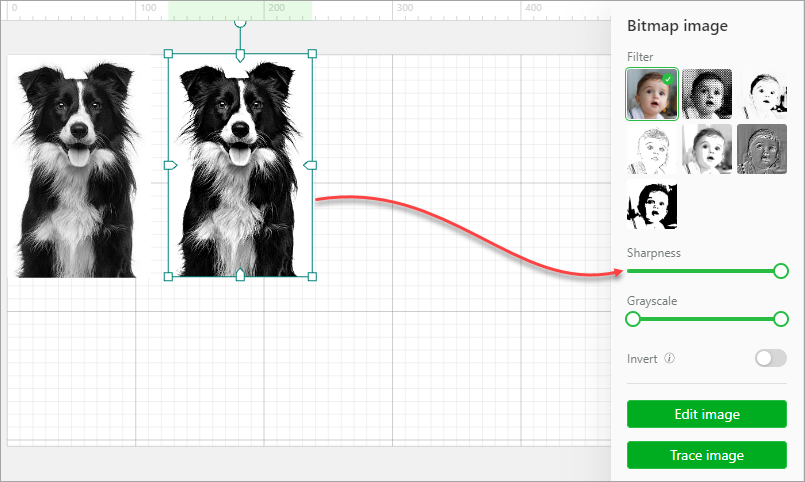
Sharpness: With other settings unchanged, sharpness is related to the clarity of detail in an image.
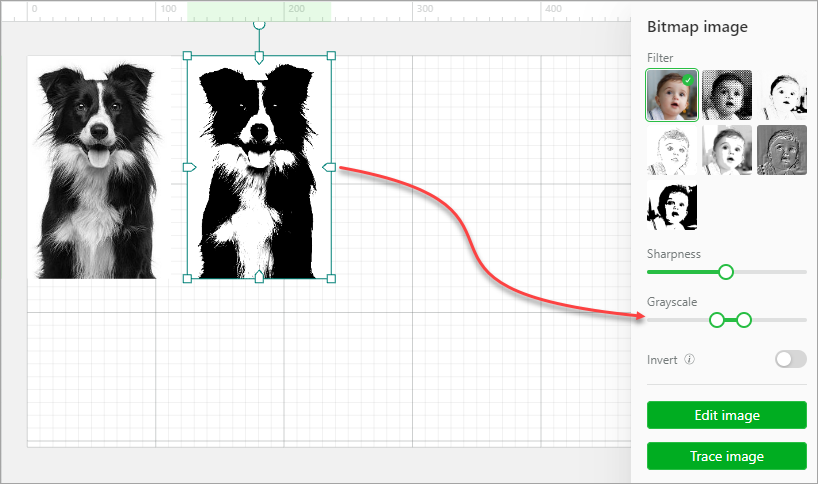
Grayscale: The grayscale is related to the contrast of light and shade. Slide the block on the left to the middle to enhance the shade. Slide the block on the right to the middle to enhance the light.
Invert: You can invert the colors of a bitmap image. This function can be useful for the processing of some dark materials, such as engraving bitmap images on transparent or translucent acrylic, black slates, ruber, and mirrors. The engraving results can be improved by using this function.
XCS supports color inverting of black-and-white, grayscale, and color bitmap images, as described in the following:
Black-and-white images: White pixels are inverted into black ones, and black ones are inverted into white ones.
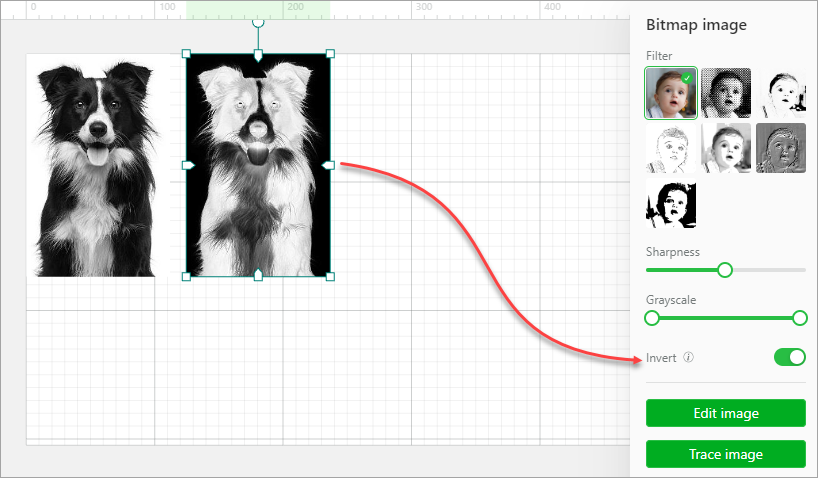
Grayscale images: Light pixels are inverted into dark ones, and dark ones are inverted into light ones.
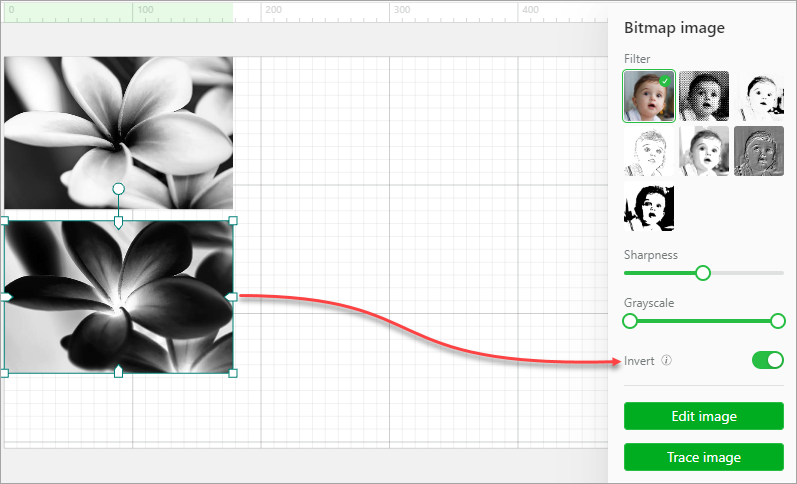
Color images: A color image is converted into a grayscale image first, and then light pixels are inverted into dark ones, and dark ones are inverted into light ones.
Note: For an image with a transparent or translucent background, the background is not inverted, and only the colors of the pixels in the image are inverted.
In addition to the preceding settings, you can further edit an image.
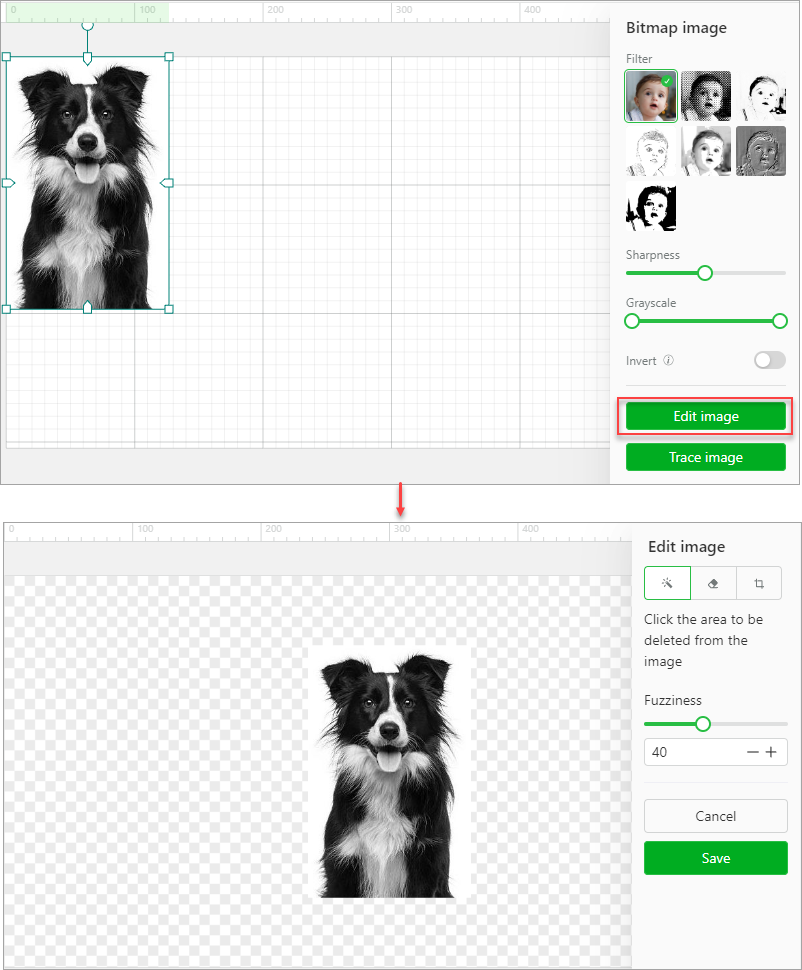
Magic wand: deletes the area you want to delete from the image
Fuzziness: This parameter is available only for the magic wind, indicating the range of pixel colors you delete at a time. The larger the value, the wider the color range, that is, the colors of the pixels to be deleted can be quite different; the smaller the value, the narrower the color range, that is, the colors of the pixels to be deleted are very similar.
Eraser: erases the area where you click from the image
Size: This parameter is available only for the eraser, indicating the size of the eraser. The larger the value, the larger the eraser.
Crop: keeps the area you select
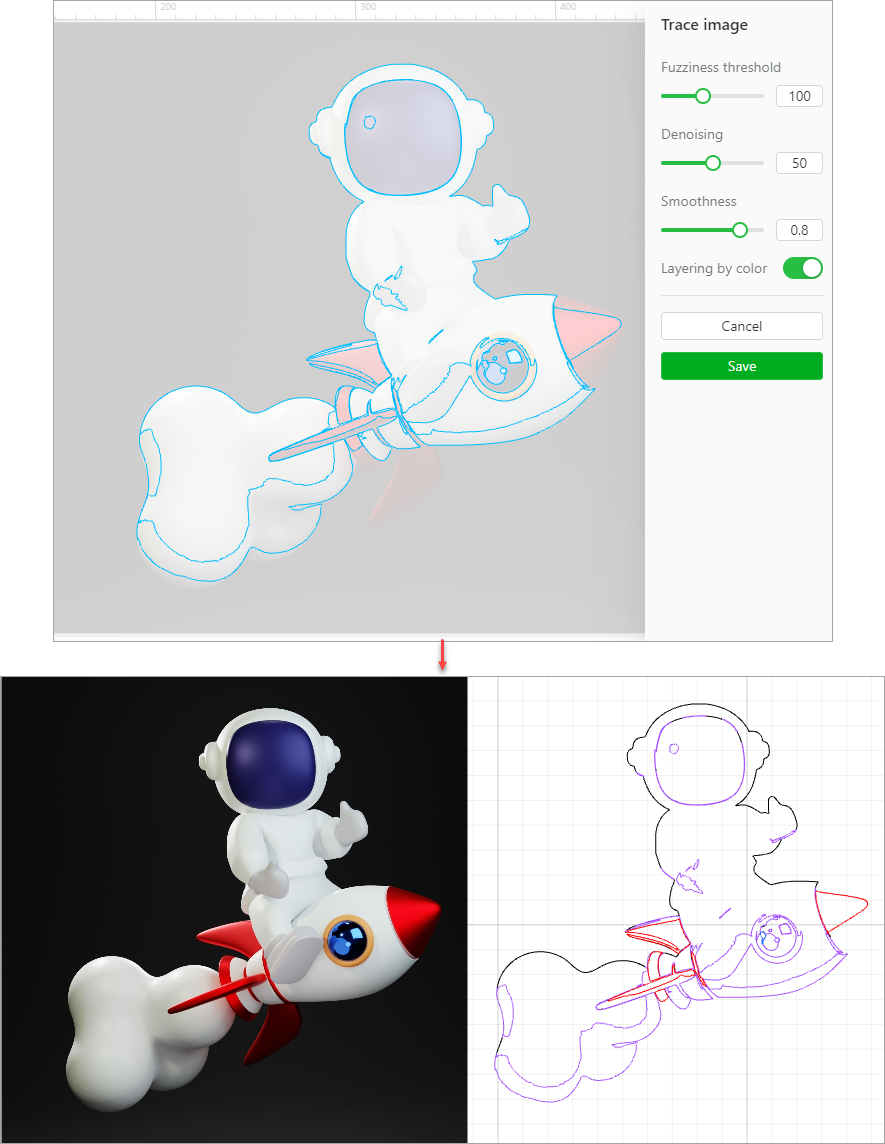
You can also convert a bitmap image into a vector.
(1) Import an image.
(2) Click Trace image.
(3) Set Fuzziness threshold, Denoising, and Smoothness.
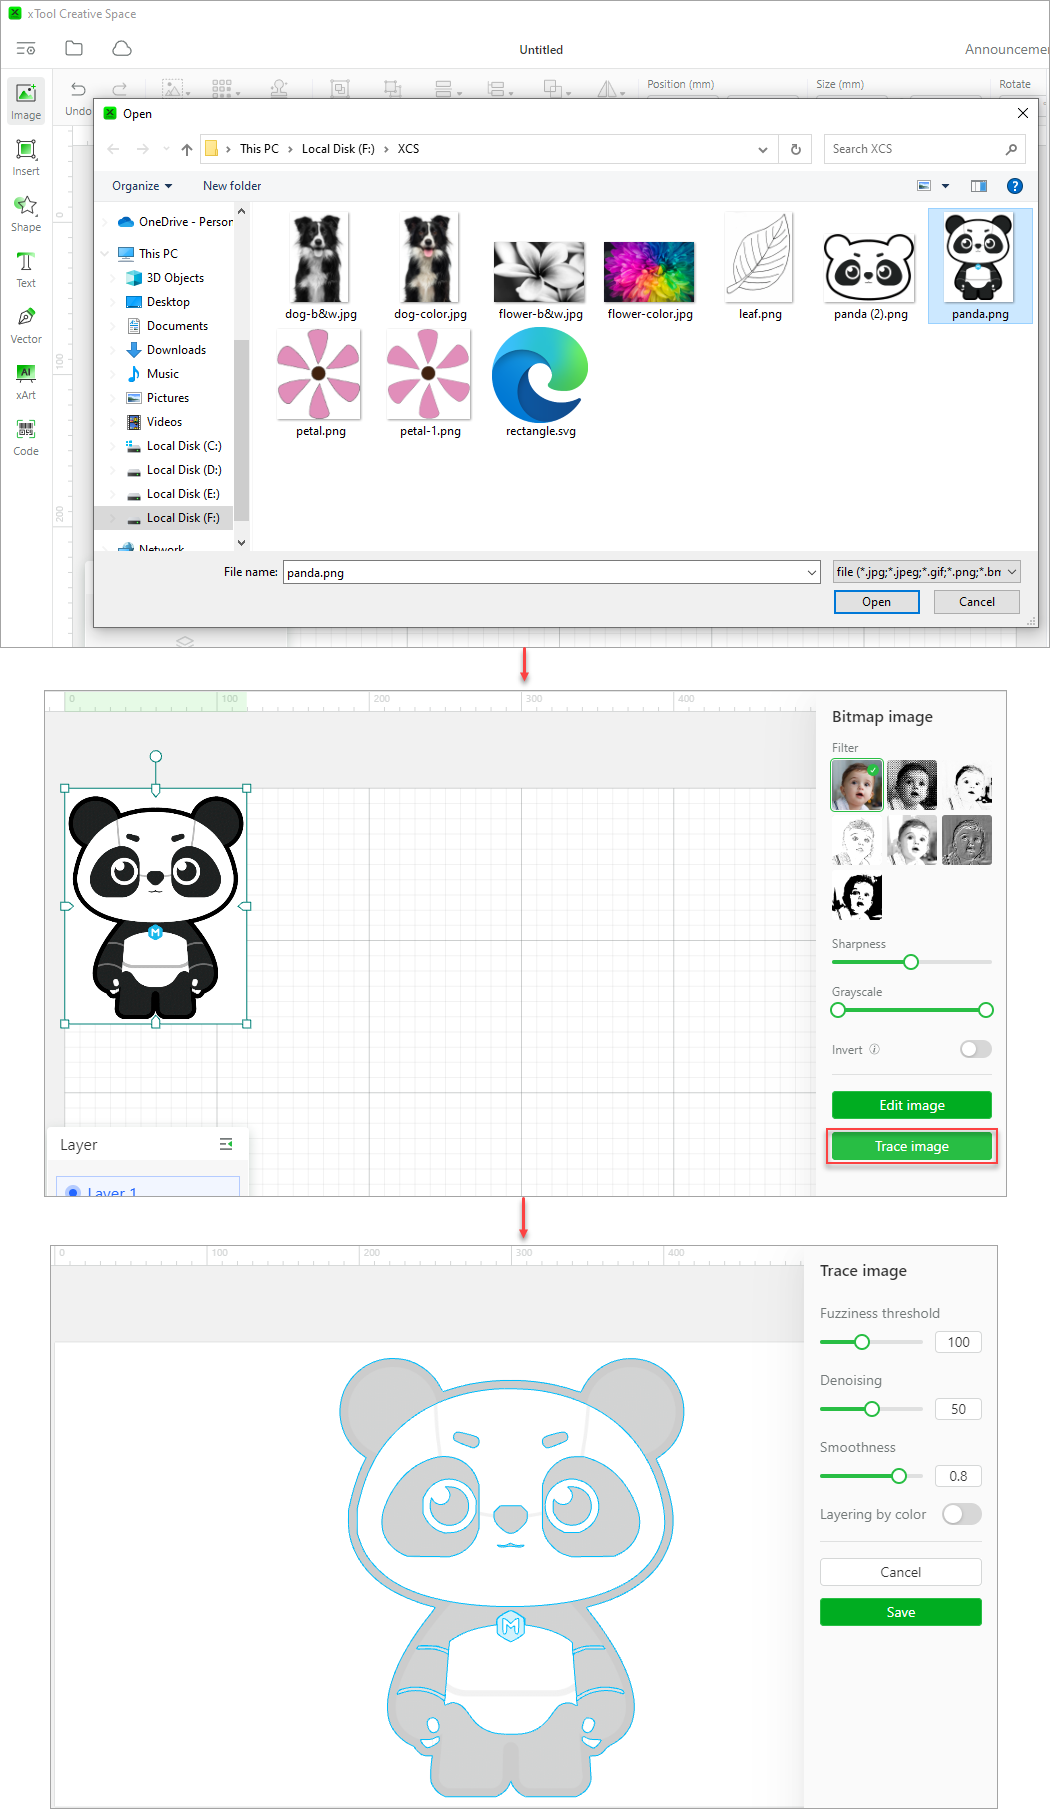
Fuzziness threshold: indicates the range of pixel colors for generating vector paths. The larger the value, the wider the color range, that is, the colors of the pixels used to generate the vector paths can be quite different. The smaller the value, the narrower the color range, that is, the colors of the pixels used to generate the vector paths are very similar. Setting range: 0–255
Denoising: removes the noise of the image. Pixels with a color value lower than the one you set will not be used to generate vector paths. Setting range: 0–100
Smoothness: sets the smoothness of the vector paths to be generated. The larger the value, the smoother the transition between neighboring pixels. Setting range: 0–1
If you are converting an image with many details, you can enable the Layering by color function. When it is enabled, the vector paths generated are layered by color, and then you can ungroup them and edit each layer.
Note:
- For a very colorful or complicated image, you need to invert it before tracing its lines.
- For images of which outlines are fuzzy, contains many colors, or colors are very similar to those of the background, the tracing may fail and thus vector generation may fail.
Insert
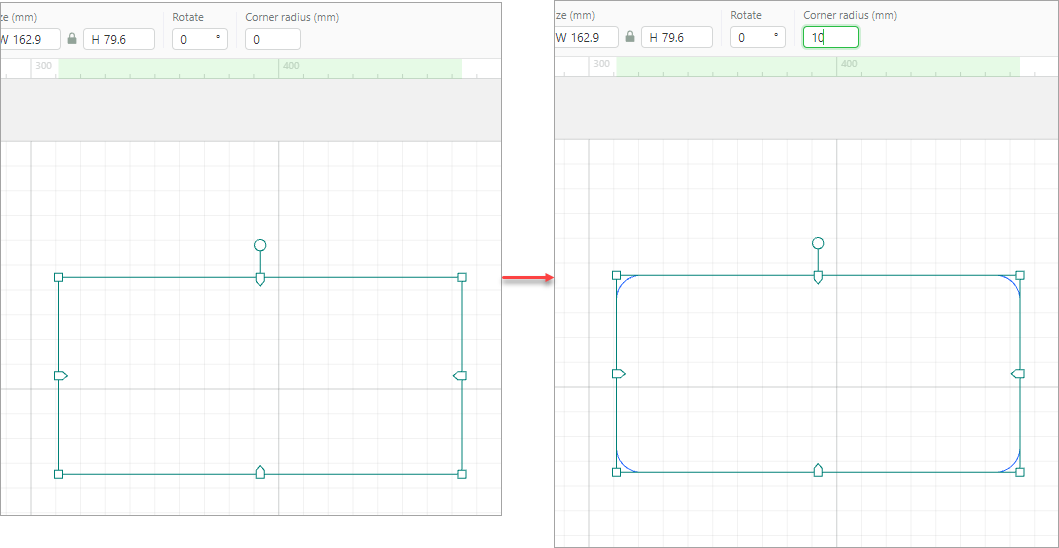
Insert: selected to draw a common shape. You can press Shift to draw a square, circle, or horizontal or vertical line.

After drawing a rectangle, you can set the corner radius for it.
Shape
Shape: Click to insert a shape
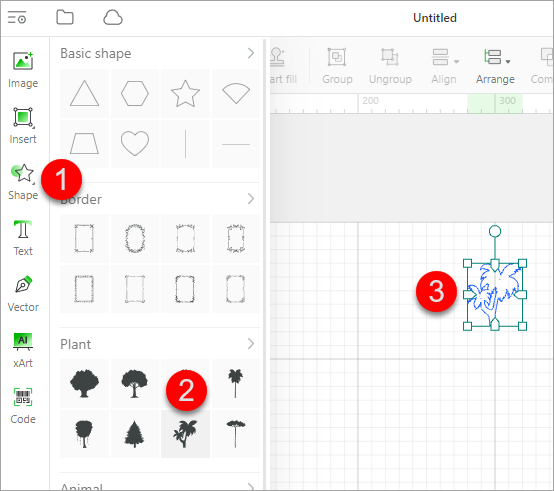
Note: After being inserted, a shape is set to be scored by default. You can set to cut it or engrave it.
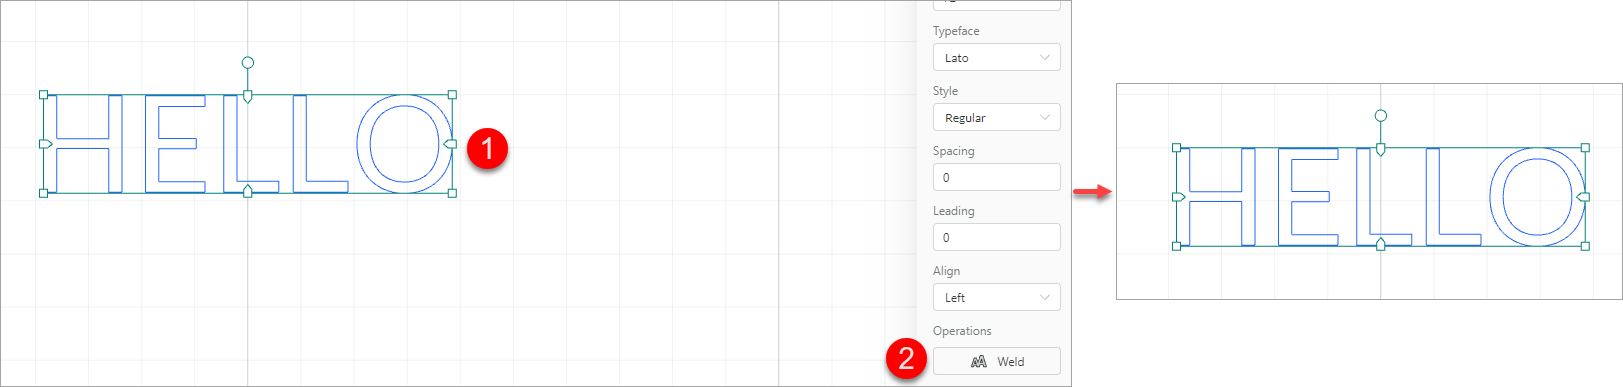
Text
Text: click to insert a text. The default text is HELLO. After inserting the text, you can change the words, and set the font size, typeface, style, spacing, leading, and aligning mode. In addition, you can weld the character strings in a text.
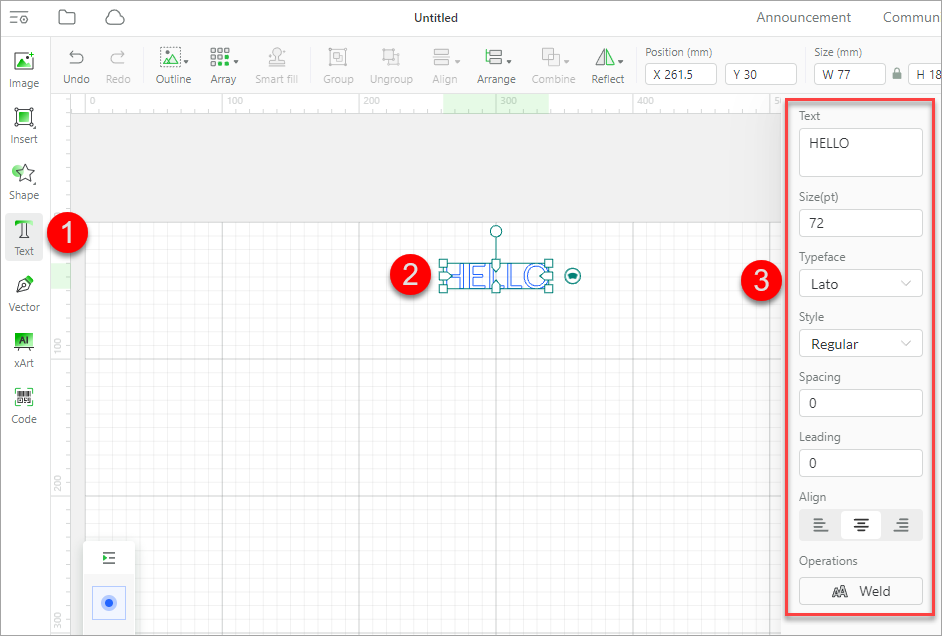
Weld
This function is used to unite the character strings that overlap one another partially in a text. After being welded, the text becomes vector paths and the text setting panel is not displayed after you select it.

If no character strings overlap one another partially in the text, the text looks the same but becomes vector paths after you weld it, and the text setting panel is not displayed after you select it.
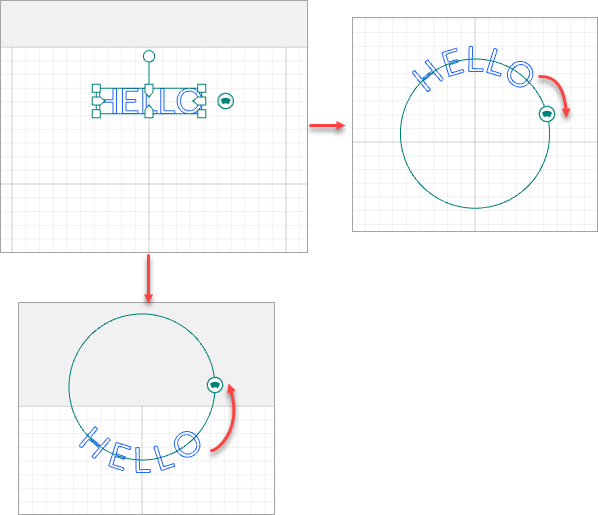
Curve
After inserting a text, you can see a control on the right of the text. You can curve the text by dragging the control.
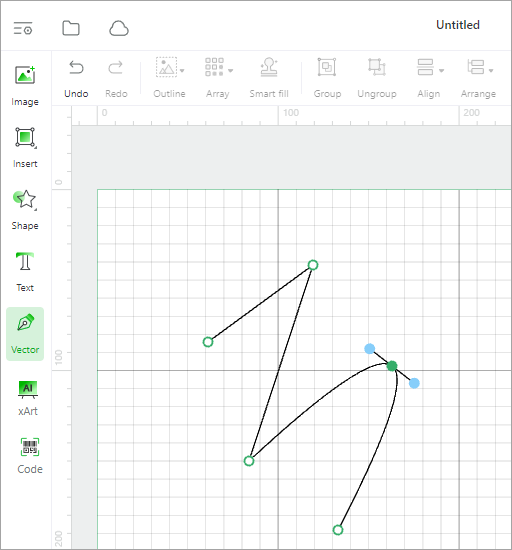
Vector
Vector: selected to draw a vector path
You can press the Esc key or click any other menu to finish the drawing.

After drawing a vector path, you can double-click it to edit it as follows:
- Double-click an anchor point to convert it to a rounded corner or back to a corner.
- Drag an anchor to change the curvature.
xArt
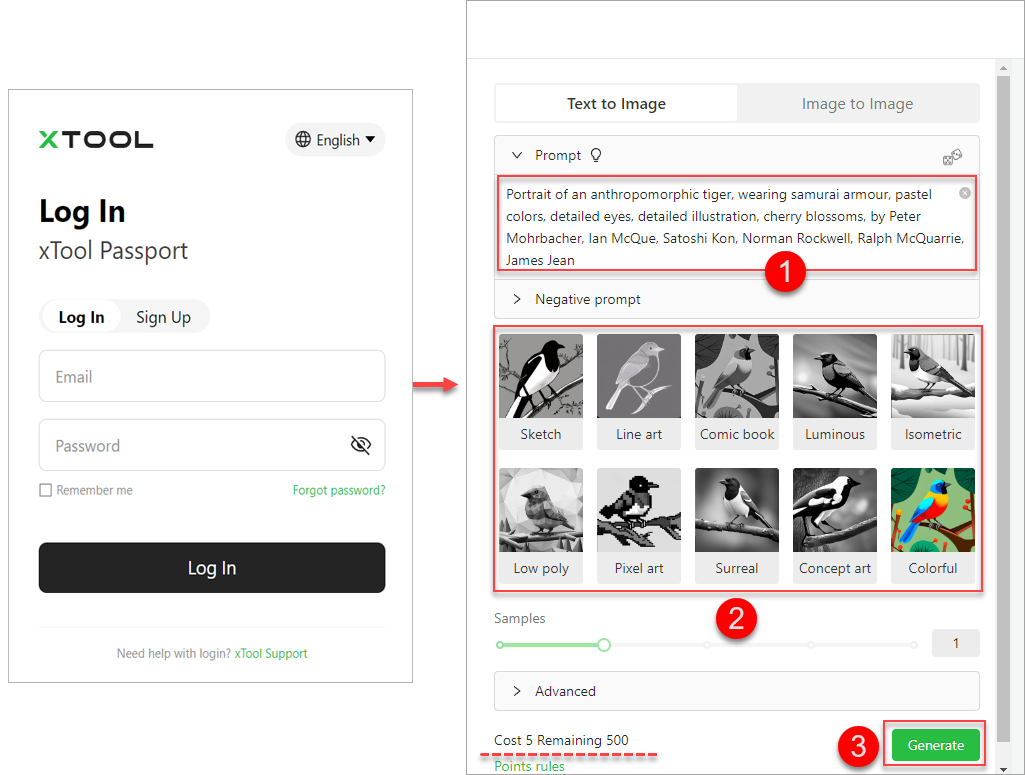
xArt: click to enter the xArt image generation portal, where you can generate images by entering prompts or uploading images. Currently, this is a beta function and is being improved. If you use xArt for the first time, you need to sign up an account and get your initial points, and every time you use xArt to generate an image, a number of points is cost.
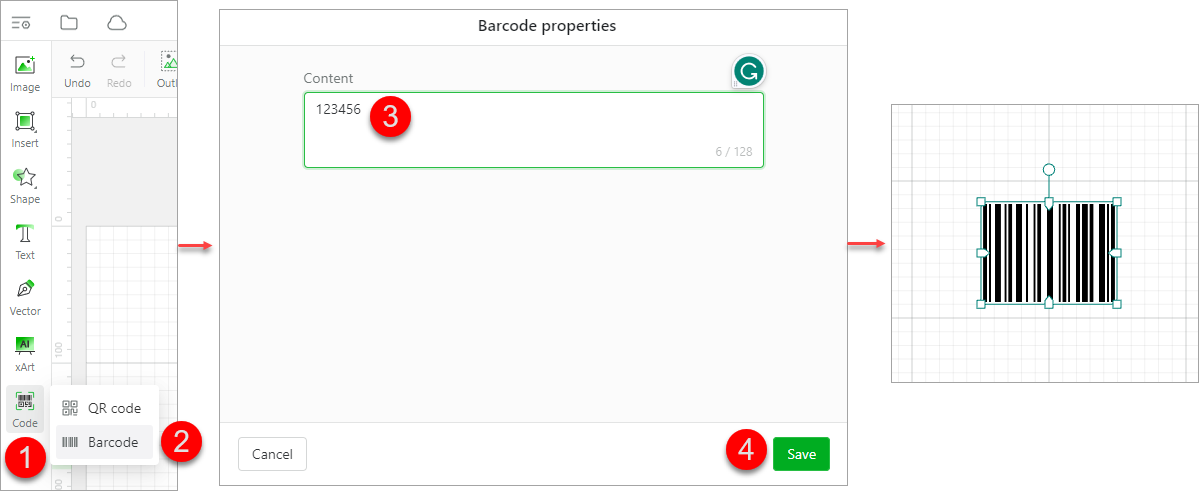
Code
Code: click to enter a character string to generate a QR code or barcode
QR code: supporting Chinese and English characters, digits, punctuations, and special symbols

Barcode: supporting English characters and digits
Select
Select: click and select one or more items
- Select one element: click an item to select it
- Select multiple elements:
- Way 1: drag the mouse pointer over all the elements to be selected
- Way 2: hold down the Shift key on the keyboard and click the elements to be selected. When holding down the Shift key, you can click an element again to deselect it.
Note: When multiple elements are of the same type, you can set processing parameters for them at a time. But for those of different types, you need to set processing parameters for them separately.
- Hand: selected to move the canvas by dragging the mouse.
Horizontal toolbar
 | |
|
|
Undo
Undo: cancels the last action
Redo
Redo: performs the last action again
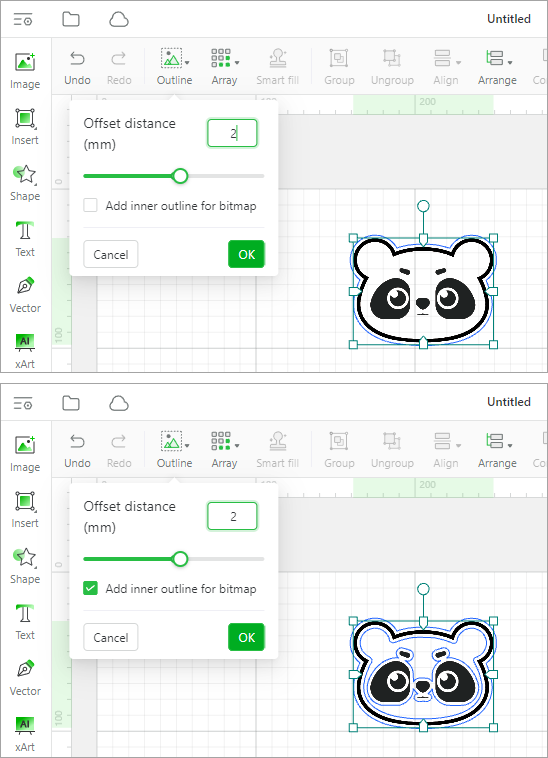
Outline
Outline: adds an outline to the elements. In addition to adding outlines for bitmaps, vector paths, and texts, you can add inner outlines for bitmaps with transparent backgrounds.
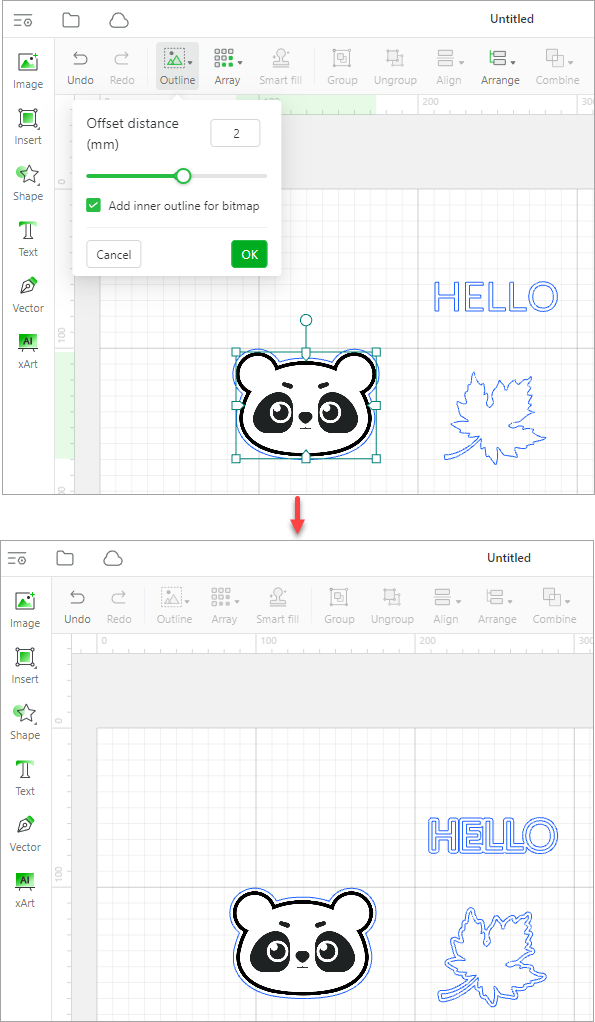
If the background of a bitmap image is not transparent, when the offset distance is a positive value, the outline is outer. When the offset distance ia s negative value, the outline is inner.
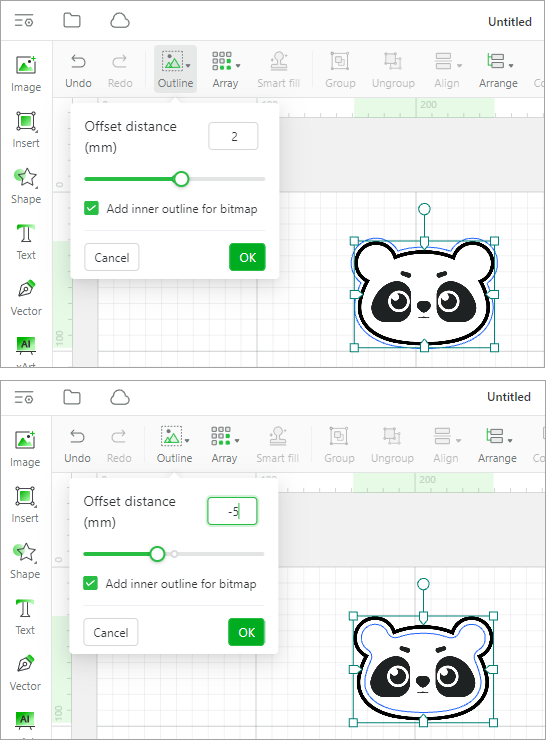
If the background of a bitmap image is transparent, you can select Add inner outline for bitmap to add an inner and outer outline for it.
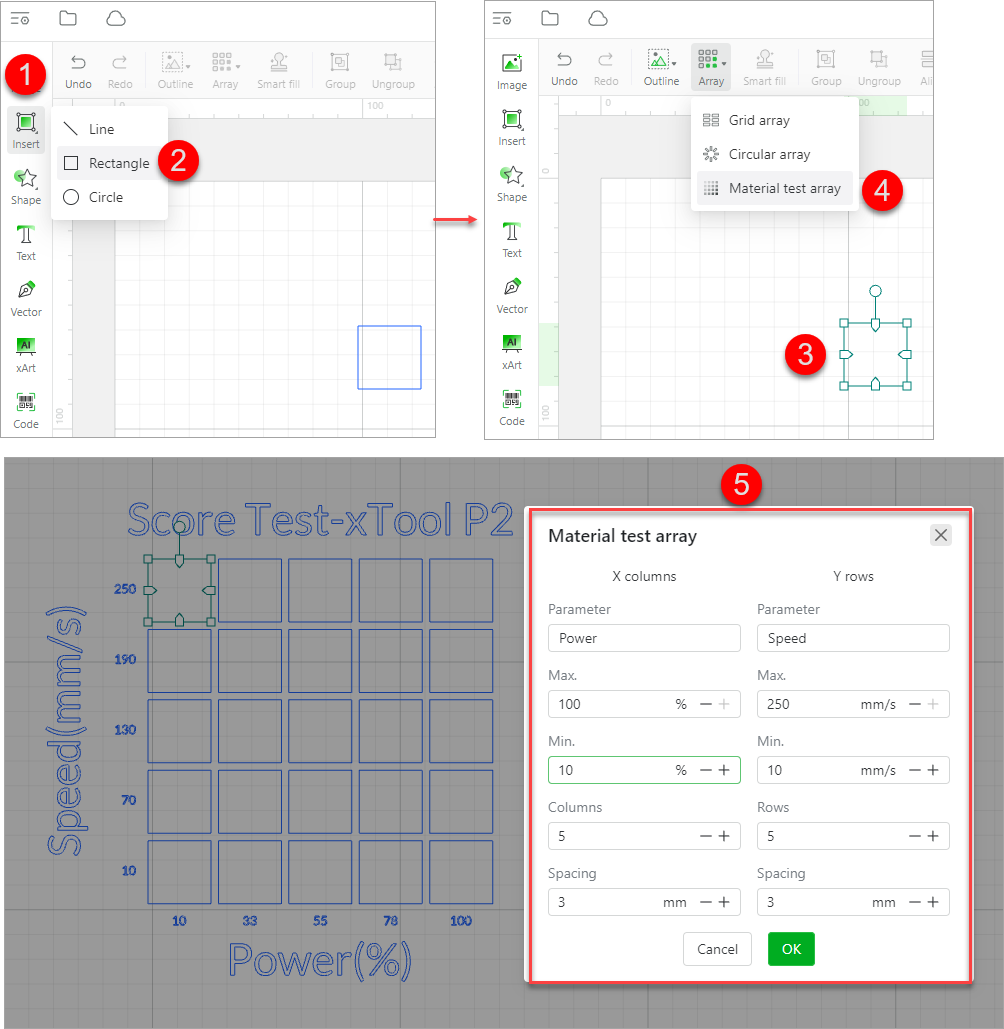
Array
Array: creates multiple copies of an element at a time and lays them out in grid or circular mode. Select an element, choose an array mode, and complete the settings.
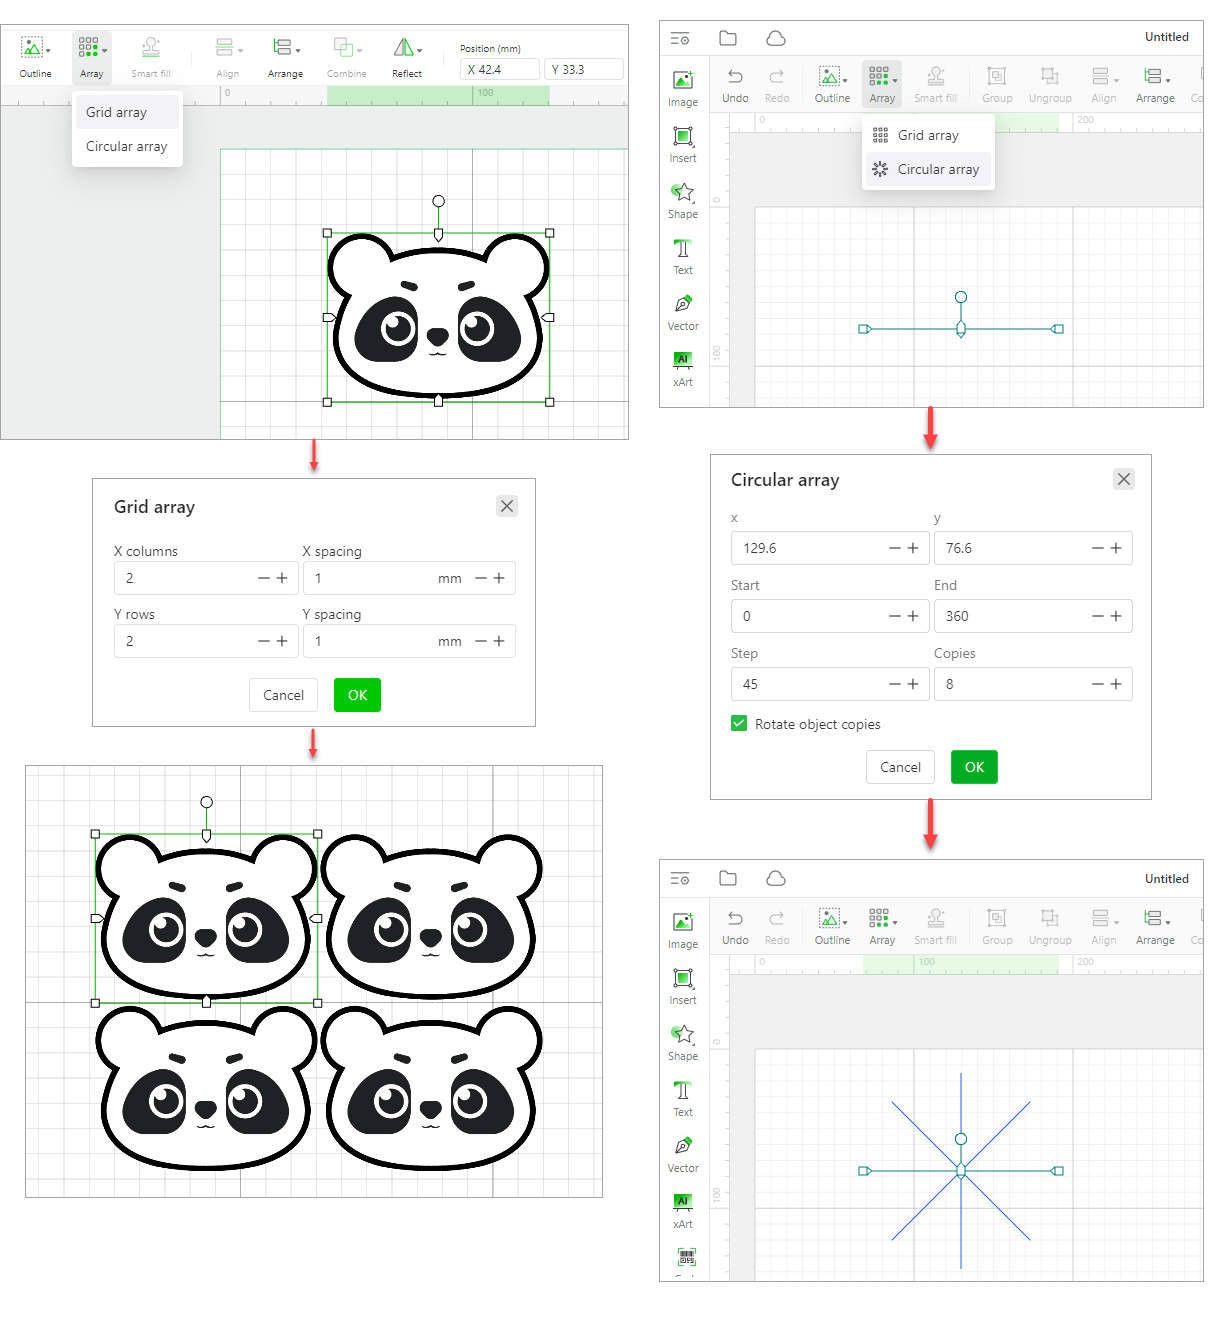
In addition, you can create a material test array by setting the number of rows and columns, maximum and minimun processing speed and power, and spacing.
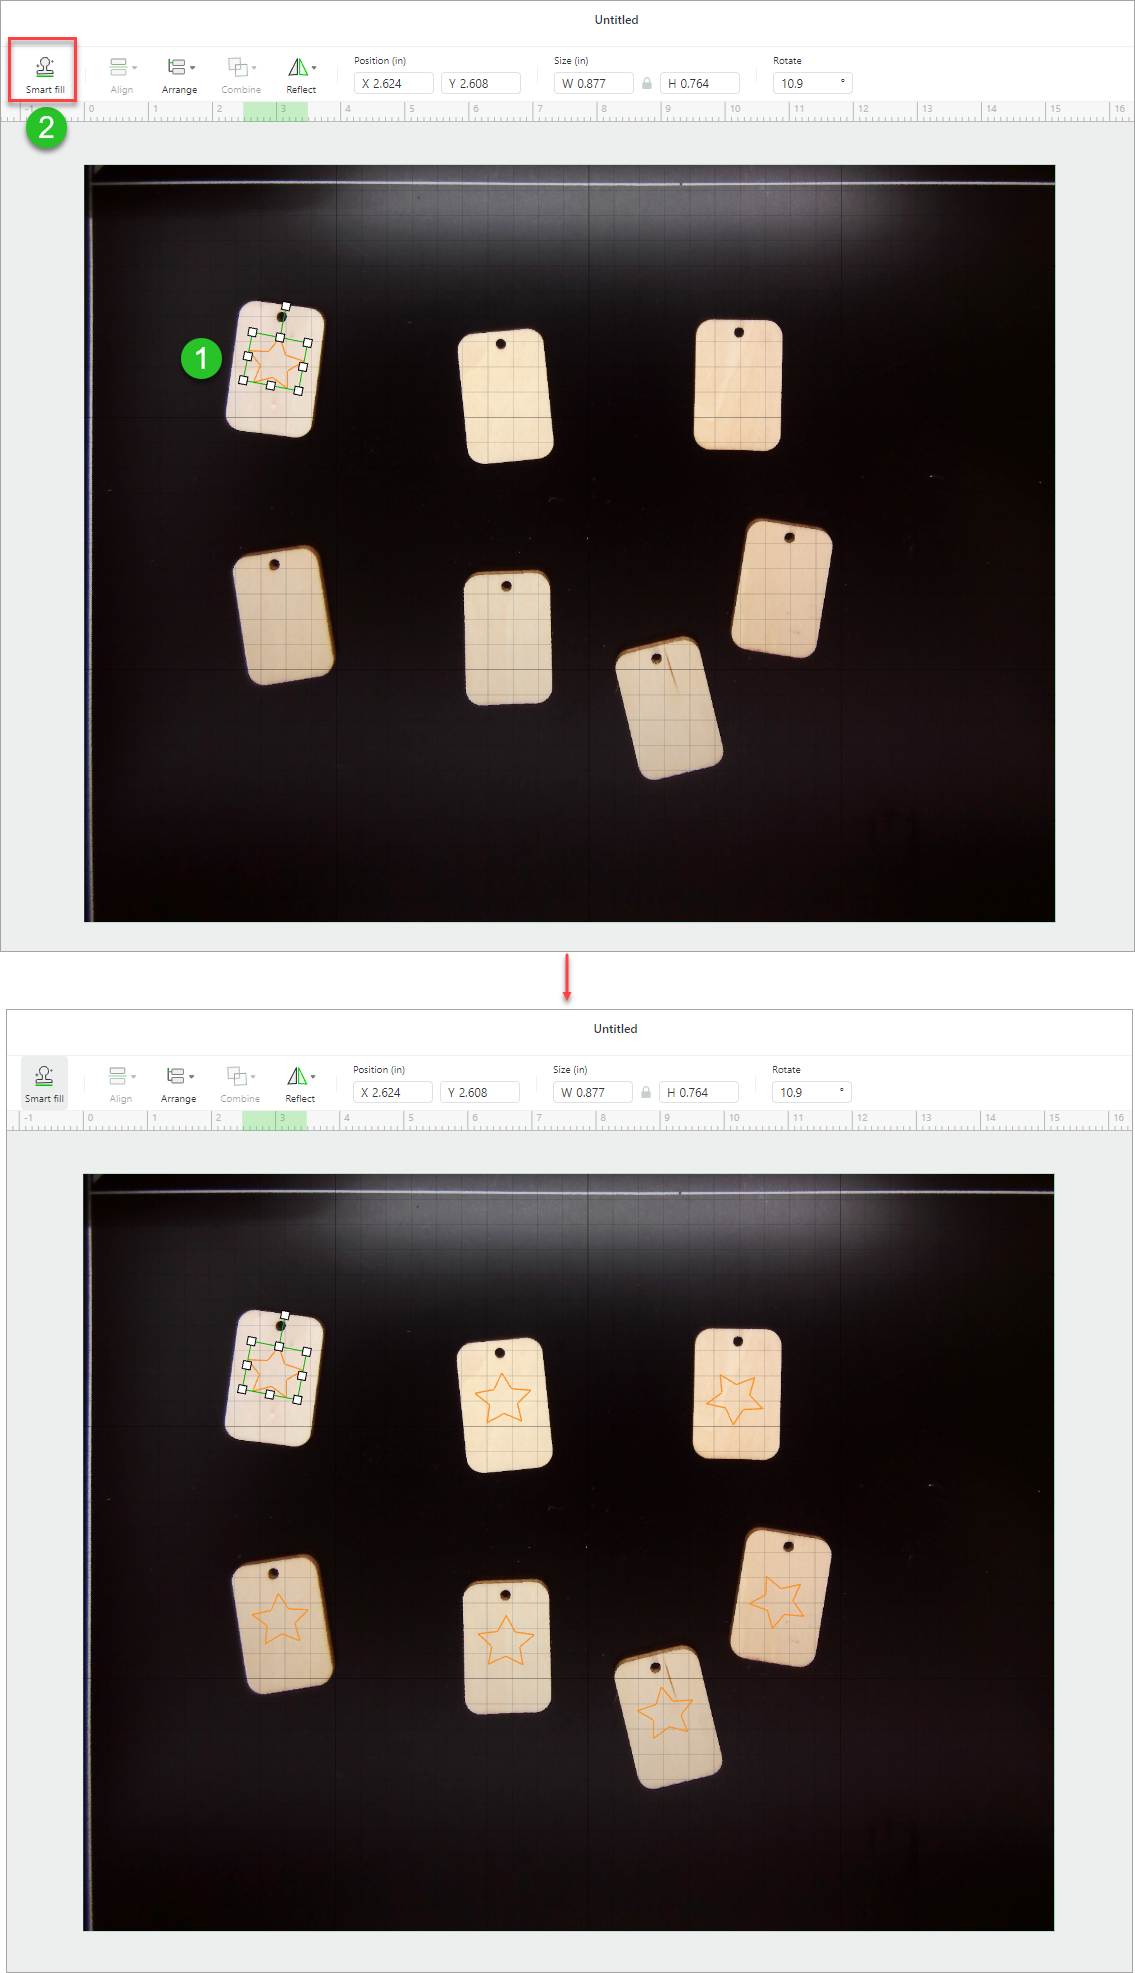
Smart fill
Smart fill: duplicates a design element for multiple materials, helping you process multiple materials at a time. Edit your design for one material, and then click Smart fill. The same design is generated for other materials.
Group
Group: groups two or more elements you've selected. You can press "Ctrl (Command) + G" to group objects.
Ungroup
Ungroup: ungroups the elements you've grouped. You can press "Ctrl (Command) + U" to ungroup objects.
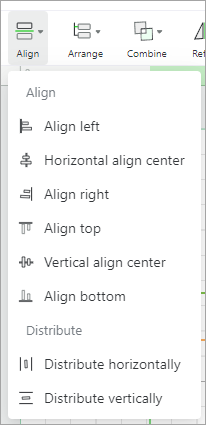
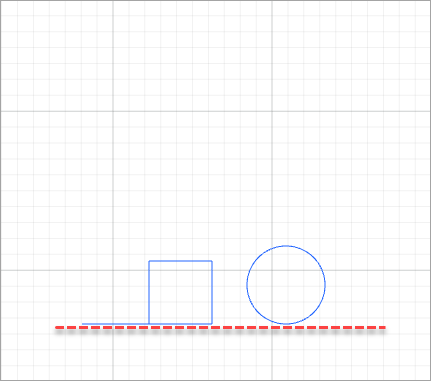
Align
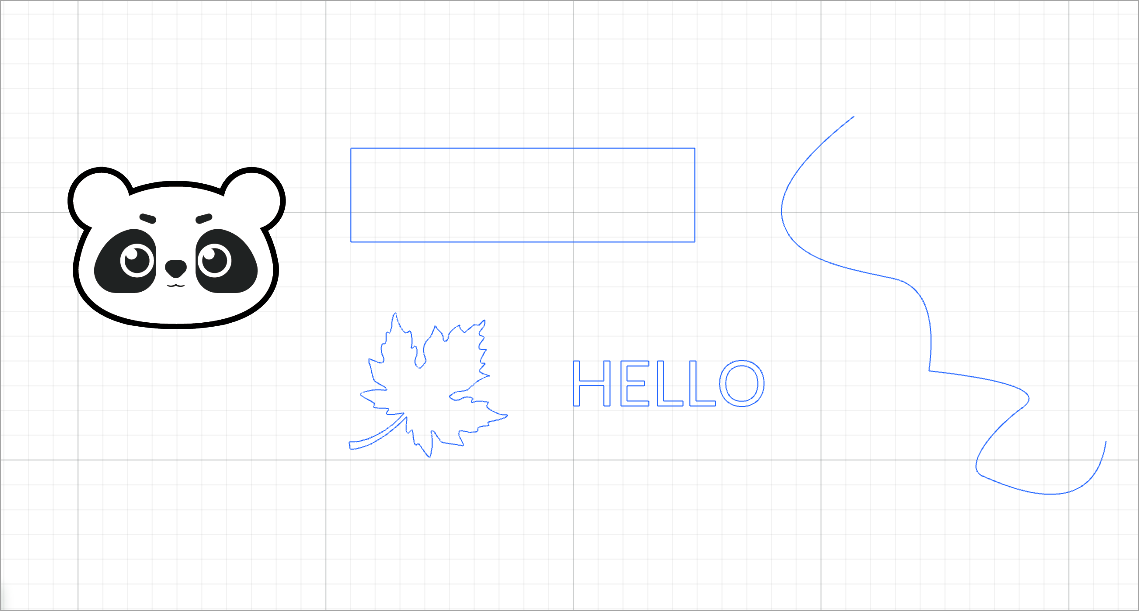
Align: aligns multiple elements
For example, to align the elements shown in the following figure.
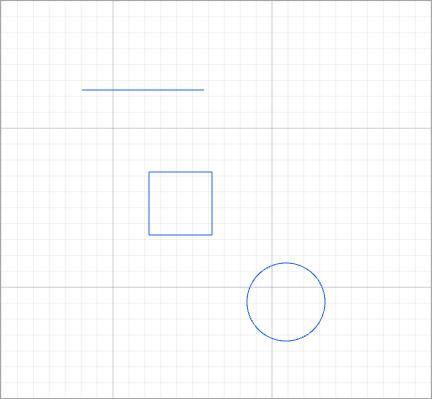
- Align left
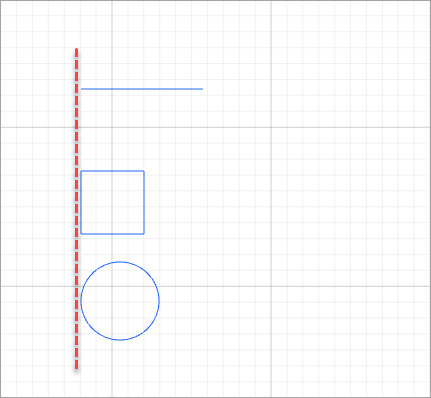
- Horizonral align center
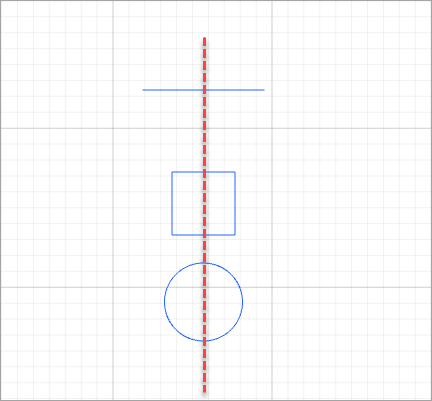
- Align right

- Align top
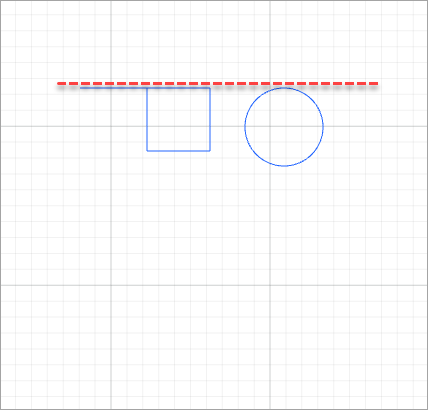
- Vertical align center
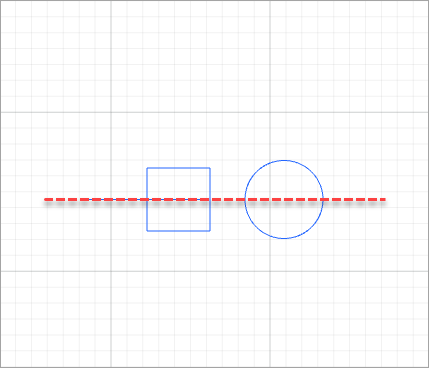
- Align bottom
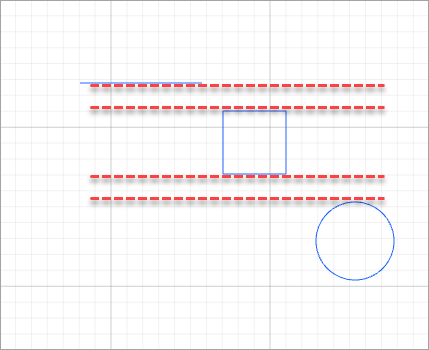
For example, to distribute the elements shown in the following figure.

- Distribute horizontally
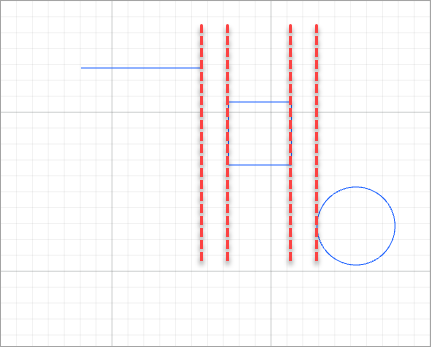
- Distribute vertically
Arrange
Arrange: arranges the order of elements. You can bring an element to front or send it to back, or bring it forward or send it backward one layer by one layer.
For example, to arrange the elements shown in the following figure.

- Bring forward

- Bring to front
- Send backward
- Send to back
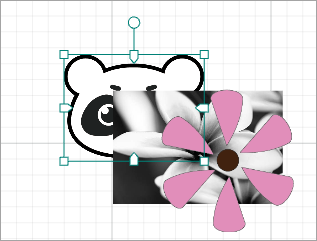
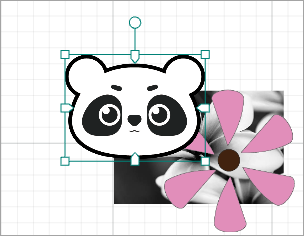
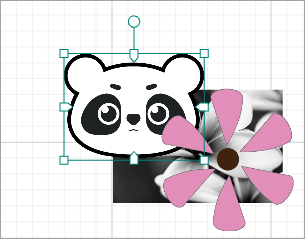
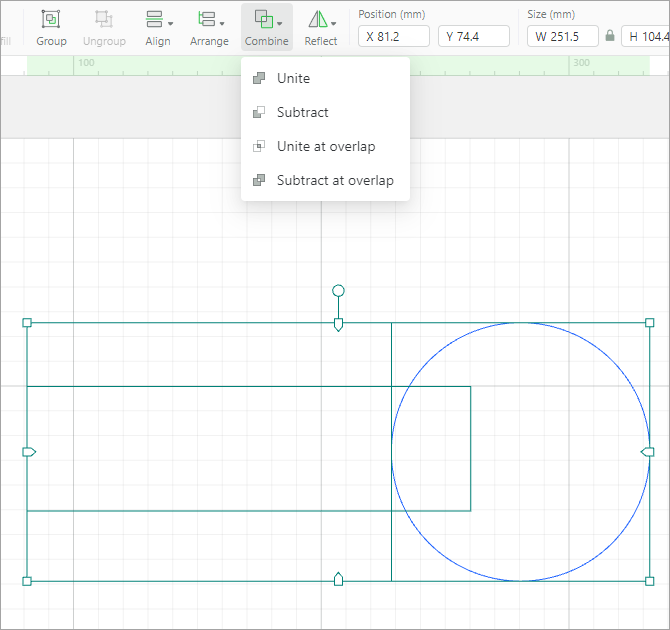
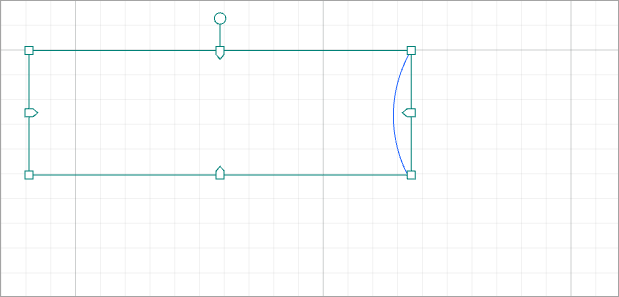
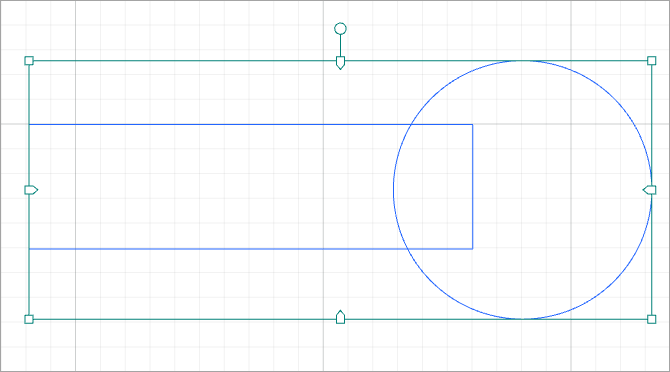
Combine
Combine: combines two or more elements
When you unite the two elements:
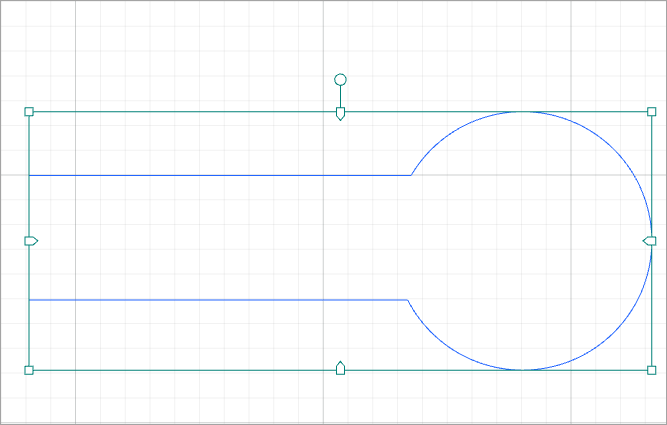
When you subtract the two elements:
When you unite the two elements at overlap:
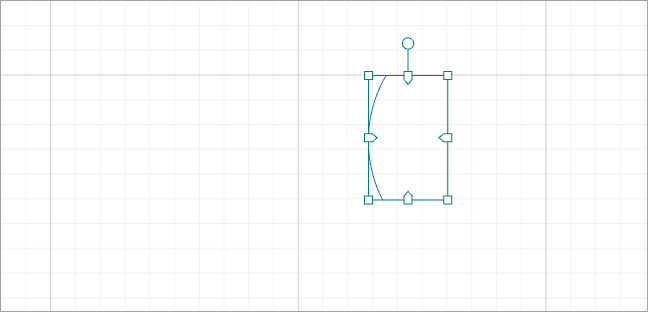
When you subtract the two elements at overlap:
Reflect
Reflect: reflects an element horizontally or vertically
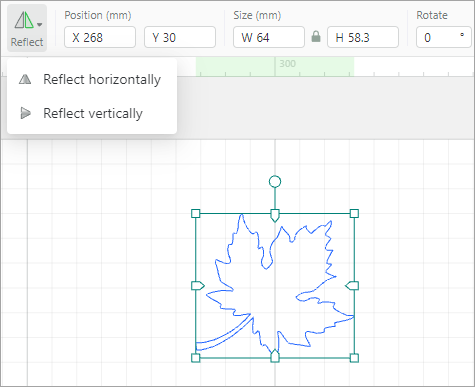
When you reflect the element horizontally:
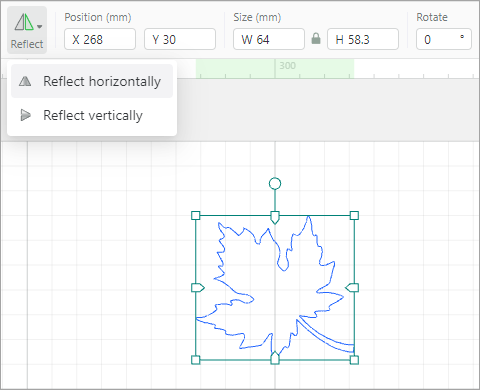
When you reflect the element vertically:

Position
Position: sets the position of an element on the canvas by the x and y coordinates. The point (0, 0) is in the upper left corner. By default, when you insert a shape or import an image, it is positioned in the upper middle of the canvas. The unit can be set in Settings.

Size
Size: displays or sets the size of an object. The unit can be set in Settings.

Tips: The width-to-height ratio of an image or element is locked when you import or insert it on XCS. You can click the lock icon to unlock the ratio so that you can change the width and height of the image or element as you like.
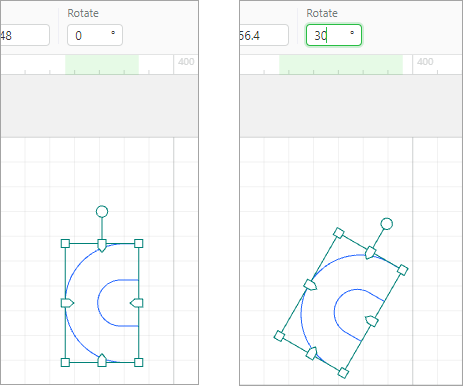
Rotate
Rotate: rotate an element by angle. A positive value indicates rotating clockwise, and a negative one indicates rotating counterclockwise.
Canvas
Design and edit objects
On the canvas, you can design objects or set and edit an imported image for processing a material.
In addition, if your xTool machine is equipped with a camera, you can preview the positions of the material and objects before processing.

Make clipping mask
You can shape a bitmap image with a vector path by making a clipping mask.
(1) Select the bitmap image and vector path.
(2) Right-click them and choose Make clipping mask from the shortcut menu.
(3) Move the image to the mask.
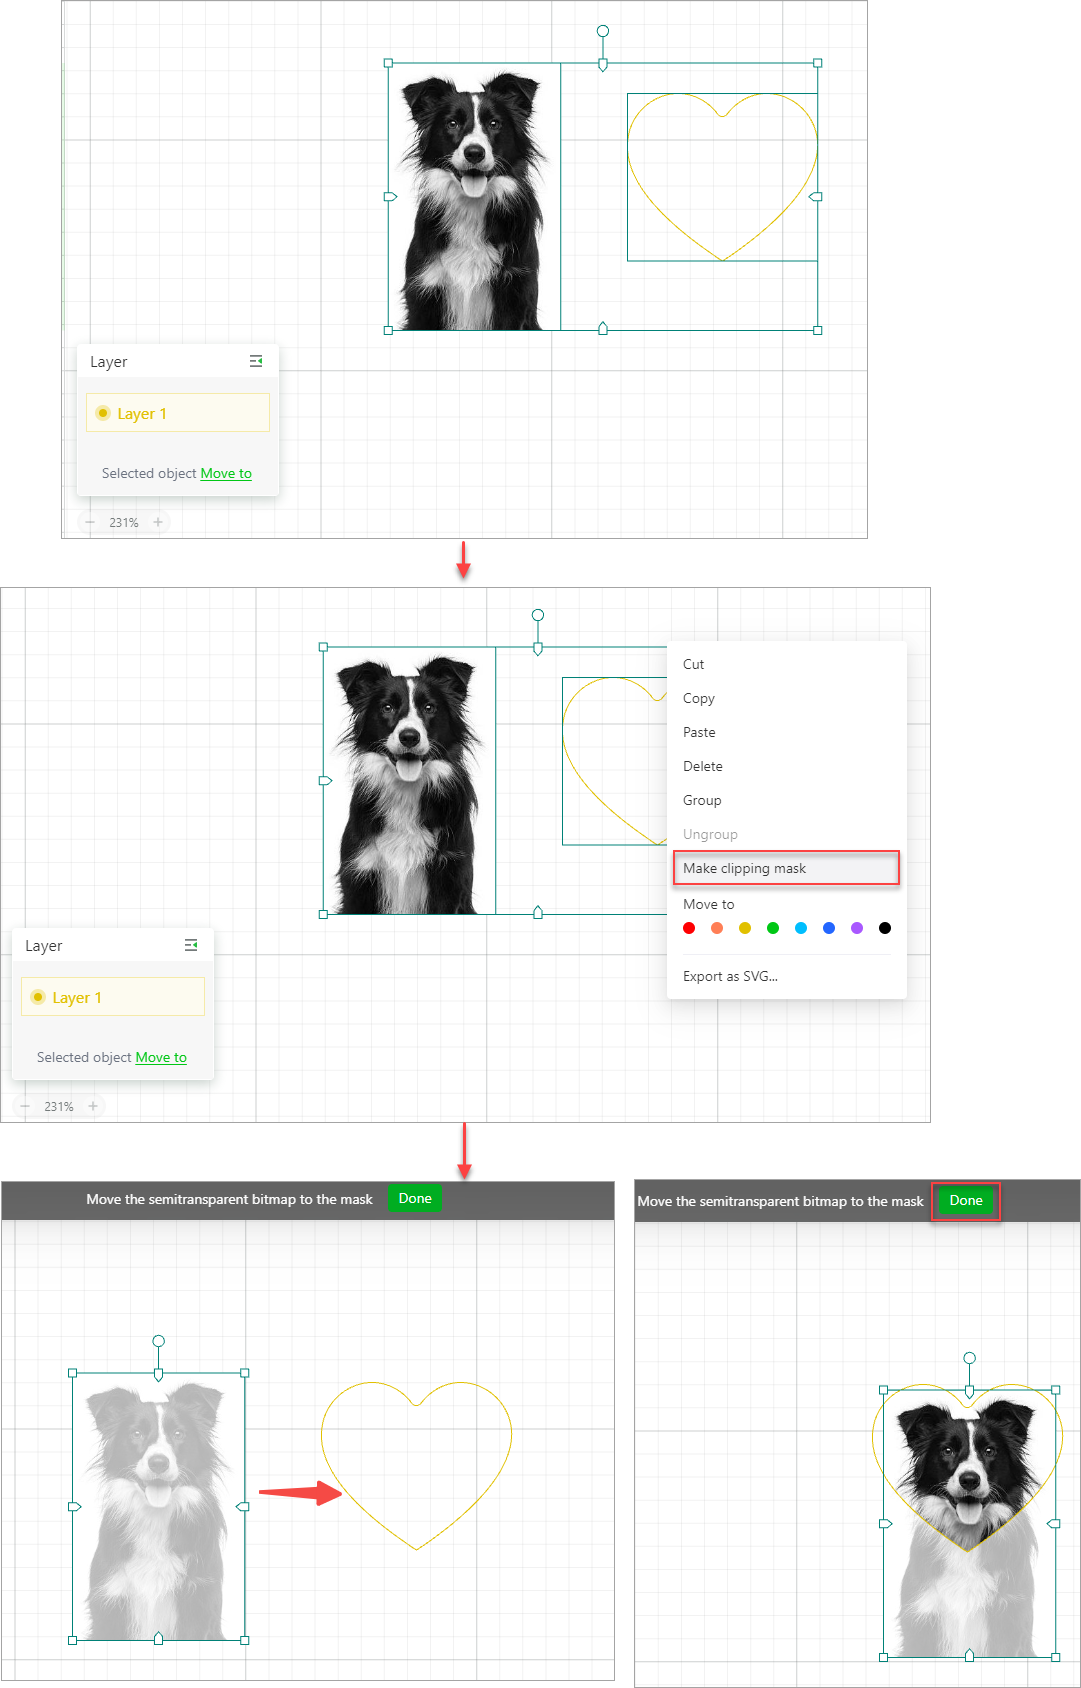
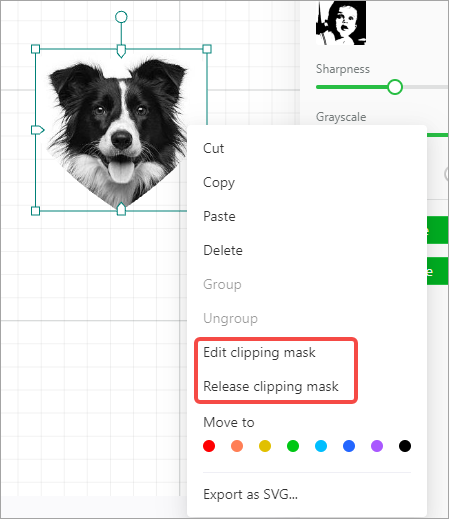
After making a clipping mask, you can edit or release it.
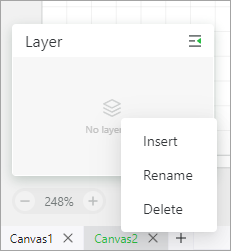
Manage canvases
You can add, delete, or rename a canvas. A project file can include multiple canvases to store multiple objects.
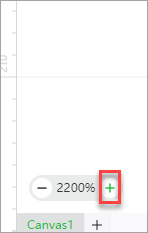
Zoon in/out the canvas
Shortcut menus
When you right-click on the blank space of the canvas, the following shortcut menu is displayed.
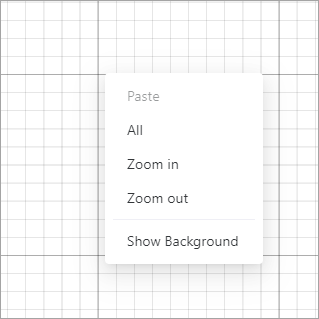
- Paste: pastes an element that has been copied
- All: selects all the elements on the canvas
- Zoom in: zooms in the canvas
- Zoom out: zooms out the canvas
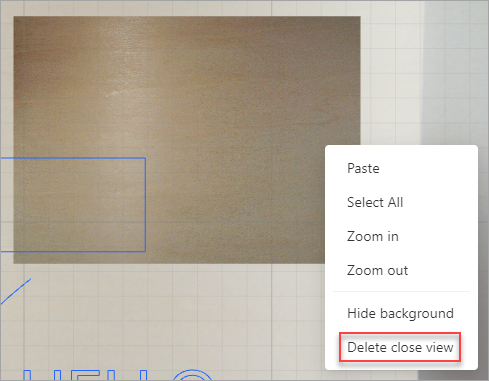
- Show/Hide background: shows or hides the image captured by the camera of a device. After you connect a device with a camera to XCS, this menu is provided to show or hide the image captured by the camera.
If you use xTool P2 and have captured a close view, you can find the Delete close view shortcut menu.
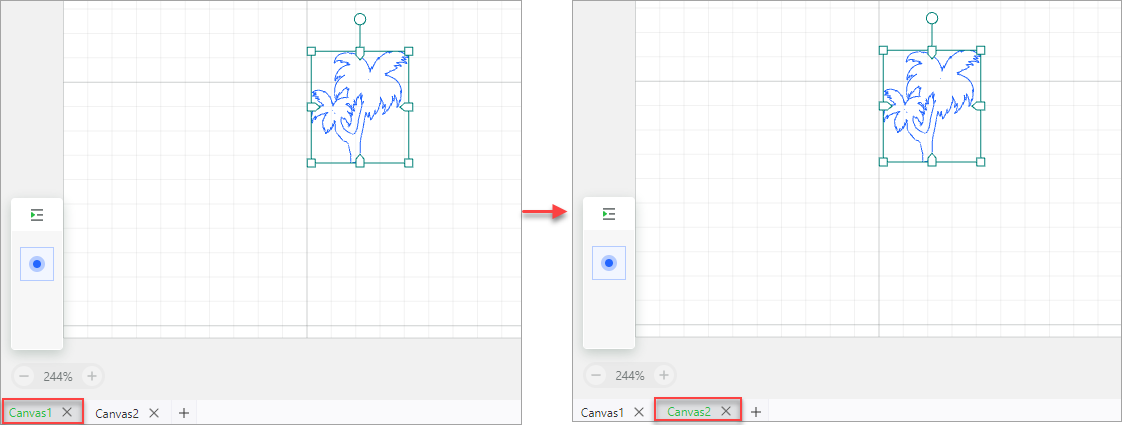
Copy and paste objects between canvases
You can copy and paste objects between canvases. When you copy an object from a canvas to another one, the object is pasted in the same position of the two canvas.
Manage object layers
Define objects on a layer
If the object to be processed is complicated, you can define it on multiple layers to manage them more easily.
When you design an image, you can define the objects to be processed in the same way as the same layer, and then you can select them all by clicking the layer and set processing parameters for all of them.
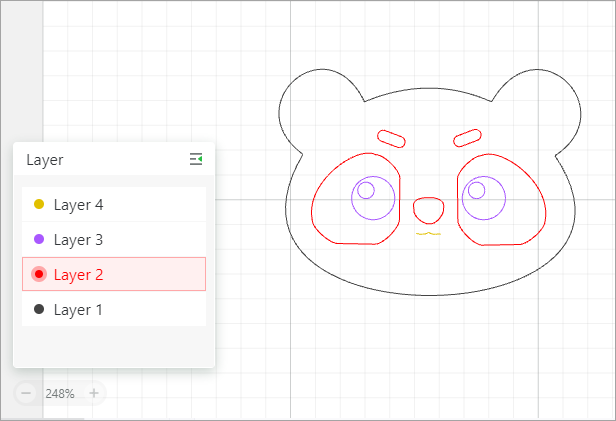
For example, select layer 3 and set the processing parameters for all the objects included in layer 3.
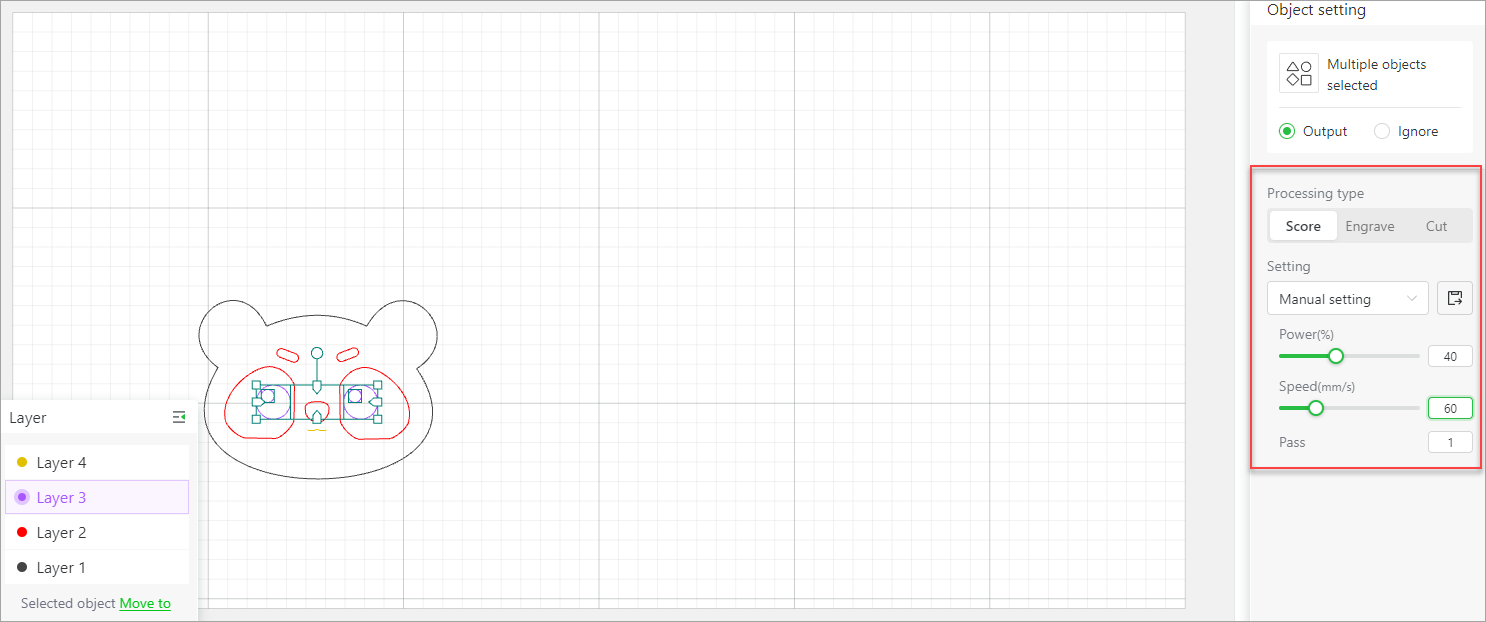
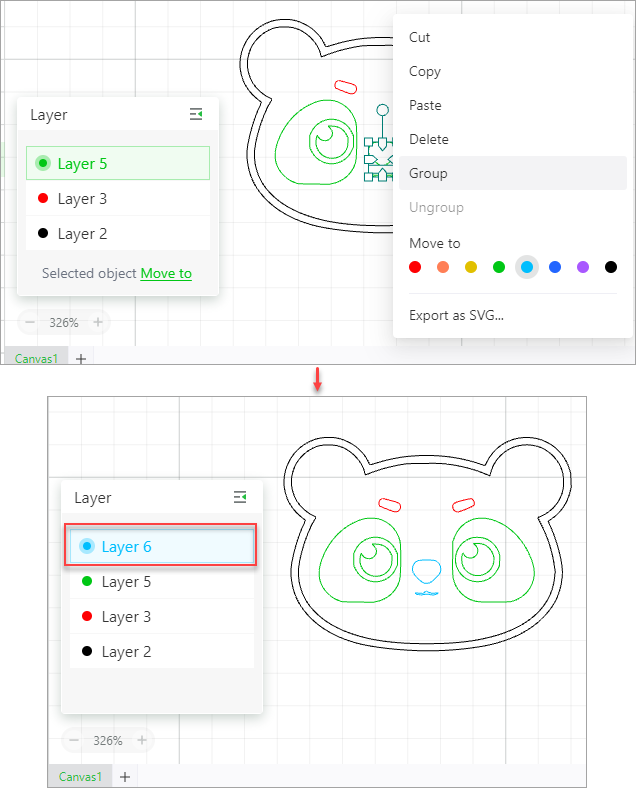
Move objects between layers
You can move an object to another layer. After the moving, however, you need to set the processing parameters for the object. The settings of the layer do not automatically take effect for it. If you move an object to a new layer, the layer is created.
Tips: When designing a complicated pattern or image, you are advised to set the objects or elements in different colors, so that XCS can define the objects as different layers after you import the image file.
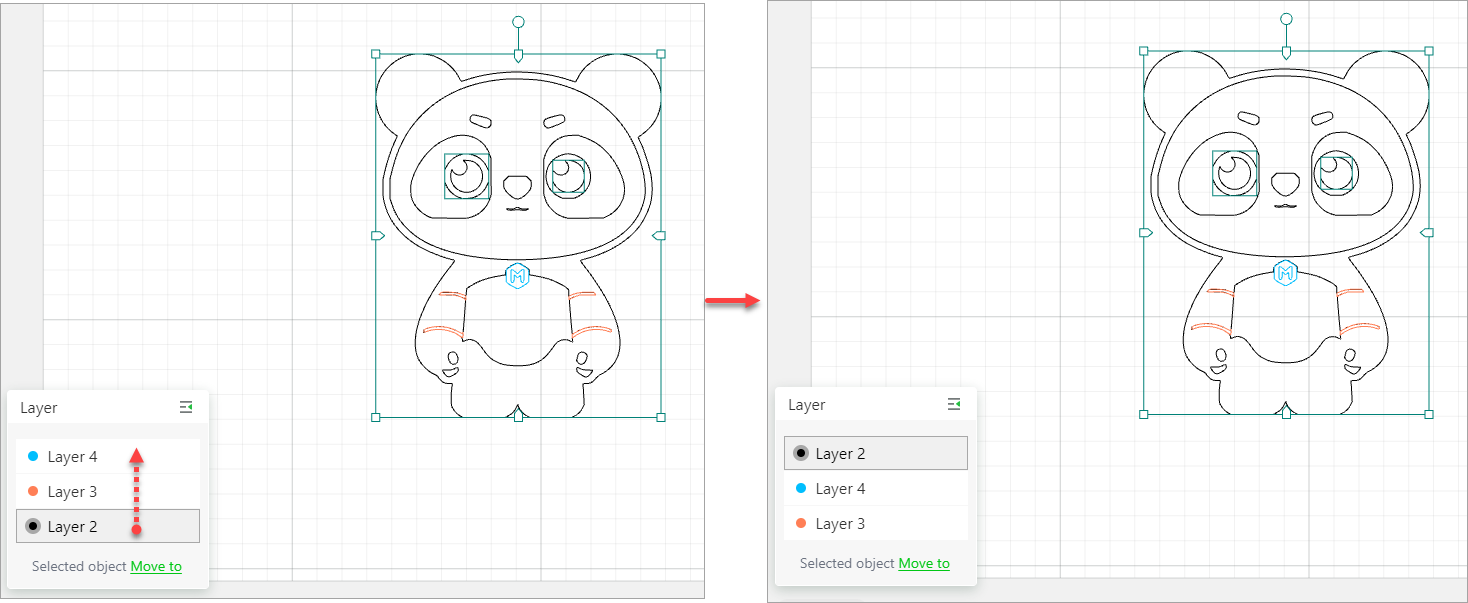
Arrange layers
In addition, you can drag an object layer to move it up or down.
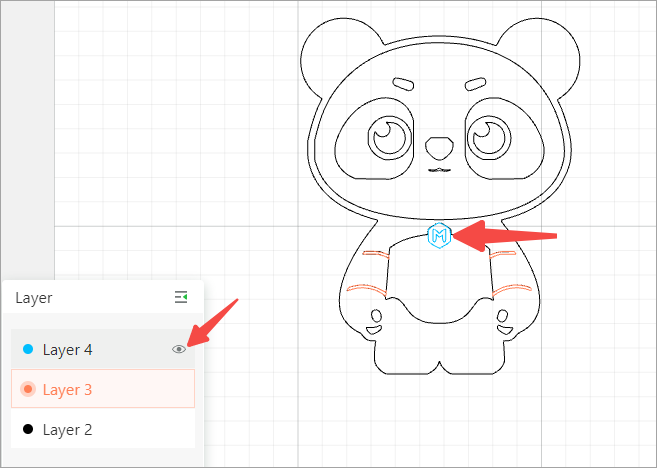
Hide or show a layer
Layer 4 shown
Layer 4 hidden
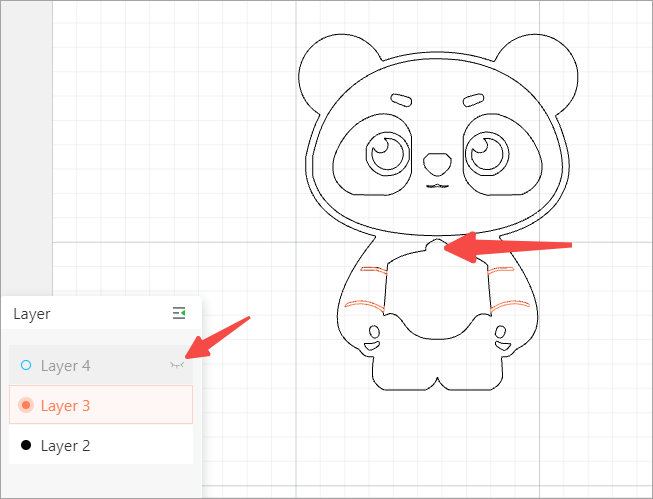
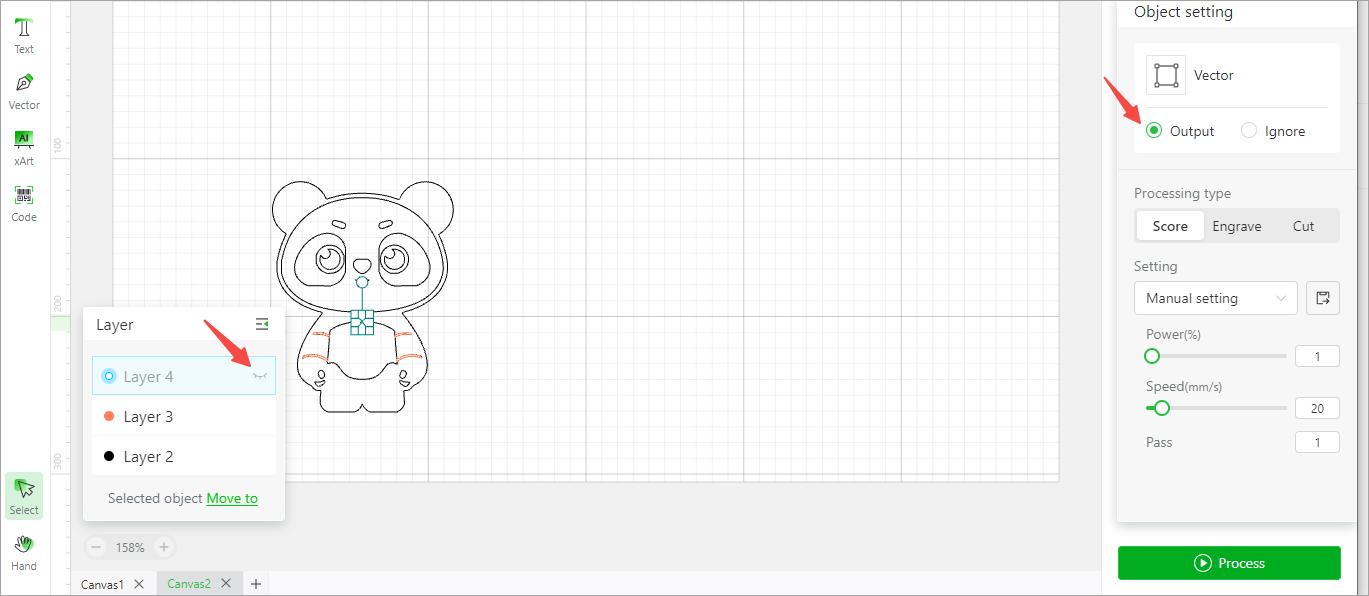
Note: Whether a layer is shown or hidden does not determine whether it is to be processed or not. For example, through layer 4 is hidden, it will be processed since it is set to Output.
Export objects as an SVG file
On a canvas, you can select one or more objects and export them as an SVG file.