The tape measure is delivered with the xTool P2 riser base, designed to help you determine the replacement level of the baseplate when you use xTool P2 with the riser base.
Understand the markings of the tape measure

The markings on this side are designed to measure the thickness of a material and determine the placement level of the baseplate accordingly.
Marking | Description |
Riser base level (baseplate right side up) | This series of markings is applicable only when you place the baseplate right side up. It determines the level at which the baseplate is to be placed. For example, if the thickness of a material is within range 1a, place the baseplate at level 1a in the riser base. |
Riser base level (baseplate upside down) | This series of markings is applicable only when you place the baseplate upside down. It determines the level at which the baseplate is to be placed. For example, if you are to place the baseplate upside down and the thickness of the material is within range 2, place the baseplate upside down at level 2 in the riser base. |

The markings on this side are designed to measure the perimeter of the material and determine the placement level and roller level accordingly.
Marking | Description |
Without riser base | This series of markings is applicable only when you use the rollers of the rotary attachment. If the perimeter of a material is no greater than 131 mm, you can keep the baseplate inside xTool P2, and place the rotary attachment on the baseplate. |
Riser base level | This series of markings is applicable only when you use the rollers of the rotary attachment. It determines the level at which the baseplate is to be placed when the perimeter of a material is greater than 131 mm. |
Roller level | This series of markings is applicable only when you use the rollers of the rotary attachment. It determines the level of the adjustable roller. Note that the green block indicates level C. |
Riser base level for chuck | This series of markings is applicable only when you use the chuck of the rotary attachment. It determines the level at which the baseplate is to be placed. |
Examples
Process a thick material
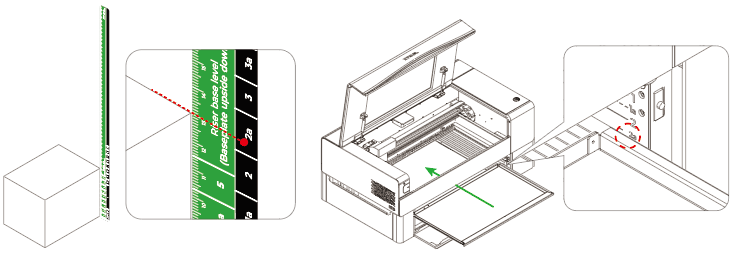
To process material with a thickness of 130 mm, read the marking in the Riser base level (baseplate right side up) series. The marking is 2a, indicating that you can place the baseplate at level 2a.

Process a long material
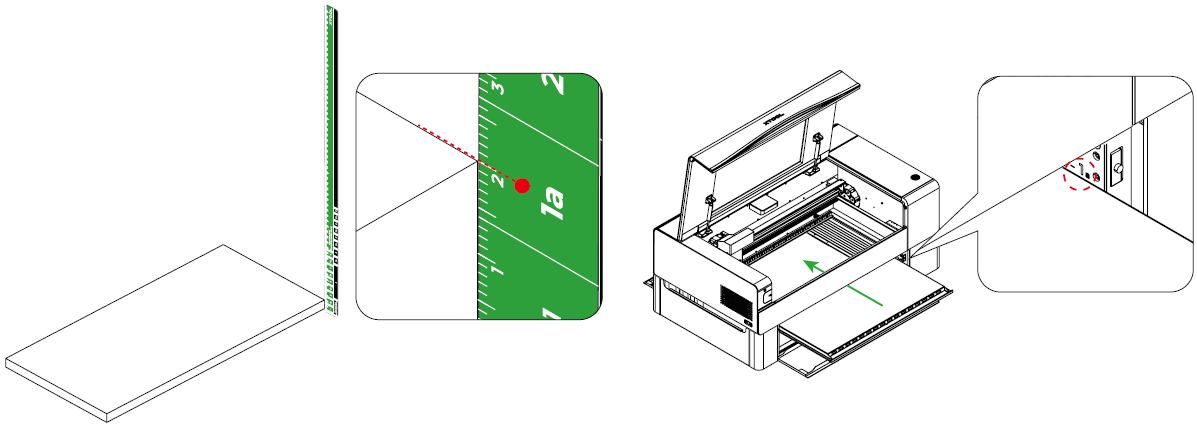
To process a long material with a thickness of 20 mm, place the baseplate upside down and read the marking in the Riser base level (baseplate upside down) series. The marking is 1a, indicating that you can place the baseplate at level 1a.

Process a cylinder
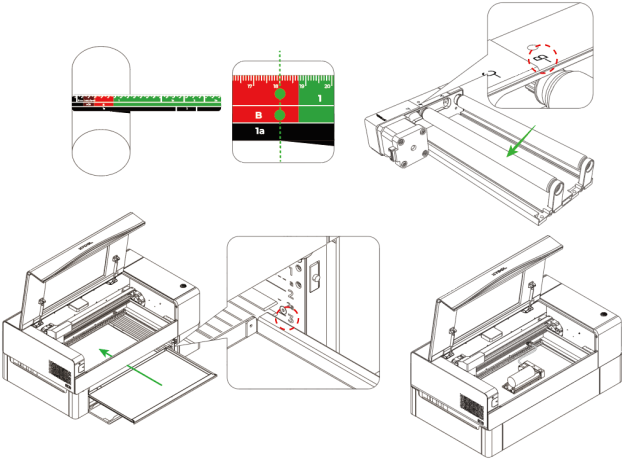
To process a cylindrical material of perimeter 180 mm in roller mode, read the markings in the Riser base level and Roller level series. The riser base level is 1 and the roller level is B, indicating that you need to place the baseplate at level 3 and set the adjustable roller to level B.

Process a sphere
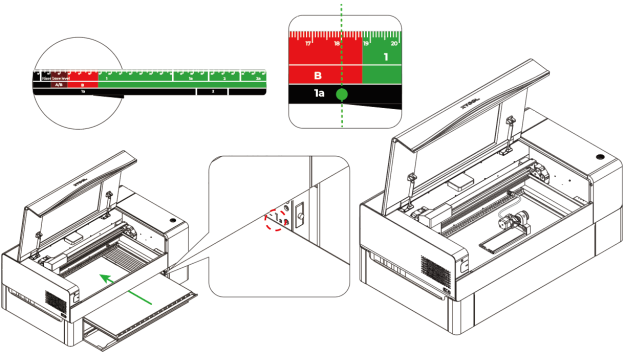
You need to use the chuck.
To process a sphere with a perimeter of 180 mm, you can place the baseplate at level 1a and then place the rotary attachment and material for processing.

Tips: For details about how to set up the chuck for holding the sphere, see xTool Rotary Attachment 2 (RA2) User Guide.

Services & Help
Learn & Community
Copyright © 2025 xTool All Rights Reserved.