How to Add Lead-in Lines in XCS
Why do I need to add lead-in lines?
Scenarios requiring lead-in lines:
- Cutting thick metals (≥3mm) with enclosed contours (e.g., circles, squares)
- Processing highly reflective materials (e.g., aluminum, brass)
- When high-precision patterns are required, especially to avoid defects at closure points, even for thin metals.
Recommended lead-in Line parameters:
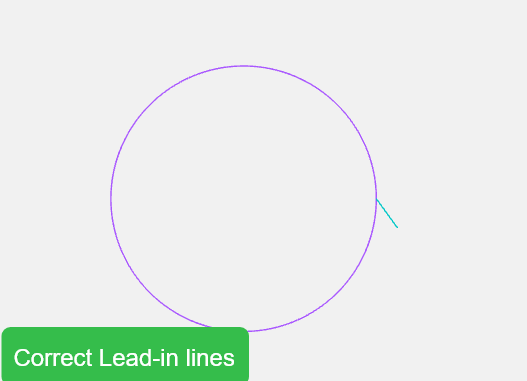
- Length: Typically 1–3 times material thickness (range: 3–10 mm)
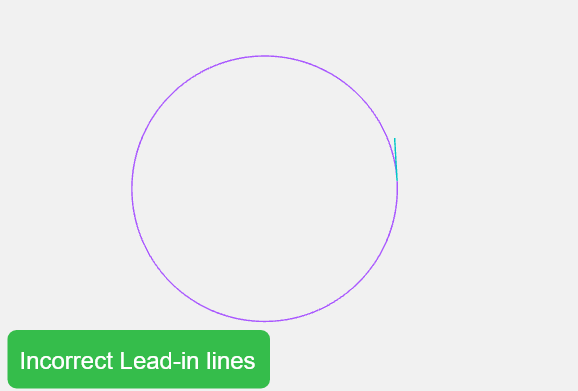
- Angle: 30°–45° relative to the tangent direction, don't set the lead-in lines too close to the patterns.
 |  |
How to set lead-in lines in XCS?
The XCS software supports automatic addition of inner/outer lead-ins; you just need to set the lead-in length for automatic generation.
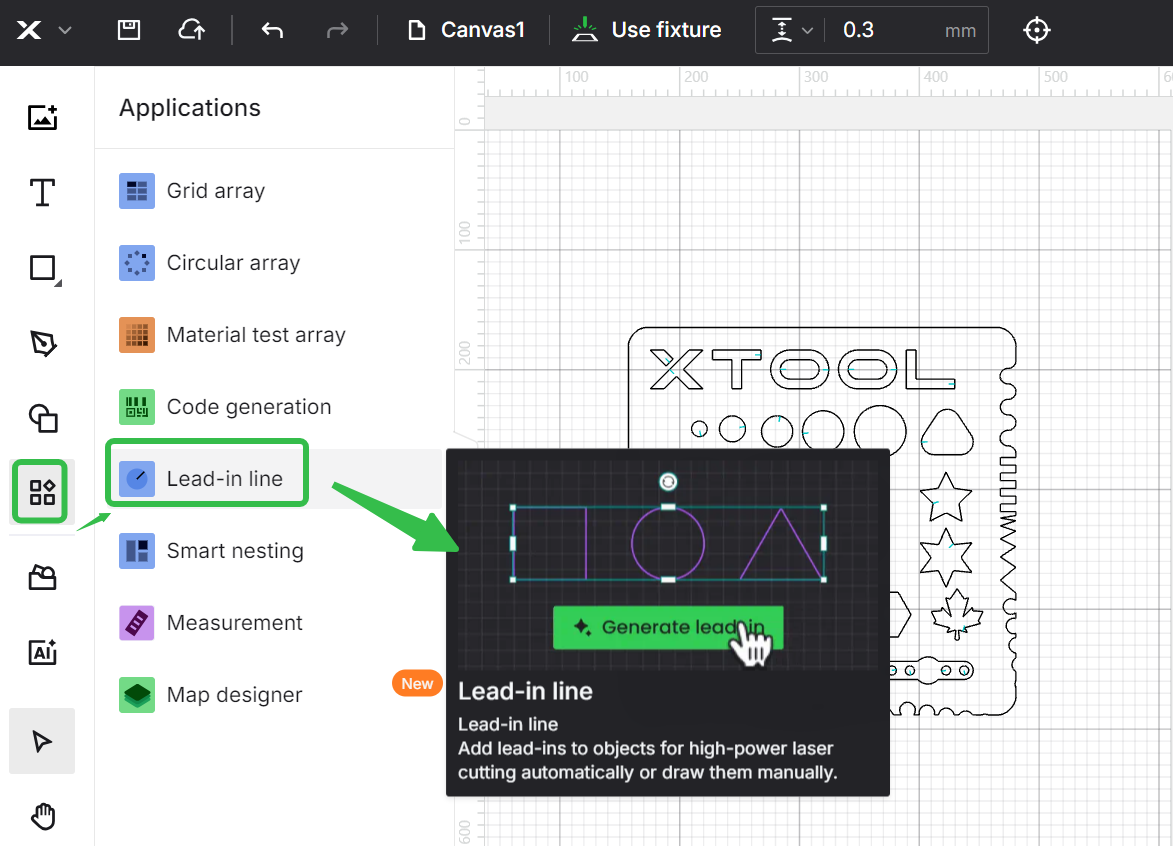 | 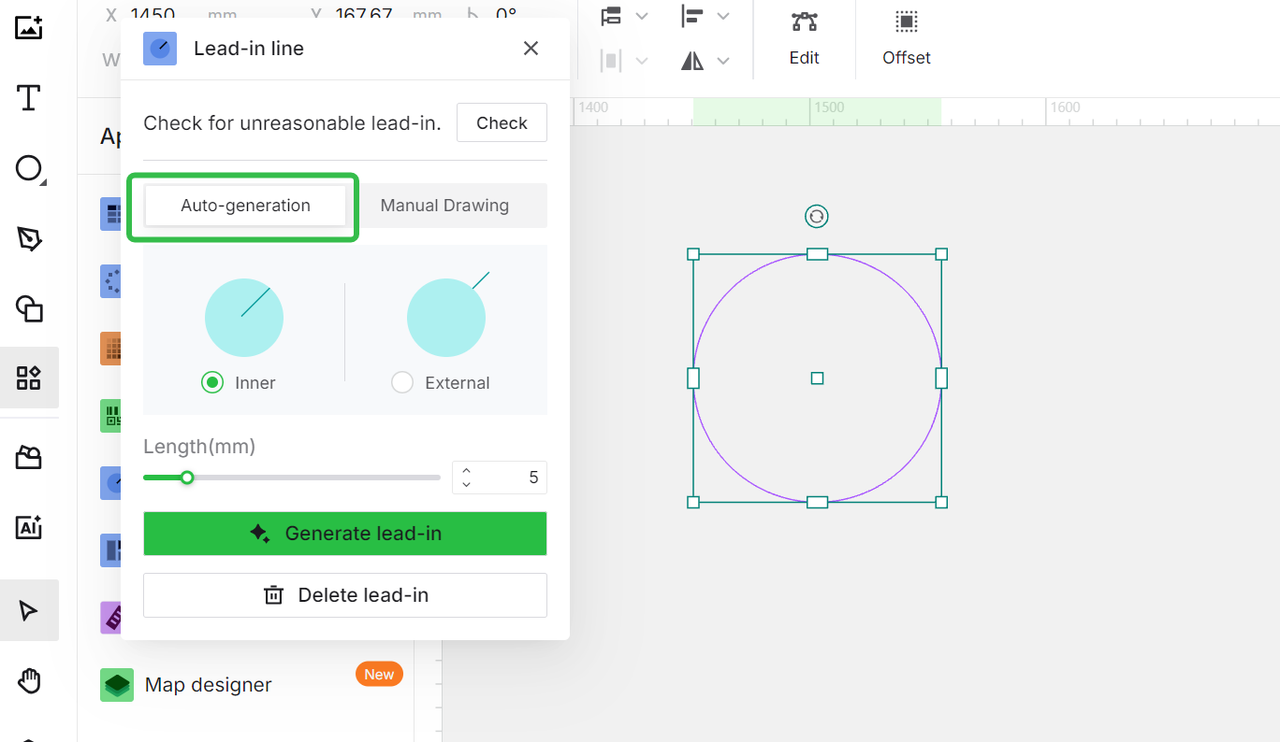 |
You can also add them manually.
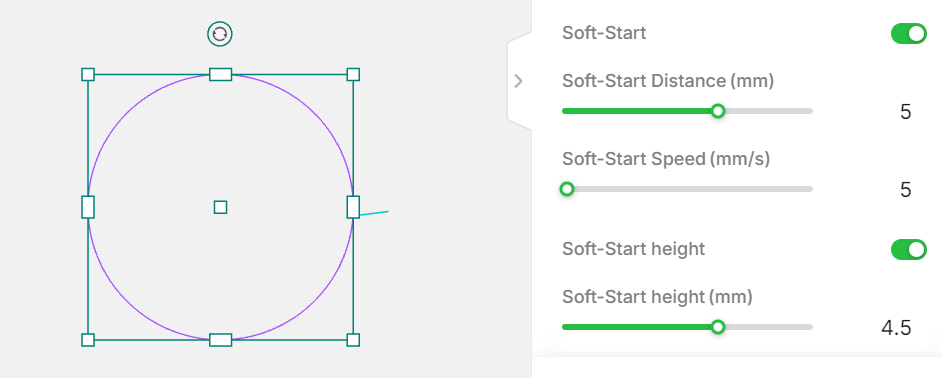
Lead-in lines and soft-start function
Generally, lead-ins are associated with the soft-start feature.
For stainless steel, brass or aluminum≥3mm, it is recommended to enable the soft-start function after setting the lead-ins to ensure cutting quality. The soft-start distance should not exceed the lead-in length, and the speed is typically set to 5mm/s.
All these settings will be applied automatically after you add the lead-in lines and choose corresponding materials.
The soft-start height is related to the material thickness; after setting the thickness, it will automatically suggest a recommended height. When using the SaveGas nozzle (telescopic nozzle), please set it to 4.5mm.
Note: For thick carbon steel and galvanized sheets, lead-in lines are required while the soft-start function is optional.
